Worklog PS2p: 3 years Hiatus... Comeback!

cfc_12

.
Joined
Apr 28, 2017
Messages
169
Likes
67
Location
Philippines
Portables
11
Am I doing it right for my analog?

this is where I cut

201.png


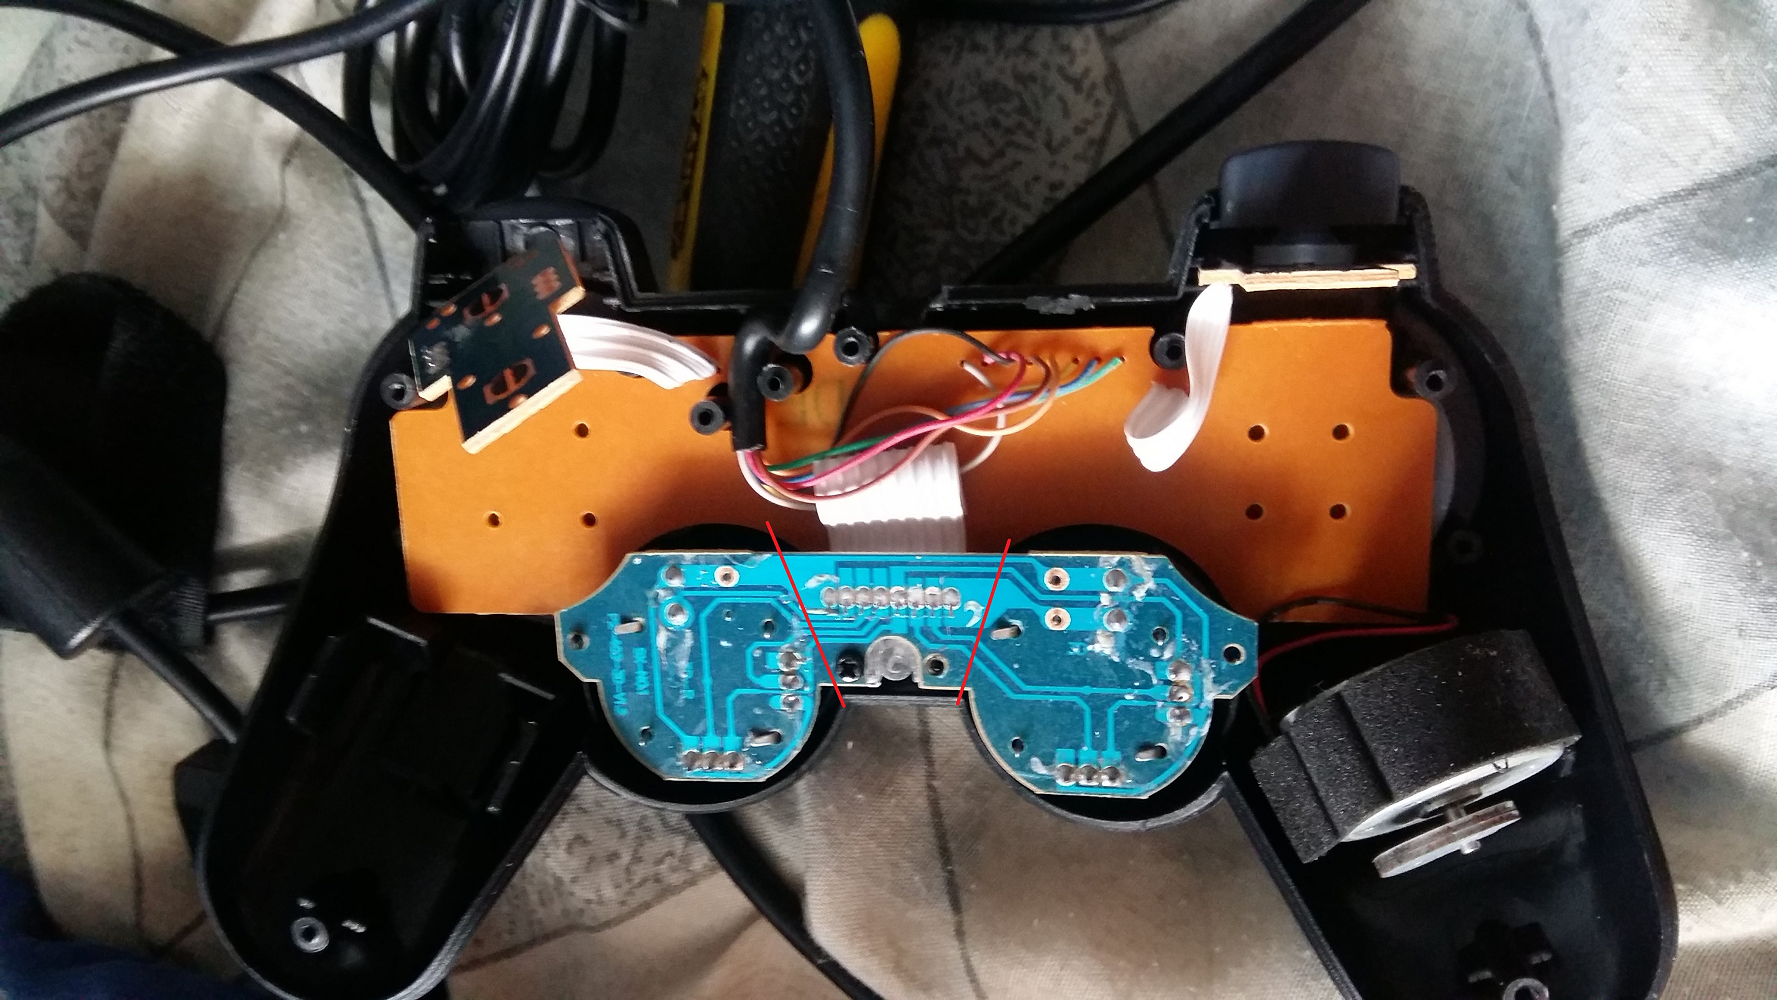
this is where I re wire it
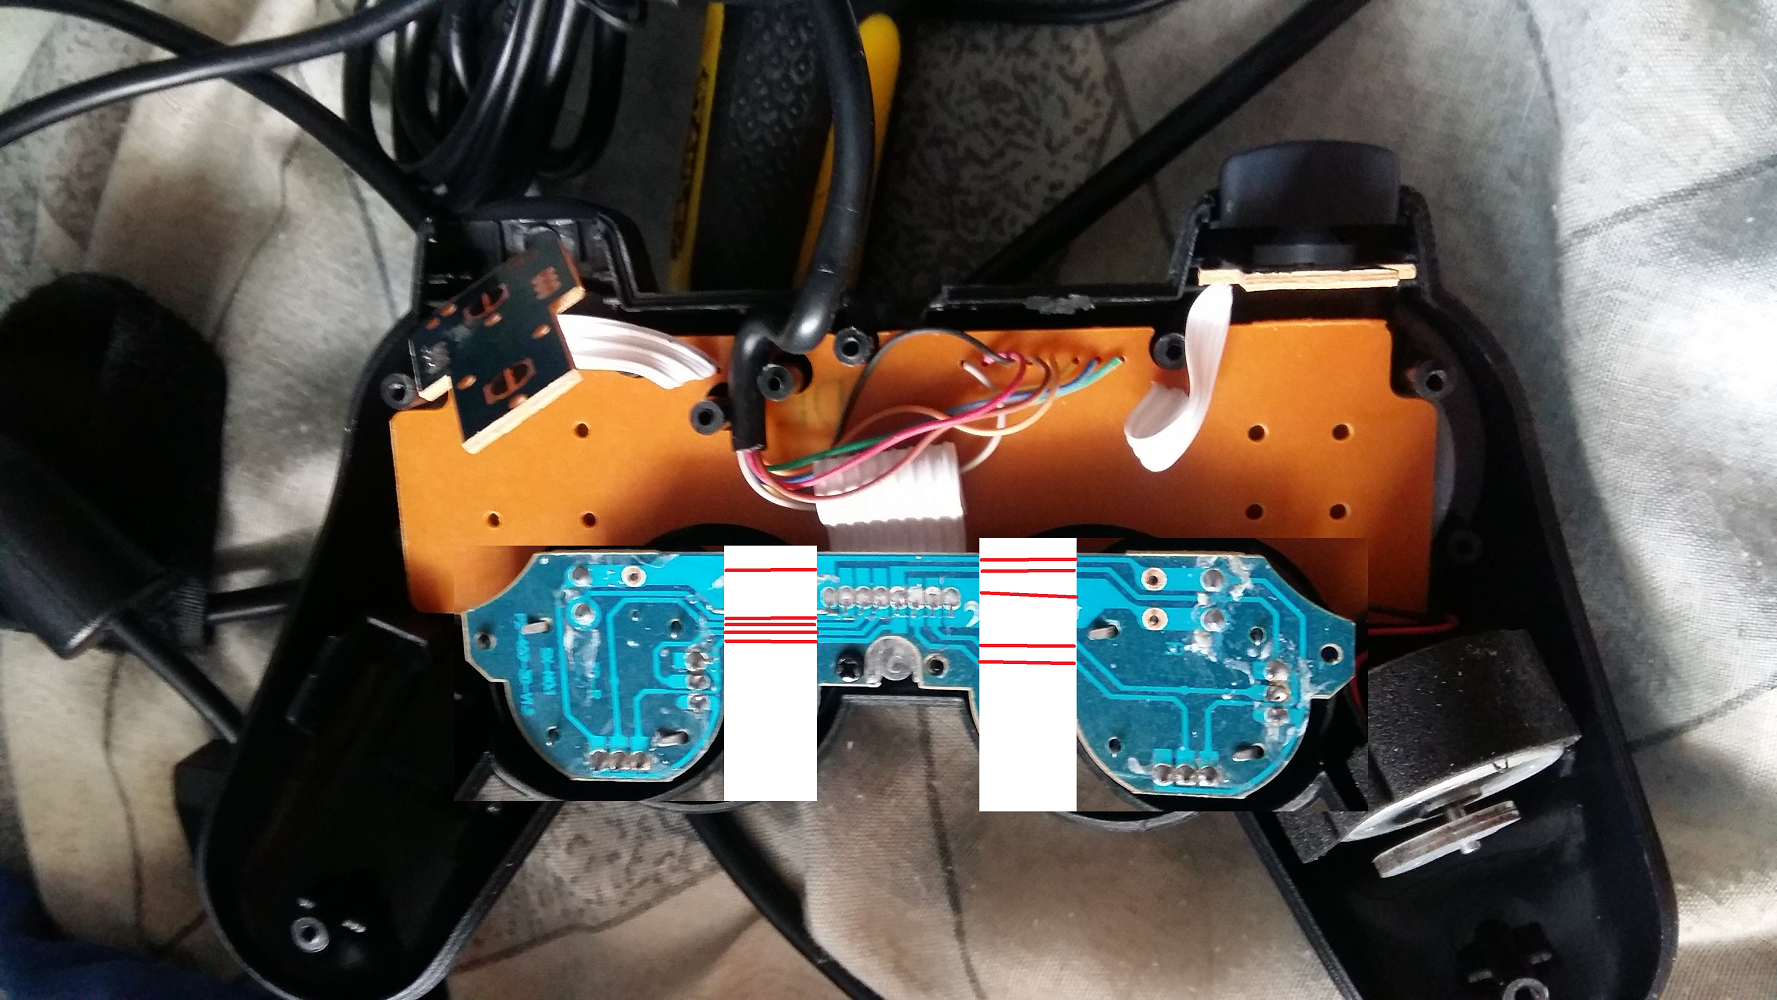
202.png
 
Joined
Apr 1, 2017
Messages
162
Likes
119
Location
UK
Portables
0
Just remove the board entirely and solder to where the ribbon is, you don't need it attached and can save room in your portable.
 

cfc_12

.
Joined
Apr 28, 2017
Messages
169
Likes
67
Location
Philippines
Portables
11
So I followed this diagram


Is it the same just like how I did in the negative (-) of Charger Port, negative (-) of AC Adapter & the ground to PS2 Motherboard?

20170727_164248.jpg

20170727_164236.jpg
 
Joined
Apr 12, 2017
Messages
201
Likes
138
Location
Canada
Its fine as long as its not contacting P+, although you should try not to go nuts with solder, there is such thing as too much, although the exact amount is a matter for debate
 
Joined
Apr 1, 2017
Messages
162
Likes
119
Location
UK
Portables
0
What Lightning says. If you have a variable temperature soldering iron, try turning it up a little so you don't have to burn your board quite so much. If you don't, I'd but some thinner solder so it takes less time to heat up.
 

cfc_12

.
Joined
Apr 28, 2017
Messages
169
Likes
67
Location
Philippines
Portables
11
i hate it when soldering irons are disposable, the needle point of the soldering iron does not stick anymore and only gives frustration
 
Joined
Apr 12, 2017
Messages
201
Likes
138
Location
Canada
What kind of a budget do you have for soldering equipment? Because its a worth while investment to get a variable temperature soldering station, and if you really wanna splurge get one that has a built in hot air tool
 

cfc_12

.
Joined
Apr 28, 2017
Messages
169
Likes
67
Location
Philippines
Portables
11
What kind of a budget do you have for soldering equipment? Because its a worth while investment to get a variable temperature soldering station, and if you really wanna splurge get one that has a built in hot air tool
sorry, i'm not gonna invest for a hot air tool, that's too much, i'm only doing this as a hobby and not too much expenses for unnecessary things
 
Joined
Apr 1, 2017
Messages
162
Likes
119
Location
UK
Portables
0
How thick is your solder? You can heat the board up less using thinner solder (with a flux core)
 

cfc_12

.
Joined
Apr 28, 2017
Messages
169
Likes
67
Location
Philippines
Portables
11
How thick is your solder? You can heat the board up less using thinner solder (with a flux core)
Nvm It. I need help. How do I wire the SELECT, START & ANALOG Buttons to the PCB?

20170729_194055.jpg


Edit this picture using paint. I really need help

back.png
 
Joined
Apr 1, 2017
Messages
162
Likes
119
Location
UK
Portables
0
Solder each (left or right but not both) bottom leg of the switches to the controller's ground then solder either left or right but not both of the switch's top legs to each of the test pads (silver) on the controller.

Simples.
 

cfc_12

.
Joined
Apr 28, 2017
Messages
169
Likes
67
Location
Philippines
Portables
11
Solder each (left or right but not both) bottom leg of the switches to the controller's ground then solder either left or right but not both of the switch's top legs to each of the test pads (silver) on the controller.

Simples.
Is this what you mean?

wire.jpg


where is the ground on the 1st picture? can you point it to me?
 
Last edited:

GingerOfOz

no wario
Staff member
.
.
2020 2nd Place Winner
2022 3rd Place Winner
Joined
Dec 16, 2016
Messages
1,122
Likes
2,710
Location
The Oregon Wildlands
Portables
just so many i am so cool
Yes like that. You can pull ground from anywhere you want.
 

Madmorda

Painting Queen
.
.
Joined
Oct 27, 2016
Messages
725
Likes
1,718
Location
Texas
Portables
2
@cfc_12 Idk what you were asking in that PM. Could you please be a bit more specific? Btw that orange wire on square is ground. See how you can see it connecting to the other half of the start button? So you can connect your start etc buttons to ground there.
 

cfc_12

.
Joined
Apr 28, 2017
Messages
169
Likes
67
Location
Philippines
Portables
11
@cfc_12 Idk what you were asking in that PM. Could you please be a bit more specific? Btw that orange wire on square is ground. See how you can see it connecting to the other half of the start button? So you can connect your start etc buttons to ground there.
I saw your custom controller, it kinda resembles my controller (the one in this picture)

I see Ashen's controller back then that he added a resistor to a PS2 controller

did you add a resistor on your controller?

since our controller is almost identical
 

Madmorda

Painting Queen
.
.
Joined
Oct 27, 2016
Messages
725
Likes
1,718
Location
Texas
Portables
2
I've never made a ps2 portable, but if you can plug that controller in and it works, then you can wire it up and it'll work without a resistor. That said, I don't know why ashen used a resistor. Was his a third party controller?
 

Gman

RTFDS
Staff member
.
.
.
.
.
Joined
Feb 25, 2016
Messages
1,437
Likes
2,887
The 3rd party controller does not need any resistor mods to work as a DS2 controller. Also on the 3rd party and 1st party controllers, not all the buttons have a common ground. Double check where the common connection is going, it might not be ground.
 

cfc_12

.
Joined
Apr 28, 2017
Messages
169
Likes
67
Location
Philippines
Portables
11
what should the sides physically look like after I trim?

what should the sides physically look like after I sand paper?

1.jpg


2.jpg


3.jpg


(The picture above is my first PS2 Motherboard, the one that is frustrating back then to power on, i cutted it using a cutting plier back in december 2013)

And I'm using a 2nd ps2 motherboard now, hope I won't screw this up
 
Joined
Apr 12, 2017
Messages
201
Likes
138
Location
Canada
You need to use a high speed cutting tool like a dremel, or a band saw in a pinch if its teeth are fine enough. Cutting pliers will run the risk of warping the board, and bending traces and planes into contacting each other. Sanding the edges is a way to prevent the latter
 
Top