Worklog Reviive - PPI Portable Brought Back From The Dead (CrazyGadget Takeover)

CrazyGadget

Crazy Helpful, CrazyGadget
.
Joined
Jun 6, 2020
Messages
600
Likes
832
Portables
???
So, a couple years ago, I got burned by buying a busted PortaPackit unit off eBay in the hopes that I could fix it on the cheap and have a decent portable to play around with (my very first!). Alas, when I opened it up, it turned out to be a bomb (see: WARNING: DO NOT BUY FROM PORTAPACKIT!!!).

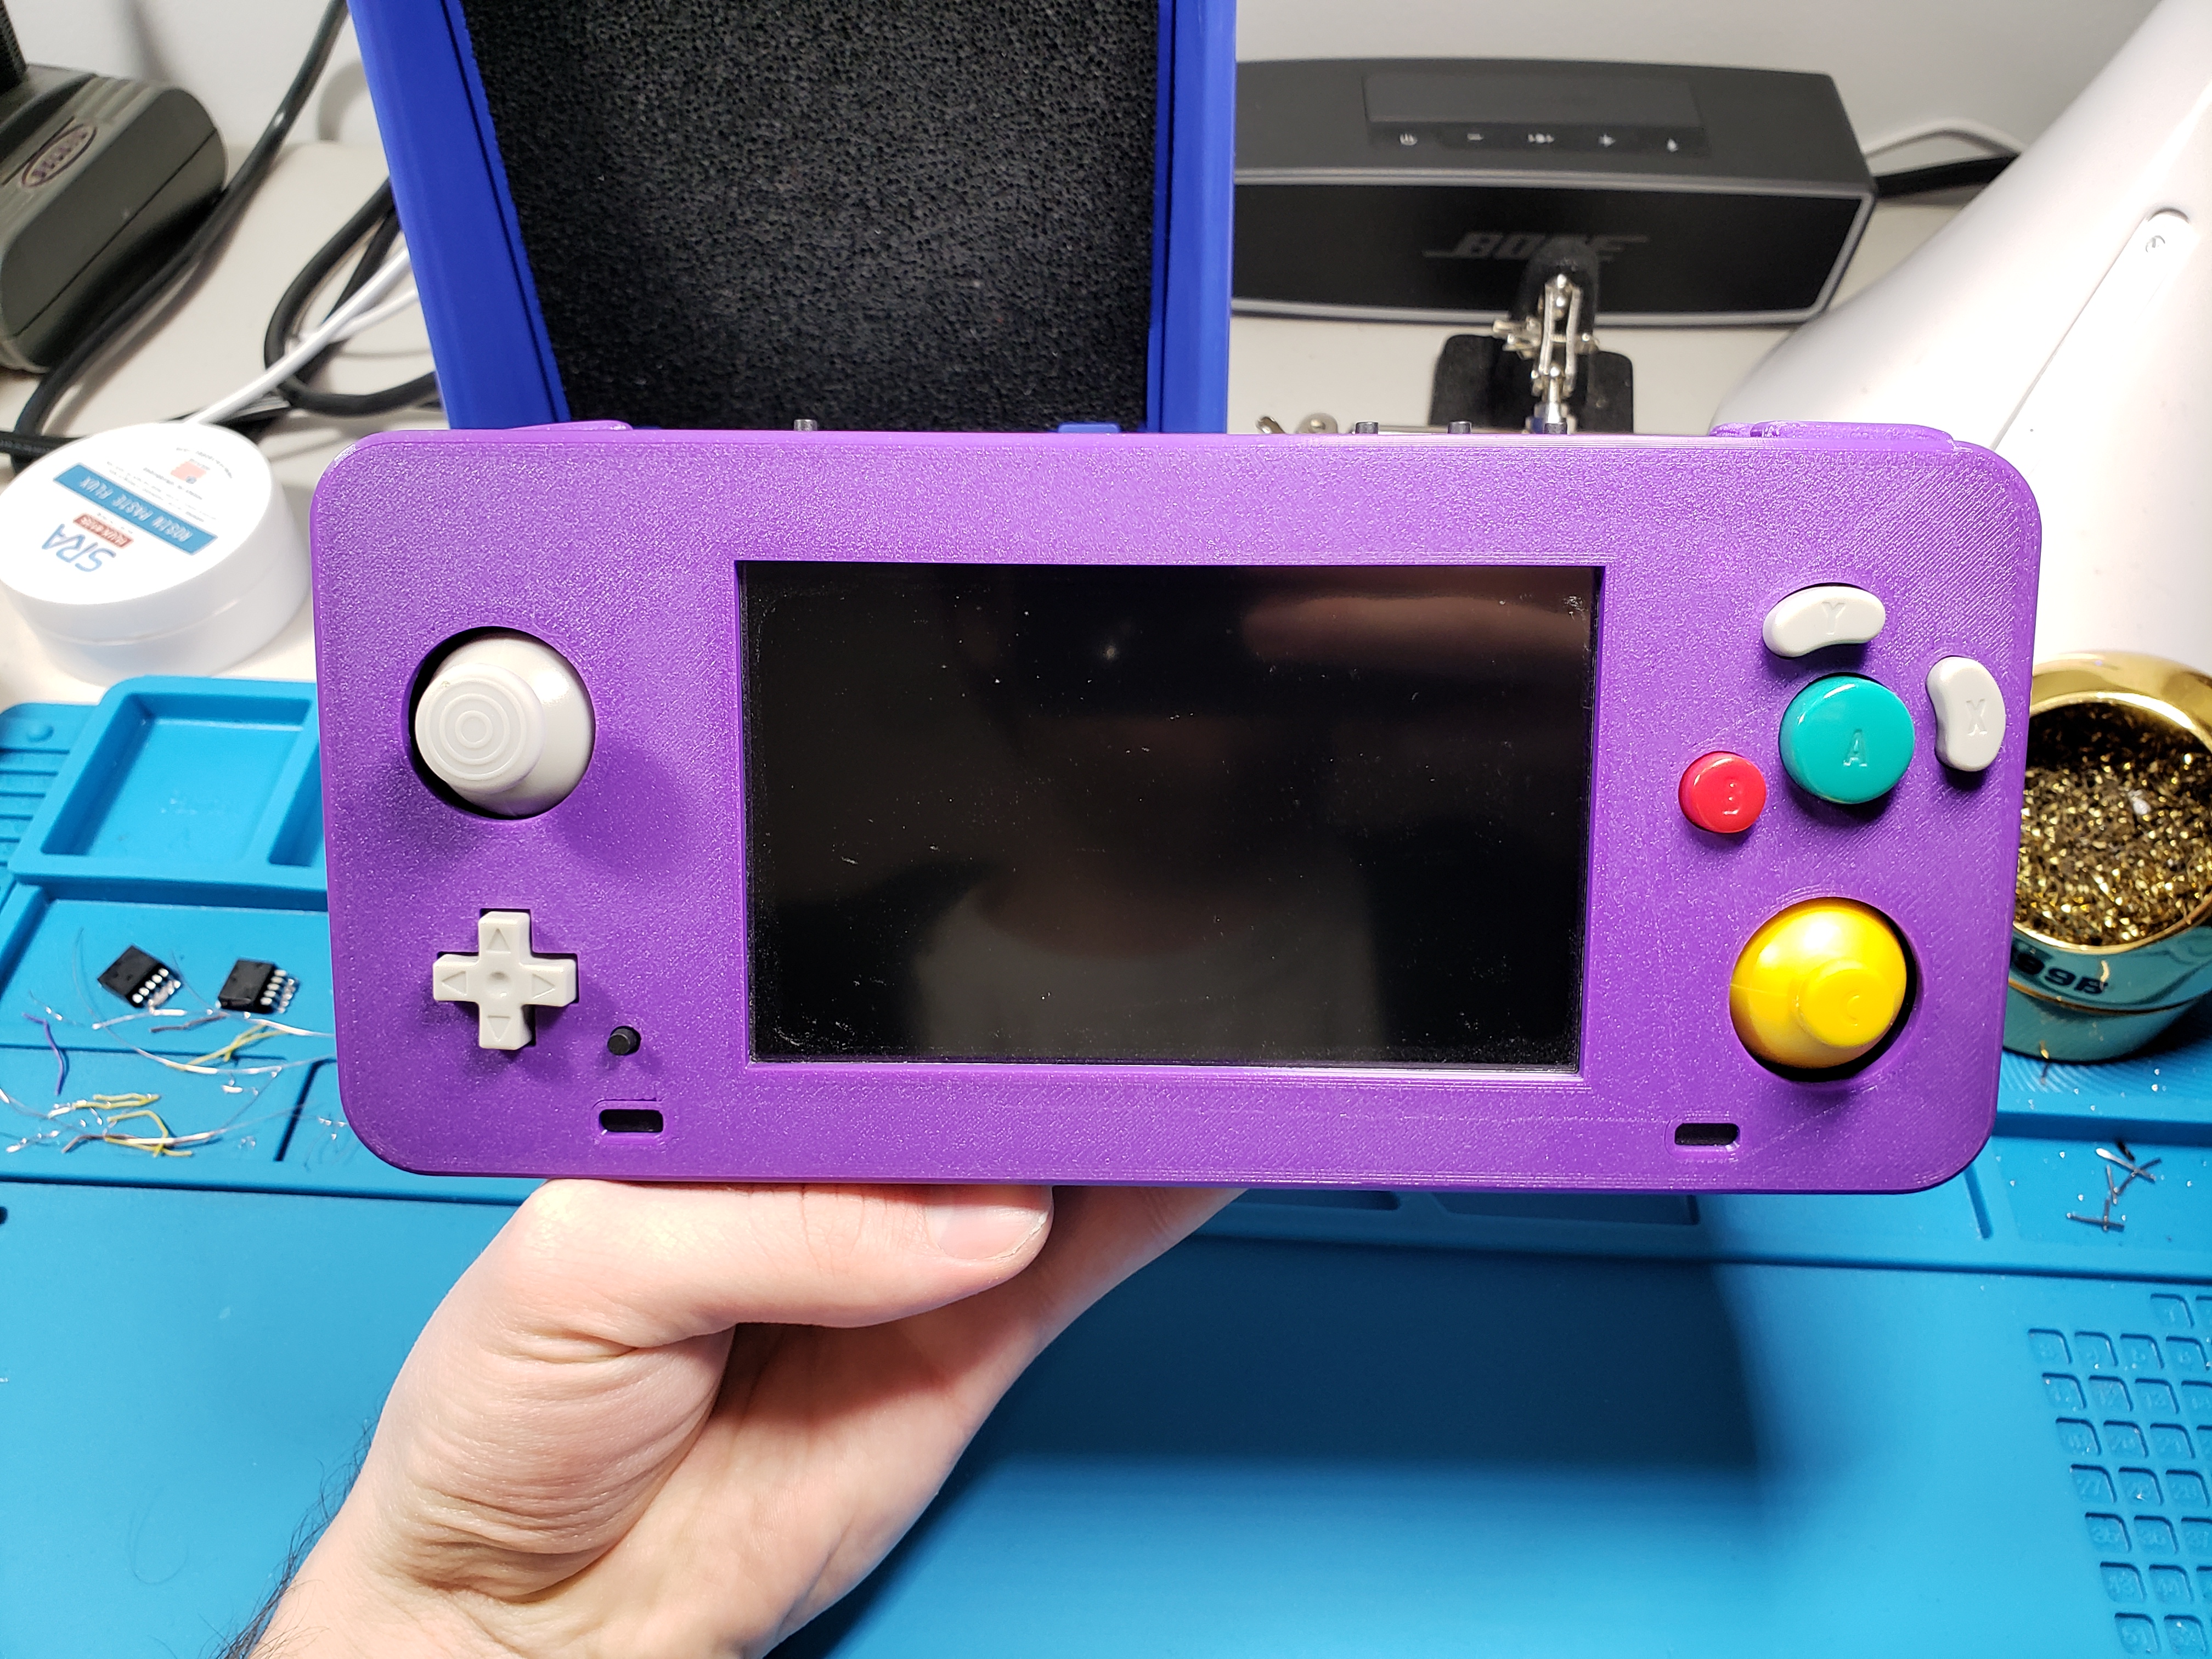
When I saw another dead PPI unit pop up on the forums in need of a new home after an attempted repair (see: Reviive Worklog and Questions - Portable Wii Brought Back From The Dead!), I decided to make the same mistake twice and welcome it into my loving arms. Taking a look at the outside, the design has definitely gotten better since the last time I played with a PPI portable:

20220130_194326.jpg


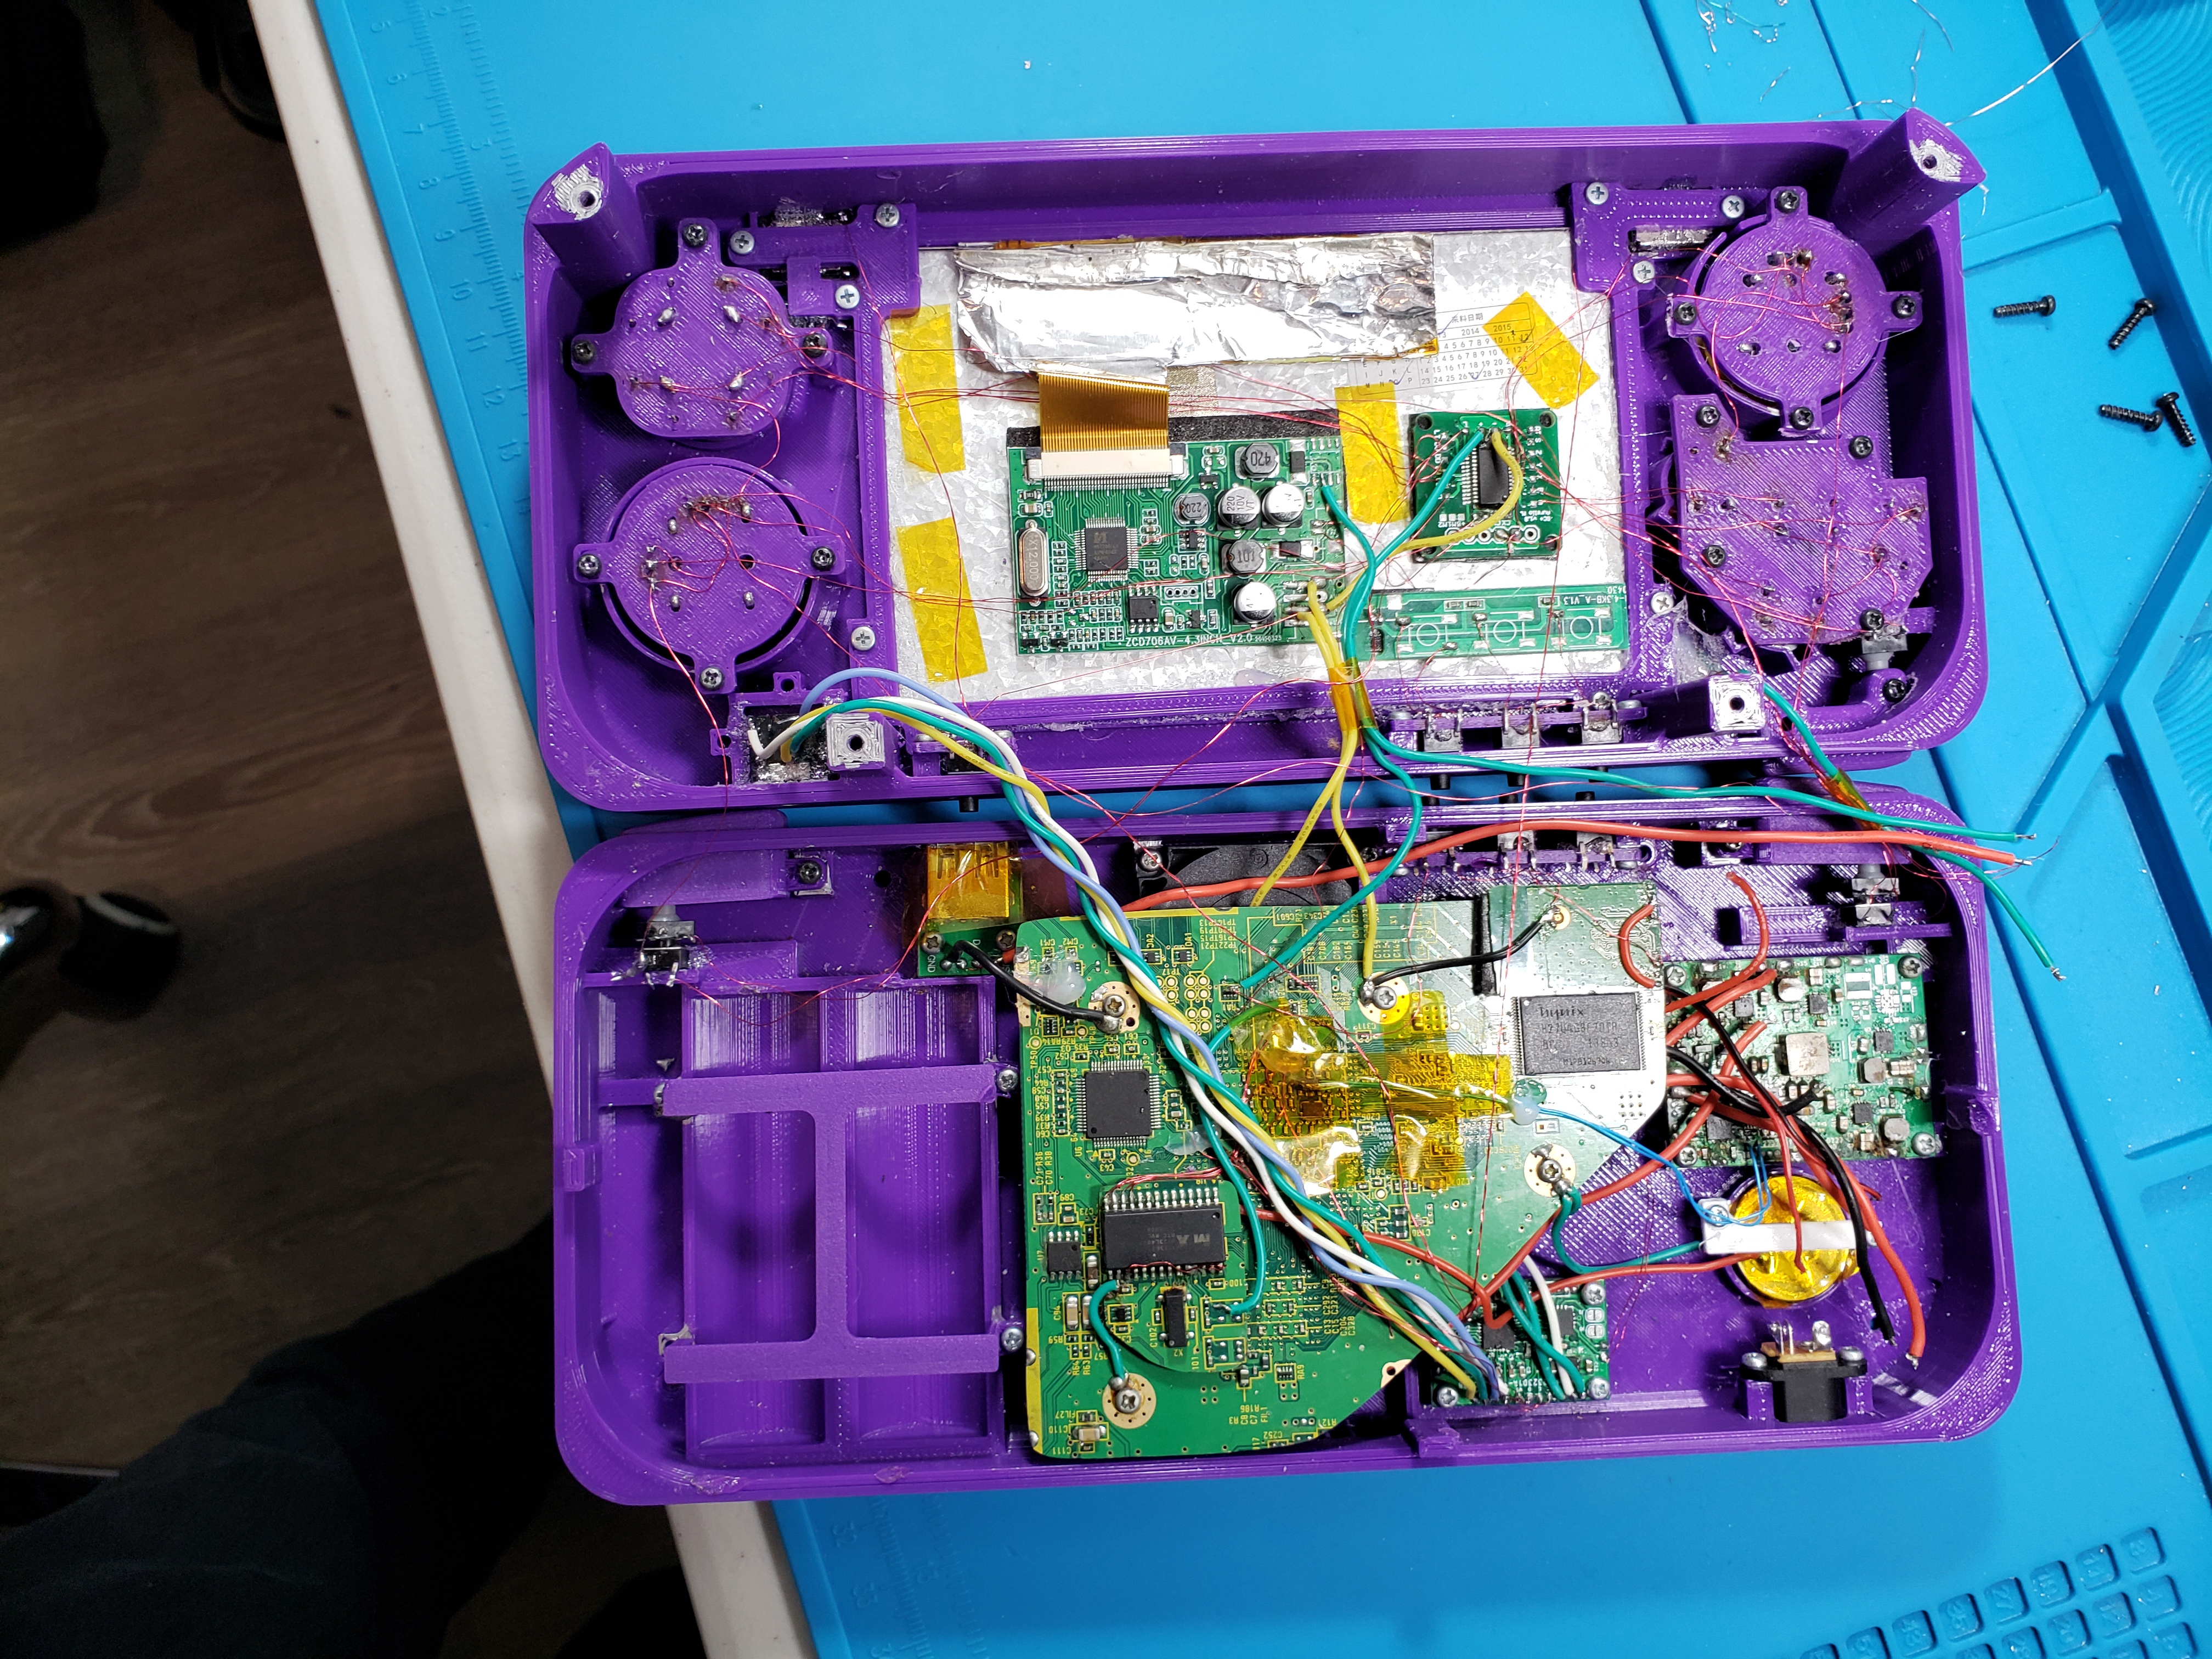
As you probably expected, that niceness all goes away once this thing is popped open:

20220130_193842.jpg
20220130_195234.jpg
20220130_195236.jpg
20220130_195238.jpg


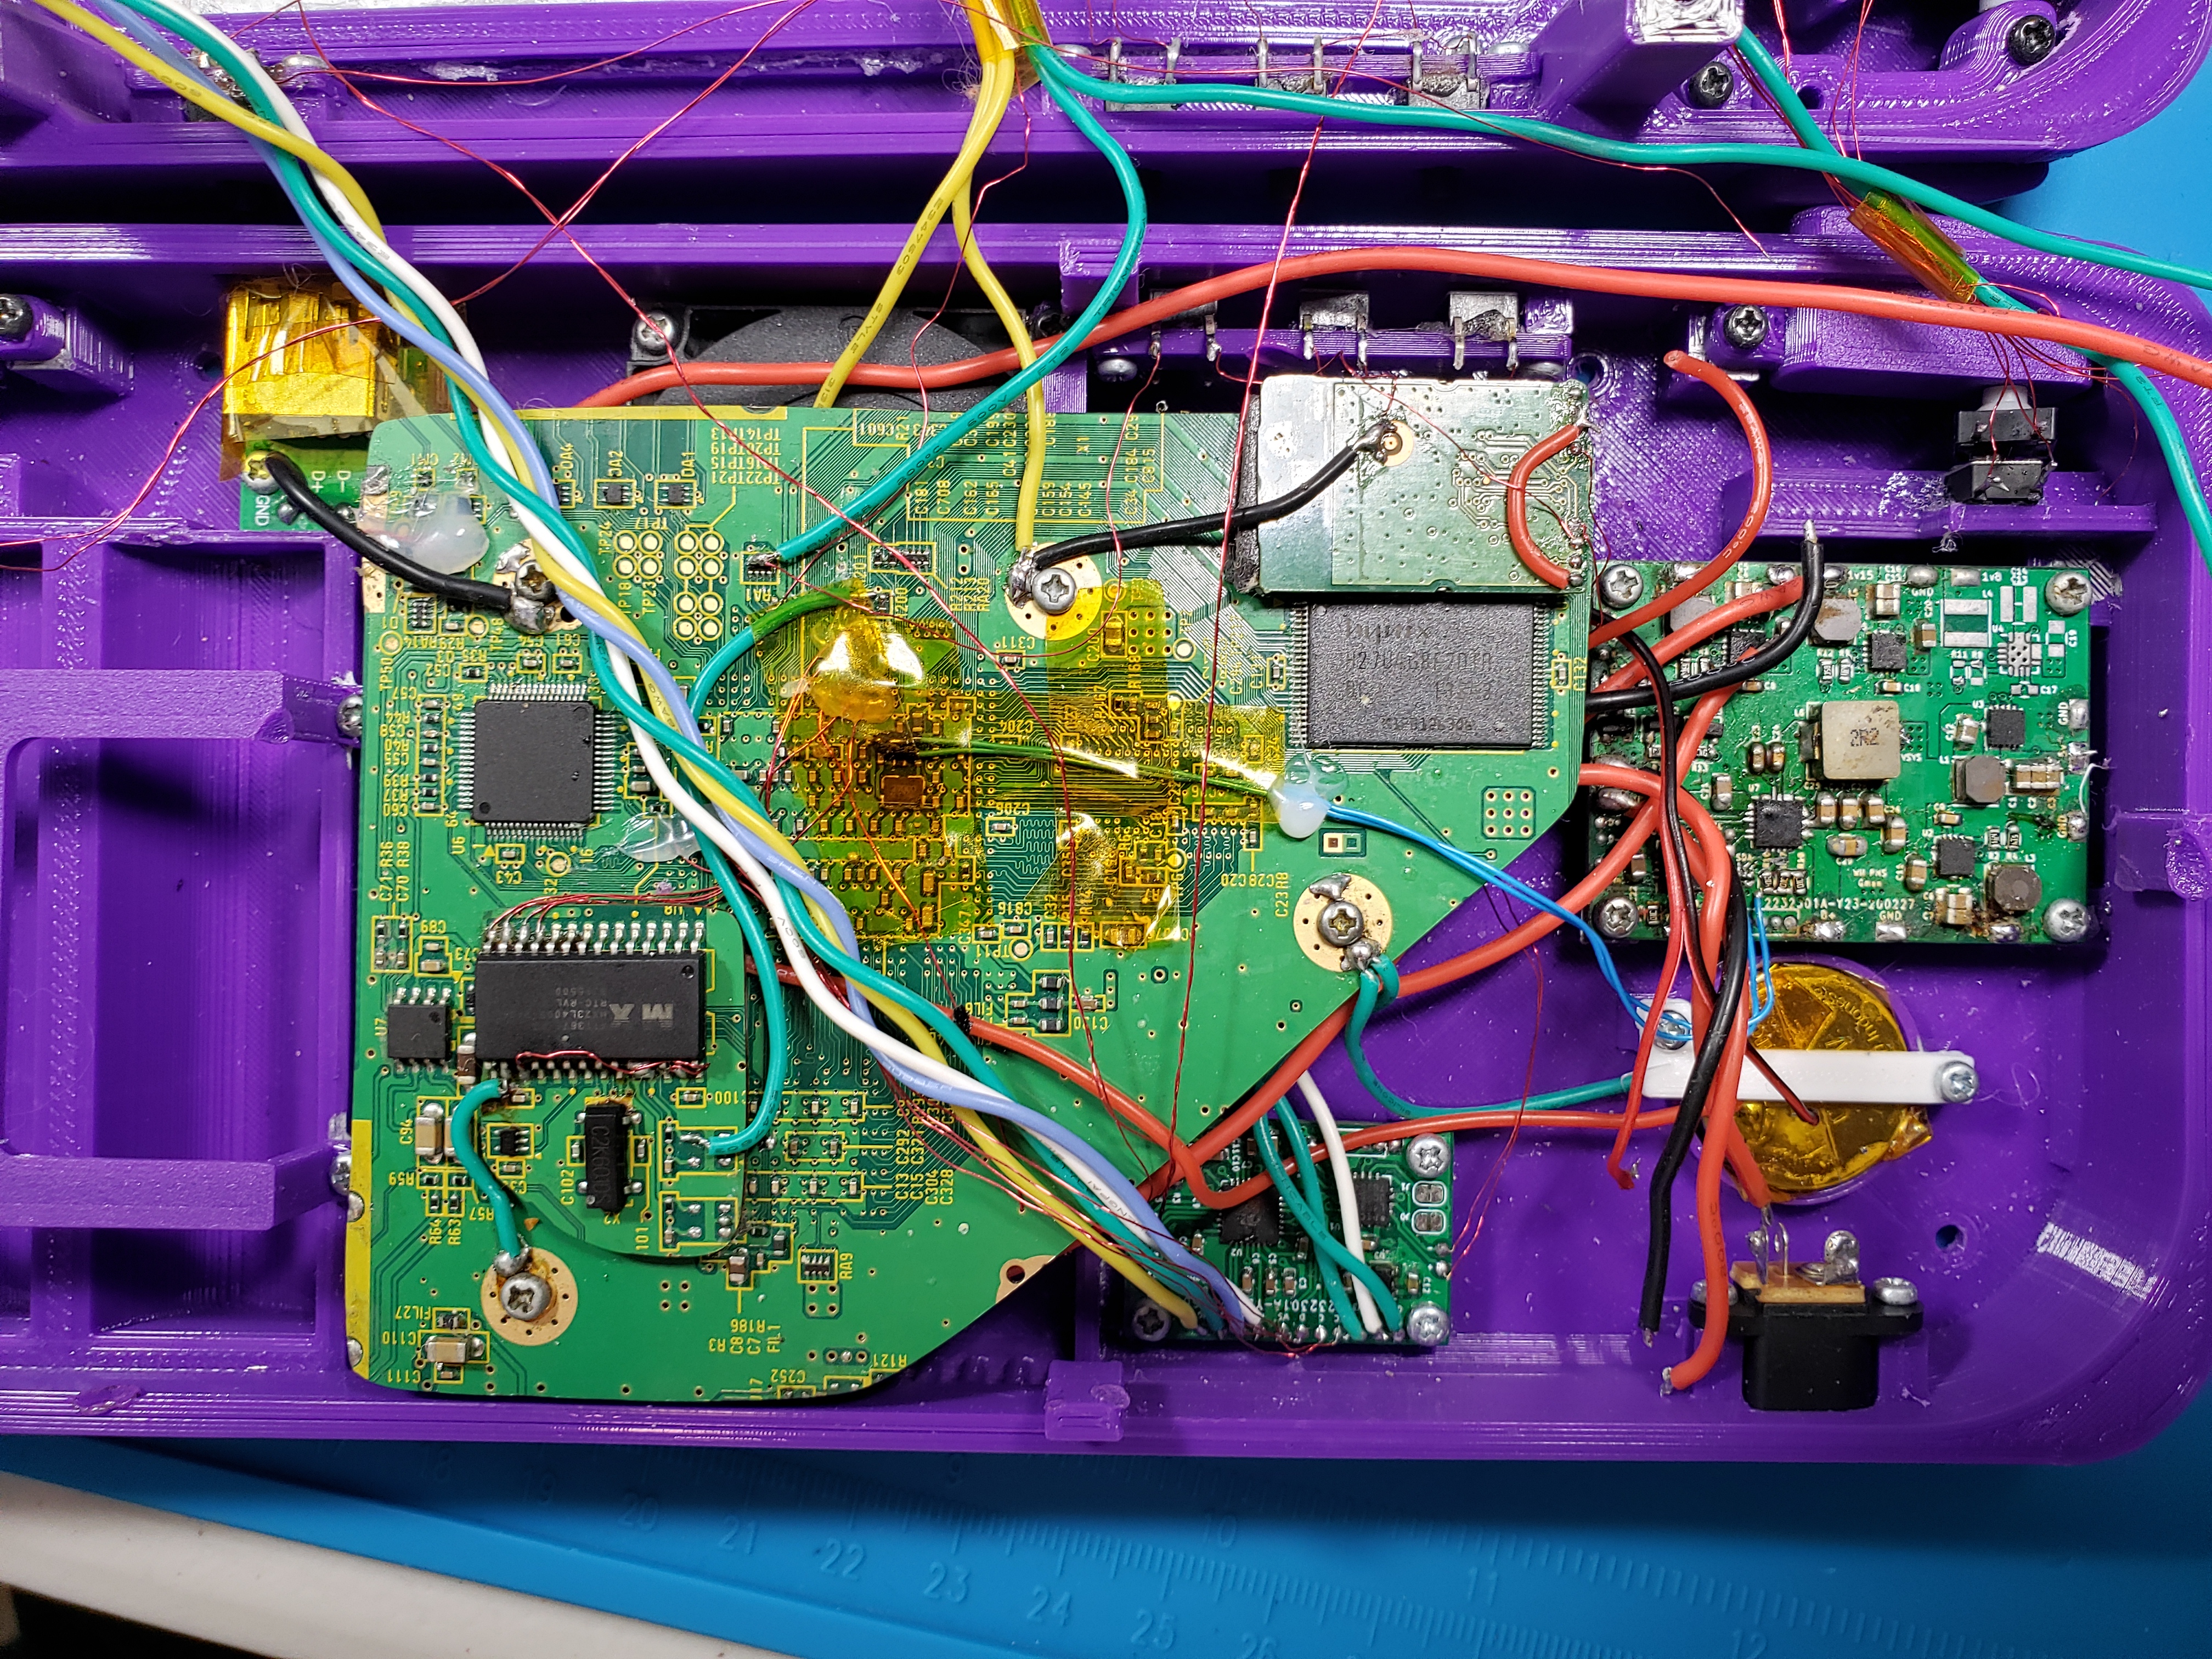
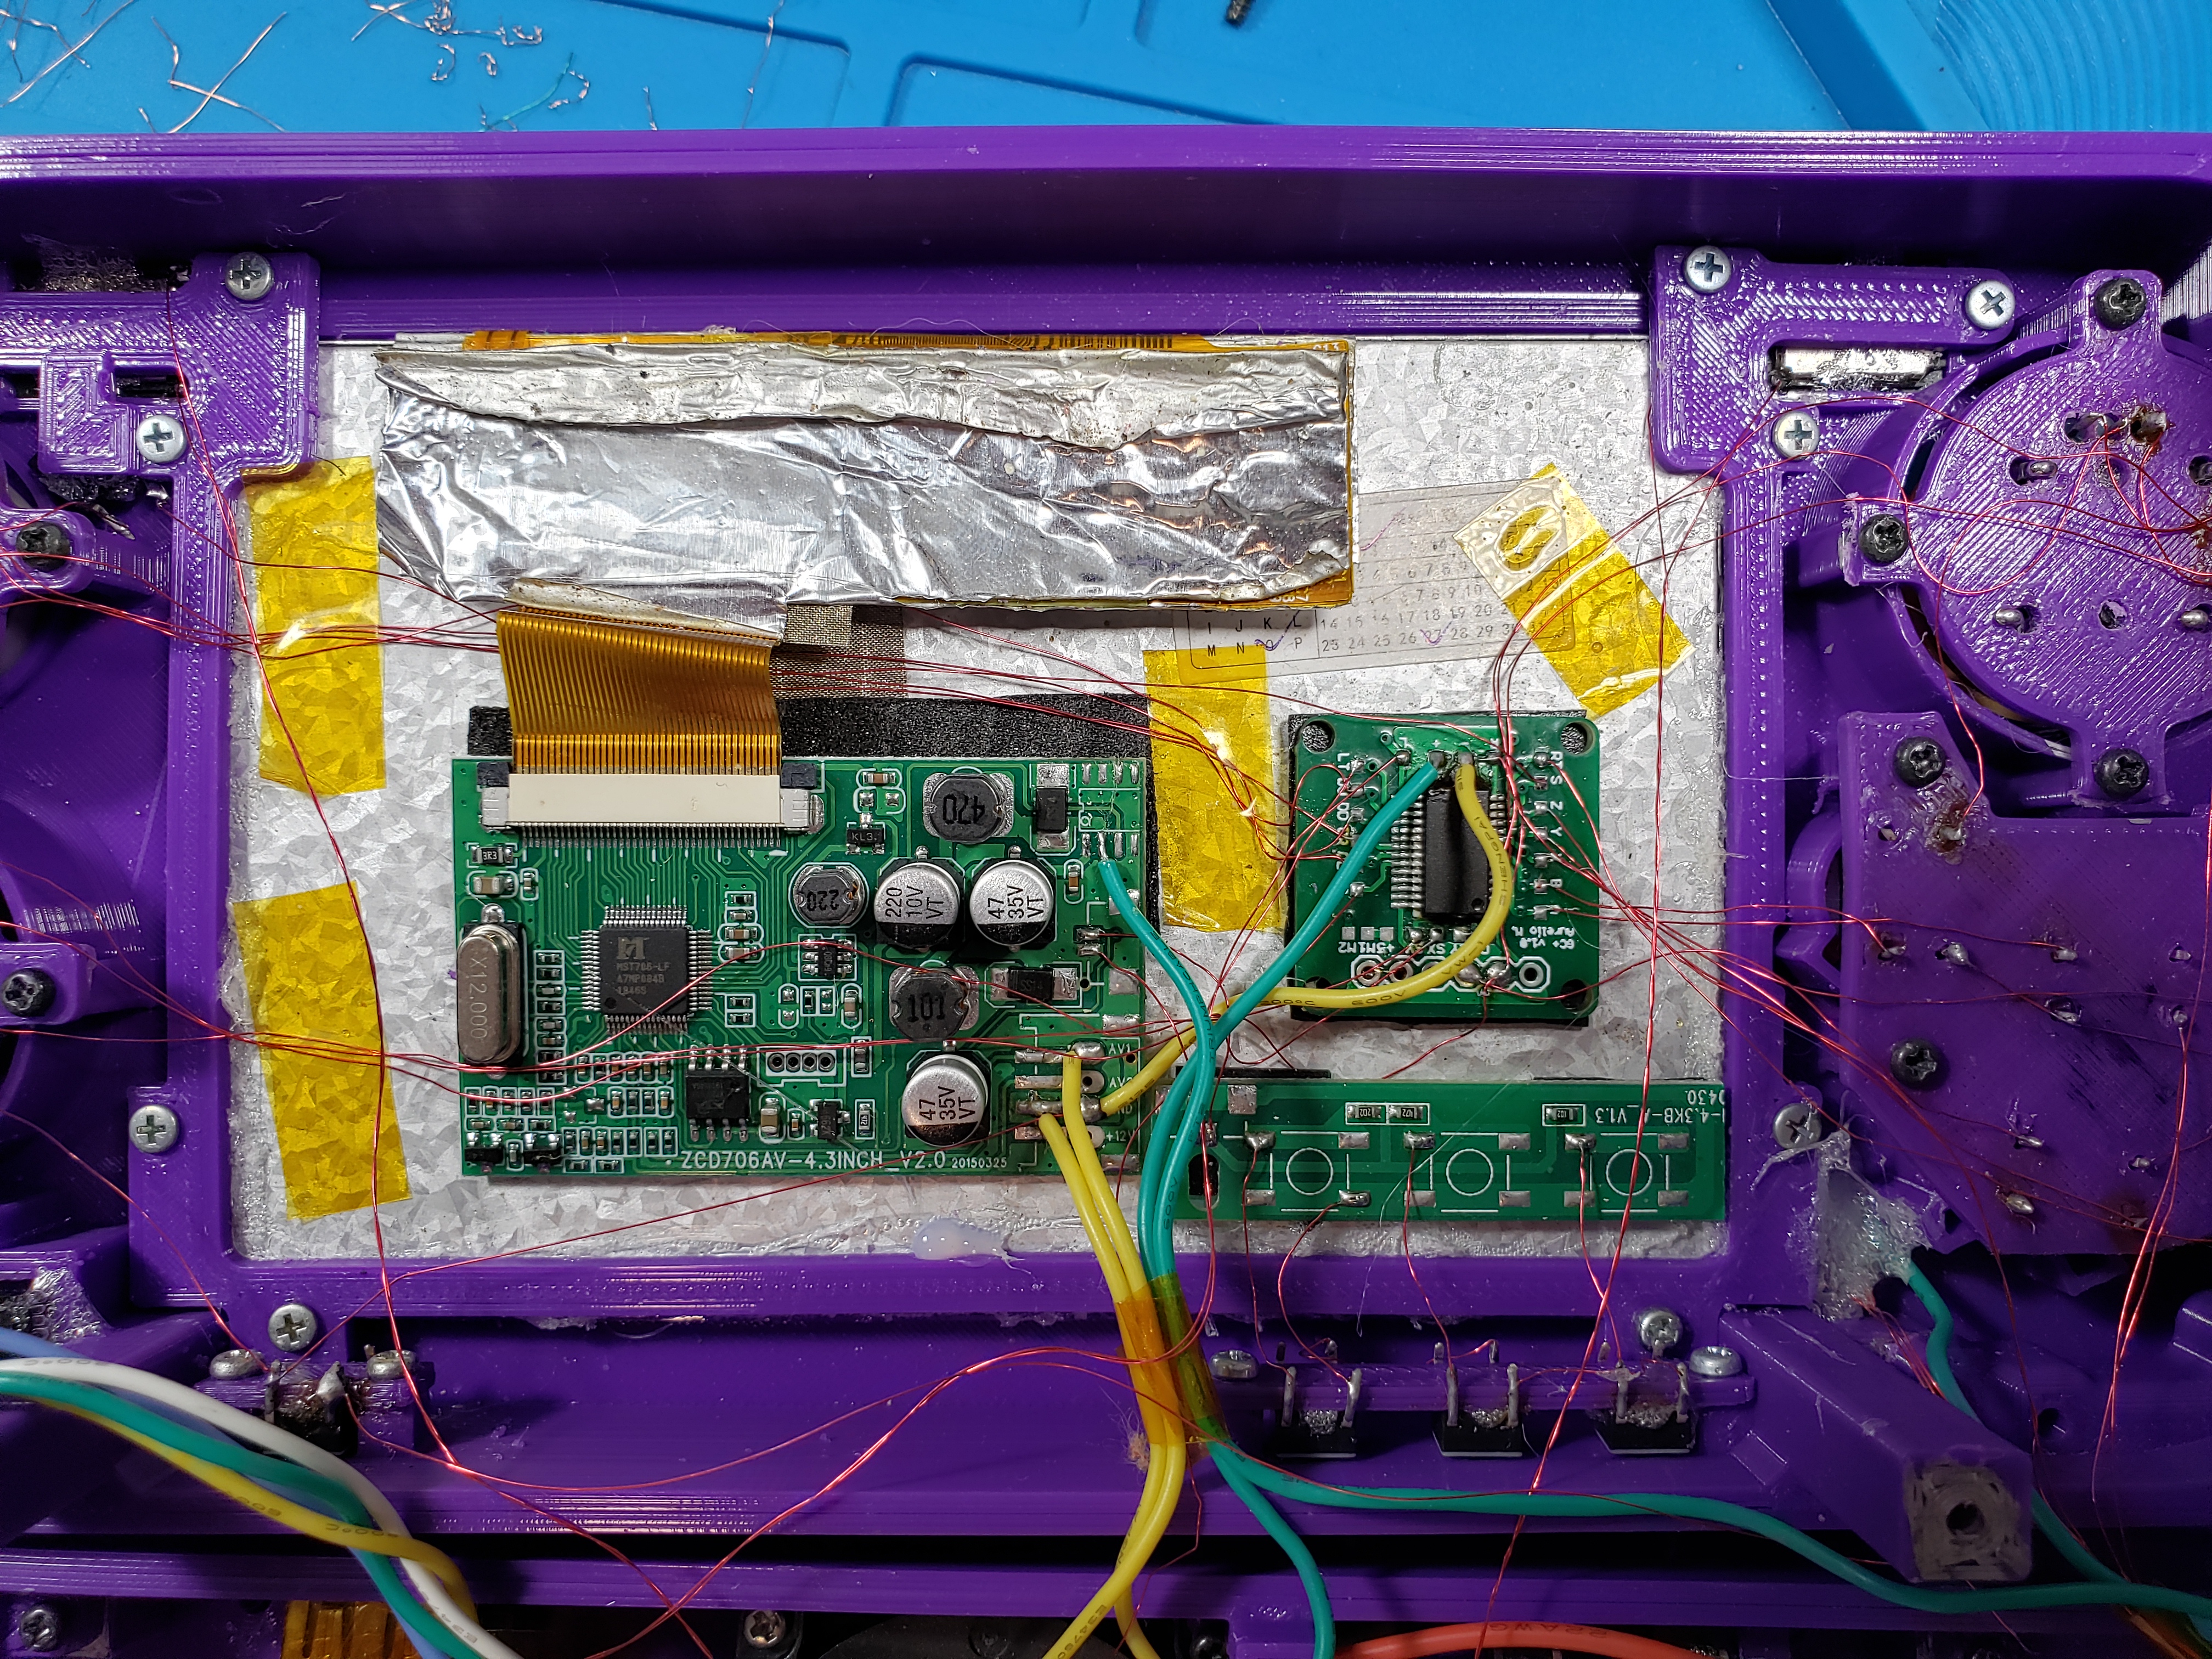
Quick side bar: the MX chip and BT module are stuck to the board with this super strong black sticky foam tape stuff. I don't quite know how to get it to unstick, I've tried running a Q-tip with IPA around the edges to try to get it to release, but no luck so far. Any suggestions would be much appreciated!

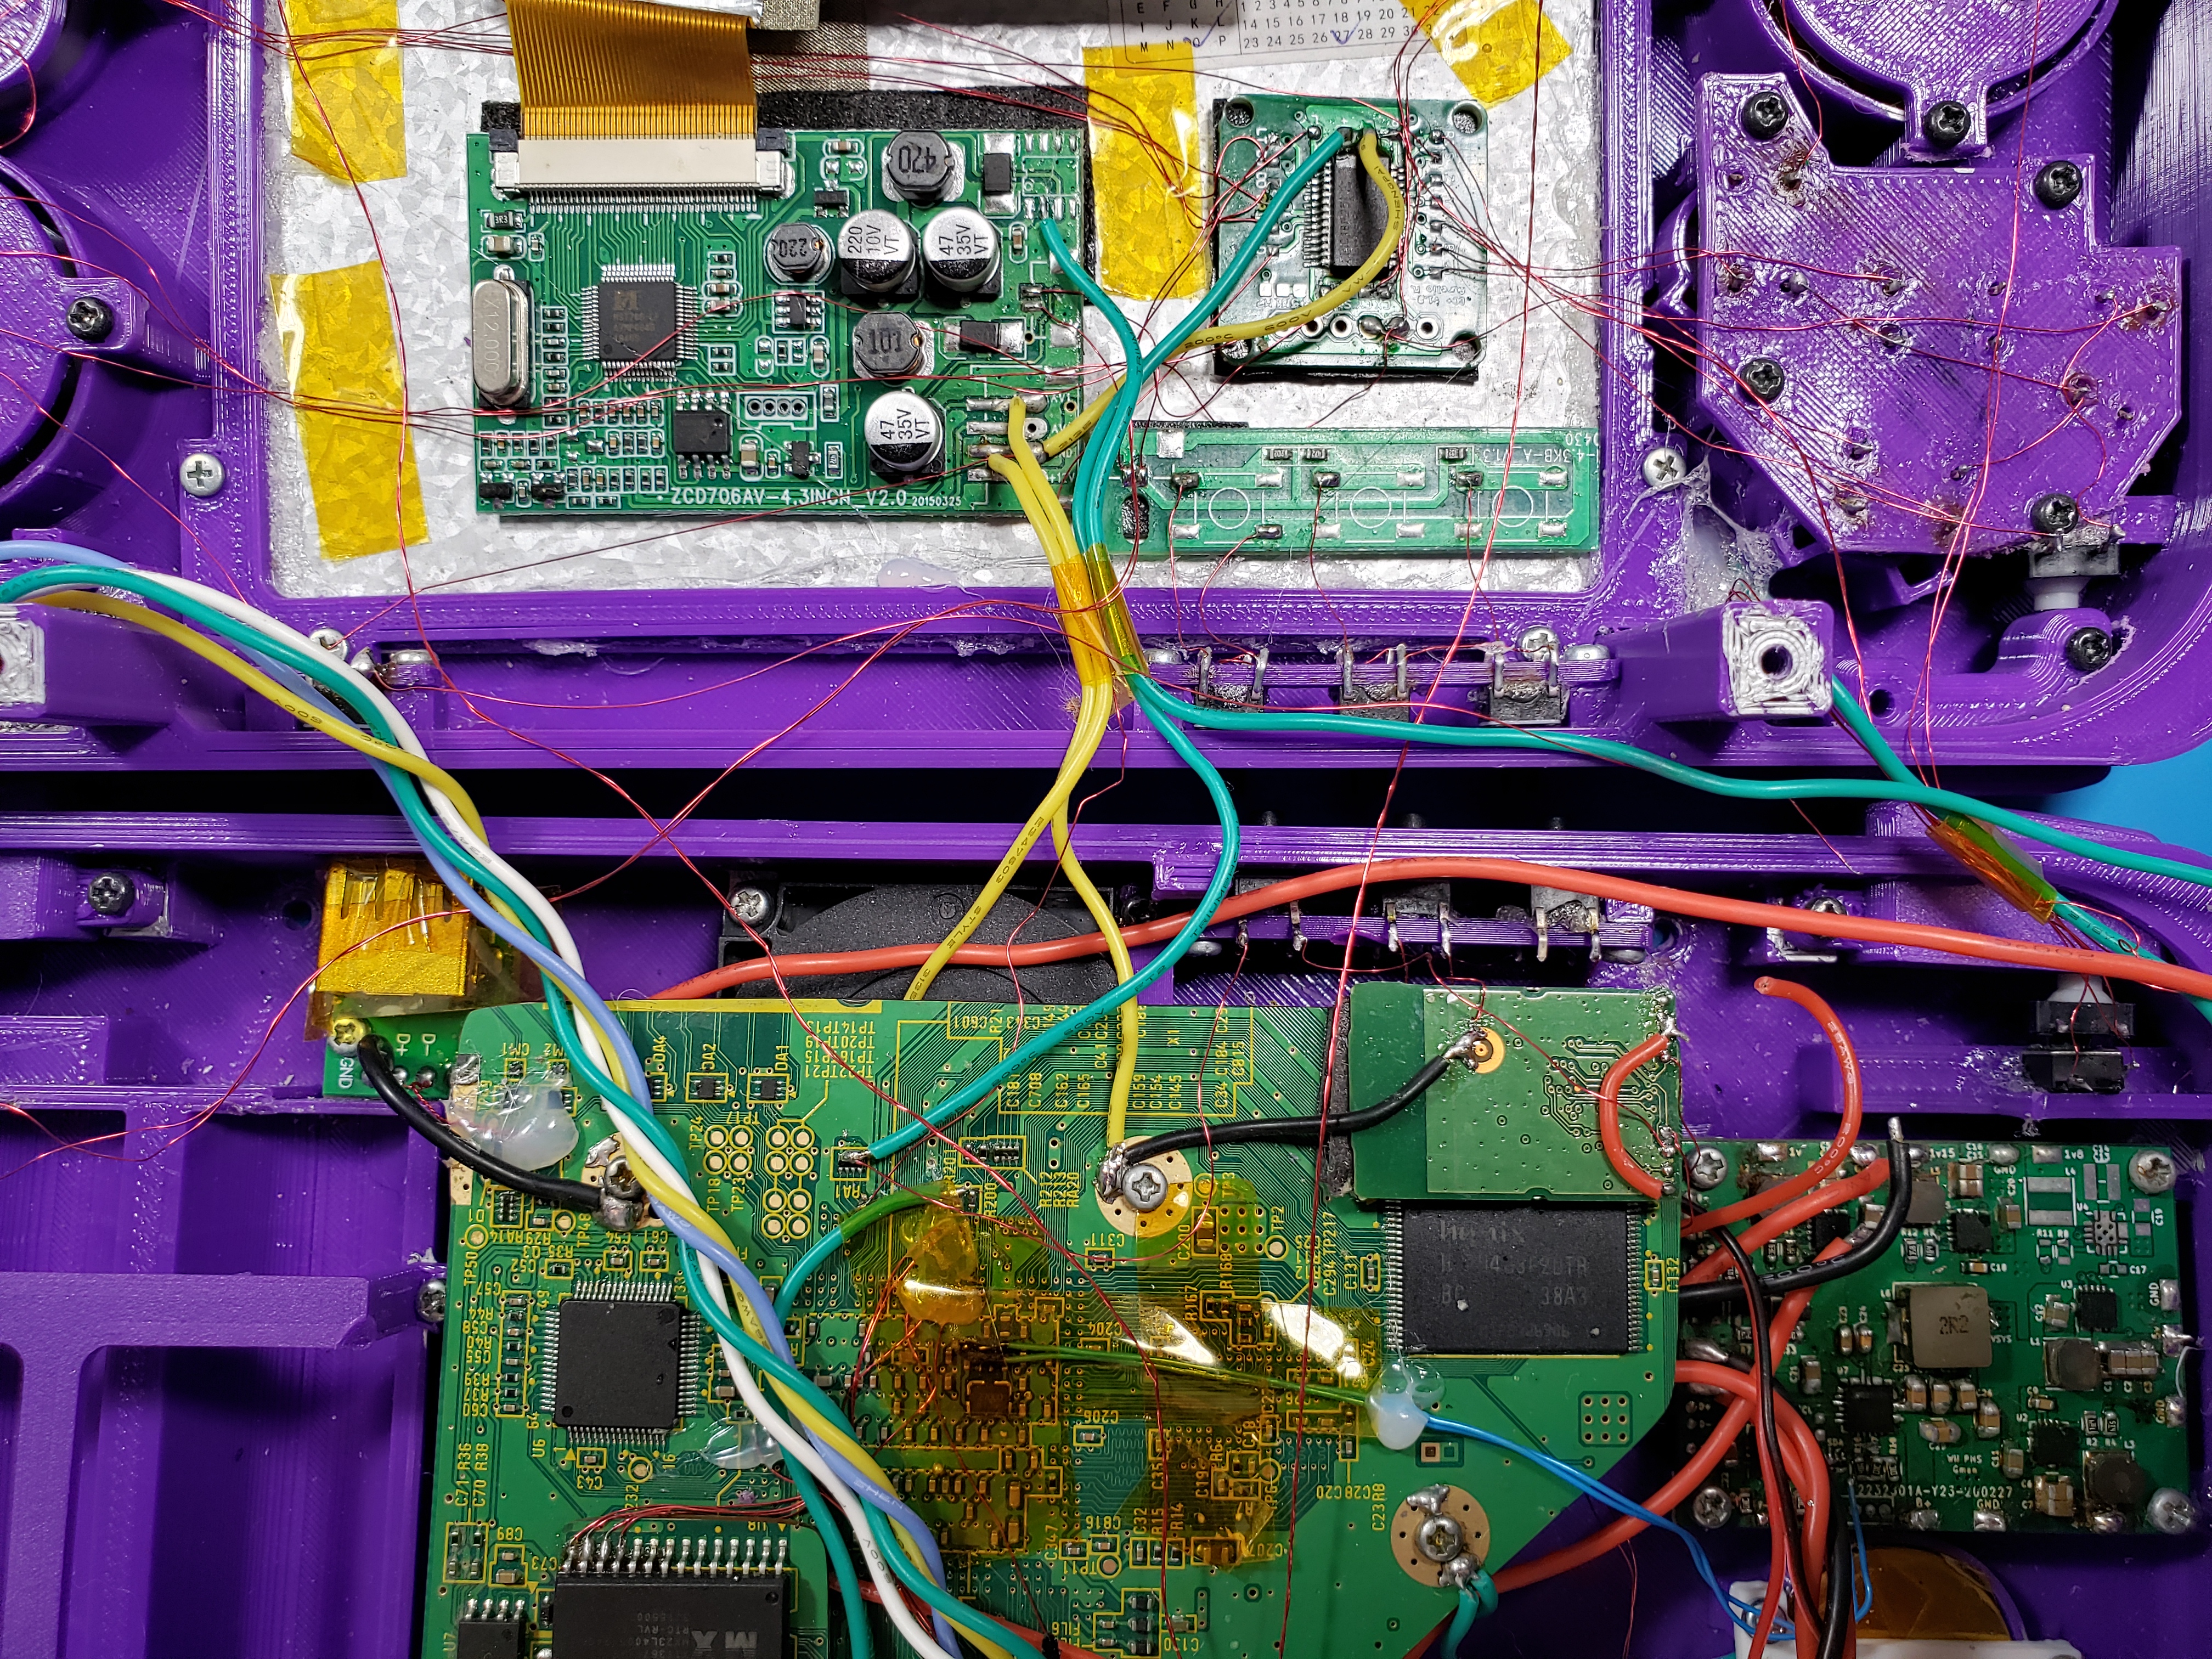
In the original worklog thread by @sappyjupiter37, the overall consensus was that something was up with the PMS. Popping that bad boy out, we can see if there's anything funky going on with it:

20220130_202446.jpg


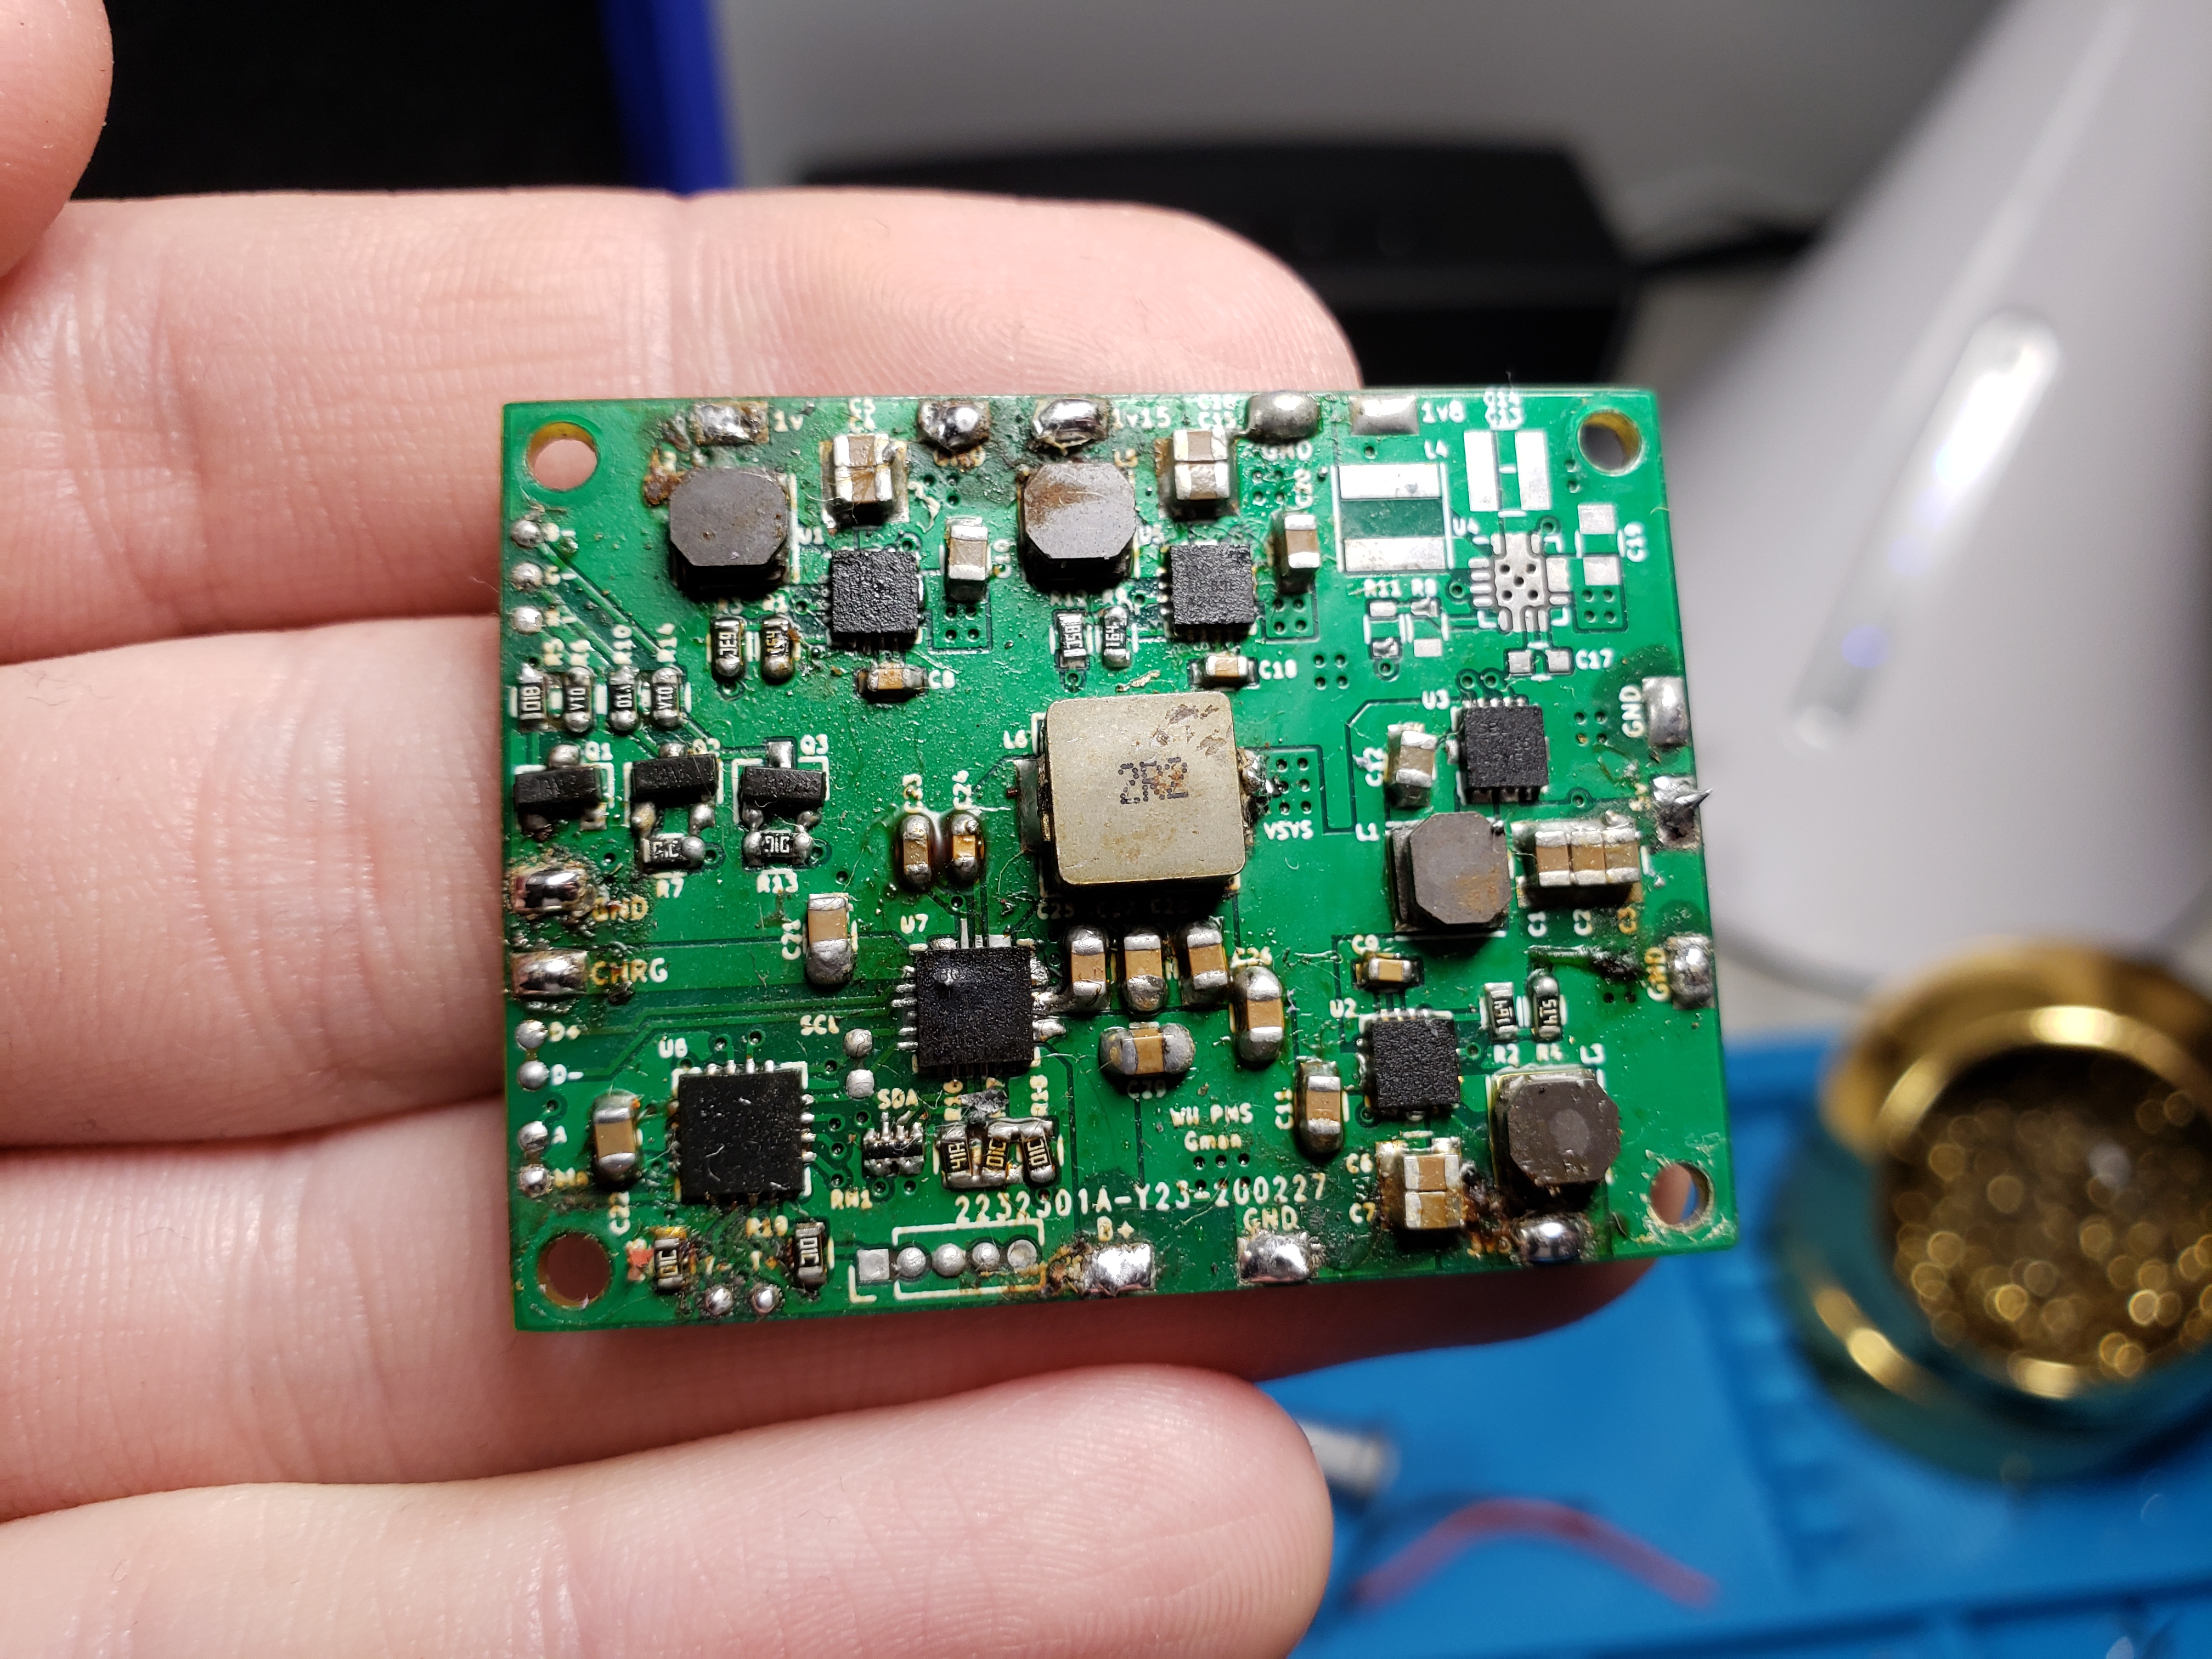
Pop goes the BQ! Even if the BQ wasn't blown, I would be amazed if this thing worked as it is. Luckily, I made up a bunch of old PMSs before the chip shortage, so I plan on just replacing this with one from my stash.

So, in my grand scheme of how I plan on getting this thing back up on its feet, my first goal is to completely disassemble the entire unit. All existing wiring will be completely scrapped. The Wii mobo, U-amp, GC+, etc. will all be looked over with a fine-tooth comb and will be touched up where necessary. I don't want to put anything back into this unit that does not live up to my own standards. Once everything is confirmed to be looking good, I will slowly reassemble the unit. Right now I'm still in the midst of disassembly, as, although there are some decent screw mounts and brackets that should hold everything in place, there's hot glue *under* the mounts as well. This is making taking the screen out a huge PITA.

20220130_211513.jpg


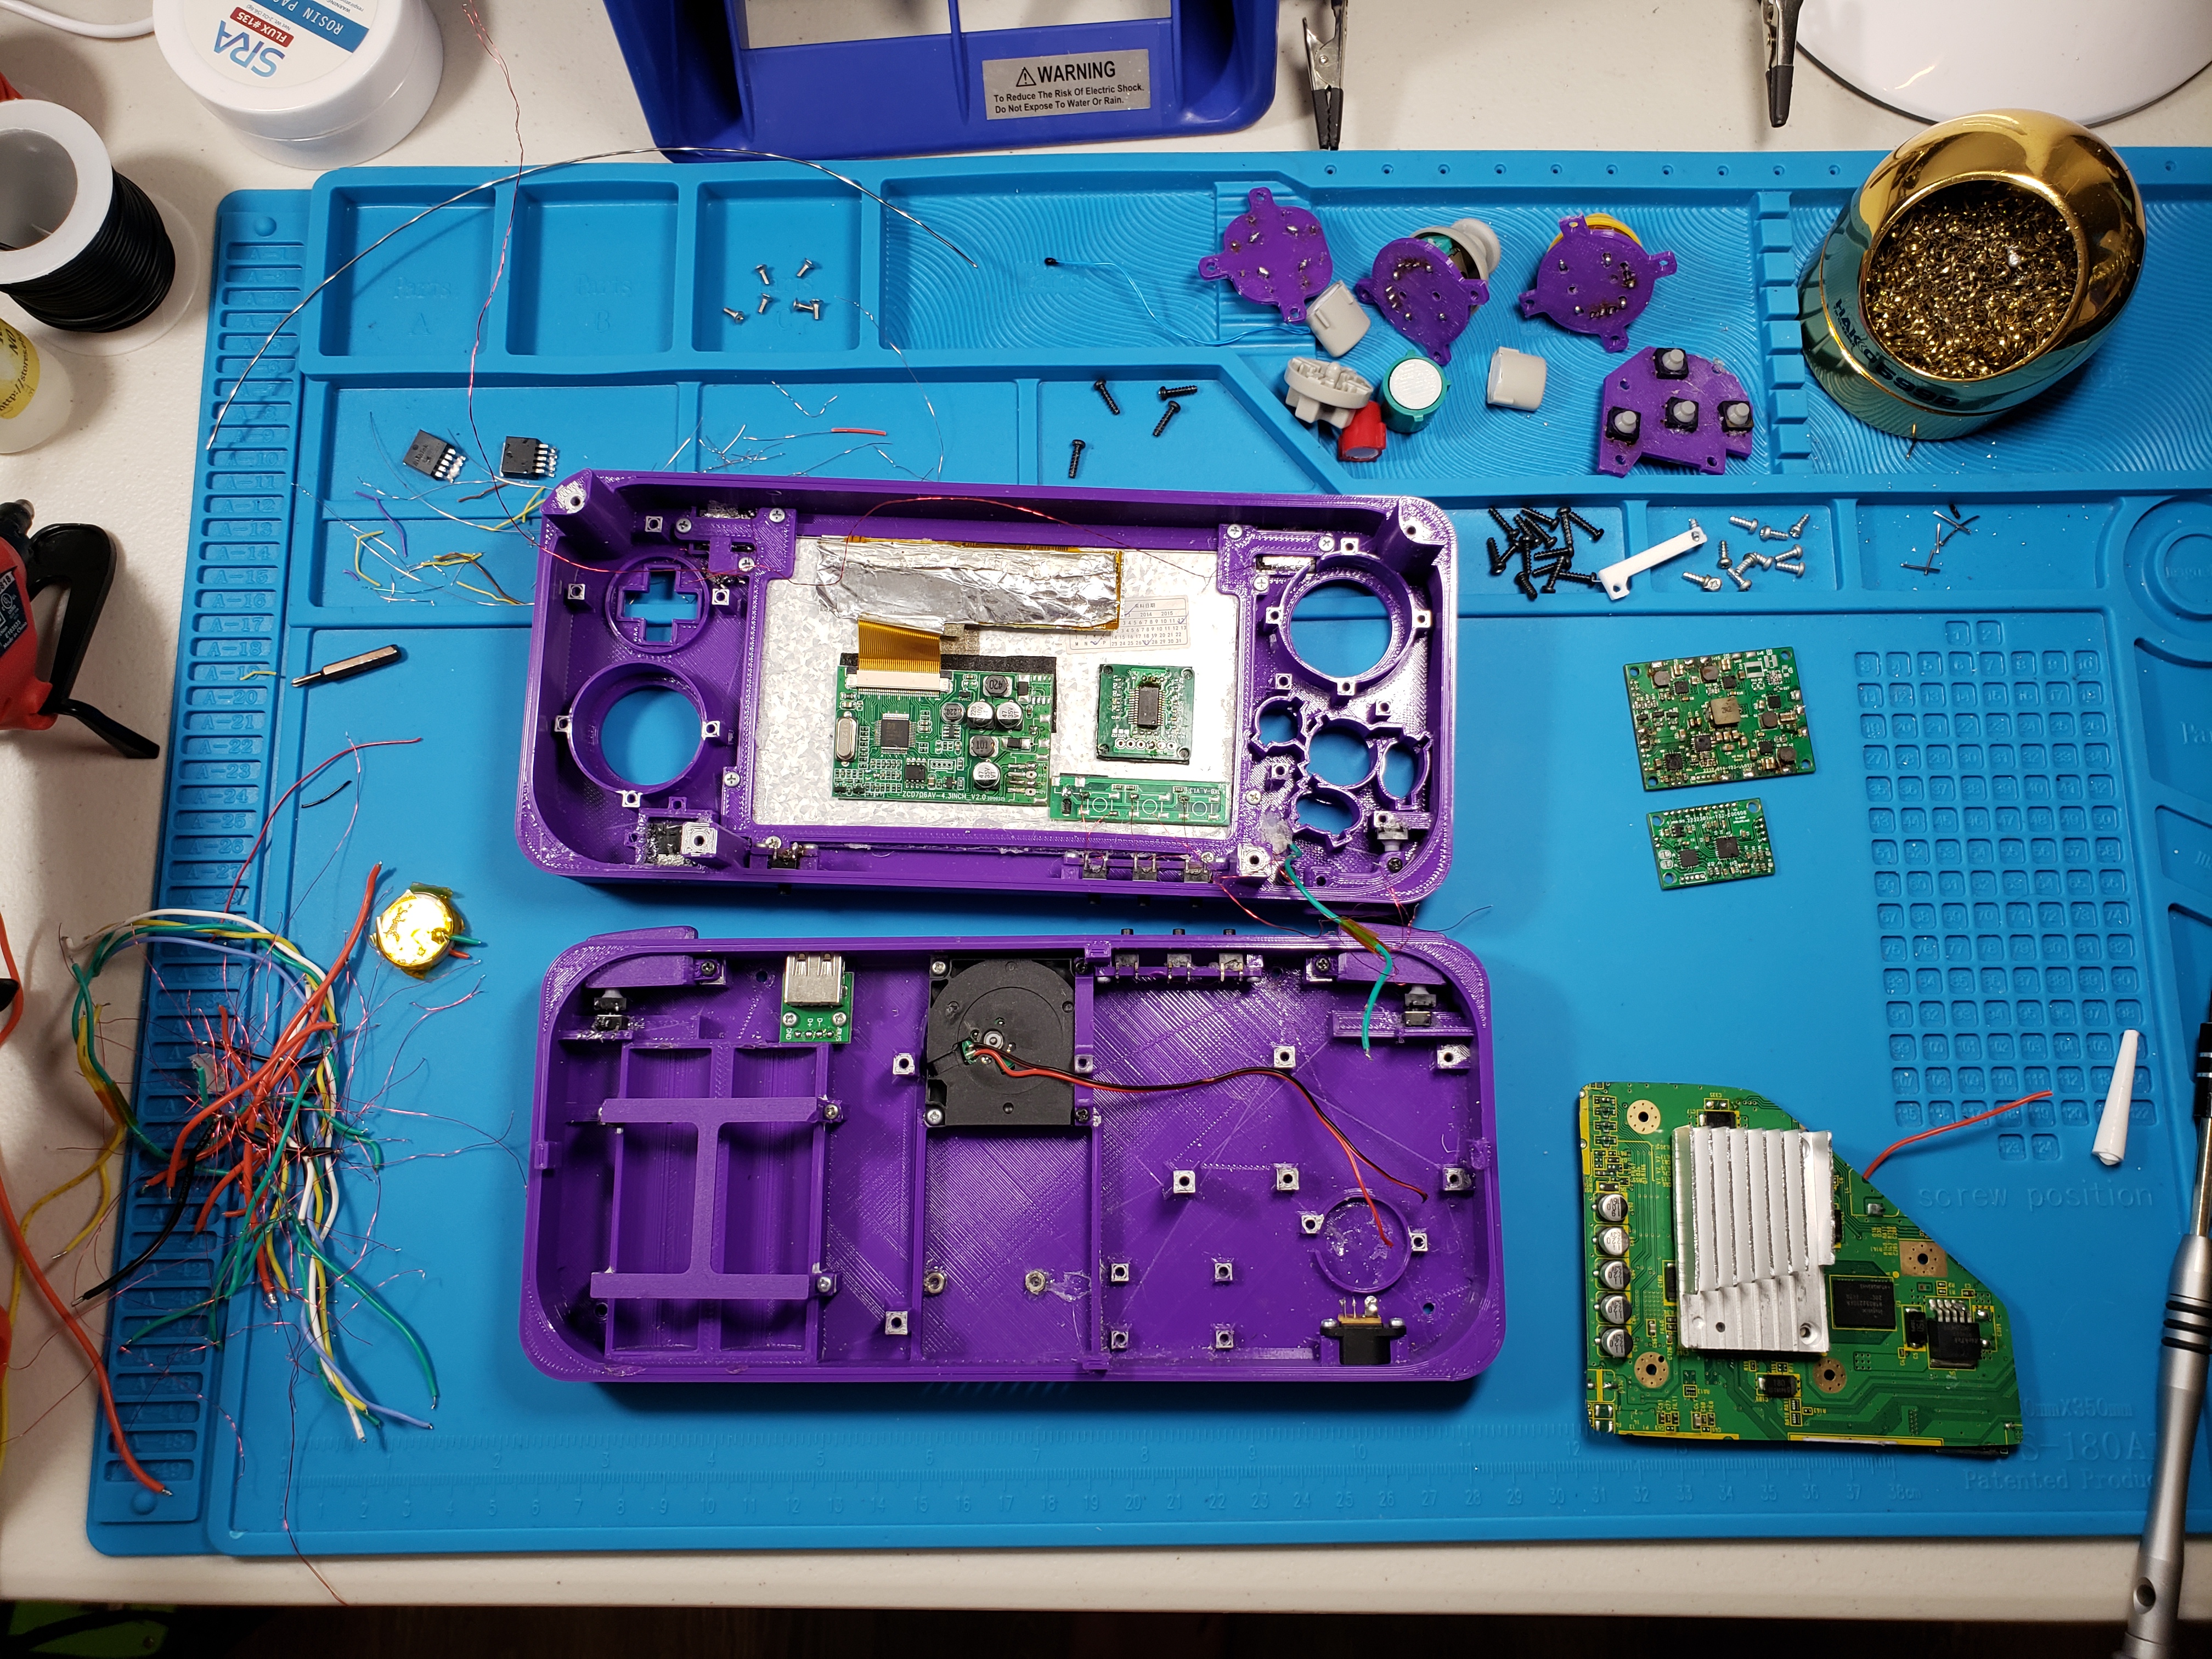
There are also quite a number of stripped screw posts in here. Any tips on how to fix those?

That's all I've got for right now, but I hope to steadily work on this until I get it into working order. Cheers!
 

Attachments

CrazyGadget

Crazy Helpful, CrazyGadget
.
Joined
Jun 6, 2020
Messages
600
Likes
832
Portables
???
Made some more progress today! I was able to carefully cut and peel all the hot glue between the screen and the case, freeing it from its PLA prison. I touched up the U-Amp a bit since some of the QFN pads needed it, but I'll talk more about that in a bit. I was able to get the bluetooth and MX chips off the Wii, which was not fun at all! That sticky foam tape is practically cement, and trying to get those off in a non-destructive manner was definitely a challenge. Here's a pic at most of the electrical stuff finally freed from the carcass:
20220131_183358.jpg


Next step was to verify that the Wii still worked. I checked all the resistances and they looked good, so I hooked it up to a known good screen and a known good PSU:

20220131_180458.jpg


That's right, this thing is running PortablizeMii! I'll leave that as is for right now, it's not hurting anything for the time being. As far as the trim itself goes, the edges of the board don't quite live up to my standards, so I was thinking I would go ahead and sand them down a little bit. But, being that I'm going to be home from college this weekend anyway, I think I'm going to cut the trim down a little bit to give myself some more breathing room in the case. It's definitely not needed, as there's more than plenty of free space inside that case, but I figure it will make installing surrounding boards / running wires around the case a little nicer when the time comes for reassembly. Here's roughly how I plan on retrimming it:

20220131_184814.jpg


Again, it's not much, but idk, I just have the urge to trim it up a little more (omega coming when???)

Here's where things start to look real ugly. Literally:

20220131_143509.jpg


I scrubbed the ever-living heck out of the PMS to try to reveal the true state of the board. As you can see, a lot of solder mask has peeled off on some of the larger pads, likely due to too much heat being on there for too long, either from initial assembly, the first attempted repair, or a combo of both. In any case, this shouldn't really be too much of a problem, as those areas are just surrounded by large planes, so any solder on there shouldn't bridge to places it shouldn't go. In terms of the BQ, I found some Aliexpress specials, and they should be at my door in roughly 3-4 weeks. That's definitely going to put a halt on this project once I get some other stuff done, but I'm in no real rush to get this thing done. My hopes are to be able to replace that chip, and pray that the PIC and buck / boost regs still work. I know that I originally said that I would just replace this board with one from my stash, and if worse comes to worst, I will. This is more of an experiment to see if I can do it.

Here's where a serious issue comes into play.

It's pretty clear that these boards were solely assembled by hand, meaning it's likely no hot air (or oven / equivalent) was used, meaning the bottom pads of the QFNs are likely not properly soldered to the board (if at all). This is huge issue, both electrically and thermally. When the BQ chips come in the mail and I go to try reworking this board, I'm also going to lift up the rest of the QFNs and see if there's any solder on that bottom pad. I will also do the same for the U-Amp.

Thanks to those who suggested the baking soda + superglue method for the stripped screw posts; I will be trying that out when I go home this weekend.

So: the next goals are:
  • Re-trim, sand, and test the mobo
  • Fill and re-drill the stripped screw mounts
  • Check to see that the screen still works
That's all I've got for now, and I probably won't have anything until the end of this coming weekend. Cheers!
 
Joined
Sep 27, 2016
Messages
404
Likes
865
I have worked in the electronic repair business for over 10 years now and I have always found taking something old and broken and breathing new life into it very therapeutic. I am enjoying reading through your thread here and that PMS board doesn't look too bad. Looks like it can be saved since its just solder mask peeling for the most part (other than the resistor pad under the BQ ic).

What I have done in the past for stripped screw posts is just cutting a small amount of new pla and placing it in the damaged area while melting it with a soldering iron. So far has worked out nicely for me haha. Good luck!
 

CrazyGadget

Crazy Helpful, CrazyGadget
.
Joined
Jun 6, 2020
Messages
600
Likes
832
Portables
???
Okay, so I made a tiny bit of progress today, but it's still going to be a while before I can *really* get to work on this thing due to the wait time on the BQ chip.

First off, I tested the screen, and it works as it should:

20220202_173455.jpg


Something to start thinking about is the cooling setup, as it's a little jank as is:
20220202_135343.jpg
20220202_135352.jpg

20220202_135402.jpg
20220202_135404.jpg


As you can see, it's definitely not the most efficient cooling setup; it uses a cut up, shortened Wii heatsink, and there's a ton of air gaps, so while some of the hot exhaust should get pushed out through the bottom vent, it's likely that it just ends up getting pushed into the case. My thought right now is to make some sort of 3d printed piece to fit around those air gaps, and make a better channel for the air to flow through the exhaust vent.

I took a good deal of time cleaning all the dust, flux, hot glue, solder balls / wisps, etc. out of the case, and began to reinstall some of the components:

20220203_000505.jpg


Originally I was going to fill and re-drill those stripped screw holes, but I found out that they're the perfect size to fit M2.5 screws, and so far everything has threaded in very well.

Over the weekend, I'll retrim the Wii, wire up the controls in the front half of the unit, and maybe hot air the U-Amp to see if there's any solder on the bottom pads. Looking a little more ahead in the future, I talked to @Gman about updating the PMS to the latest firmware, since the older revisions have some bugs that could lead to issues down the road. As it stands, the older version of the PMS1 cannot be updated to the newest firmware unless the LED driver circuit is modified, which looks pretty easy. Big shoutout to him for entertaining all of my stupid questions. It might be a long shot to get this board working, but by God I'm gonna try.

That's all I've got for now; hopefully I'll have some updates by the end of the weekend!
 

CrazyGadget

Crazy Helpful, CrazyGadget
.
Joined
Jun 6, 2020
Messages
600
Likes
832
Portables
???
Okay, I didn't get as much done as I wanted to, but that's no biggie. The only progress I made on the unit this weekend was retrimming the Wii:

20220205_161218.jpg
20220205_161227.jpg


I'm going to hold off on hot air-ing the U-Amp until I get those BQ chips and work on the PMS since there's no real use in having to bust out the hot air setup two separate times. Hopefully during this week, I can rewire the controls to the GC+. I also brought back my calipers with me, so I might try to mock up a piece to help the exhaust air go through the vent in the case.

Okay, that's all the time I've got. I gotta get back to playing Animal Crossing New Leaf on my Nintendo 3DS!
 
Joined
Sep 30, 2021
Messages
49
Likes
69
Location
Idaho
Portables
2
As an avid follower of the original post of this project, I am so jazzed about this and can't wait to see it finally functioning - you'll have to bring it to MGC this year
 

CrazyGadget

Crazy Helpful, CrazyGadget
.
Joined
Jun 6, 2020
Messages
600
Likes
832
Portables
???
As an avid follower of the original post of this project, I am so jazzed about this and can't wait to see it finally functioning - you'll have to bring it to MGC this year
Unfortunately I'm not going to be able to make it to MGC this year. It's the weekend before finals start and I really don't want to mess up my last semester at college haha. That being said, I'll be sure to bring it to the next one!
 

CrazyGadget

Crazy Helpful, CrazyGadget
.
Joined
Jun 6, 2020
Messages
600
Likes
832
Portables
???
Gman comes in clutch once again! He had some spare BQs from building the PMS1s, and was able to ship a couple my way. I even managed to cancel my Aliexpress order for the fake ones since they never shipped out, so no money lost there!

I popped off the blown BQ, and it looks like there was solder on that bottom pad (also judging by the bottom of the BQ itself); this is good news, it means the rest of the QFNs are soldered on properly, meaning I don't have to lift all of them. I put the new BQ on, as well as modified the LED driver circuit to accommodate for the new firmware, flashed the new firmware, and then hooked it up to a battery. Tested the voltages, LED modes, and charging; everything looks good!

20220212_170337.jpg
20220212_202810.jpg
20220212_201815.jpg


I'm hoping that I can finish this project up within the week, but we'll see how that goes. It feels pretty good to have fixed this board, I love that this revival is using all the original parts, revitalized!
 

CrazyGadget

Crazy Helpful, CrazyGadget
.
Joined
Jun 6, 2020
Messages
600
Likes
832
Portables
???
Aight it's done

20220216_203002.jpg


20220216_195730.jpg
20220216_195757.jpg
20220216_195802.jpg

A huge thank you to everyone who helped me out with all the little things I ran into while rebuilding this, and a HUGE thank you to Gman for helping me bring this PMS back to life with the new BQ and showing me how to change the LED driver circuit to work with the newer firmware. I gave it a full run for its money playing a couple different Gamecube and Wii games, and it seems to be performing well. The cooling setup is still a little sketchy, but if it works, it works. I must say, the weak link of this portable is definitely the screen. Something about these cheap 240 composite 16:9 TN Amazon backup cams just... it looks so bad. It also has 2 small dark spots and a singular stuck pixel. But you know what? The only nonoriginal parts in this thing are the batteries, BQ chip and wires. I did what I set out to do, and revived this dead portable to its formal glory, and I'm happy with that.

Cheers friends, and thank you for coming on this ride with me!
 
Joined
Aug 7, 2021
Messages
67
Likes
25
Location
United States, Florida
Aight it's done

View attachment 21273


A huge thank you to everyone who helped me out with all the little things I ran into while rebuilding this, and a HUGE thank you to Gman for helping me bring this PMS back to life with the new BQ and showing me how to change the LED driver circuit to work with the newer firmware. I gave it a full run for its money playing a couple different Gamecube and Wii games, and it seems to be performing well. The cooling setup is still a little sketchy, but if it works, it works. I must say, the weak link of this portable is definitely the screen. Something about these cheap 240 composite 16:9 TN Amazon backup cams just... it looks so bad. It also has 2 small dark spots and a singular stuck pixel. But you know what? The only nonoriginal parts in this thing are the batteries, BQ chip and wires. I did what I set out to do, and revived this dead portable to its formal glory, and I'm happy with that.

Cheers friends, and thank you for coming on this ride with me!
absolutely beautiful job!
 
Joined
Feb 3, 2022
Messages
37
Likes
28
Location
your walls
Portables
Half
Aight it's done

View attachment 21273


A huge thank you to everyone who helped me out with all the little things I ran into while rebuilding this, and a HUGE thank you to Gman for helping me bring this PMS back to life with the new BQ and showing me how to change the LED driver circuit to work with the newer firmware. I gave it a full run for its money playing a couple different Gamecube and Wii games, and it seems to be performing well. The cooling setup is still a little sketchy, but if it works, it works. I must say, the weak link of this portable is definitely the screen. Something about these cheap 240 composite 16:9 TN Amazon backup cams just... it looks so bad. It also has 2 small dark spots and a singular stuck pixel. But you know what? The only nonoriginal parts in this thing are the batteries, BQ chip and wires. I did what I set out to do, and revived this dead portable to its formal glory, and I'm happy with that.

Cheers friends, and thank you for coming on this ride with me!
Finally, a PPI Portable that isn’t regarded as a weapon of mass destruction

5AD6071B-63B4-40A7-B087-D3CDB5DF4E6D.gif


Really clean wiring ( ͡° ͜ʖ ͡°), great job
 
Top