
Hello everyone,
This worklog is about the GameBoy 64 Worklog. Based on the feedback i received, i had to change few things as well as some small problems that were bugging me, here are the changes:
1- I tweaked the design because of the feedback i received.
2- The case finishing is the reason why I'm remaking my whole project, i just didn't feel the satisfaction i'd get from completing the first portable.
3- Cable management, The wires had extra length than necessary.
4- using different wires for video/audio instead of magnet wires and twisting them with a drill instead of my hands.
4- Less hot glue, I had to use a lot of IPA to remove some useless blobs of glue, it was just hell.
5- Change the tact switch since adafruit's sucks, The left D-pad button was straight up not making contact because of how trash they were.
So i tore down the whole thing, and took my time with everything slowly, Because being this was my first successful project, i was kind of doing things fast just so see if this project would ever be done, now that i know that i could do this, here are the results at the moment.(Most of the things done are from the casing side at the moment)
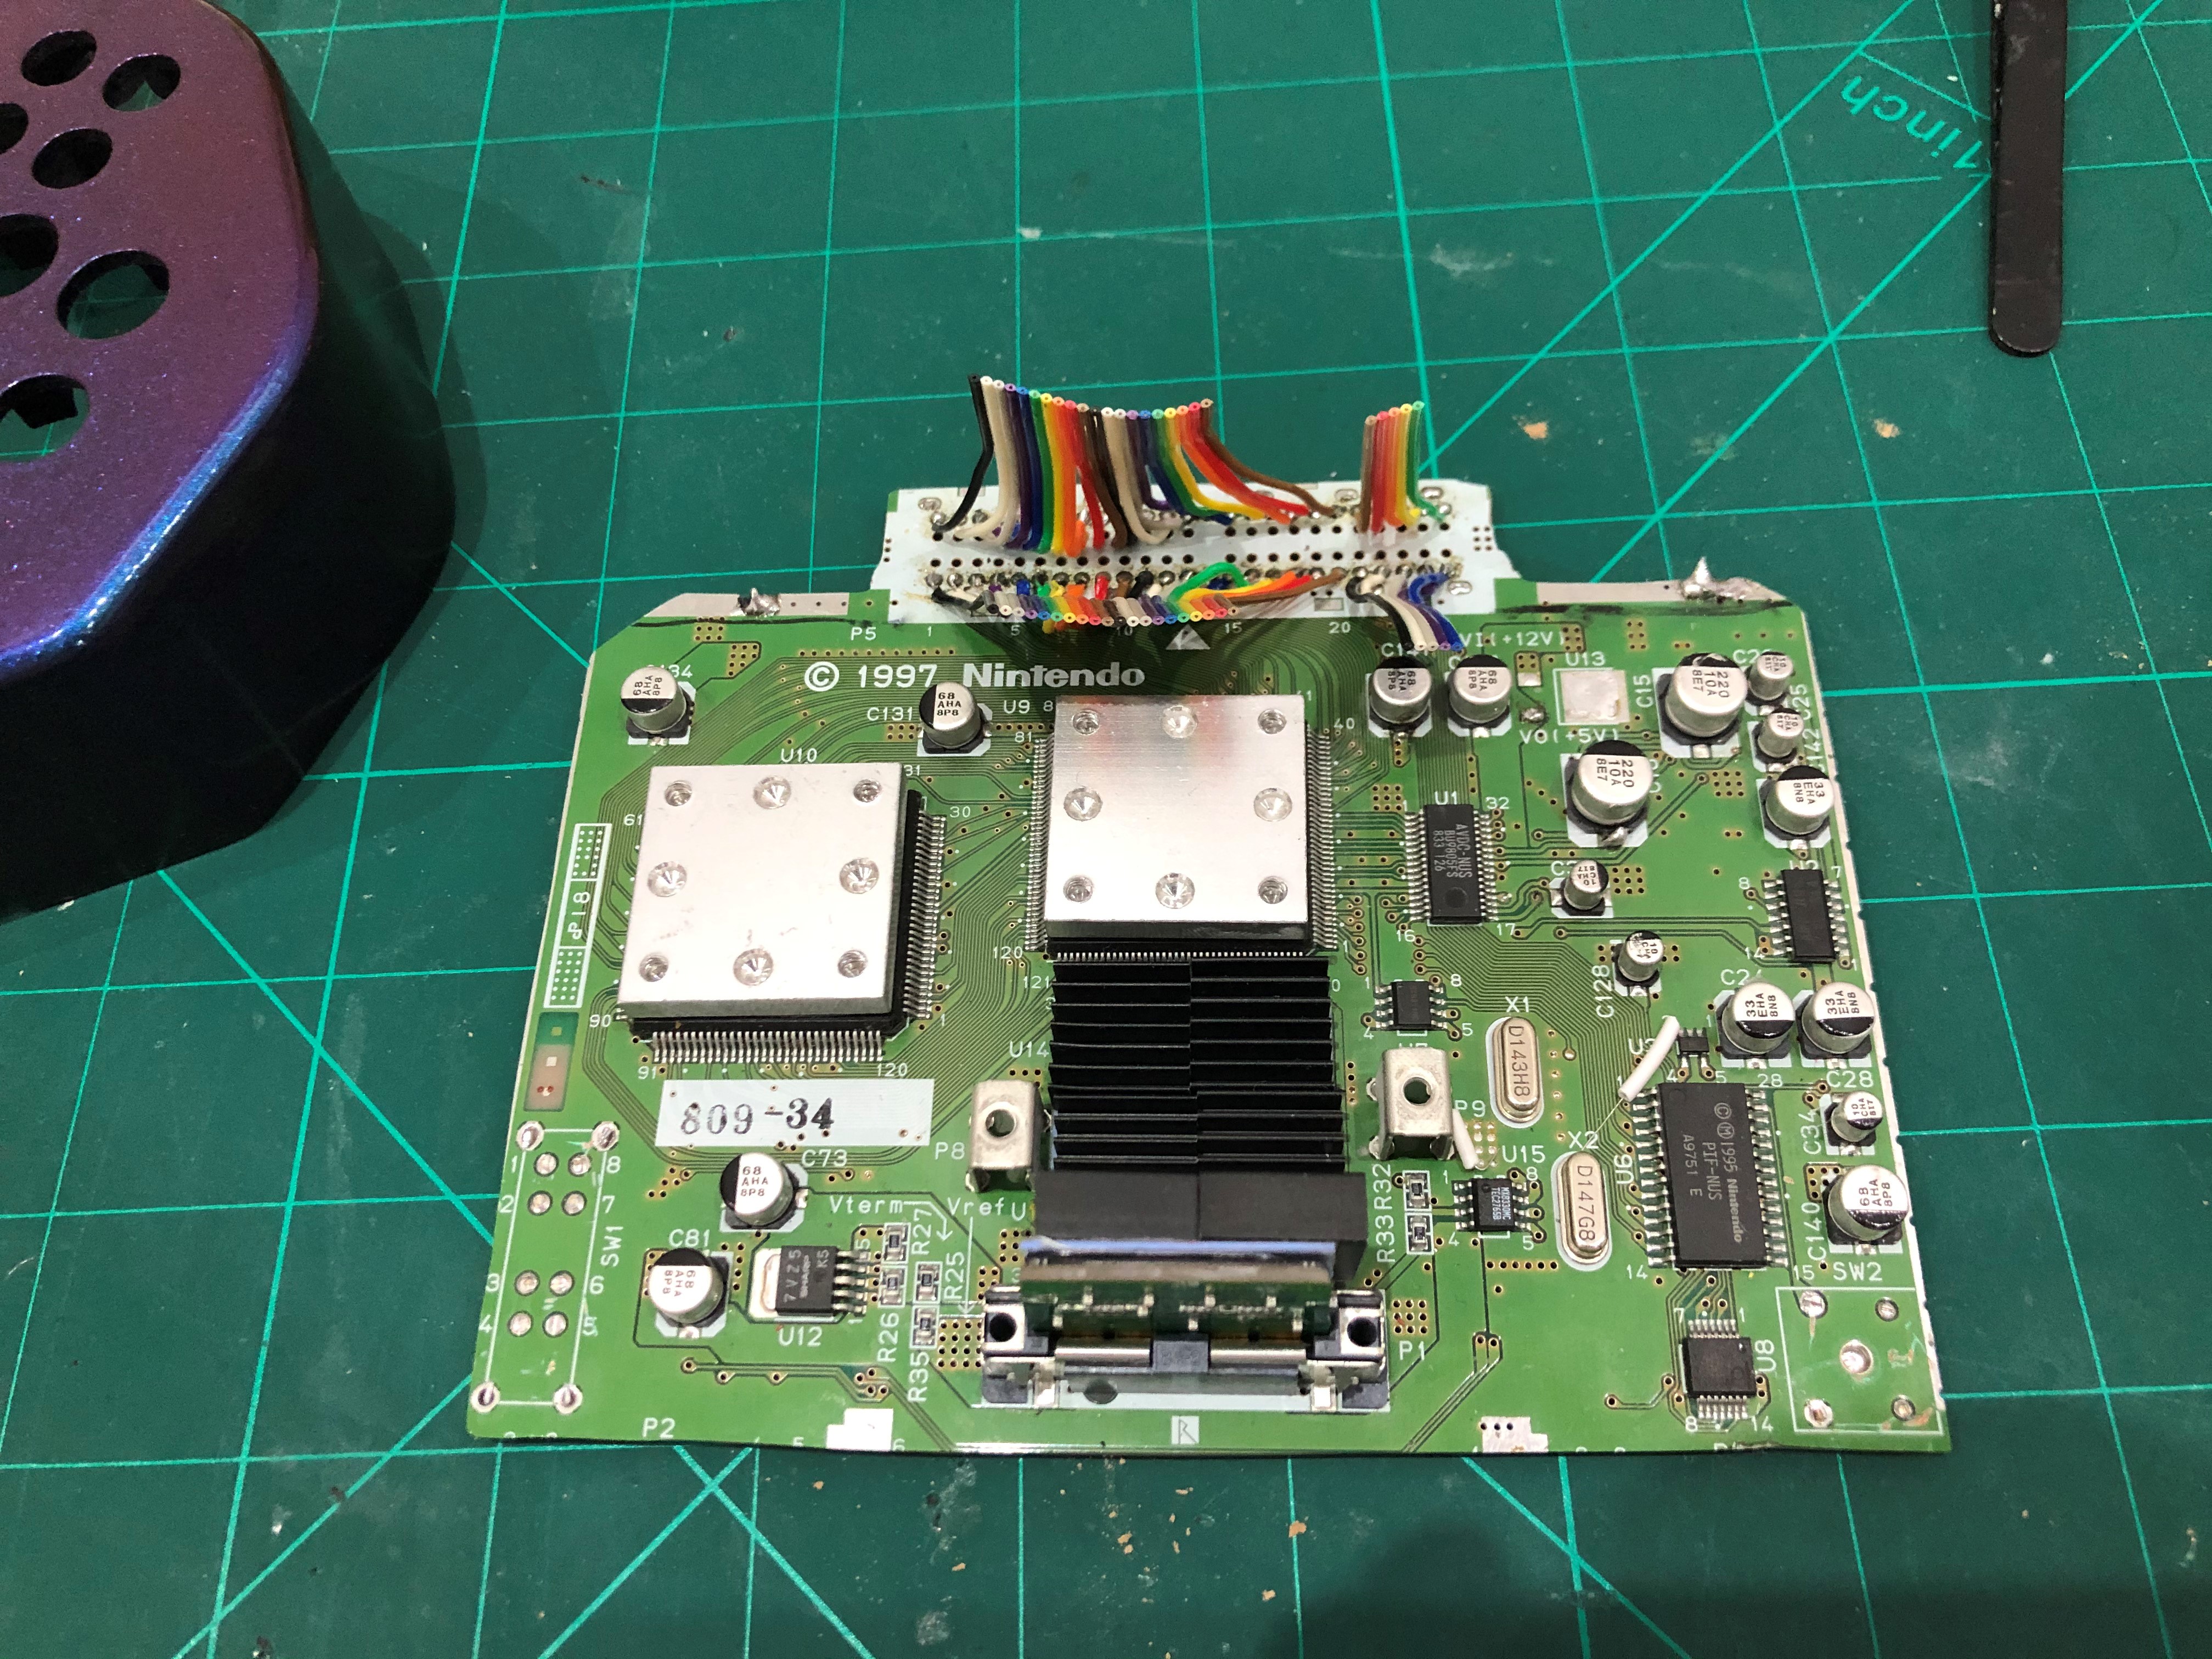
For the N64. i wanted to wait for the case to finish, since im going to attach things inside the case so that i dont end up using a lot of wires unnecessarily. But here's what i have done at the moment:
If there's anything else i can improve on before i finish the project, I'd appreciate it.
Some more updates soon when i assemble things up.
This worklog is about the GameBoy 64 Worklog. Based on the feedback i received, i had to change few things as well as some small problems that were bugging me, here are the changes:
1- I tweaked the design because of the feedback i received.
2- The case finishing is the reason why I'm remaking my whole project, i just didn't feel the satisfaction i'd get from completing the first portable.
3- Cable management, The wires had extra length than necessary.
4- using different wires for video/audio instead of magnet wires and twisting them with a drill instead of my hands.
4- Less hot glue, I had to use a lot of IPA to remove some useless blobs of glue, it was just hell.
5- Change the tact switch since adafruit's sucks, The left D-pad button was straight up not making contact because of how trash they were.
So i tore down the whole thing, and took my time with everything slowly, Because being this was my first successful project, i was kind of doing things fast just so see if this project would ever be done, now that i know that i could do this, here are the results at the moment.(Most of the things done are from the casing side at the moment)
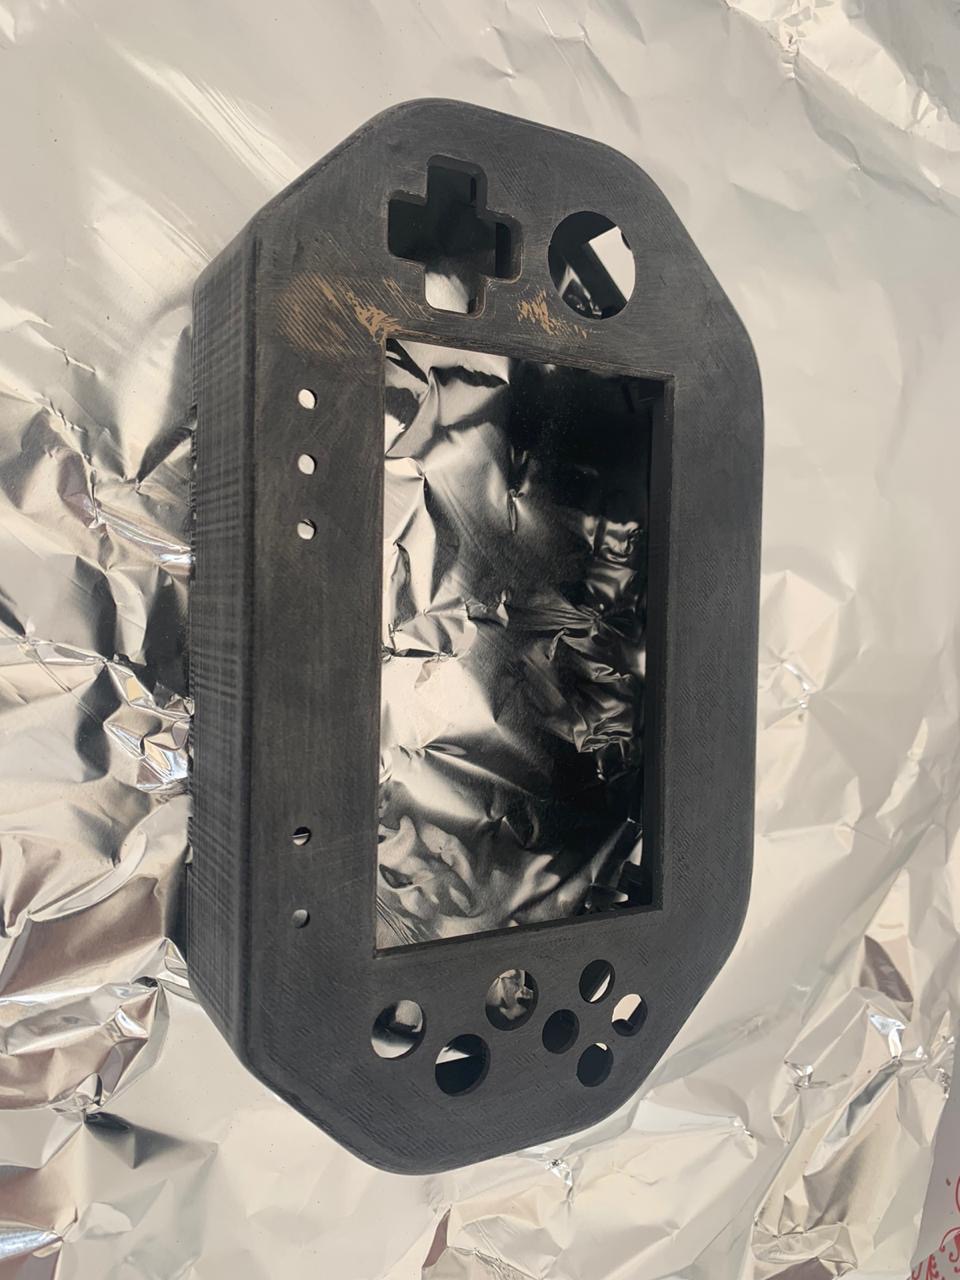
So most of the feedback came at the finishing of the last case, i mean, even i didn't like it:
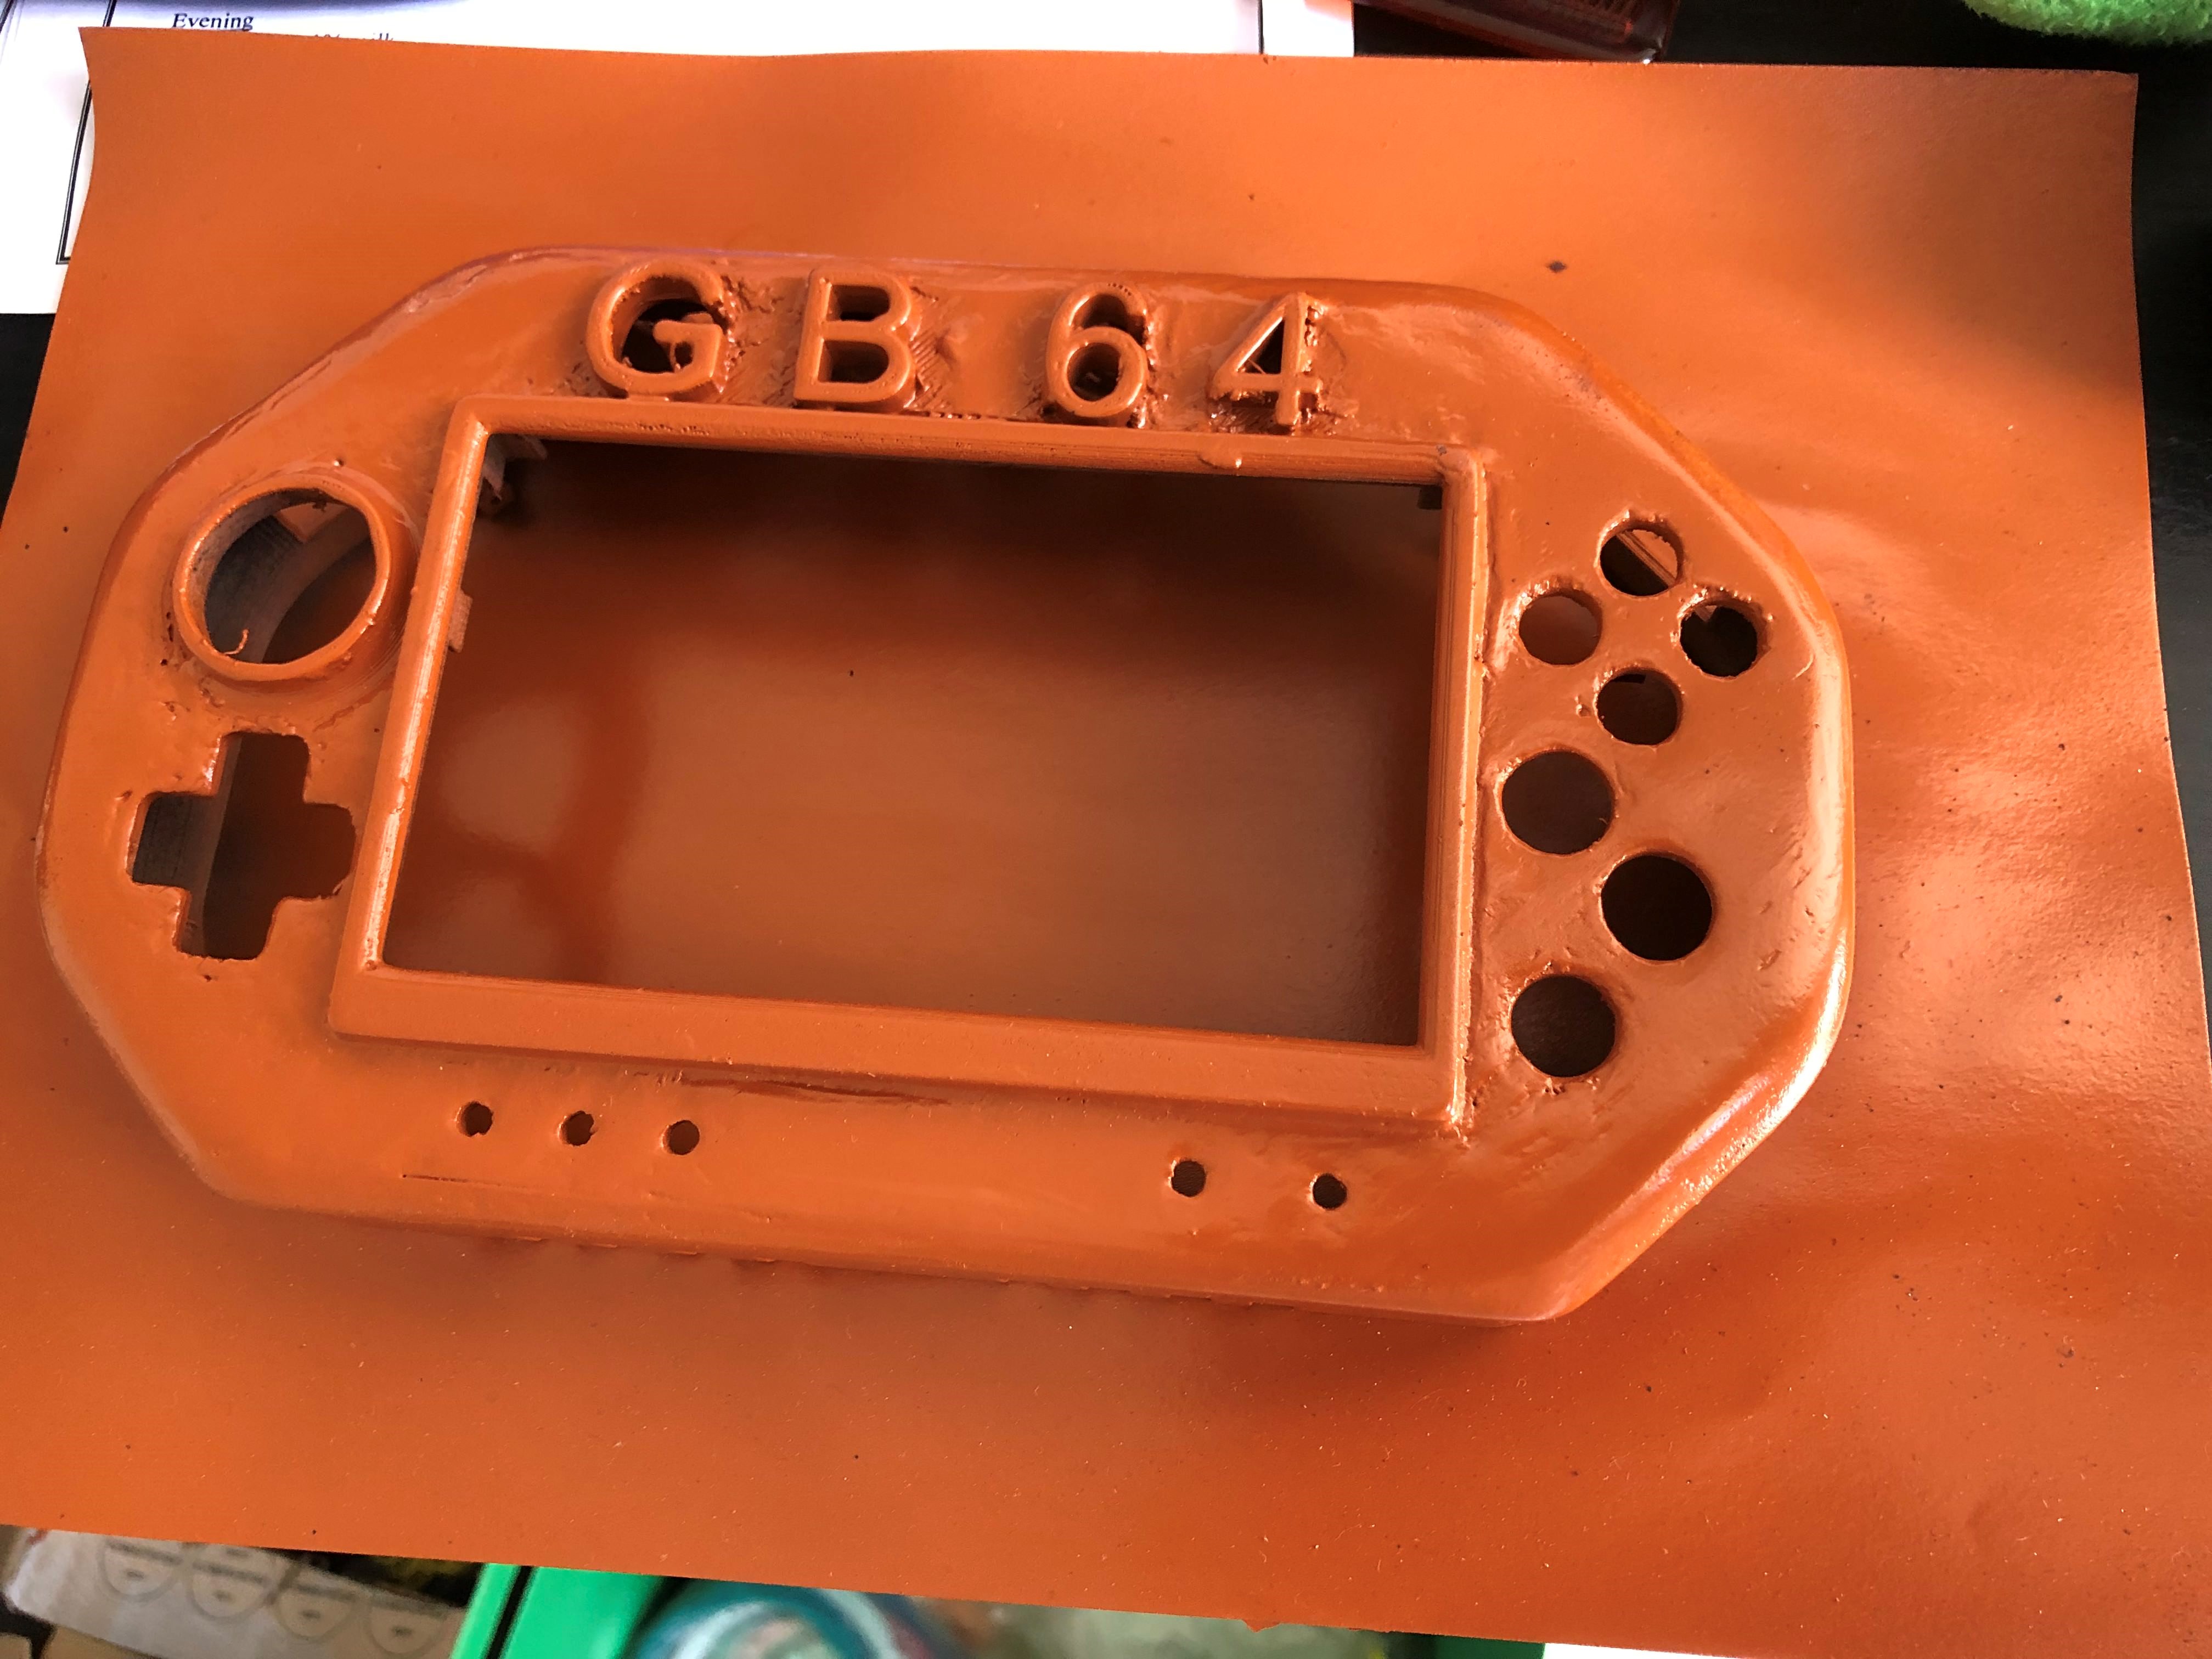
Yea, It's obvious.
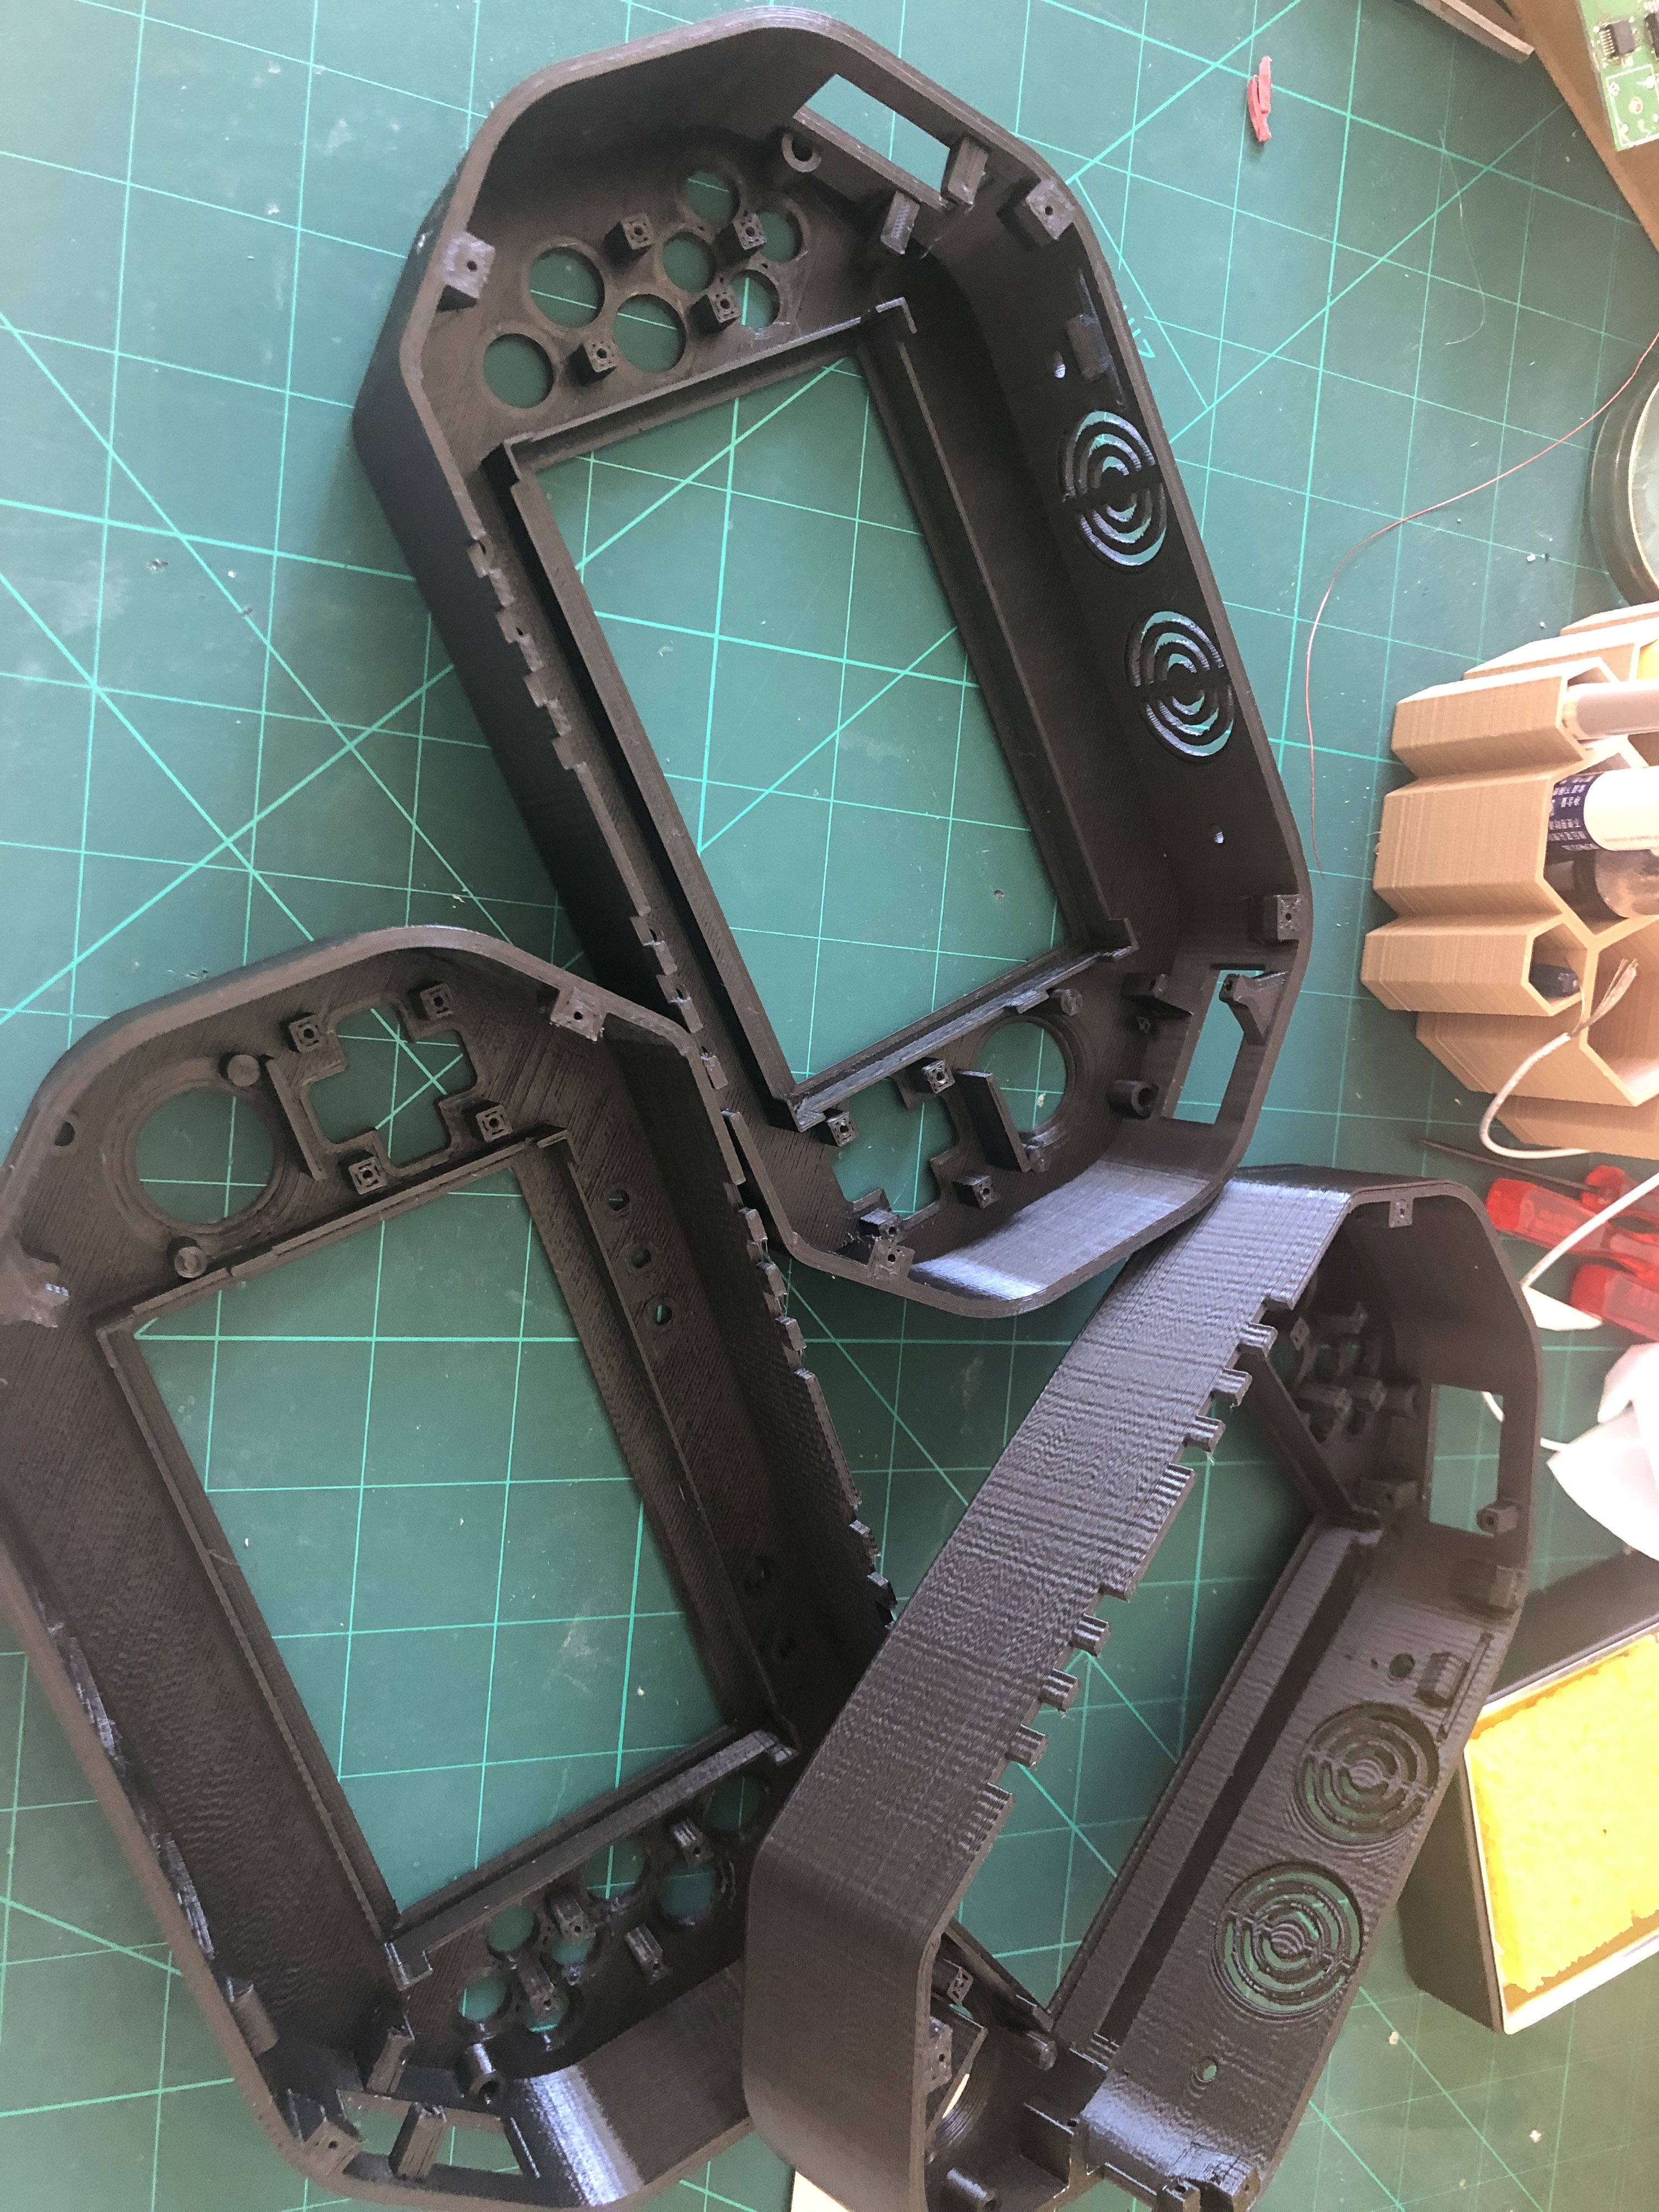
So i decided to hit up Fusion 360 for a design tweak, Basically removing the Letters all and all and make everything leveled so that i wouldnt use a lot of supports as my foundation since my 3d printer is crappy.
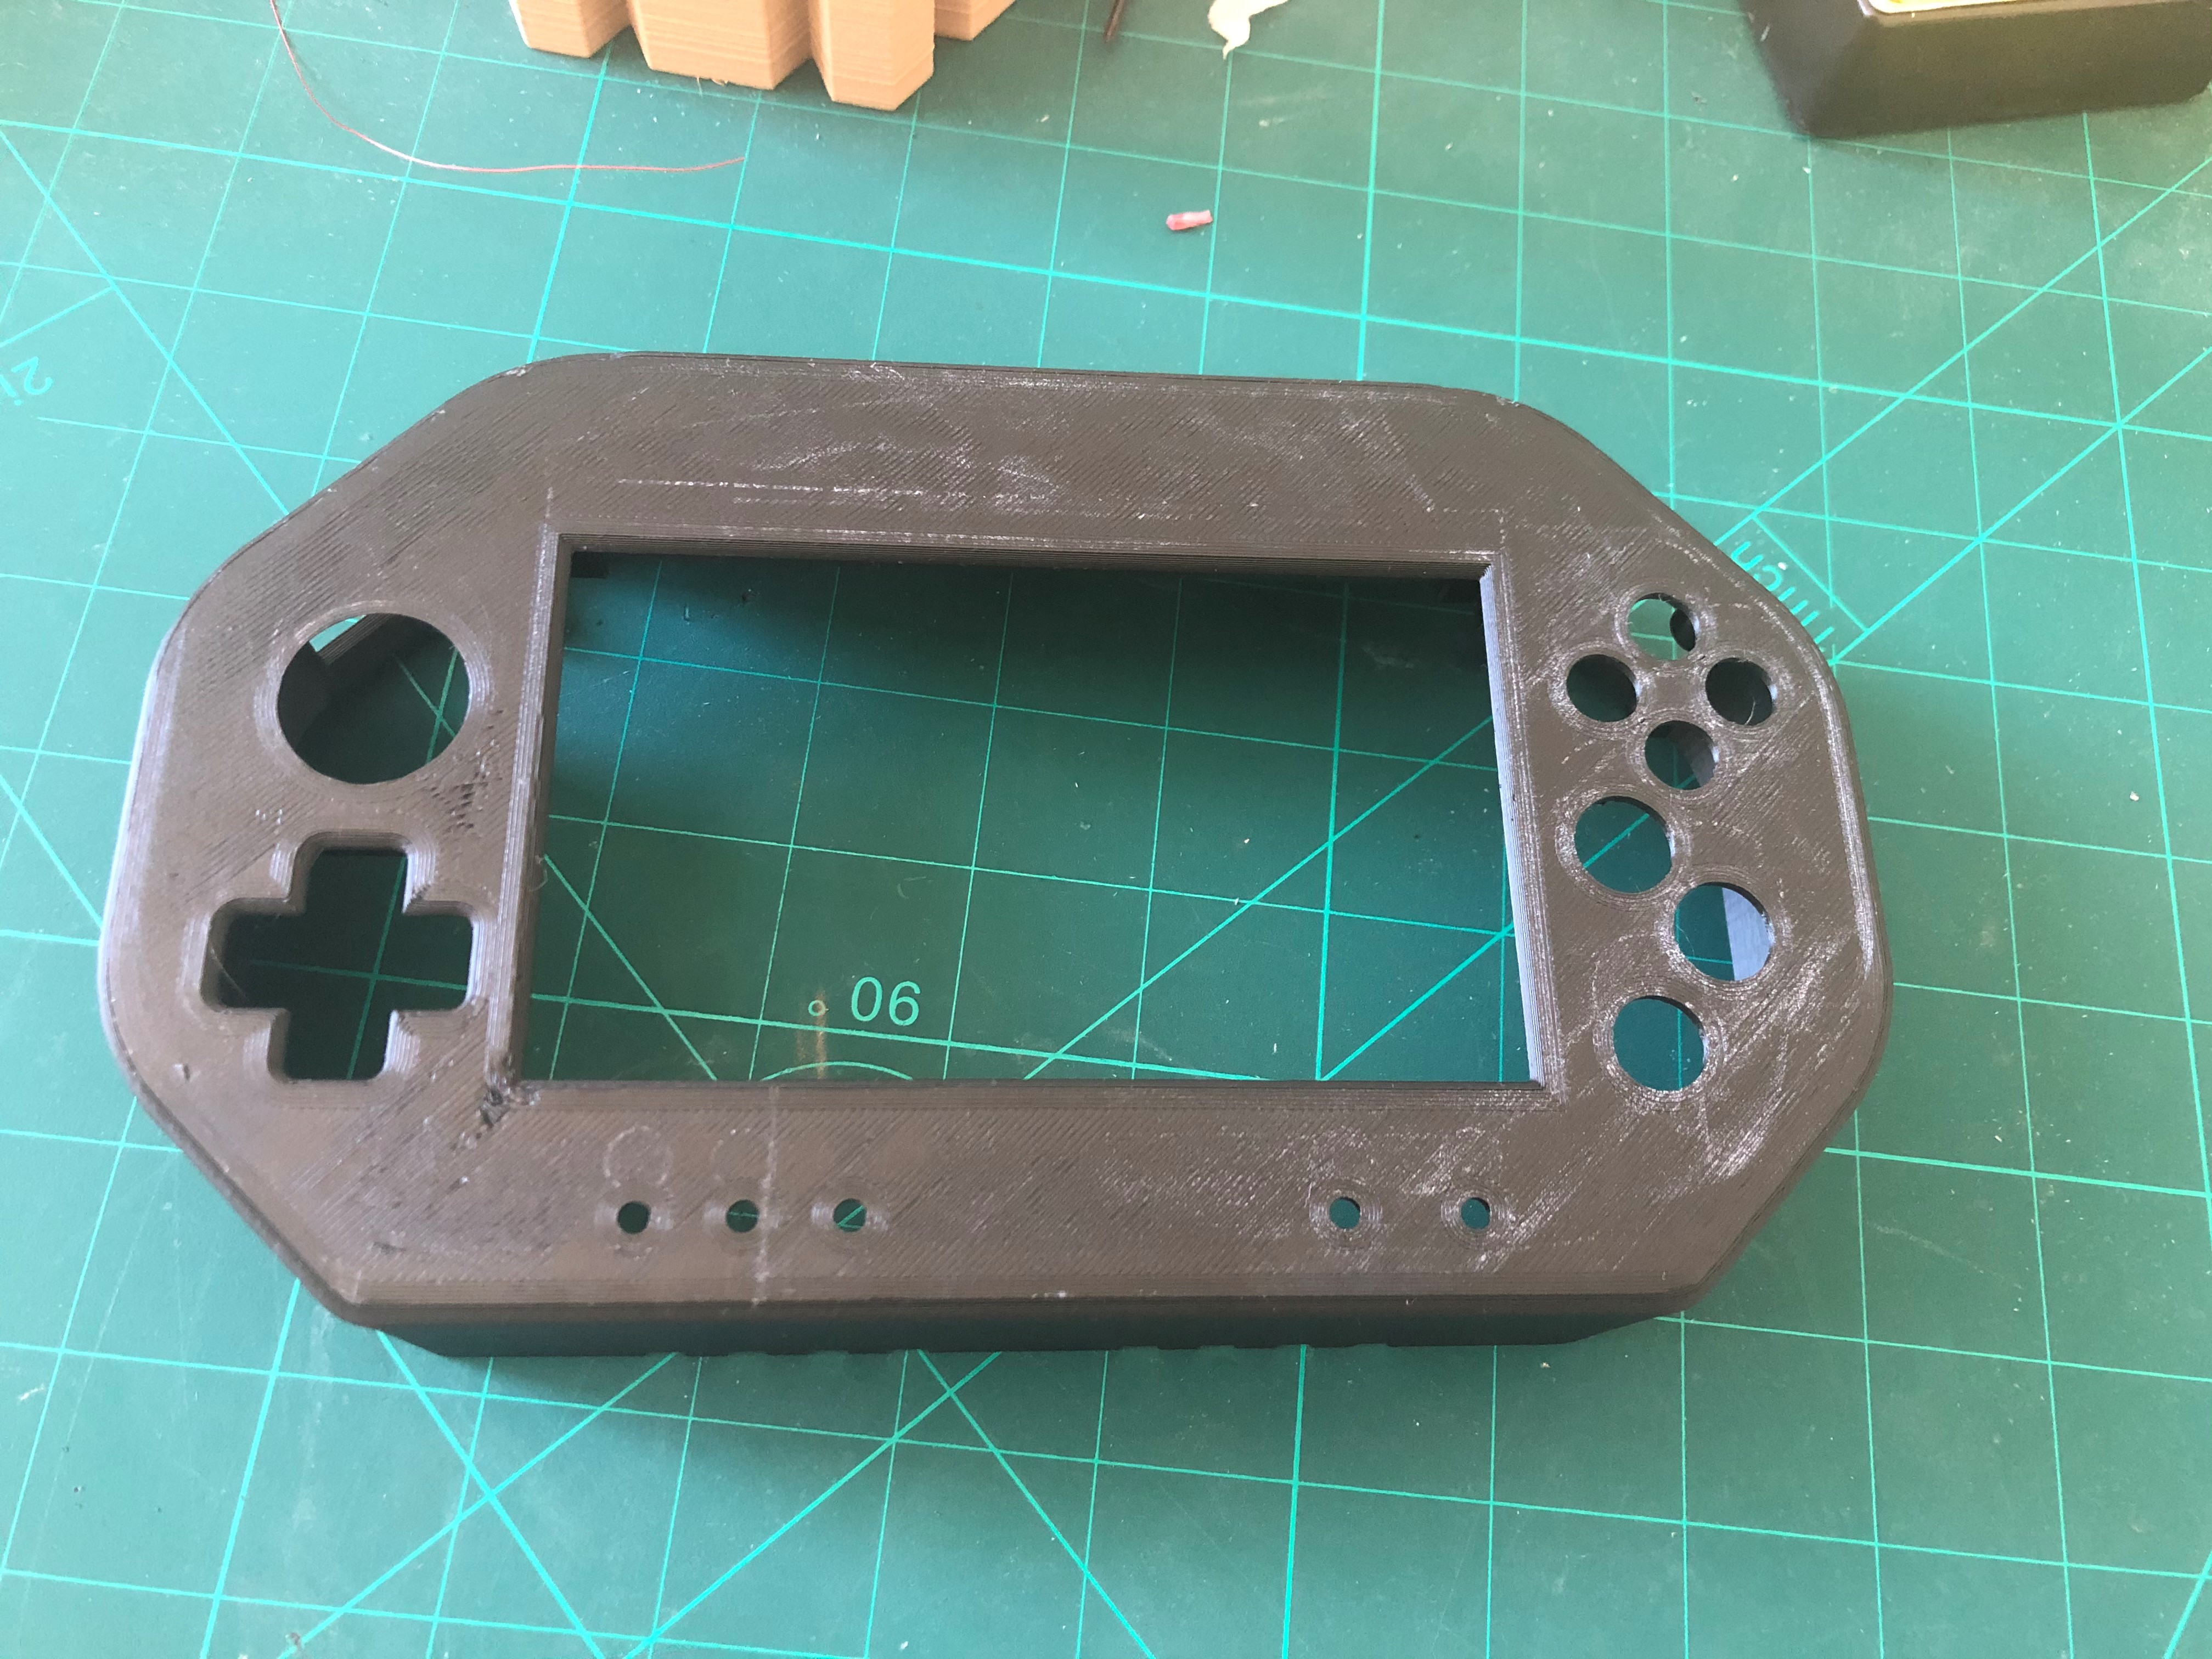
So after a couple of test prints:
It took about 2-3 days to settle on one, so at last i settled on this:
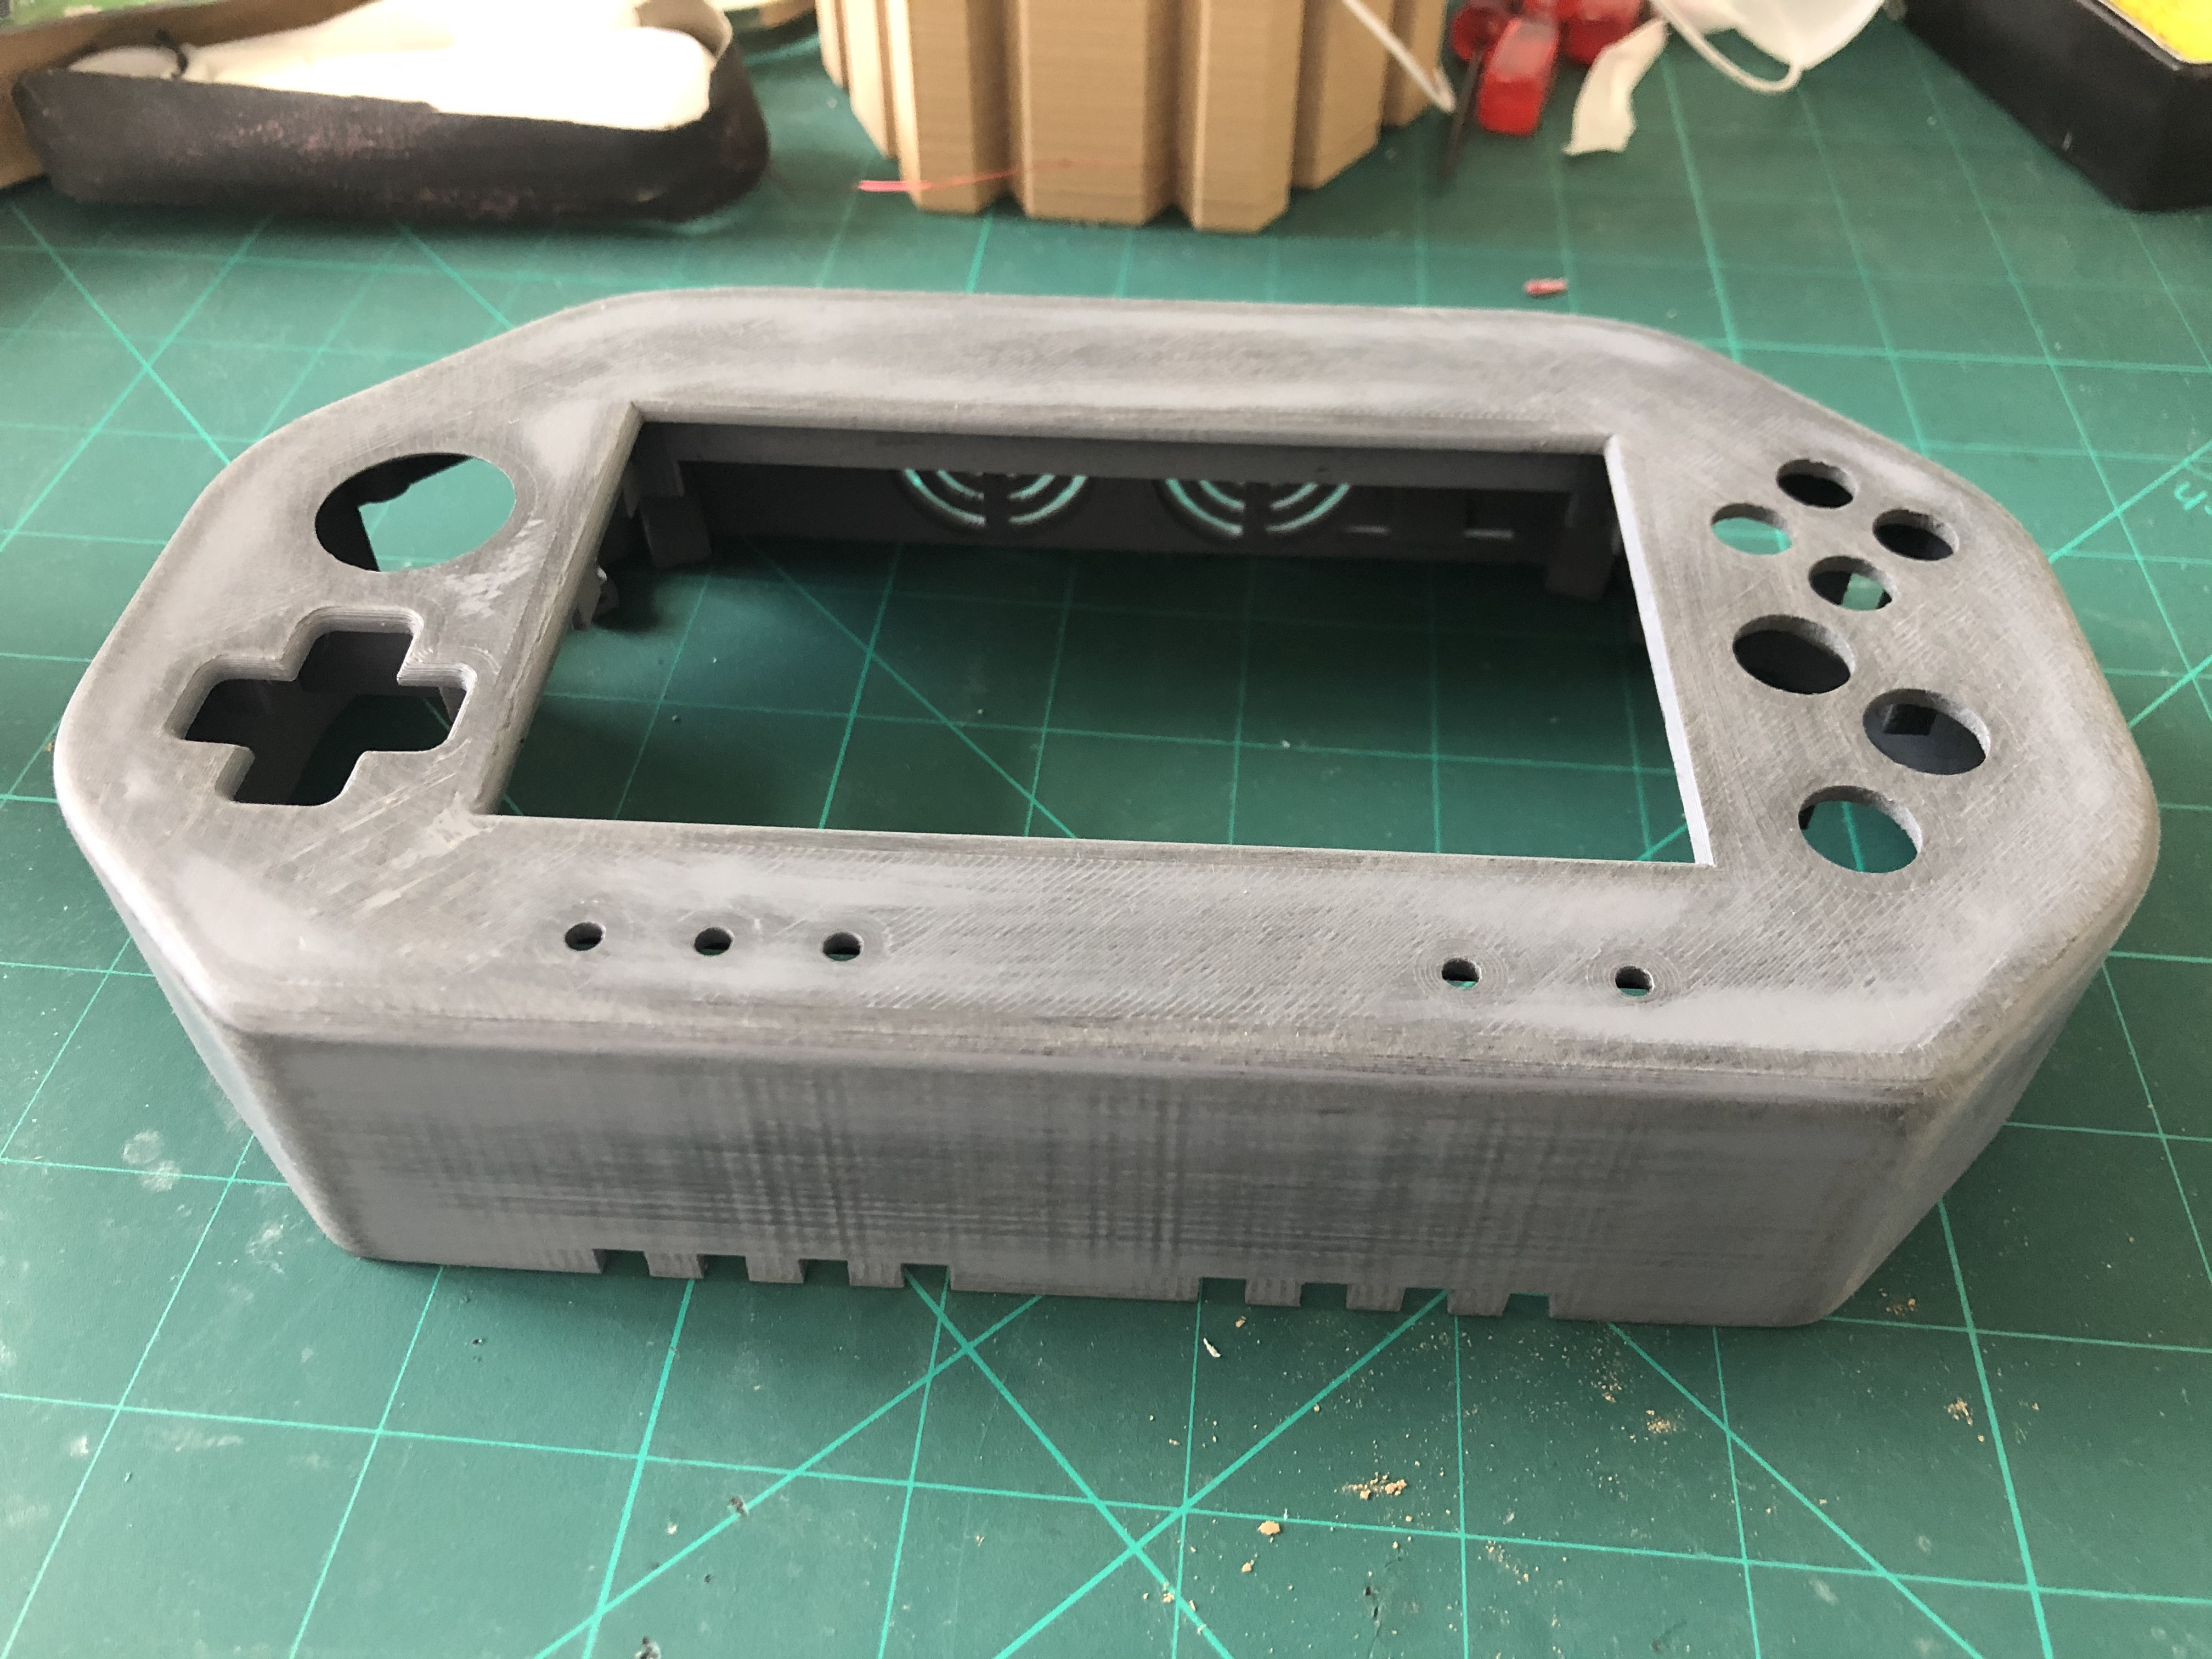
So i first sanded it then filled the cracks on the left with wood filler since the things that people use in this forums isn't available for me, so i had to do it with what i have:
So that was the first sanding, then i added primer and re-sanded it again:
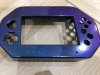
So here's the end result:
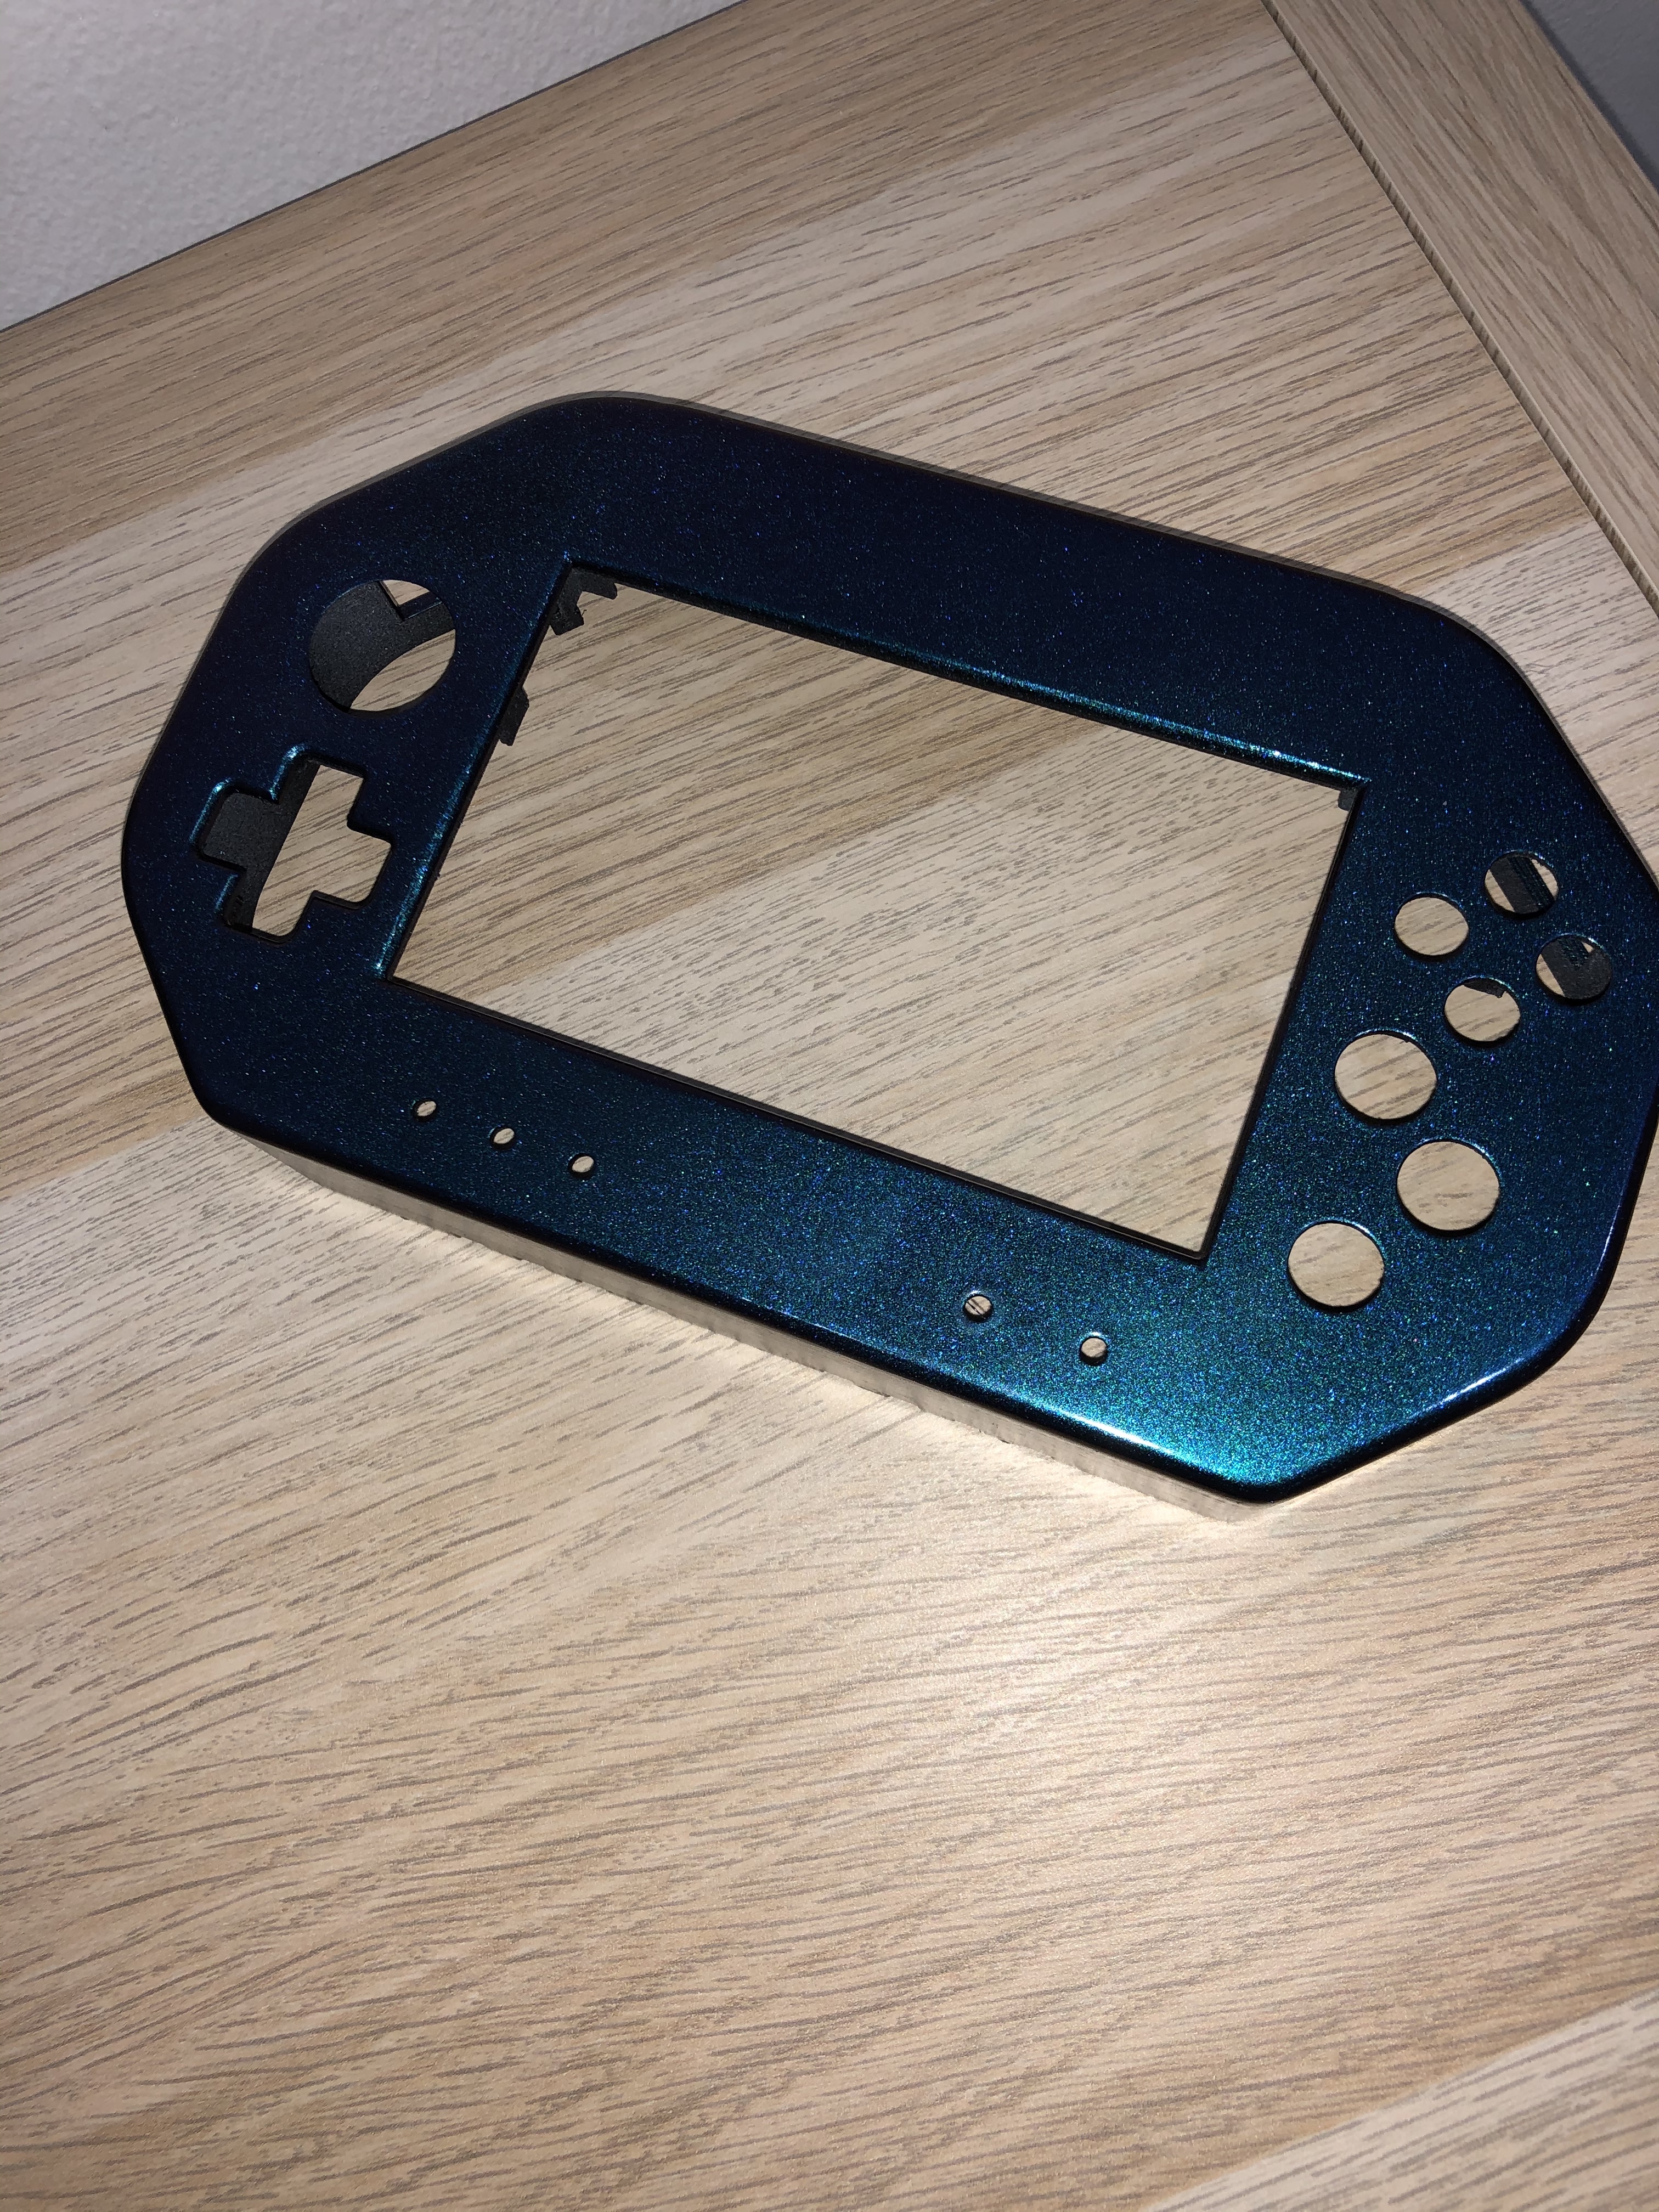
Another one:
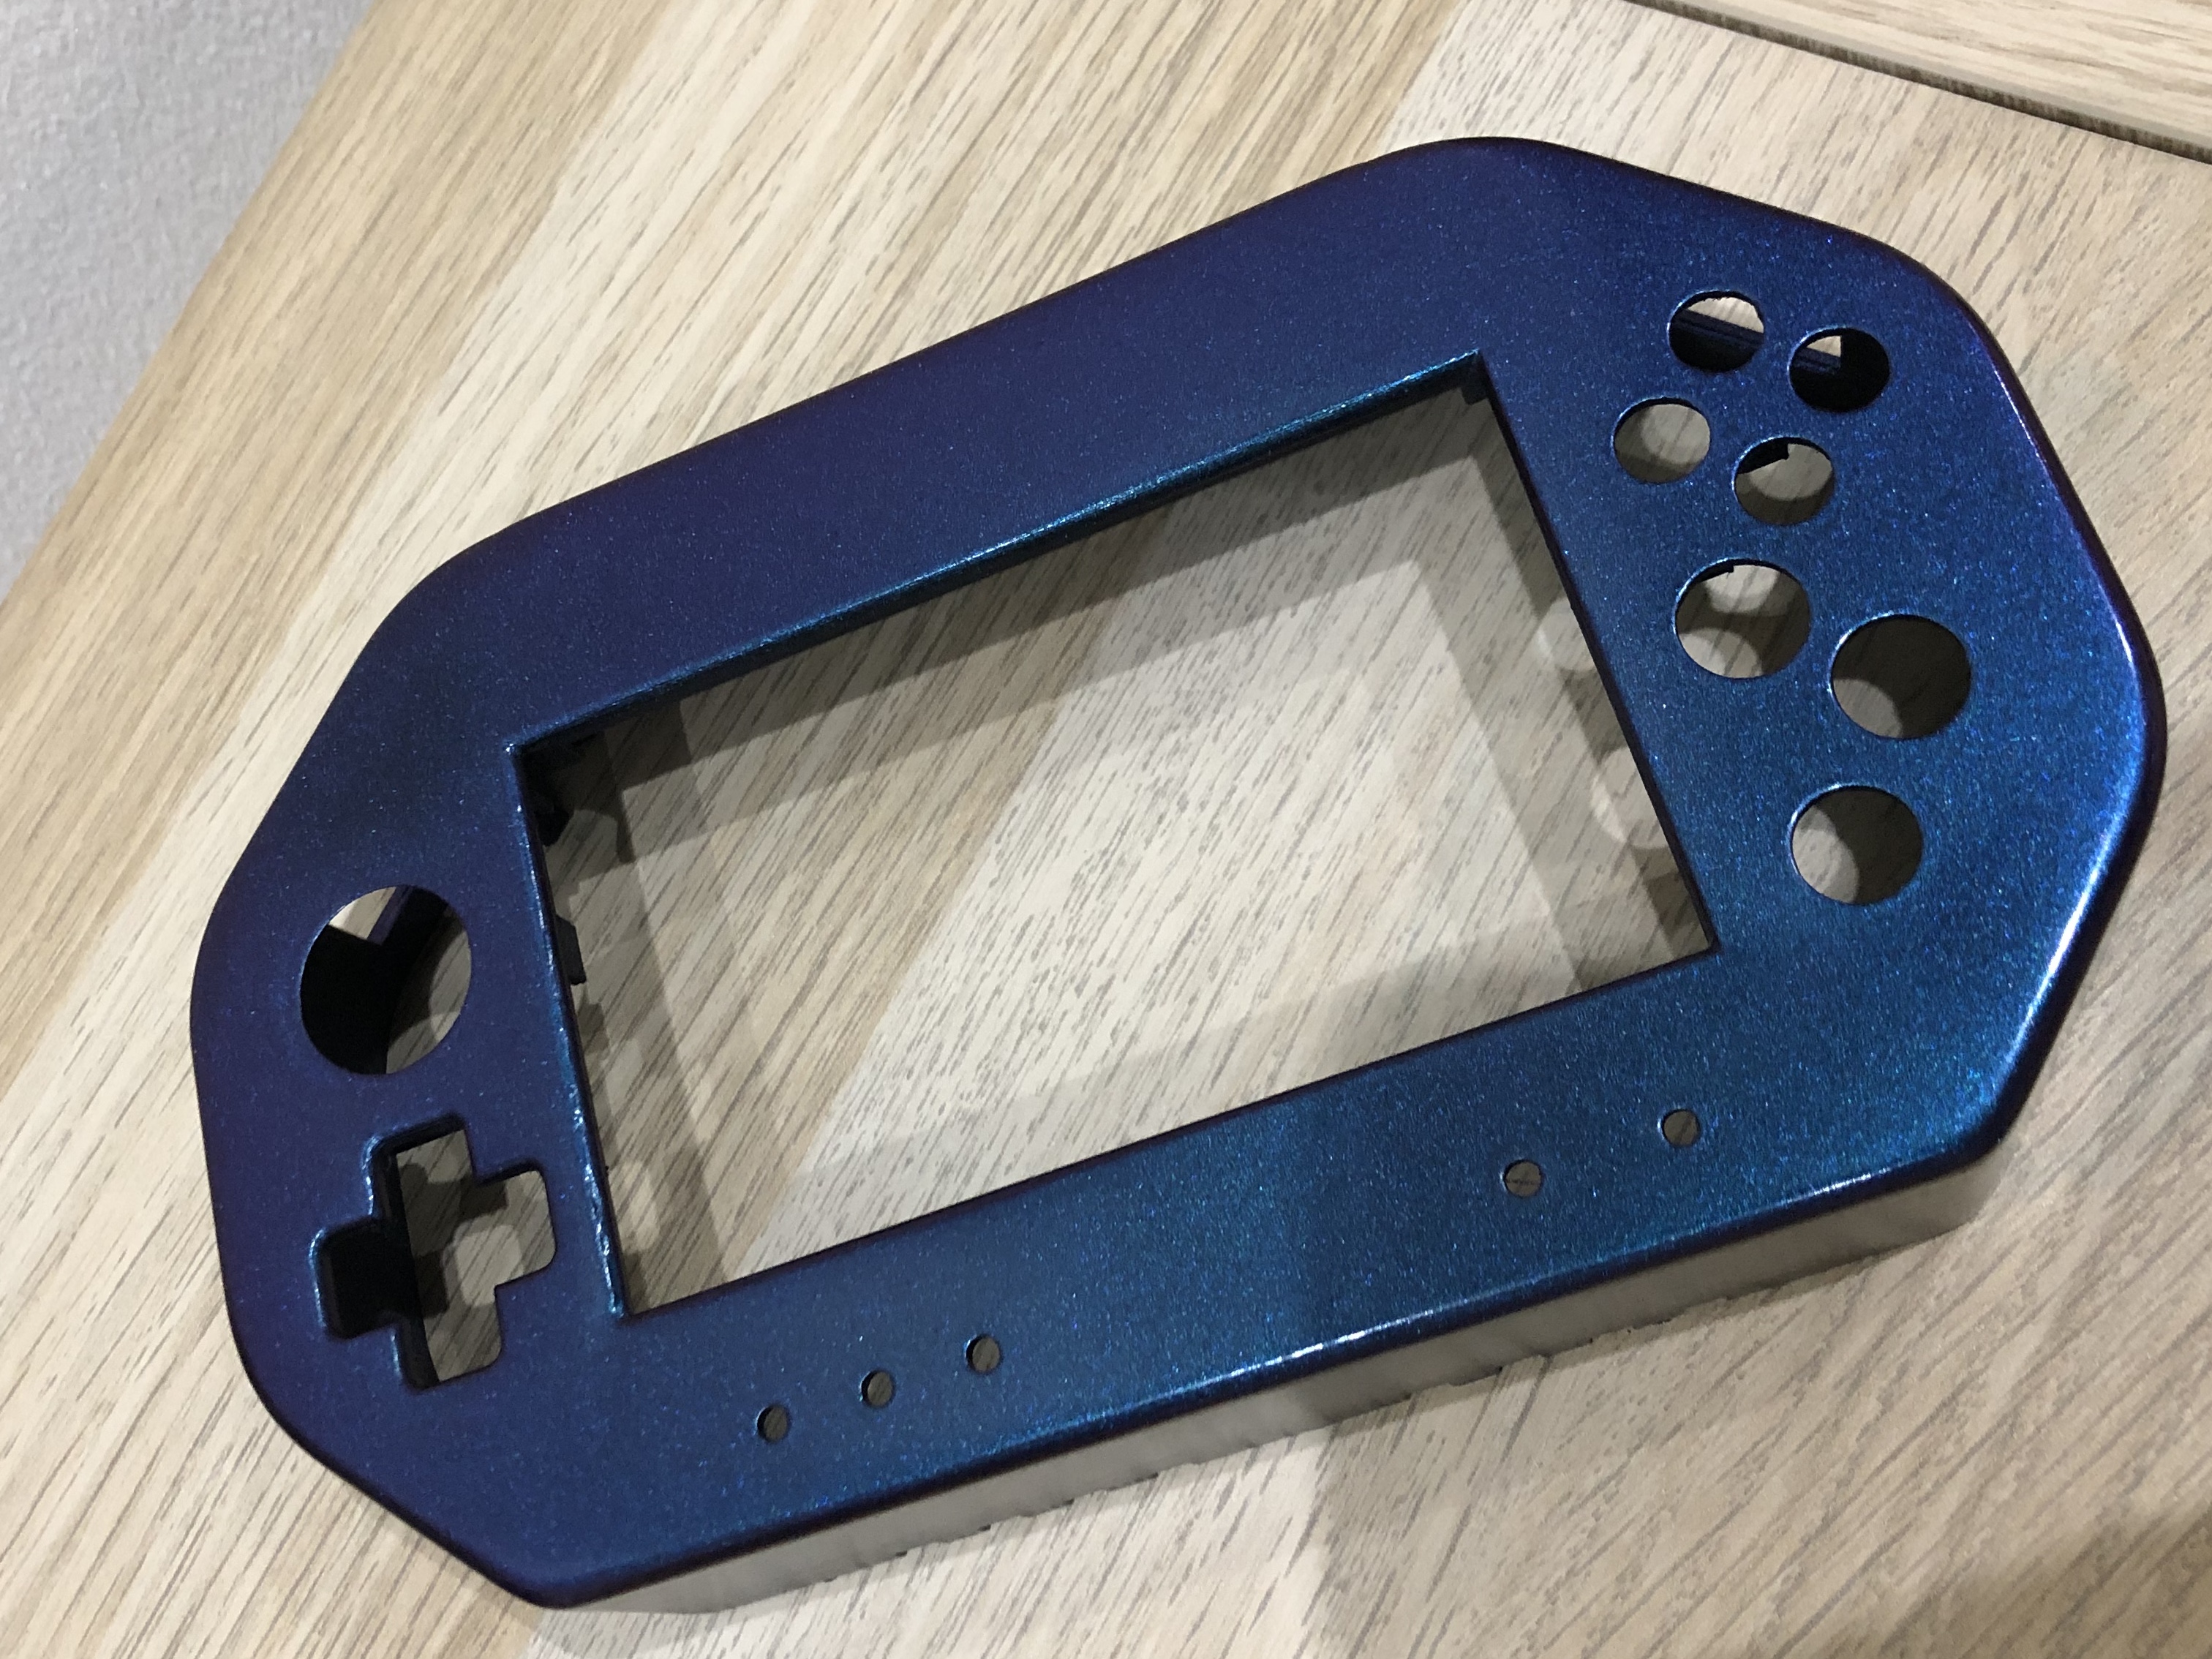
It already looks 100% better than it was before.
I decided to go with this color instead of the poopy color this time, It's also a tribute to my dropped project, which was a playstation 1 protable(Got burnt before i closed the case), the casing's color was the same.
Yea, It's obvious.
So i decided to hit up Fusion 360 for a design tweak, Basically removing the Letters all and all and make everything leveled so that i wouldnt use a lot of supports as my foundation since my 3d printer is crappy.
So after a couple of test prints:
It took about 2-3 days to settle on one, so at last i settled on this:
So i first sanded it then filled the cracks on the left with wood filler since the things that people use in this forums isn't available for me, so i had to do it with what i have:
So that was the first sanding, then i added primer and re-sanded it again:
So here's the end result:
Another one:
It already looks 100% better than it was before.
I decided to go with this color instead of the poopy color this time, It's also a tribute to my dropped project, which was a playstation 1 protable(Got burnt before i closed the case), the casing's color was the same.
For the N64. i wanted to wait for the case to finish, since im going to attach things inside the case so that i dont end up using a lot of wires unnecessarily. But here's what i have done at the moment:
If there's anything else i can improve on before i finish the project, I'd appreciate it.
Some more updates soon when i assemble things up.
Attachments
-
 2.4 MB Views: 435
Last edited: