
Yup! That's perfect.
Worklog The WiiCube
- Thread starter icy_system
- Start date
- Joined
- Mar 26, 2023
- Messages
- 134
- Likes
- 95
Hi again. How exactly can I remove the part that needs to be removed from the screen board? I have tried desoldering from the top because I can't see it soldered on the bottom, but I am not getting any liquid from the metal. Can I try to pry it off? I don't have a hot air station.
Also, I accidentally scratched part of the board with the iron, and I am wondering if it is okay.
Also, I accidentally scratched part of the board with the iron, and I am wondering if it is okay.
Use this tutorial (different driver board, same concept):
- Joined
- Mar 26, 2023
- Messages
- 134
- Likes
- 95
Thanks, for the video CrazyGadget! I was able to get it off.
EDIT:
This is a different question:
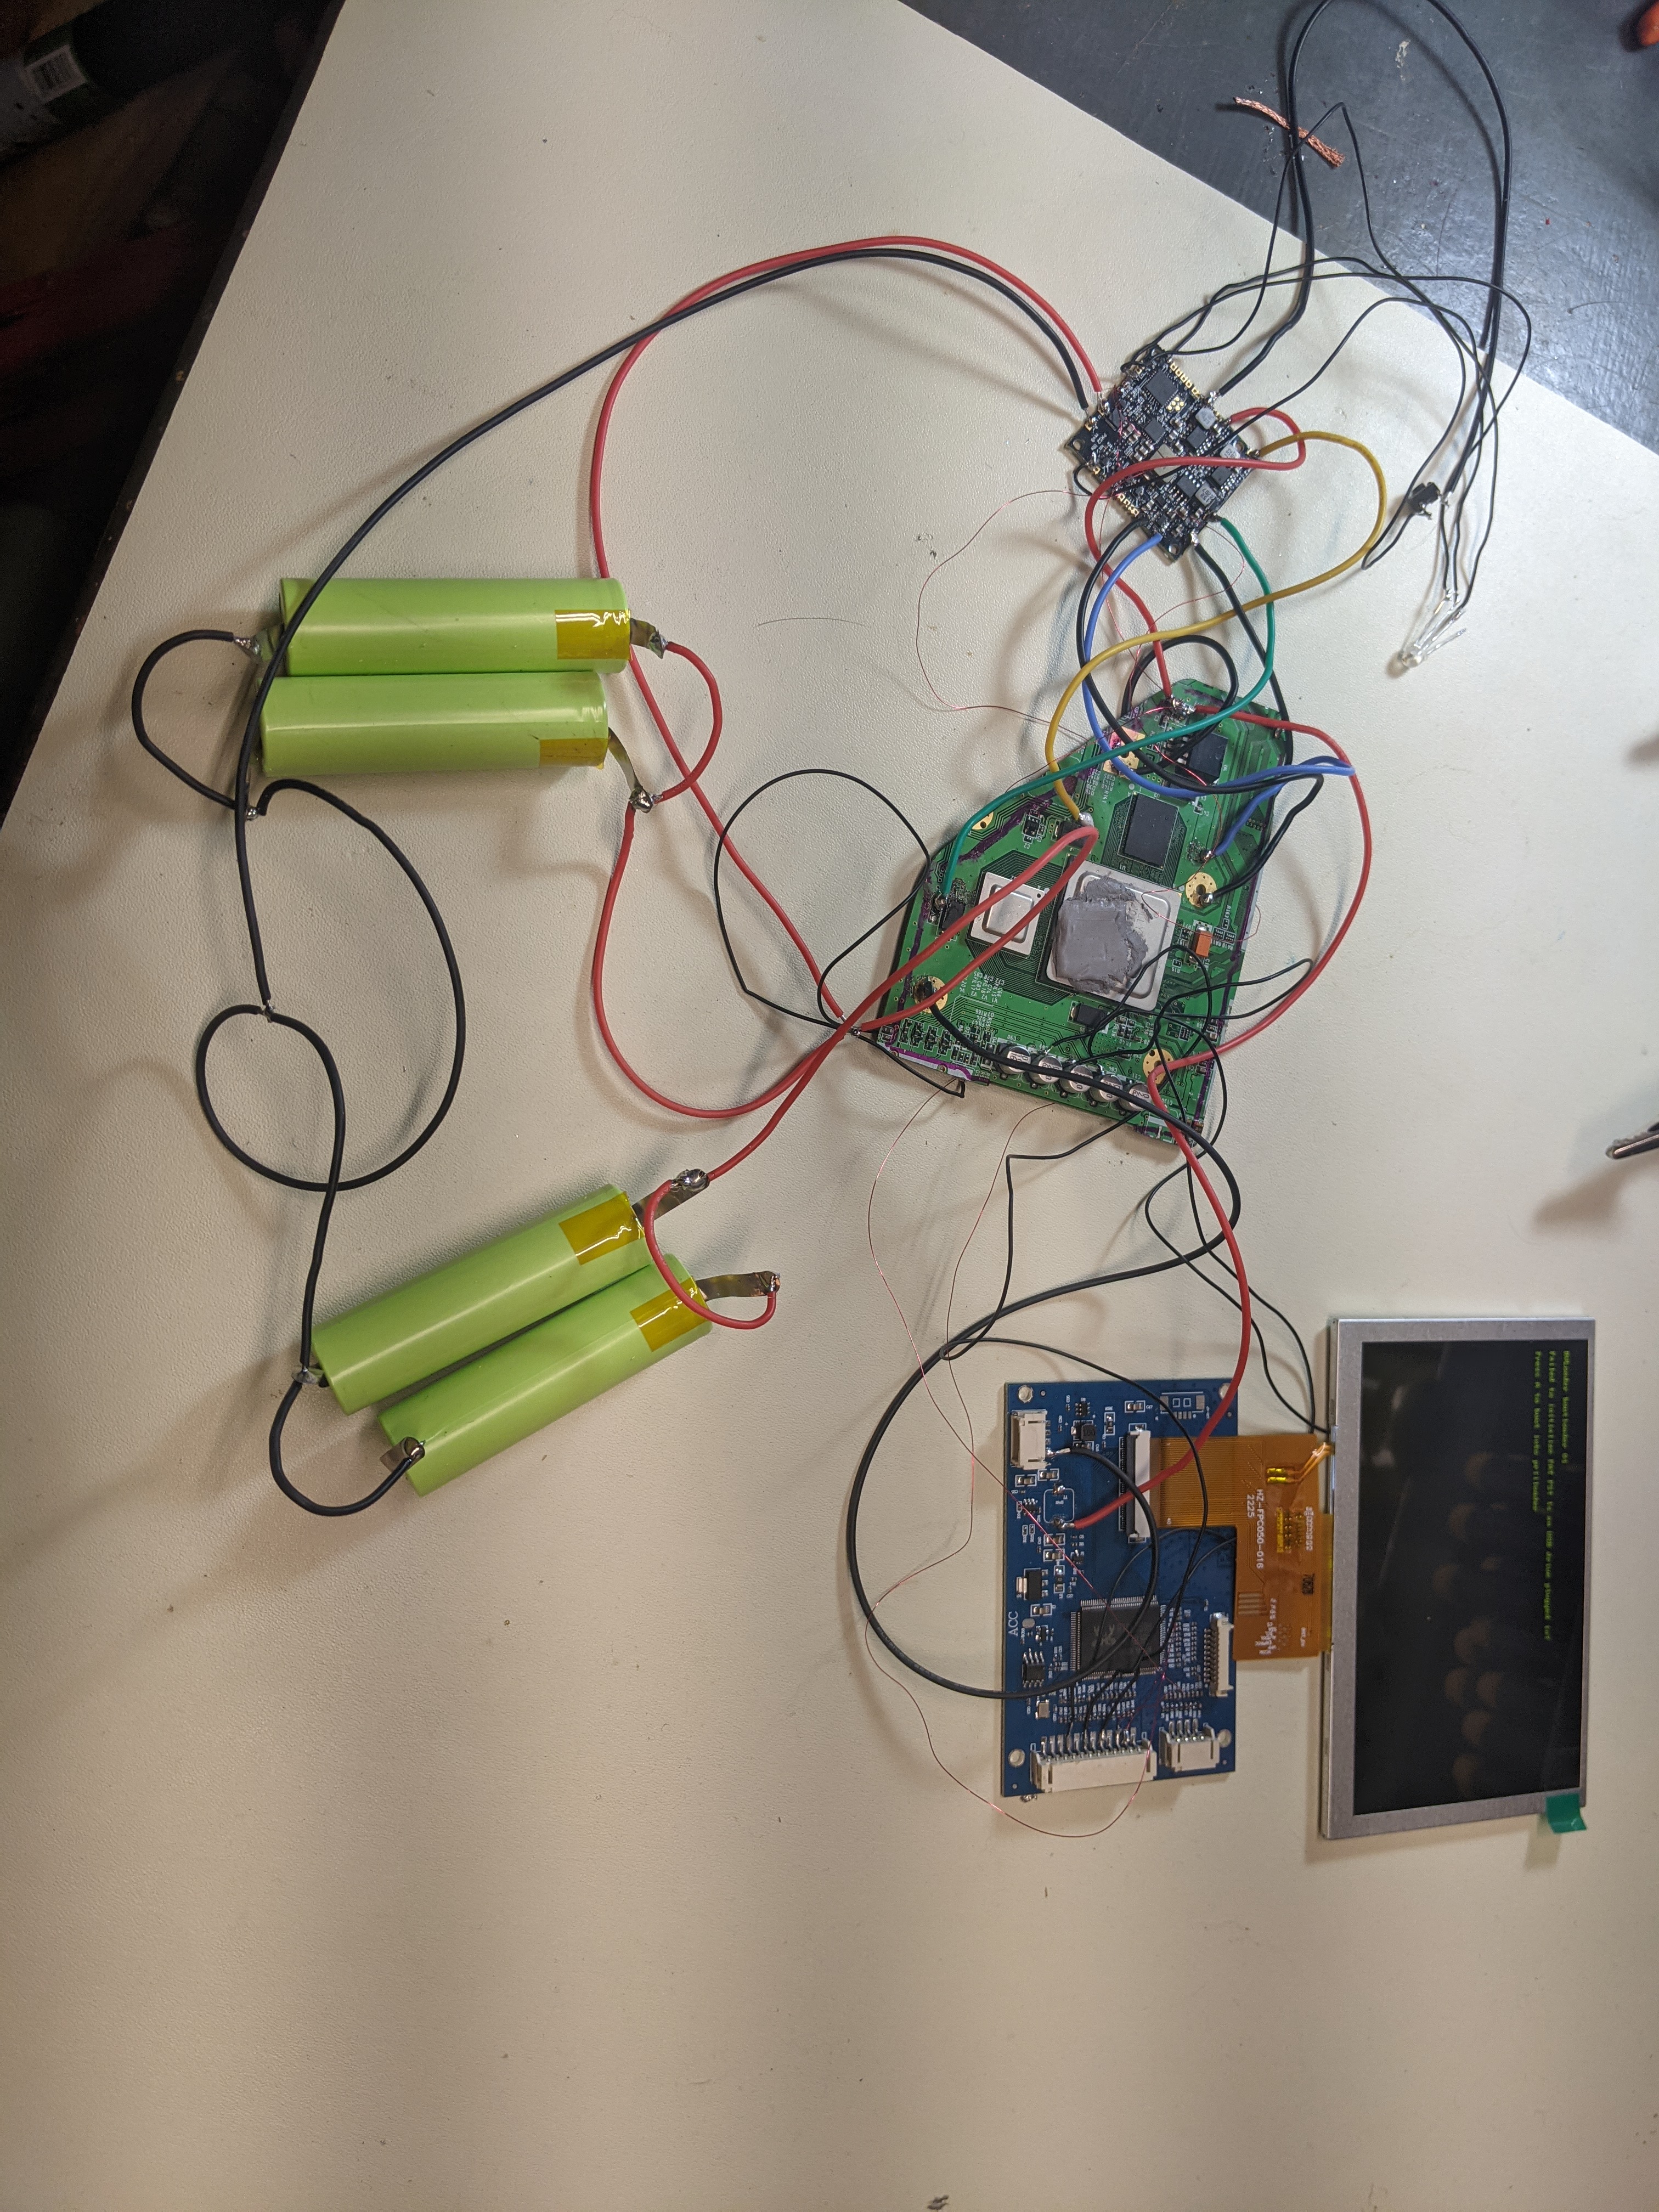
After wiring up a lot of stuff, I tested some resistances and it looks like ground and 3.3v are connected somehow. Does anyone know where it could be, or if it is just something that happens after you wire wire it up. I think it is not the latter because the other resistances are the same as they were before.

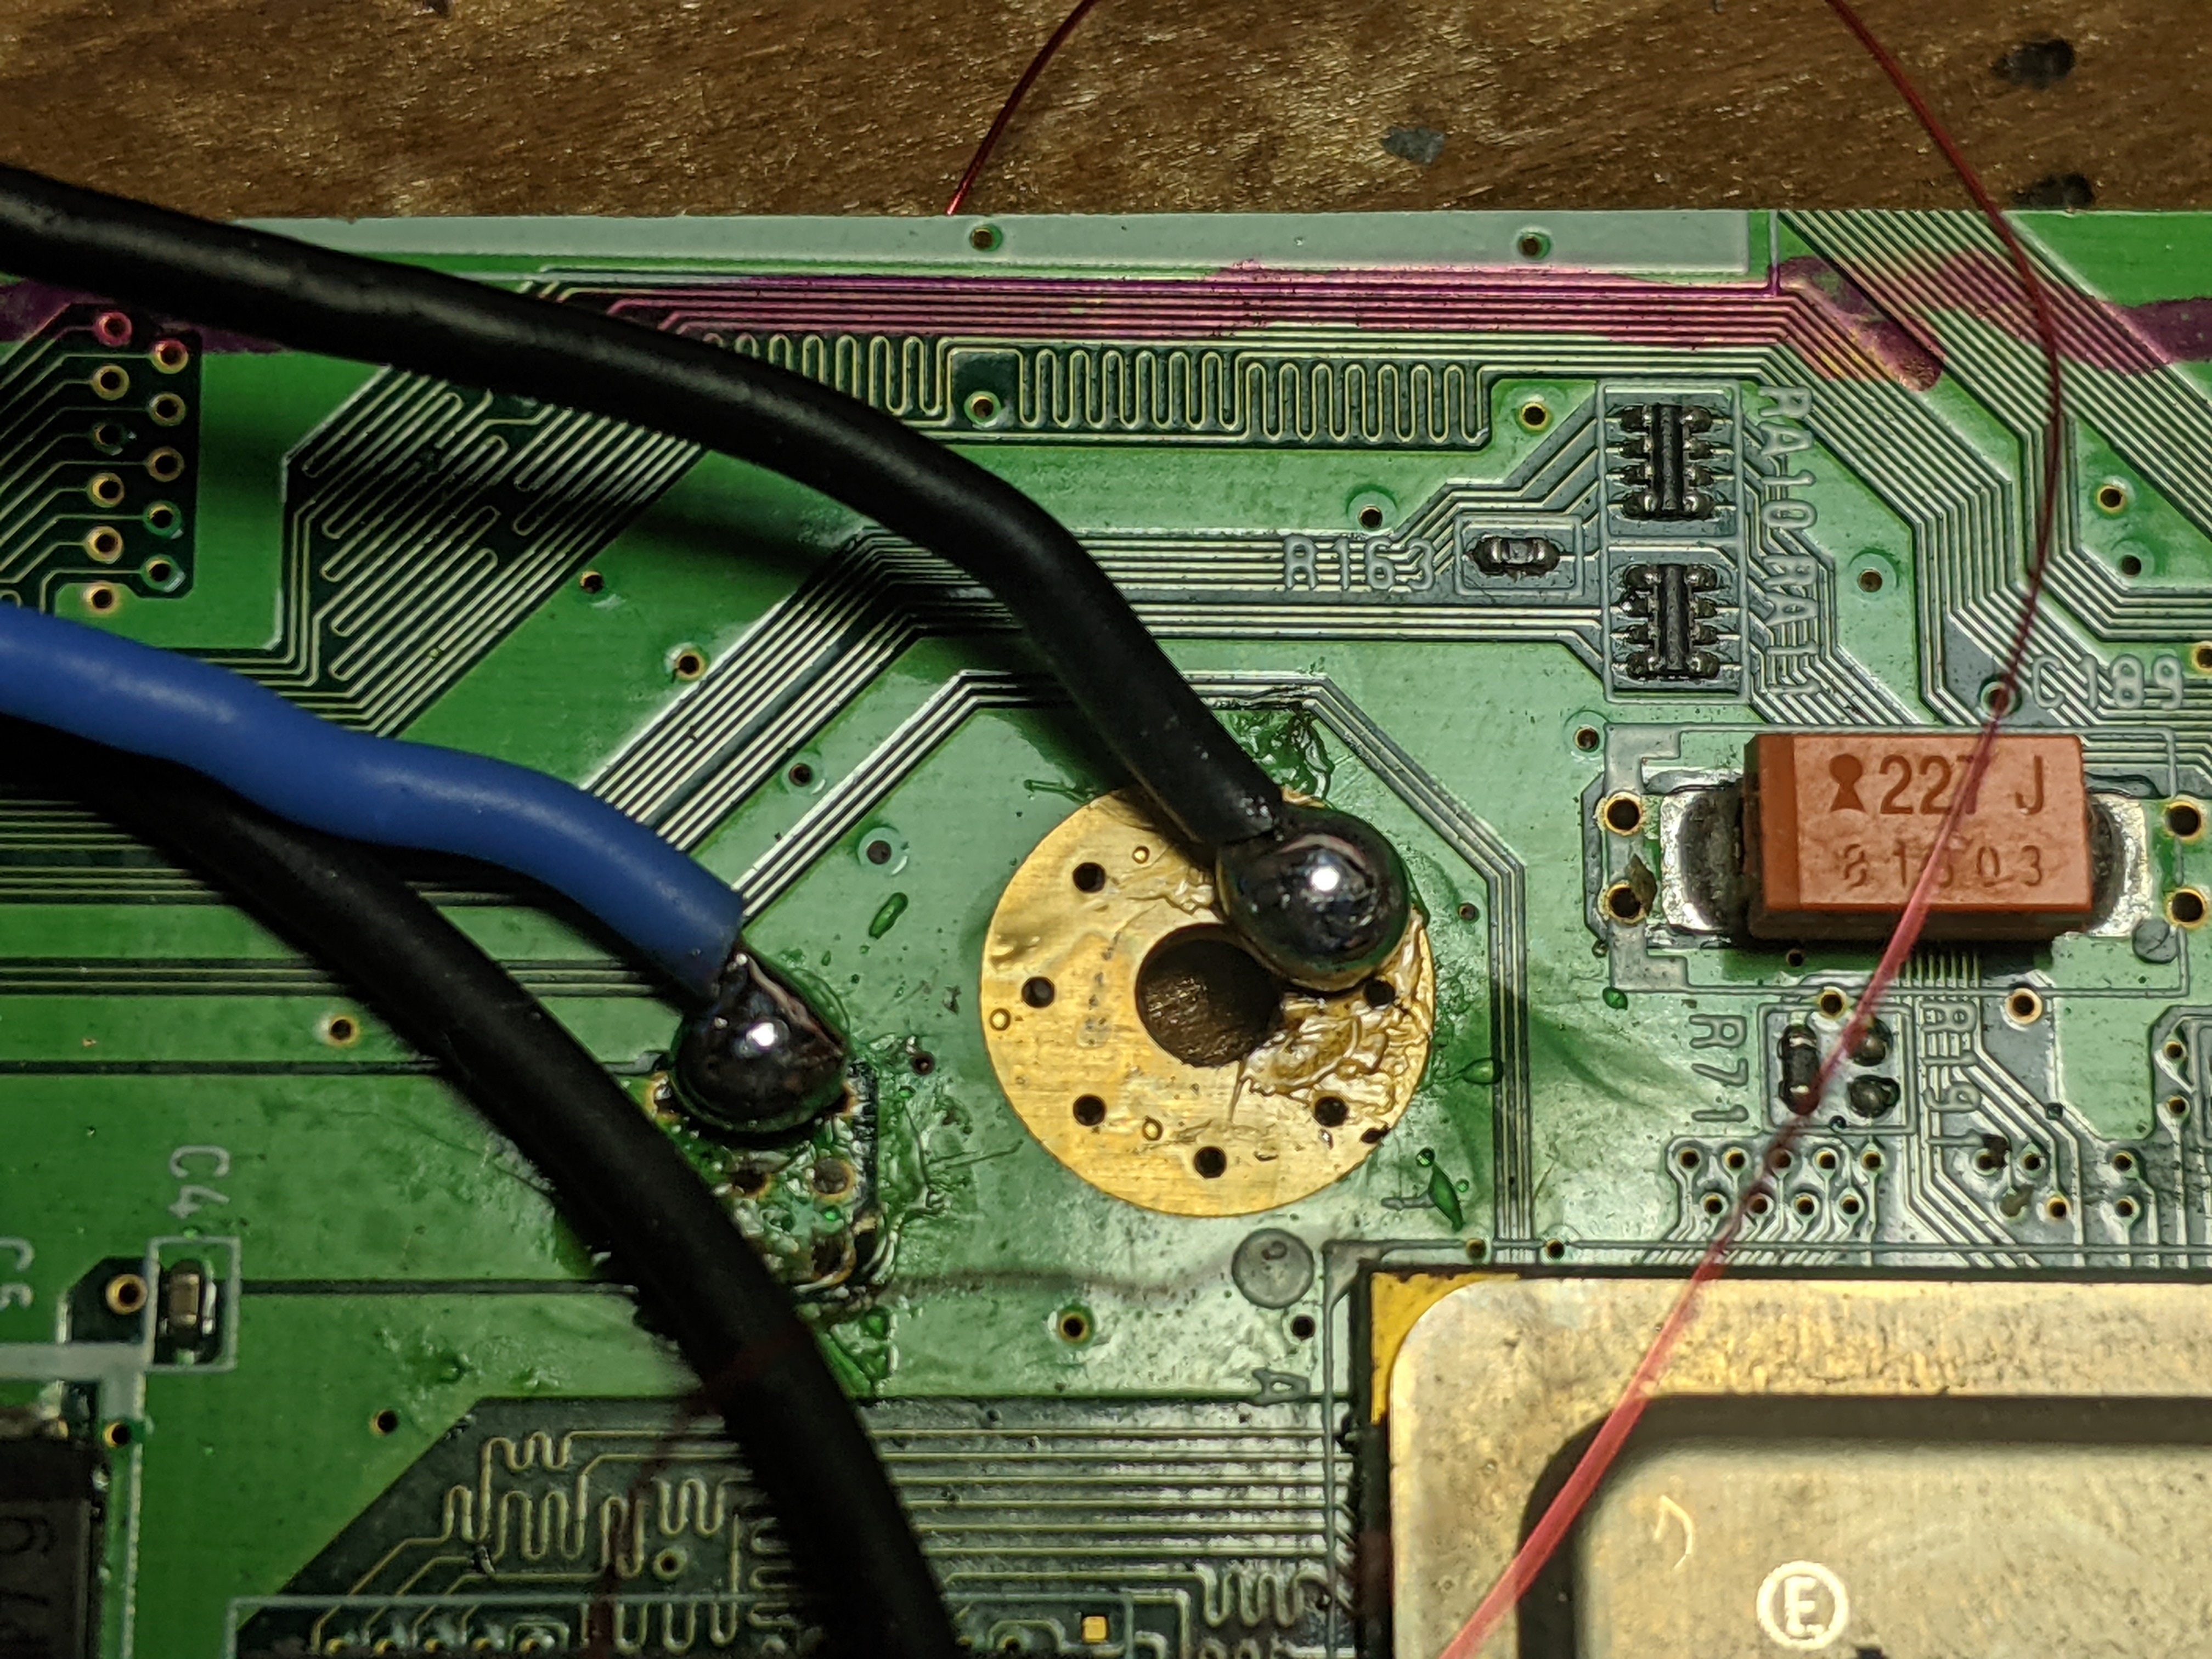
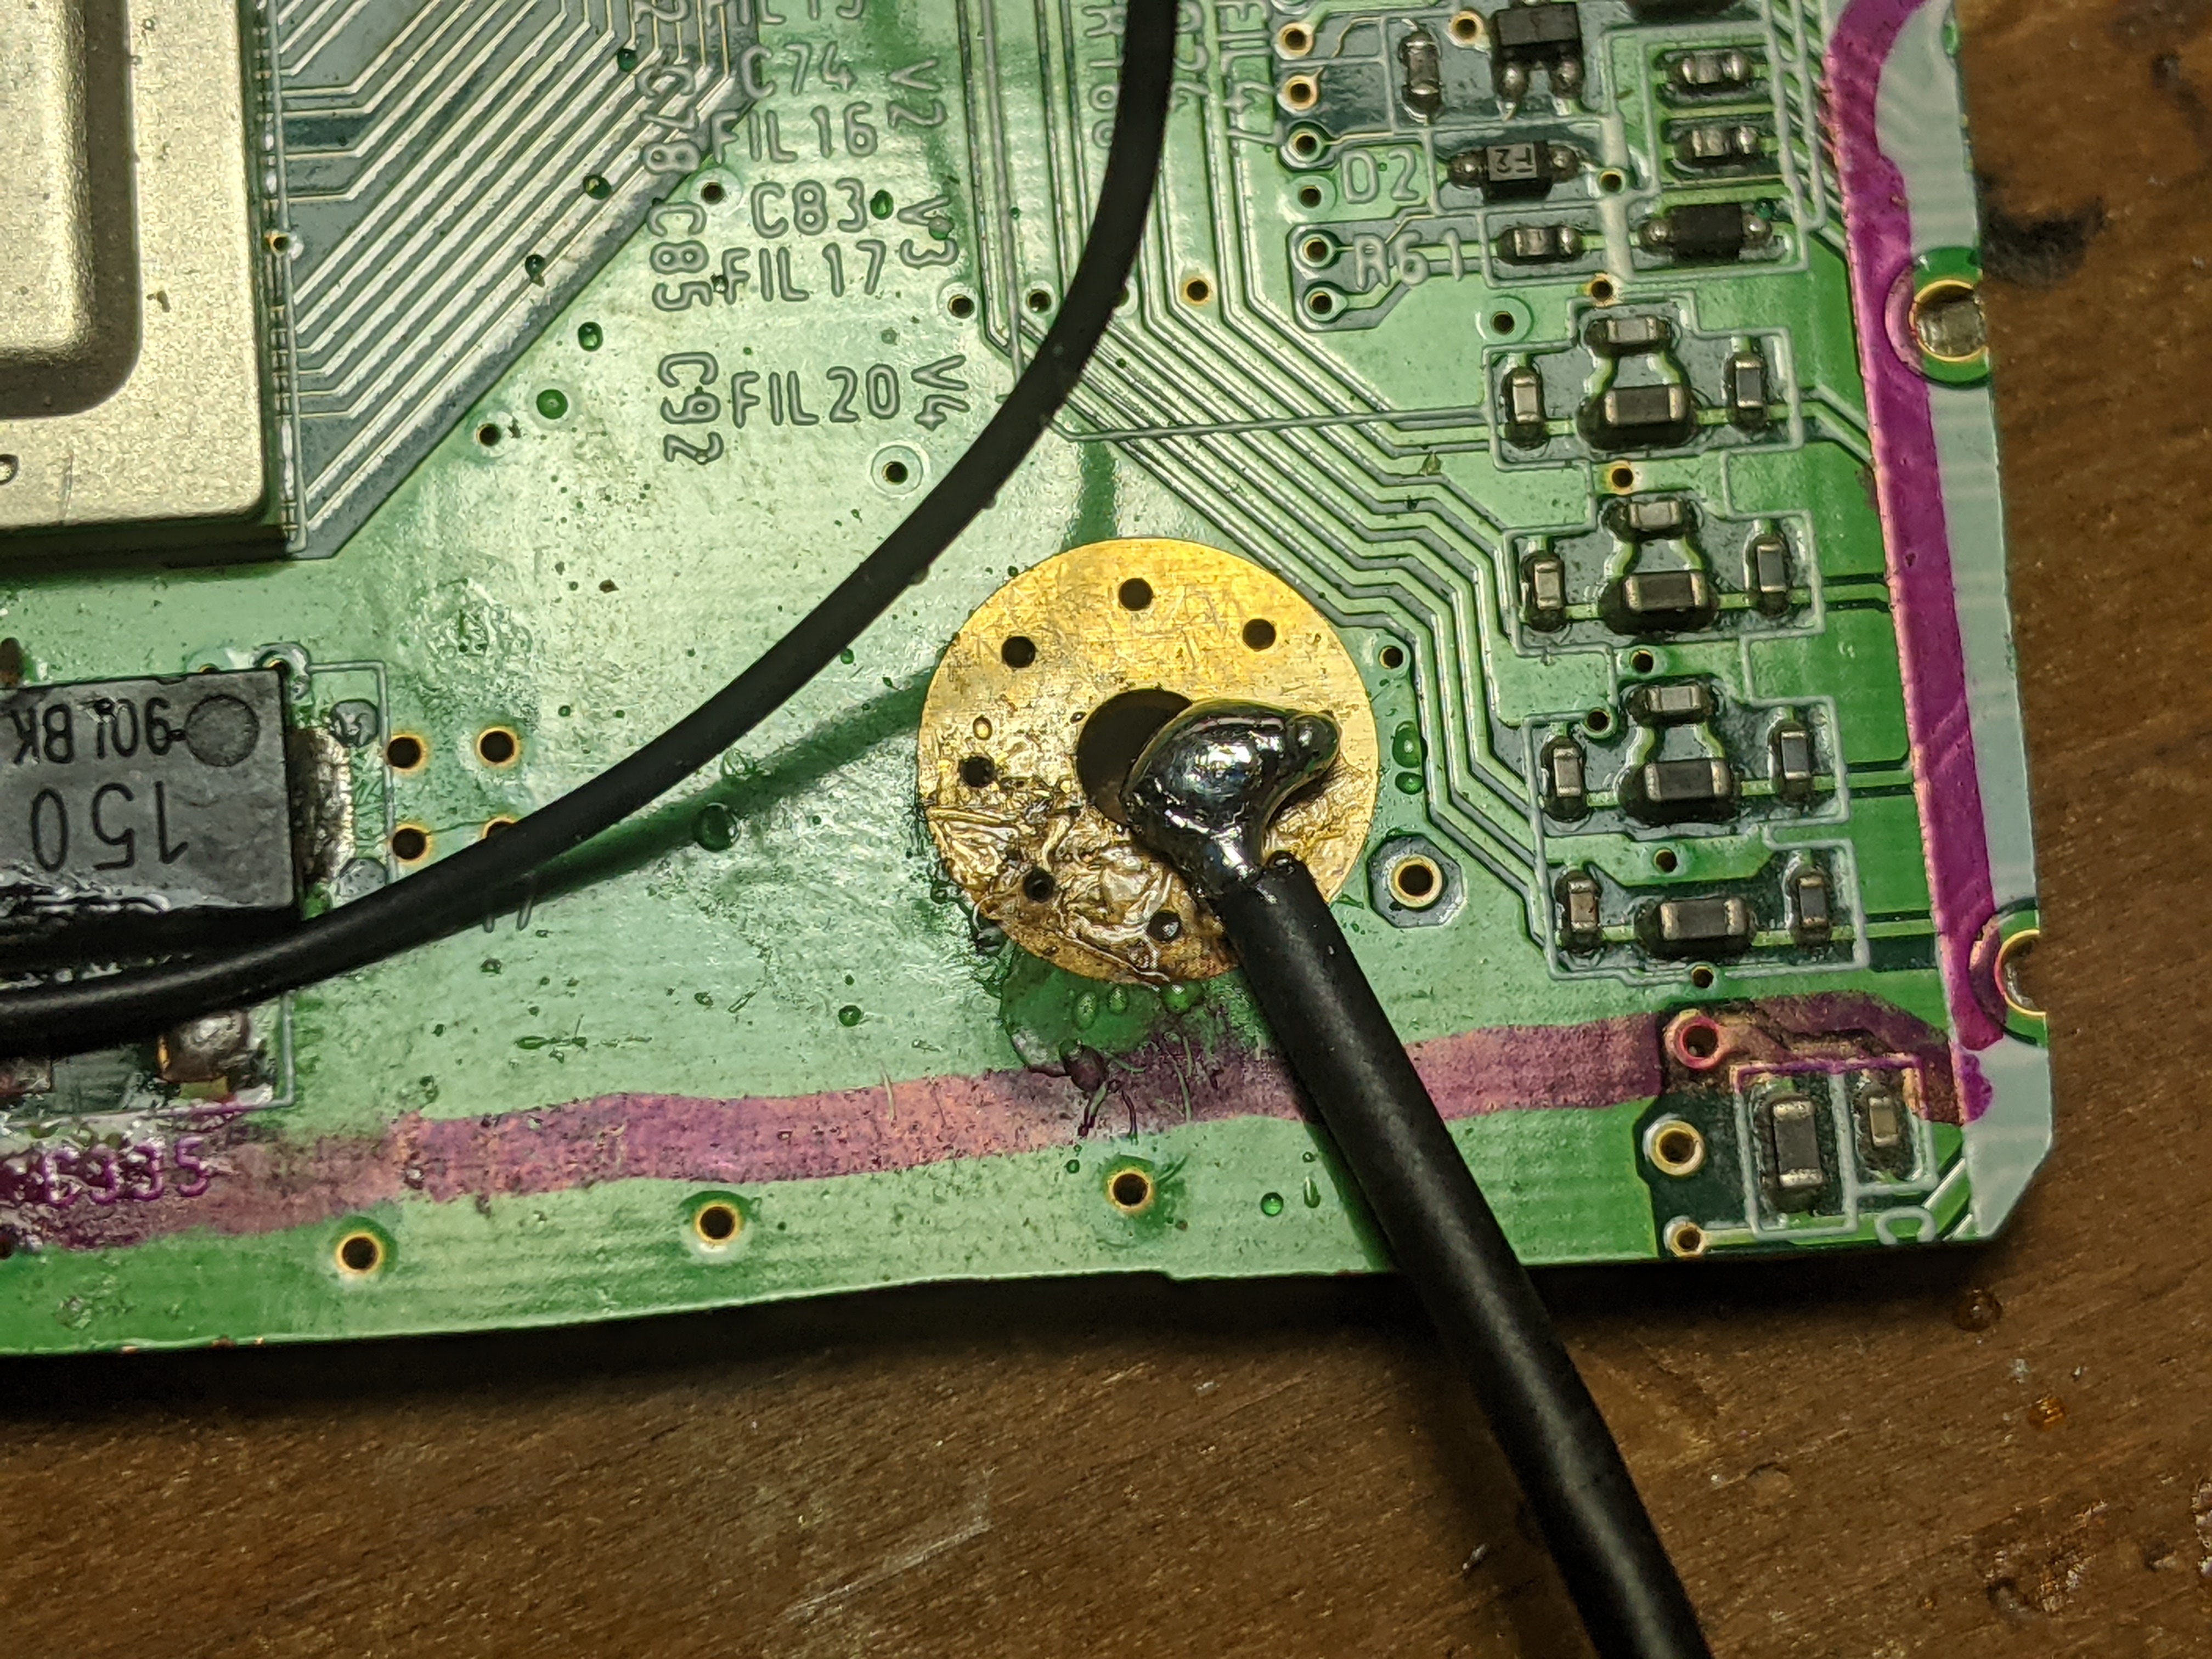
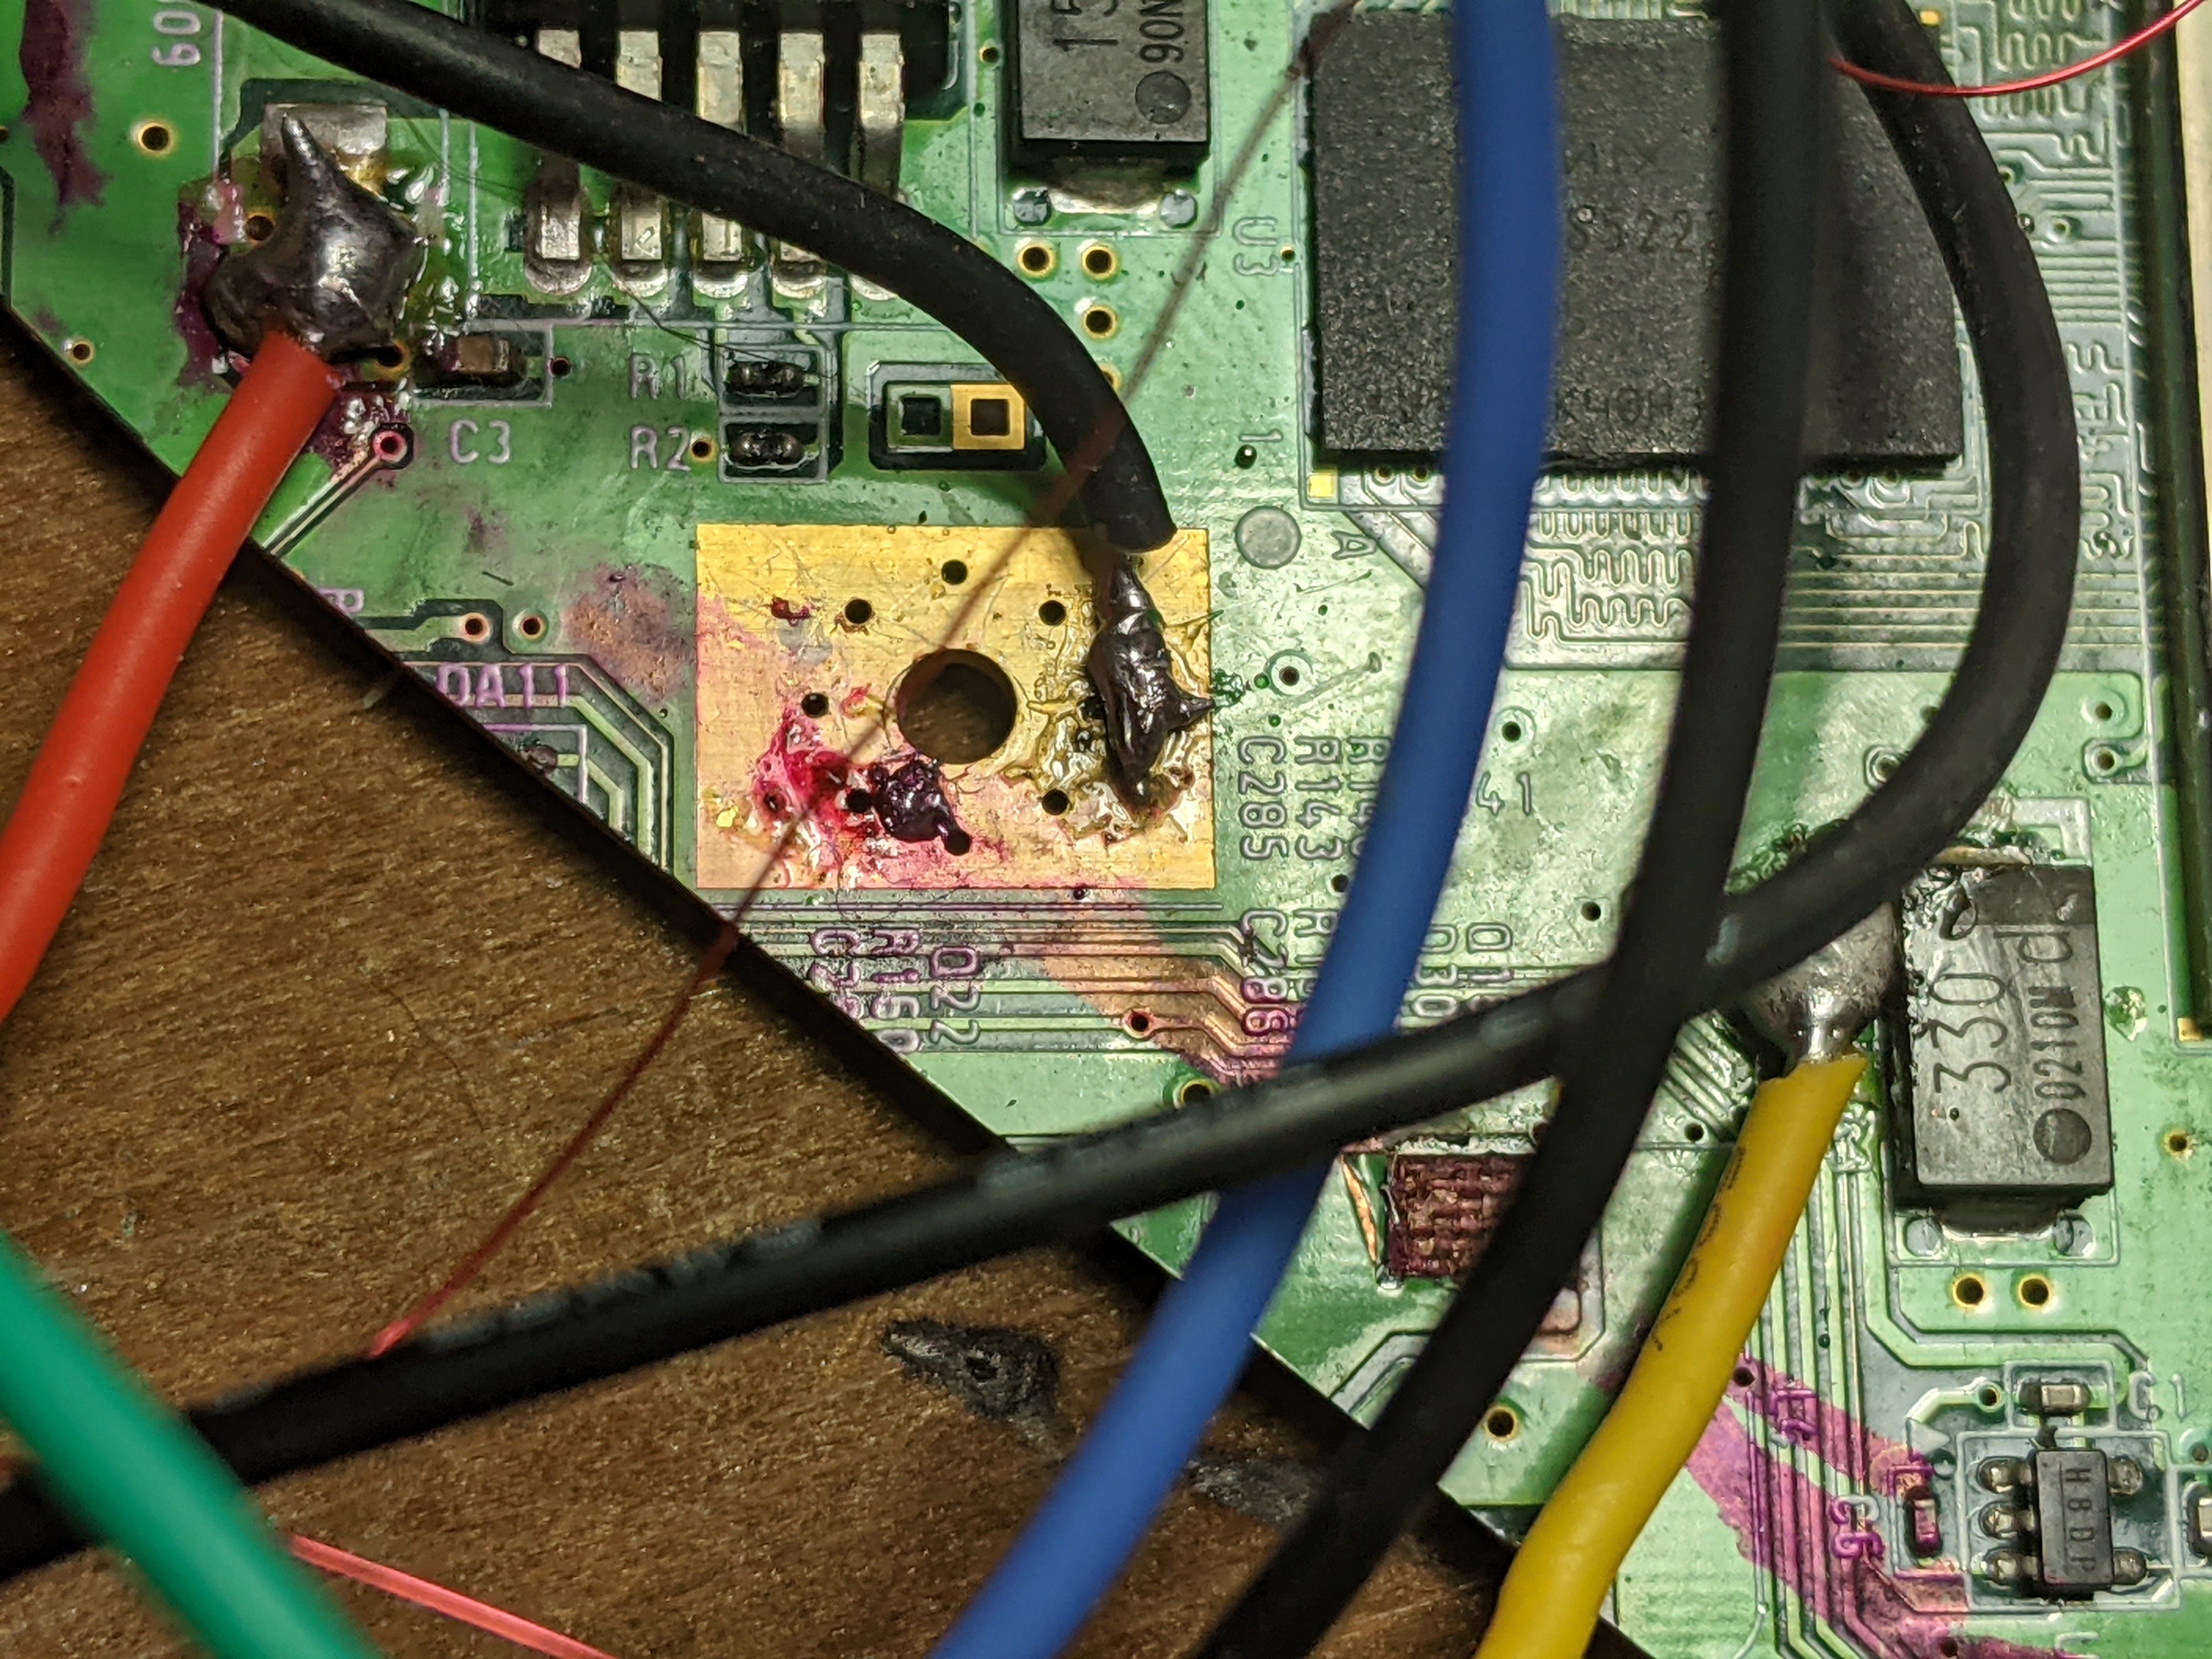
Oh, also, I bridged some pins on the AVE. I still have to fix that. It might be that.
EDIT:
This is a different question:
After wiring up a lot of stuff, I tested some resistances and it looks like ground and 3.3v are connected somehow. Does anyone know where it could be, or if it is just something that happens after you wire wire it up. I think it is not the latter because the other resistances are the same as they were before.
Oh, also, I bridged some pins on the AVE. I still have to fix that. It might be that.
Last edited:
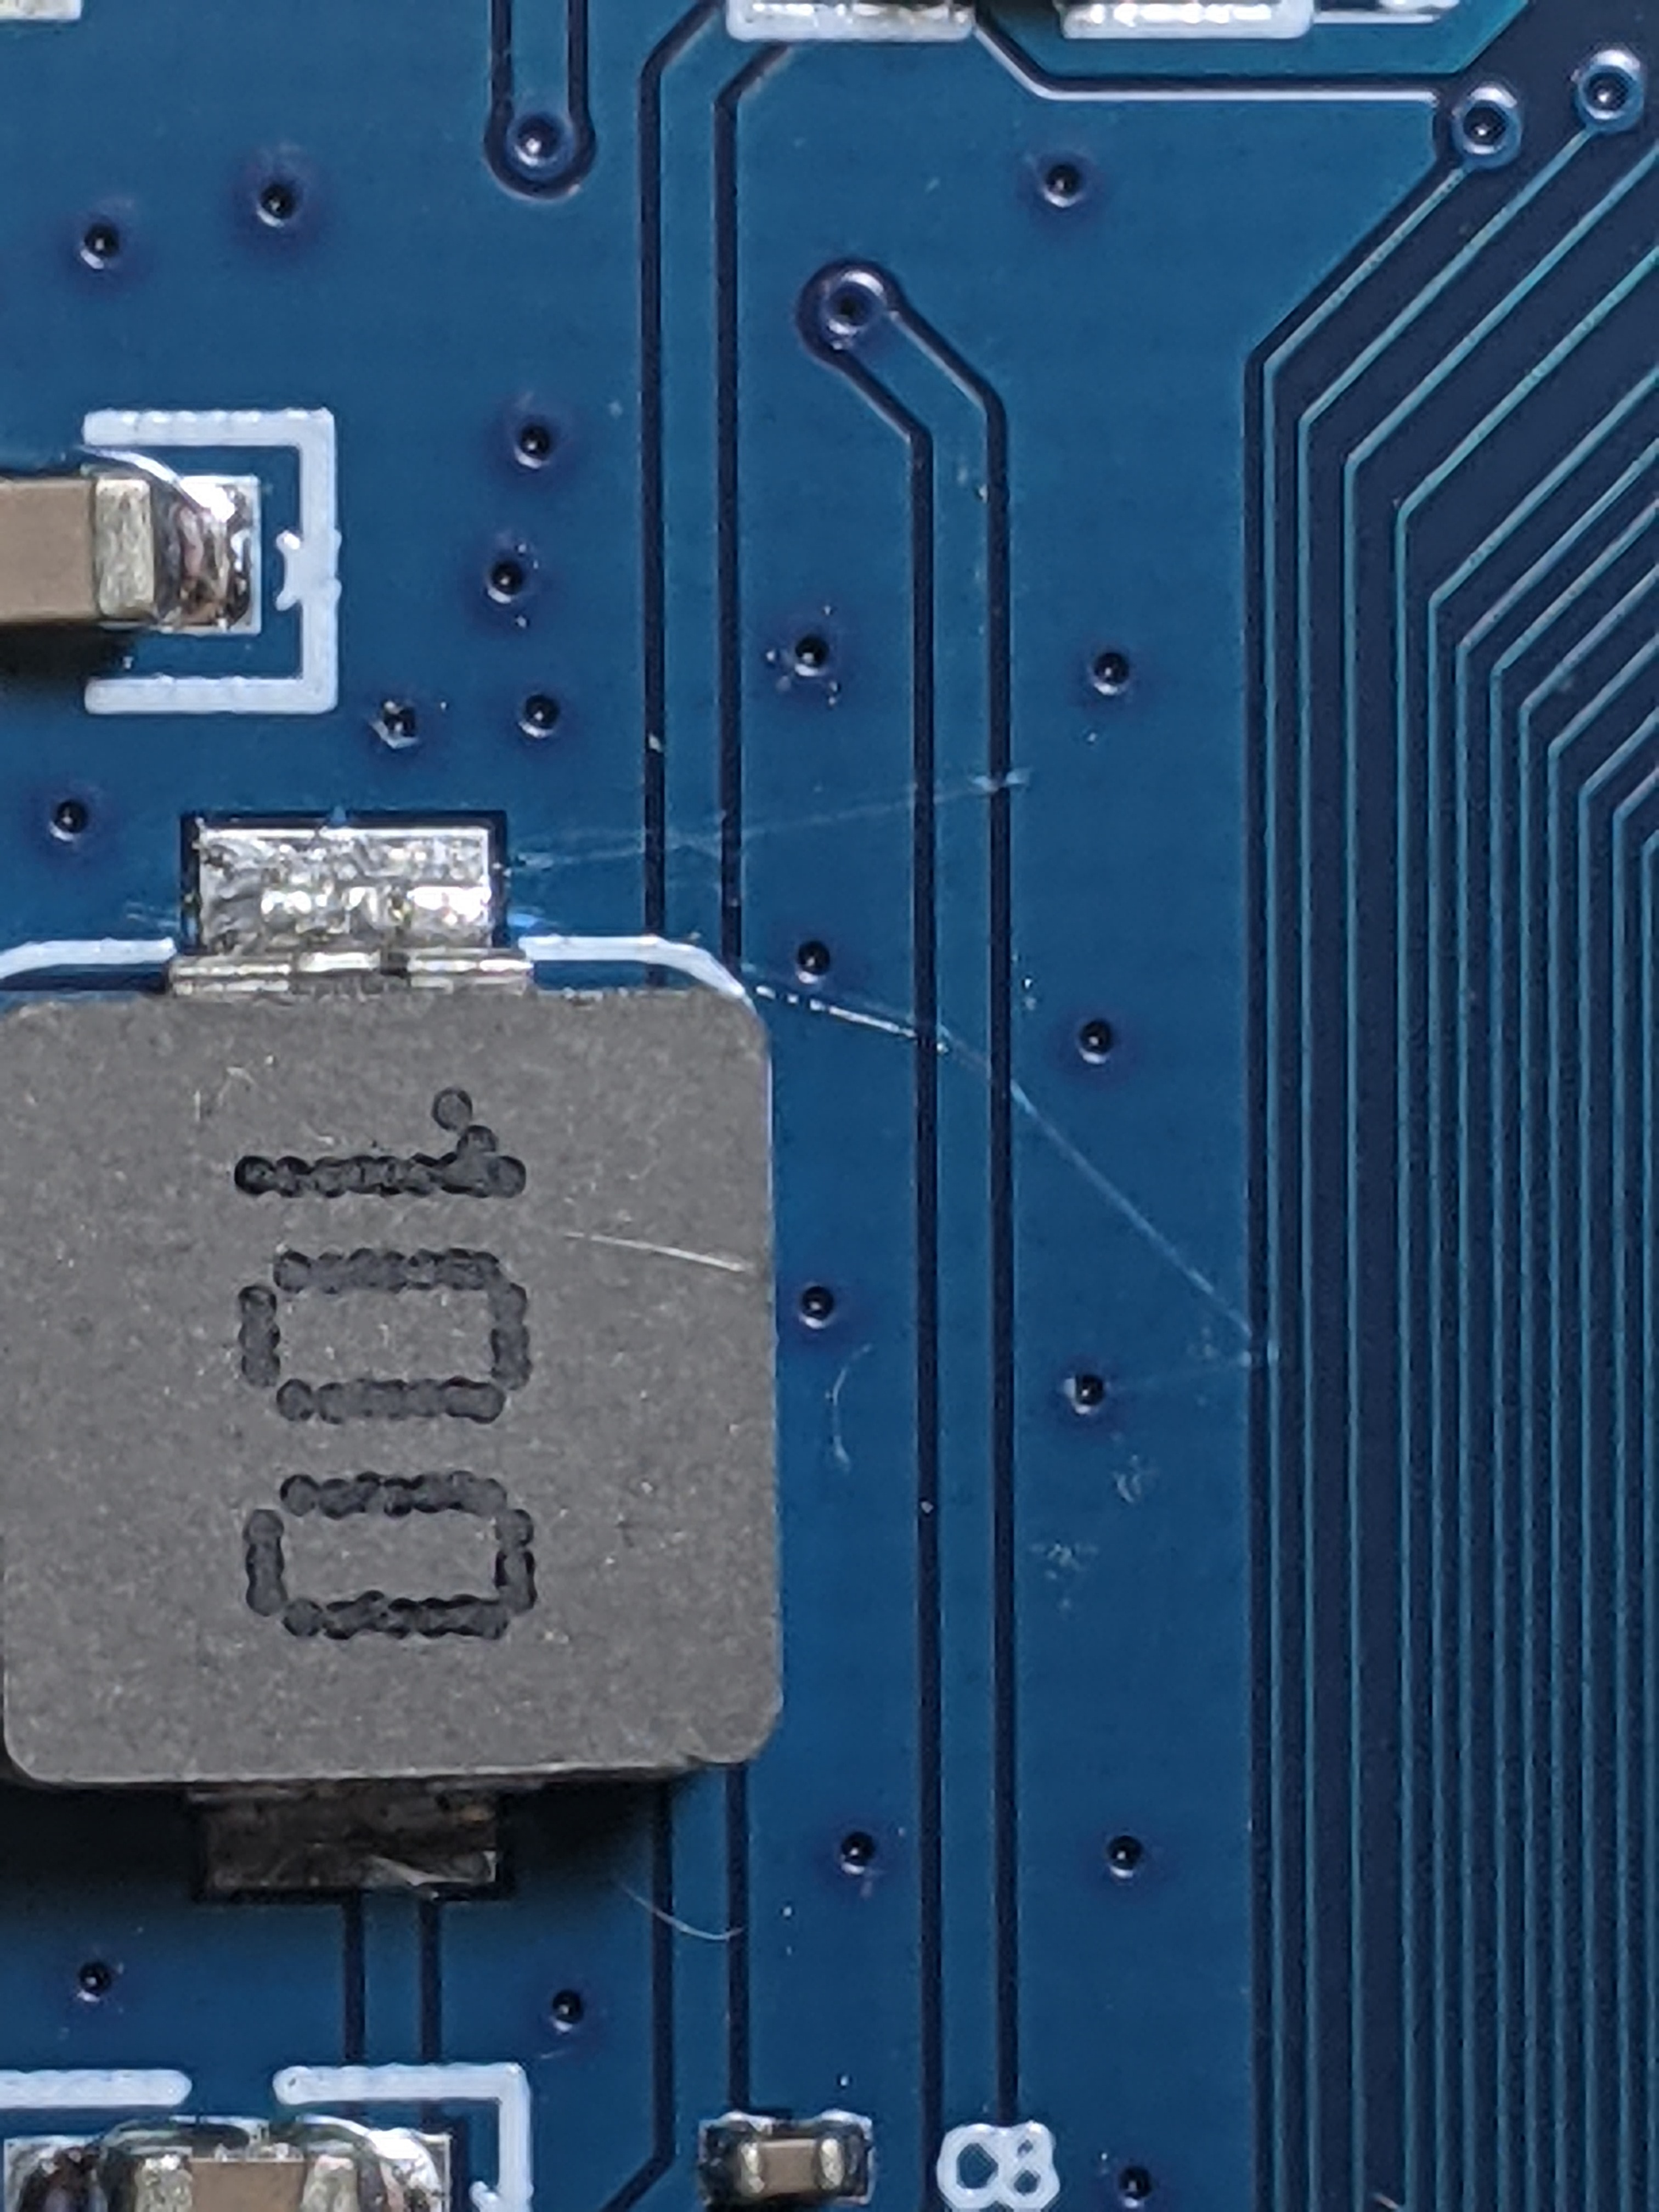
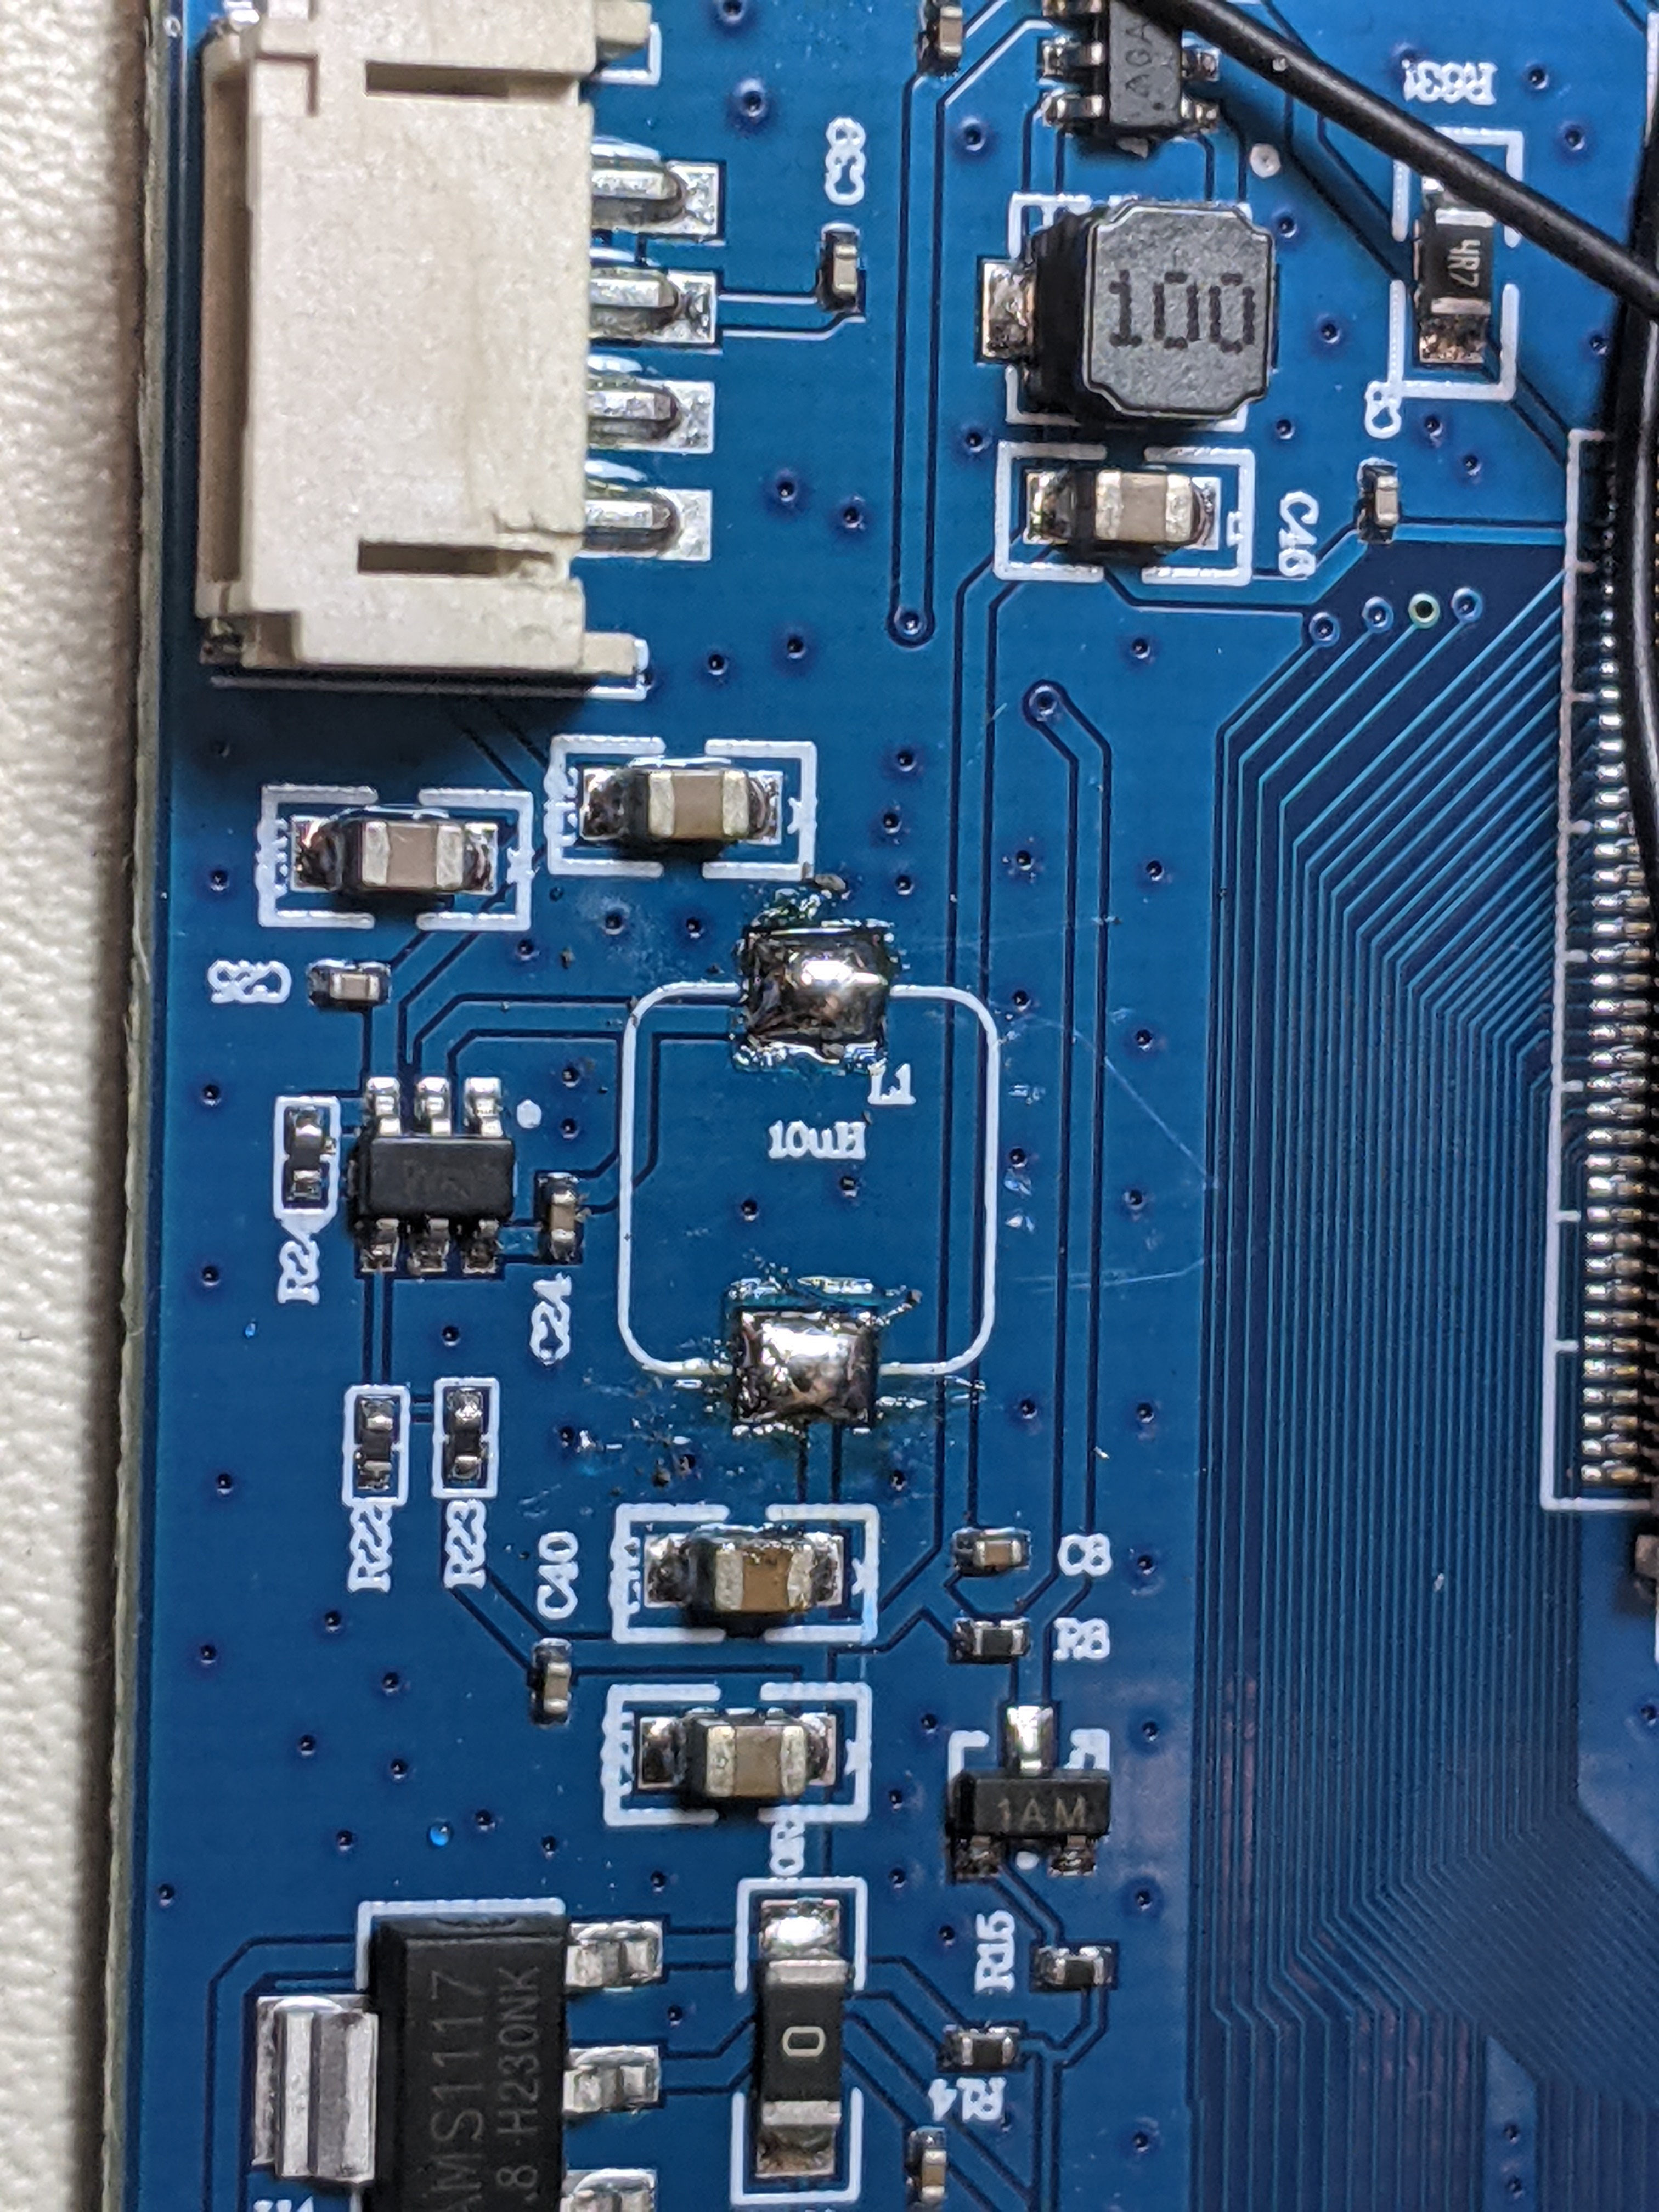
Wiring the PMS to the Wii affects the resistance values, so some change is expected. I don't know the PMS' inherent resistances, but as long as the resistance between voltage lines and ground is at least double digits, it should be fineThanks, for the video CrazyGadget! I was able to get it off.
View attachment 27455
EDIT:
This is a different question:
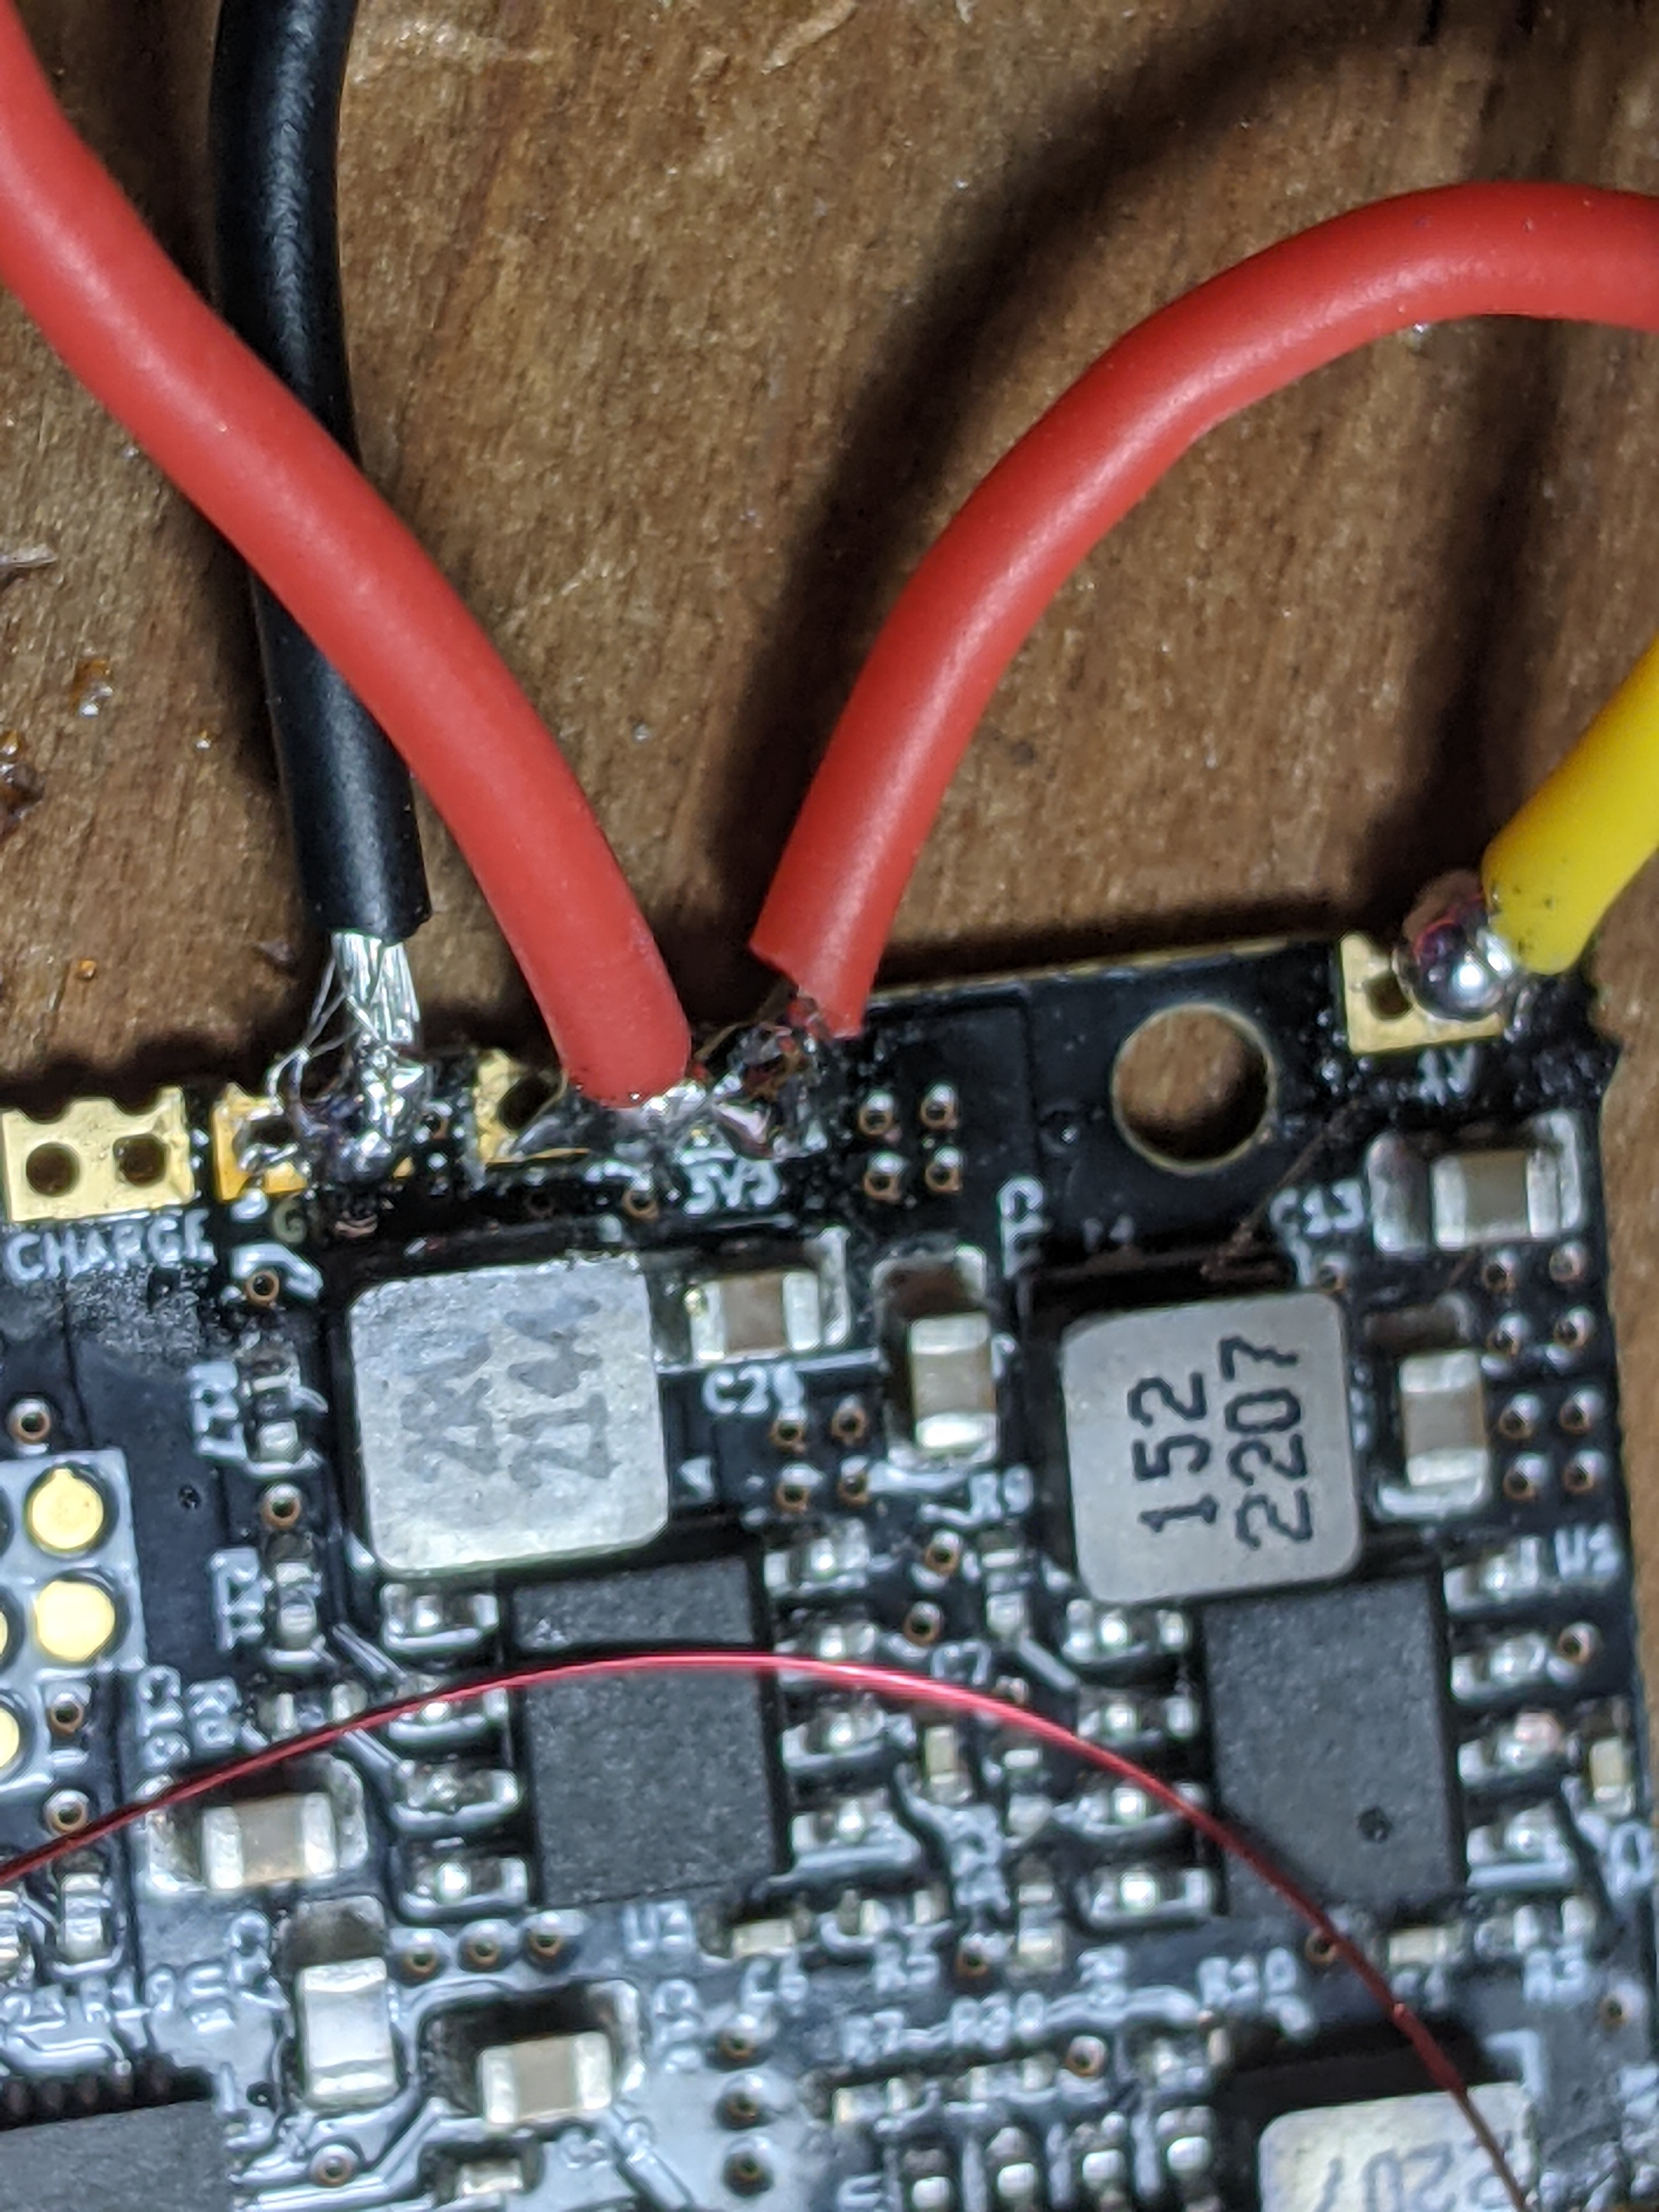
After wiring up a lot of stuff, I tested some resistances and it looks like ground and 3.3v are connected somehow. Does anyone know where it could be, or if it is just something that happens after you wire wire it up. I think it is not the latter because the other resistances are the same as they were before.
View attachment 27456
View attachment 27458
View attachment 27457
View attachment 27459
View attachment 27460
View attachment 27461
Oh, also, I bridged some pins on the AVE. I still have to fix that. It might be that.
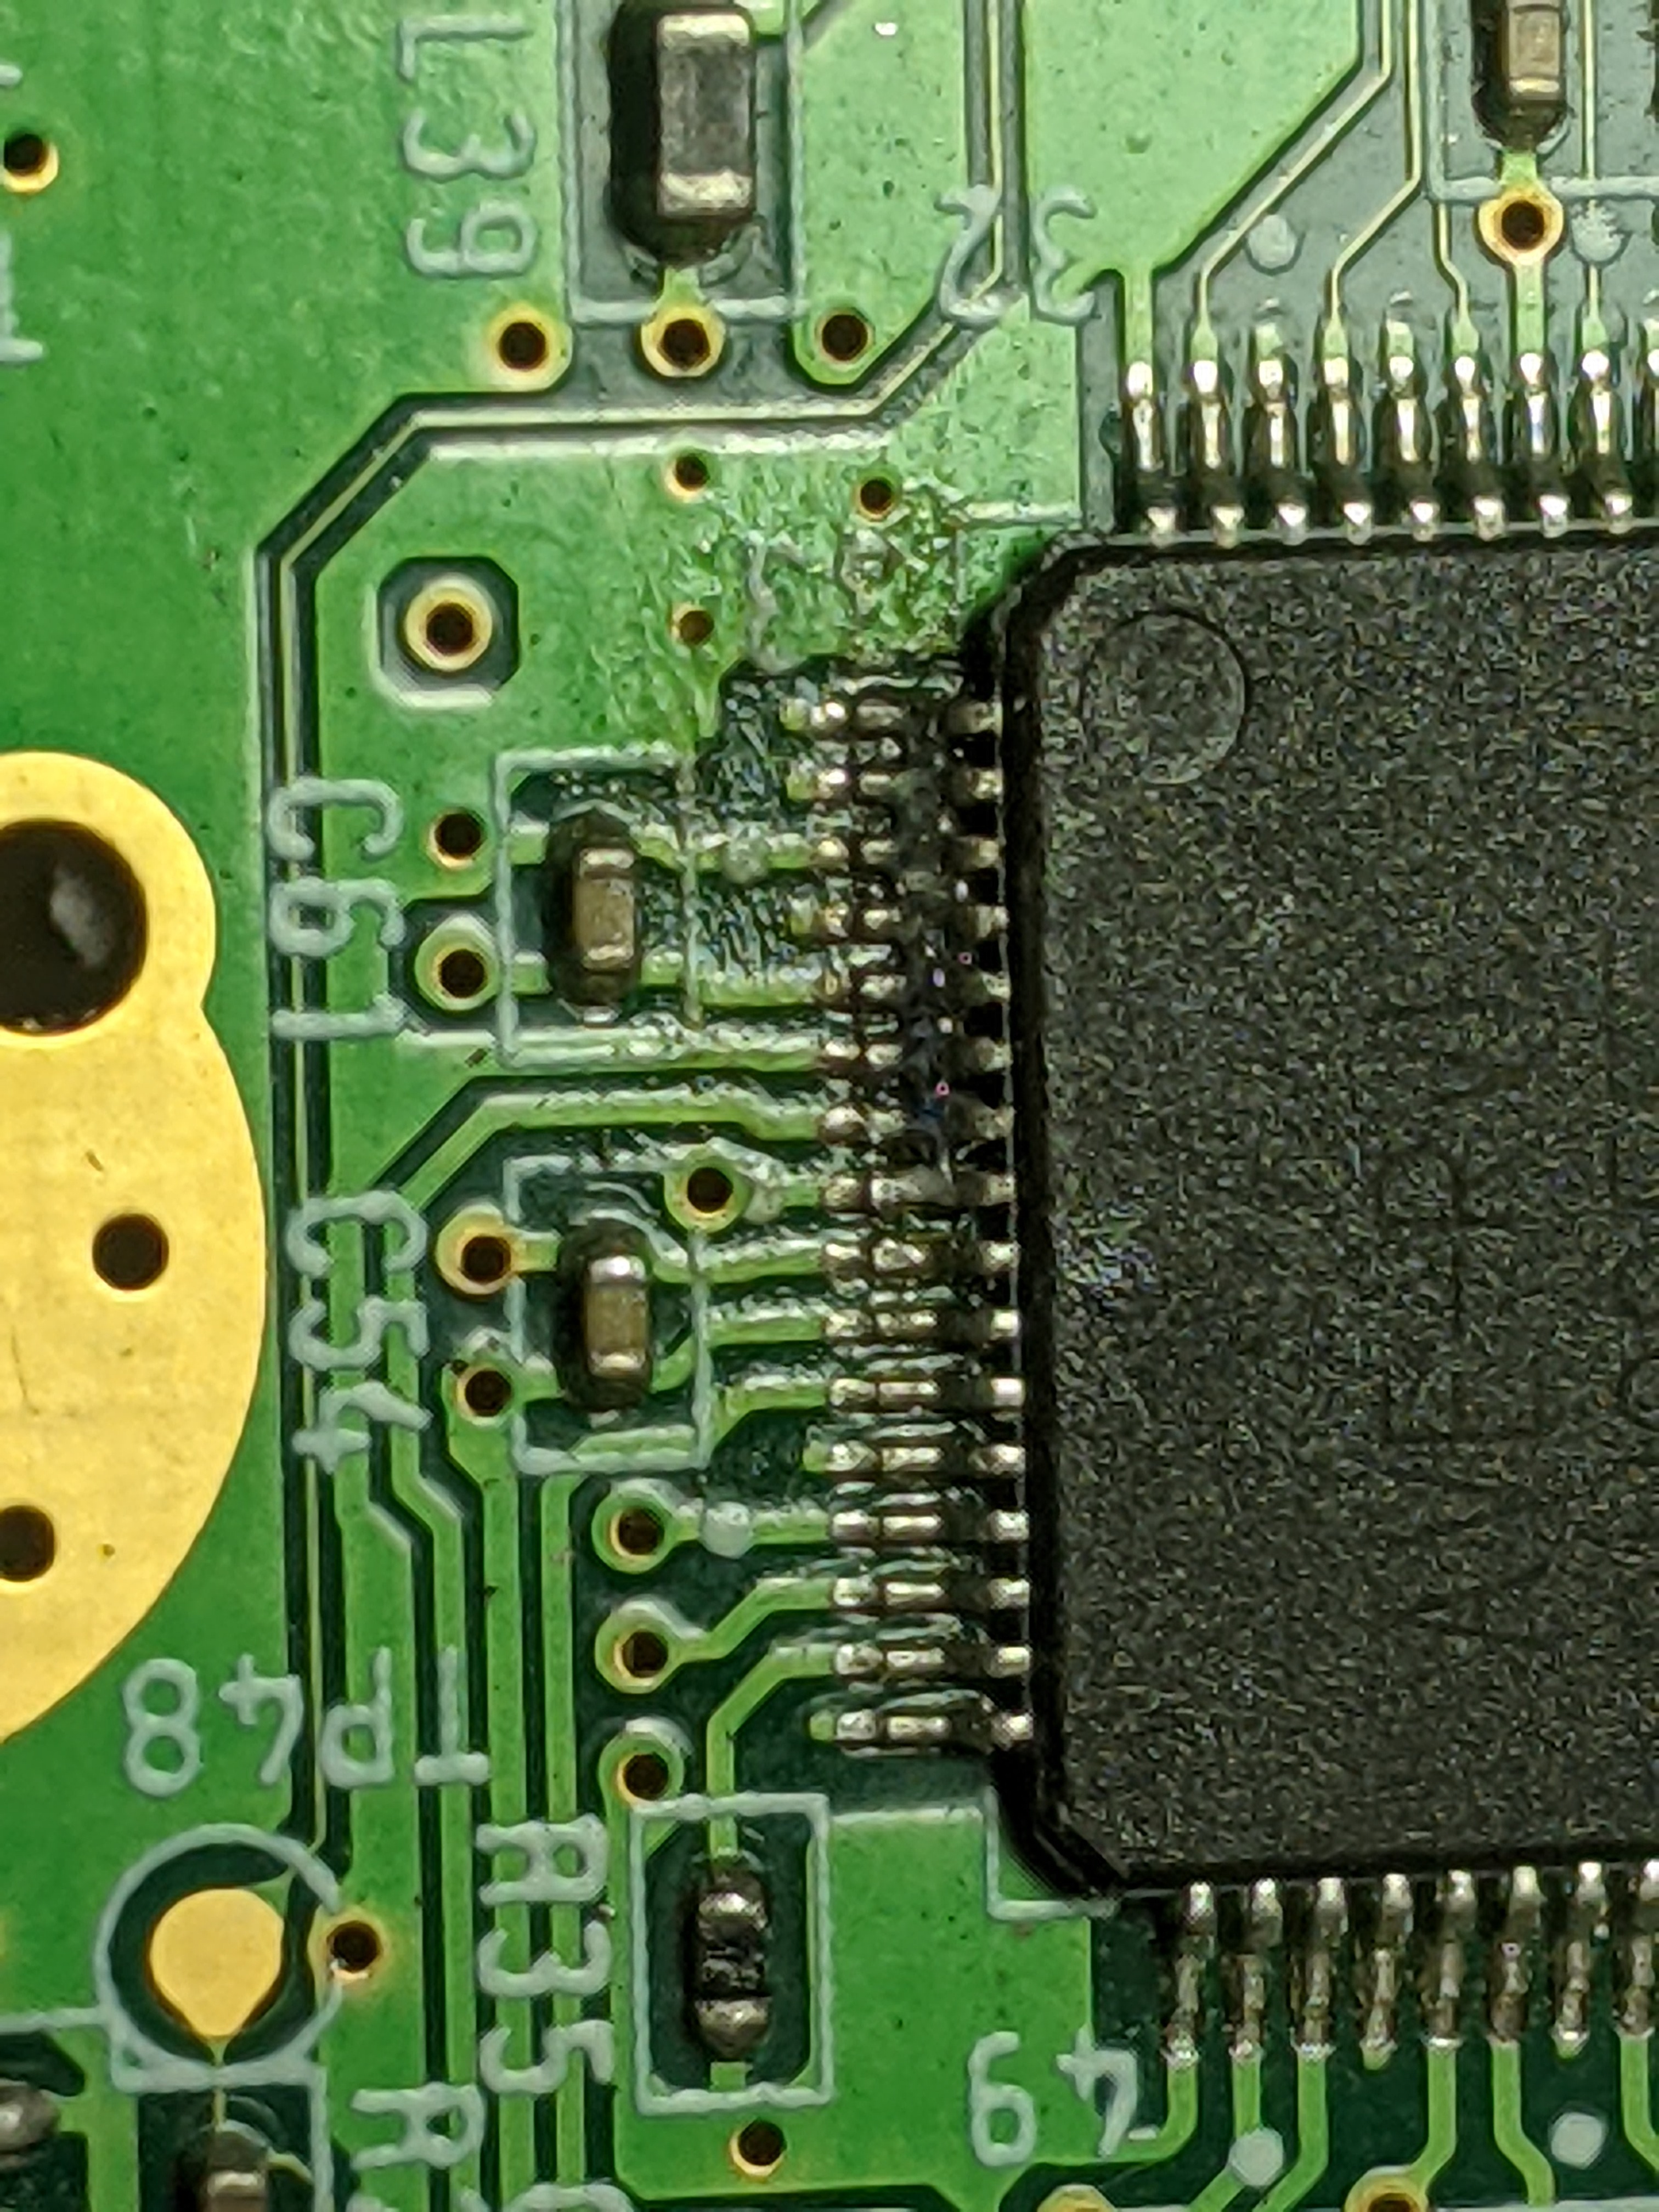
EDIT: I think I see a little short between the 3.3v pad on the PMS and the nearby ground via
Last edited:
- Joined
- Mar 26, 2023
- Messages
- 134
- Likes
- 95
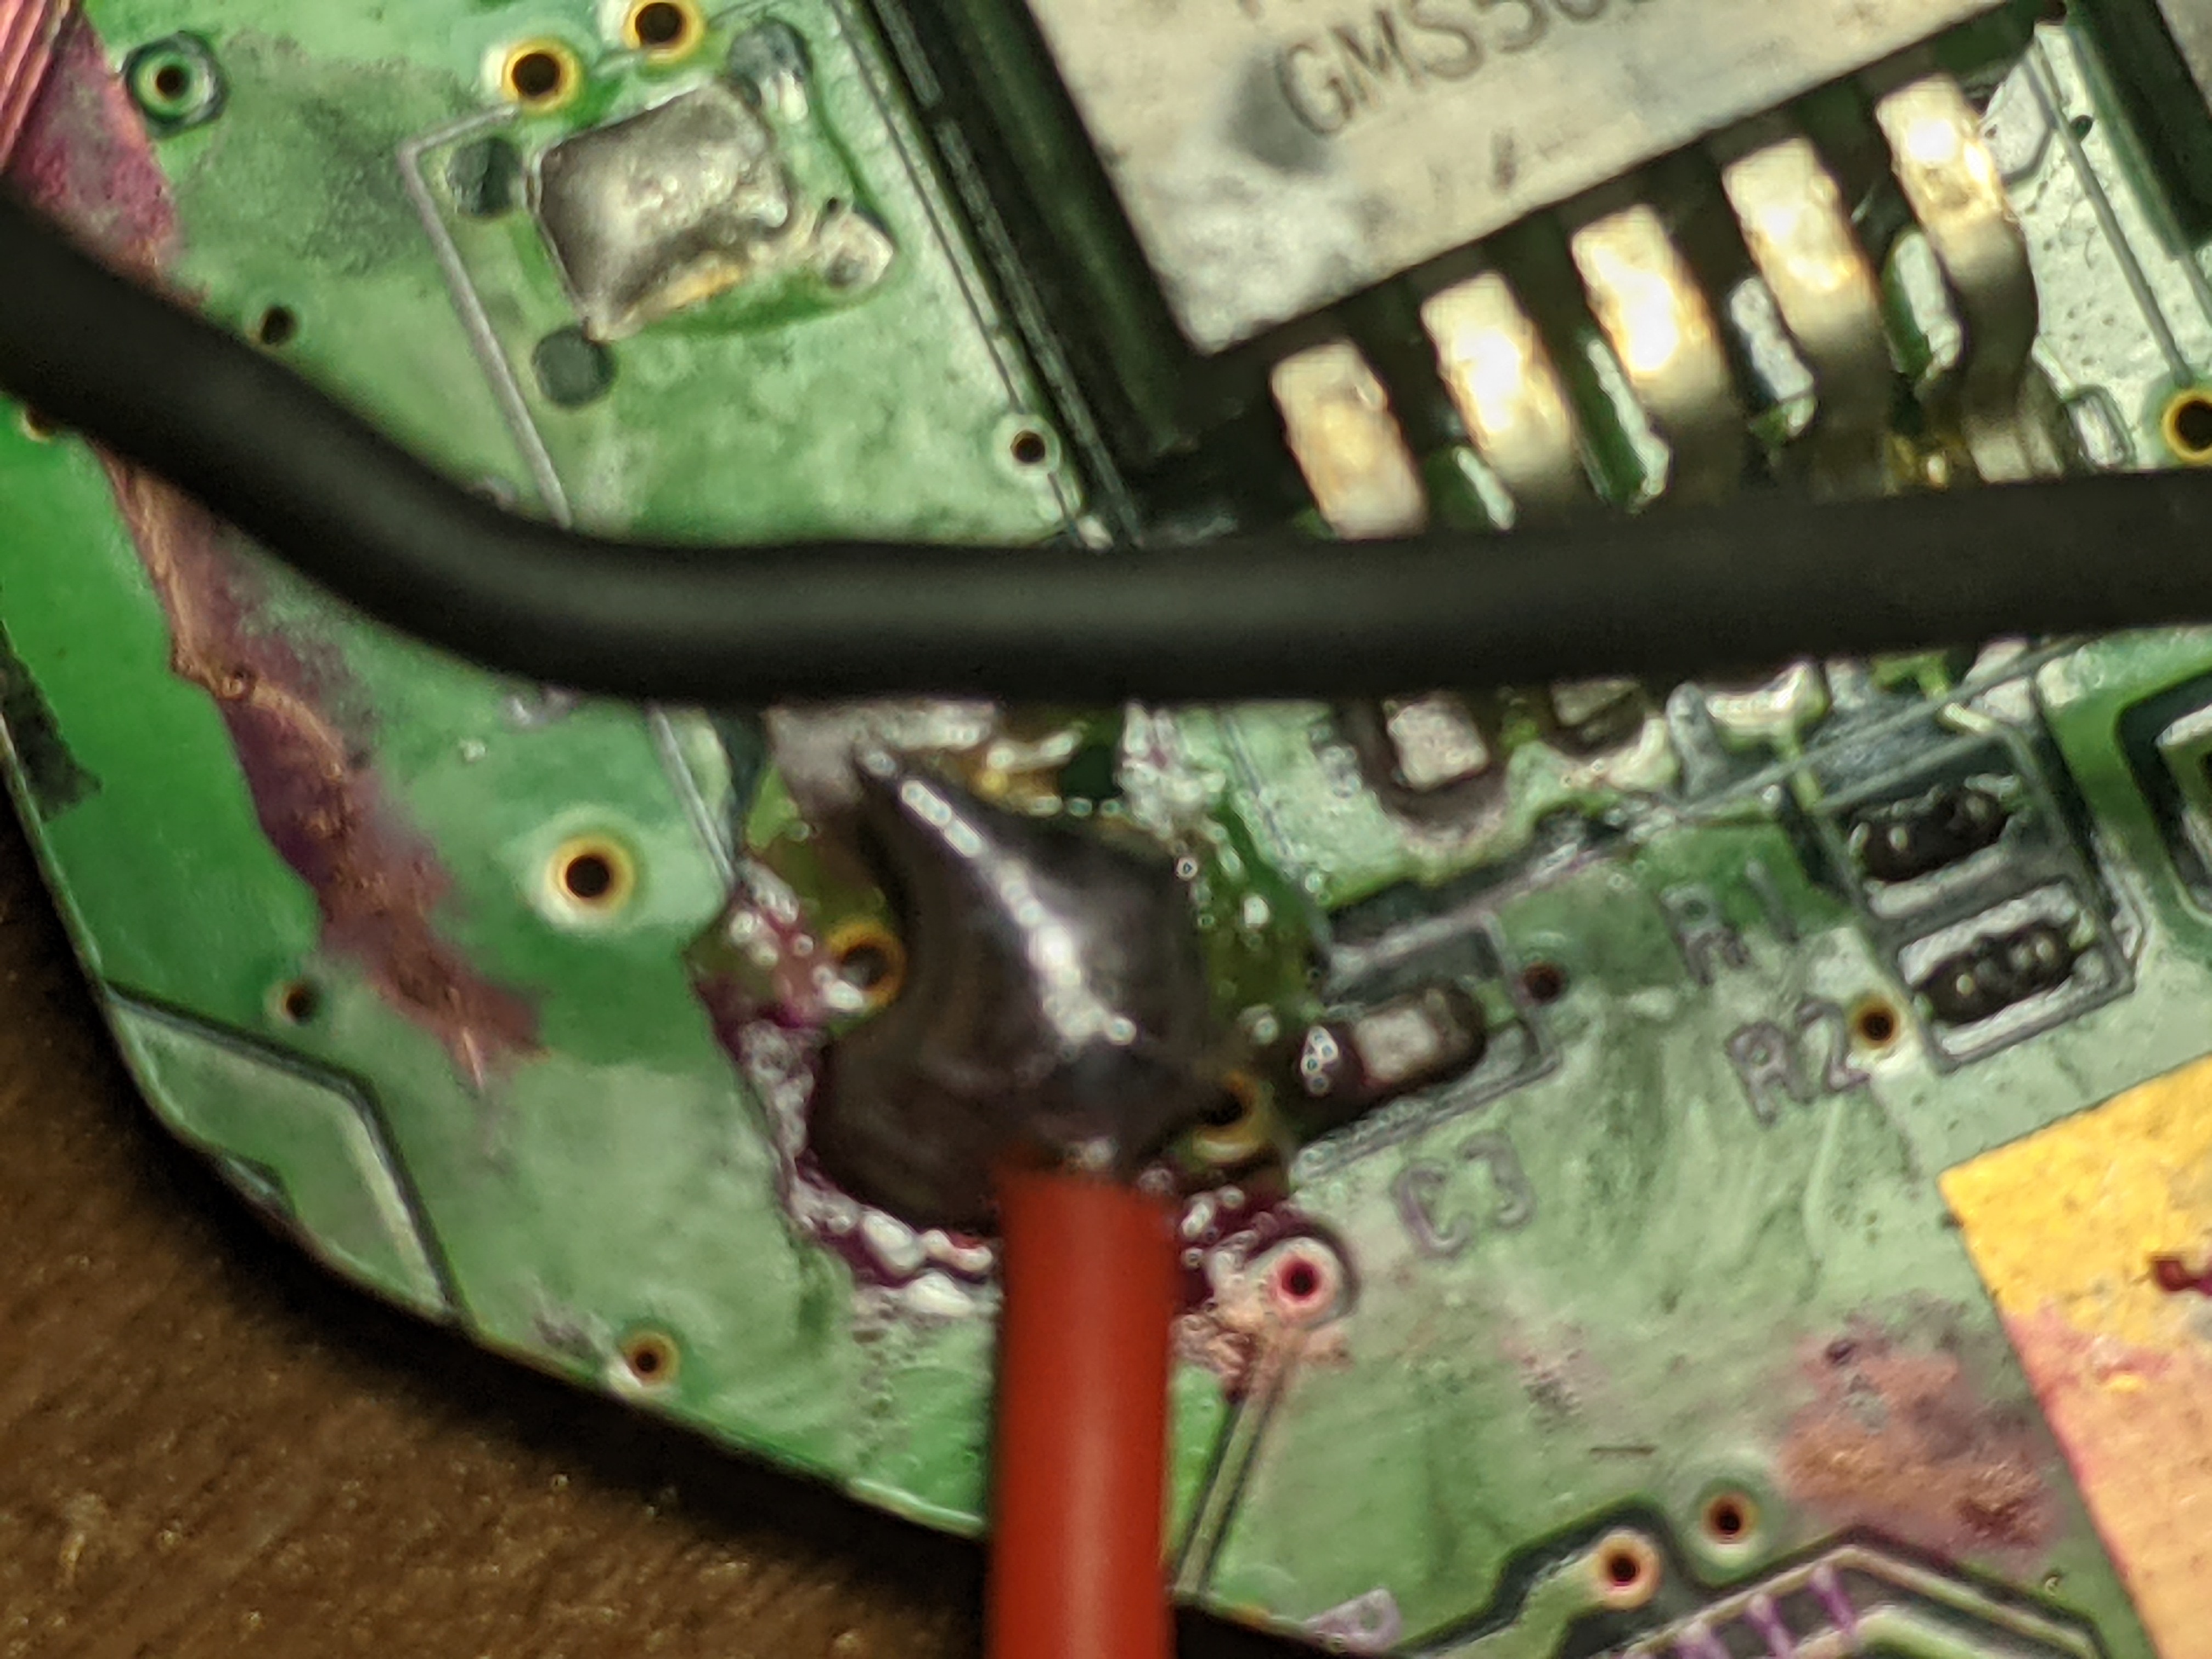
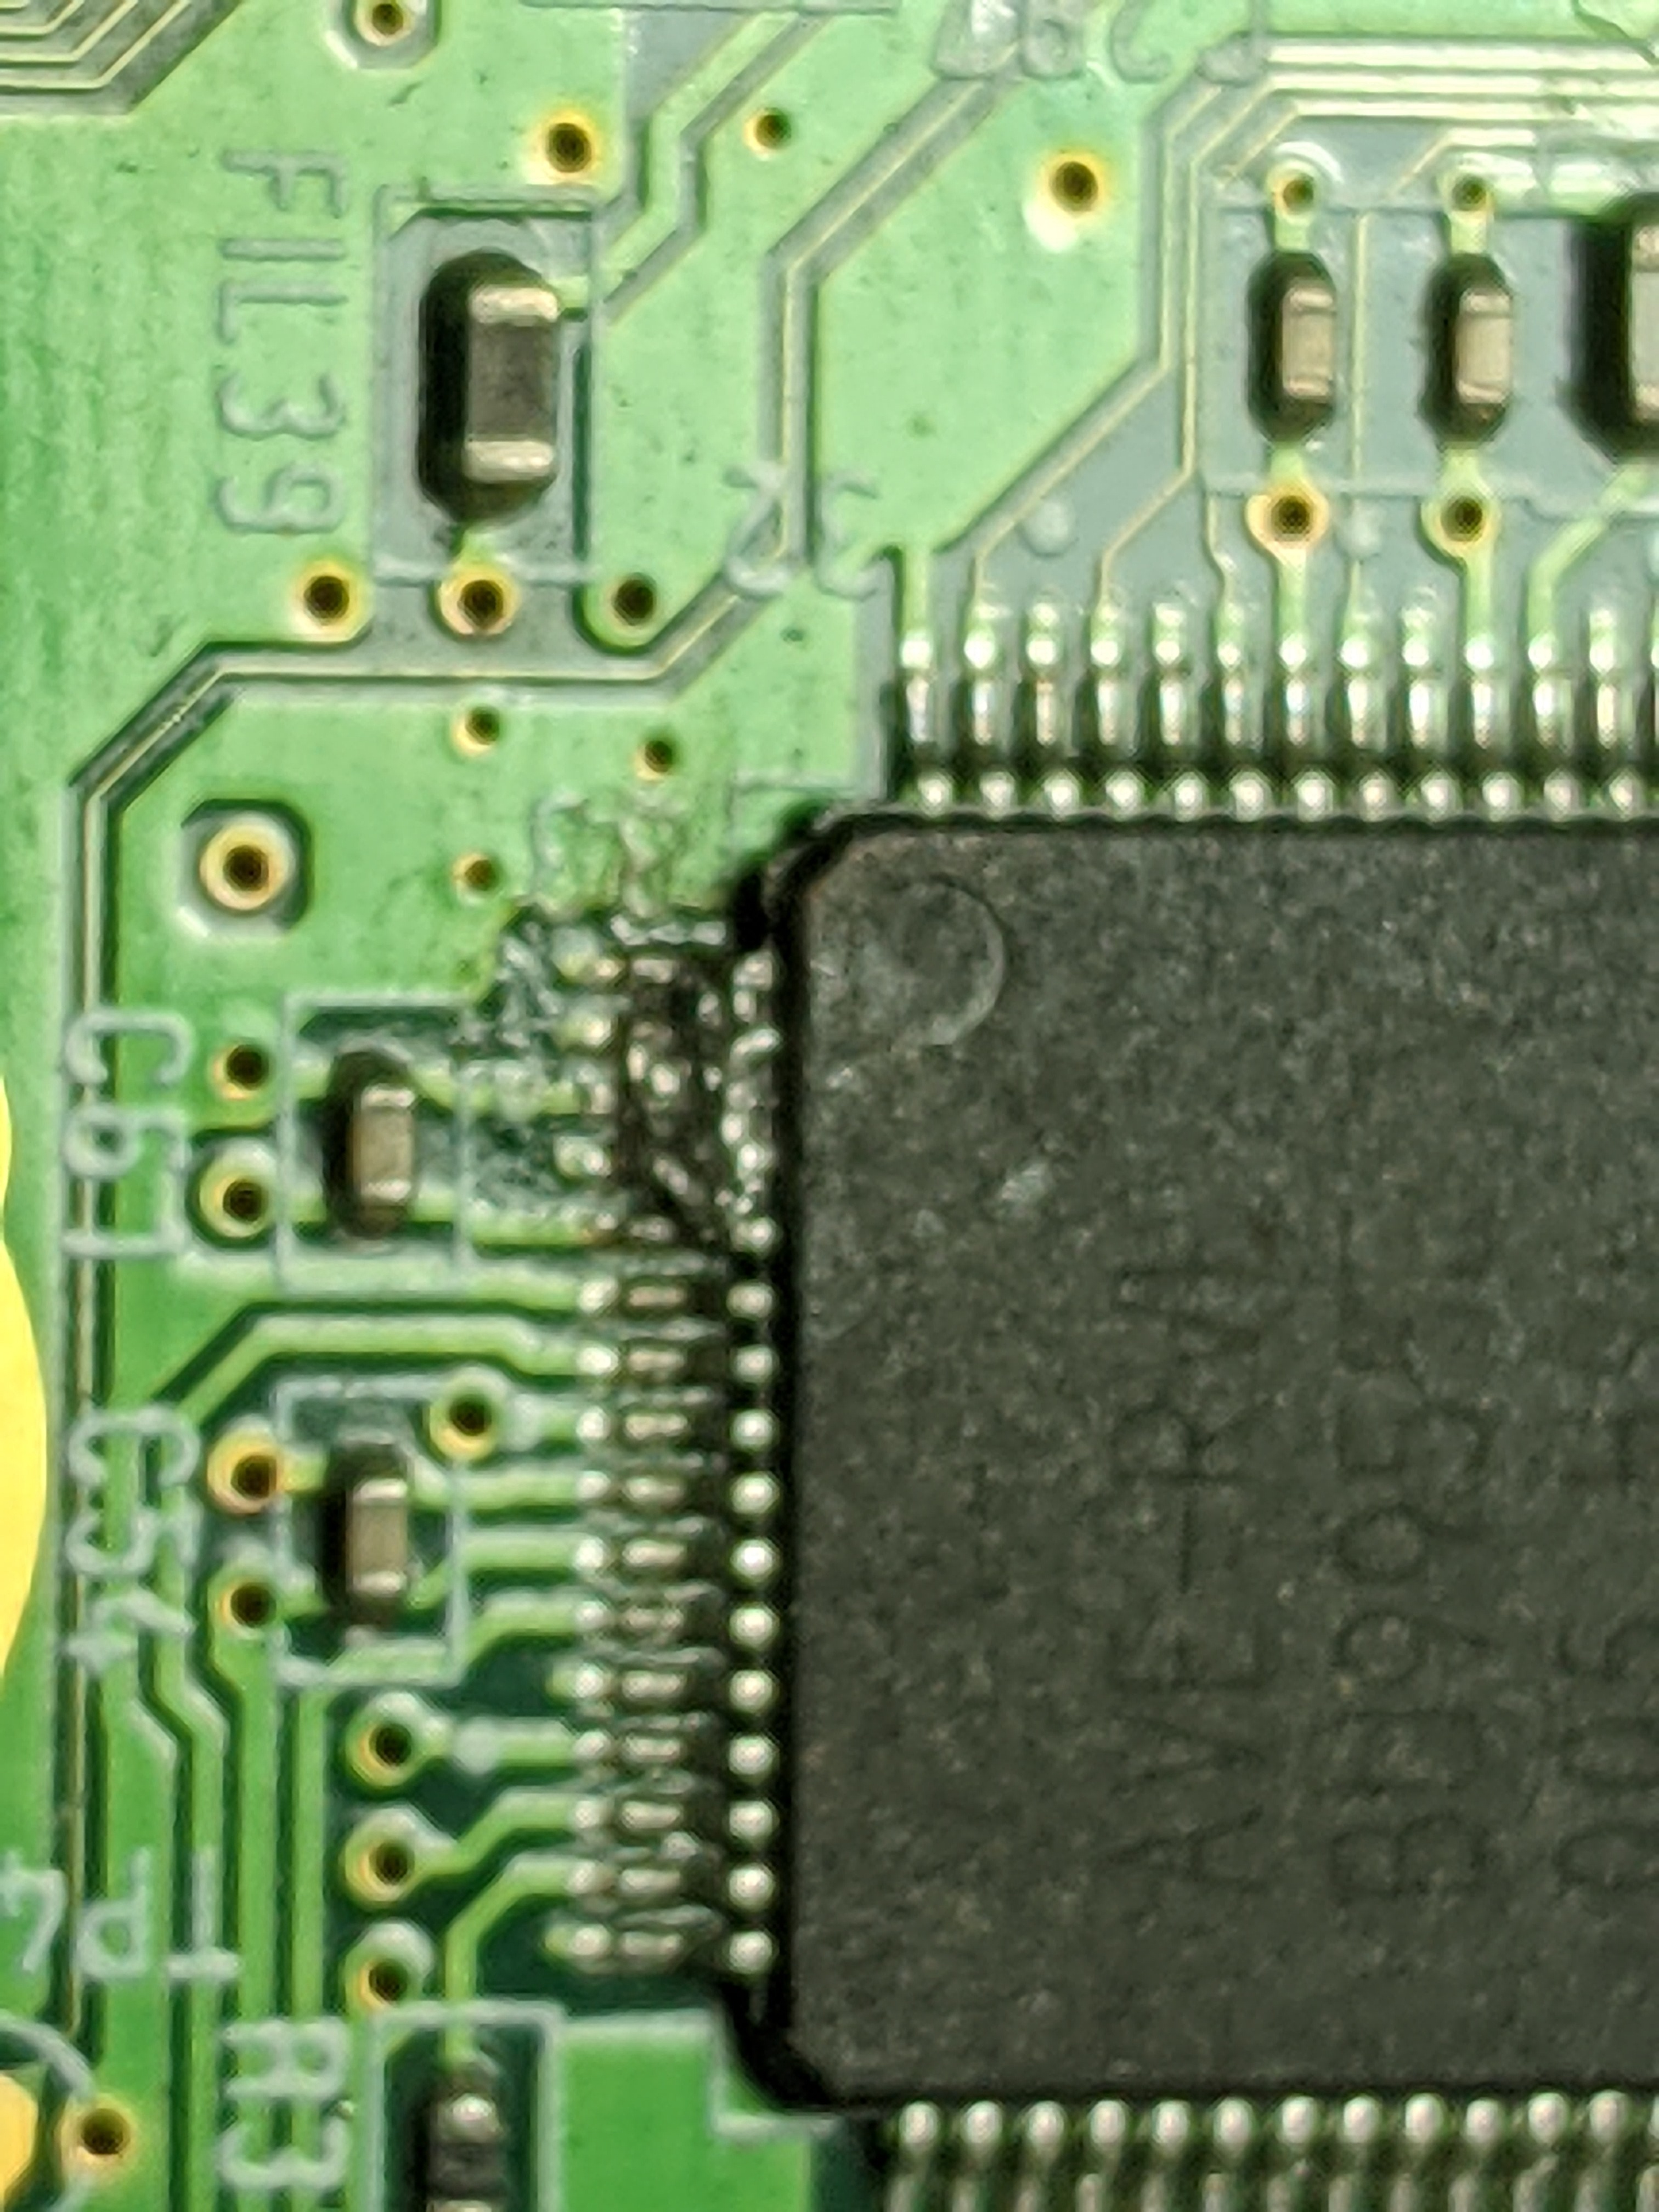
I was trying to solder hsync and vsync, I and I messed up and got a lot of solder on it. I am trying to solder it with desolder braid and I'm having some trouble. I am going to get a solder sucker, but does anyone have any tips on how to do this? I have been putting the braid against it and putting the iron on top of that. I also have been just putting it when it is liquid. I'm also having trouble making it liquid. Maybe a thicker tip?
Edit: (8:36 PM)
Same connection of 3.3v and ground. Cleaned up some solder.
Edit: (8:36 PM)
Same connection of 3.3v and ground. Cleaned up some solder.
Last edited:
Are you using any flux aside from the rosin flux that's inside the solder by default?
Also if you have any kapton tape handy, you can cut a bit of it and fold it over itself to make a little shim. Then you can heat one bridged pin and push the tape between the pins to attempt to sever the bridge. A thin razor blade like a scalpel of box cutter blade can be used to the same effect
Also if you have any kapton tape handy, you can cut a bit of it and fold it over itself to make a little shim. Then you can heat one bridged pin and push the tape between the pins to attempt to sever the bridge. A thin razor blade like a scalpel of box cutter blade can be used to the same effect
- Joined
- Mar 26, 2023
- Messages
- 134
- Likes
- 95
Nope, I didn't know that flux helped for desoldering. Thanks, I'll try that.Are you using any flux aside from the rosin flux that's inside the solder by default?
Also if you have any kapton tape handy, you can cut a bit of it and fold it over itself to make a little shim. Then you can heat one bridged pin and push the tape between the pins to attempt to sever the bridge. A thin razor blade like a scalpel of box cutter blade can be used to the same effect
I don't have an kapton tape, but I have some normal electrical tape. Maybe I can use that?
- Joined
- Oct 5, 2019
- Messages
- 132
- Likes
- 122
- Portables
- 2
Don't use electrical tape it will melt with the solder tip. Kapton tape is heat resistant tape.Nope, I didn't know that flux helped for desoldering. Thanks, I'll try that.
I don't have an kapton tape, but I have some normal electrical tape. Maybe I can use that?
Yeah definitely don't use any tape besides kapton tape. Kapton tape can handle several hundred degrees celsius. Anything else will just melt and burn
- Joined
- Mar 26, 2023
- Messages
- 134
- Likes
- 95
Hi, I am almost finished, but I have one question.
I have enabled the rvloader VGA patch, so do I still need to give MODE 3.3v? I already did it yesterday, so I am just wondering if that is okay and not necessary or if I needed to do it. Thanks in advance
I have enabled the rvloader VGA patch, so do I still need to give MODE 3.3v? I already did it yesterday, so I am just wondering if that is okay and not necessary or if I needed to do it. Thanks in advance
- Joined
- Oct 5, 2019
- Messages
- 132
- Likes
- 122
- Portables
- 2
Yes you needed to do it for VGA to workHi, I am almost finished, but I have one question.
I have enabled the rvloader VGA patch, so do I still need to give MODE 3.3v? I already did it yesterday, so I am just wondering if that is okay and not necessary or if I needed to do it. Thanks in advance
- Joined
- Mar 26, 2023
- Messages
- 134
- Likes
- 95
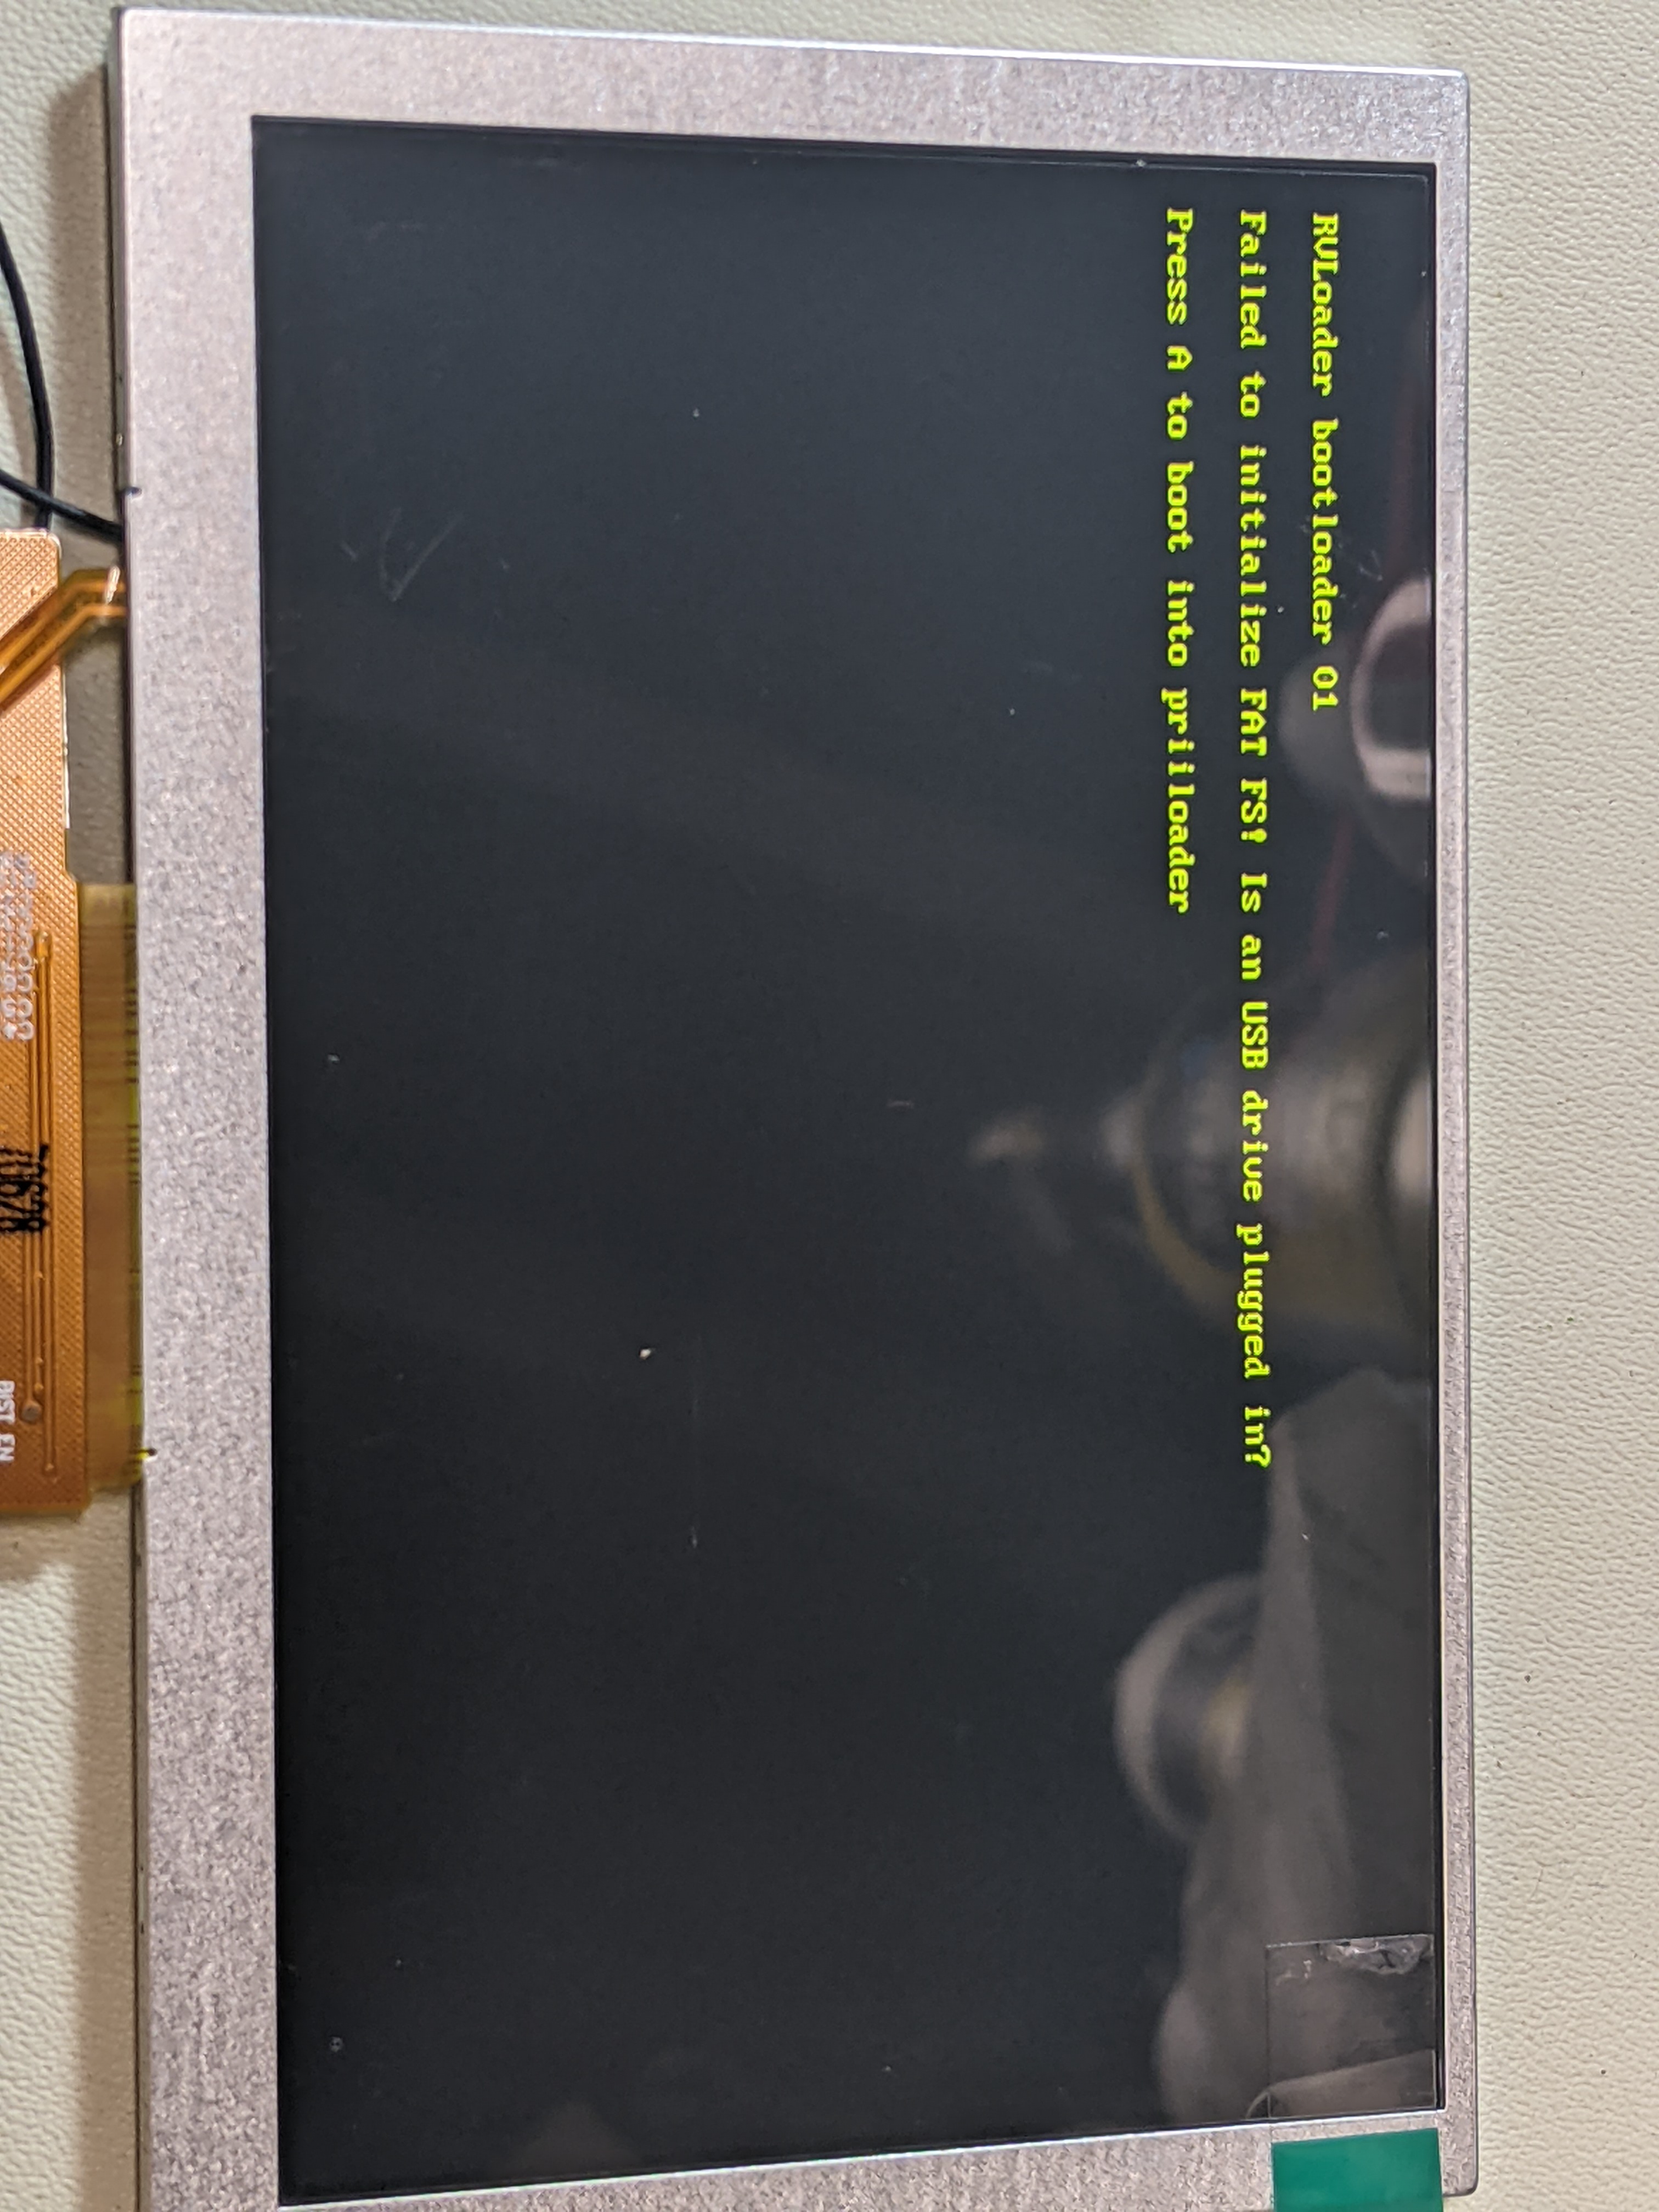
I finished wiring up the Wii, and it worked on the first try!
Next, I have to get the controller, usb, and sound working. Also, I have to think about cooling. Then, I can finish up the case and print it.
NOTE: Those batteries have some open spots, so I have to fix that.
Next, I have to get the controller, usb, and sound working. Also, I have to think about cooling. Then, I can finish up the case and print it.
NOTE: Those batteries have some open spots, so I have to fix that.
Last edited:
- Joined
- Mar 26, 2023
- Messages
- 134
- Likes
- 95
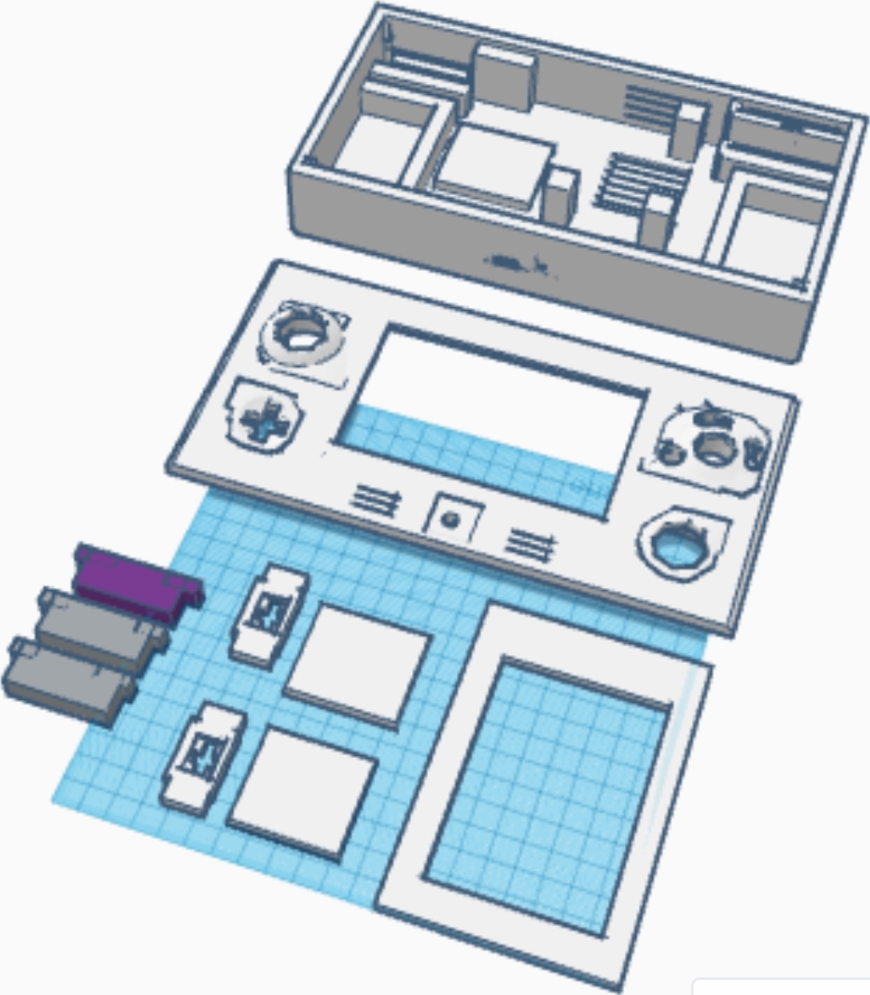
Hey guys, I'm just finishing up the 3D modeling, and I have a couple of questions.
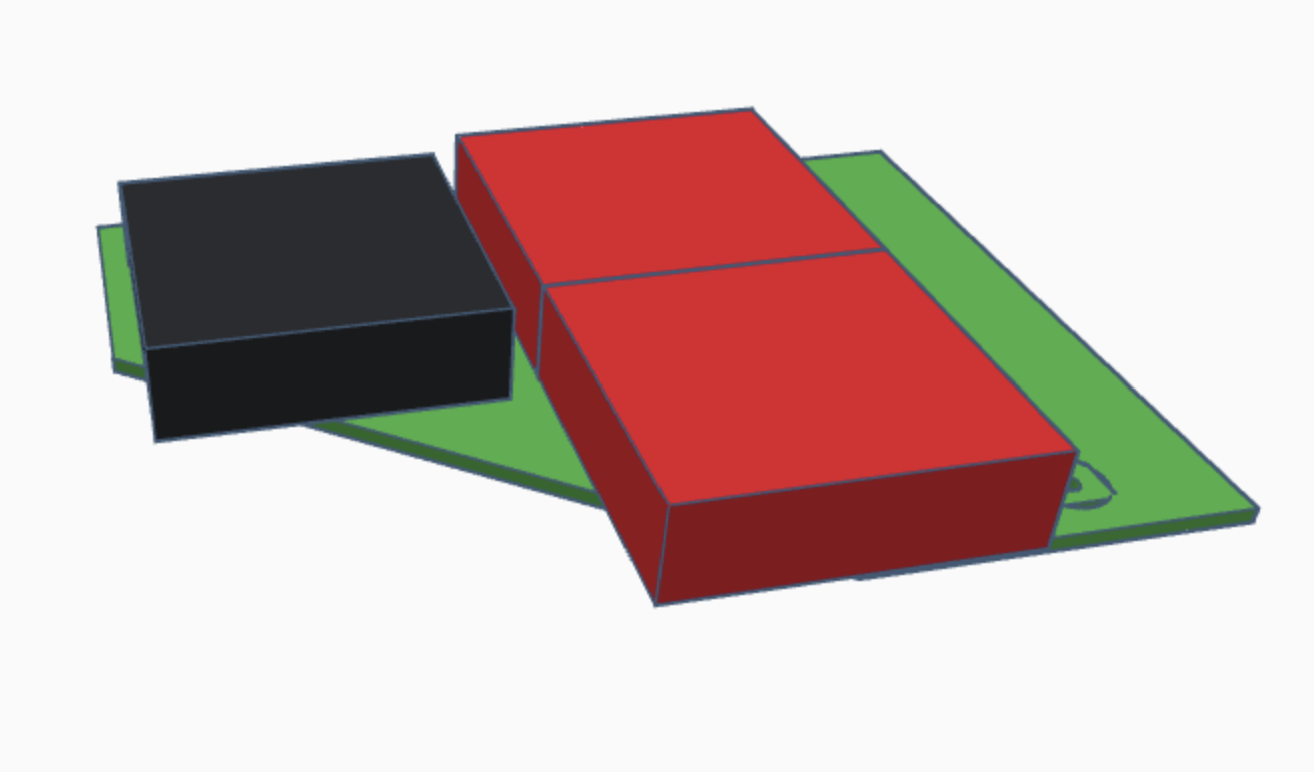
First, what are these? I know the sliders above are for the triggers, but I'm not sure what these do.

Also, how can I make a compact cooling system for the Wii? I'm thinking about using the fan and the heatsinks from the Ashida. Should the fan blow into the heatsink? Should it suck the stuff or blow out? How does it fit if it has to go over the heatsinks? It would make the portable thick. Last, how do the heatsinks clamp down?
Anyone that has any ideas or that can explain how this is done would help a ton.
First, what are these? I know the sliders above are for the triggers, but I'm not sure what these do.
Also, how can I make a compact cooling system for the Wii? I'm thinking about using the fan and the heatsinks from the Ashida. Should the fan blow into the heatsink? Should it suck the stuff or blow out? How does it fit if it has to go over the heatsinks? It would make the portable thick. Last, how do the heatsinks clamp down?
Anyone that has any ideas or that can explain how this is done would help a ton.
Last edited:
Tigerkev
.
- Joined
- Mar 14, 2021
- Messages
- 47
- Likes
- 13
AFAIK those are the digital press pads for the triggers, ghere should be some membranes somewhere on that spot.Hey guys, I'm just finishing up the 3D modeling, and I have a couple of questions.
First, what are these? I know the sliders above are for the triggers, but I'm not sure what these do.
View attachment 27556
Also, how can I make a compact cooling system for the Wii? I'm thinking about using the fan and the heatsinks from the Ashida. Should the fan blow into the heatsink? Should it suck the stuff or blow out? How does it fit if it has to go over the heatsinks? It would make the portable thick.
Anyone that has any ideas or that can explain how this is done would help a ton.
View attachment 27557
For cooling i would recommend getting a small fan and some kind of small heatsink(s)
The method used in the G-Wii is the most compact cooling solution currentlyHey guys, I'm just finishing up the 3D modeling, and I have a couple of questions.
First, what are these? I know the sliders above are for the triggers, but I'm not sure what these do.
View attachment 27556
Also, how can I make a compact cooling system for the Wii? I'm thinking about using the fan and the heatsinks from the Ashida. Should the fan blow into the heatsink? Should it suck the stuff or blow out? How does it fit if it has to go over the heatsinks? It would make the portable thick. Last, how do the heatsinks clamp down?
Anyone that has any ideas or that can explain how this is done would help a ton.
View attachment 27557
- Joined
- Mar 26, 2023
- Messages
- 134
- Likes
- 95
Hello guys! The model is finished and I'm going to print it. I plan to use PLA. Also, the edges are a little boxy and there are some rough spots by the controls, so I do plan on a lot of sanding. Let me know what you think.
- Joined
- Mar 26, 2023
- Messages
- 134
- Likes
- 95
Thanks for the input, Tigerkev. I was thinking the same thing but I figured the start button would be used less and that I want it to look like a GameCube controller.Looks cool!
Though I suggest maybe putting the start button somewhere more accessible like between the buttons and C-Stick, though a bit to the left, the other side would have the same effect.
- Joined
- Mar 26, 2023
- Messages
- 134
- Likes
- 95
Hey all,
I am in the process of trying to print my 3d design for my case. I tried JLCPCB, but the shipping was too much, and PCBWAY is also too expensive. I am wondering if anyone on the forums would be able to print my file on their 3d printer. If anyone is interested, then they can just dm me or message here. I'll send the files so you can get an idea of how much it would cost to print and how much you would want me to pay. I am thinking it would be like $40 + shipping. (I'm in the US)
Also, I was thinking about messaging this in the 3d printing part of the Discord also, would that be okay?
Thank you!
Last edited: