
Well, it seems that I have missed the bandwagon by a few years when it comes to making portable console systems and such. Even though people have moved on to bigger and better things I decided to try my hand at a GameCube Portable I’ve named “GameCube Proto Ver. 1”.
Since this is my first portable project I decided to keep it really simple so no trimming of the Motherboard, OEM power regulator along with finding as many inventive ways as possible to reuse OEM parts. I have a TON of physical games I want to play sitting on my entertainment center, (and due to the fact I haven’t been able to find a good place to buy a DD Replacement) I figured I would keep the original DD in the machine.
My motivation, (other than just the love of puzzles, electronics and makings things small) is the fact that as a musician with a fulltime job and a husband/father so I don’t have a lot of time to just sit and enjoy games anymore. When I am home and want to play I don’t want to be stuck in my music studio, (where I have all my gaming systems stashed) and stay locked away from my family. With a good portable/semi-portable I can at least be with my family, (while my son watches cartoons or my wife watches soaps) play a few games and any help needed from me is just a Pause Button away.
Thus the real reason why I am keeping as much OEM as possible, so it’s not so time consuming to build my first basic portable/semi-portable. I already have plans and some parts for a second GCp, something to take more time/liberties with, (Mother Board trimming, custom power regulators, possible DD replacement if I can find one, etc.) and make it smaller. After that the sky is the limit!!
Sorry, I’ve went on a lot longer that I intended but I do want to say thanks to everyone here on the BitBuilt forums along with the all the great posts from GC-Forever, ModRetro, BenHeck and all the other great forums out there, (along with Google for getting me to the right places, lol).
It's not going to be the most beautiful thing but so far I haven't fried anything so that's a plus. Any suggestions anyone has feel free to let me know!!")
__________________________________________
And so it Starts...
So I guess since I started this back on June 15th I will have to post quite a few "along the way" pictures... hopefully that's ok to do. I can say that I've been having a blast doing this project and so far I totally agree with Ashen on one point... case work is a pain, lol!!
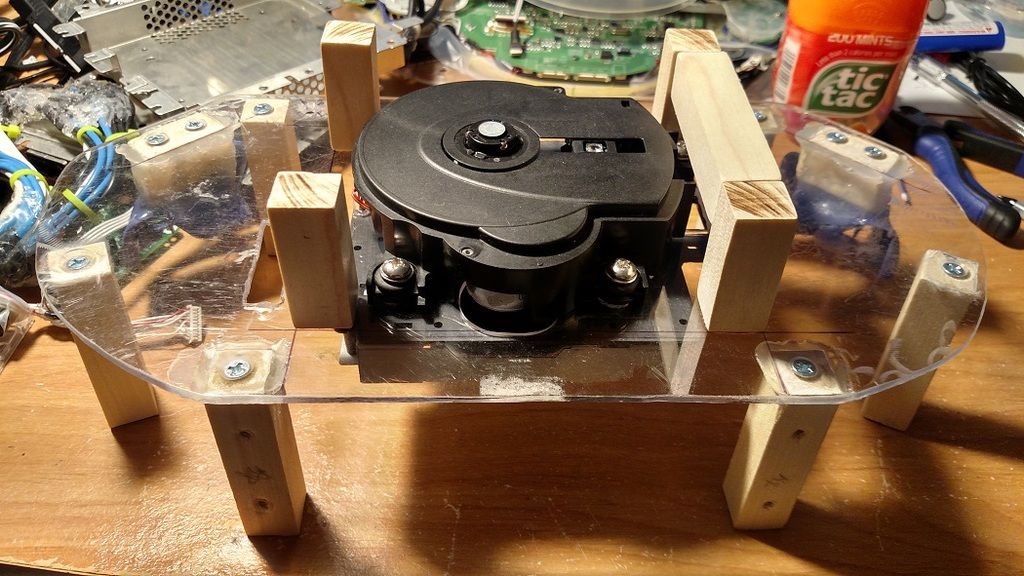
And so it starts... getting all the pieces in place. I know a lot of you don't care for the PSOne Screen and after getting some nicer one's off eBay for other projects I can see why. Too bad I didn't find that out until later, lol!! I plan on making a much smaller GameCube Proto, (Maybe a "ProtoCube") using some nicer parts though so I figured this would be a good starting point.
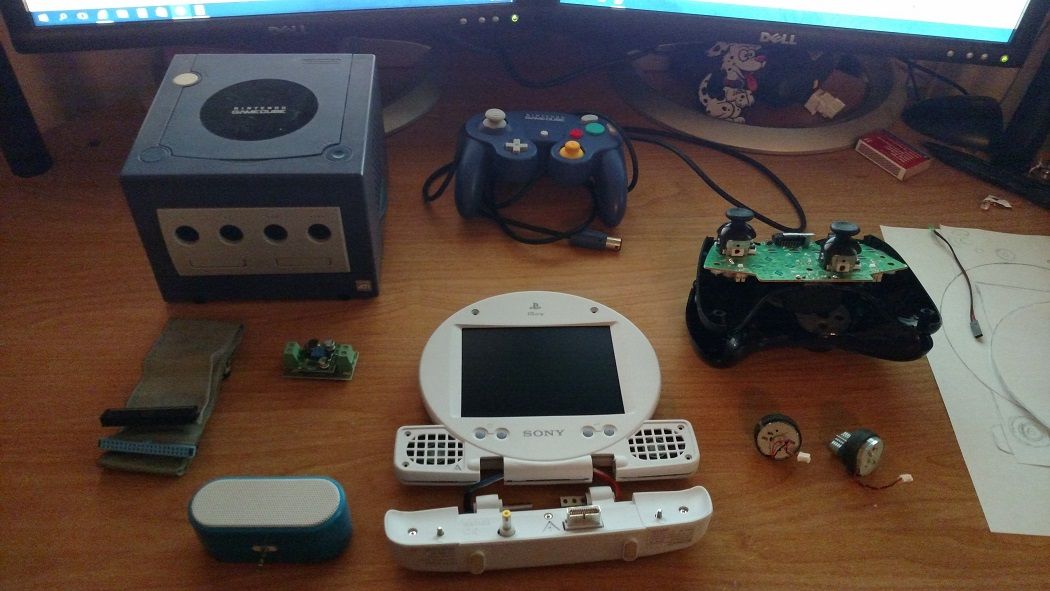
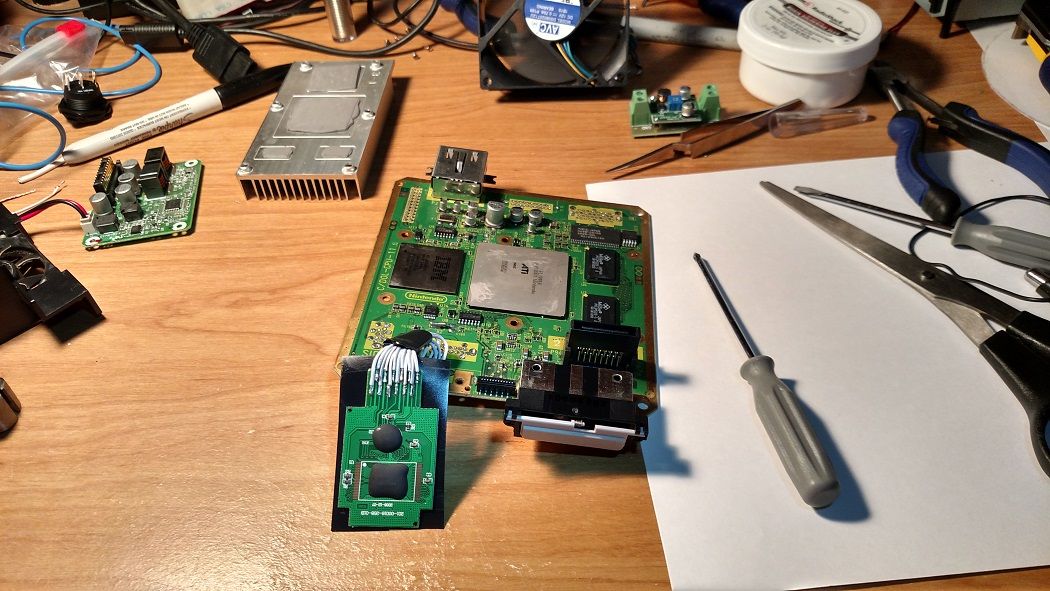
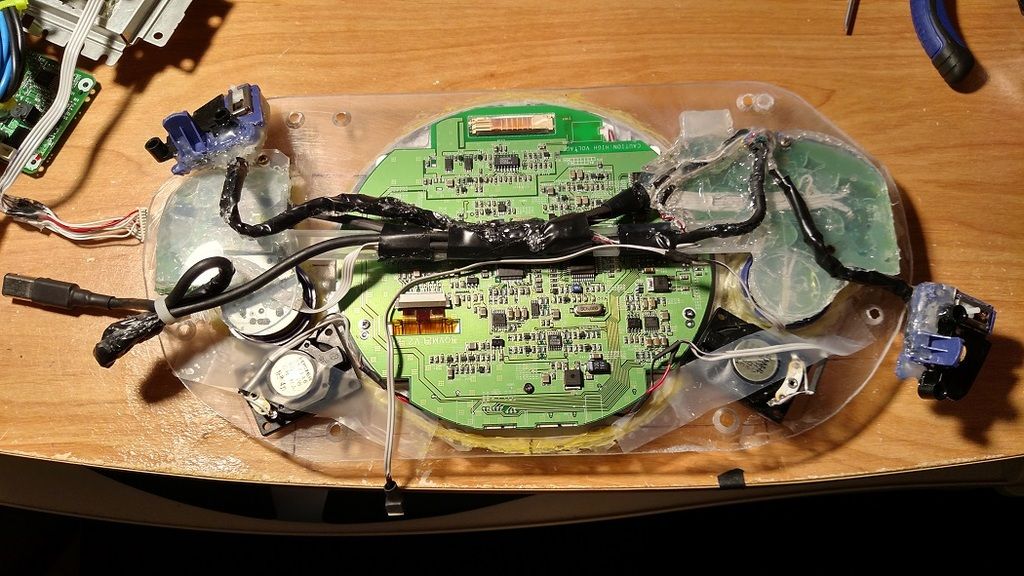
Everything taken apart, removed some useless ports, (although I'm still thinking of adding a GBA Player since I have a big case... you'll see later") ) and installing the built in memory card.
) and installing the built in memory card. 
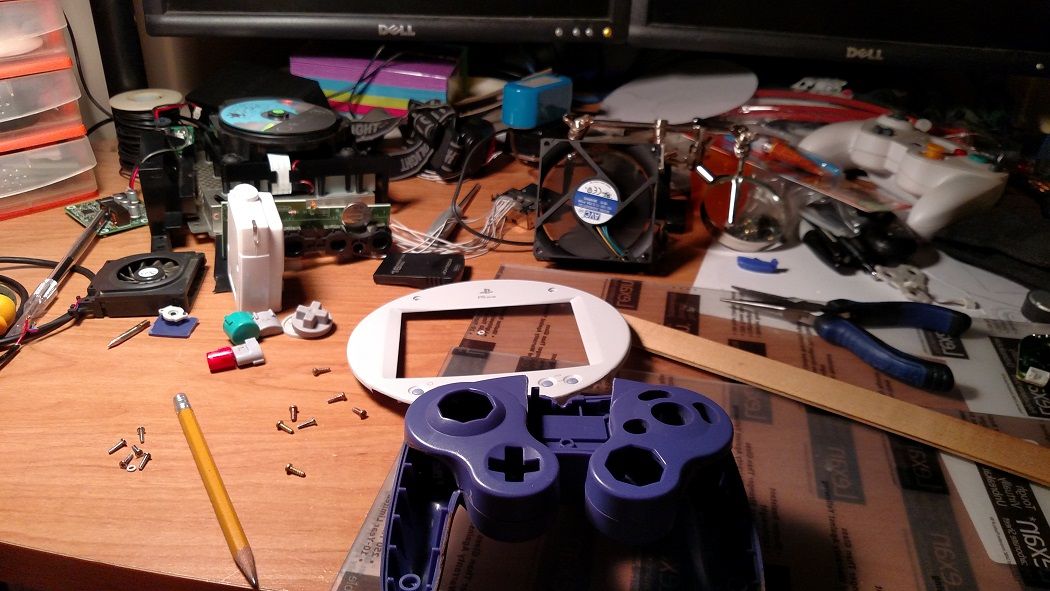
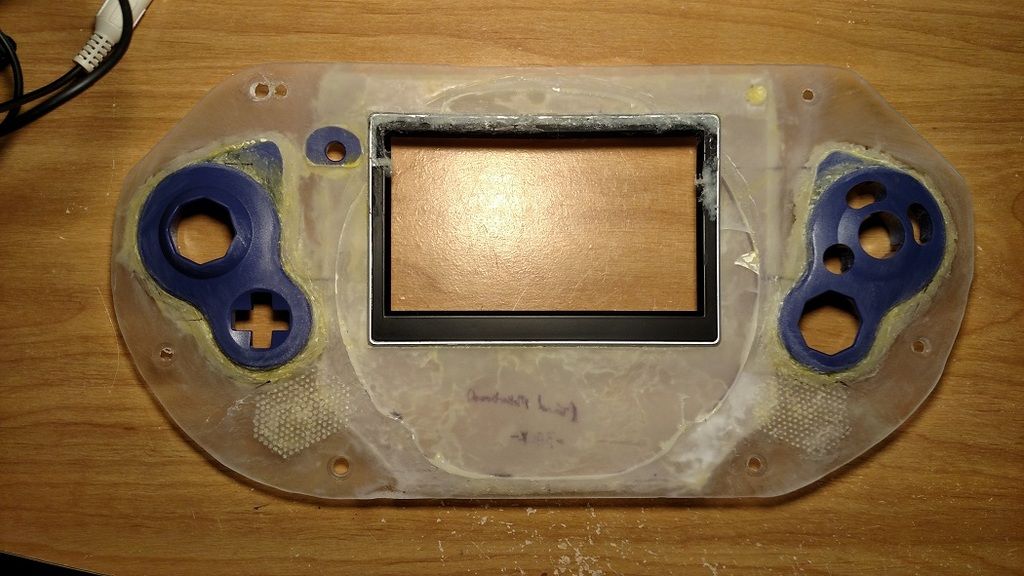
Starting to cut up the plastic parts and getting them ready to meld them together into one unit!!
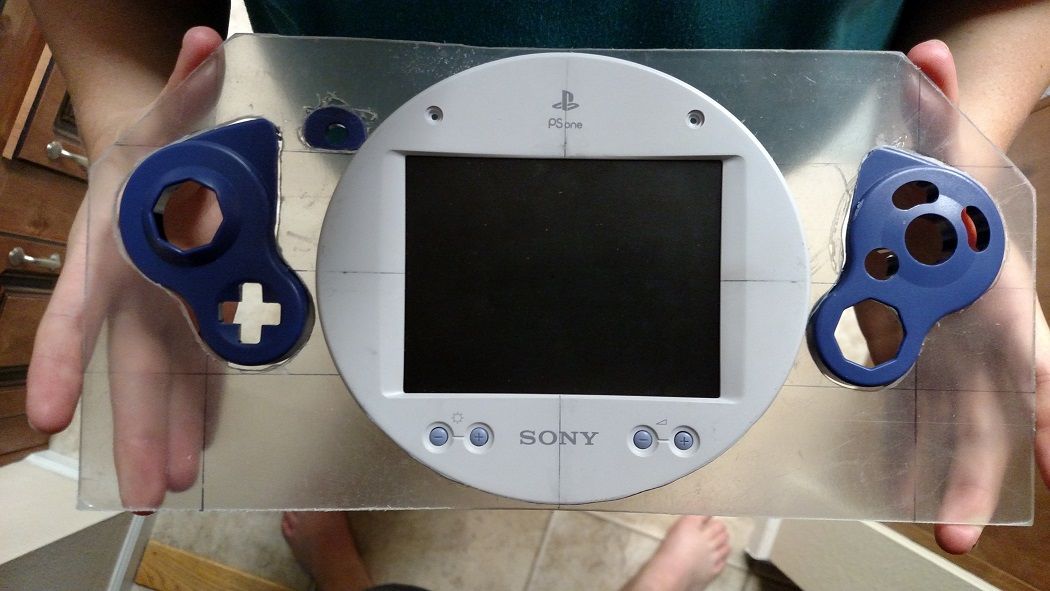
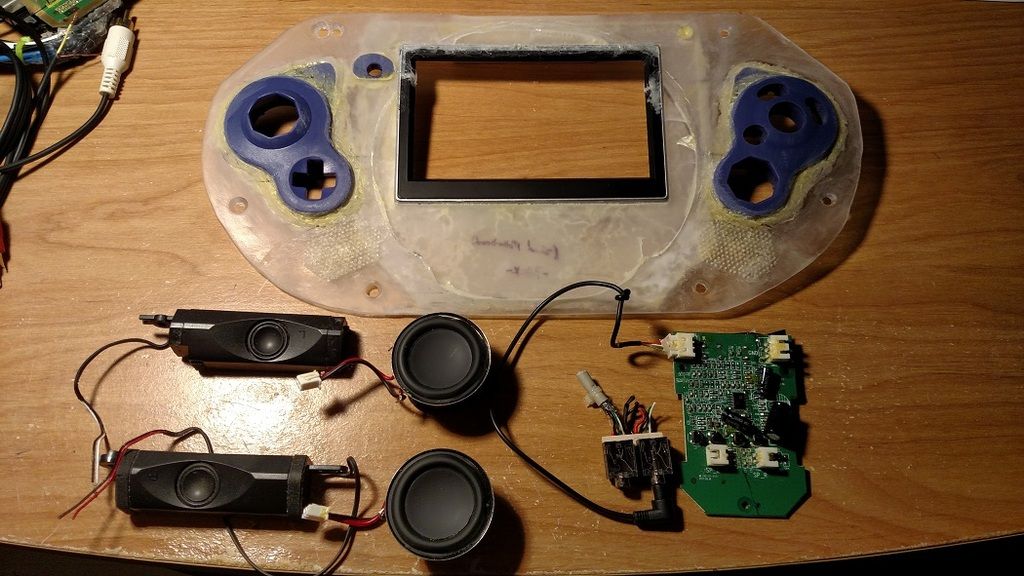
And the first look at the face of the beast!! I actually didn't mean to place the start button on the left hand side but figured I would just roll with it, (didn't realize I was cutting upside down). It's not too bad and I can always move it before paint if it gets annoying.
I have more pictures that I will post in a bit to get my post up to speed.
Since this is my first portable project I decided to keep it really simple so no trimming of the Motherboard, OEM power regulator along with finding as many inventive ways as possible to reuse OEM parts. I have a TON of physical games I want to play sitting on my entertainment center, (and due to the fact I haven’t been able to find a good place to buy a DD Replacement) I figured I would keep the original DD in the machine.
My motivation, (other than just the love of puzzles, electronics and makings things small) is the fact that as a musician with a fulltime job and a husband/father so I don’t have a lot of time to just sit and enjoy games anymore. When I am home and want to play I don’t want to be stuck in my music studio, (where I have all my gaming systems stashed) and stay locked away from my family. With a good portable/semi-portable I can at least be with my family, (while my son watches cartoons or my wife watches soaps) play a few games and any help needed from me is just a Pause Button away.
Thus the real reason why I am keeping as much OEM as possible, so it’s not so time consuming to build my first basic portable/semi-portable. I already have plans and some parts for a second GCp, something to take more time/liberties with, (Mother Board trimming, custom power regulators, possible DD replacement if I can find one, etc.) and make it smaller. After that the sky is the limit!!
Sorry, I’ve went on a lot longer that I intended but I do want to say thanks to everyone here on the BitBuilt forums along with the all the great posts from GC-Forever, ModRetro, BenHeck and all the other great forums out there, (along with Google for getting me to the right places, lol).
It's not going to be the most beautiful thing but so far I haven't fried anything so that's a plus. Any suggestions anyone has feel free to let me know!!
__________________________________________
And so it Starts...
So I guess since I started this back on June 15th I will have to post quite a few "along the way" pictures... hopefully that's ok to do. I can say that I've been having a blast doing this project and so far I totally agree with Ashen on one point... case work is a pain, lol!!
And so it starts... getting all the pieces in place. I know a lot of you don't care for the PSOne Screen and after getting some nicer one's off eBay for other projects I can see why. Too bad I didn't find that out until later, lol!! I plan on making a much smaller GameCube Proto, (Maybe a "ProtoCube") using some nicer parts though so I figured this would be a good starting point.

Everything taken apart, removed some useless ports, (although I'm still thinking of adding a GBA Player since I have a big case... you'll see later
) and installing the built in memory card. 
Starting to cut up the plastic parts and getting them ready to meld them together into one unit!!

And the first look at the face of the beast!! I actually didn't mean to place the start button on the left hand side but figured I would just roll with it, (didn't realize I was cutting upside down). It's not too bad and I can always move it before paint if it gets annoying.

I have more pictures that I will post in a bit to get my post up to speed.


 .
.