
- Joined
- Jun 28, 2017
- Messages
- 70
- Likes
- 114
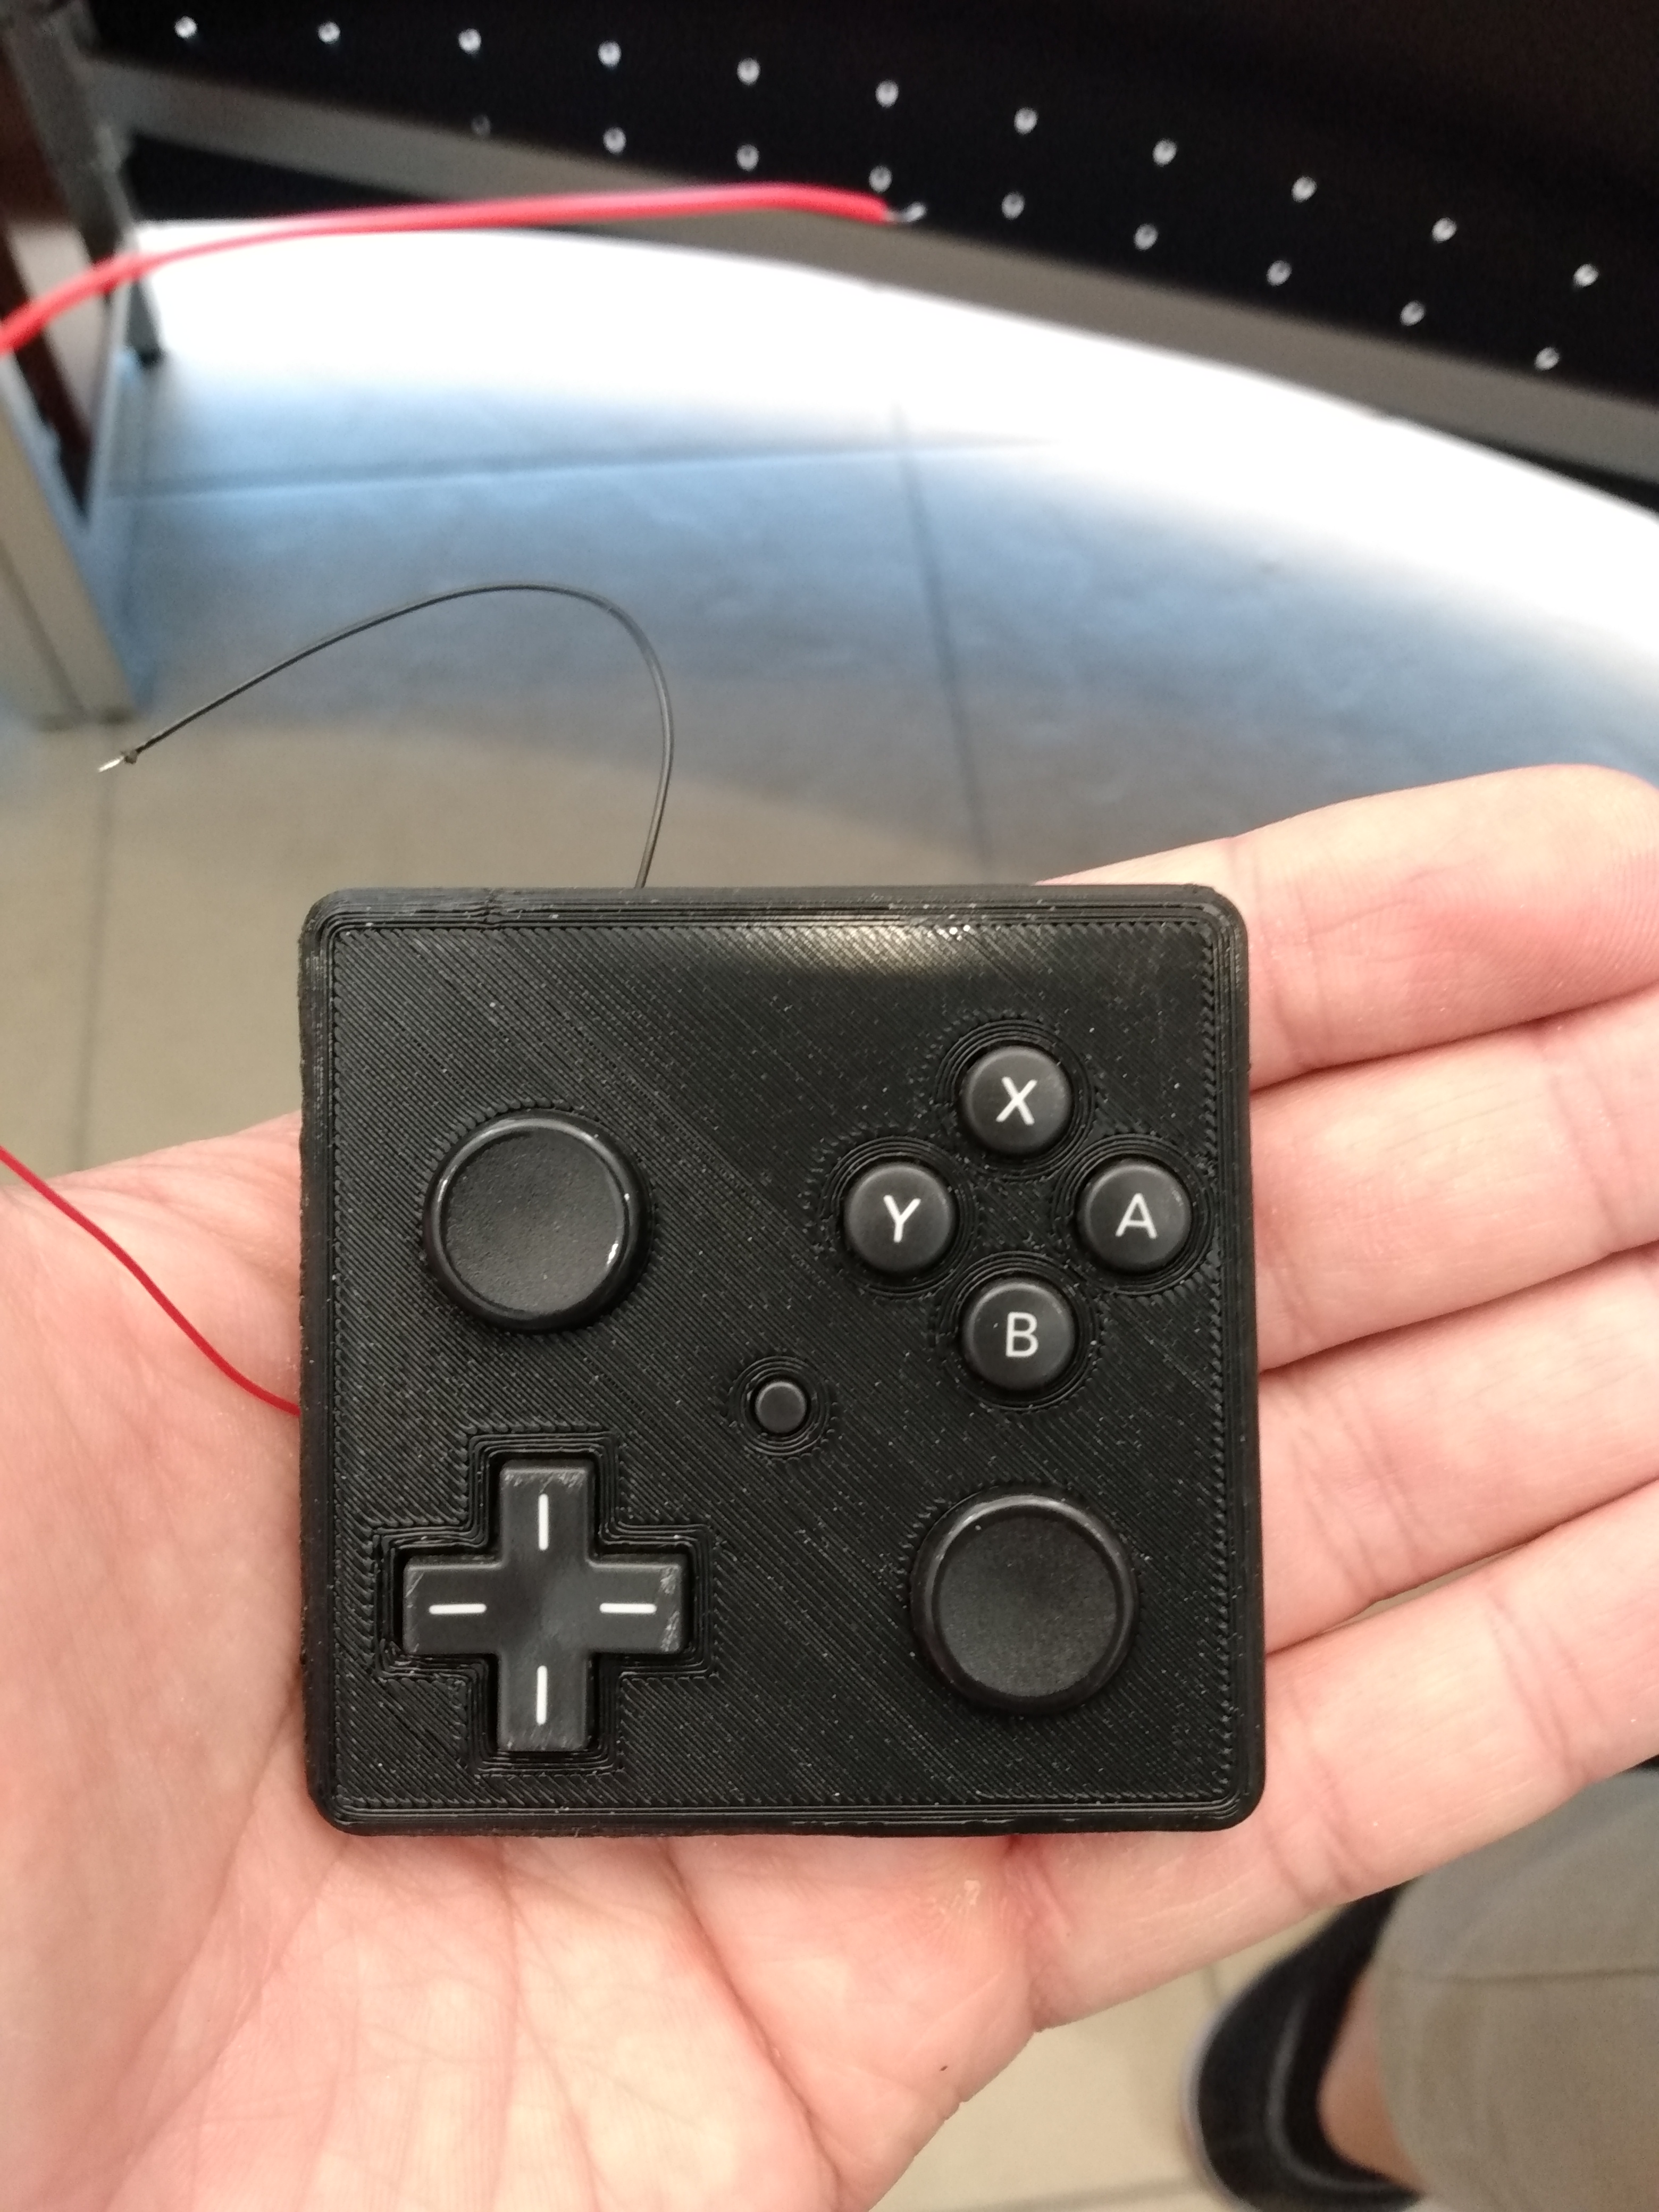
So I am finally putting together my build thread for my mini GameCube controller, which I am dubbing the "GC-" for its diminutive size. It wouldn't of been possible without the pizza magic that is GC+, so I thought it would be a fitting name.
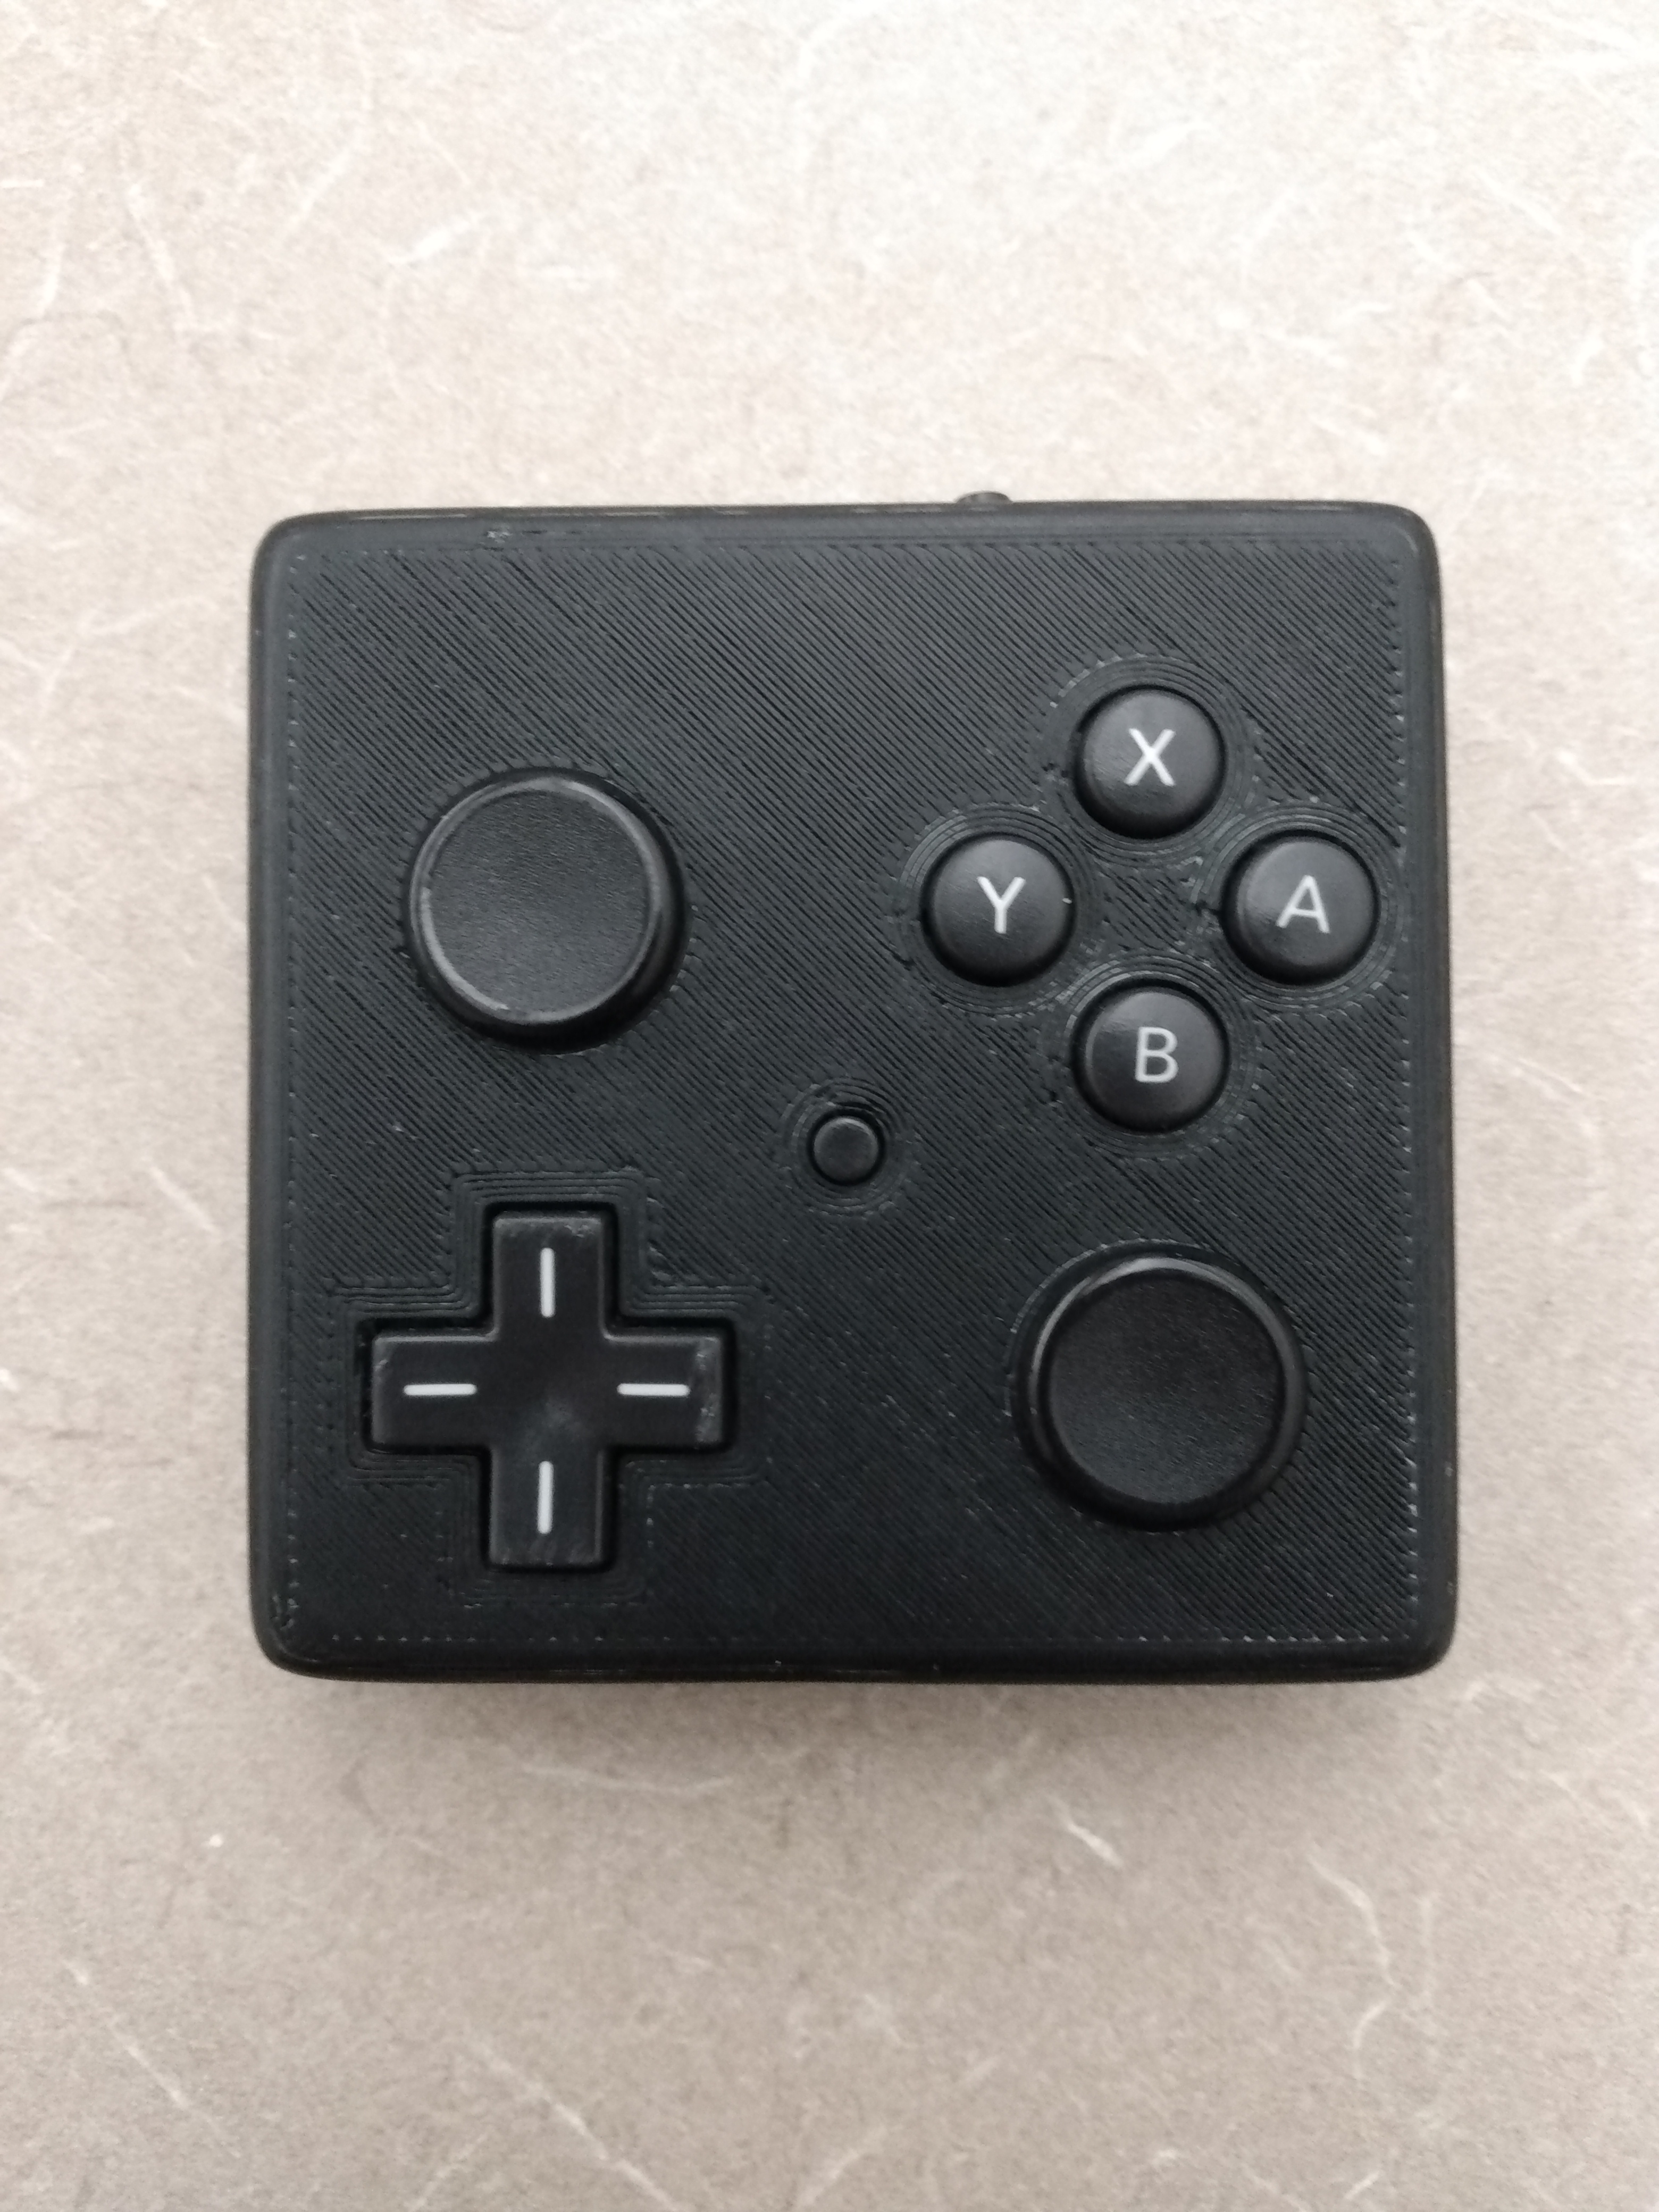
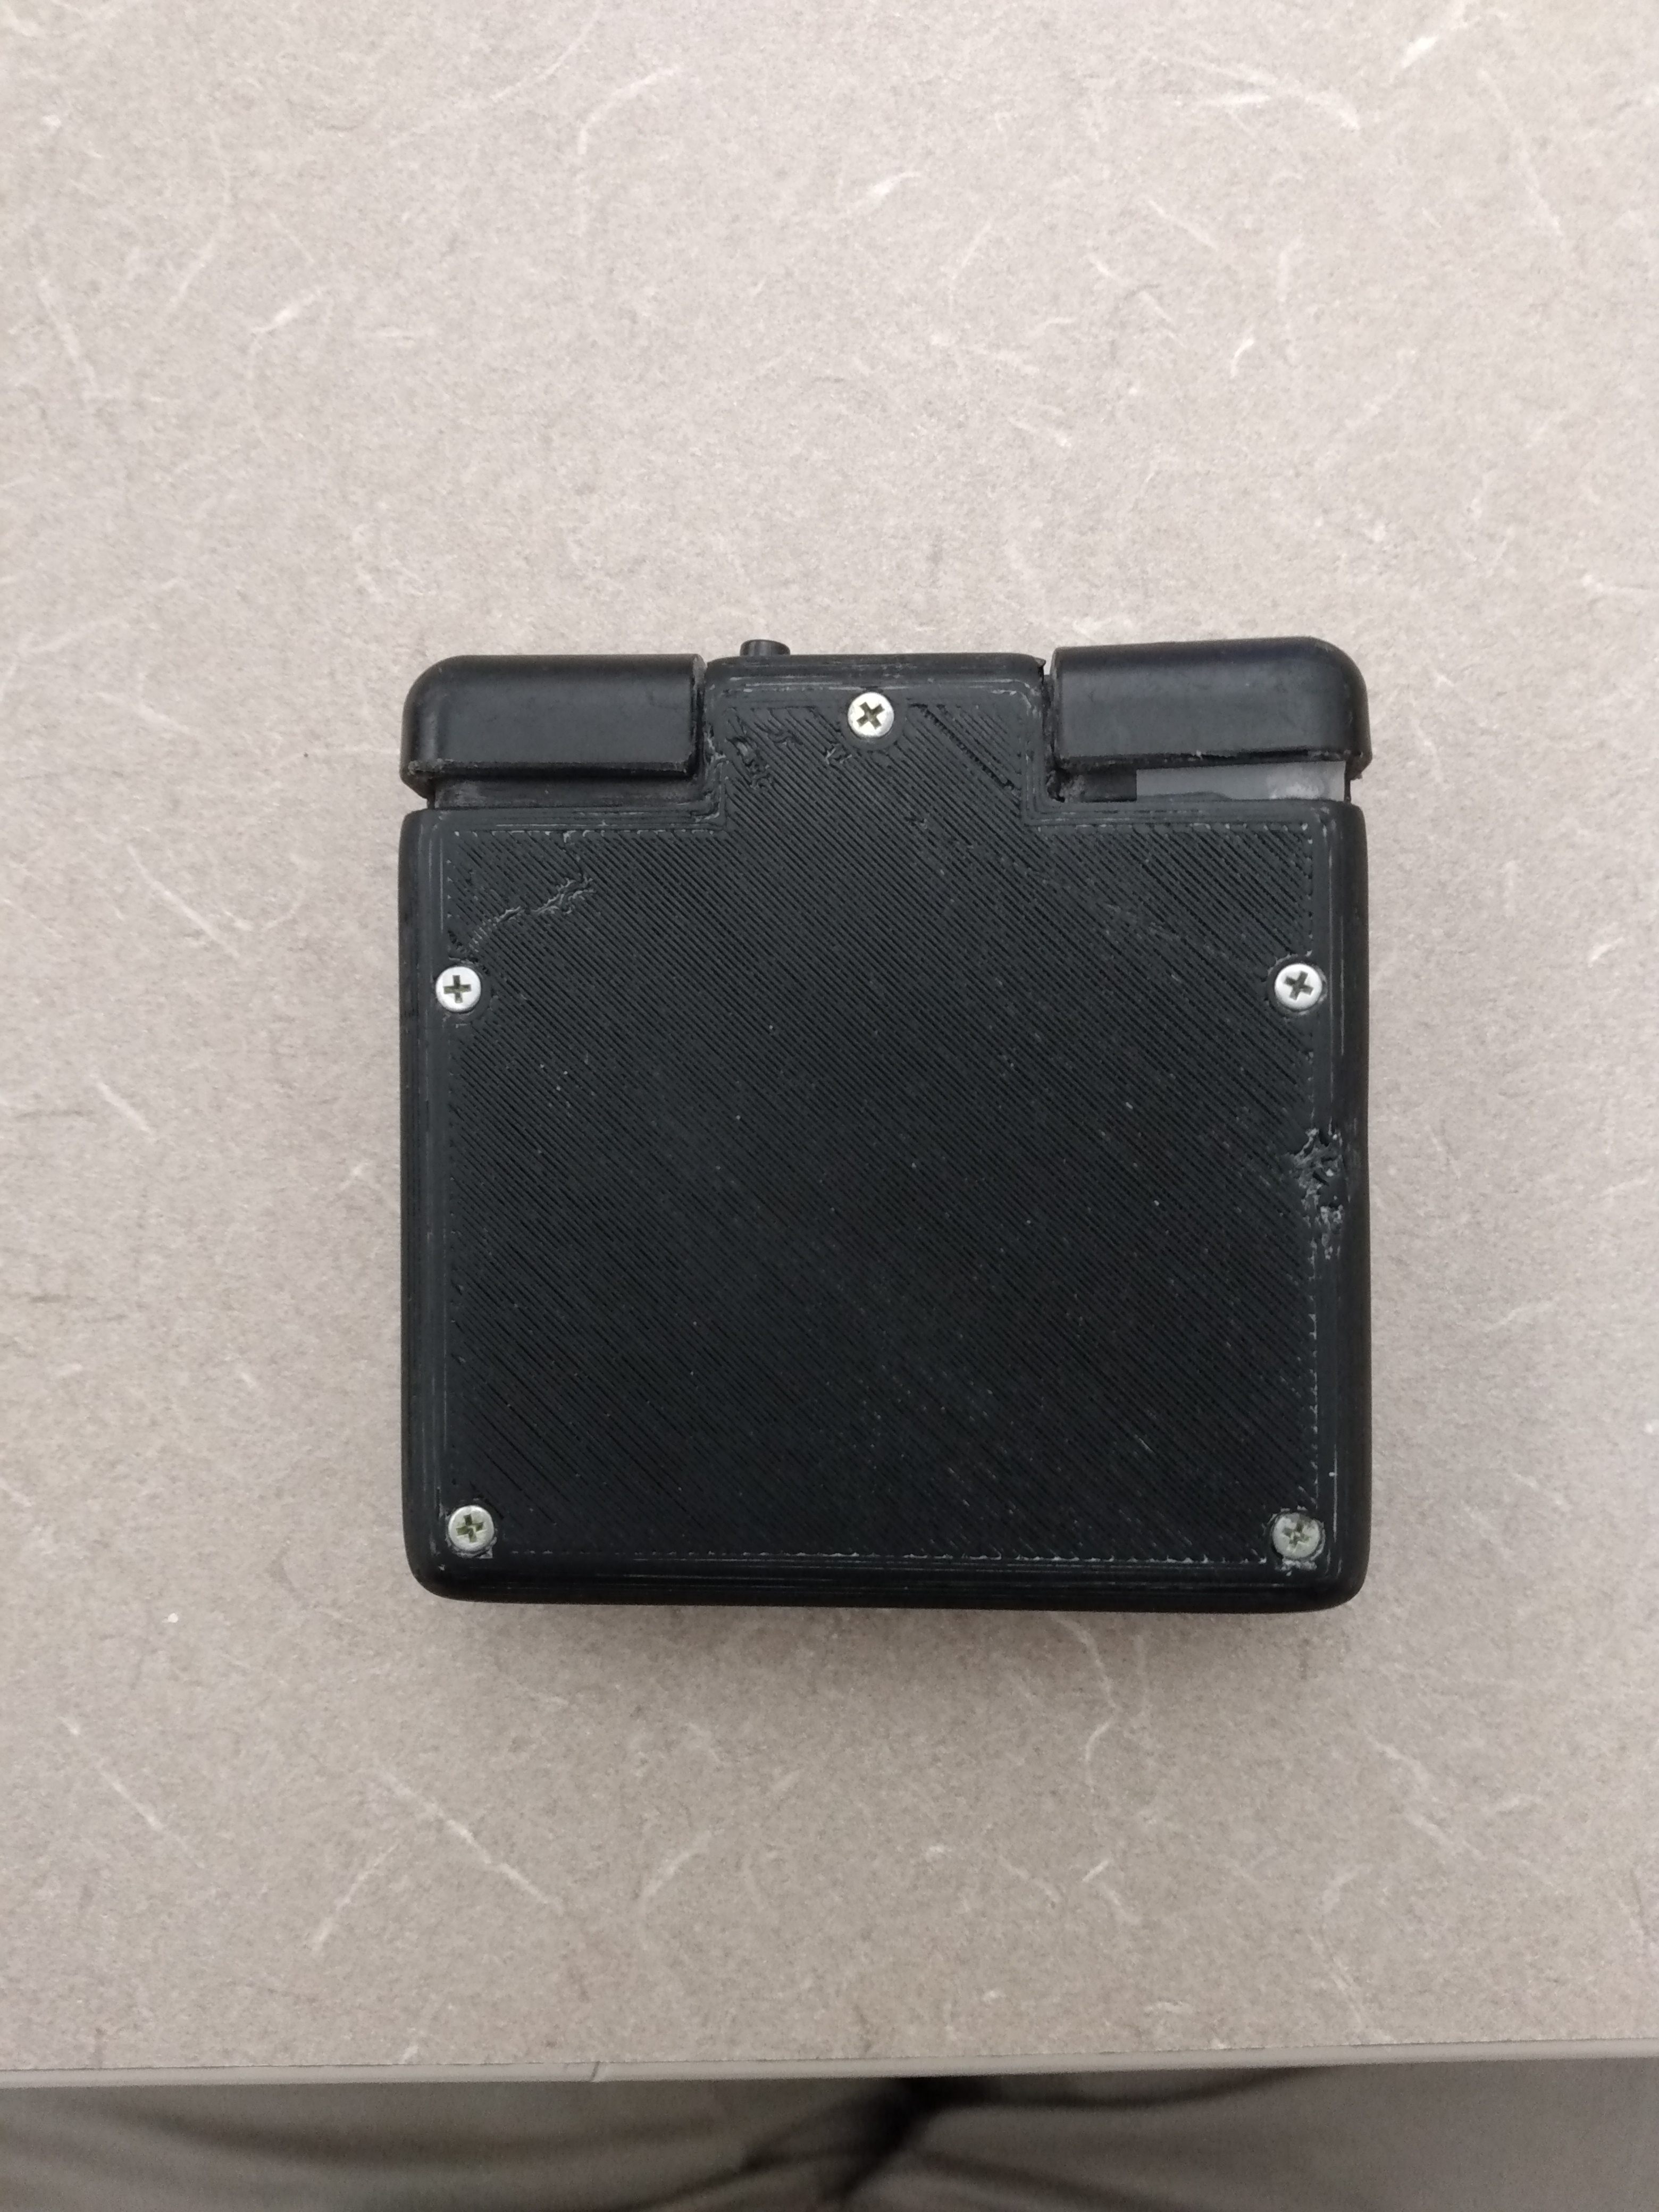
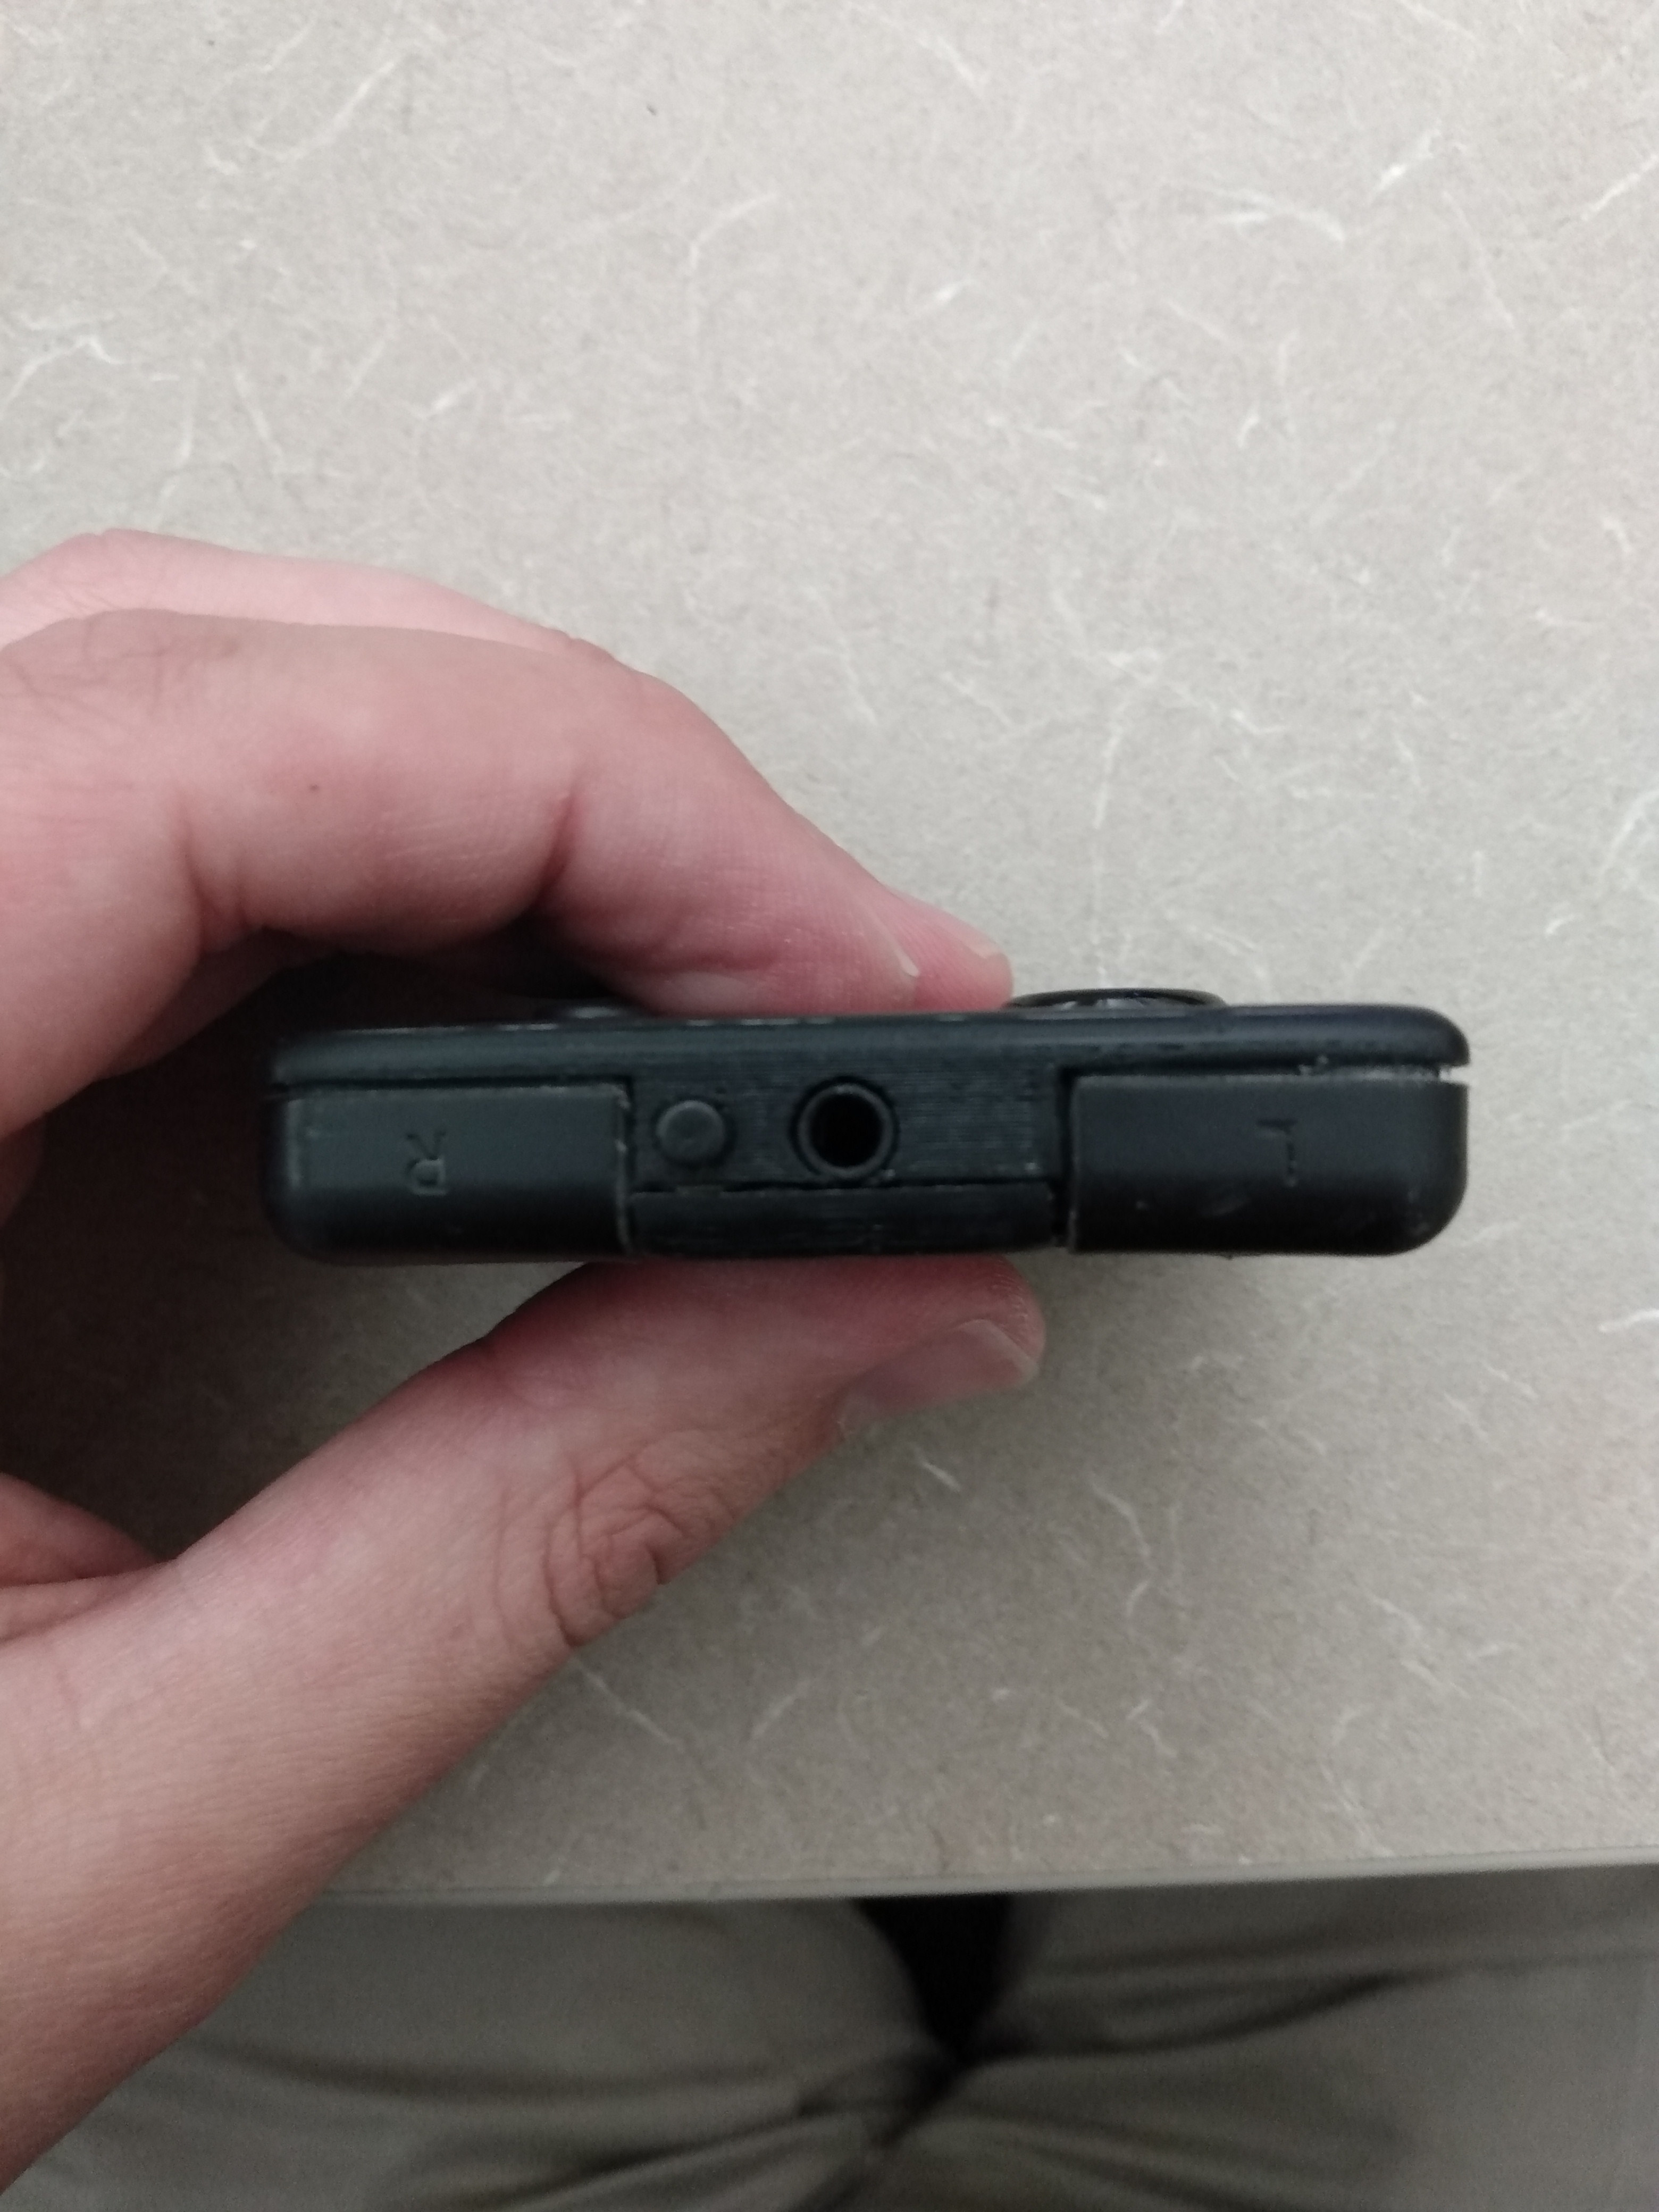
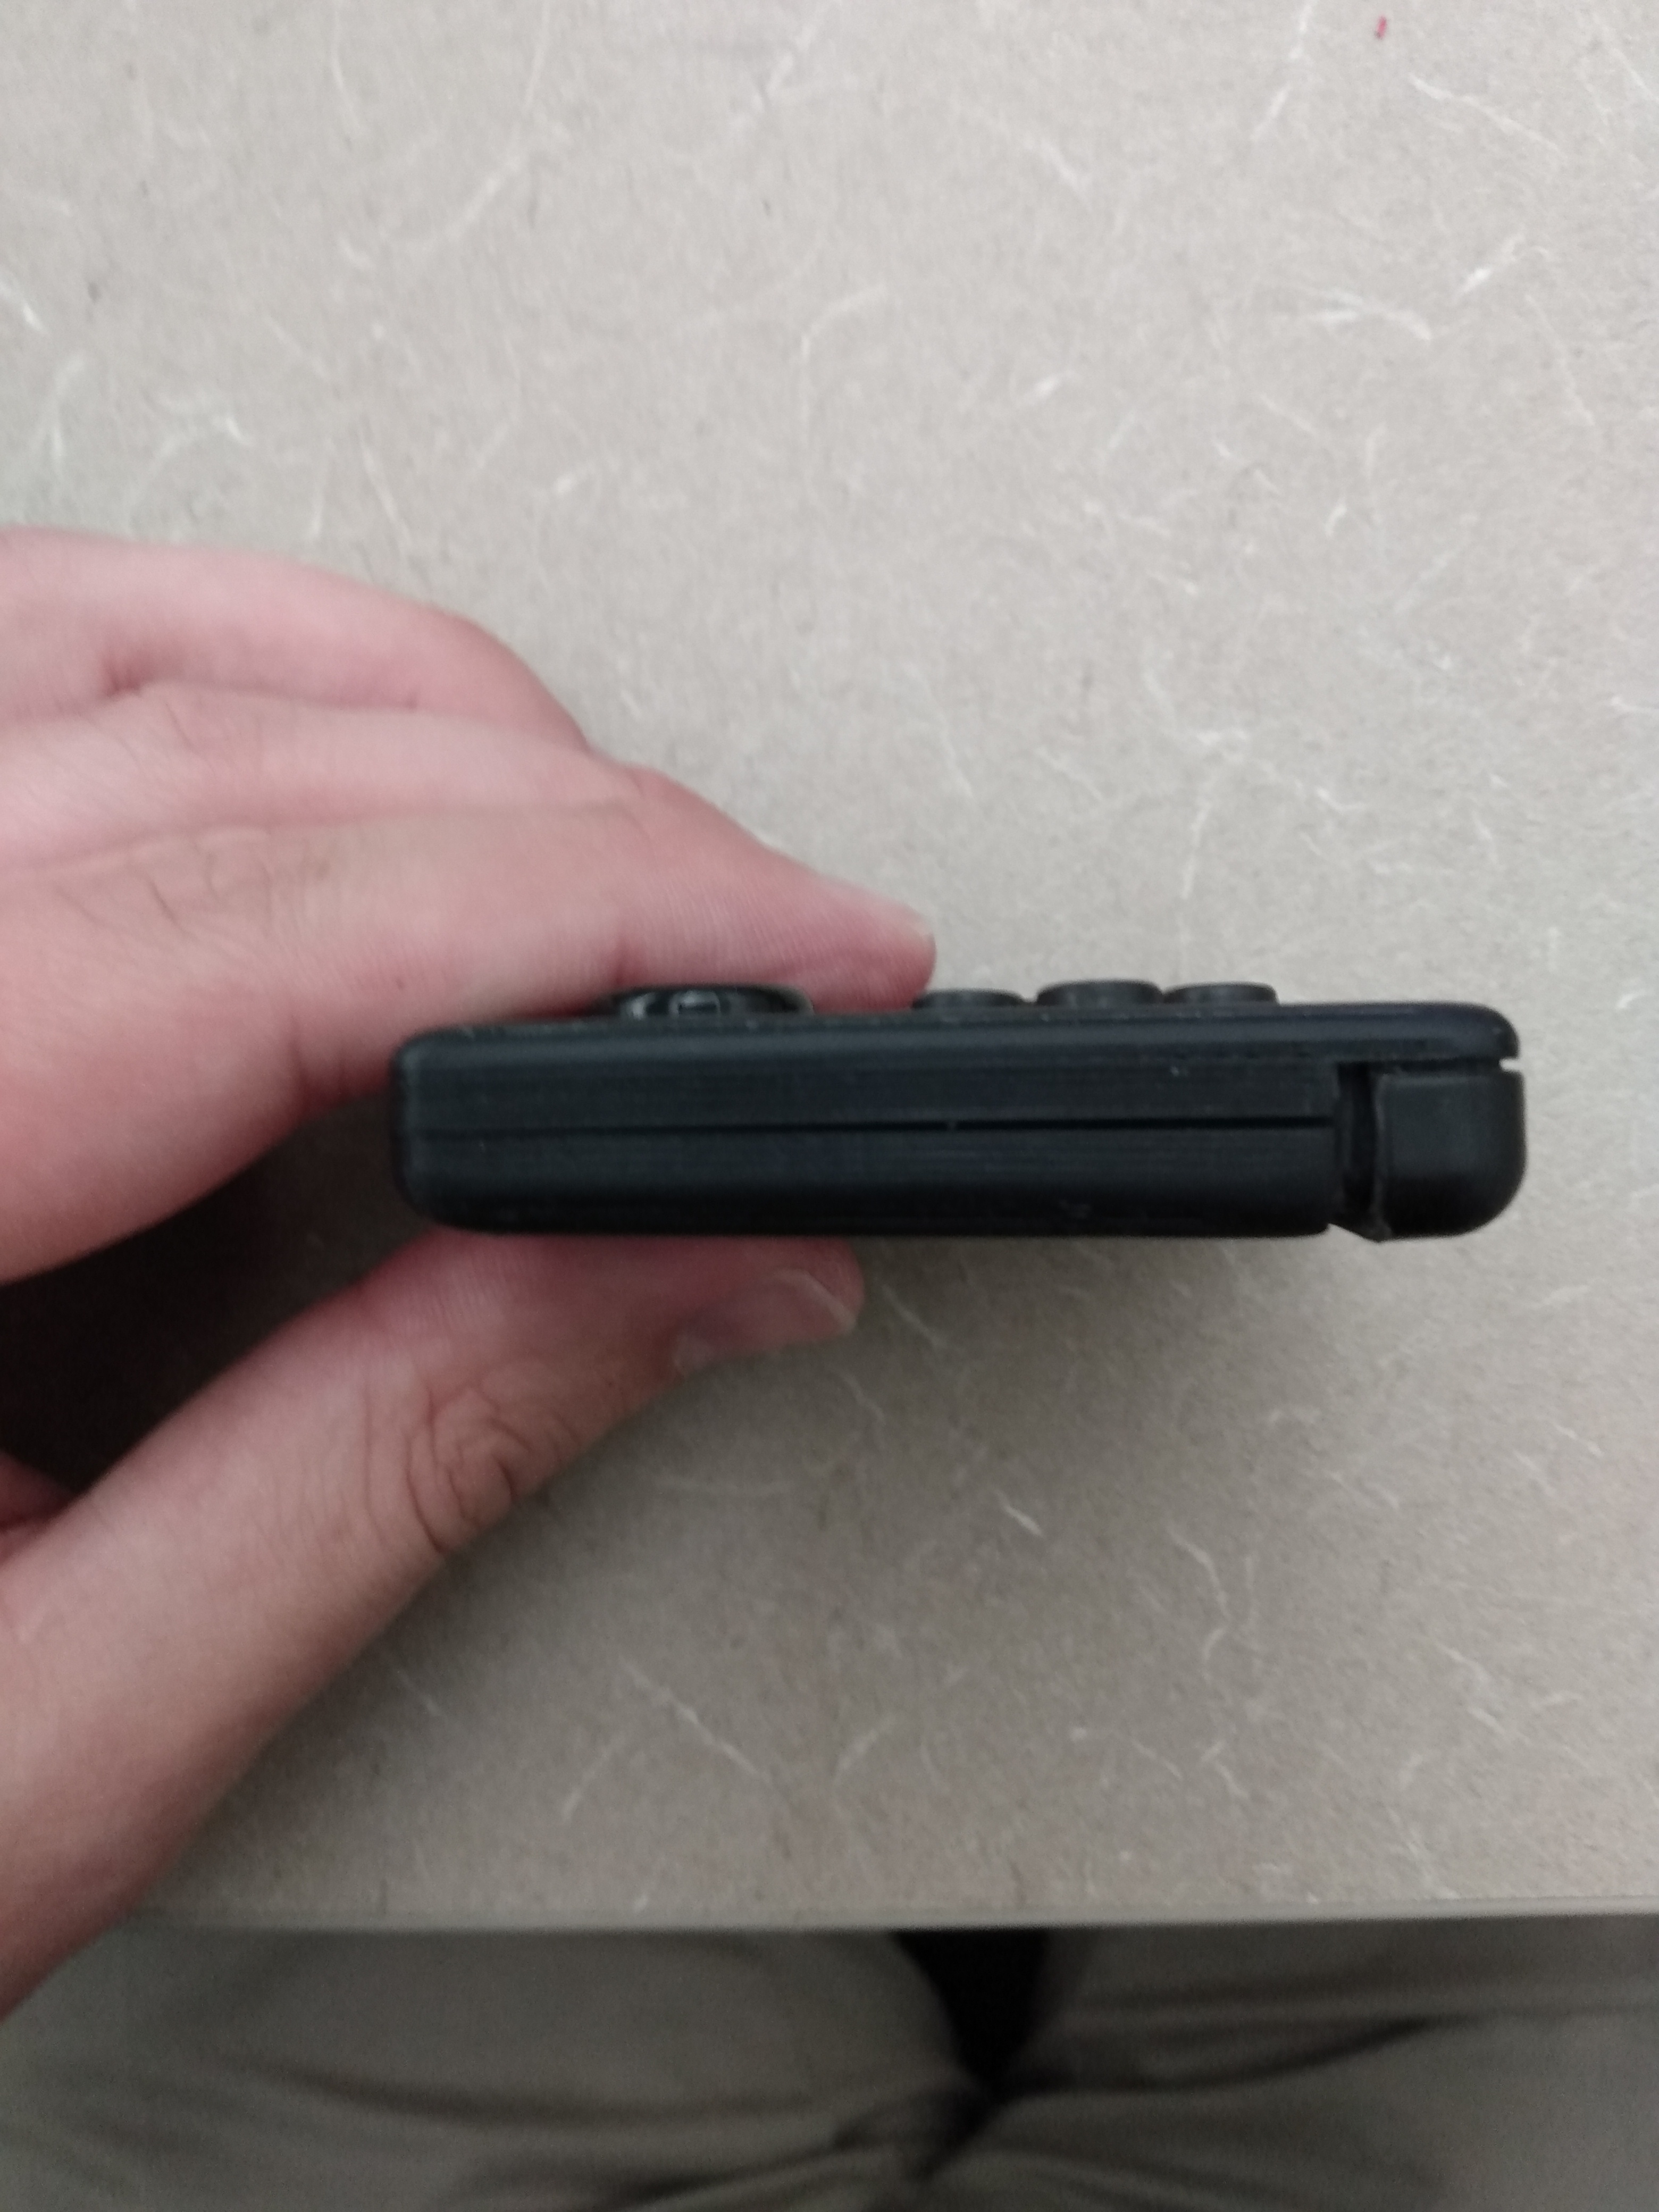
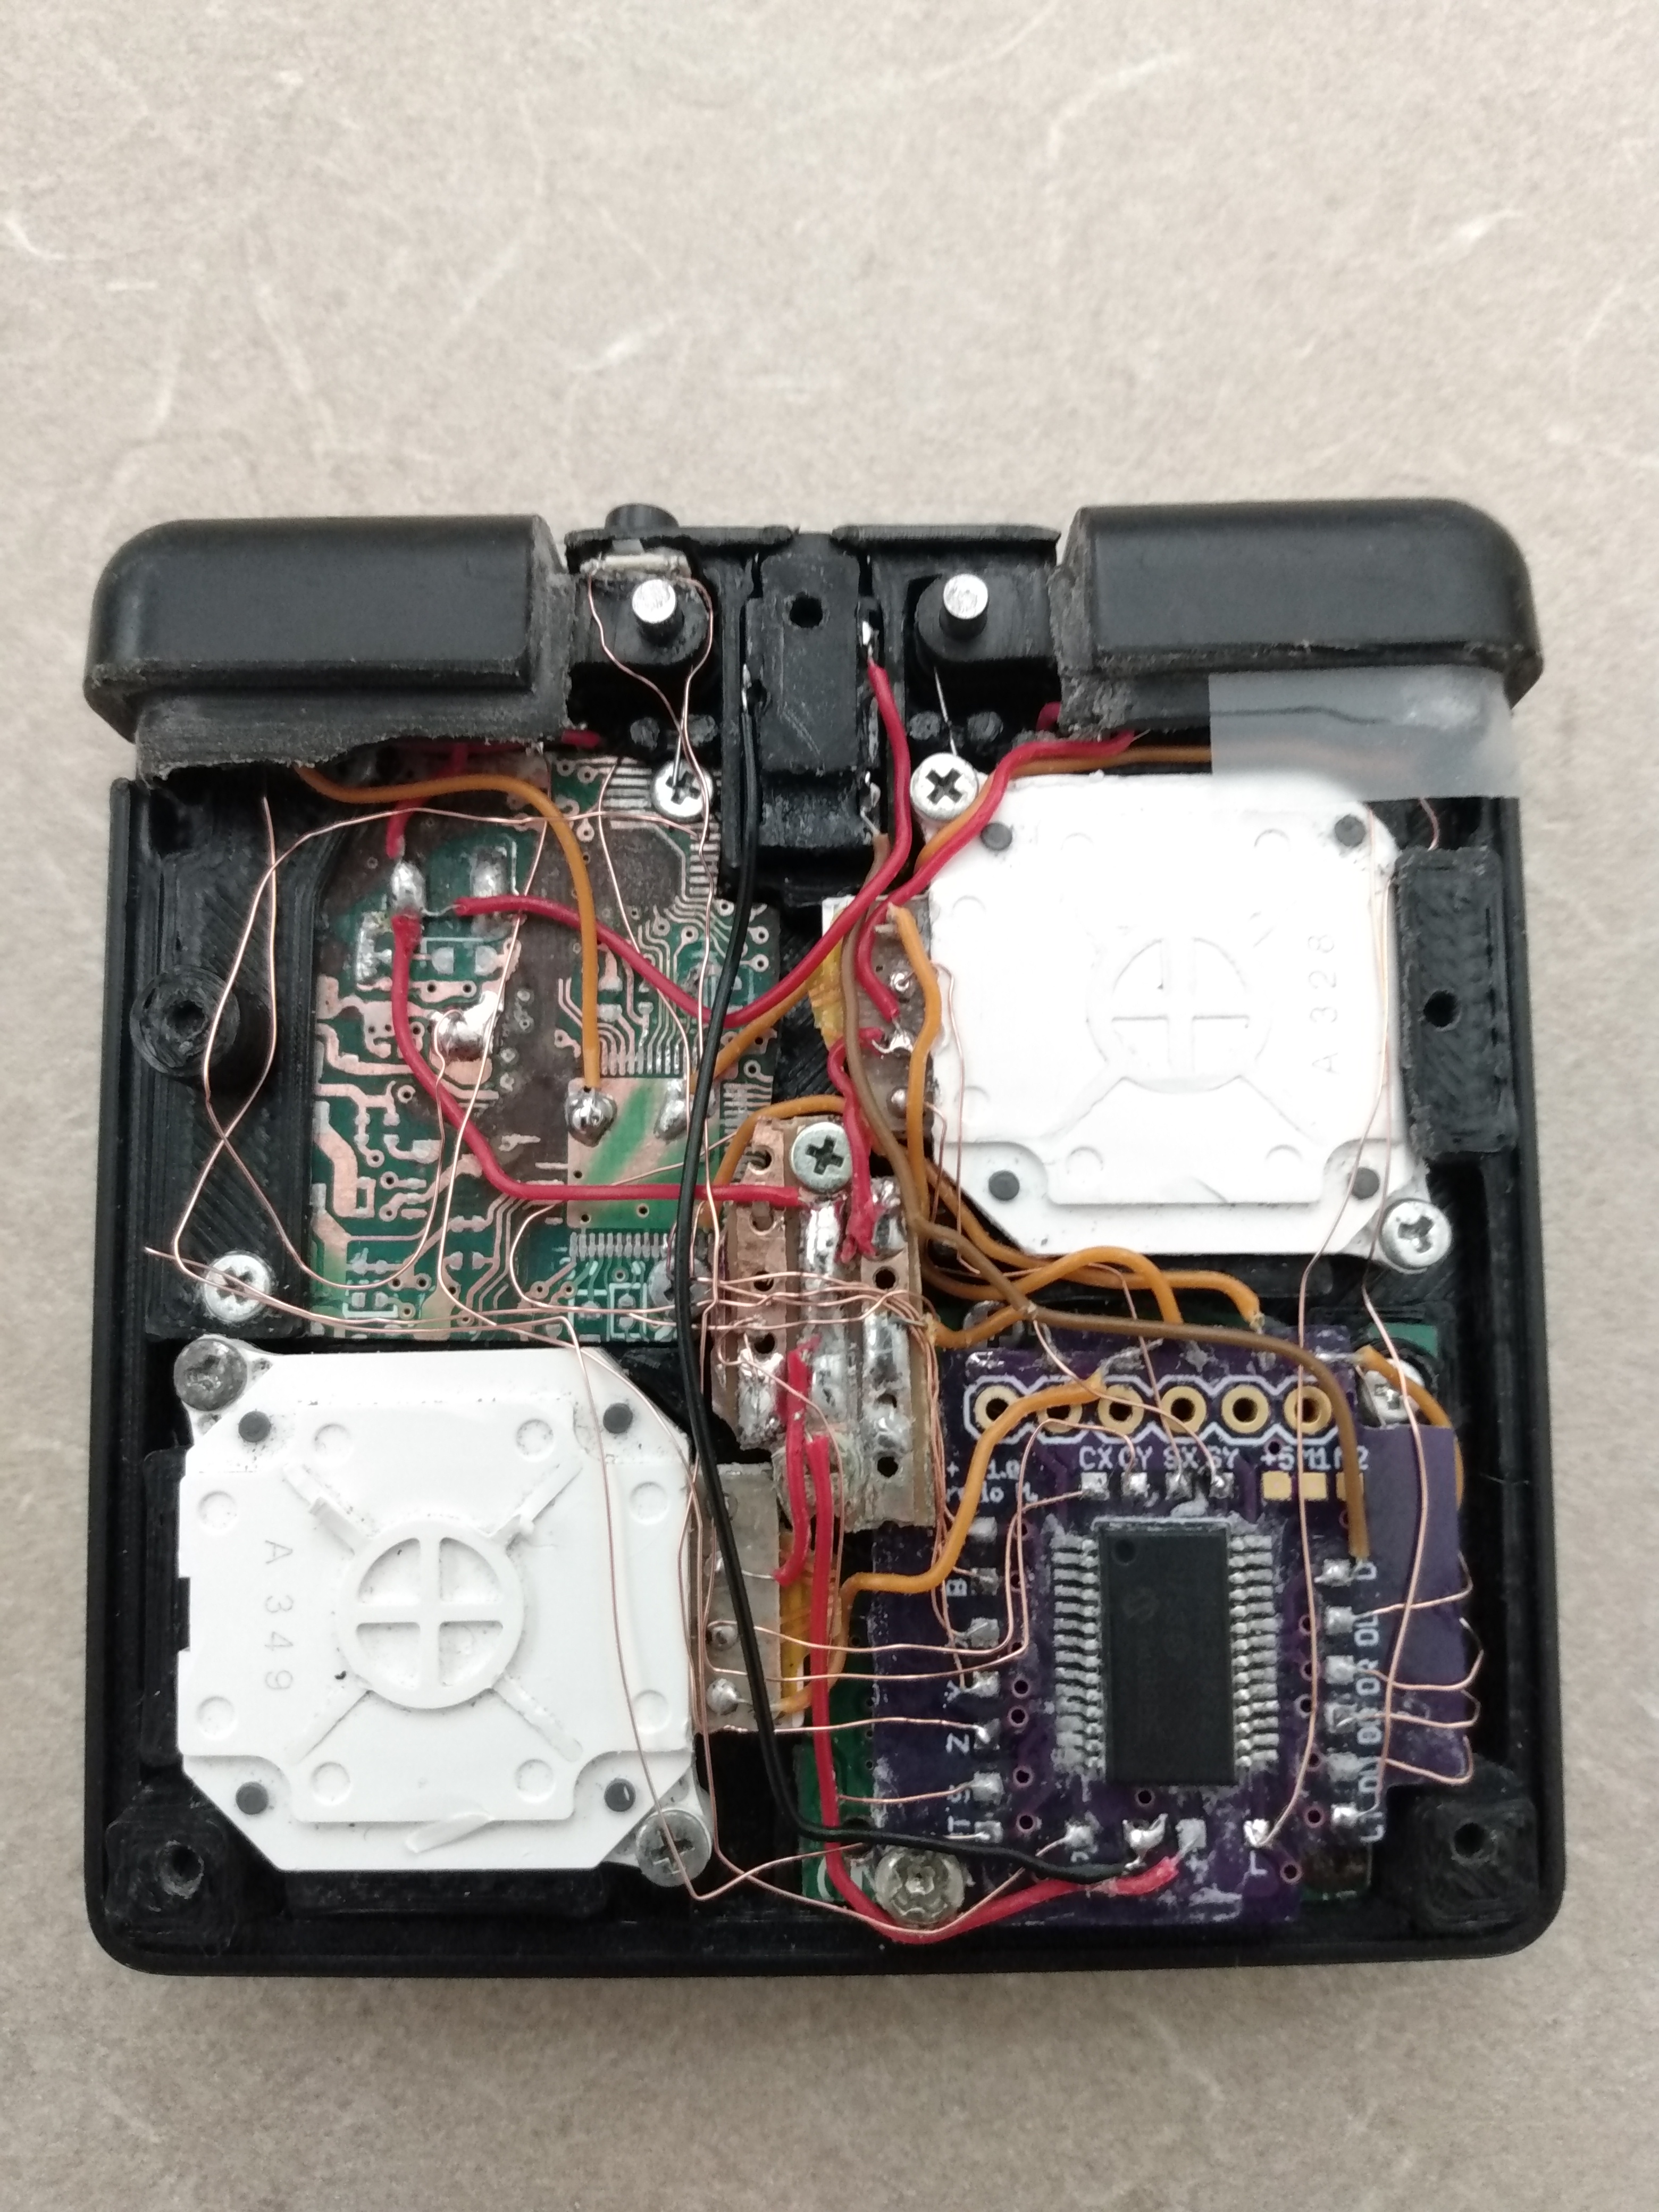
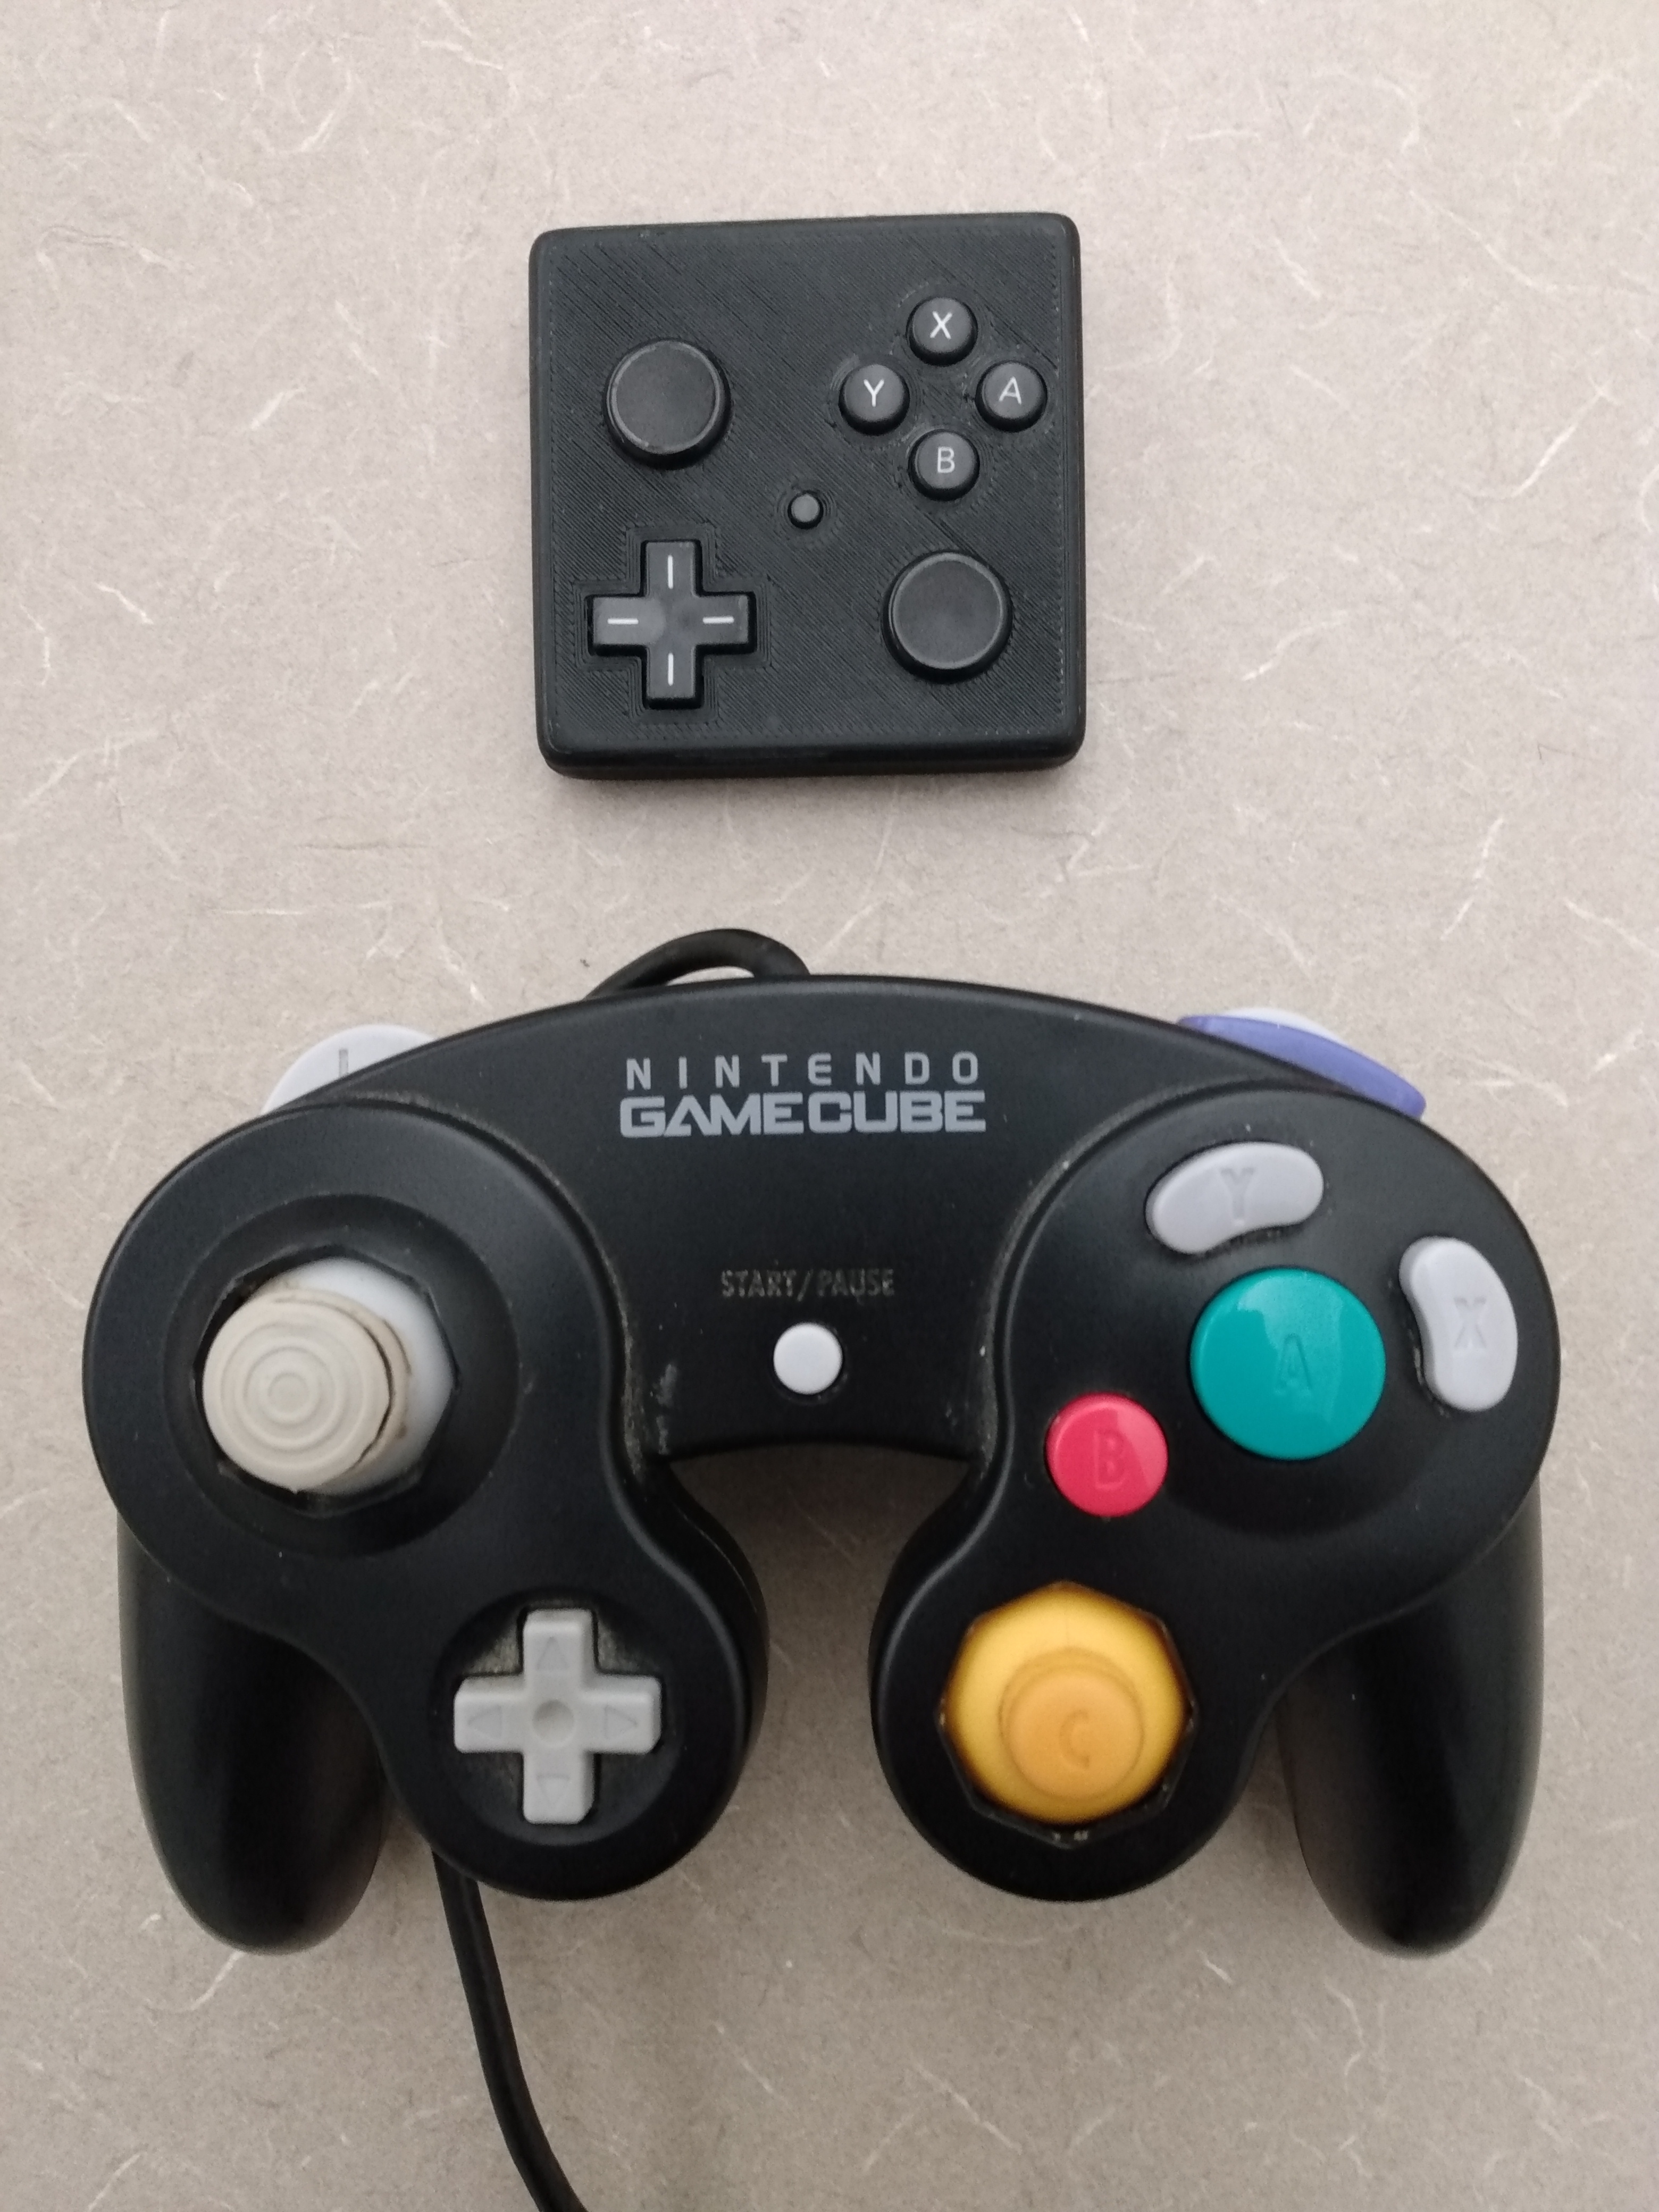
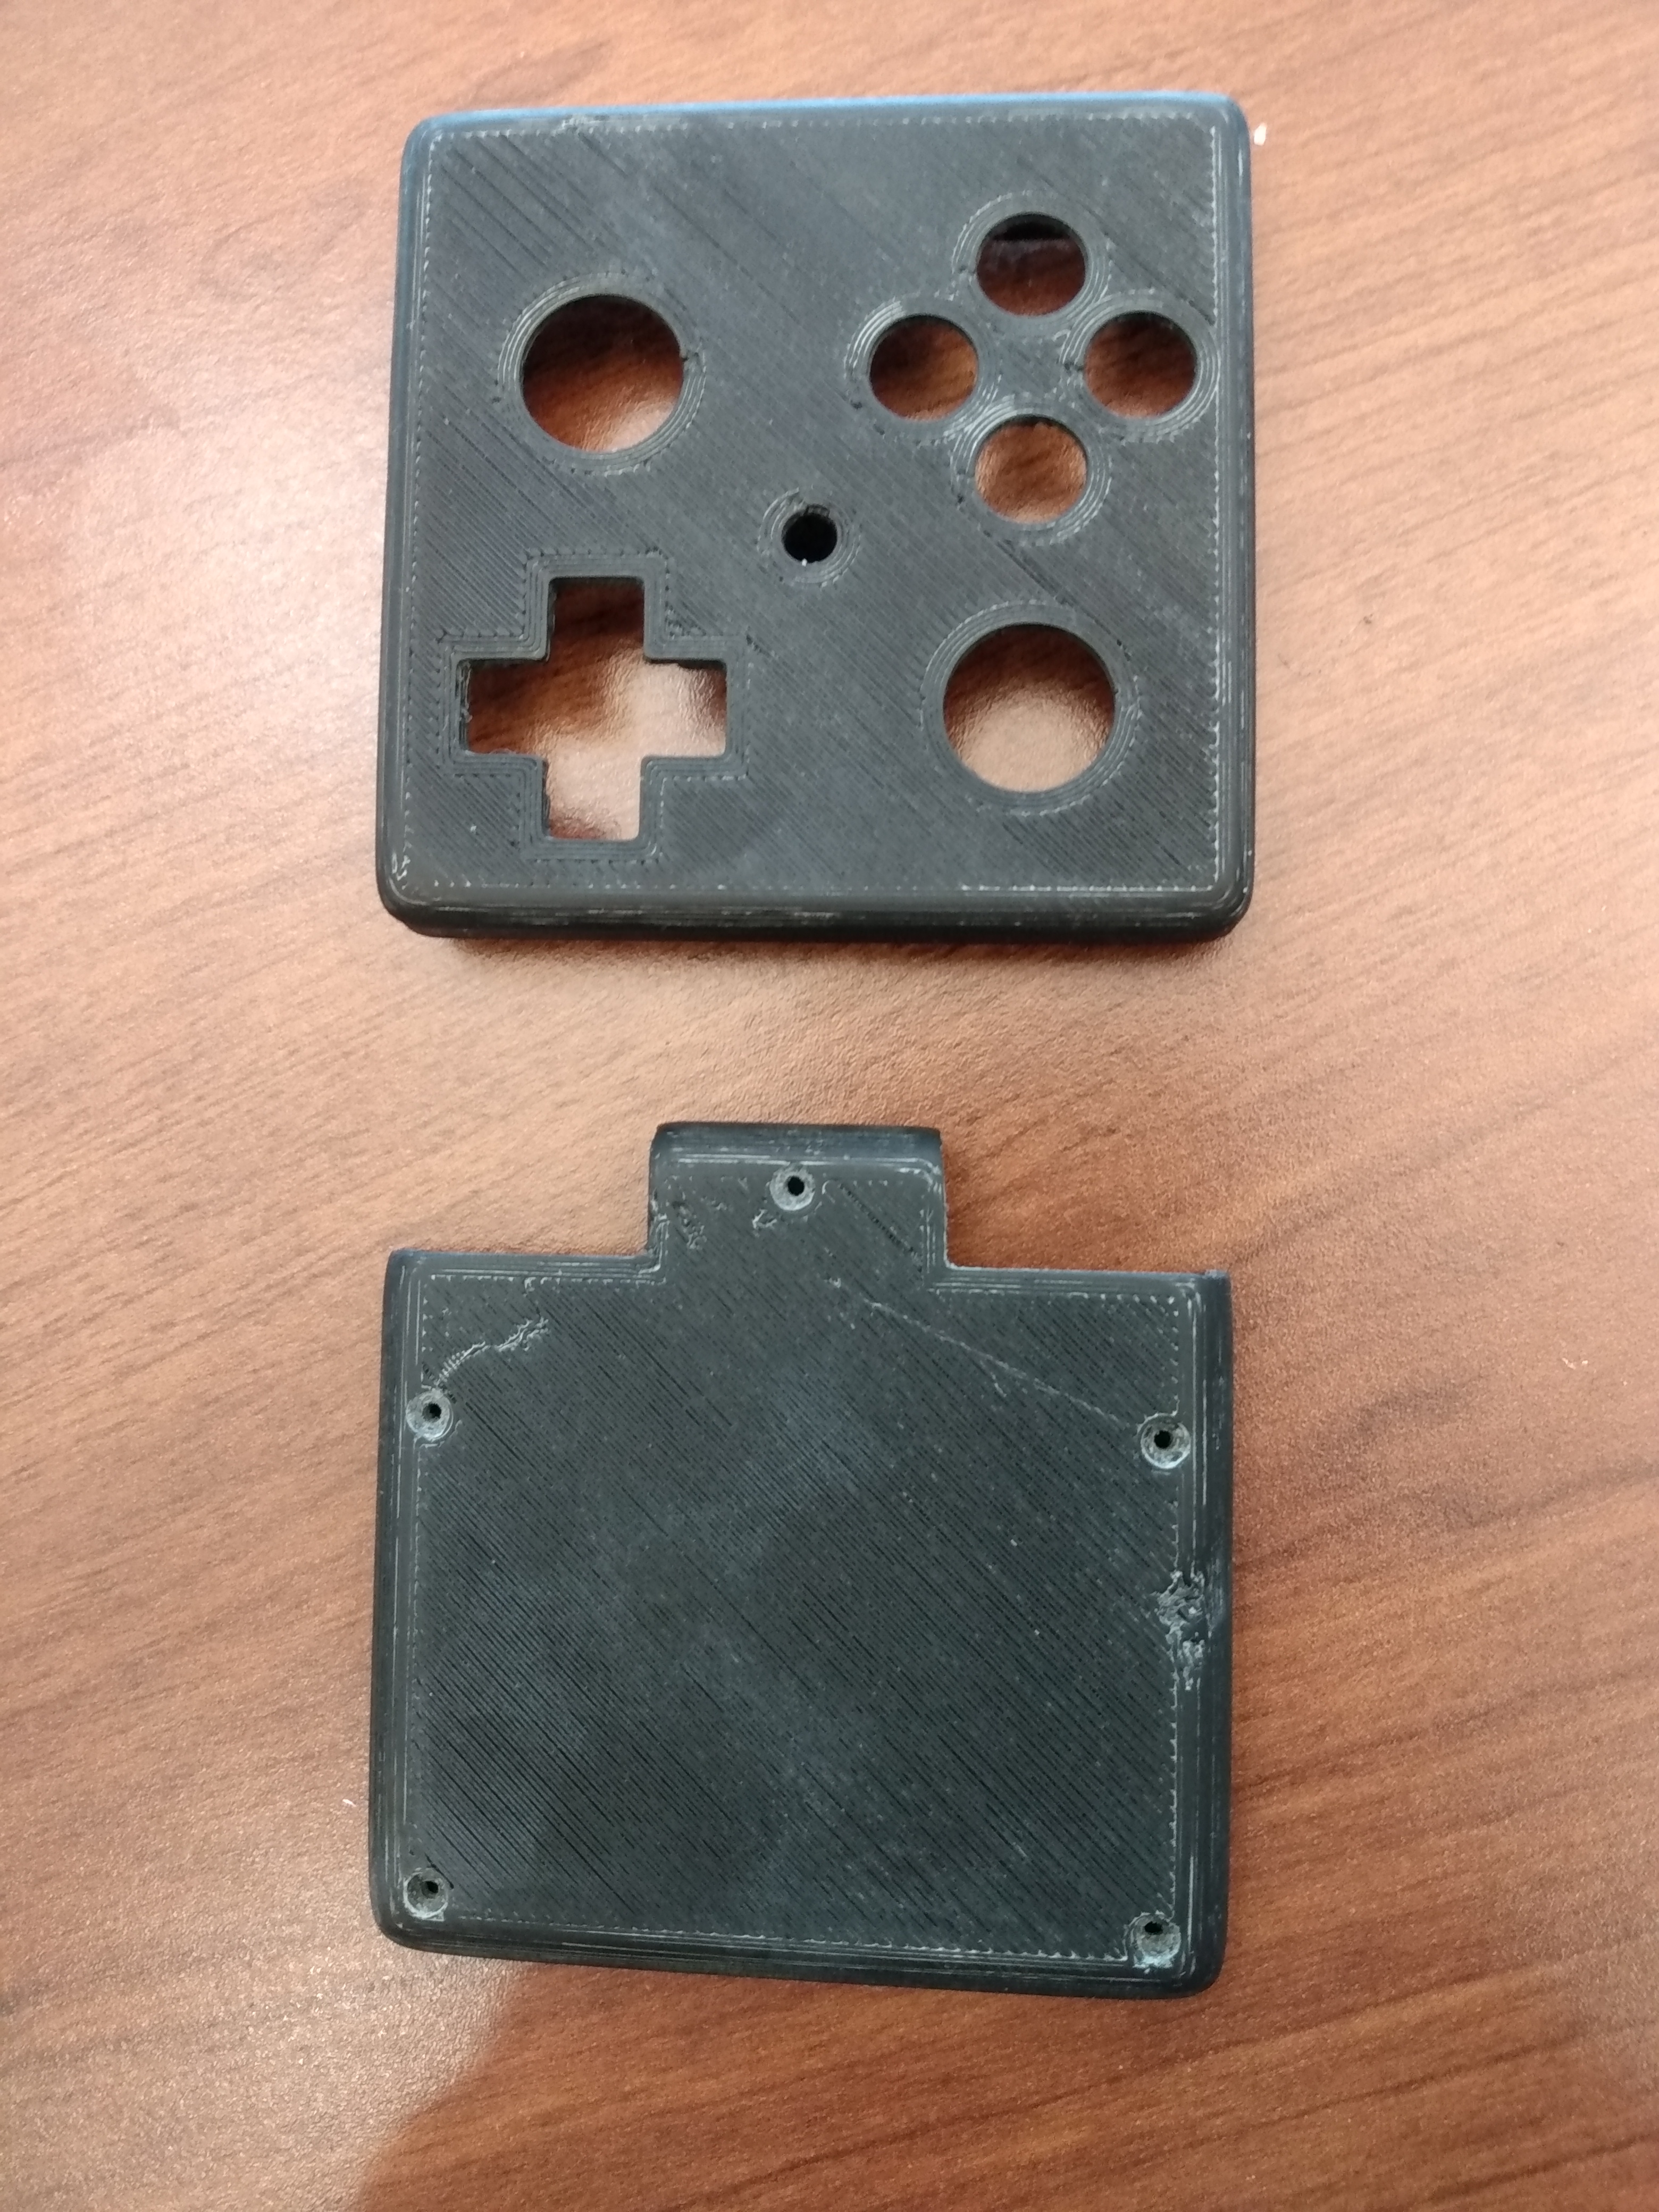
First here are the finished pics, a comparison to a regular gc controller, and the internals. I tried to get some of the Gman right angles, but it still ended up pretty spaghetti.
First I want to tell you guys about my motivation for completing this project. My first portabilizing endeavor was making a wii laptop (some pics later in the thread) that I could play wherever I wanted. I found however that even though I loved the feel of my OEM controller, it was super bulky, and I often would end up playing fire emblem on my phone instead of packing all the stuff that i needed to play the wii laptop. My original plan was to somehow embed the controller somewhere onto the laptop so it could be one unit, and then i could remove it when I was ready to play but that became too complex too fast. I then decided to try and just make the smallest gamecube controller I could that still had a form factor that was comfortable. Eventually I will make a case (woodworking is one of my other hobbies) to hold the laptop, power supply, GC-, and the cable to connect the controller to the laptop so having a tiny controller will make the size of the carrying case a lot more reasonable.
The Gameboy SP was my childhood gameboy, so I thought it would be the perfect form factor for a mini controller. So with this general idea in mind I created the below goals that I wanted to meet with my controller:
Trying to incorporate the original triggers was probably the biggest headache of this whole process, since it required pretty tight tolerances to have it feel good. I ended up printing out lots of prototypes on a monoprice mini select v2, I will spare you those pictures. I also found out that their was a lot of friction happening with the triggers rubbing on the PLA, causing a sticking or binding on the left trigger. i guess the normal ABS of the original DS lite case was a lot more slick and conducive for the style of triggers. I need to test if some type of grease/lubricant might help that out.
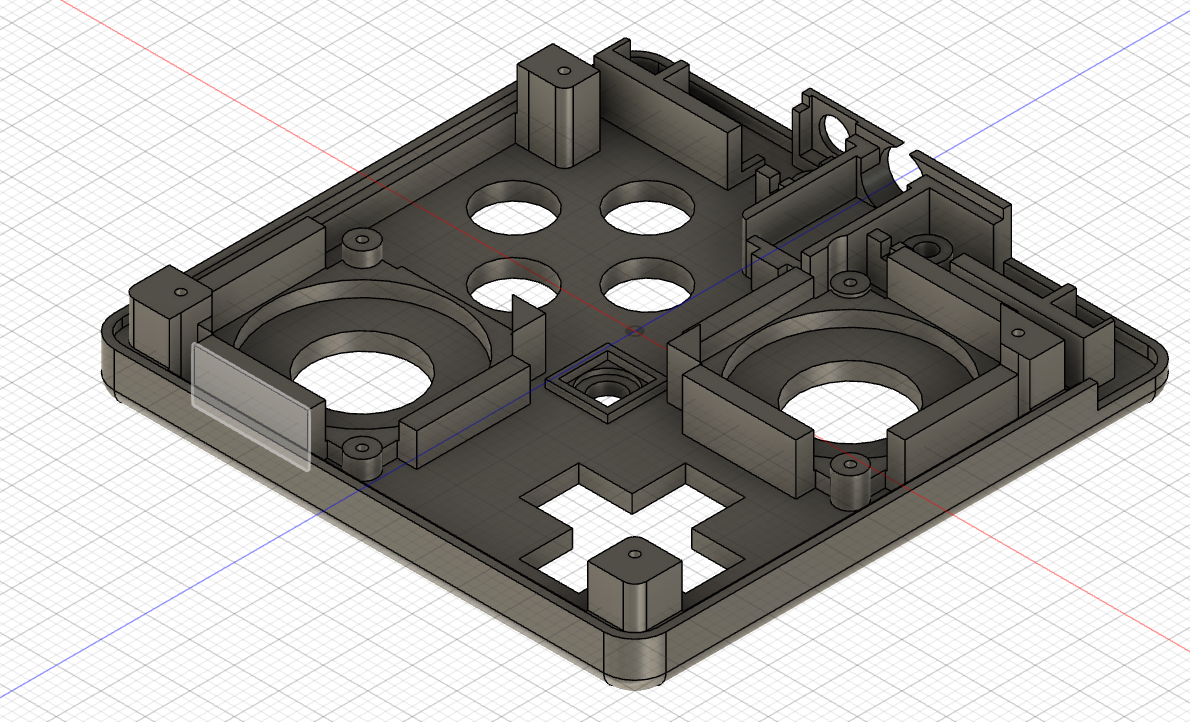
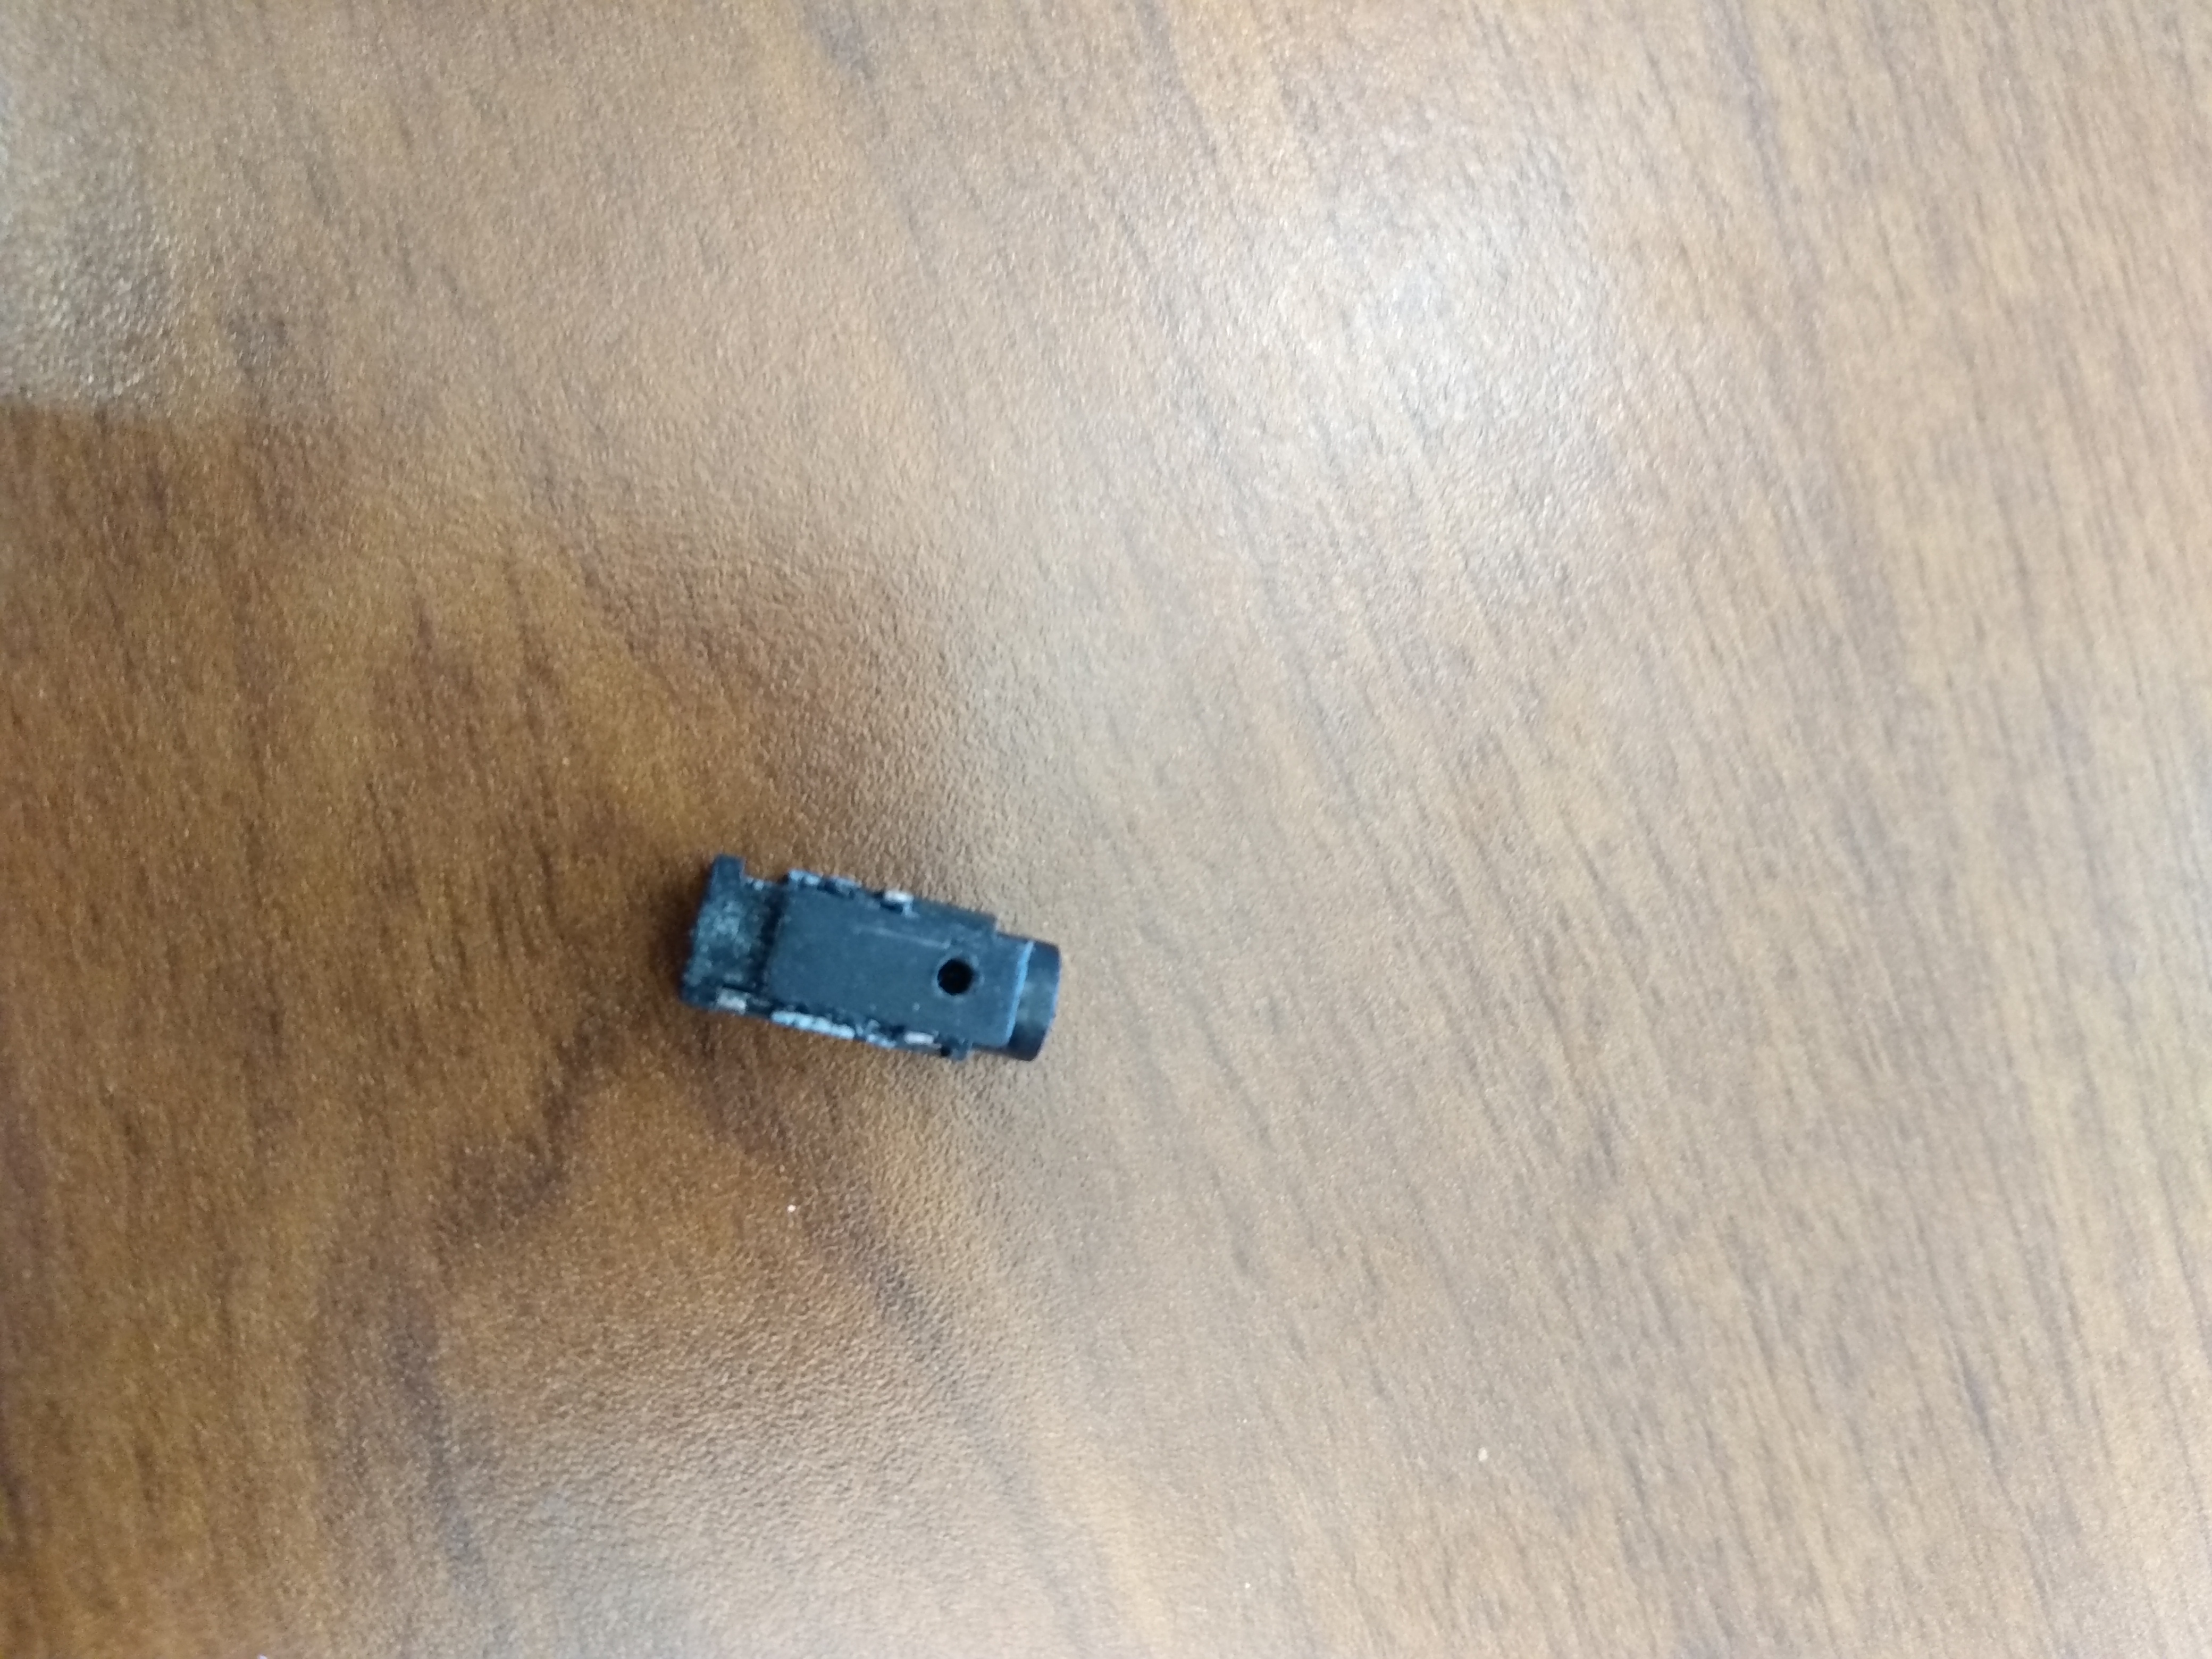
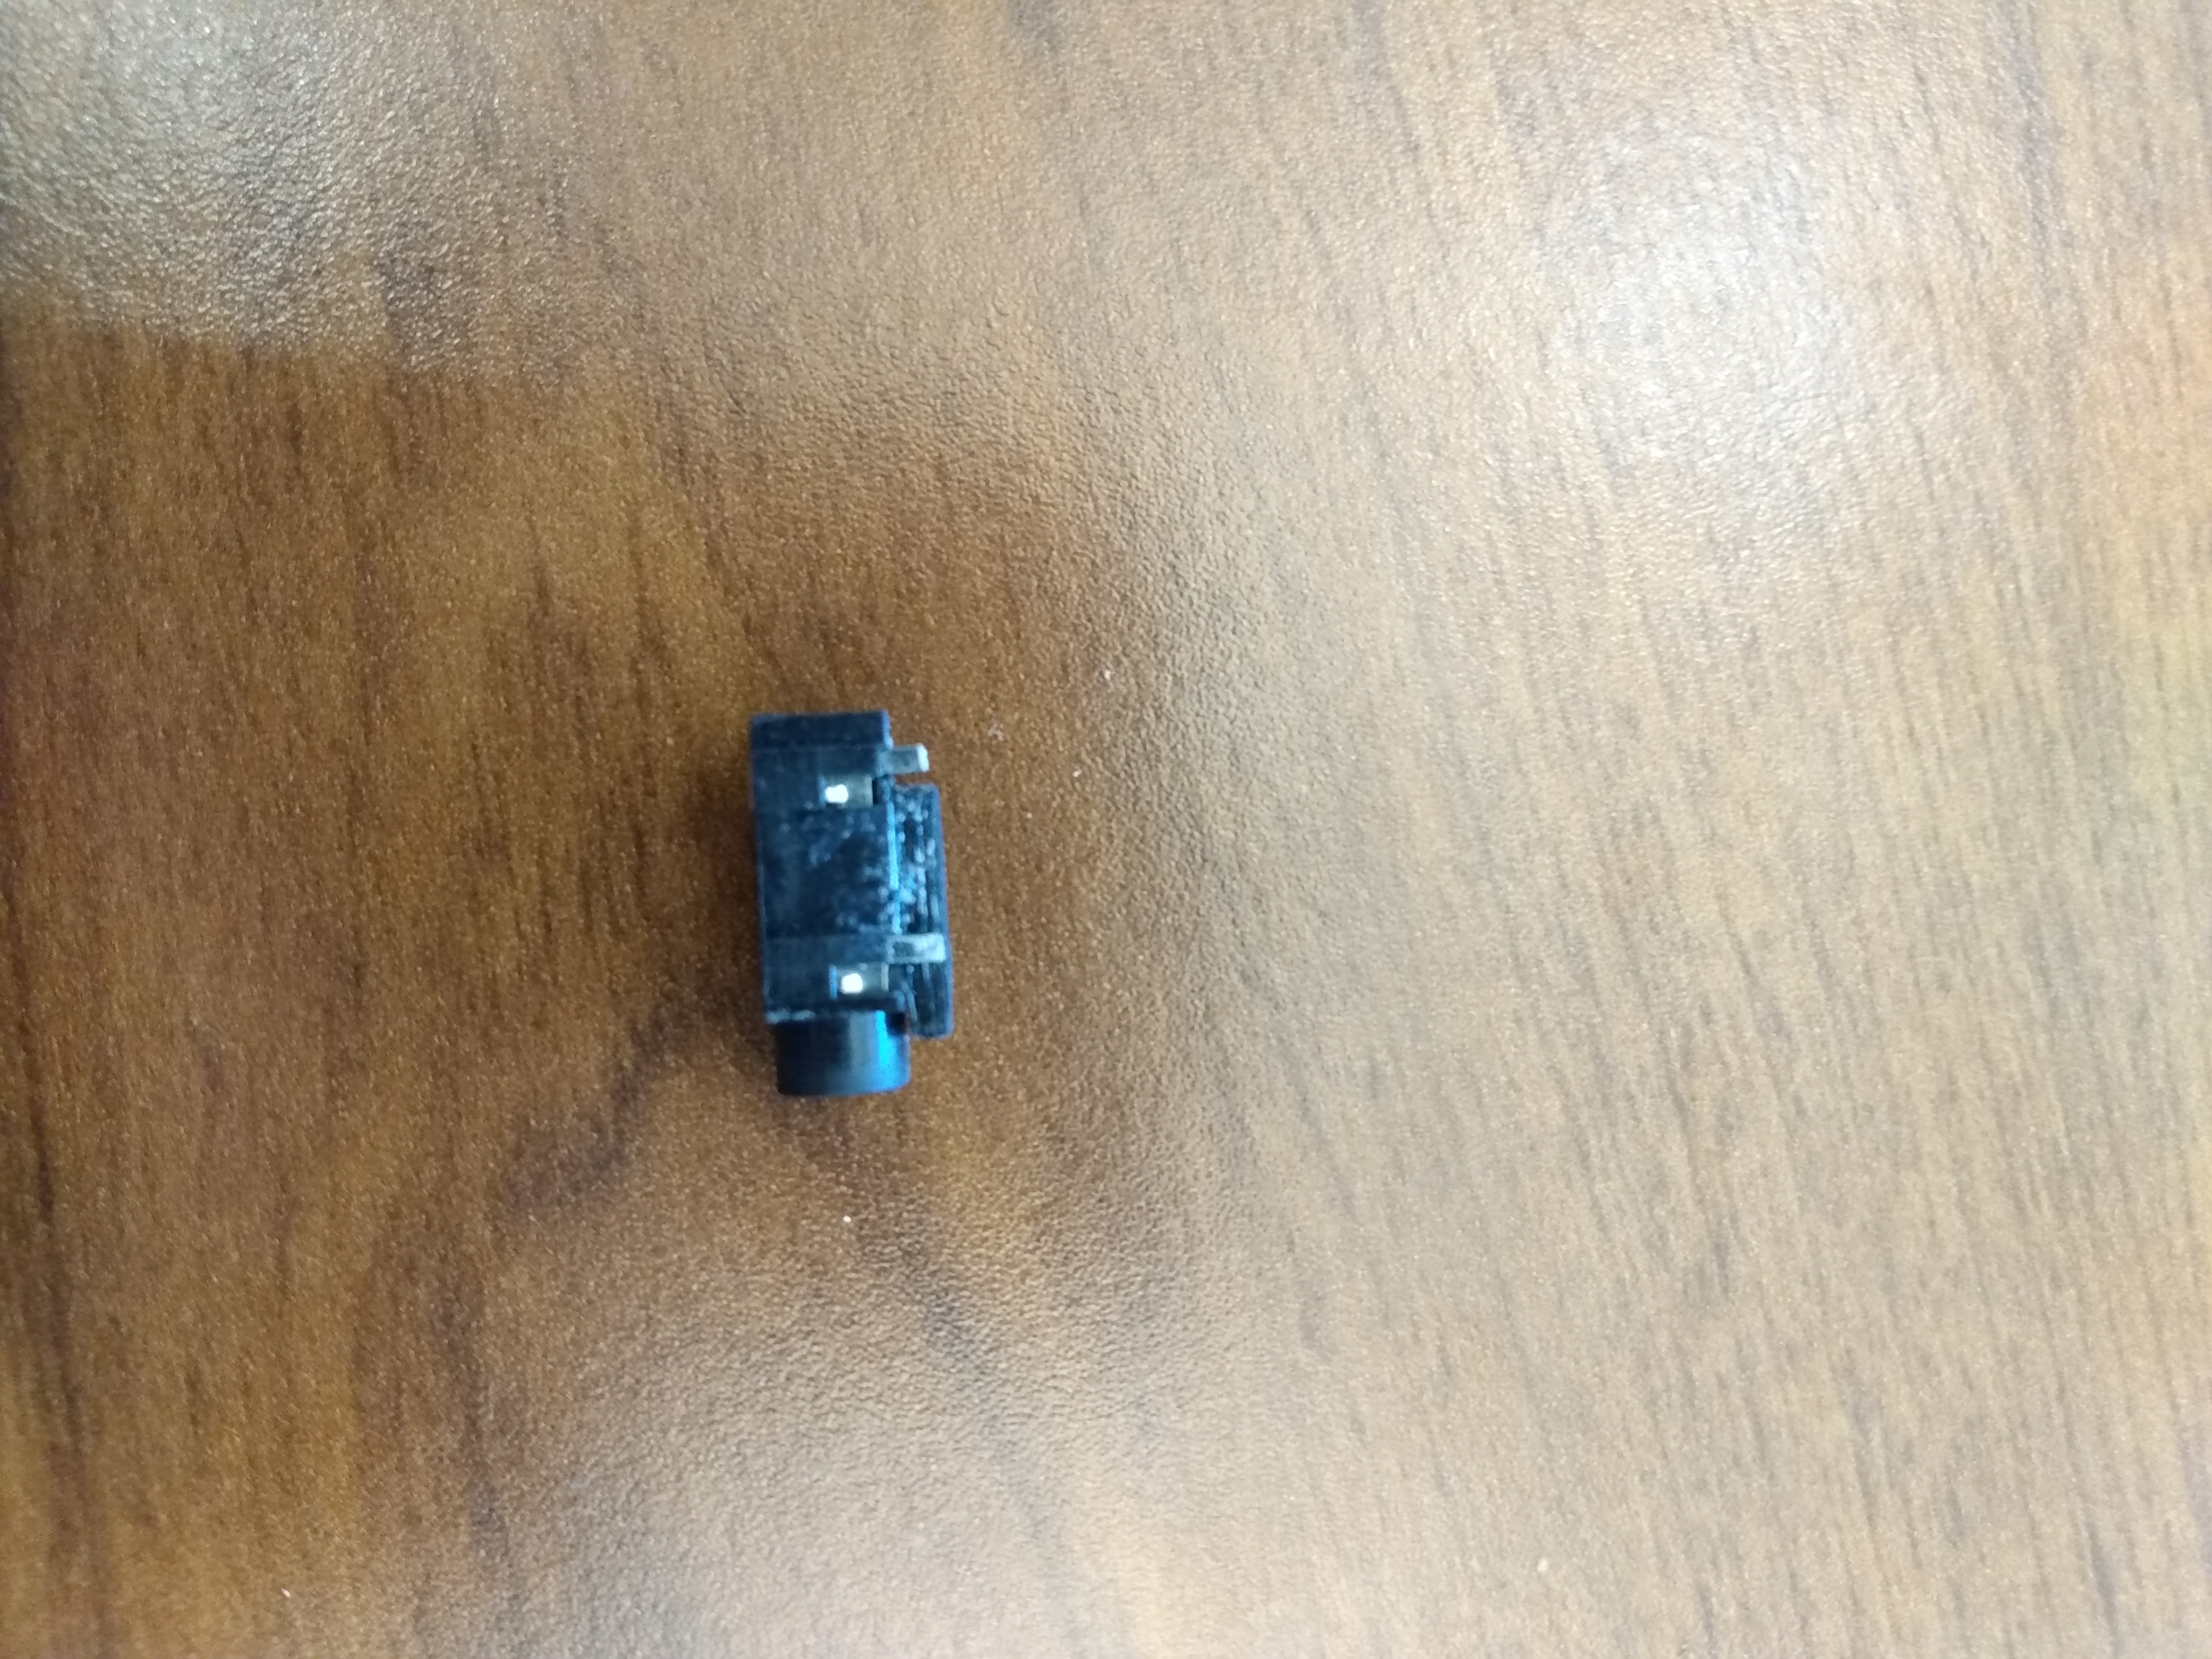
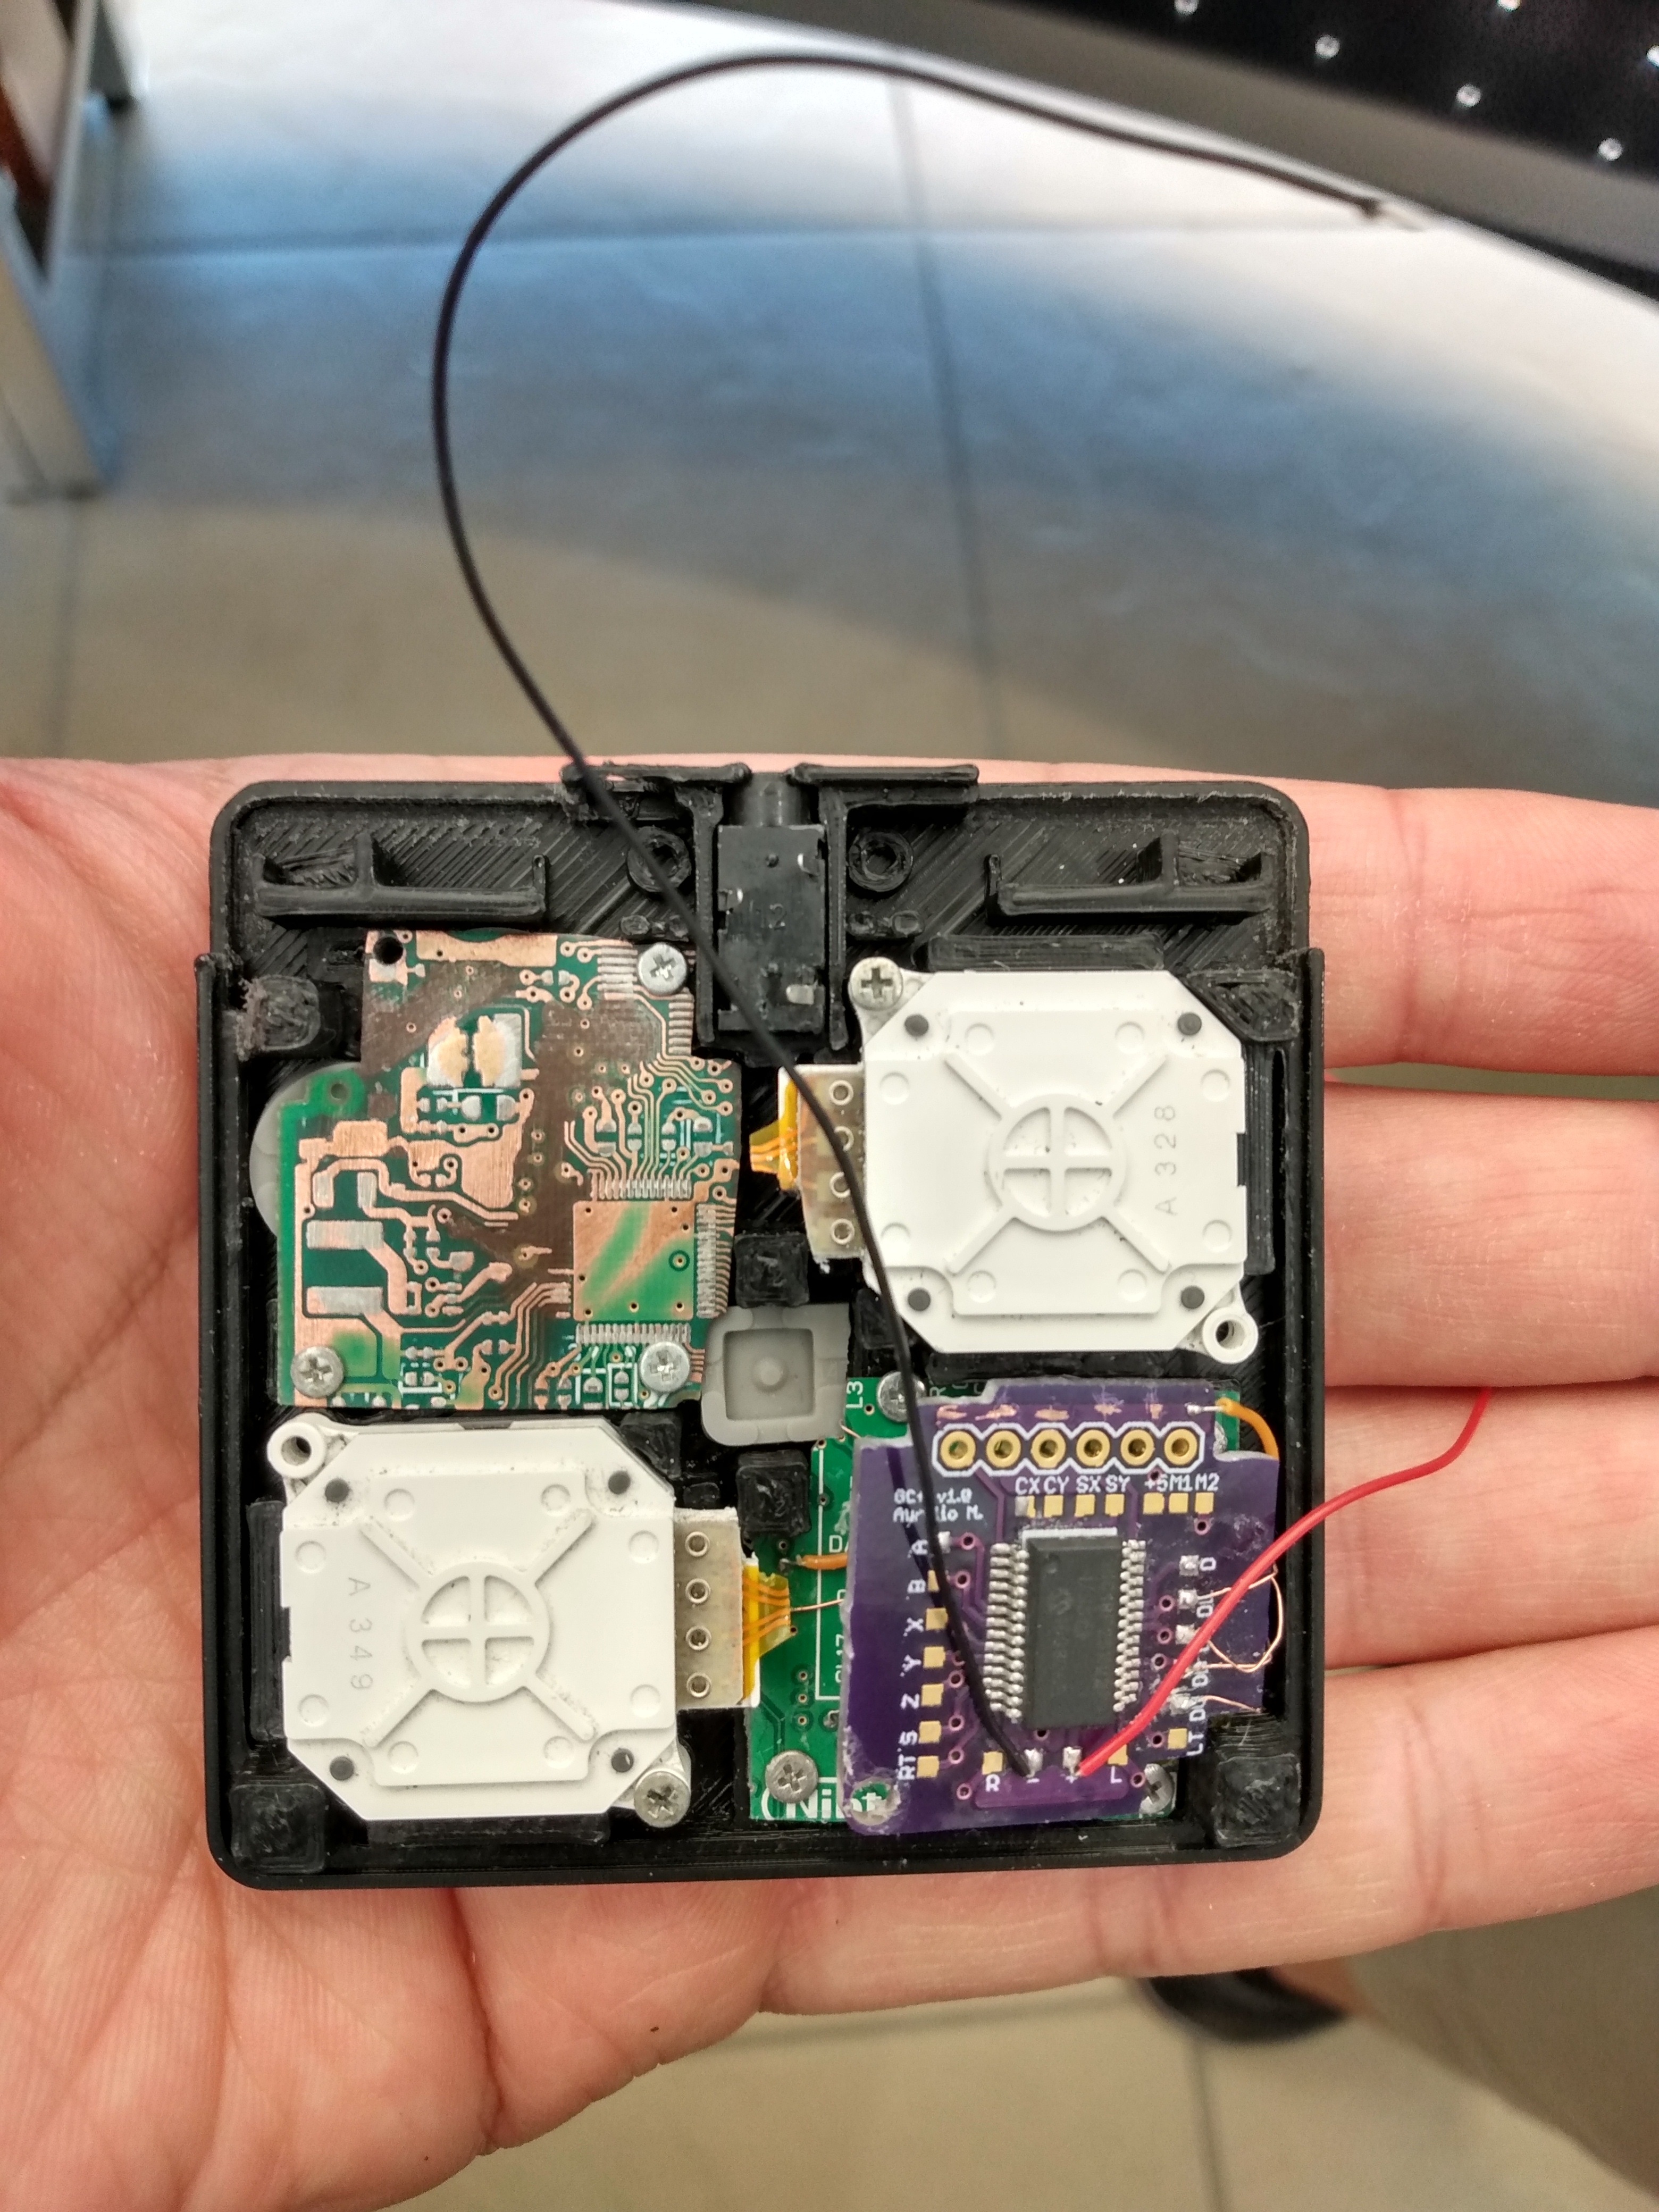
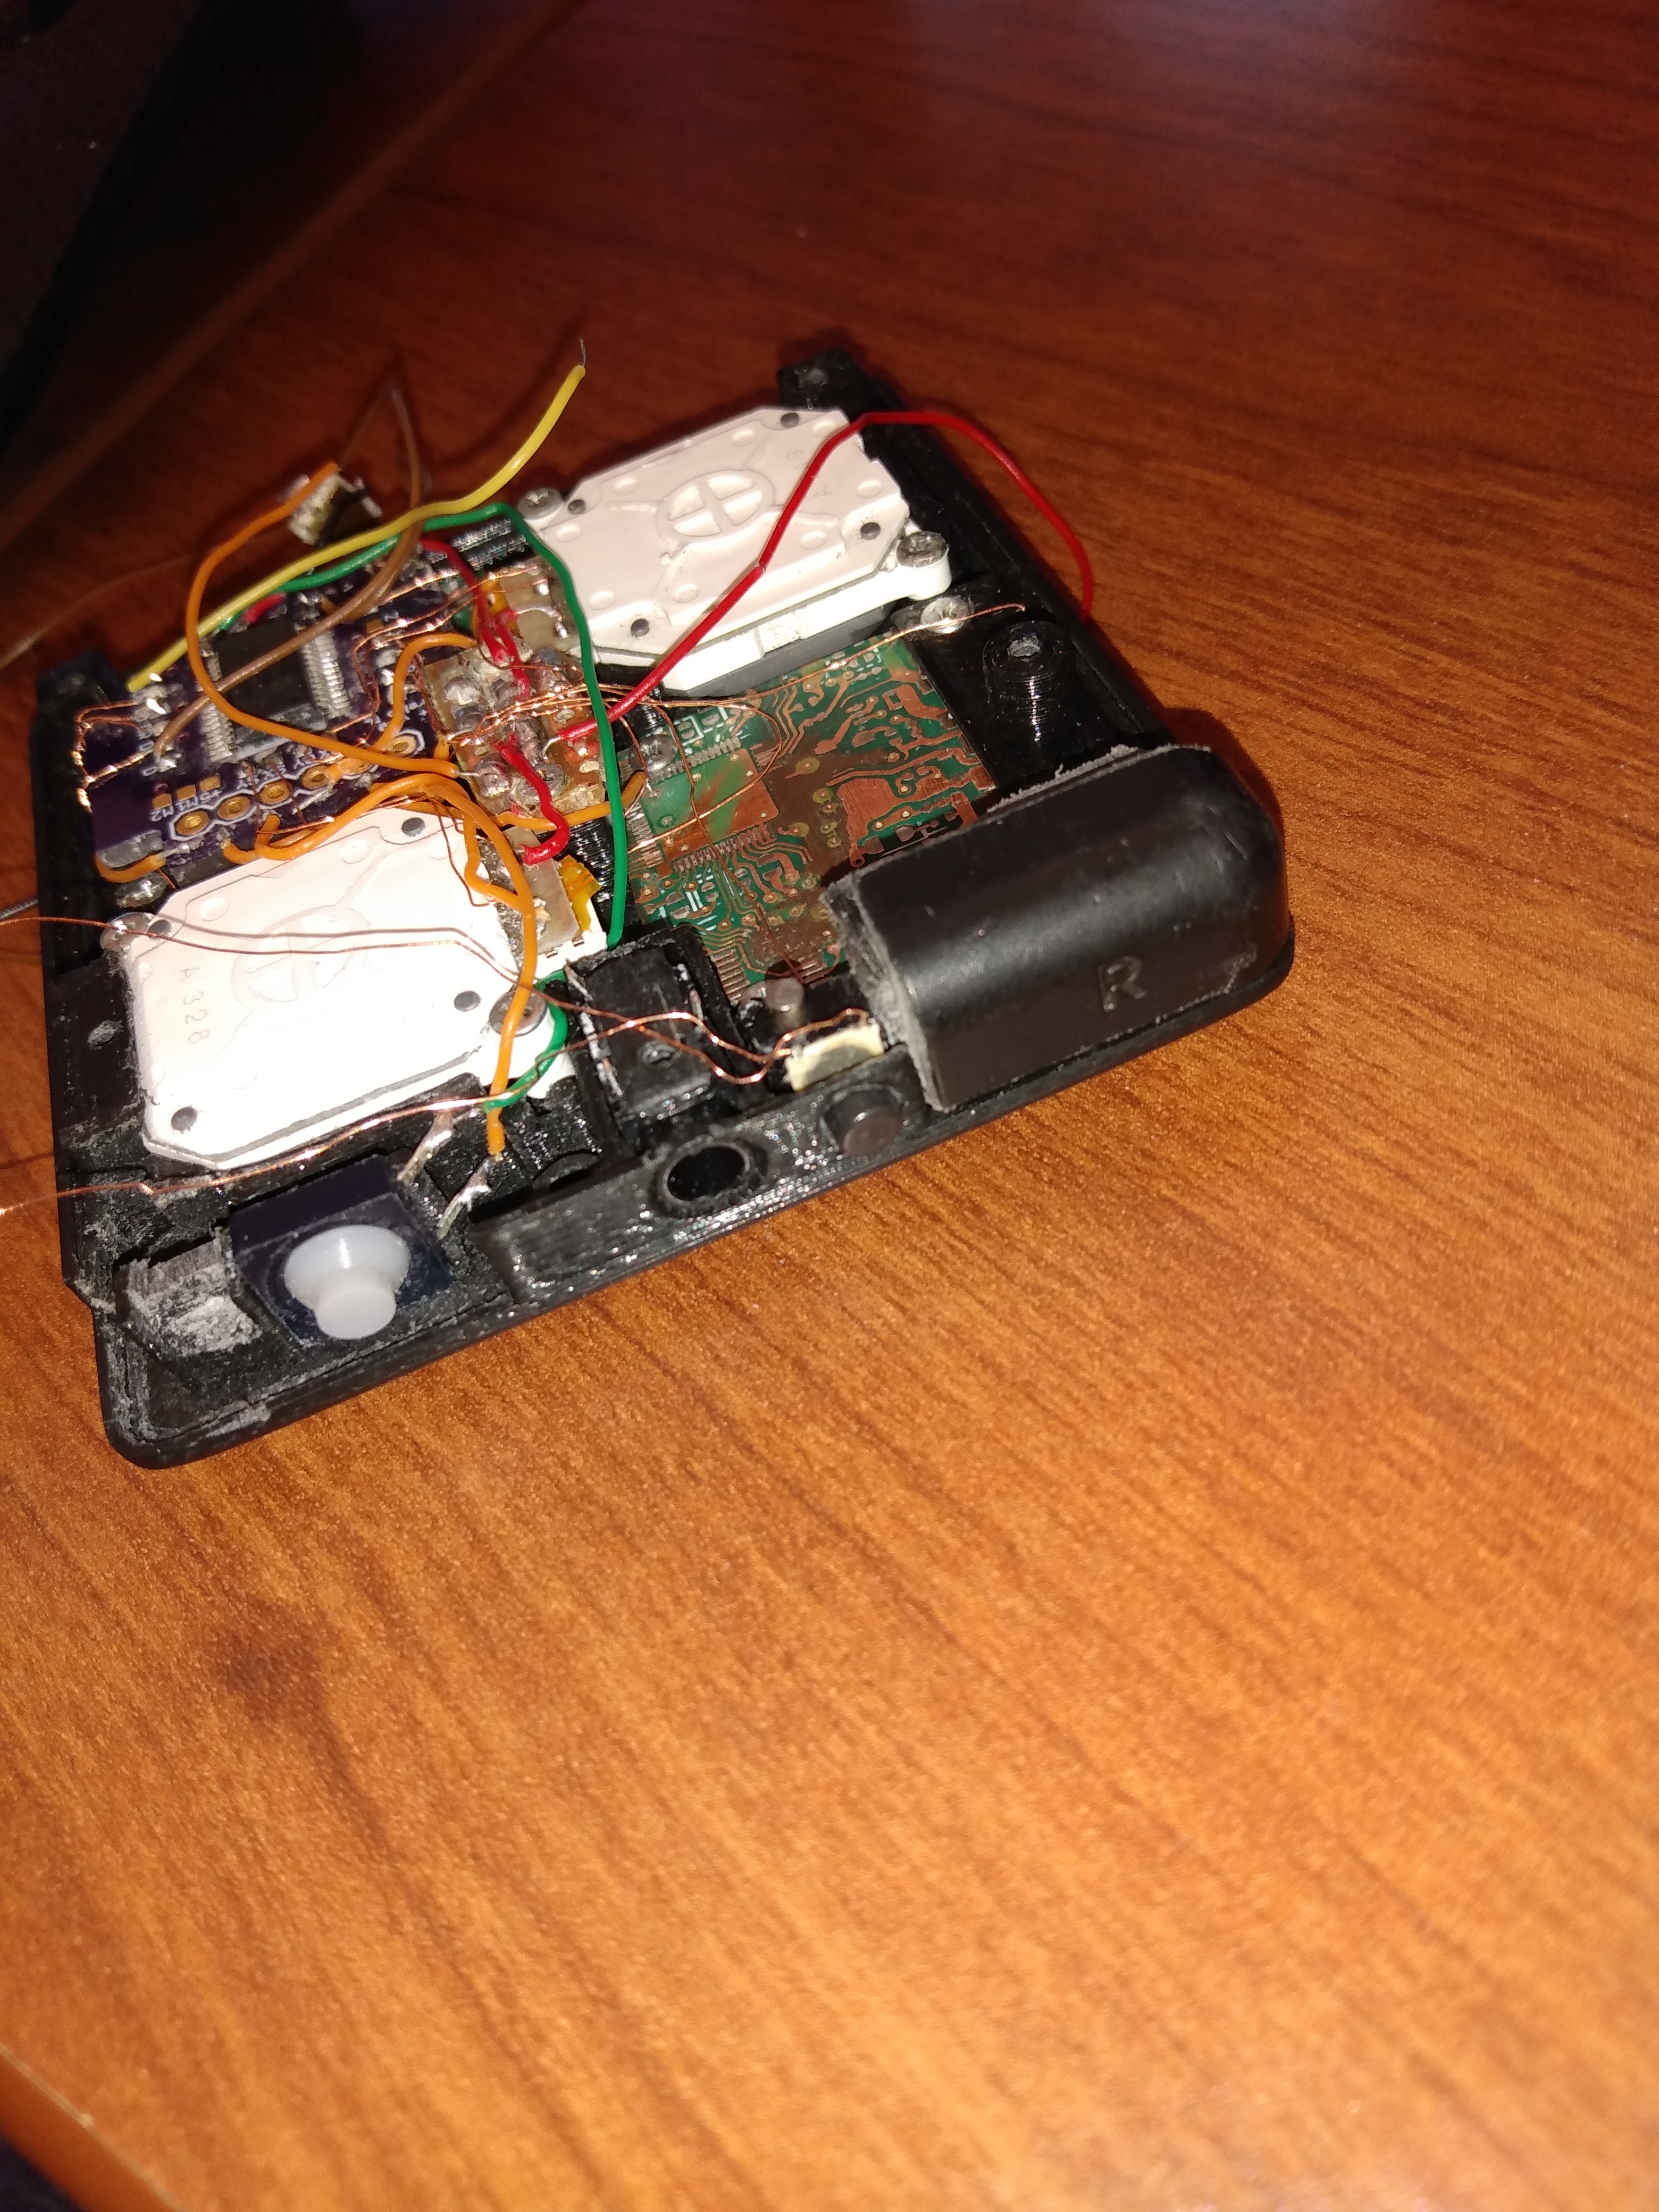
So here are the pics of the case and some of the other parts printed out. First, It was pretty difficult finding room to mount screw posts to keep the two halves mounted together without getting in the way of everything else that is crammed in there. I ended up printing a piece that screwed in with the trimmed ABXY board, and gluing another small piece to the audio jack which then was super glued into its spot. It has worked really well and has kept any hot glue out of the equation.
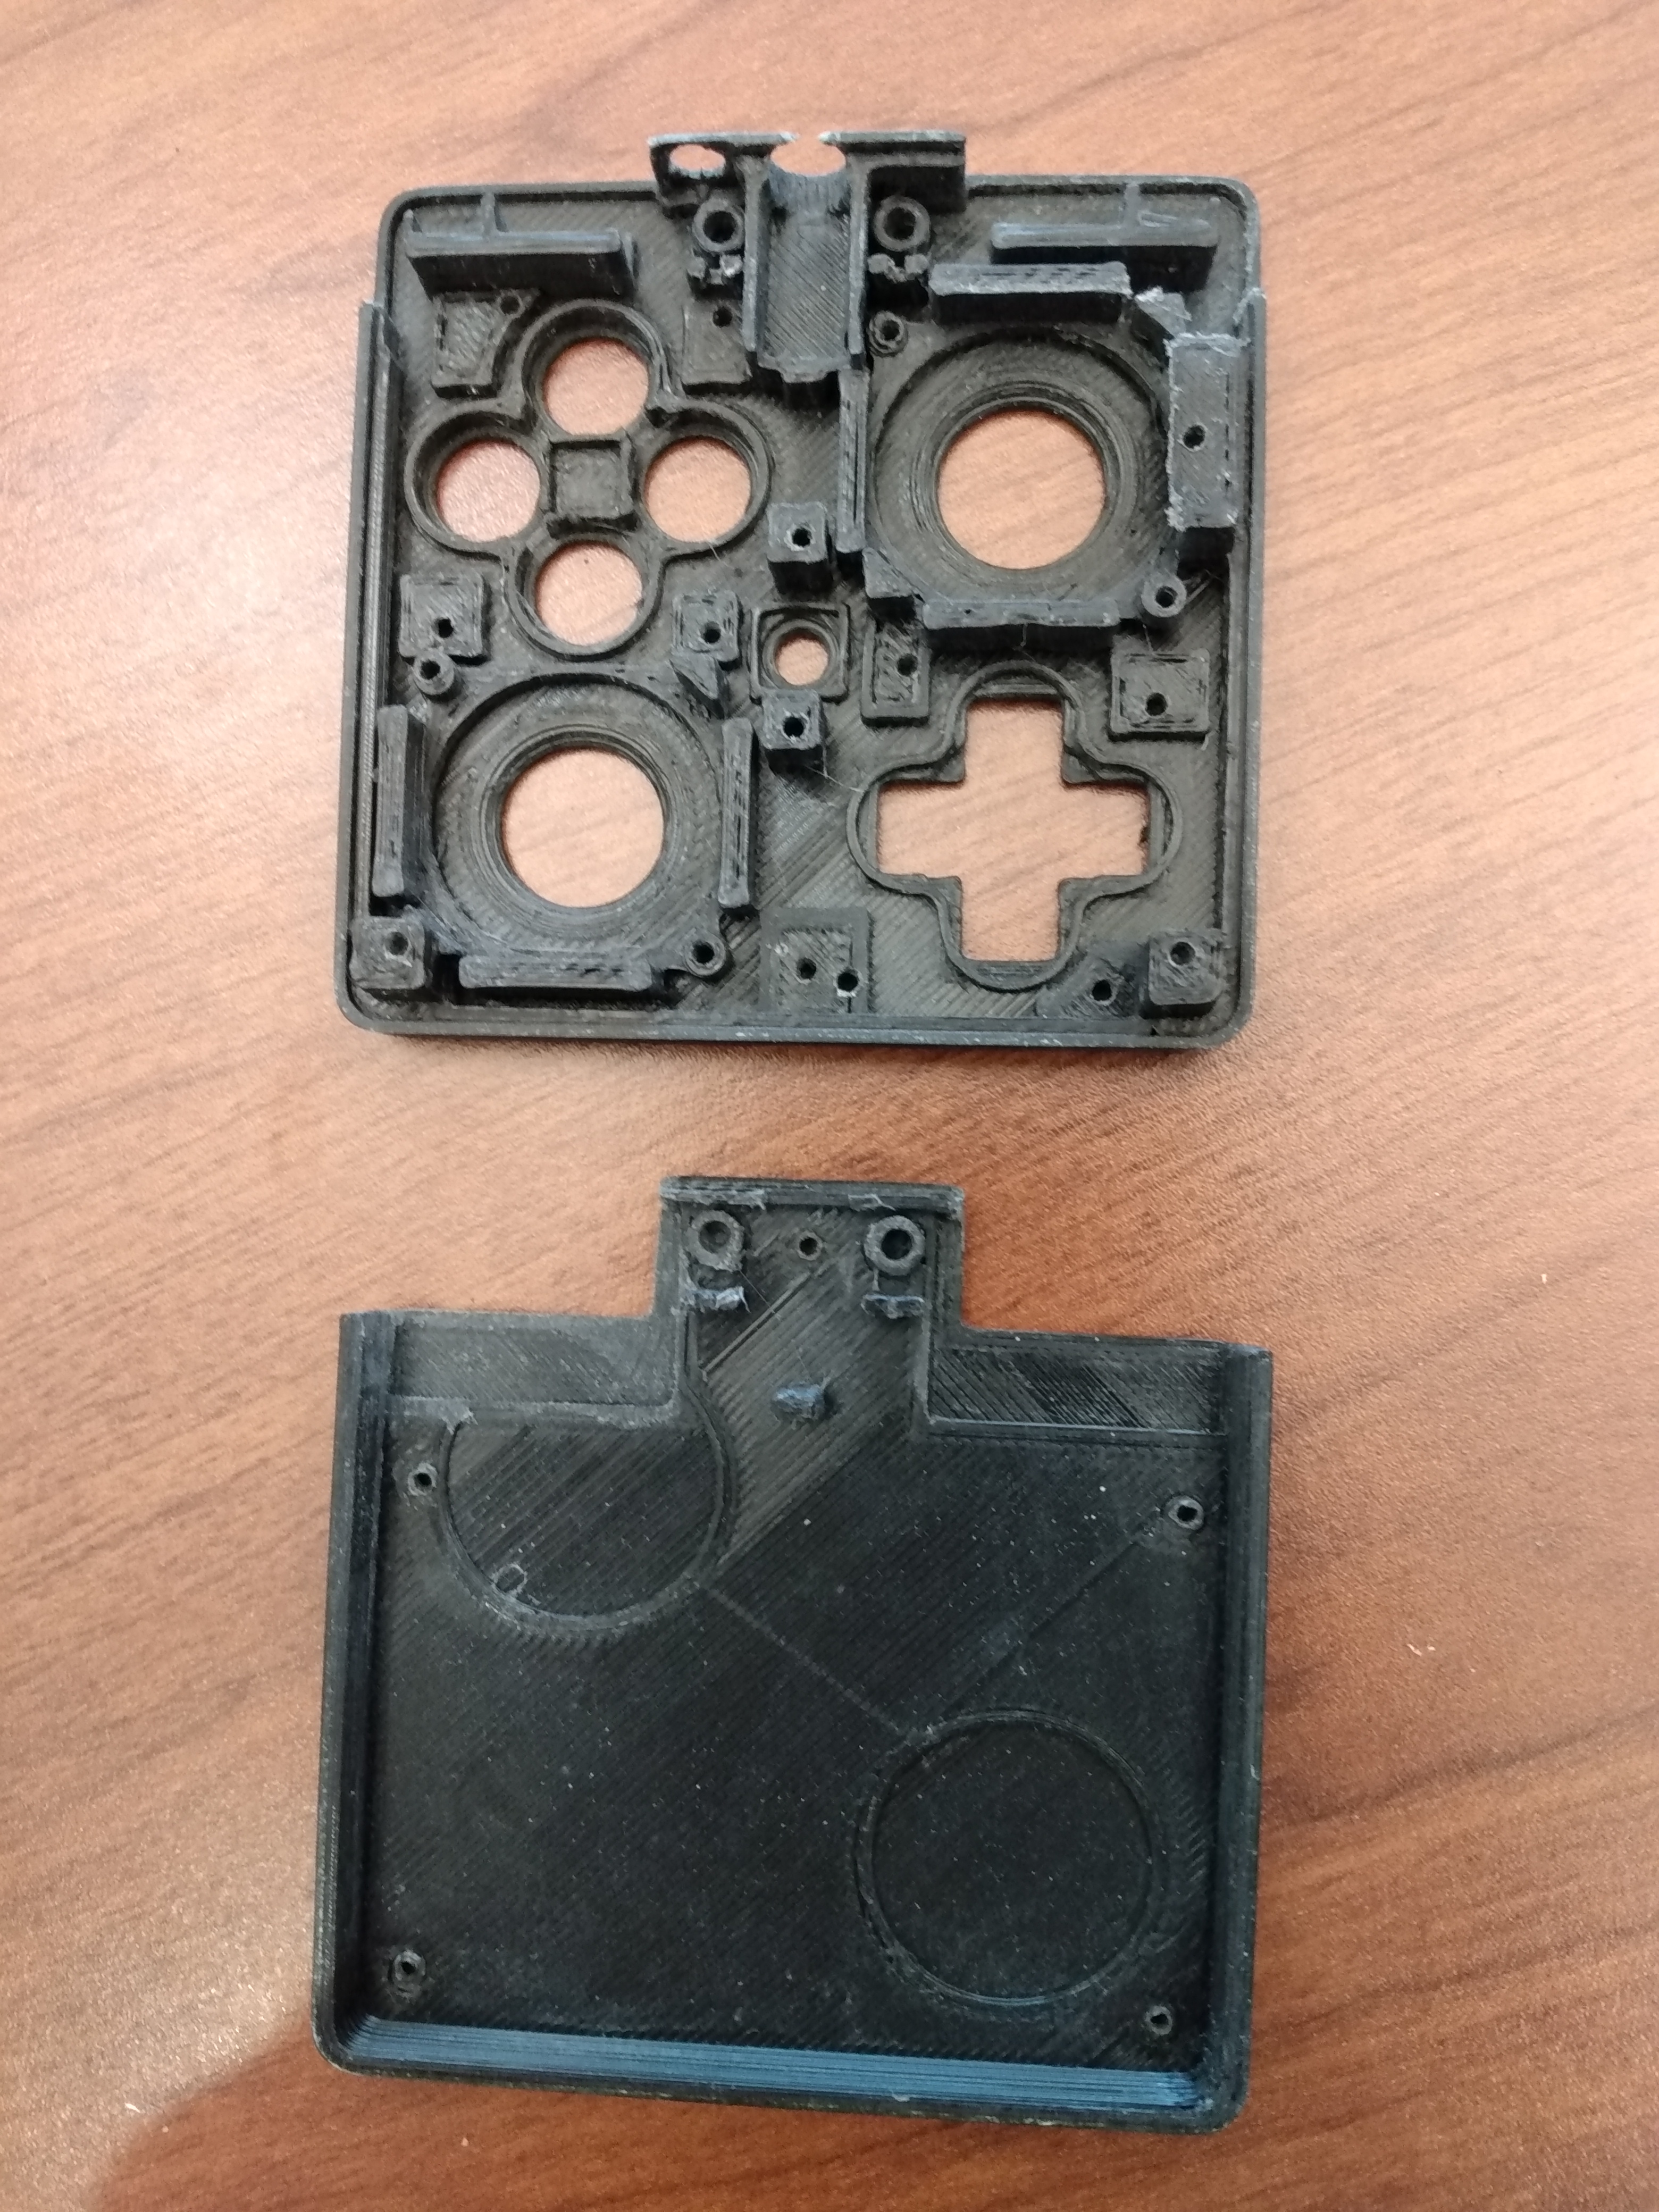
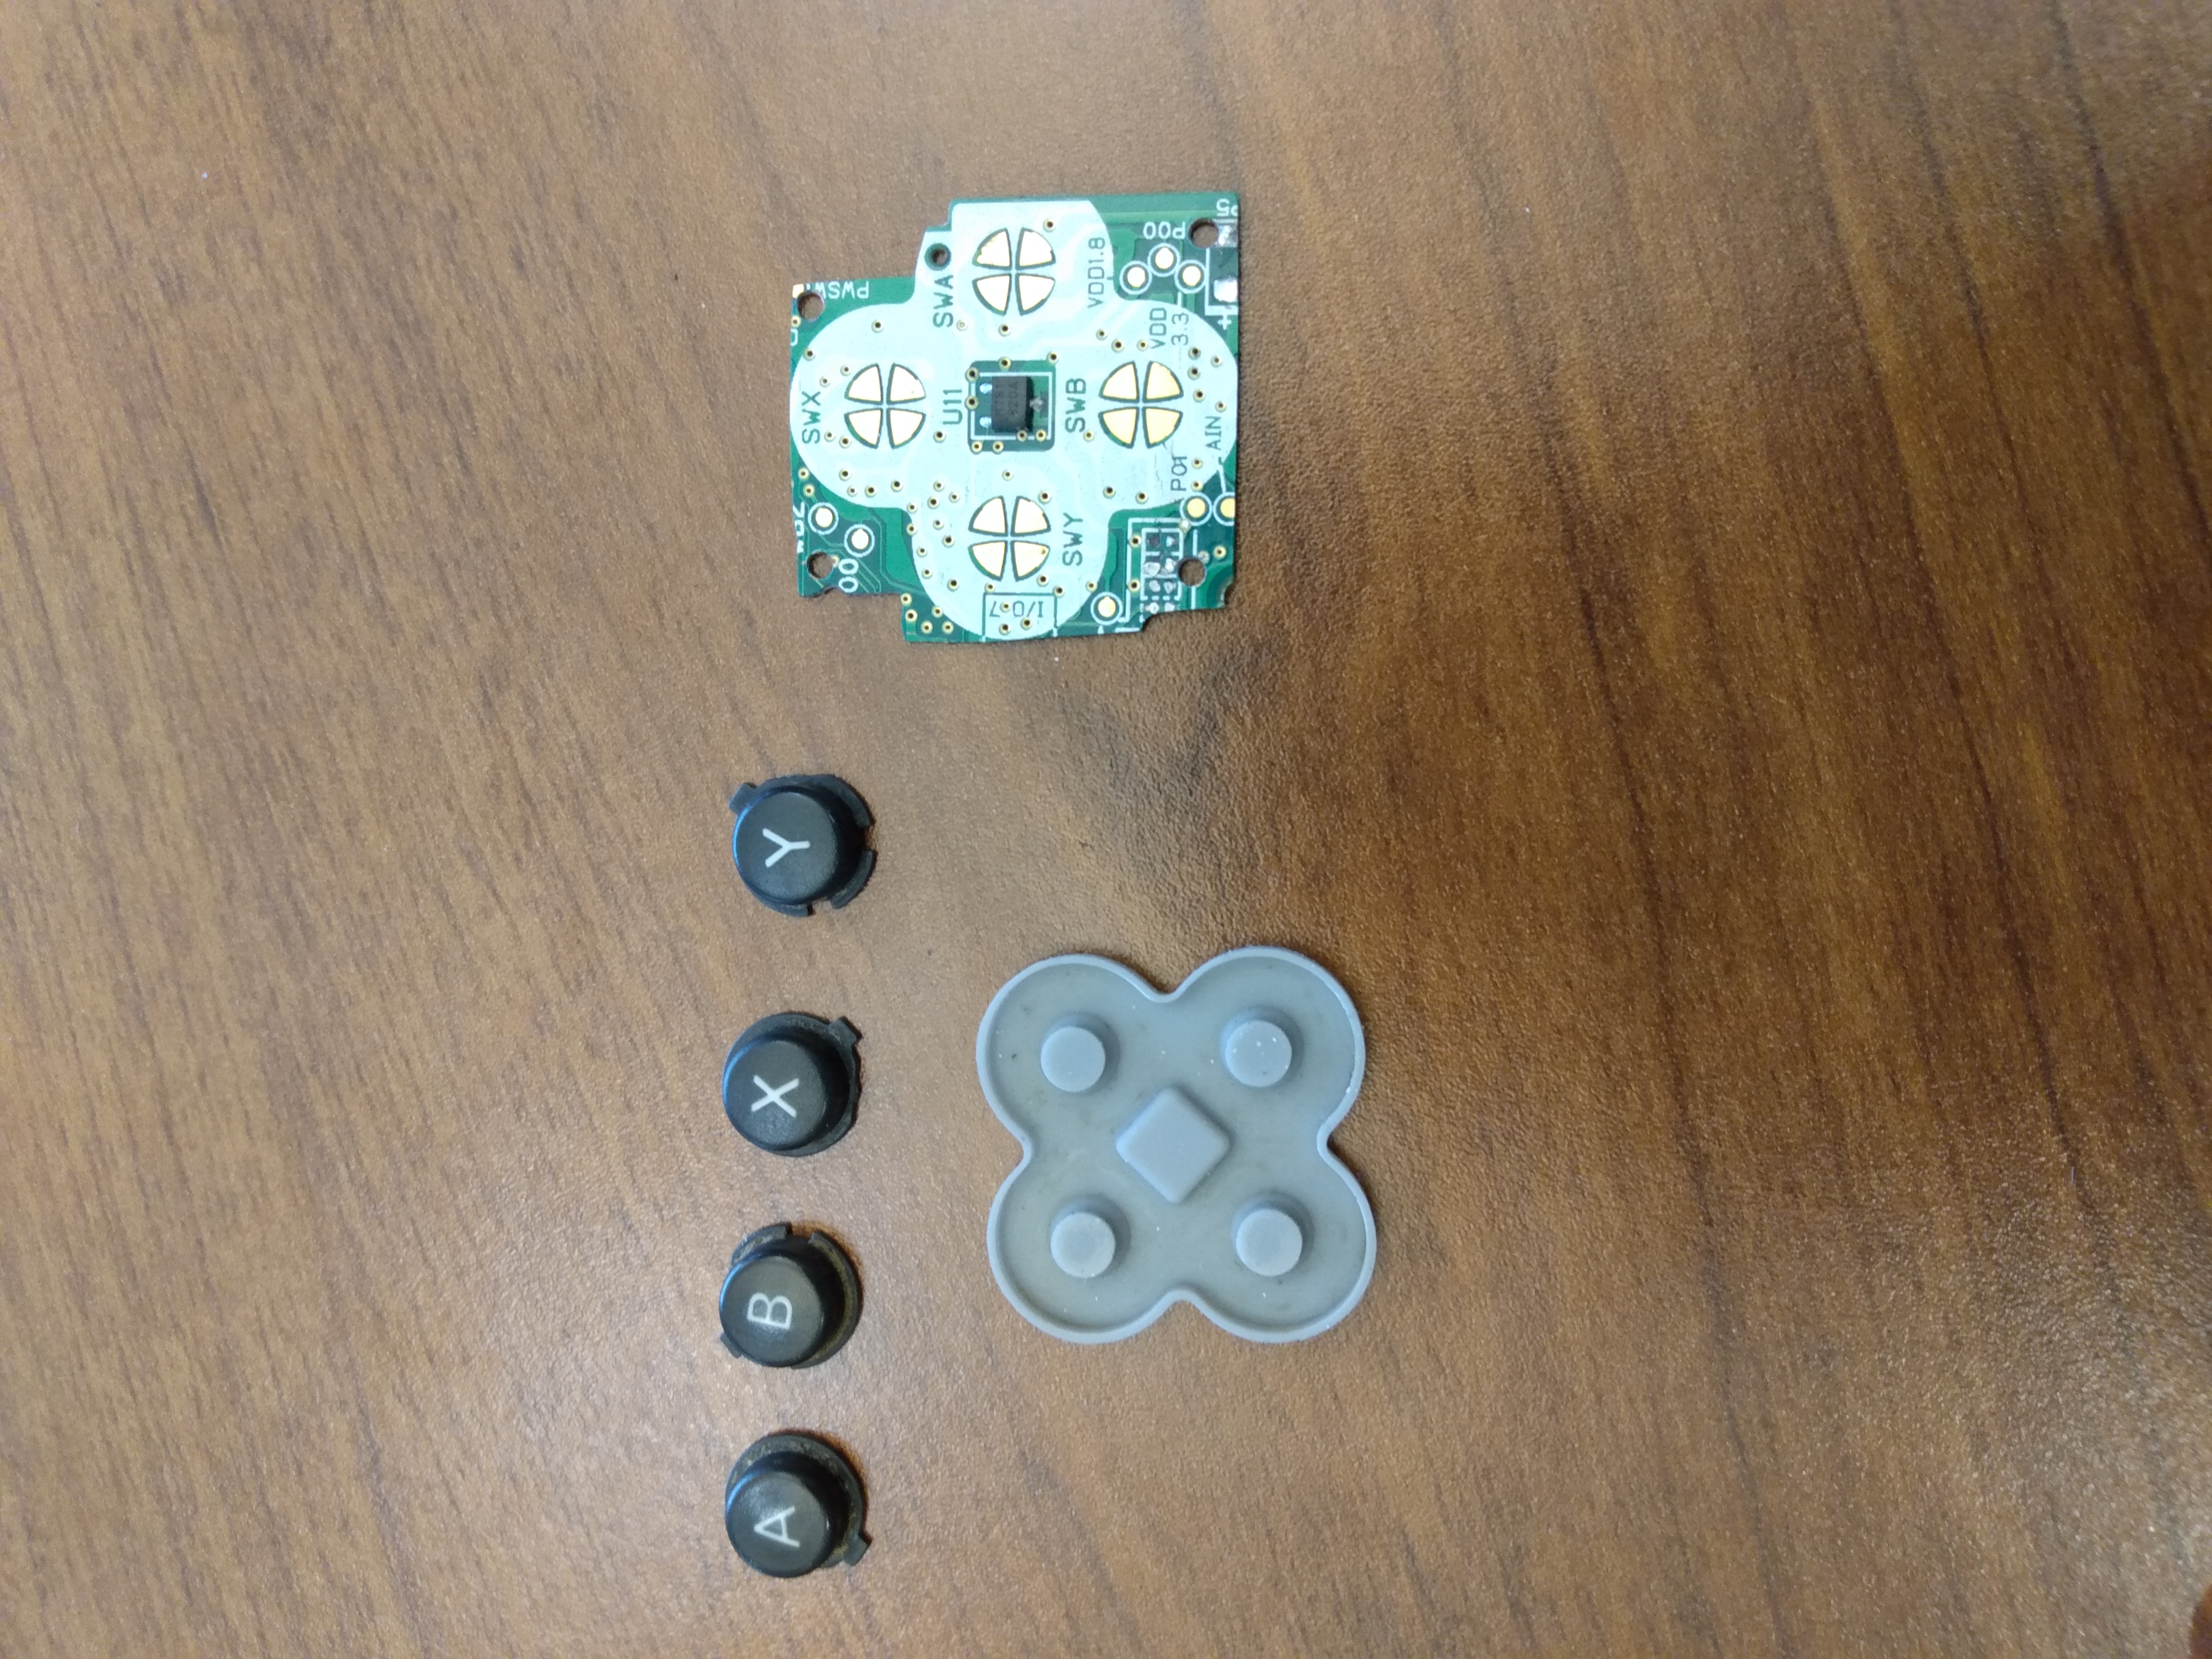
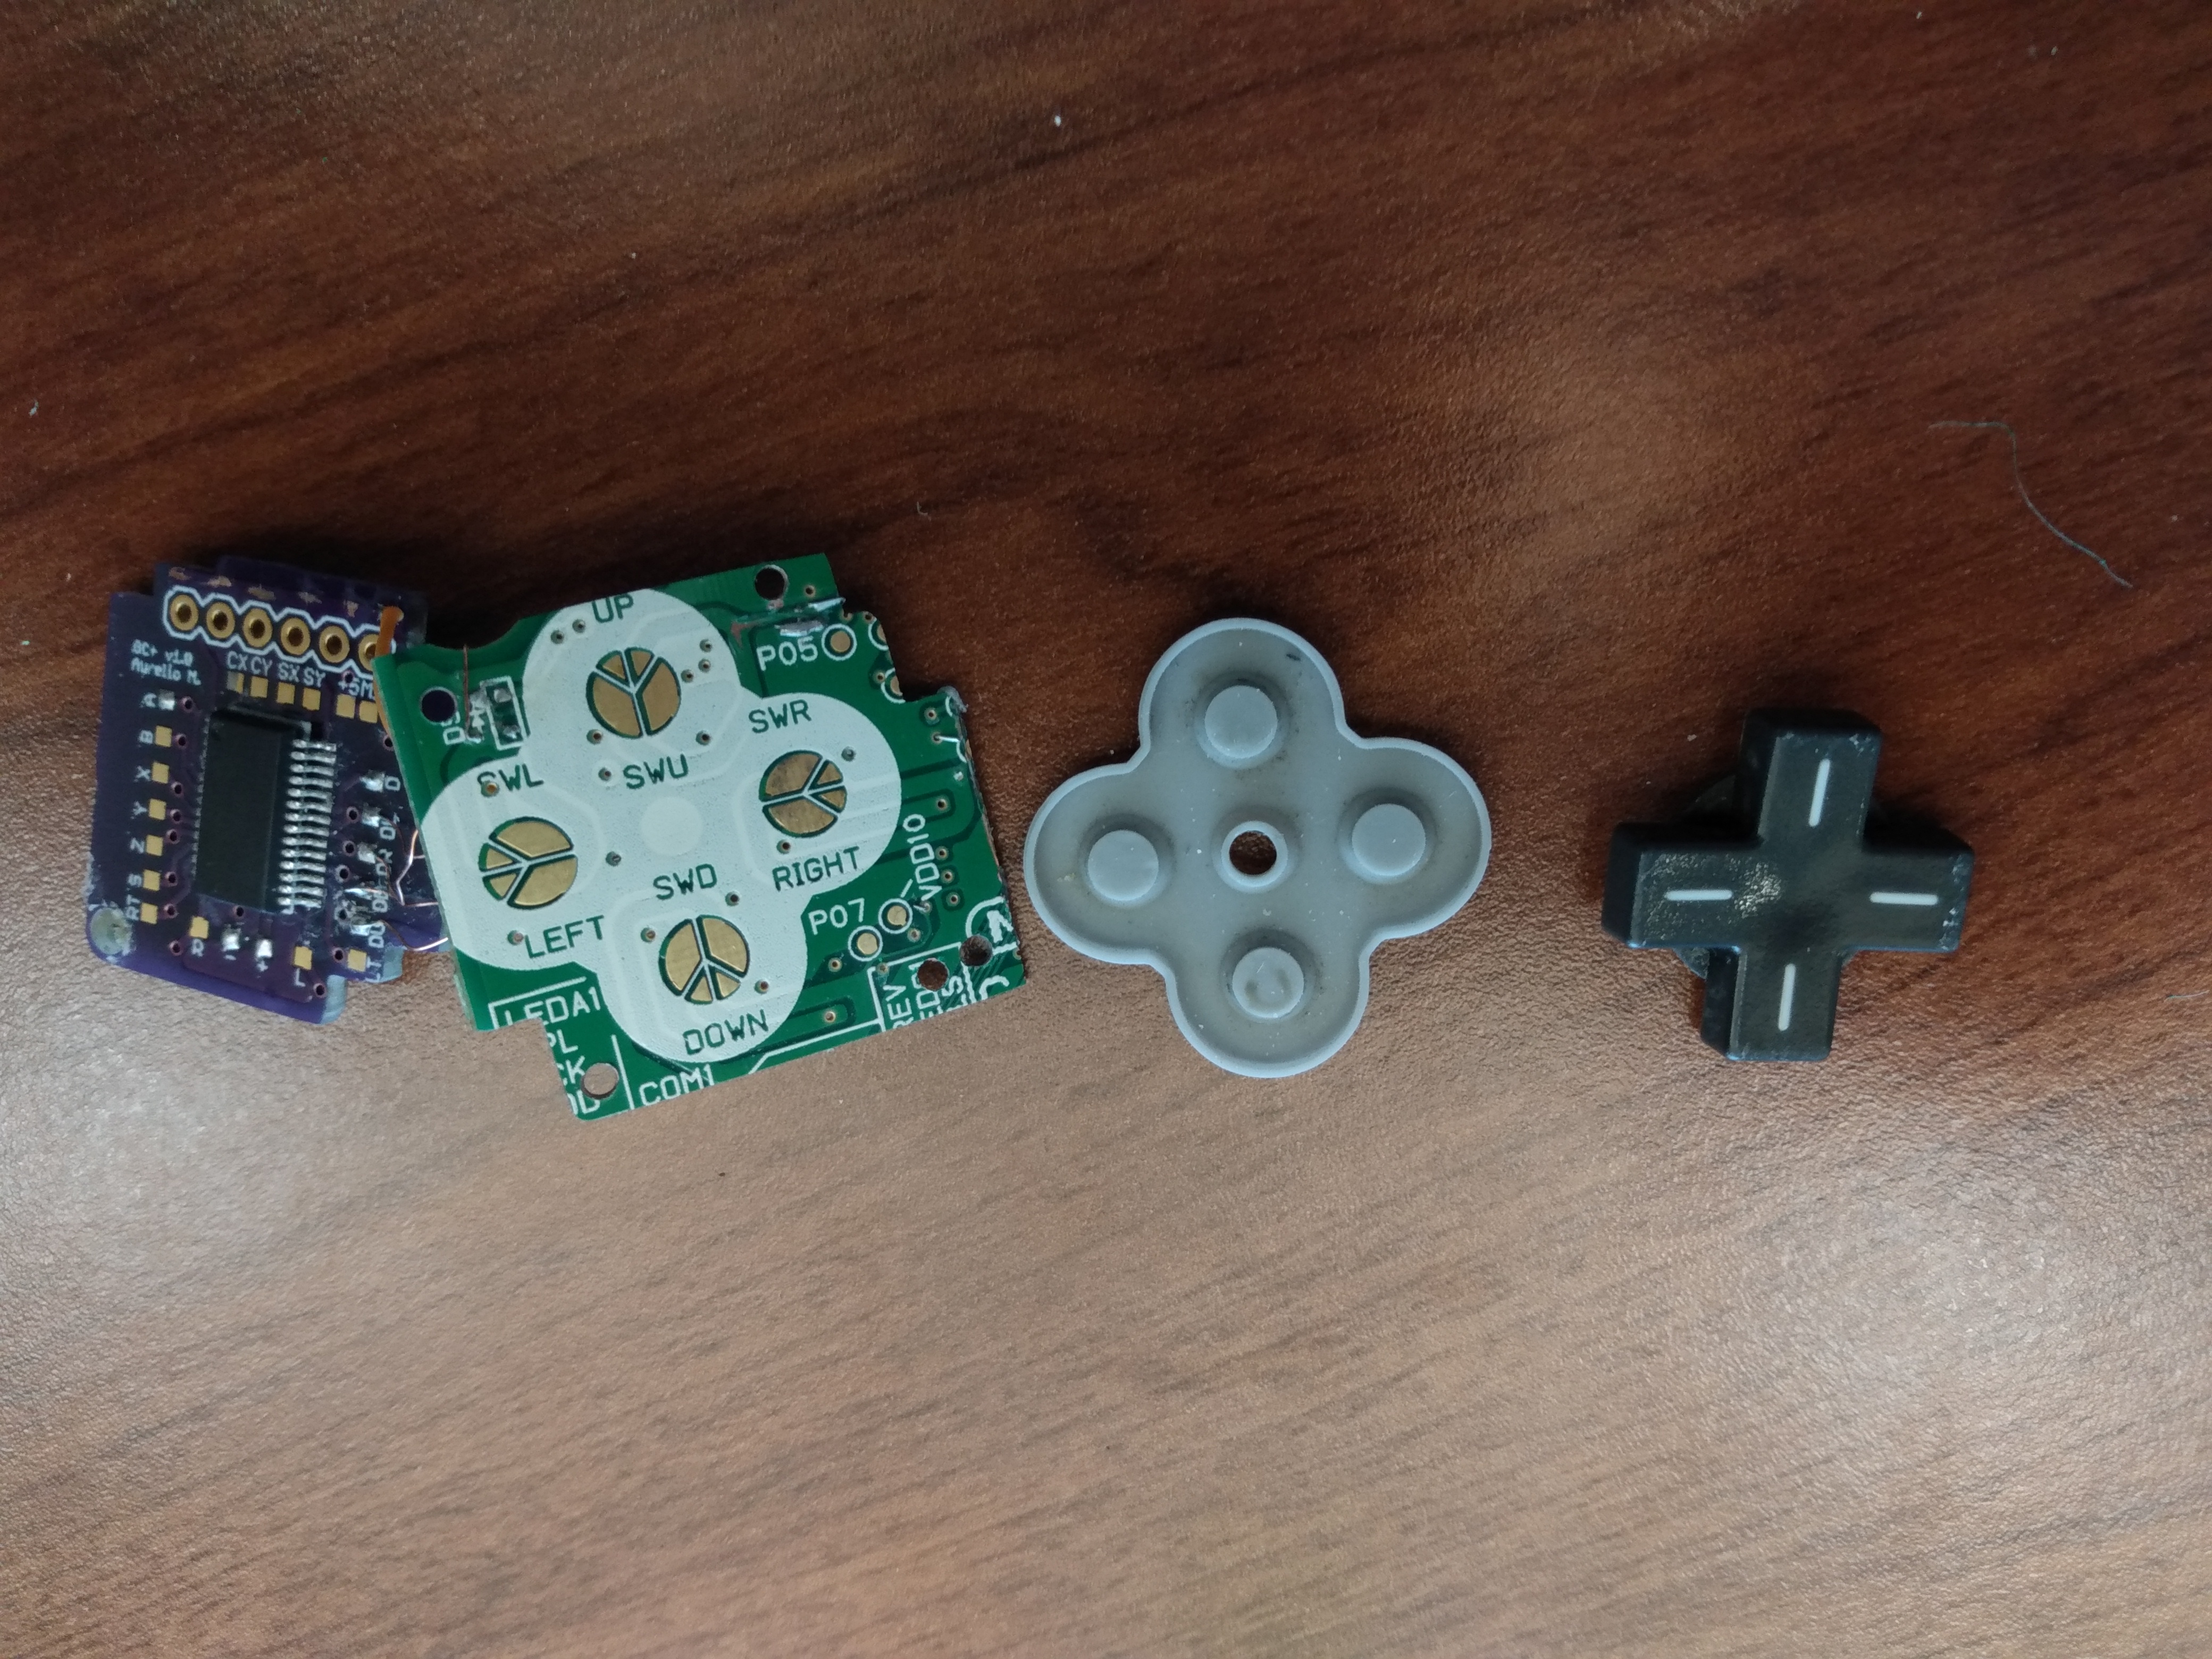
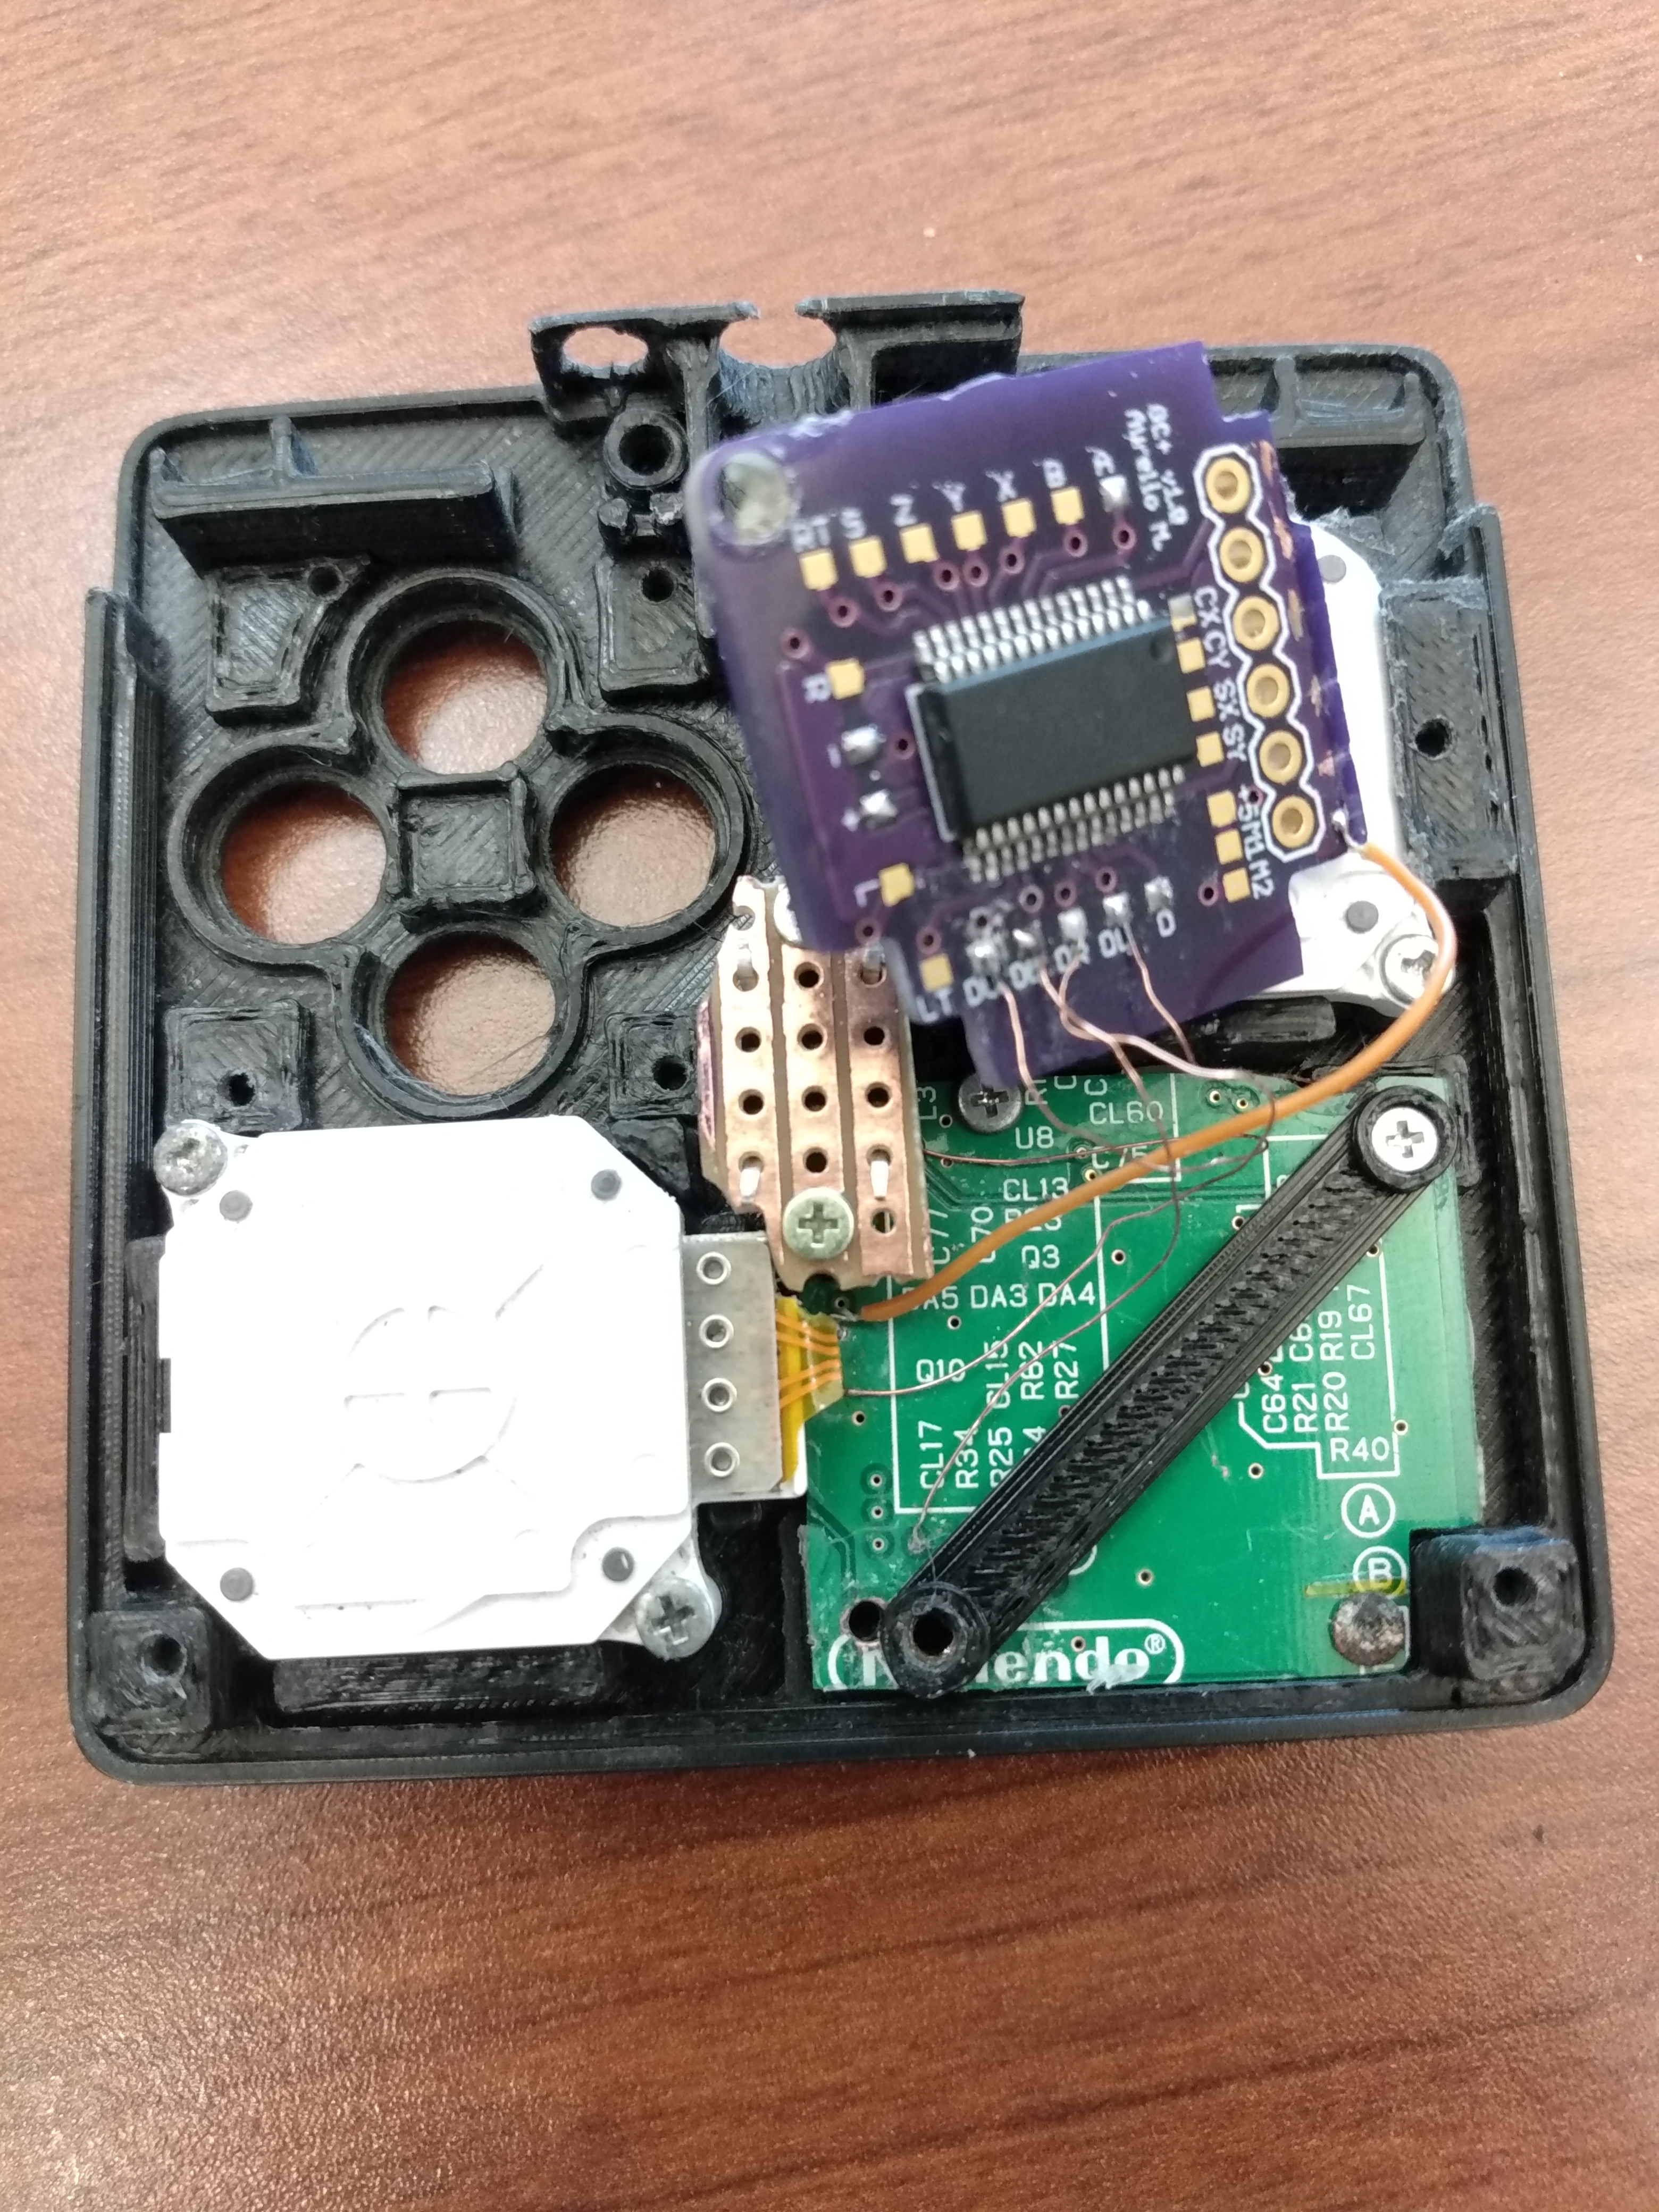
I also printed a little spacer bracket so that I could anchor the gc+ along with the dpad trimmed board. You can see that I trimmed the already tiny gc+ board, if I make another I will probably keep the top right portion so that it will be secure on 2 points. as of right now it is pretty secure with all the wires and the screw in the bottom left.
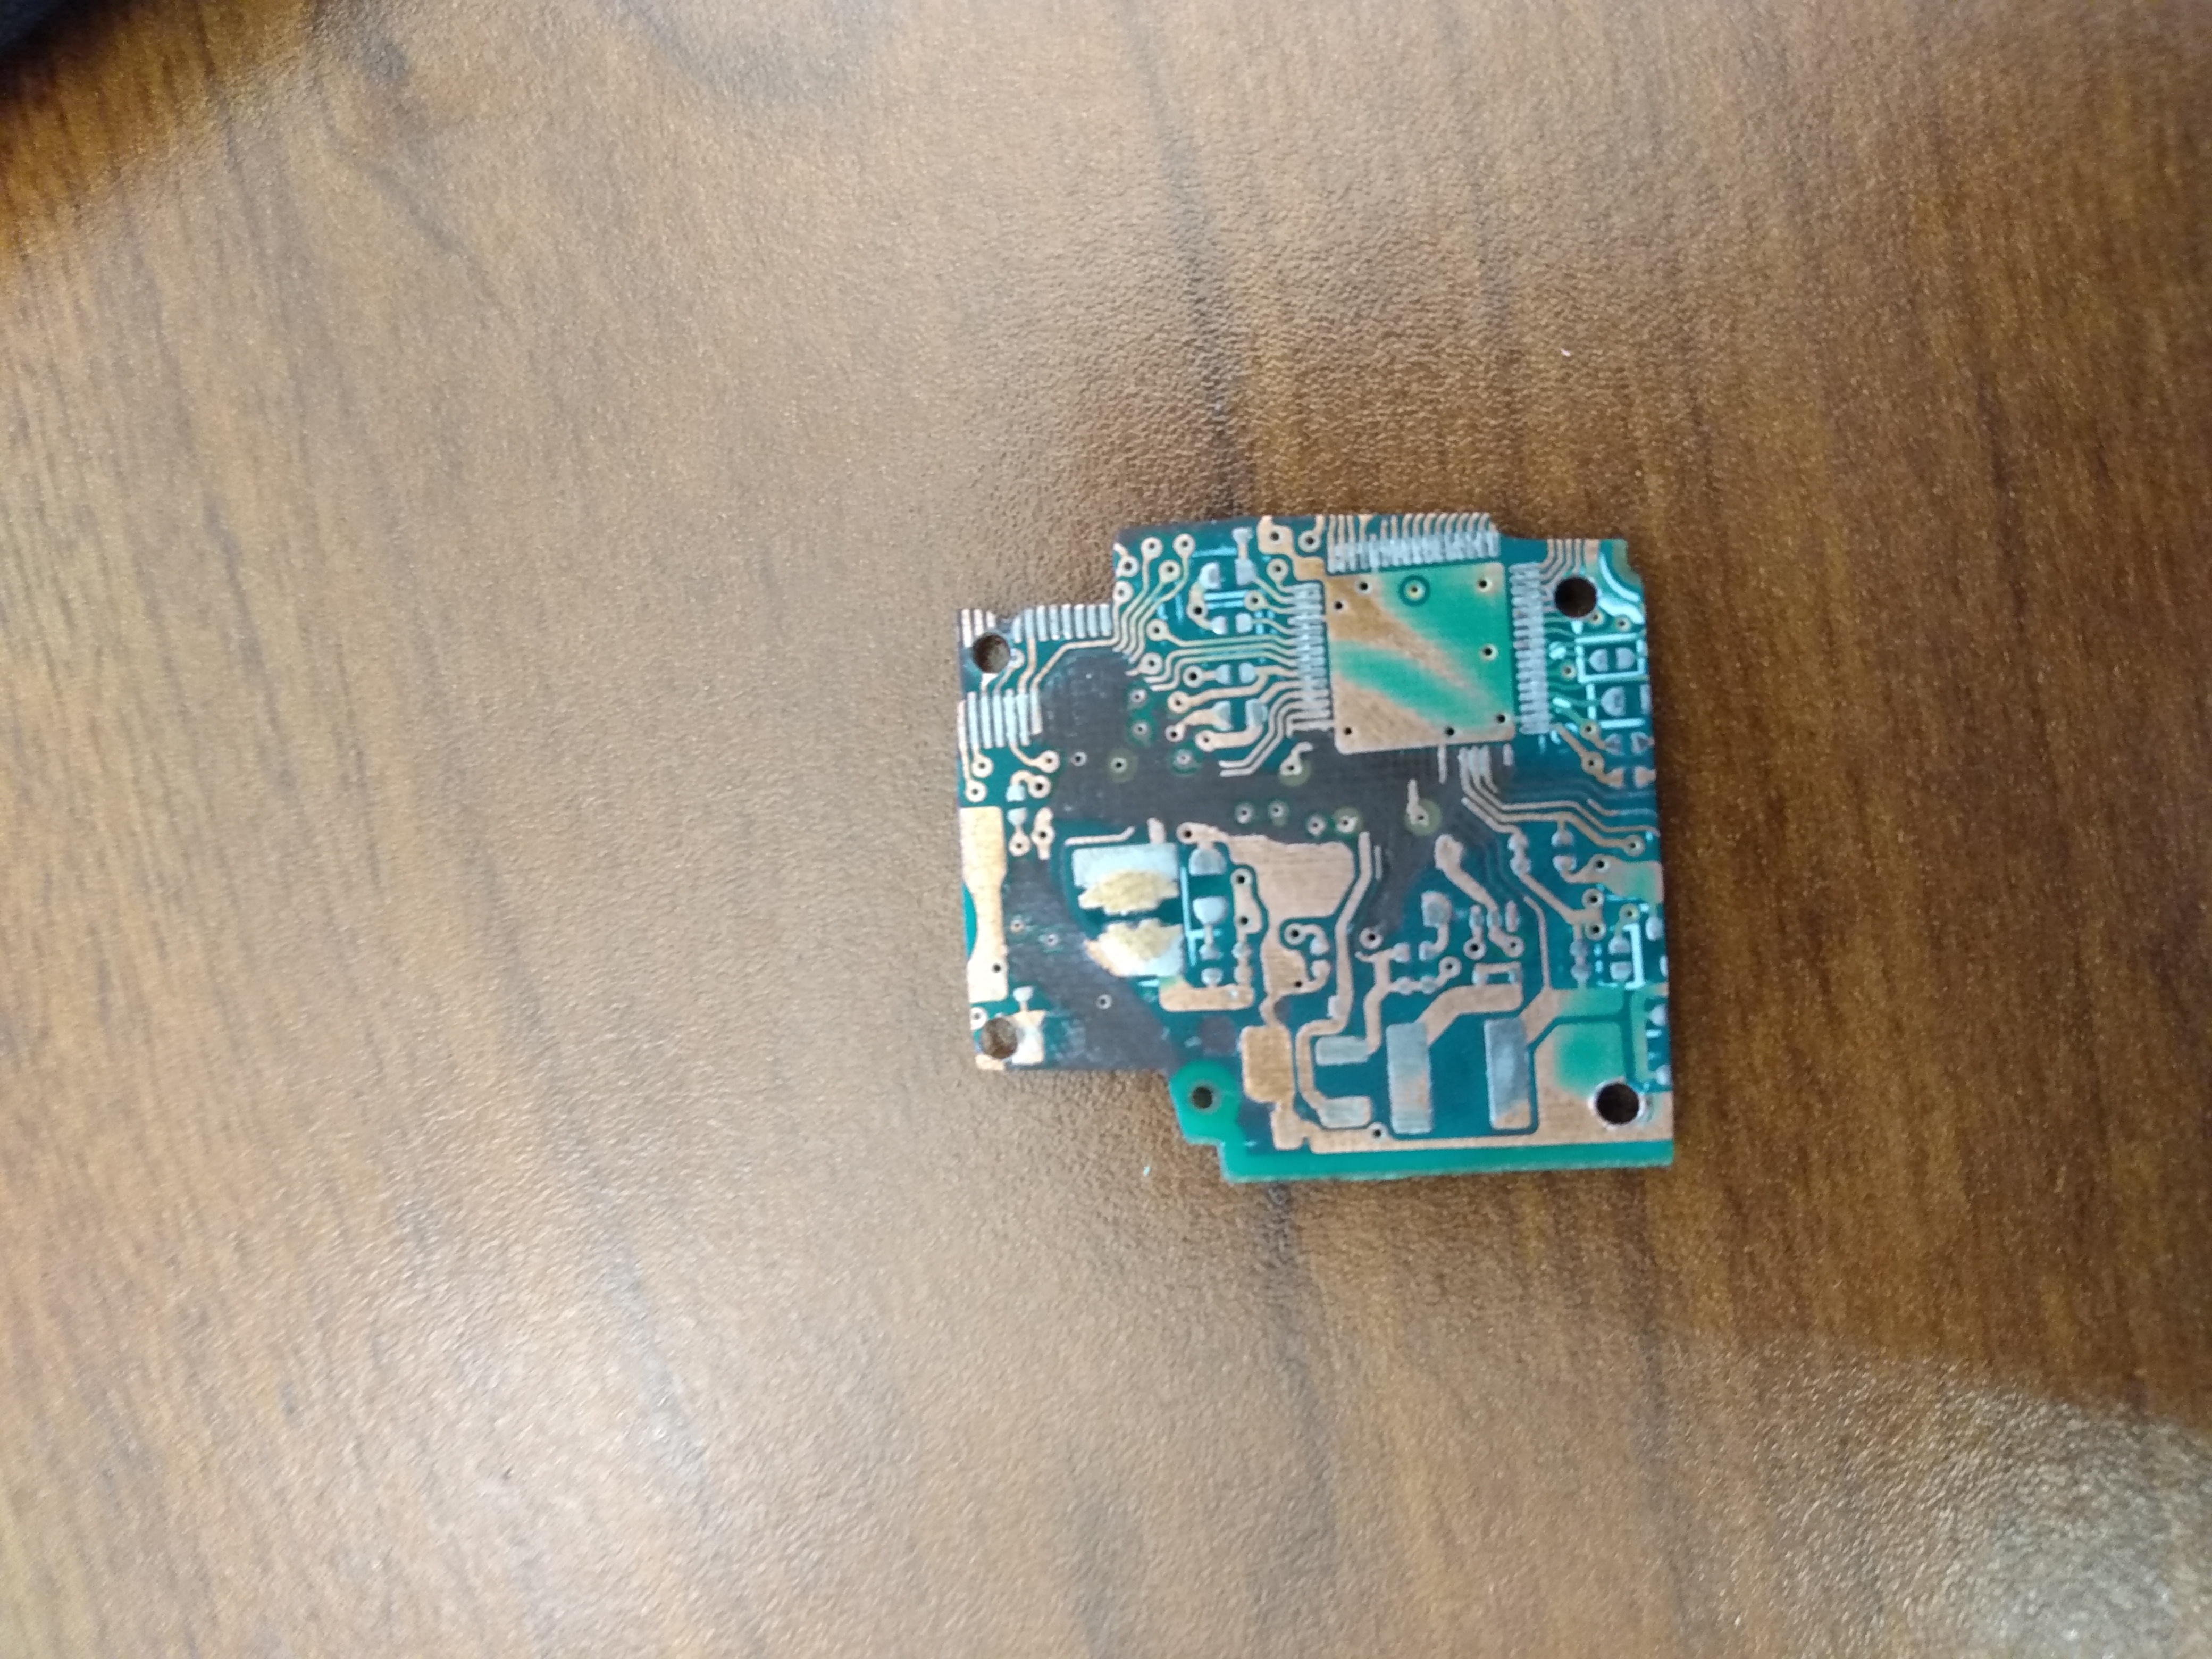
Next was trimming the ds lite motherboard to use as the contacts. it made the most sense as it was the slimmest, best solution I could think of. Plus it is thrifty! I ended up sanding all the parts off of the back side of each pcb so that the 3d printed brackets i modeled would sit flat. There was a lot of trial and error in sanding them to get it to fit perfectly in its designated spot. Both of these pcbs are held down with the various screws that held the Ds Lite together.
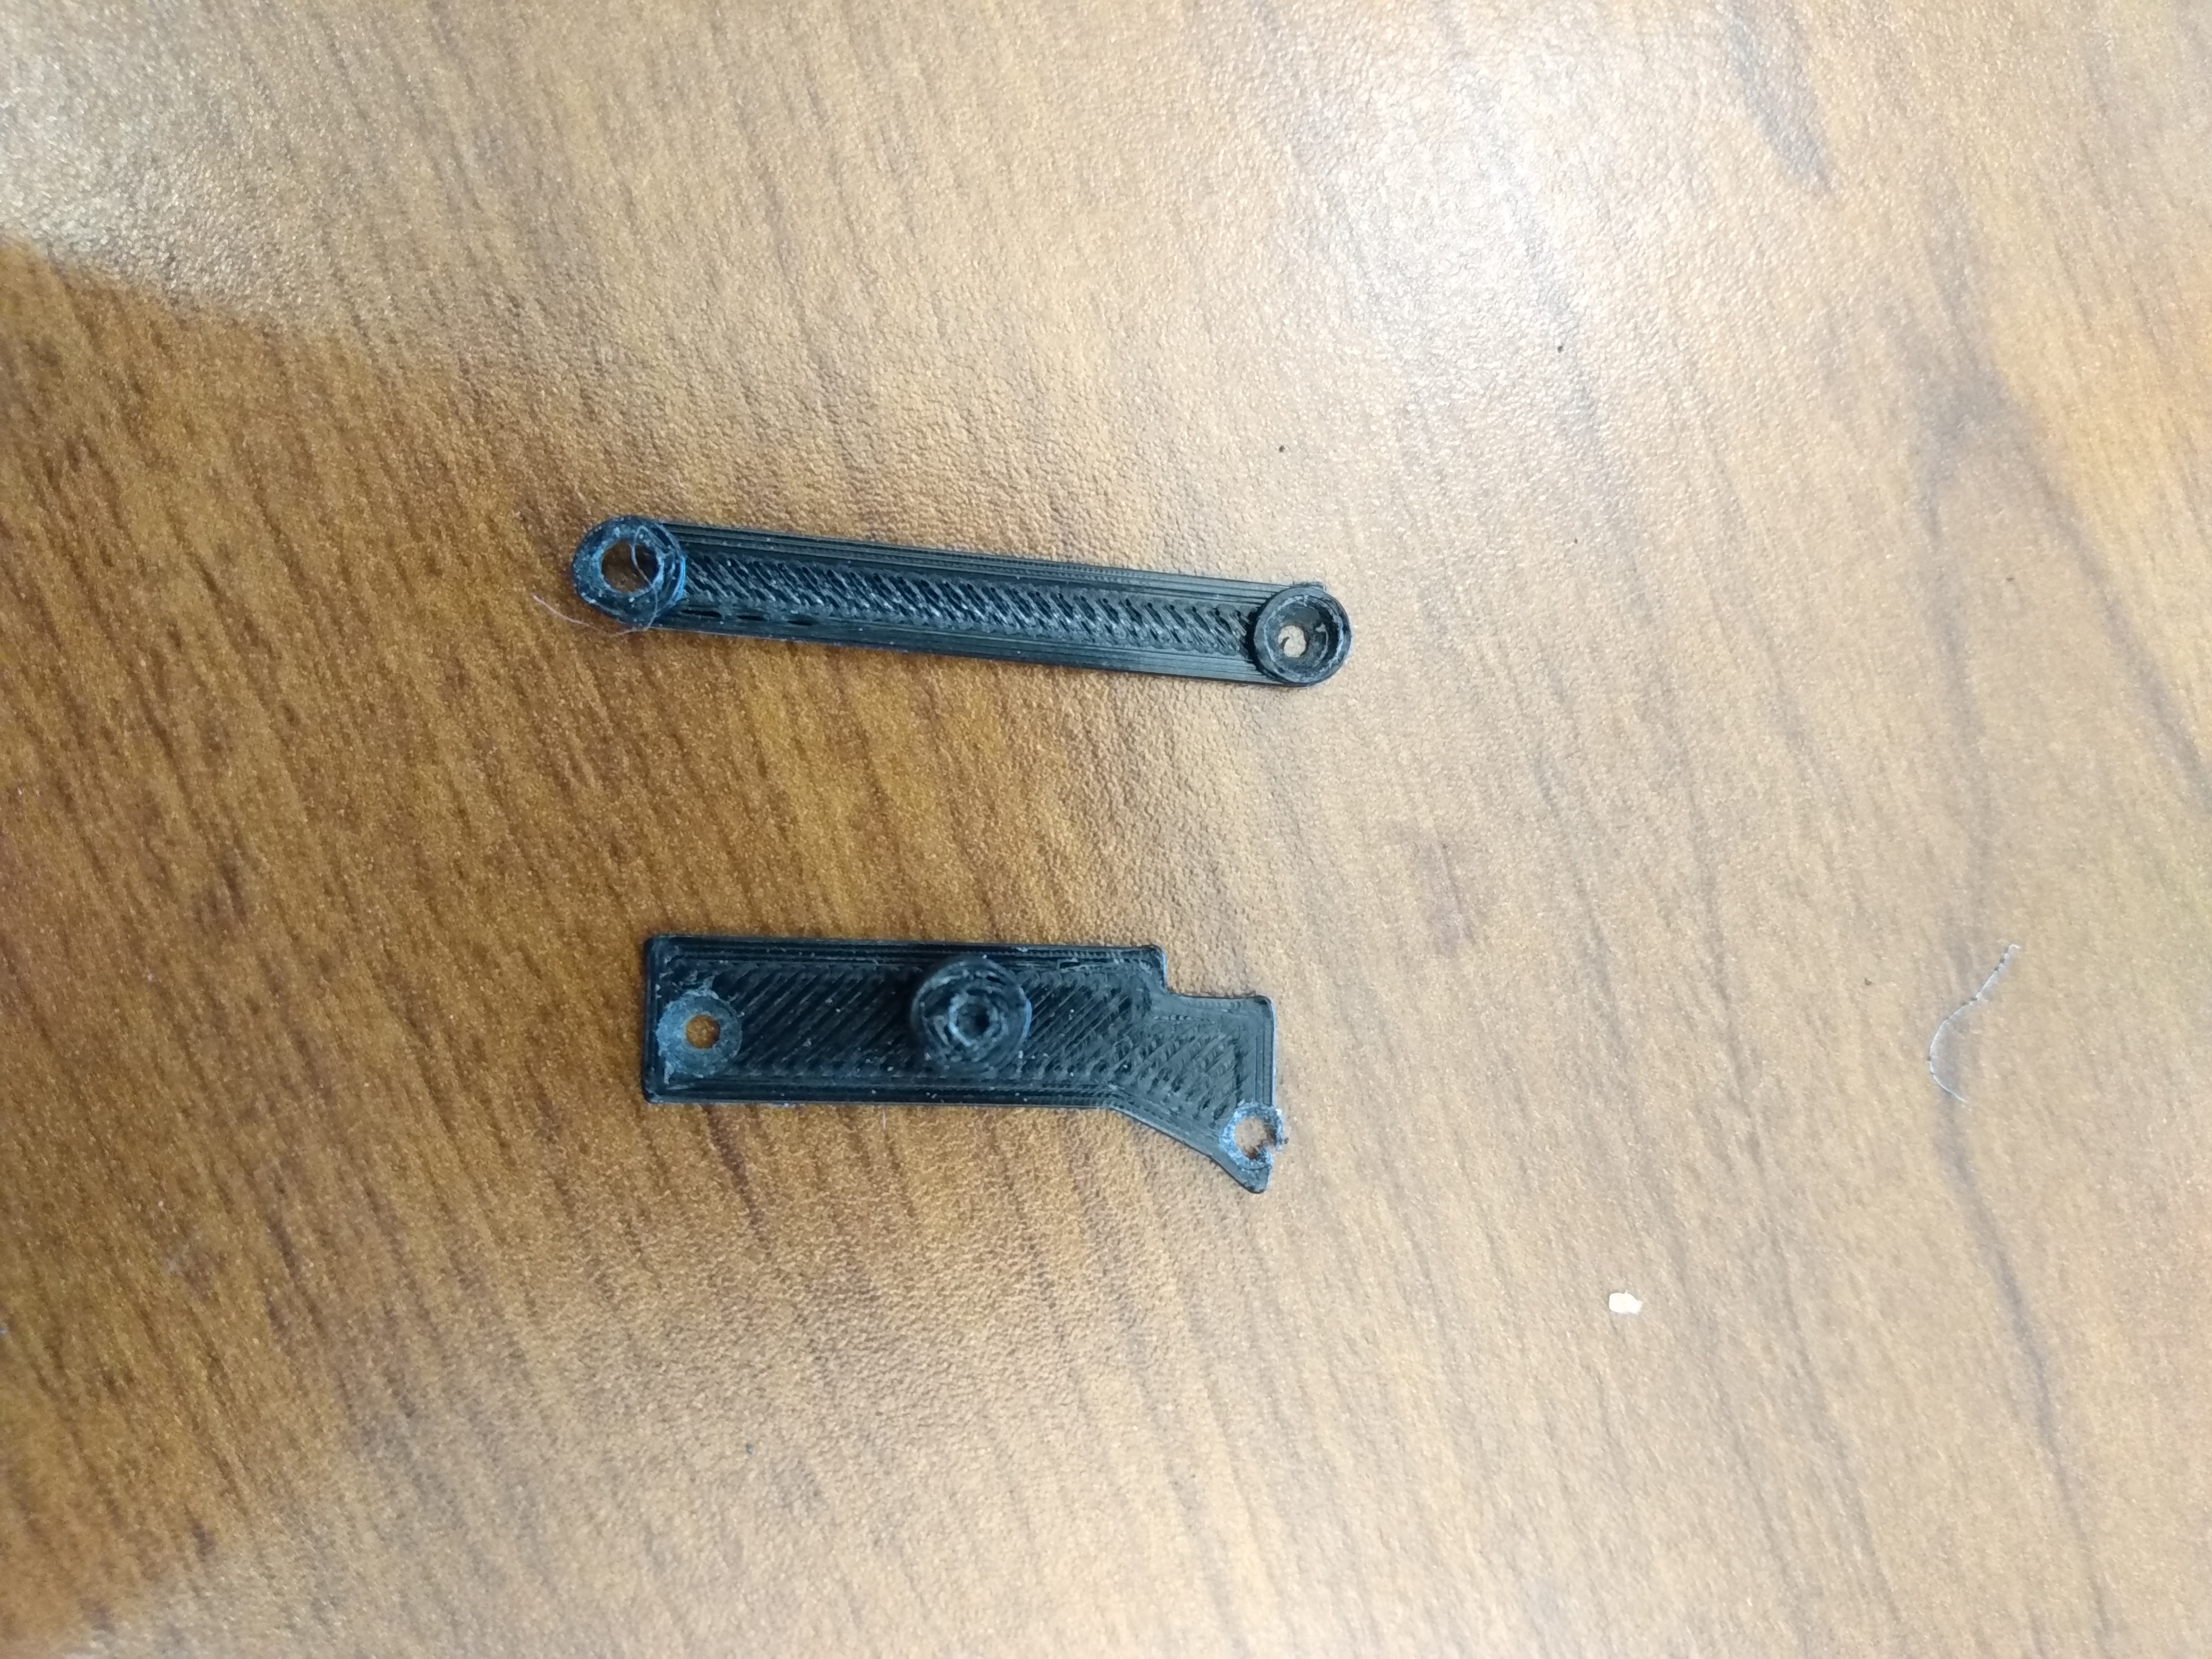
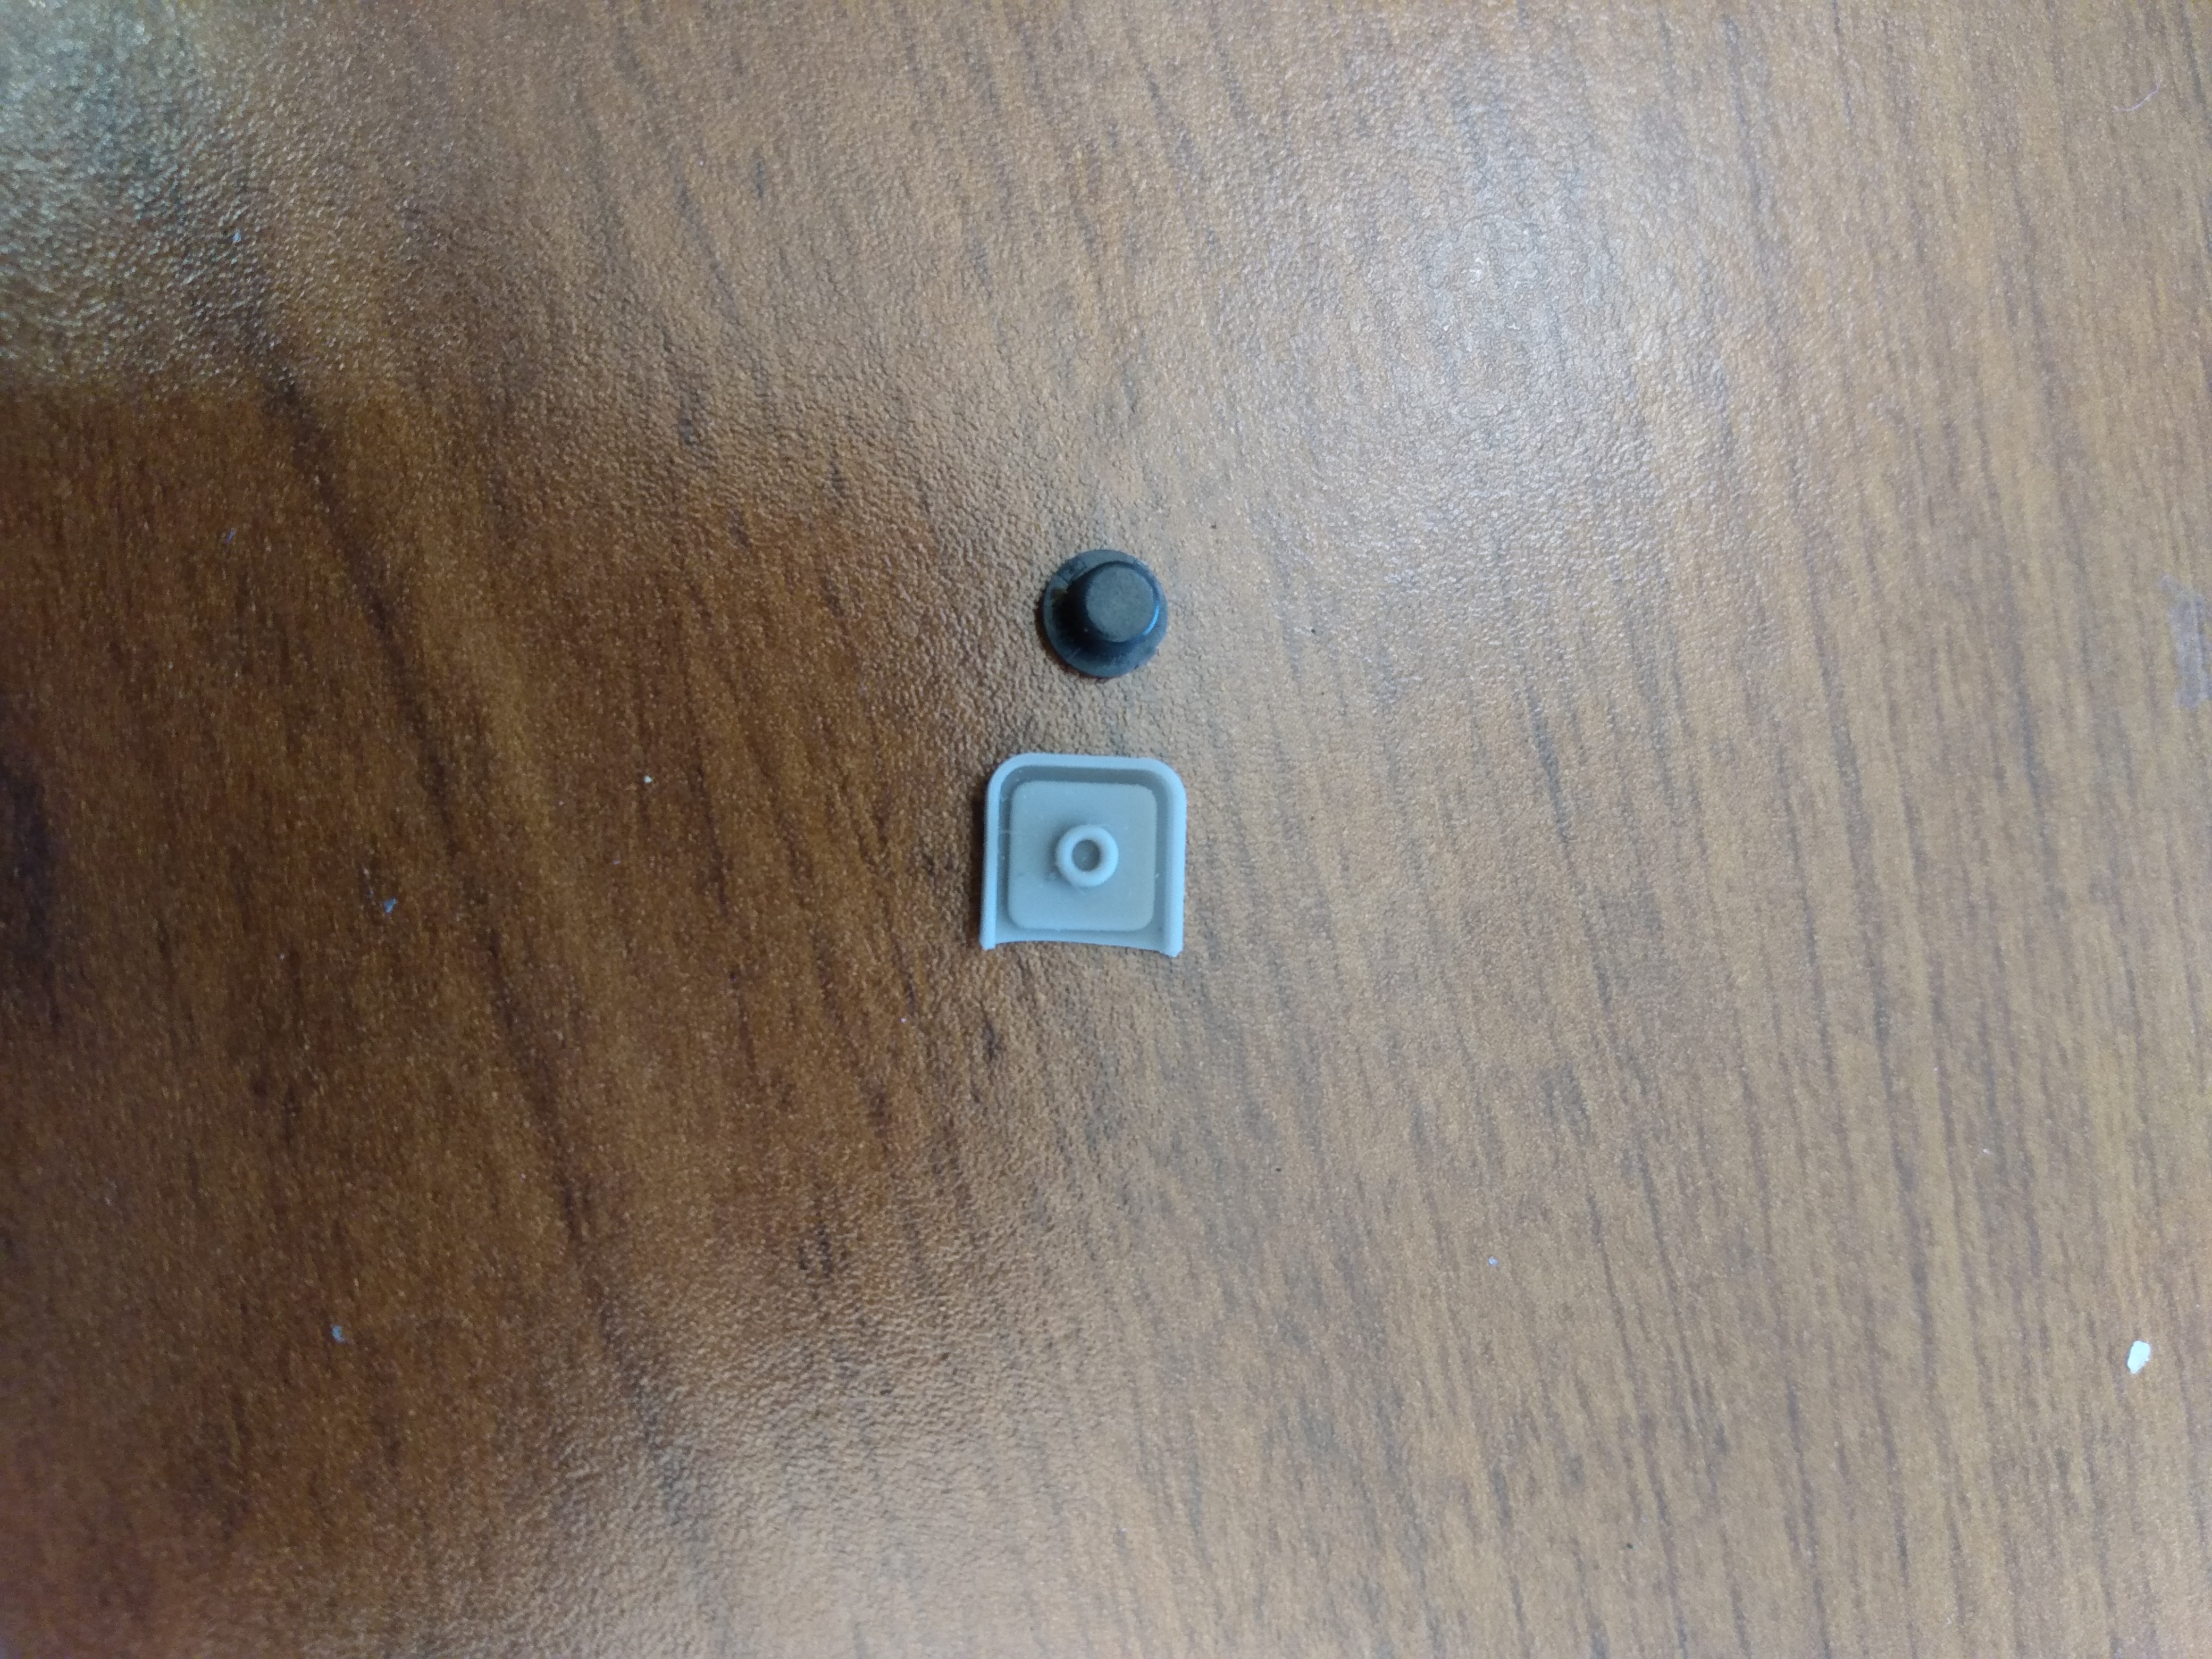
For the start button, I originally wanted to use the smd tacts that were already used for the start and select buttons and trim those parts of the motherboard, but I accidently destroyed one while trying to figure out how to implement the z button. because of this, I dug into my old guitar effects pedal bag-o-parts and found some perfboard and a clicky tact to use. it ended working well as the perfboard was sort of a bus for the ground and 3.3v lines. In the future I will probably super glue a little piece of perf on the back of the ABXY board and use that as the bus. you can see that I used the DS lite button and membrane too
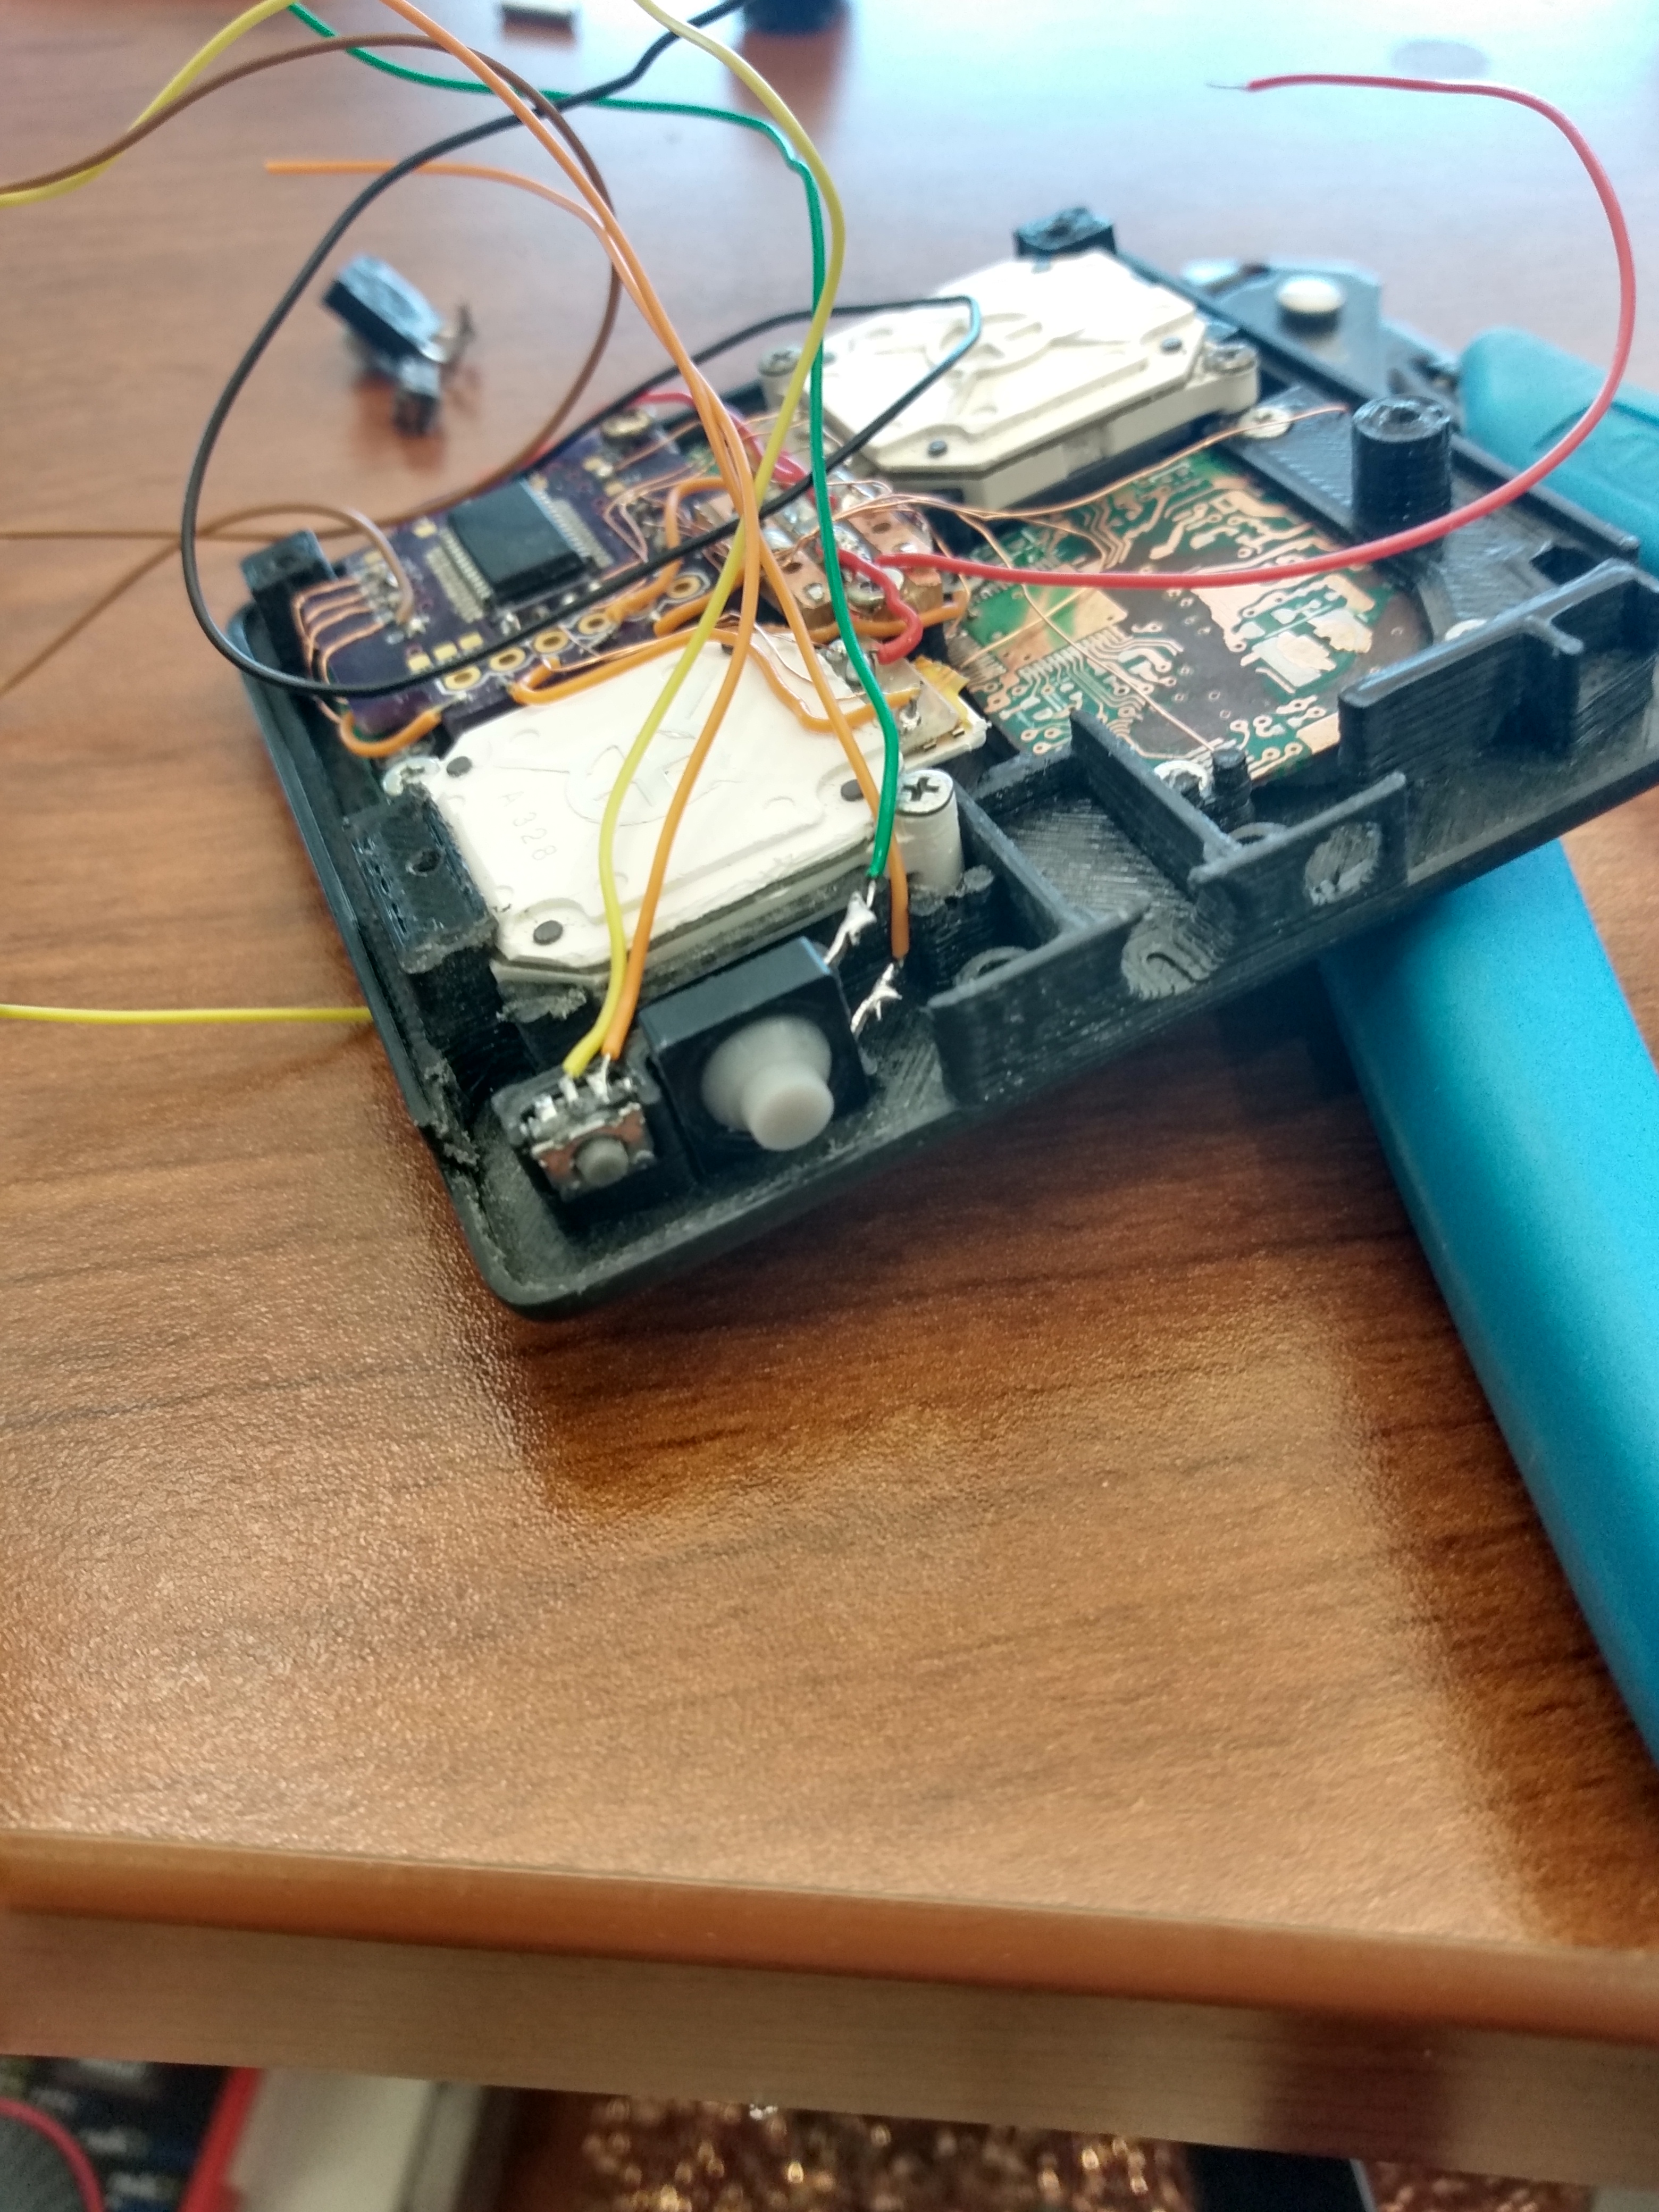
after those parts were in place, I put in the 3ds sliders. This was really easy, it turned out perfect the first time! below you can see a couple of pics with most stuff screwed in and then some of my spaghetti wiring. One of the pics is from one of my earlier prototypes before I got the screw post situation sorted out. the posts near the triggers were ruining everything and preventing the trigger assembly from working at all, so that is why I ended up moving them down. Aurelio helped me out with the wiring of the sliders, I had to swap x and y due to their the orientation in my case.

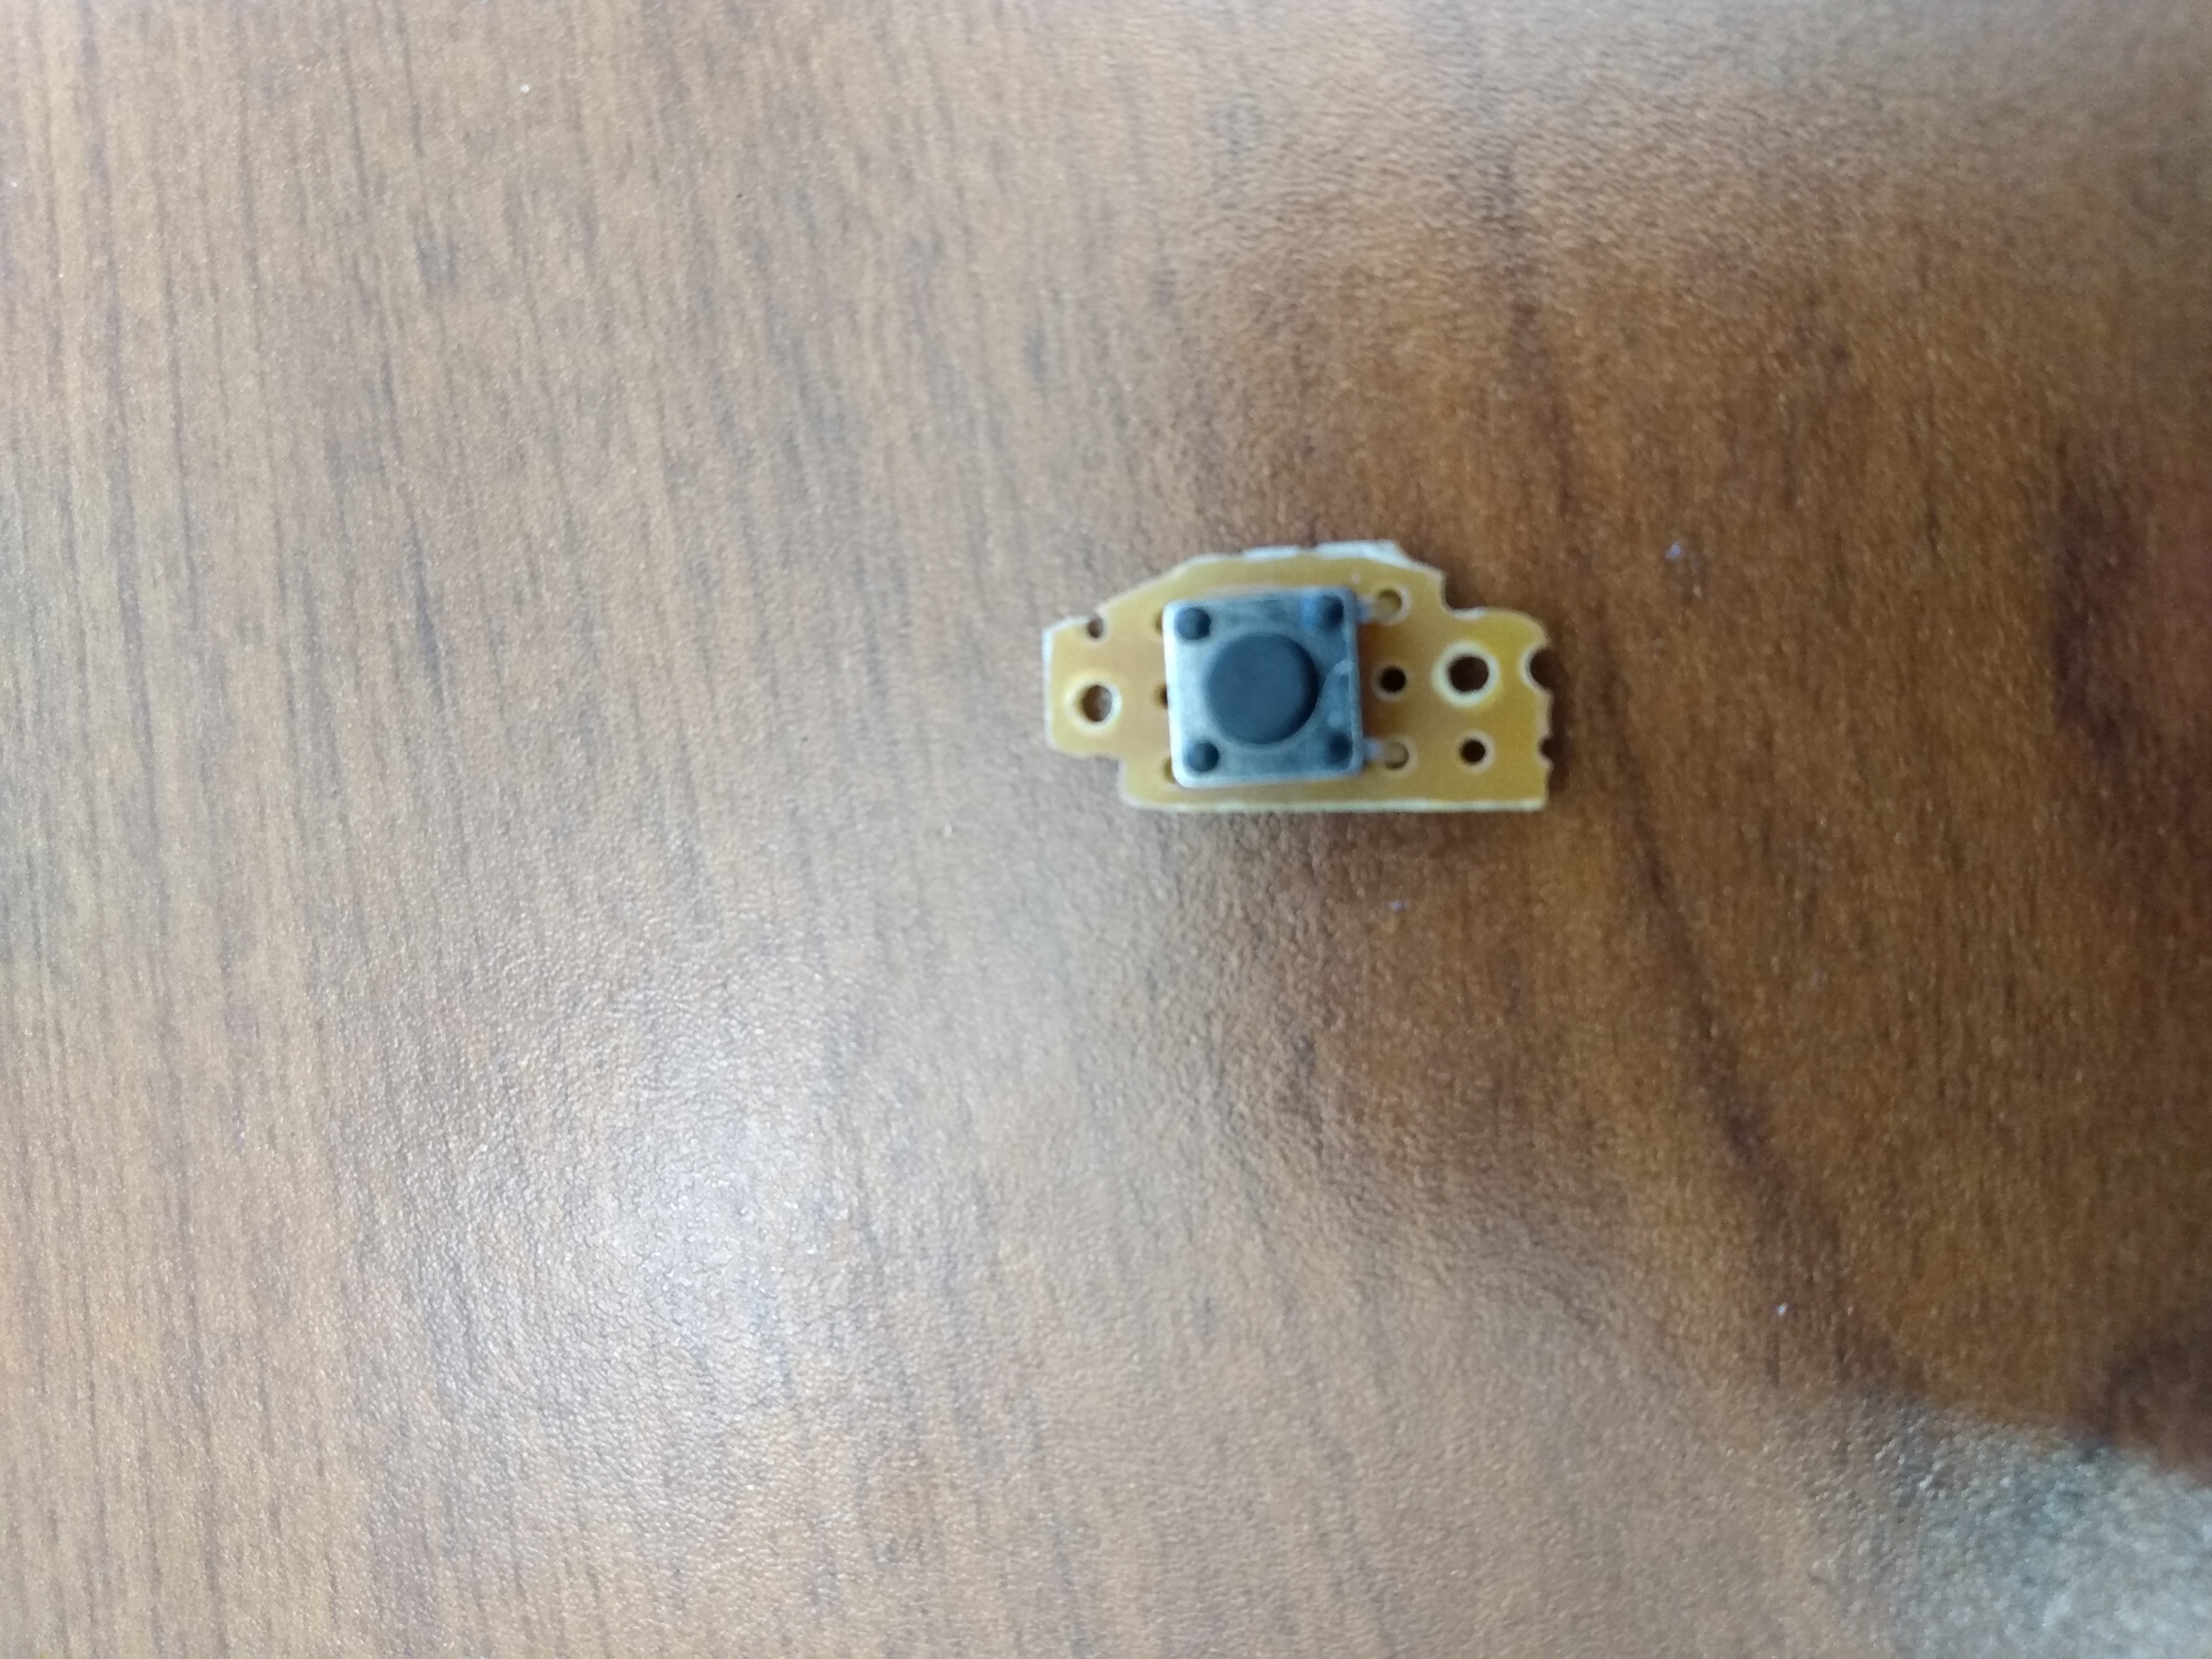
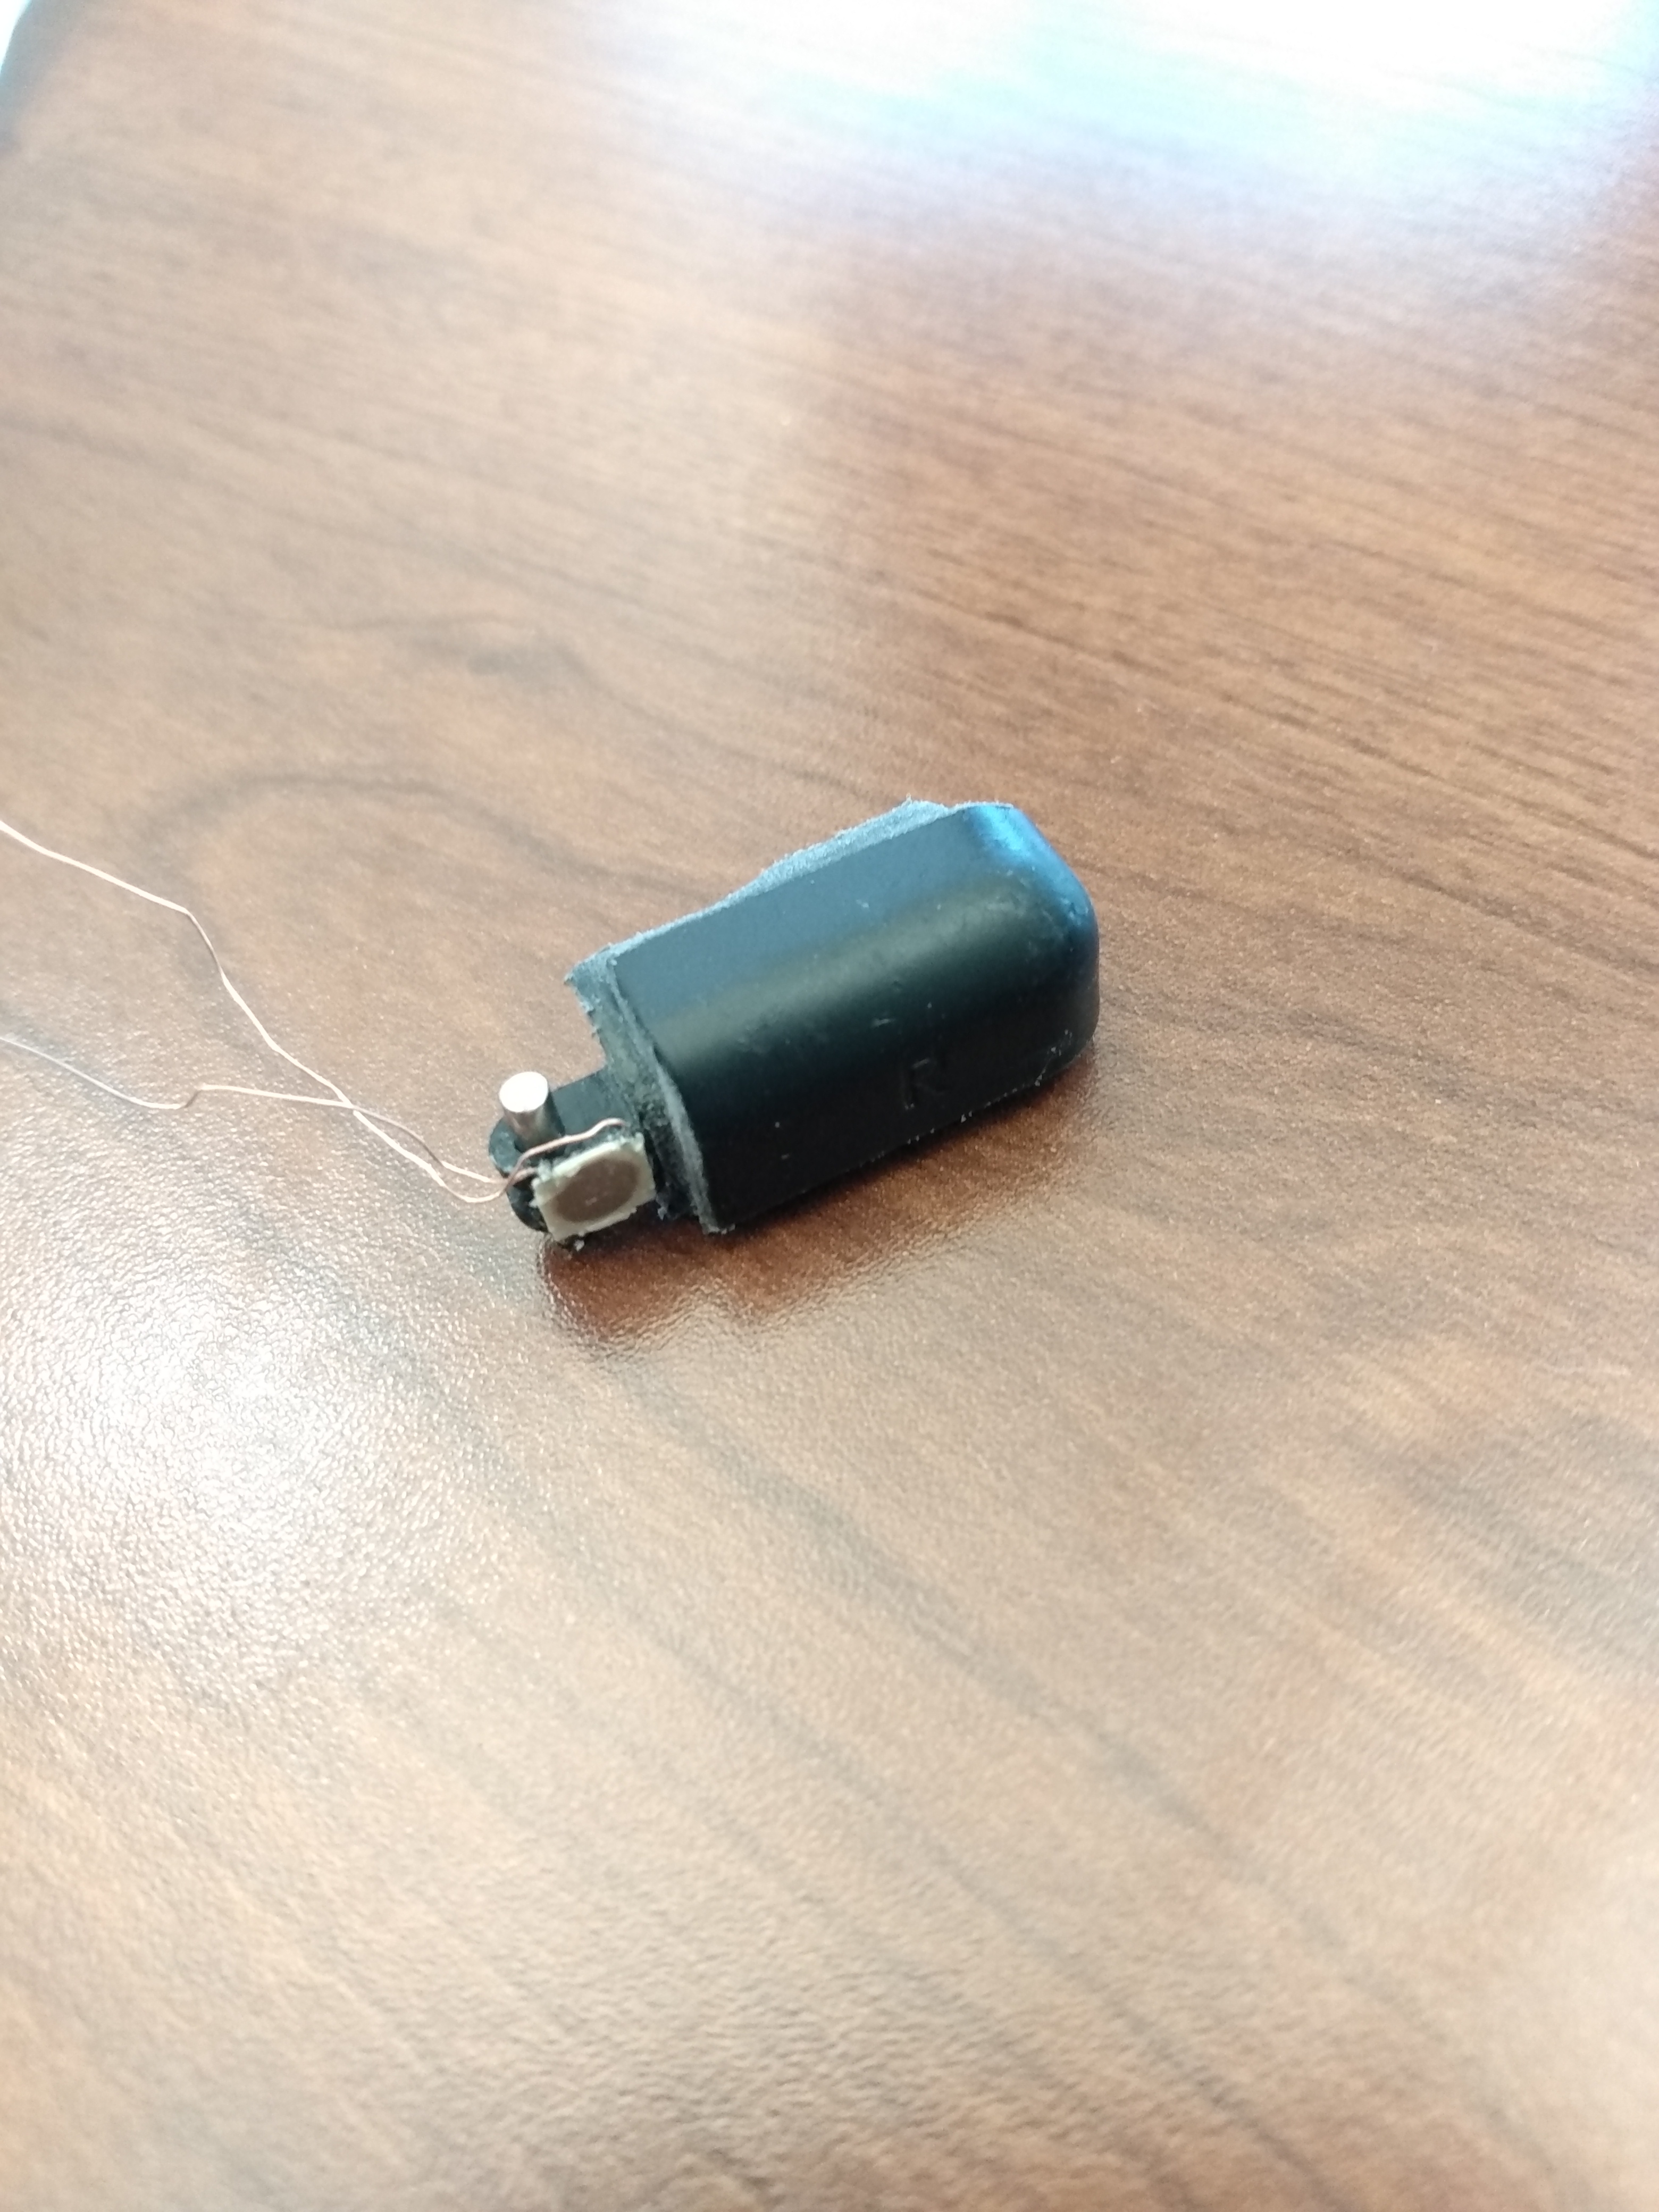
After this I got to work on the triggers. I utilized the inferior grey squishy tact, and orginally the trigger tacts off of the DS Lite motherboard. I guess wrecked them while trying to remove them, so I then ended raiding my dead wii motherboard stack to utlize the tacts that are on there. I couldn't remove them without destroying them, so I ended up keeping the pcb with it and trimming it as small as I could. In the future I will do this with the ds lite trigger tacts.

you can see how I fit them into the trigger, it works really well and I only had to cut the post on the inside of the DS lite shoulder button and add a piece of electrical tape to get the action right.
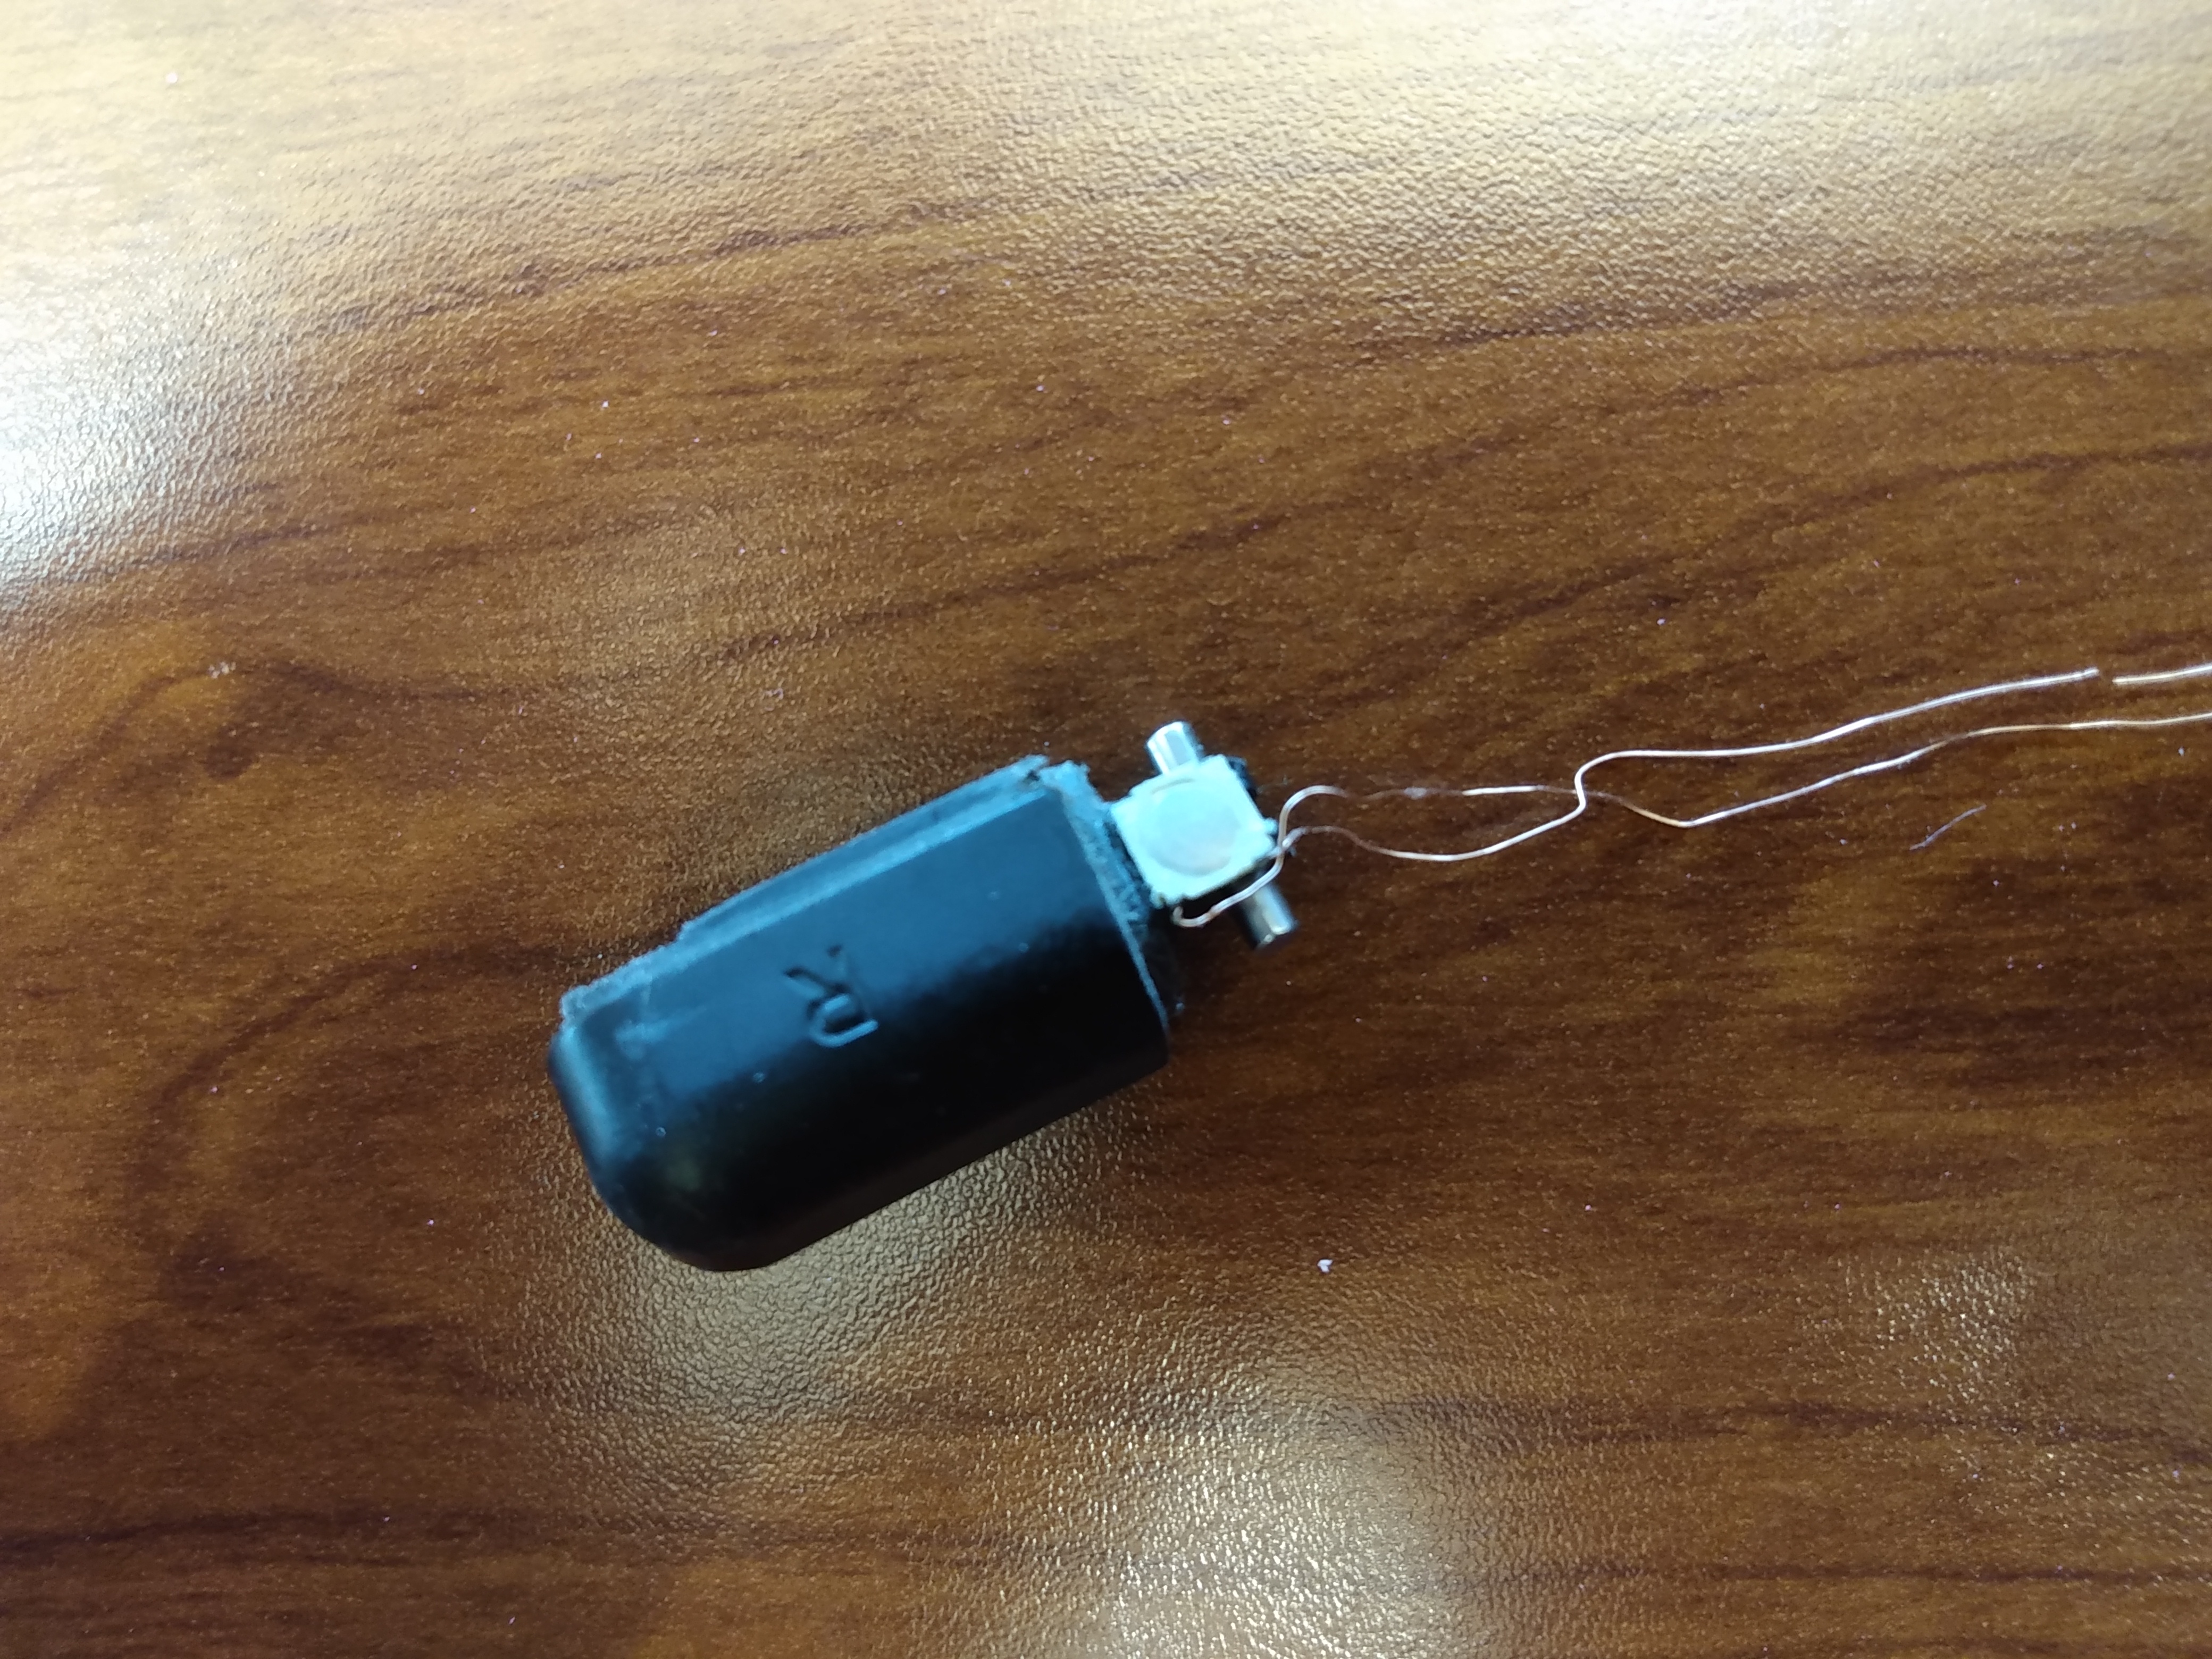
I had a really difficult time thinking of how I was going to implement the z button. At first I wanted to have it above the right trigger like the og controller, but it would increase the phatness by a lot. Then I thought maybe putting on the back of the shell, but I was able to attach everything else to the front, and i didn't want the two halves to be connected with wires. below is the picture of what I ended up doing. I filled the part of the trigger that has the metal post go through it, and superglued one of the smd tacts that was used for the select button. I was able to trim the select button and its membrane to fit in the tiny space between the trigger and the case, and it ended up being perfect. I am probably most proud of this design, as the z button was making or breaking a lot of the goals that i had.
After that, i finished wiring everything up, tested it out (make sure the analog tact gets 3.3v, not ground lol) and it was done!
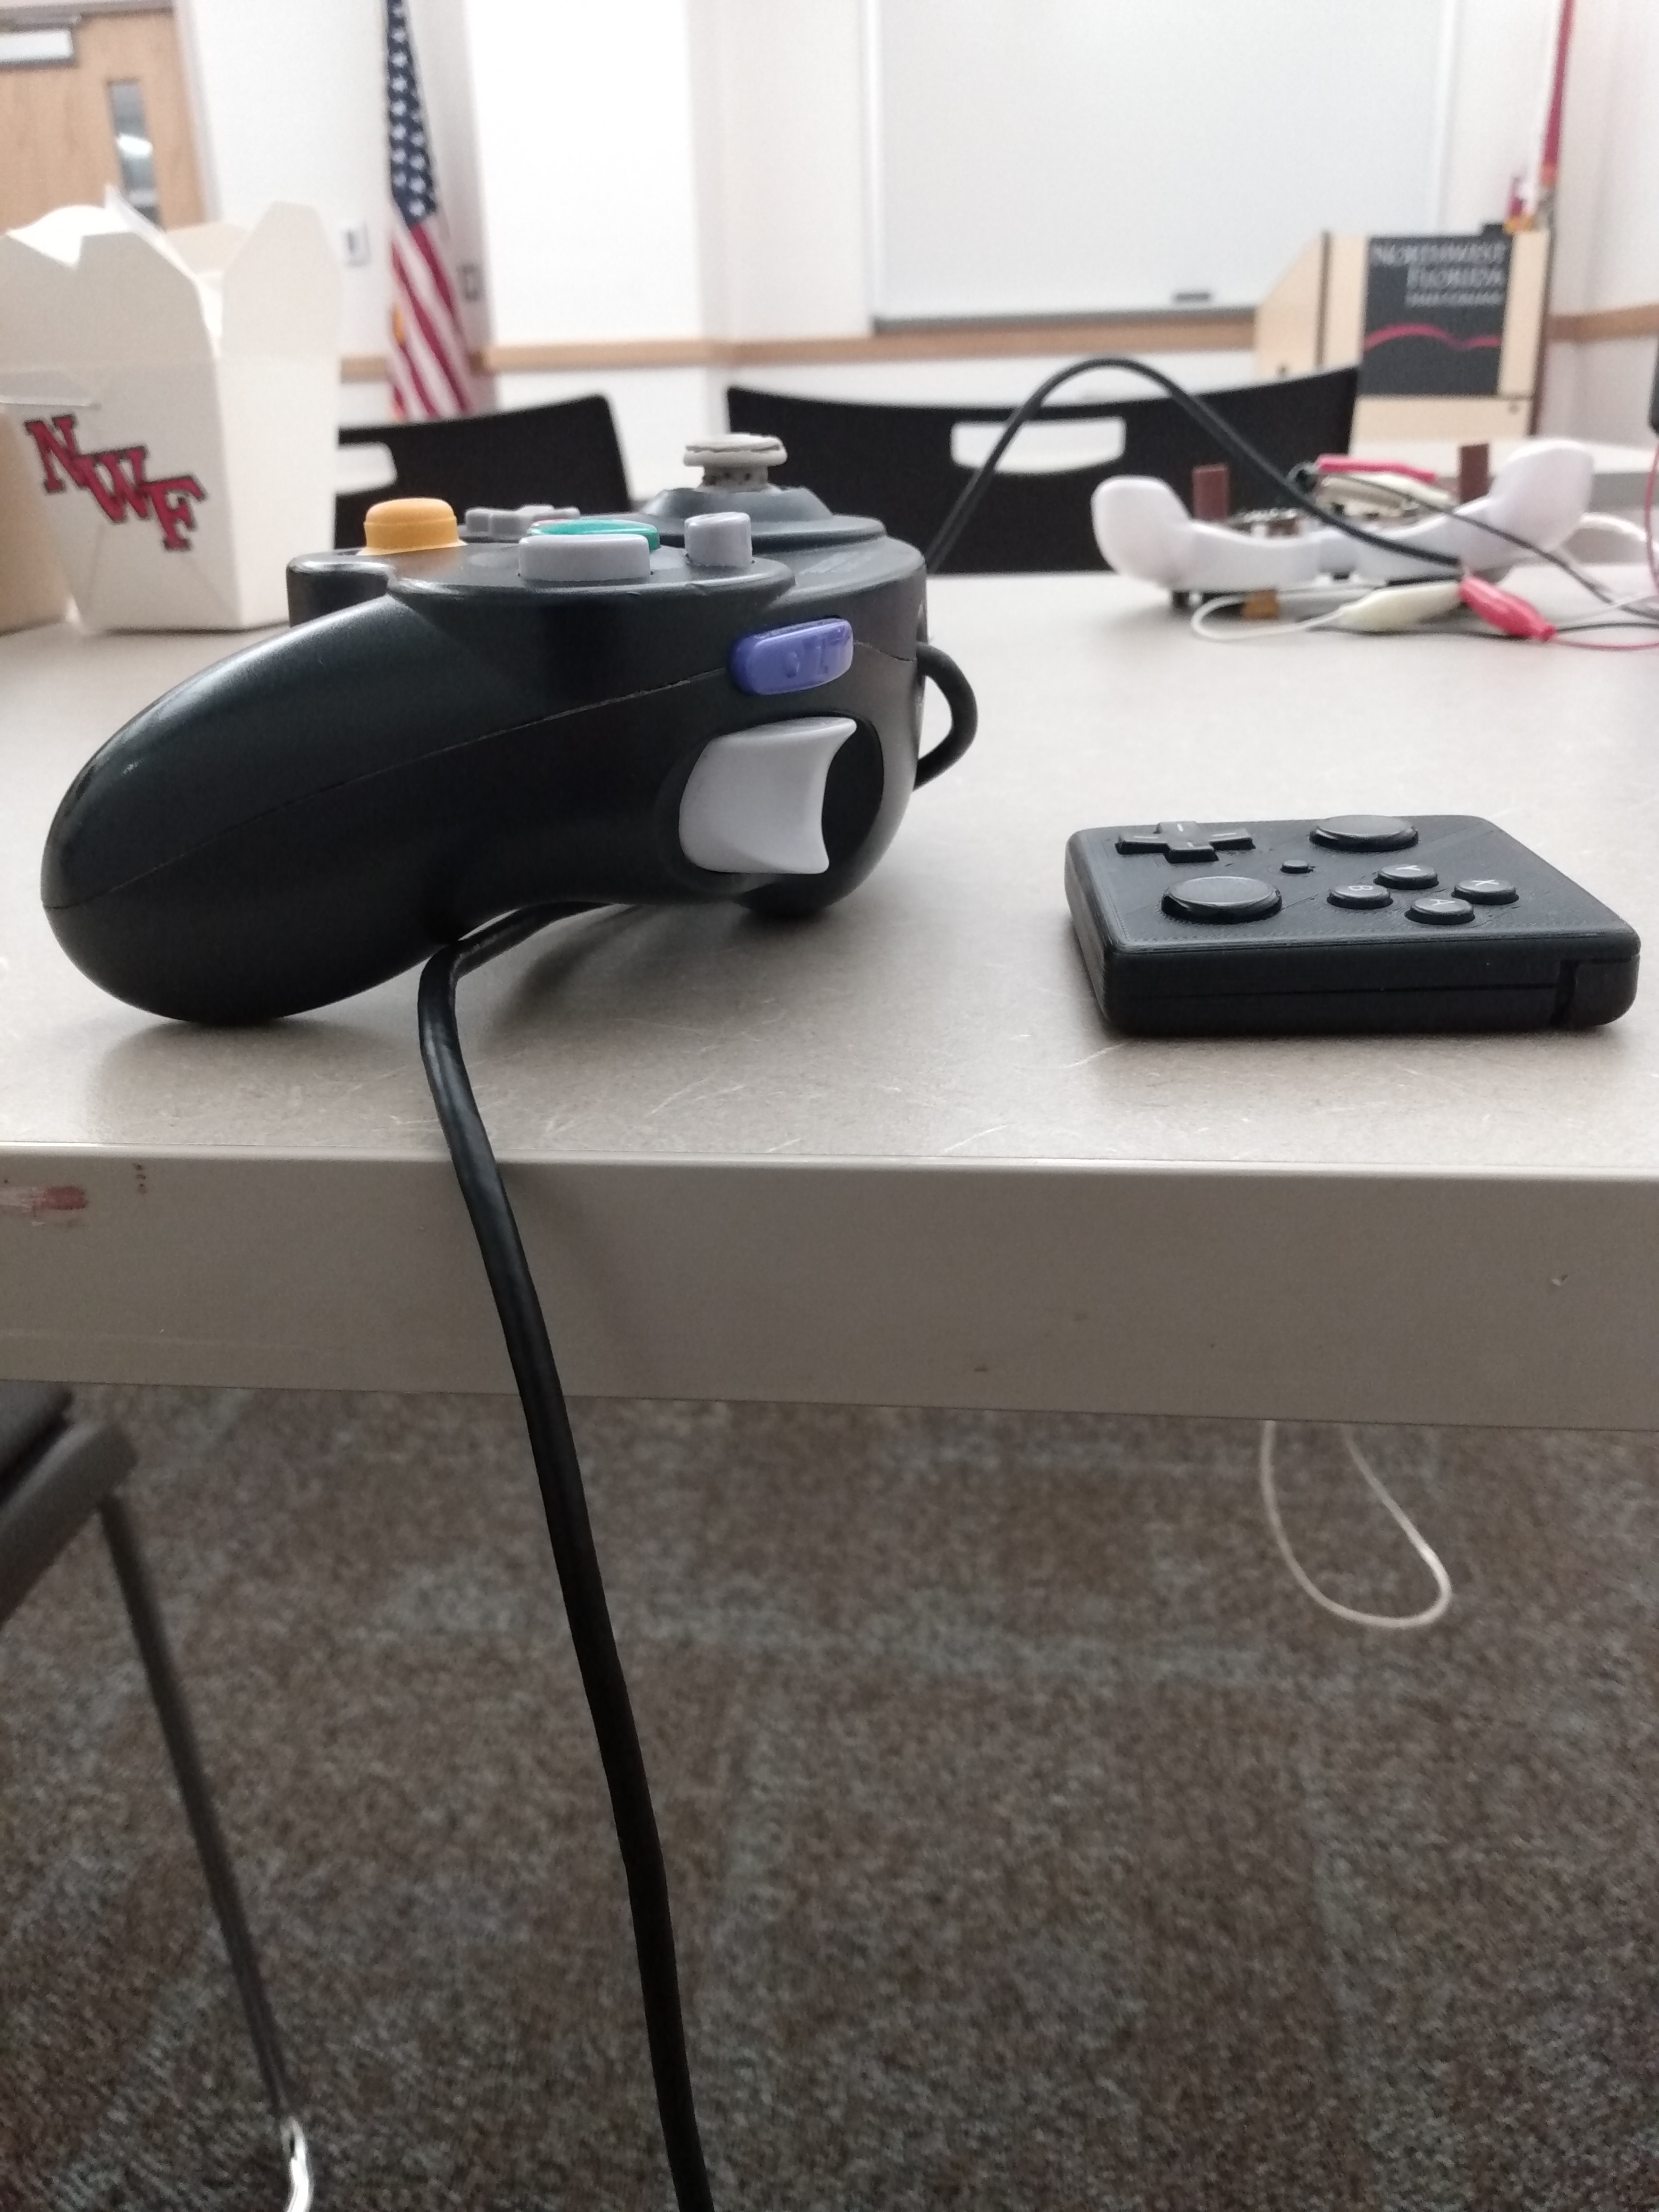
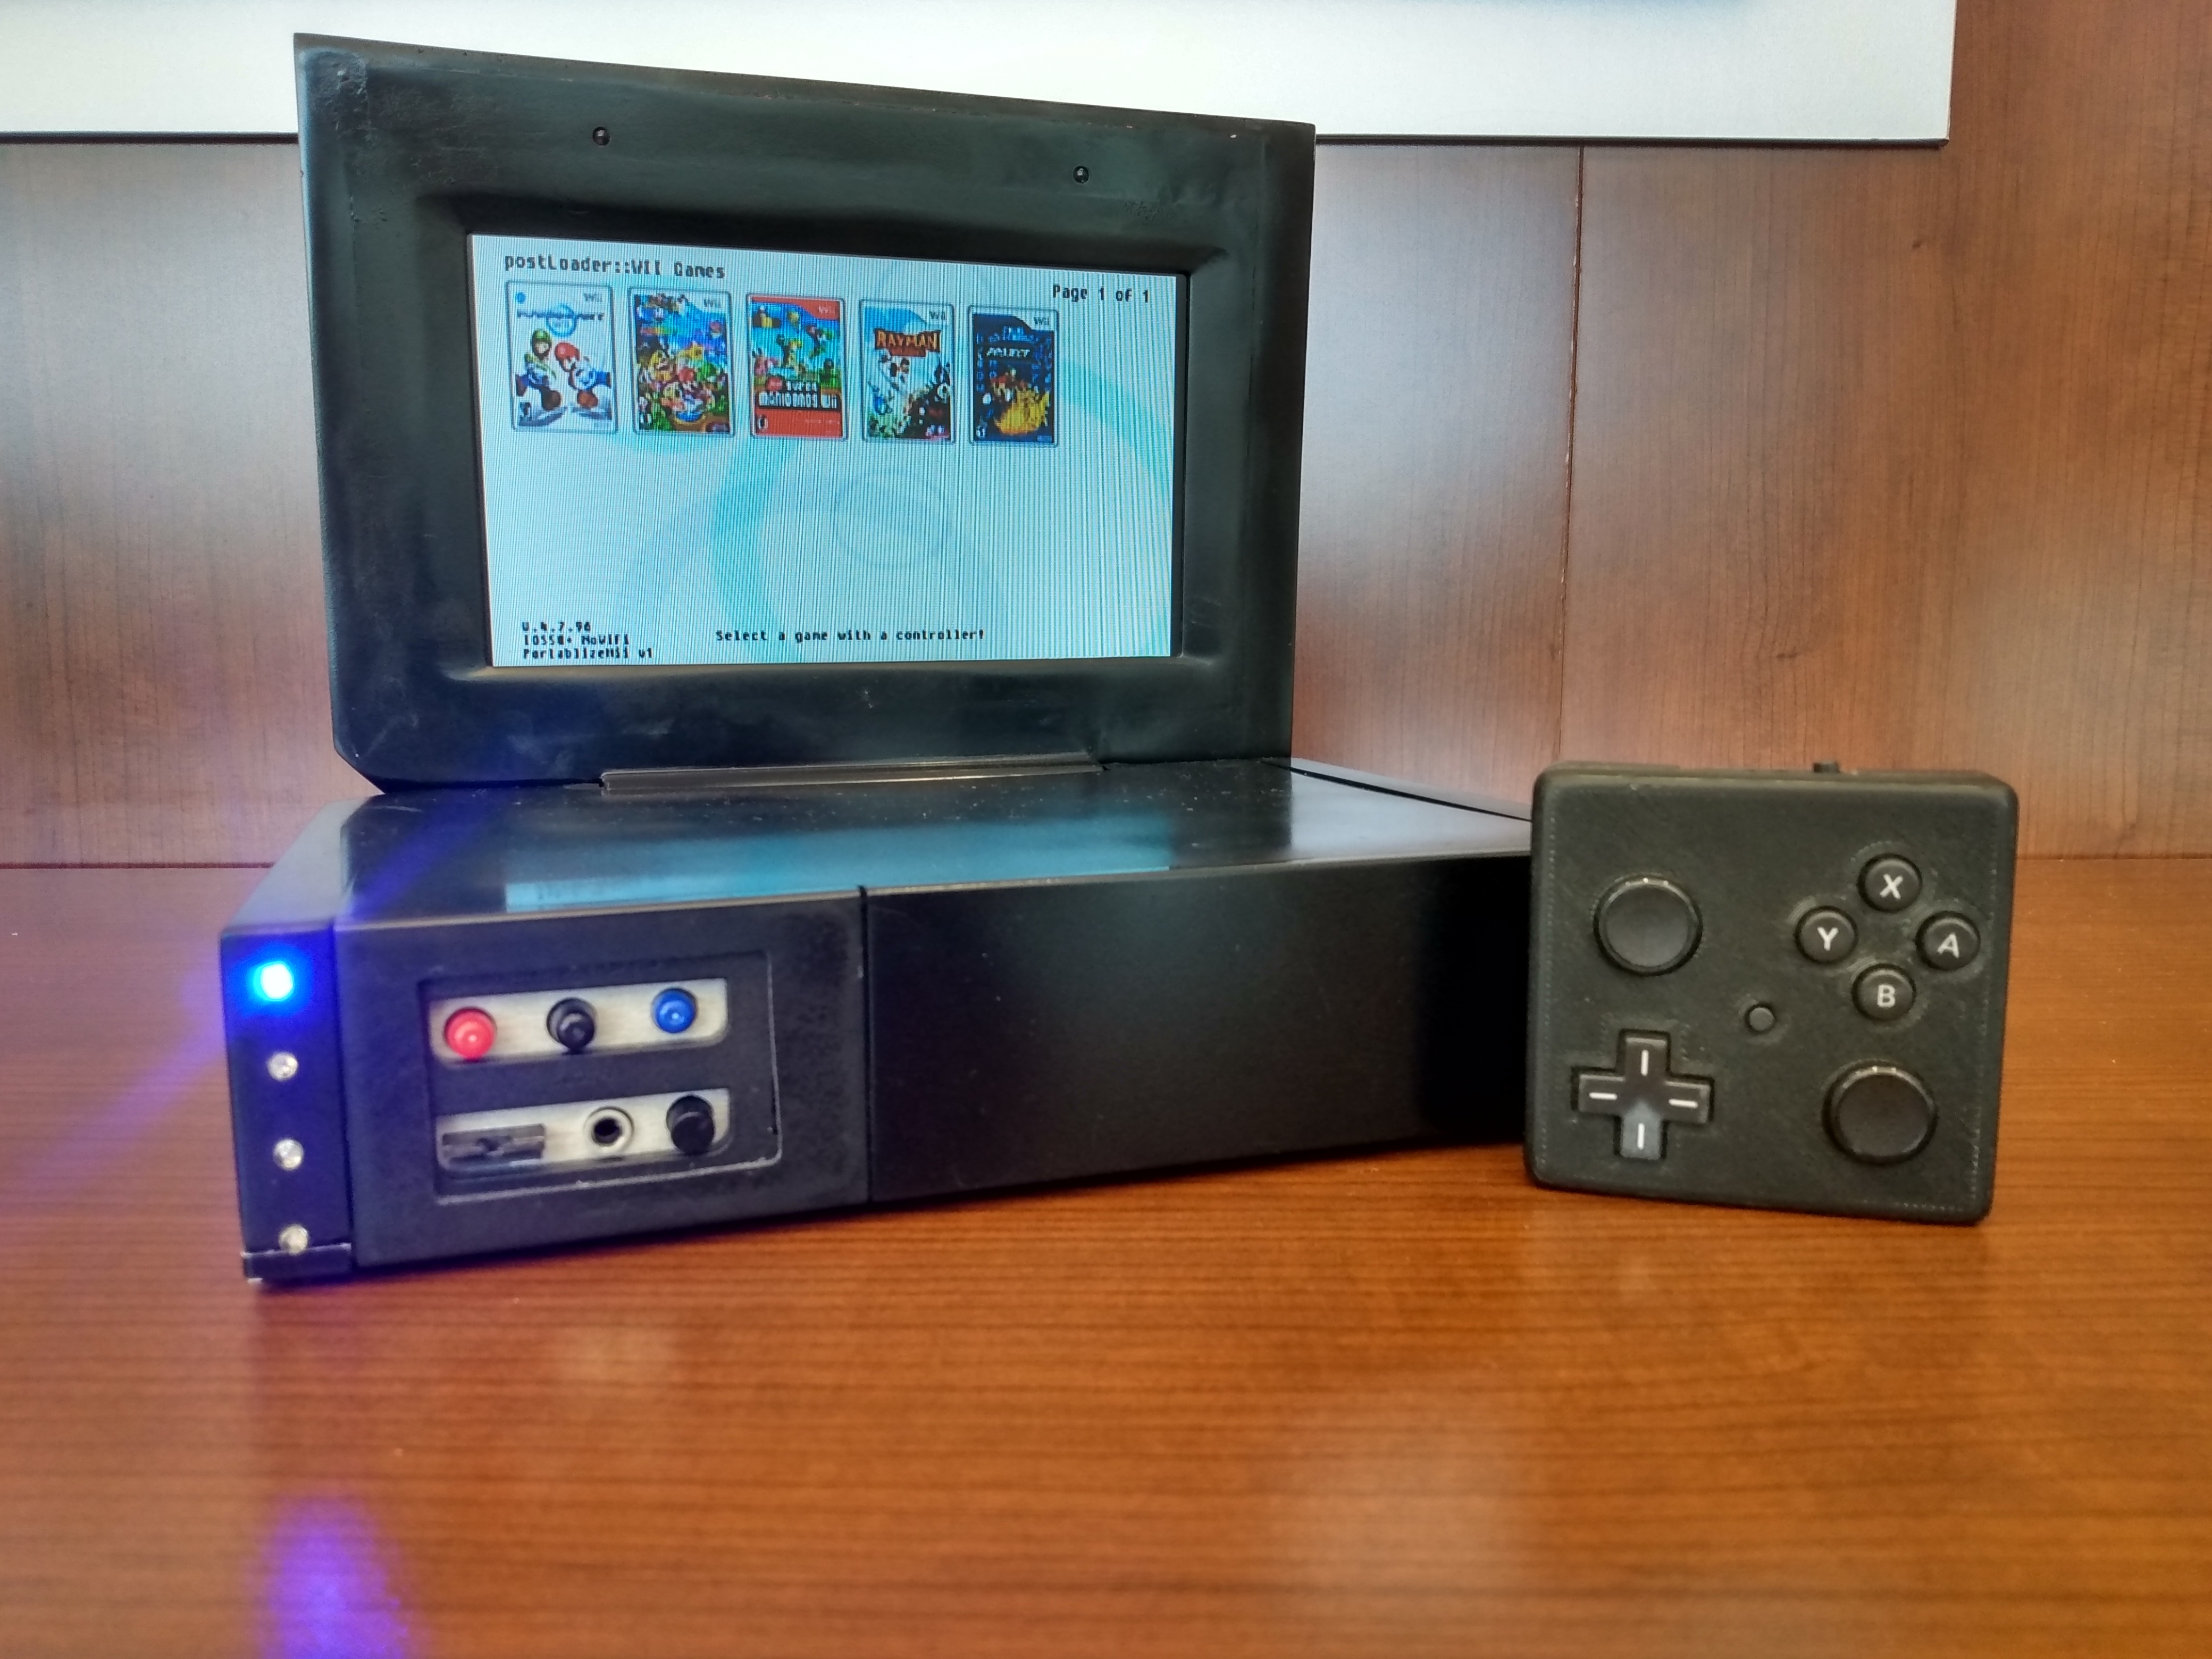
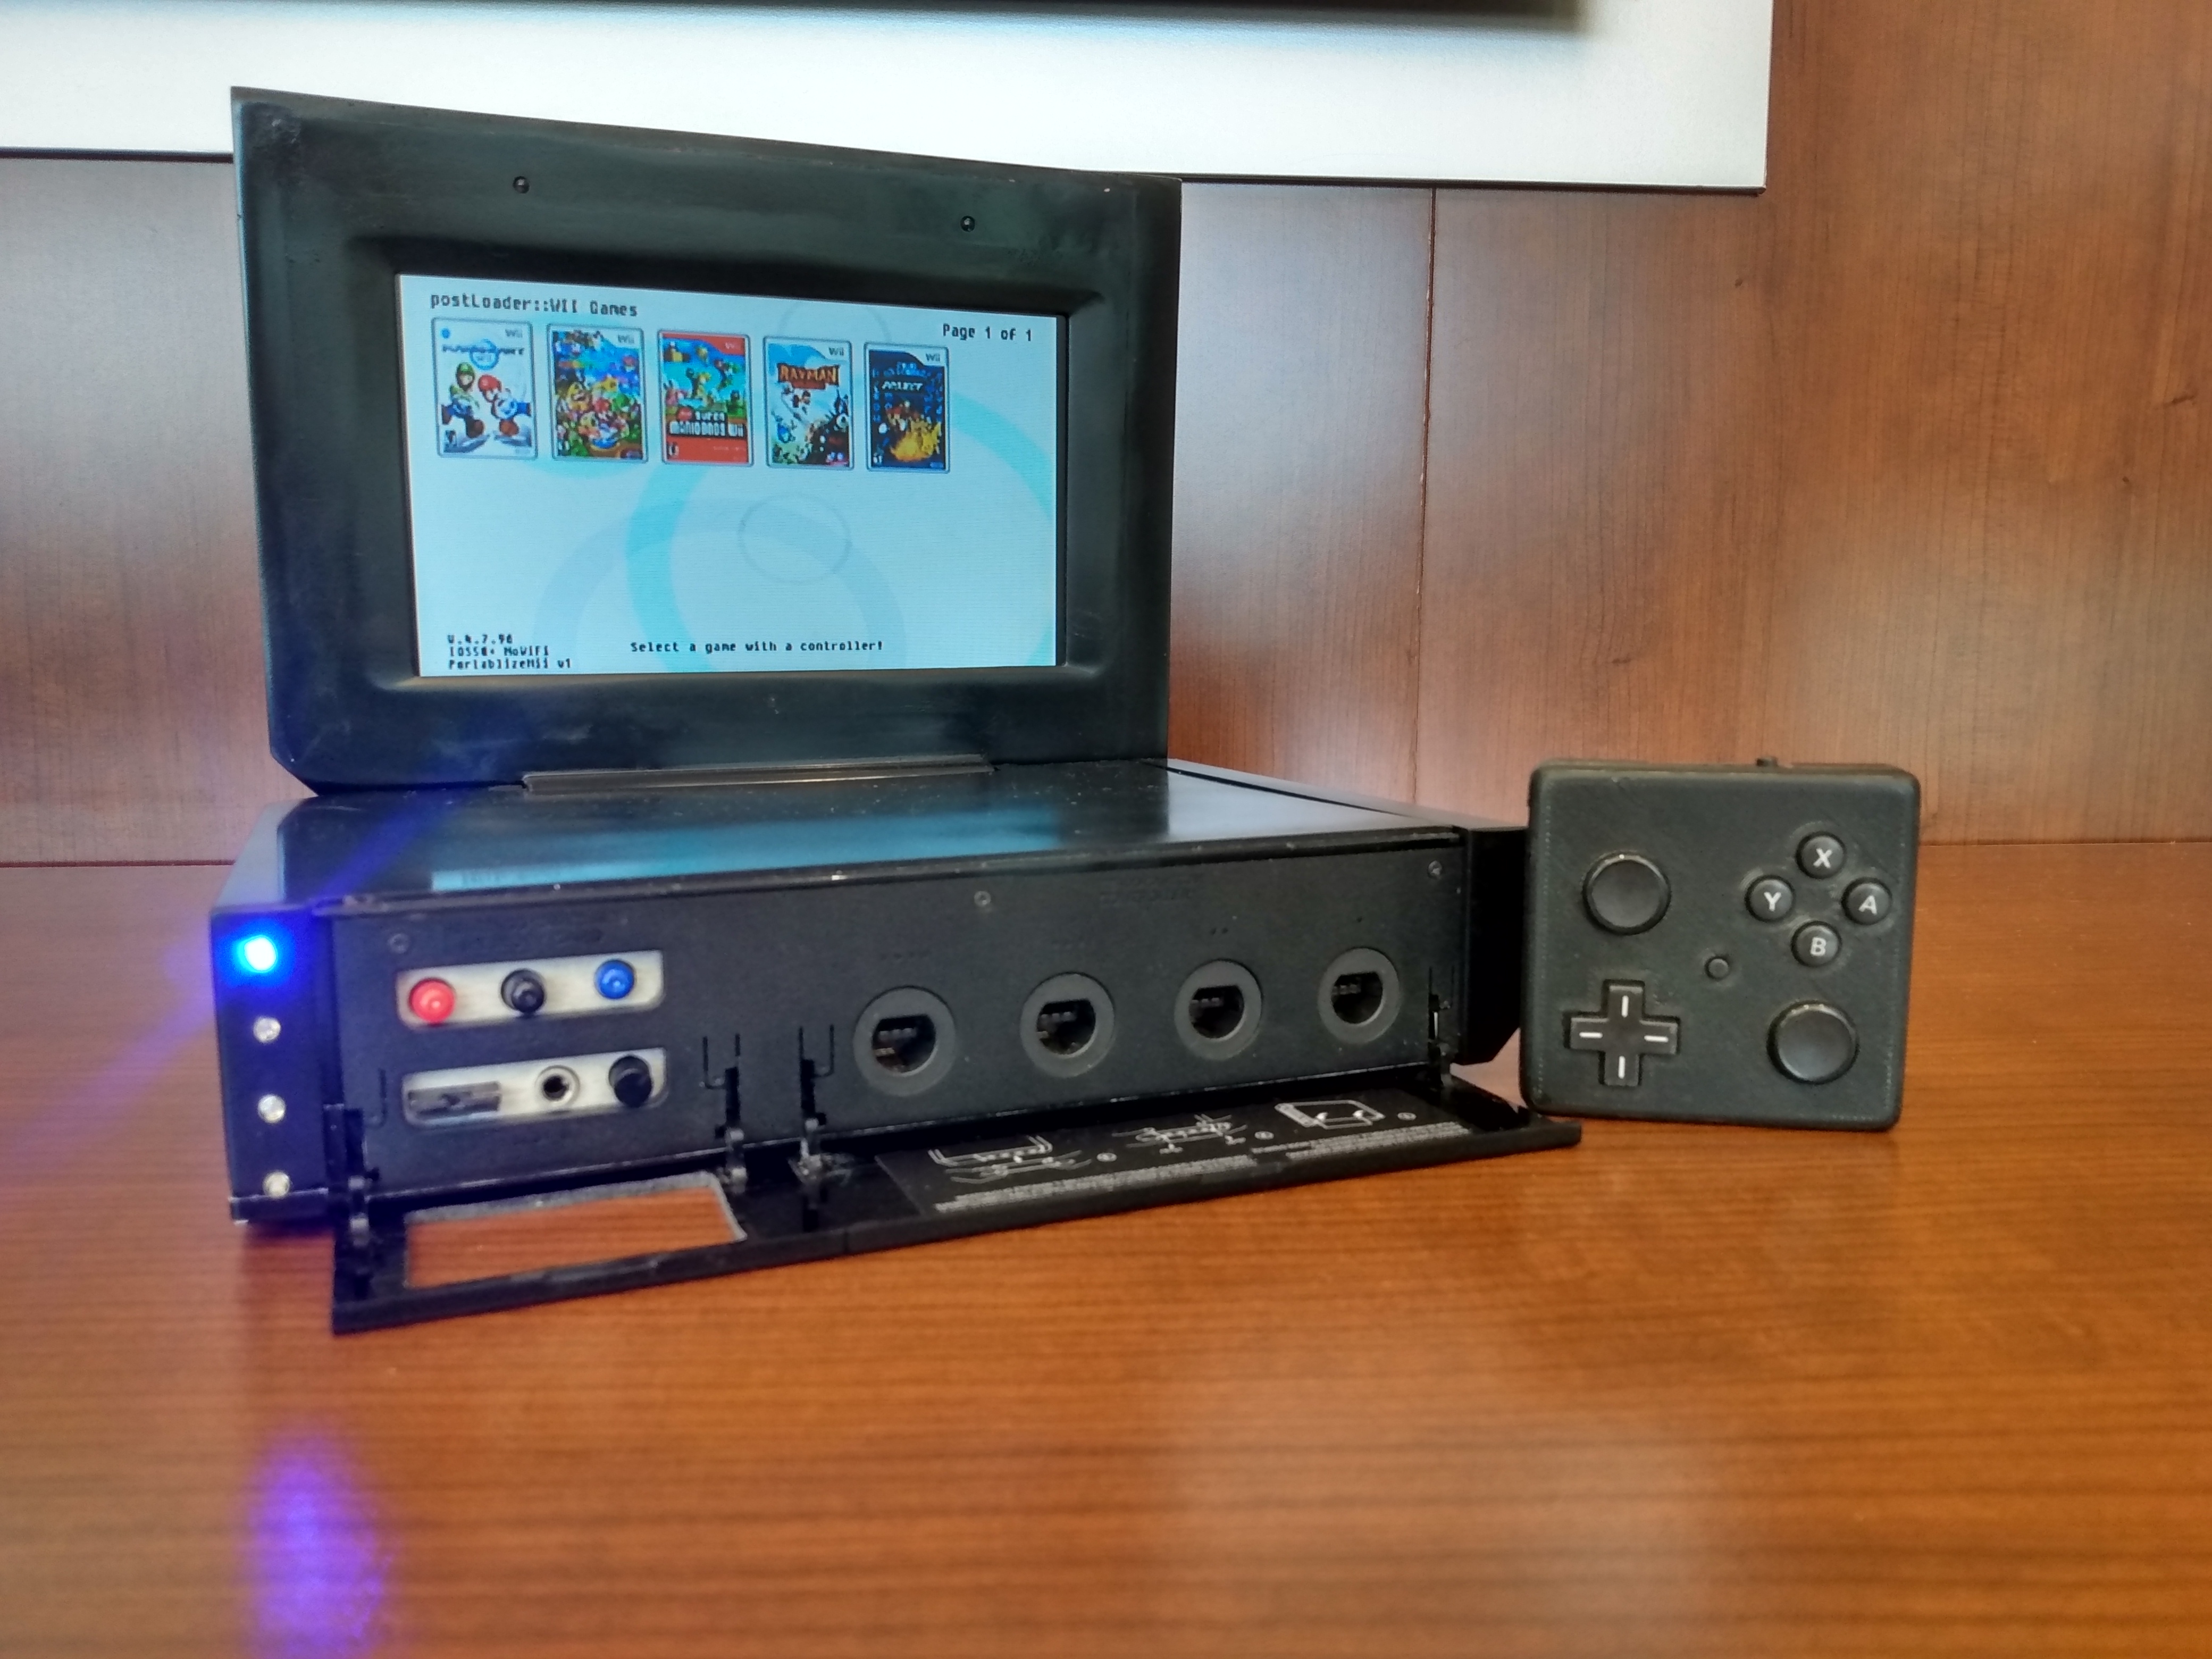
Below is a pic with it displayed next to my wii-laptop. Thanks everybody for checking out my worklog!
First here are the finished pics, a comparison to a regular gc controller, and the internals. I tried to get some of the Gman right angles, but it still ended up pretty spaghetti.
First I want to tell you guys about my motivation for completing this project. My first portabilizing endeavor was making a wii laptop (some pics later in the thread) that I could play wherever I wanted. I found however that even though I loved the feel of my OEM controller, it was super bulky, and I often would end up playing fire emblem on my phone instead of packing all the stuff that i needed to play the wii laptop. My original plan was to somehow embed the controller somewhere onto the laptop so it could be one unit, and then i could remove it when I was ready to play but that became too complex too fast. I then decided to try and just make the smallest gamecube controller I could that still had a form factor that was comfortable. Eventually I will make a case (woodworking is one of my other hobbies) to hold the laptop, power supply, GC-, and the cable to connect the controller to the laptop so having a tiny controller will make the size of the carrying case a lot more reasonable.
The Gameboy SP was my childhood gameboy, so I thought it would be the perfect form factor for a mini controller. So with this general idea in mind I created the below goals that I wanted to meet with my controller:
- To have a full featured gamecube controller minus rumble using GC+ v1
- to be thrifty with the parts (more on this later)
- to use 3ds sliders
- to utilize the DS Lite buttons, membranes, shoulder buttons, shoulder tact switches, springs, screws, and the trimmed motherboard to use as the contacts.
- to have the dual action tacts
- to 3d print the shell since frankencasing my wii laptop was waaayyyy too much work
- to make the size in all dimensions as small as possible. (it ended up being 63mmx63mmx12mm)
- No hot glue!
- and for it to look good. I like the all black look.
Trying to incorporate the original triggers was probably the biggest headache of this whole process, since it required pretty tight tolerances to have it feel good. I ended up printing out lots of prototypes on a monoprice mini select v2, I will spare you those pictures. I also found out that their was a lot of friction happening with the triggers rubbing on the PLA, causing a sticking or binding on the left trigger. i guess the normal ABS of the original DS lite case was a lot more slick and conducive for the style of triggers. I need to test if some type of grease/lubricant might help that out.
So here are the pics of the case and some of the other parts printed out. First, It was pretty difficult finding room to mount screw posts to keep the two halves mounted together without getting in the way of everything else that is crammed in there. I ended up printing a piece that screwed in with the trimmed ABXY board, and gluing another small piece to the audio jack which then was super glued into its spot. It has worked really well and has kept any hot glue out of the equation.
I also printed a little spacer bracket so that I could anchor the gc+ along with the dpad trimmed board. You can see that I trimmed the already tiny gc+ board, if I make another I will probably keep the top right portion so that it will be secure on 2 points. as of right now it is pretty secure with all the wires and the screw in the bottom left.
Next was trimming the ds lite motherboard to use as the contacts. it made the most sense as it was the slimmest, best solution I could think of. Plus it is thrifty! I ended up sanding all the parts off of the back side of each pcb so that the 3d printed brackets i modeled would sit flat. There was a lot of trial and error in sanding them to get it to fit perfectly in its designated spot. Both of these pcbs are held down with the various screws that held the Ds Lite together.
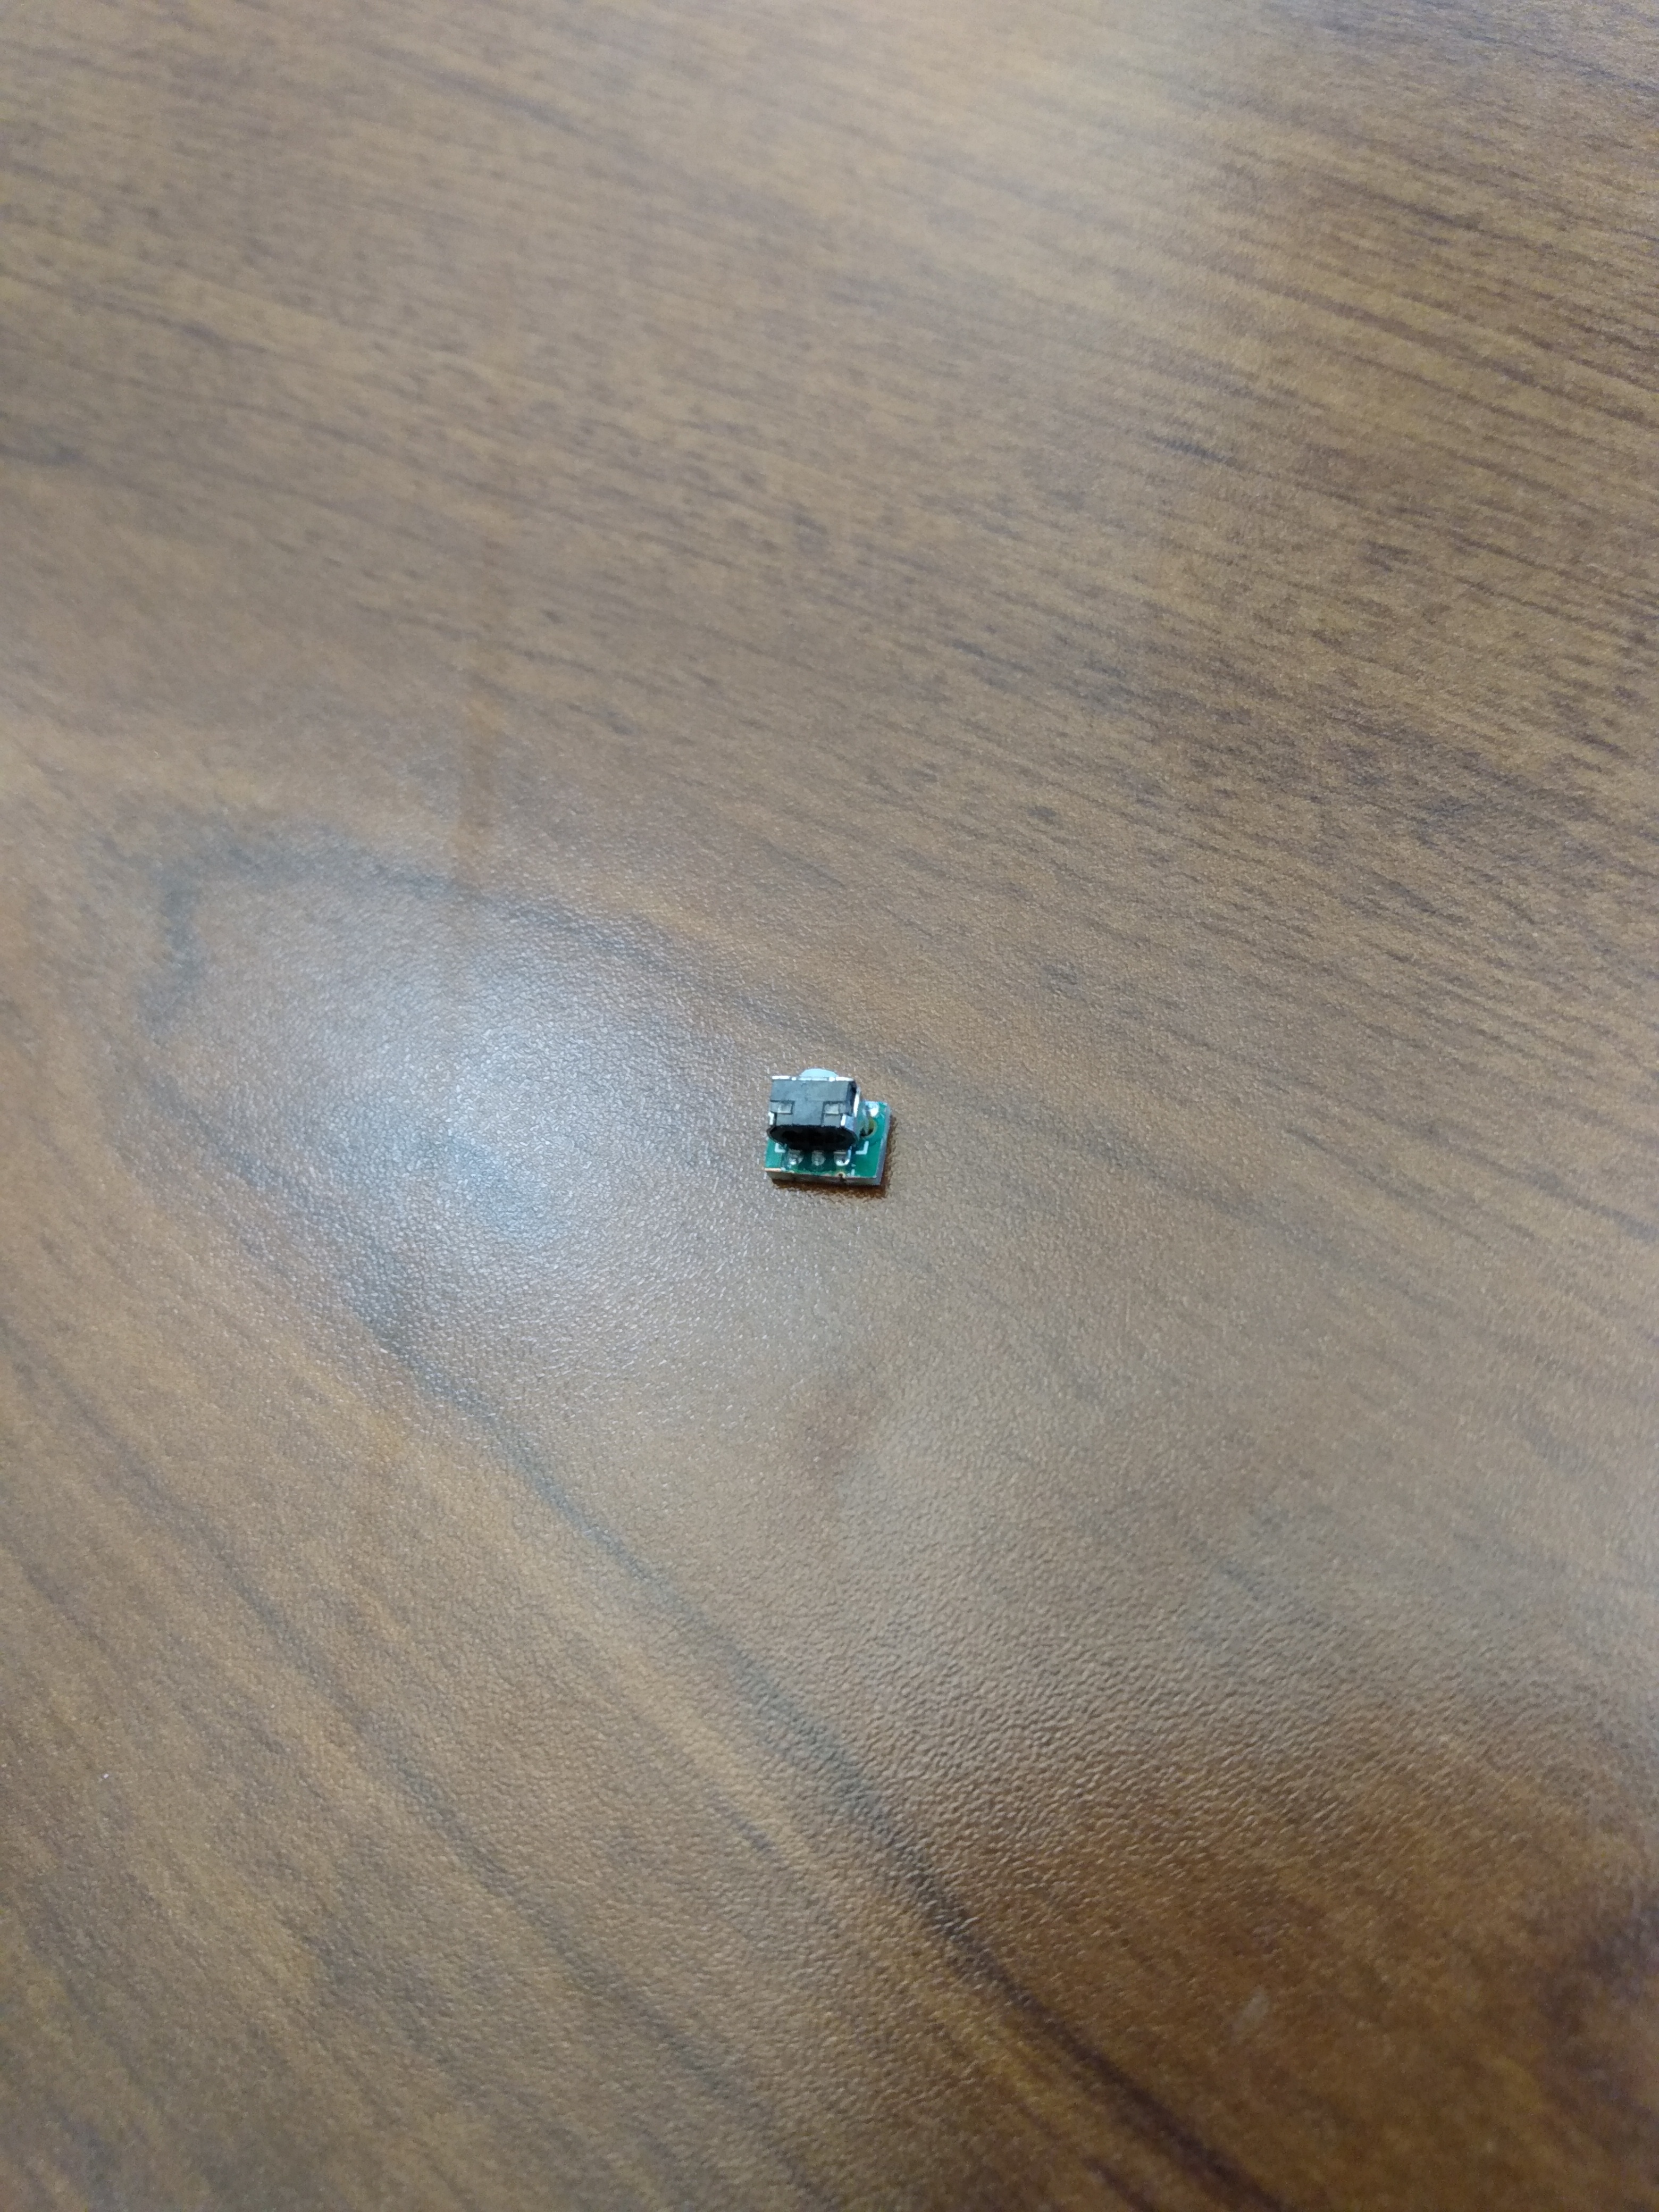
For the start button, I originally wanted to use the smd tacts that were already used for the start and select buttons and trim those parts of the motherboard, but I accidently destroyed one while trying to figure out how to implement the z button. because of this, I dug into my old guitar effects pedal bag-o-parts and found some perfboard and a clicky tact to use. it ended working well as the perfboard was sort of a bus for the ground and 3.3v lines. In the future I will probably super glue a little piece of perf on the back of the ABXY board and use that as the bus. you can see that I used the DS lite button and membrane too
after those parts were in place, I put in the 3ds sliders. This was really easy, it turned out perfect the first time! below you can see a couple of pics with most stuff screwed in and then some of my spaghetti wiring. One of the pics is from one of my earlier prototypes before I got the screw post situation sorted out. the posts near the triggers were ruining everything and preventing the trigger assembly from working at all, so that is why I ended up moving them down. Aurelio helped me out with the wiring of the sliders, I had to swap x and y due to their the orientation in my case.
After this I got to work on the triggers. I utilized the inferior grey squishy tact, and orginally the trigger tacts off of the DS Lite motherboard. I guess wrecked them while trying to remove them, so I then ended raiding my dead wii motherboard stack to utlize the tacts that are on there. I couldn't remove them without destroying them, so I ended up keeping the pcb with it and trimming it as small as I could. In the future I will do this with the ds lite trigger tacts.
you can see how I fit them into the trigger, it works really well and I only had to cut the post on the inside of the DS lite shoulder button and add a piece of electrical tape to get the action right.
I had a really difficult time thinking of how I was going to implement the z button. At first I wanted to have it above the right trigger like the og controller, but it would increase the phatness by a lot. Then I thought maybe putting on the back of the shell, but I was able to attach everything else to the front, and i didn't want the two halves to be connected with wires. below is the picture of what I ended up doing. I filled the part of the trigger that has the metal post go through it, and superglued one of the smd tacts that was used for the select button. I was able to trim the select button and its membrane to fit in the tiny space between the trigger and the case, and it ended up being perfect. I am probably most proud of this design, as the z button was making or breaking a lot of the goals that i had.
After that, i finished wiring everything up, tested it out (make sure the analog tact gets 3.3v, not ground lol) and it was done!
Below is a pic with it displayed next to my wii-laptop. Thanks everybody for checking out my worklog!
Last edited: