Worklog [2023 Contest Entry] Playskool64 (name pending)

Madmorda

Painting Queen
.
.
Joined
Oct 27, 2016
Messages
725
Likes
1,718
Location
Texas
Portables
2
Hello friends! It's been a while since I've posted any of my projects, but I've decided to enter in this year's building contest with a project idea I've been toying with for a while. First, to explain!

I joined the modding scene right at the end of the Modretro days, when projects were held together with hot glue and hope, and right at the beginning of the Bitbuilt days where projects began to be less of a fire hazard and more professional looking. Nowadays we have board trimming down to a science, easily accessible 3d printed shells, fully customized circuit boards, and even customized software made specifically for portablizing.

As amazing as all of that progress and success is, I still have a strong sense of nostalgia for the days where shells were frankencased from whatever you could find laying around, and every project looked extremely unique. I have begun to lose interest in modern portablizing, because it feels like I would just be remaking the same project that someone else made (handheld wii), just in a different shell. That still requires a TON of work and creativity (and I'm definitely not knocking yall's super sexy portables at all), but that isn't the kind of project that sparked my interest in modding originally.

In this project, I'm hoping to go back in time to when projects felt weirder and wackier, and looked more like a fever dream of a console than an actual commercial product. On to the actual interesting stuff!

Screenshot_20230529_184502_eBay.jpg

Screenshot_20230529_184514_eBay.jpg
Screenshot_20230529_184525_eBay.jpg


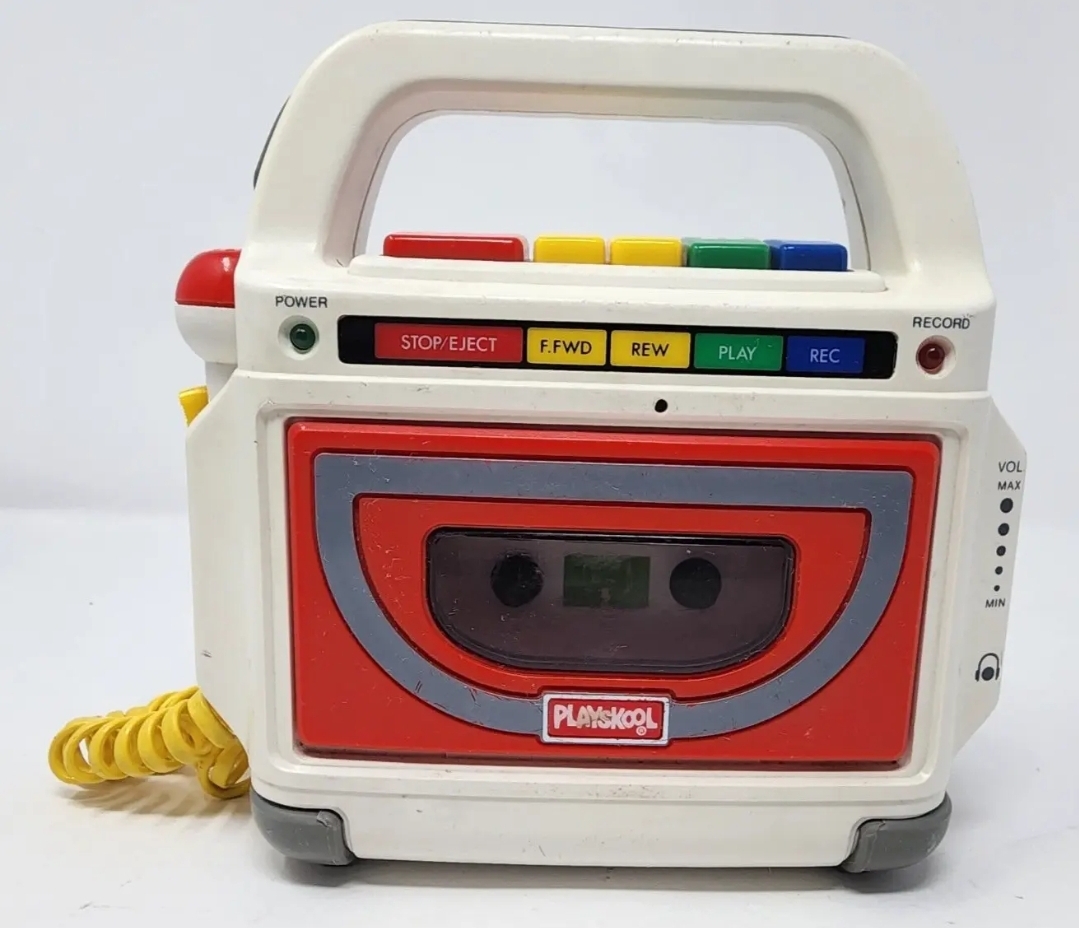
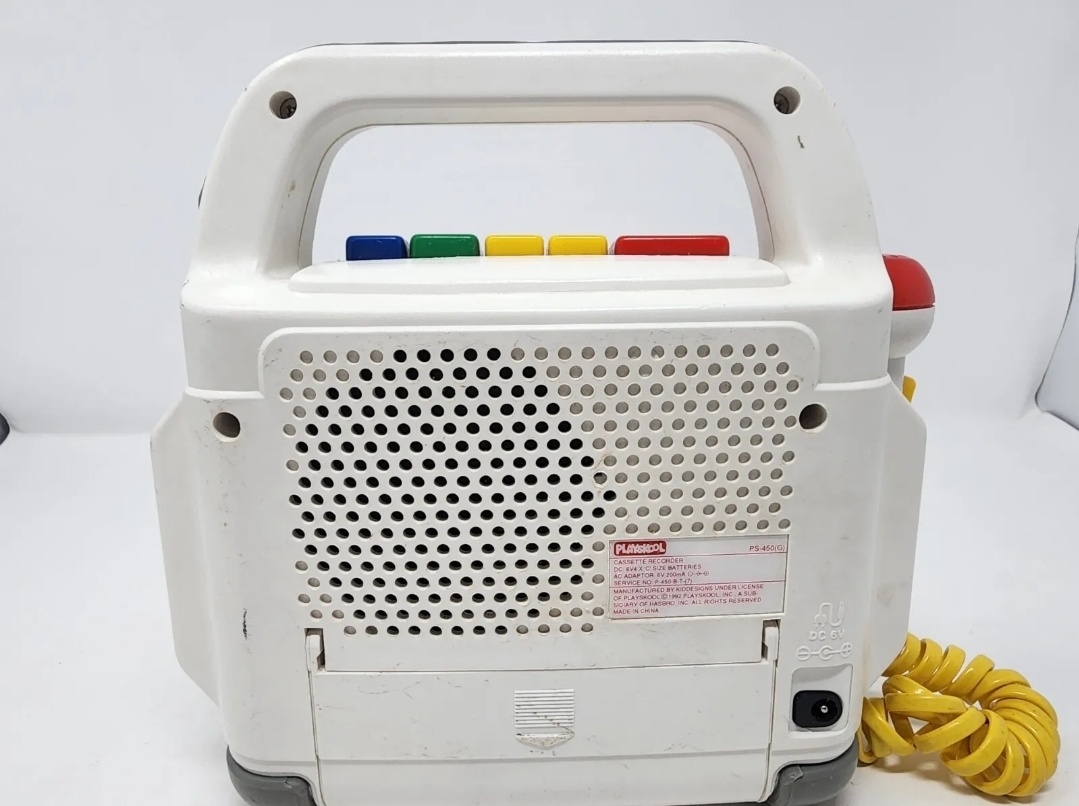
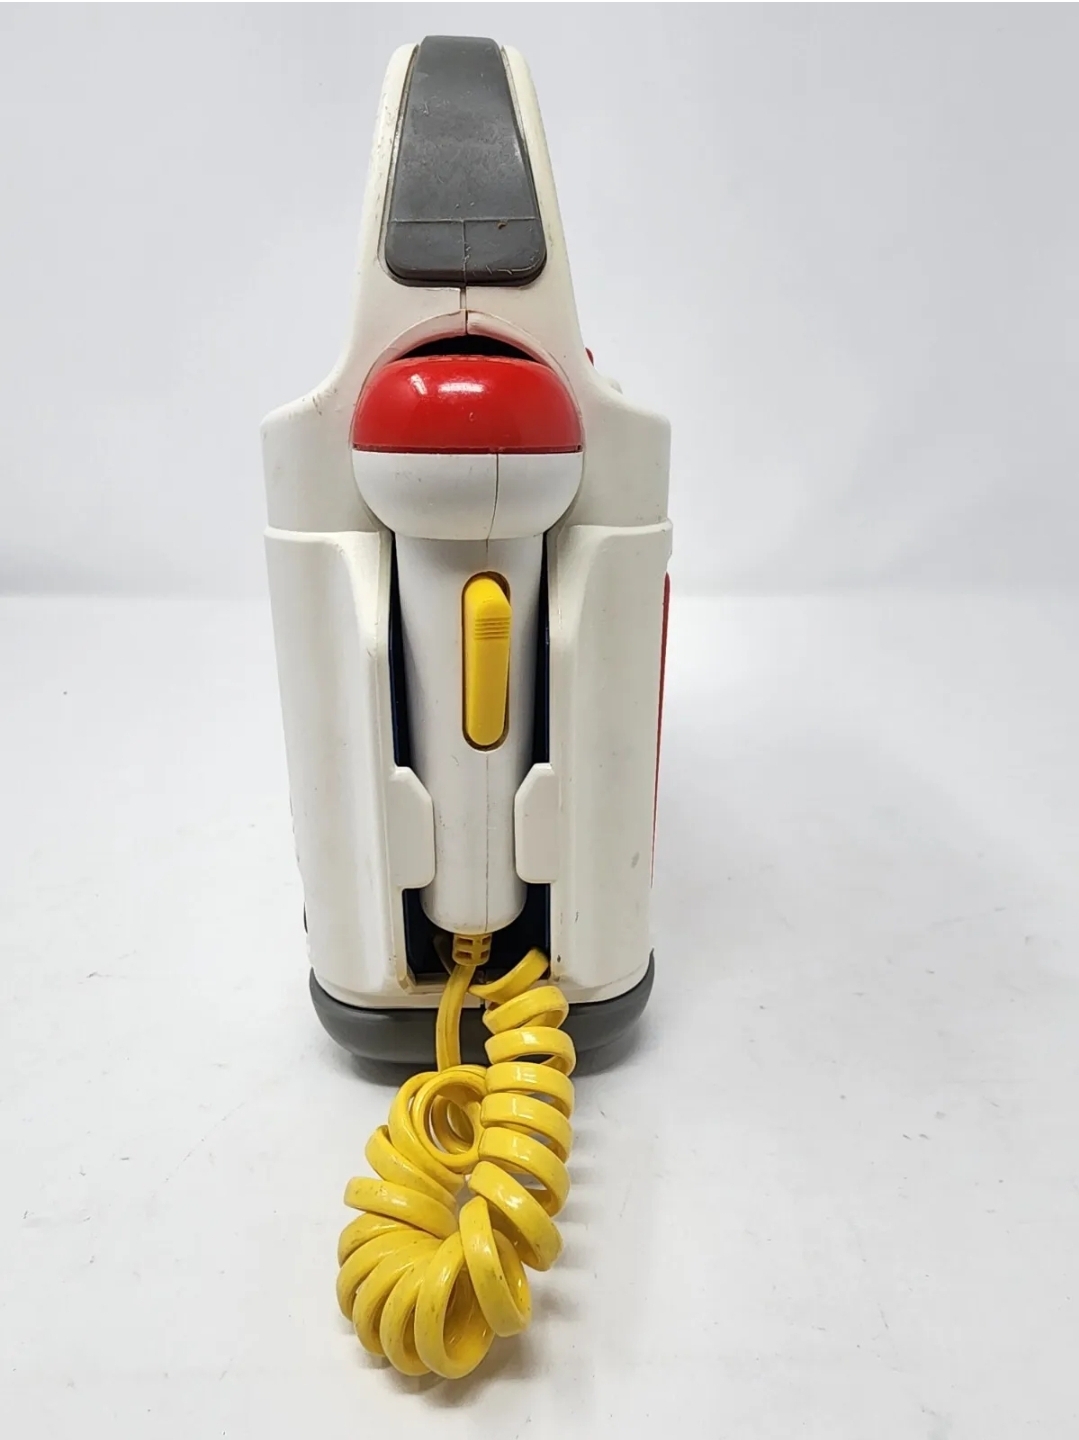
I found this model of Playskool cassette player at Goodwill a few years ago, and it struck me as being very N64-like all in of its primary colored glory. I just ordered a new one in good shape to do this project. My goal for this project is to convert this kids cassette player into a functional N64, hopefully with a working cassette tray where you can put carts, and a Hey You Pikachu microphone. N64 carts are obviously a good bit bigger than cassettes, but having looked this over pretty good, I think that it's very probably doable because it's so bulky.

Here are my main goals for this console:

-N64 console inside the cassette player
-Functional tray for cartridges
-4 controller ports
-Working microphone for Hey You Pikachu (this is very important)
-Internal regulators, since I dislike the bulky N64 power brick
-Generic video output cable option, such as 3.5mm jack
-Repurpose existing buttons (power, reset, etc)

Here are things I would like to add if there is time/space:

-Battery
-LCD screen and speakers in the back
-New label for buttons to denote their new uses (same color scheme)

I hope to be able to fit everything, but it is a super tight squeeze if you add in batteries, so I dont know for sure yet. Even the cartridge fit is iffy, so fingers crossed that it's doable!

Happy modding everyone! Worklog to come as parts begin arriving.
 
Joined
Apr 30, 2023
Messages
53
Likes
37
Location
USA
Portables
0
I look forward to the results. It makes me feel inspired to eventually take a crack at making a Wii phone ... that can't make actual calls.fisher-price-rotary-phone.jpg
 

Madmorda

Painting Queen
.
.
Joined
Oct 27, 2016
Messages
725
Likes
1,718
Location
Texas
Portables
2
Today my Playskool cassette player arrived, so I began the work of dremeling out the insides and planning where everything is going to go.

20230602_150552.jpg
20230602_150710.jpg


Disassembly was a pain, as a few parts were glued in, but I got through it with the system undamaged! I then dremelled through anything I knew I didn't need on the front shell.

20230602_152942.jpg
20230602_160043.jpg


N64 carts will fit through the cassette slot on the front, however it will need to go into a cartridge slot actually down slightly below the bottom of the red door. I'm hoping to build sort of a "rocker" for the cart slot, so that it can rotate with the game as the red door closes, if that makes sense.

20230602_171831.jpg
20230602_171851.jpg


There is only a couple mm worth of clearance on the sides of the cart, so I will be 3d printing some brackets to allow the door to open and close, and those will be glued in later. Update on those coming soon!
 

Madmorda

Painting Queen
.
.
Joined
Oct 27, 2016
Messages
725
Likes
1,718
Location
Texas
Portables
2
Today I picked up an n64, and desoldered the cart slot and controller ports. I plan to integrate an expansion pack, not because it's needed, but because it seems like a shame not to have on in here after all this effort.

20230603_174428.jpg


On the back of the cassette player, there is a battery compartment with a nice flip up lid. I am going to keep this lid, and hide the n64 controller ports inside.

20230603_182525.jpg

20230603_190748.jpg


The n64 motherboard just happens to fit PERFECTLY (within like 2mm) into the shell with no trimming except the corners/edges. I can either put it in as-is, or I can fully trim it in order to keep the screw posts (you can see the trim outline on the board). I think I'd prefer to keep the board intact, because there are these little tabs at the top and grey feet on the bottom of the shell that I think will hold the system together without glue. I MAY have to dab a little glue on as closing it just to secure it, but I think that is truly in the spirit of this type or project anyways. It would also be a shame to waste such a perfect fit :p

20230603_190949.jpg


This also means that if I keep the board intact, there will be almost certainly be room for an LCD and (maybe) even a battery pack underneath it. In that case, the LCD will be where the speaker grid currently is, right above the controller ports. A 4.3' screen looks like it would be the best fit without overdoing it. That would also be nice since I could potentially keep the Volume slider and headphone jack working if there's room, as well as making some of the buttons on top have more logical functions.
 

Retro95

.
2023 3rd Place
Joined
Mar 29, 2023
Messages
180
Likes
235
Location
Oregon
Portables
2
Truly fantastic and whacky idea. Thank you for the updates. It makes logging in to check out notifications a lot more fun!
 
Joined
Feb 17, 2017
Messages
3
Likes
0
Today my Playskool cassette player arrived, so I began the work of dremeling out the insides and planning where everything is going to go.

View attachment 27871View attachment 27872

Disassembly was a pain, as a few parts were glued in, but I got through it with the system undamaged! I then dremelled through anything I knew I didn't need on the front shell.

View attachment 27873View attachment 27874

N64 carts will fit through the cassette slot on the front, however it will need to go into a cartridge slot actually down slightly below the bottom of the red door. I'm hoping to build sort of a "rocker" for the cart slot, so that it can rotate with the game as the red door closes, if that makes sense.

View attachment 27875View attachment 27876

There is only a couple mm worth of clearance on the sides of the cart, so I will be 3d printing some brackets to allow the door to open and close, and those will be glued in later. Update on those coming soon!
Truly fantastic and whacky idea. Thank you for the updates. It makes logging in to check out notifications a lot more fun!
Today I picked up an n64, and desoldered the cart slot and controller ports. I plan to integrate an expansion pack, not because it's needed, but because it seems like a shame not to have on in here after all this effort.

View attachment 27893

On the back of the cassette player, there is a battery compartment with a nice flip up lid. I am going to keep this lid, and hide the n64 controller ports inside.

View attachment 27895
View attachment 27896

The n64 motherboard just happens to fit PERFECTLY (within like 2mm) into the shell with no trimming except the corners/edges. I can either put it in as-is, or I can fully trim it in order to keep the screw posts (you can see the trim outline on the board). I think I'd prefer to keep the board intact, because there are these little tabs at the top and grey feet on the bottom of the shell that I think will hold the system together without glue. I MAY have to dab a little glue on as closing it just to secure it, but I think that is truly in the spirit of this type or project anyways. It would also be a shame to waste such a perfect fit :p

View attachment 27897

This also means that if I keep the board intact, there will be almost certainly be room for an LCD and (maybe) even a battery pack underneath it. In that case, the LCD will be where the speaker grid currently is, right above the controller ports. A 4.3' screen looks like it would be the best fit without overdoing it. That would also be nice since I could potentially keep the Volume slider and headphone jack working if there's room, as well as making some of the buttons on top have more logical functions.
Looks like a great start
 

Madmorda

Painting Queen
.
.
Joined
Oct 27, 2016
Messages
725
Likes
1,718
Location
Texas
Portables
2
My parts came in! I'm able to perfectly fit a 4.3" screen, and a battery pack with no problems. Actually, I think I could fit a battery pack 3x the size, but I think this one will be plenty for the project so it's not an actual brick. It should come out to like 1-1.5hrs run time or so I believe, which is enough for several rounds of battle BattleTanx or smash. The battery pack I chose supports plug and play, which is nice so I can use the same plug for either charging or using the console with a TV.

20230609_182113.jpg

20230609_182103.jpg


I went ahead and dremelled out the hole for the screen, and I call it good enough. The shell is a bit convex, so I'll probably need to 3d print a little piece so there's no gap. I hope to get some 3d printing done this weekend :)

20230609_182122.jpg
 

Adan

.
Joined
Aug 27, 2022
Messages
47
Likes
35
Location
USA
Portables
0.5
what display/driver is that! my driver is massive :(
 

Stitches

2 and a Half Dollarydoos
Staff member
.
.
Joined
Feb 5, 2017
Messages
3,848
Likes
3,025
Location
Banana Bender Land, Australia
Portables
6
what display/driver is that! my driver is massive :(
That type of driver board is used in the very cheap "reverse camera monitors" sold on ebay/aliexpress. It only accepts composite video and isn't particularly great
 

Madmorda

Painting Queen
.
.
Joined
Oct 27, 2016
Messages
725
Likes
1,718
Location
Texas
Portables
2
Yep, this is a 4.3" backup monitor, and it's true that it's not as nice as an hdmi/component screen or one with 1080p or something.

However, I personally love these little screens, and have absolutely no use for HDMI or 1080p at such a small size, especially for an n64 project. It's small, super cheap, very easy to wire, lightweight, and pretty forgiving in terms of voltage input. When the n64 came out, HDMI didn't even exist.

This feeling kind of goes back to my first post about us losing the spirit of portablizing. When all portables use the same few batteries, screens, buttons, consoles, and custom pcbs, because they are technically better, I think our projects, creativity, and community all suffer as a result. If when I started, I had been told that I needed this screen, and that battery, and these custom PCBs in order to build anything worth the effort, I never would have gotten into portablizing at all because it all adds up so fast and is overwhelming.

I want to bring back the hot-glue-not-screws portables, the 1hr-battery-is-okay portables, the composite-not-vga portables, and the flea-market-finds portables. That's what this project is all about.
 

StonedEdge

a.k.a. ClonedEdge
.
.
Joined
Nov 16, 2018
Messages
366
Likes
1,495
Location
Japan, Tokyo
Portables
2
Yep, this is a 4.3" backup monitor, and it's true that it's not as nice as an hdmi/component screen or one with 1080p or something.

However, I personally love these little screens, and have absolutely no use for HDMI or 1080p at such a small size, especially for an n64 project. It's small, super cheap, very easy to wire, lightweight, and pretty forgiving in terms of voltage input. When the n64 came out, HDMI didn't even exist.

This feeling kind of goes back to my first post about us losing the spirit of portablizing. When all portables use the same few batteries, screens, buttons, consoles, and custom pcbs, because they are technically better, I think our projects, creativity, and community all suffer as a result. If when I started, I had been told that I needed this screen, and that battery, and these custom PCBs in order to build anything worth the effort, I never would have gotten into portablizing at all because it all adds up so fast and is overwhelming.

I want to bring back the hot-glue-not-screws portables, the 1hr-battery-is-okay portables, the composite-not-vga portables, and the flea-market-finds portables. That's what this project is all about.
Glad to see you’re keeping the old modding spirit alive! Unfortunately with the proliferation of kits and the ease of the builds, a lot of people now seem to be wanting to make the same thing. As a result, a lot of ingenuity/creativity has been lost, but there are still a select few who want to make their own devices/designs and get more satisfaction than building a pre-made kit, for example. I think the fact that you’re doing something unique already gets a vote from me. All the more power to you, that’s what we should be all about.
 
Last edited:
Joined
Oct 27, 2020
Messages
108
Likes
120
Portables
KiWii Portable (In progress)
Today I picked up an n64, and desoldered the cart slot and controller ports. I plan to integrate an expansion pack, not because it's needed, but because it seems like a shame not to have on in here after all this effort.

View attachment 27893

On the back of the cassette player, there is a battery compartment with a nice flip up lid. I am going to keep this lid, and hide the n64 controller ports inside.

View attachment 27895
View attachment 27896

The n64 motherboard just happens to fit PERFECTLY (within like 2mm) into the shell with no trimming except the corners/edges. I can either put it in as-is, or I can fully trim it in order to keep the screw posts (you can see the trim outline on the board). I think I'd prefer to keep the board intact, because there are these little tabs at the top and grey feet on the bottom of the shell that I think will hold the system together without glue. I MAY have to dab a little glue on as closing it just to secure it, but I think that is truly in the spirit of this type or project anyways. It would also be a shame to waste such a perfect fit :p

View attachment 27897

This also means that if I keep the board intact, there will be almost certainly be room for an LCD and (maybe) even a battery pack underneath it. In that case, the LCD will be where the speaker grid currently is, right above the controller ports. A 4.3' screen looks like it would be the best fit without overdoing it. That would also be nice since I could potentially keep the Volume slider and headphone jack working if there's room, as well as making some of the buttons on top have more logical functions.
Omg this is awesome! I'm so glad you came up with this idea, especially for the competition, glad to see you participating!!!
 

MRKane

.
2021 3rd Place Winner
Joined
Nov 5, 2017
Messages
406
Likes
488
I want to bring back the hot-glue-not-screws portables, the 1hr-battery-is-okay portables, the composite-not-vga portables, and the flea-market-finds portables. That's what this project is all about.
After my own heart! This is the sort of thing I love too!!
 
Top