I wanted to share with everyone here the final product GinKage and I have been working on since July 2023 - Retro Lite CM5.
Despite its shortcomings, I'm really happy with the v1 build. It's everything the Retro Lite CM4 was - and more! I do hope you guys like it!
Open source files can be found here, including CAD files, Armbian build files and FAQs.
https://github.com/StonedEdge/Retro-Lite-CM5
Worklog here:
https://bitbuilt.net/forums/index.php?threads/retro-lite-cm5.5815/
Specifications
Hardware specifications
Software specifications
Internal Components/Hardware/Random Pictures
All of the components laid out - ready for assembly time! I re-used the Retro Lite CM4 heatsinks we had lying around but ultimately it would need a proper heatsink to make contact with the SoC with paste instead of a thermal pad for better heat conductivity.

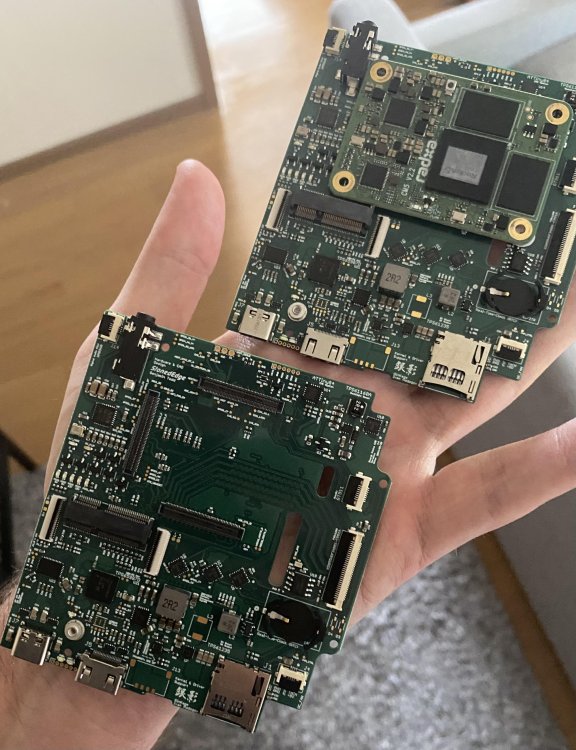
Internal PCBs - 6 layer boards designed myself, fitted with the compute module (v2.2 pictured).
These took about 3-4 months to design. Ordered, fabbed and assembled by JLCPCB (few parts I did by hand).
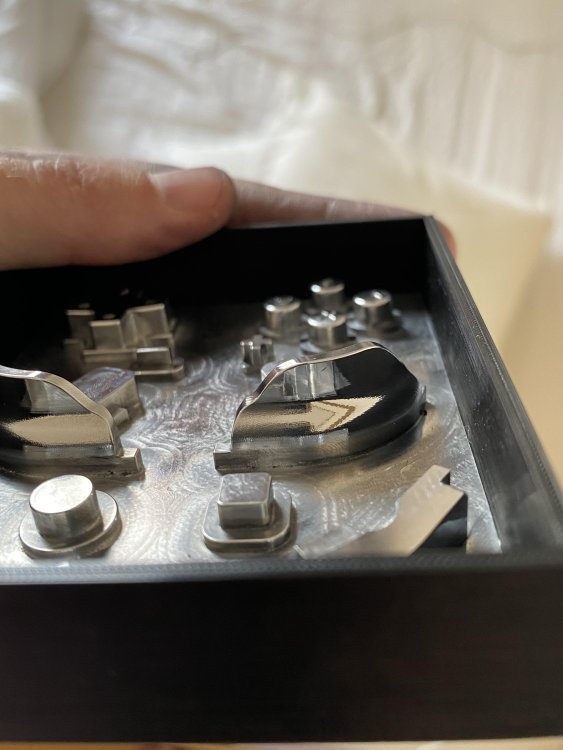
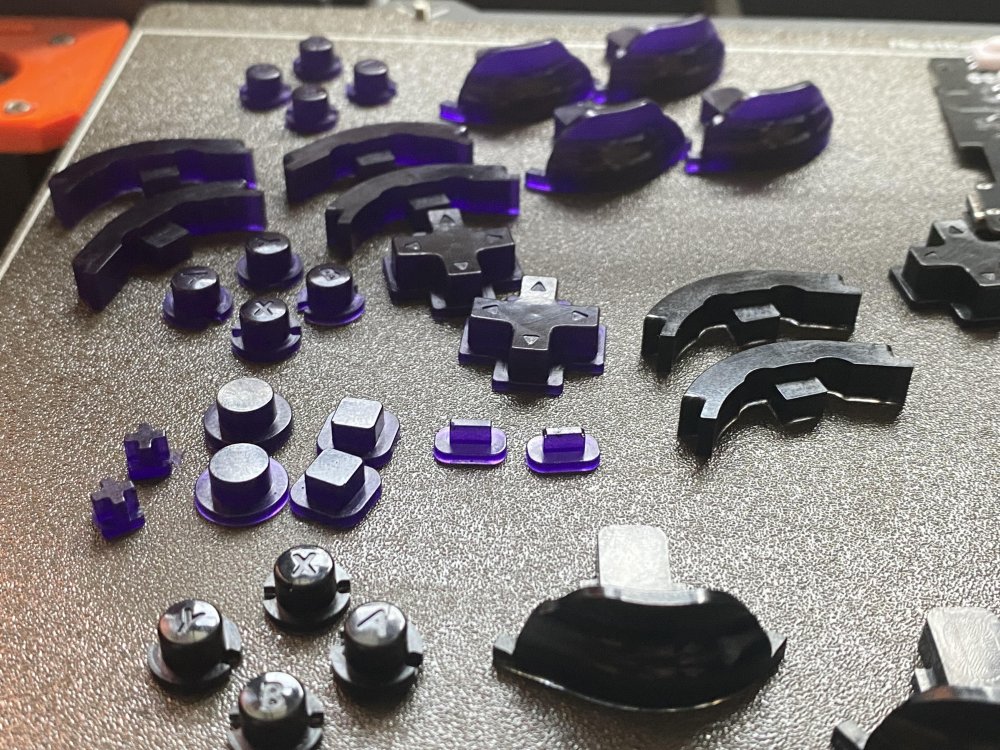
Handmaking all of the buttons with silicone and resin from a machined polished mould. 3D printed buttons really dont feel good so I wanted to make these special!

Final internal pictures before closing it up
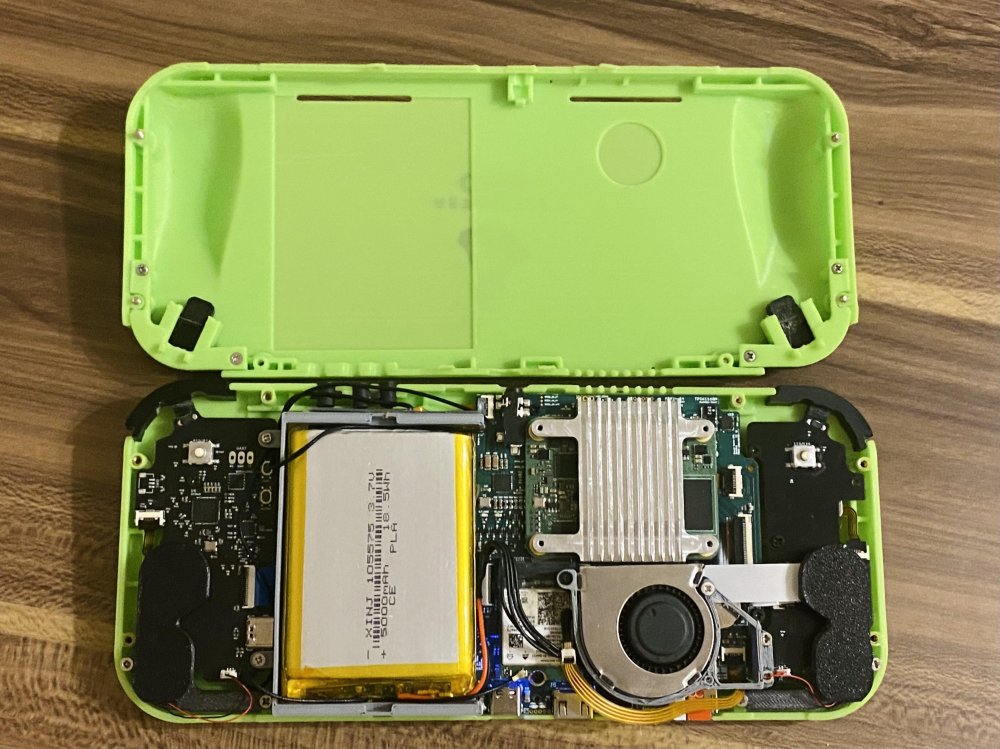
Upgraded to a 10000mAh pack (well, in my testing this is more like 8000mAh...) for now I am charging it to 4.2v even though it does say it can go to 4.35v. It's a tight fit.

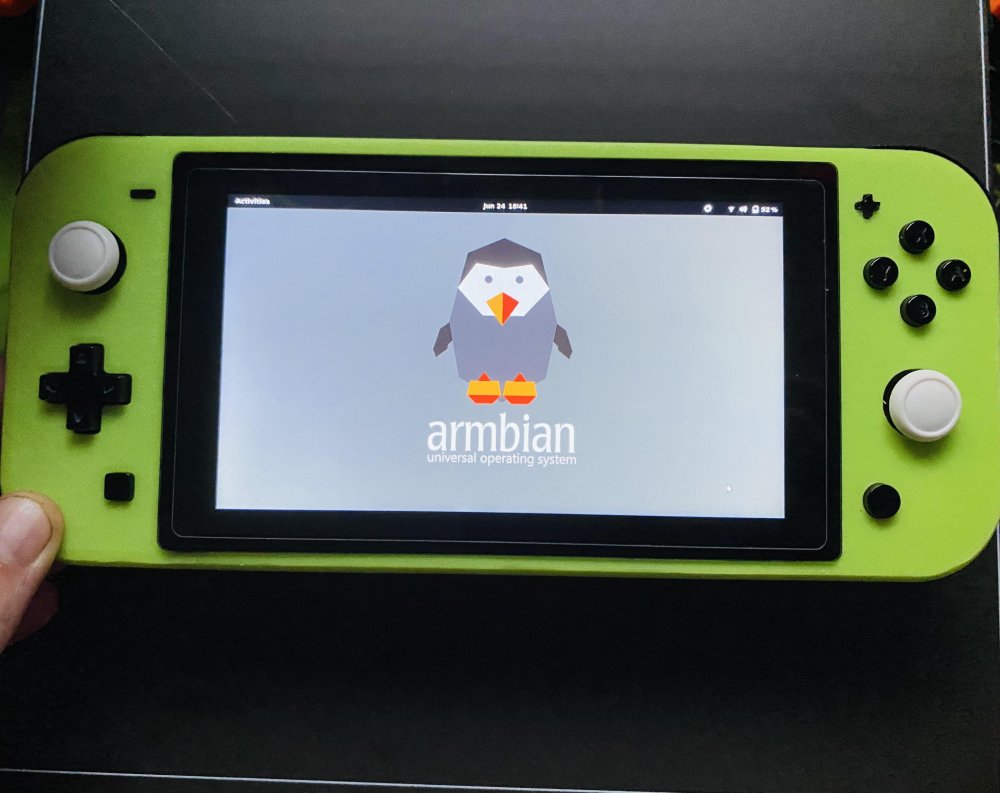
Front shot of Armbian desktop
Flashed to the internal eMMC (non-socketable) with an SD card for added storage for running games via RetroPie
Docking. DisplayPort functionality works over Type-C with my TPS65987D/TUSB546 PD extcon config. I have set it up to work with 2 lanes of DisplayPort and 2 lanes of USB 3.0 over Type-C
Here I am using an AyaNeo Air Docking Station, but any hub will work.

Grips for added comfort. Because... why not?

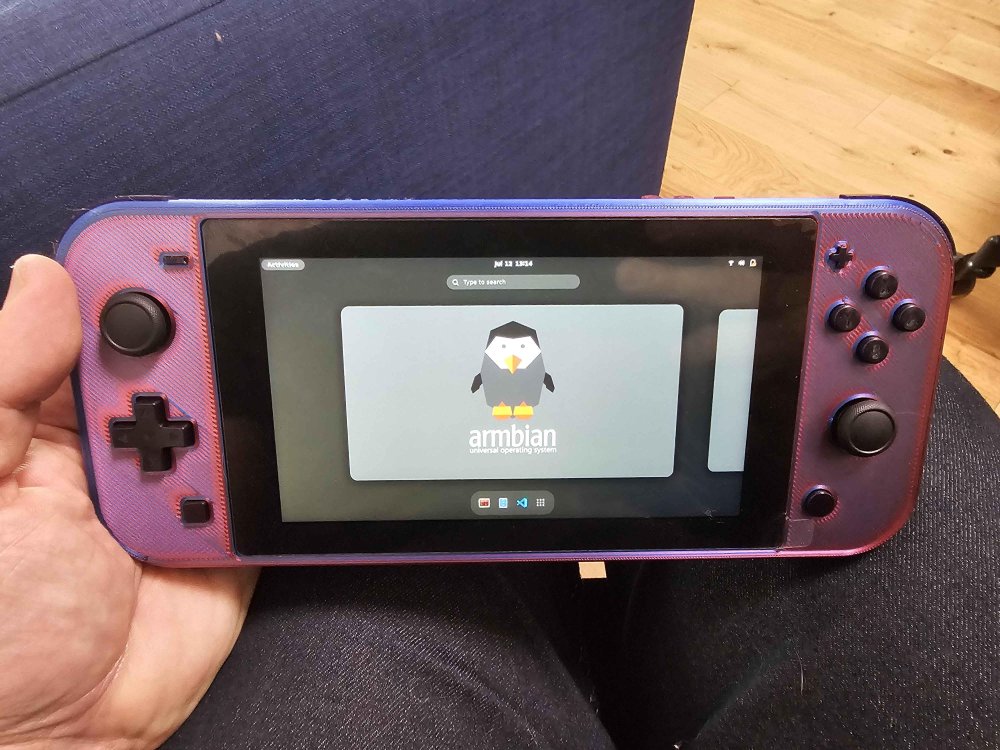
Purple build! (GinKage)


So, what is in store for the Retro Lite CM5 in the future?
Currently, we're in discussion with Radxa Ltd to commercialize this device into a proper product (pending some tweaks to the hardware) so that people will be able to purchase it. They are going to help us with the DFM process, manufacturing of the injection molded shell, reducing the cost to a reasonable level and making it available to the public.
We will post here with updates as they come to hand - we don't have much to share at this stage but will do so as things progress.
 x.com
x.com
Despite its shortcomings, I'm really happy with the v1 build. It's everything the Retro Lite CM4 was - and more! I do hope you guys like it!
Open source files can be found here, including CAD files, Armbian build files and FAQs.
https://github.com/StonedEdge/Retro-Lite-CM5
Worklog here:
https://bitbuilt.net/forums/index.php?threads/retro-lite-cm5.5815/
Specifications
Hardware specifications
- 3D printable housing in PLA. Comfort grips for ergonomics
- Radxa CM5 Compute Module (8GB RAM/64GB eMMC)
- SoC – Rockchip RK3588S octa-core processor with 4x Cortex‑A76 cores @ up to 2.4GHz, 4x Cortex‑A55 core @ 1.8GHz Arm Mali-G610 MP4 “Odin” GPU Video decoder – 8Kp60 H.265, VP9, AVS2, 8Kp30 H.264 AVC/MVC, 4Kp60 AV1, 1080p60 MPEG-2/-1, VC-1, VP8 Video encoder – 8Kp30 H.265/H.264 video encoder
- WiFi 6/Bluetooth 5.2 via PCIe E-key slot (Intel AX210) - https://www.intel.com/content/www/u...6/intel-wifi-6e-ax210-gig/specifications.html
- 6 layer carrier board with 3 B2B mezzanine connectors to interface with any Radxa CM5 module
- 5v boost rated at 3.5A continuous current
- RP2040 gamepad HID controller - complete with SDL mappings and evdev gyro support/mouse control via MPU6050
- 1280 x 720 (5.5" DSI IPS LCD): DSI video output on internal display with capactive touch support
- Up to 4k HDMI video output via HDMI output
- Up to 4k DisplayPort Alternate Mode via Type-C
- USB 2.0/3.1 capable USB-C data transfer
- USB-C dual role port functionality (sink/source)
- Brightness and volume HUD adjustment. Brightness is adjusted by holding plus hotkey + down/up. Volume controlled either by volume buttons or plus hotkey + left right DPAD
- USB-C PD charging support via sink profiles supporting 5V/3A, 9V/3A, 12V/2A & 15V/2.6A (switch charger) via TPS65987D PD controller (see binary in TPS65987D folder). Recommended to use <12V for best charge and play performance
- Headphone jack, with automatic switching
- BQ24292i charger
- 8000mAh lipo (10000 on the markings, more like 8000 in testing), providing around 1.5-6 hours of gameplay depending on load. GoW 2 test did 3 hours at 2x resolution before hitting 0%
- MAX17055 fuel gauge
- WM8960 stereo i2s amp
- Dual stacked shoulder buttons (L, R, LZ, RZ) with dual tact buttons for GameCube functionality (LR analog/LR digital)
- 2x hall effect analog sticks running at 3v3
- Resin casted ABXY, DPAD, start+select, shoulder buttons
- Silicone membranes for nice button feel
- RTC support via HYM8603
Software specifications
- Armbian GNOME desktop w/ official Linux mainline support! The device has been upstreamed here (should be official at the next update) https://github.com/armbian/community/releases
Add board config for Retro Lite CM5 by ginkage · Pull Request #6972 · armbian/build
Description Community-supported board (myself as the maintainer). Documentation summary for feature / change Pretty straightforward: mainline U-Boot, only the vendor kernel supported (no legacy or ... github.com
- Full upstream Rocknix support
- Android 13 (soonTM - thank you to @notime2d8 for his hard work on this - this is the only way to utilize vulkan as at the time of this post)
- Hardware graphics support via Panfrost/OpenGLES (no Vulkan support on Linux… for now)
- Safe software/hardware shutdown (either from software or via button)
- Low power sleep mode - draws around 5% battery life overnight in sleep mode. Good enough.
Internal Components/Hardware/Random Pictures
All of the components laid out - ready for assembly time! I re-used the Retro Lite CM4 heatsinks we had lying around but ultimately it would need a proper heatsink to make contact with the SoC with paste instead of a thermal pad for better heat conductivity.

Internal PCBs - 6 layer boards designed myself, fitted with the compute module (v2.2 pictured).
These took about 3-4 months to design. Ordered, fabbed and assembled by JLCPCB (few parts I did by hand).

Handmaking all of the buttons with silicone and resin from a machined polished mould. 3D printed buttons really dont feel good so I wanted to make these special!


Final internal pictures before closing it up

Upgraded to a 10000mAh pack (well, in my testing this is more like 8000mAh...) for now I am charging it to 4.2v even though it does say it can go to 4.35v. It's a tight fit.
Front shot of Armbian desktop
Flashed to the internal eMMC (non-socketable) with an SD card for added storage for running games via RetroPie

Docking. DisplayPort functionality works over Type-C with my TPS65987D/TUSB546 PD extcon config. I have set it up to work with 2 lanes of DisplayPort and 2 lanes of USB 3.0 over Type-C
Here I am using an AyaNeo Air Docking Station, but any hub will work.

Grips for added comfort. Because... why not?

Purple build! (GinKage)


So, what is in store for the Retro Lite CM5 in the future?
Currently, we're in discussion with Radxa Ltd to commercialize this device into a proper product (pending some tweaks to the hardware) so that people will be able to purchase it. They are going to help us with the DFM process, manufacturing of the injection molded shell, reducing the cost to a reasonable level and making it available to the public.
We will post here with updates as they come to hand - we don't have much to share at this stage but will do so as things progress.
x.com
Last edited:

