

Alessi
.
- Joined
- Dec 16, 2024
- Messages
- 3
- Likes
- 4
This is the first time I'm posting here, so hello everyone  Also, English is not my first language so please excuse any errors.
I wanted to participate in this year's summer building contest but honestly since this will be my first project I didn't want to stress myself out too much, and I don't think I could finish it in 3 months. So I'd rather take my time with this, maybe I'll enter the contest next year.
Almost a year ago after making a PS2 Ultra Slim I had an idea. Can something like this be made with a PS4? After disassembling my PS4 Slim and removing the Blu-ray drive the motherboard is a little over half the size of the original console, so that will be the target size of this build.
The biggest concern with this build is the power supply, which takes up almost a quarter of the whole console, so that was the first problem I wanted to solve.
Based on Lecisco's PS4 portable, the PS4 Slim uses like 80w max while gaming, so my idea is to make a USB-C PD 100W custom power supply, I have some trigger boards that use the CH224K IC to configure the USB charger to output 20V at 5A so I'll use that IC since it is pretty easy to configure. Now, the PS4 doesn't use 20V, it uses 12V as the main voltage and 5V for standby and other things, so I'll have to bring down those voltages using two buck converters. My choice is Vishay's SiC431 buck converters that are capable of 24V max voltage input at 24A max current output, so they're perfect for this project.
I made some PCBs in college, but never for something high-power, so there may be some corrections in the future.
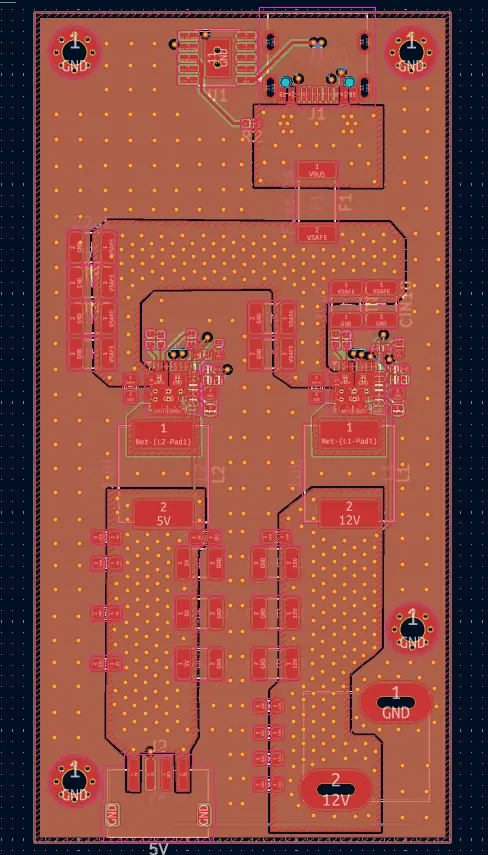
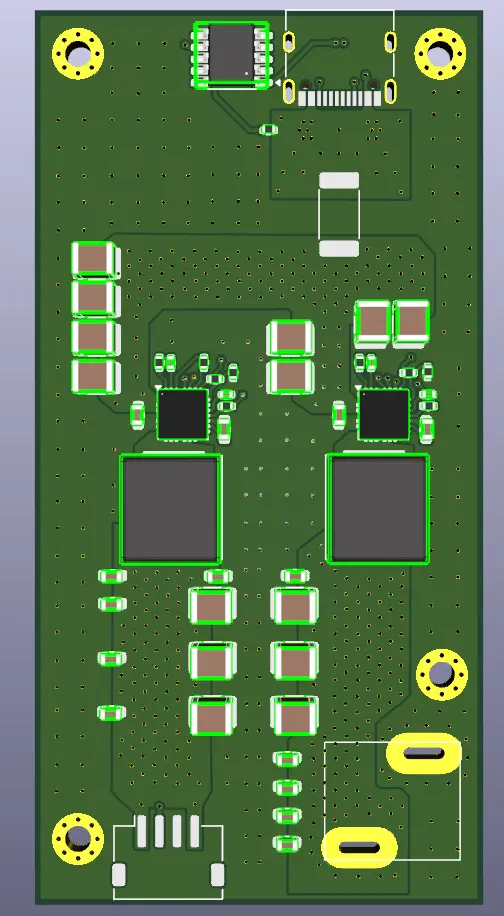
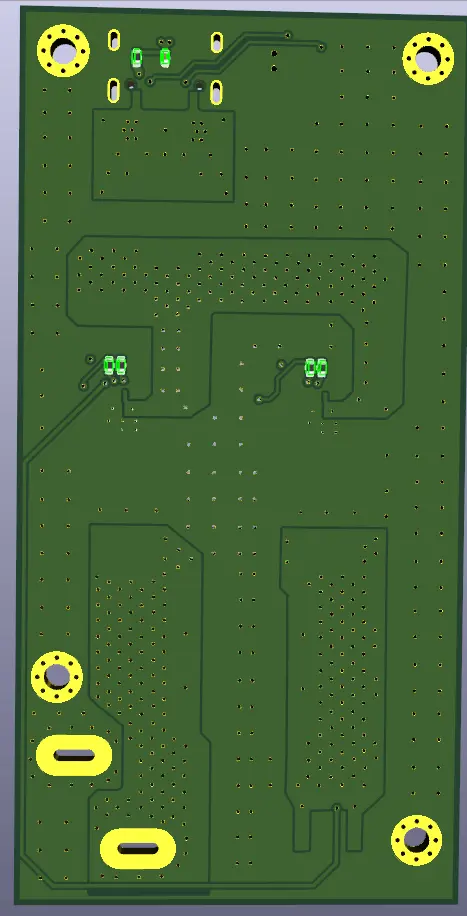
It is a 4 layer PCB, it has the USB-C PD circuit, a 5A fuse, two buck converters and for connecting it to the motherboard I'll use the same connector that is in the 12V output of the original power supply, it's a pretty uncommon connector so to finish this project I will have to get a donor power supply to salvage it (if anyone has found where to source this connector or a better replacement or idea to connect it to the motherboard please tell me), for the 5V, it is the same connector found on the PS4 motherboard.
This is the finished PCB:
And that's all I have done for now, the next things I want to do are:
Also, English is not my first language so please excuse any errors.I wanted to participate in this year's summer building contest but honestly since this will be my first project I didn't want to stress myself out too much, and I don't think I could finish it in 3 months. So I'd rather take my time with this, maybe I'll enter the contest next year.
Almost a year ago after making a PS2 Ultra Slim I had an idea. Can something like this be made with a PS4? After disassembling my PS4 Slim and removing the Blu-ray drive the motherboard is a little over half the size of the original console, so that will be the target size of this build.
The biggest concern with this build is the power supply, which takes up almost a quarter of the whole console, so that was the first problem I wanted to solve.
Based on Lecisco's PS4 portable, the PS4 Slim uses like 80w max while gaming, so my idea is to make a USB-C PD 100W custom power supply, I have some trigger boards that use the CH224K IC to configure the USB charger to output 20V at 5A so I'll use that IC since it is pretty easy to configure. Now, the PS4 doesn't use 20V, it uses 12V as the main voltage and 5V for standby and other things, so I'll have to bring down those voltages using two buck converters. My choice is Vishay's SiC431 buck converters that are capable of 24V max voltage input at 24A max current output, so they're perfect for this project.
I made some PCBs in college, but never for something high-power, so there may be some corrections in the future.
It is a 4 layer PCB, it has the USB-C PD circuit, a 5A fuse, two buck converters and for connecting it to the motherboard I'll use the same connector that is in the 12V output of the original power supply, it's a pretty uncommon connector so to finish this project I will have to get a donor power supply to salvage it (if anyone has found where to source this connector or a better replacement or idea to connect it to the motherboard please tell me), for the 5V, it is the same connector found on the PS4 motherboard.
This is the finished PCB:
And that's all I have done for now, the next things I want to do are:
- Assemble the power supply and test if it works
- Plan where I'll be putting the SSD (maybe on the underside of the PCB, but in the opposite direction of the original)
- Start designing the custom case
- Assemble everything