
Worklog Wii U R&D Thread (WURD)
- Thread starter Shank
- Start date
I really appreciate all the kind words about the guide!  I know I said I was taking a break, but I couldn't help but continue with Wii U development.
First off, I am publicly releasing all of my Wii U scans (both WUP-01 and WUP-50) as well as my pseudo-compendium-- about 15GB in total. The scans have already been shared around privately for de_Fuse and USATA development, but with the guide being complete there's no longer any reason for me to hoard them. The WUP-01.pdn in the root folder is NOT a full-fledged compendium like the Wii one. It was a tool for my personal use and has doodles all over it, as well as things that might be wrong, or not make sense. Hopefully people find it useful, or at least interesting!
Wii U Docs Folder Link
I've also been testing some new softmod stuff for the Wii U and it's very promising. Here are some notes:
To facilitate the setup of SD card-less ISFSHax, I wrote a Wii U homebrew app called "haxcopy". Normally you have to use an FTP client to transfer the hax folder to the Wii U's SLC NAND. But this app copies it from the SD card, eliminating the need for FTP. Streamlining things with homebrew like this is very important for lowering the barrier to entry IMO.
https://github.com/mackieks/haxcopy


So now the mandatory relocation list has shrunk to:
The guide will be updated once all this stuff is thoroughly tested. If anyone intends to perform a LOLWUT trim, I highly recommend waiting a few more weeks!
I know I said I was taking a break, but I couldn't help but continue with Wii U development.First off, I am publicly releasing all of my Wii U scans (both WUP-01 and WUP-50) as well as my pseudo-compendium-- about 15GB in total. The scans have already been shared around privately for de_Fuse and USATA development, but with the guide being complete there's no longer any reason for me to hoard them. The WUP-01.pdn in the root folder is NOT a full-fledged compendium like the Wii one. It was a tool for my personal use and has doodles all over it, as well as things that might be wrong, or not make sense. Hopefully people find it useful, or at least interesting!
Wii U Docs Folder Link
I've also been testing some new softmod stuff for the Wii U and it's very promising. Here are some notes:
- You can disable the disc drive by using minute_minute to set the SATA device to 'none' in the SEEPROM. The Pico de_Fuse method of disabling the disc drive actually spoofs this SEEPROM value, which is technically safer, but for portablizing the riskier approach of actually writing the SEEPROM is fine. This means we no longer have to wire up the Pico de_Fuse modchip, although you'll still need it if you want to restore a NAND dump.
- With ISFSHax, you can do a couple things:
- Replace the MLC (eMMC) NAND with an SD card of arbitrary size. This is great because we can replace the 32GB eMMC with a 256GB microSD card for storing tons of games!
- Store IOSU plugins on the SLC (TSOP) NAND and boot them automatically without an SD card present. One new experimental plugin by jan-hofmeier redirects USB to SD. This means we can use a USB drive instead of an SD card for Aroma and homebrew!
To facilitate the setup of SD card-less ISFSHax, I wrote a Wii U homebrew app called "haxcopy". Normally you have to use an FTP client to transfer the hax folder to the Wii U's SLC NAND. But this app copies it from the SD card, eliminating the need for FTP. Streamlining things with homebrew like this is very important for lowering the barrier to entry IMO.
https://github.com/mackieks/haxcopy


So now the mandatory relocation list has shrunk to:
- the 3 wireless modules (BT, Wi-Fi, GamePad)
- the SMC and RTC
- SLC (TSOP) NAND and microSD card (MLC replacement)
- USB for Aroma/homebrew
The guide will be updated once all this stuff is thoroughly tested. If anyone intends to perform a LOLWUT trim, I highly recommend waiting a few more weeks!
Last edited:
I would like to formally apologise to everyone to whom I said "Wii U portablising is a pipe dream". I was wrong. Let the future commence!
- Joined
- Feb 18, 2024
- Messages
- 69
- Likes
- 25
- Portables
- working on No.1
I'VE BEEN WAITING FOR THIS FOR SO LONG!!!!!!!!
monke
.
- Joined
- Jul 8, 2021
- Messages
- 4
- Likes
- 0
to be fair it was a pipe dream 3 years agoI would like to formally apologise to everyone to whom I said "Wii U portablising is a pipe dream". I was wrong. Let the future commence!
monke
.
- Joined
- Jul 8, 2021
- Messages
- 4
- Likes
- 0
4* years ago, when this thread was madeto be fair it was a pipe dream 3 years ago
- Joined
- Jan 16, 2024
- Messages
- 4
- Likes
- 1
I wonder when the video guides will start coming out... This is soo awesome it cant be long!
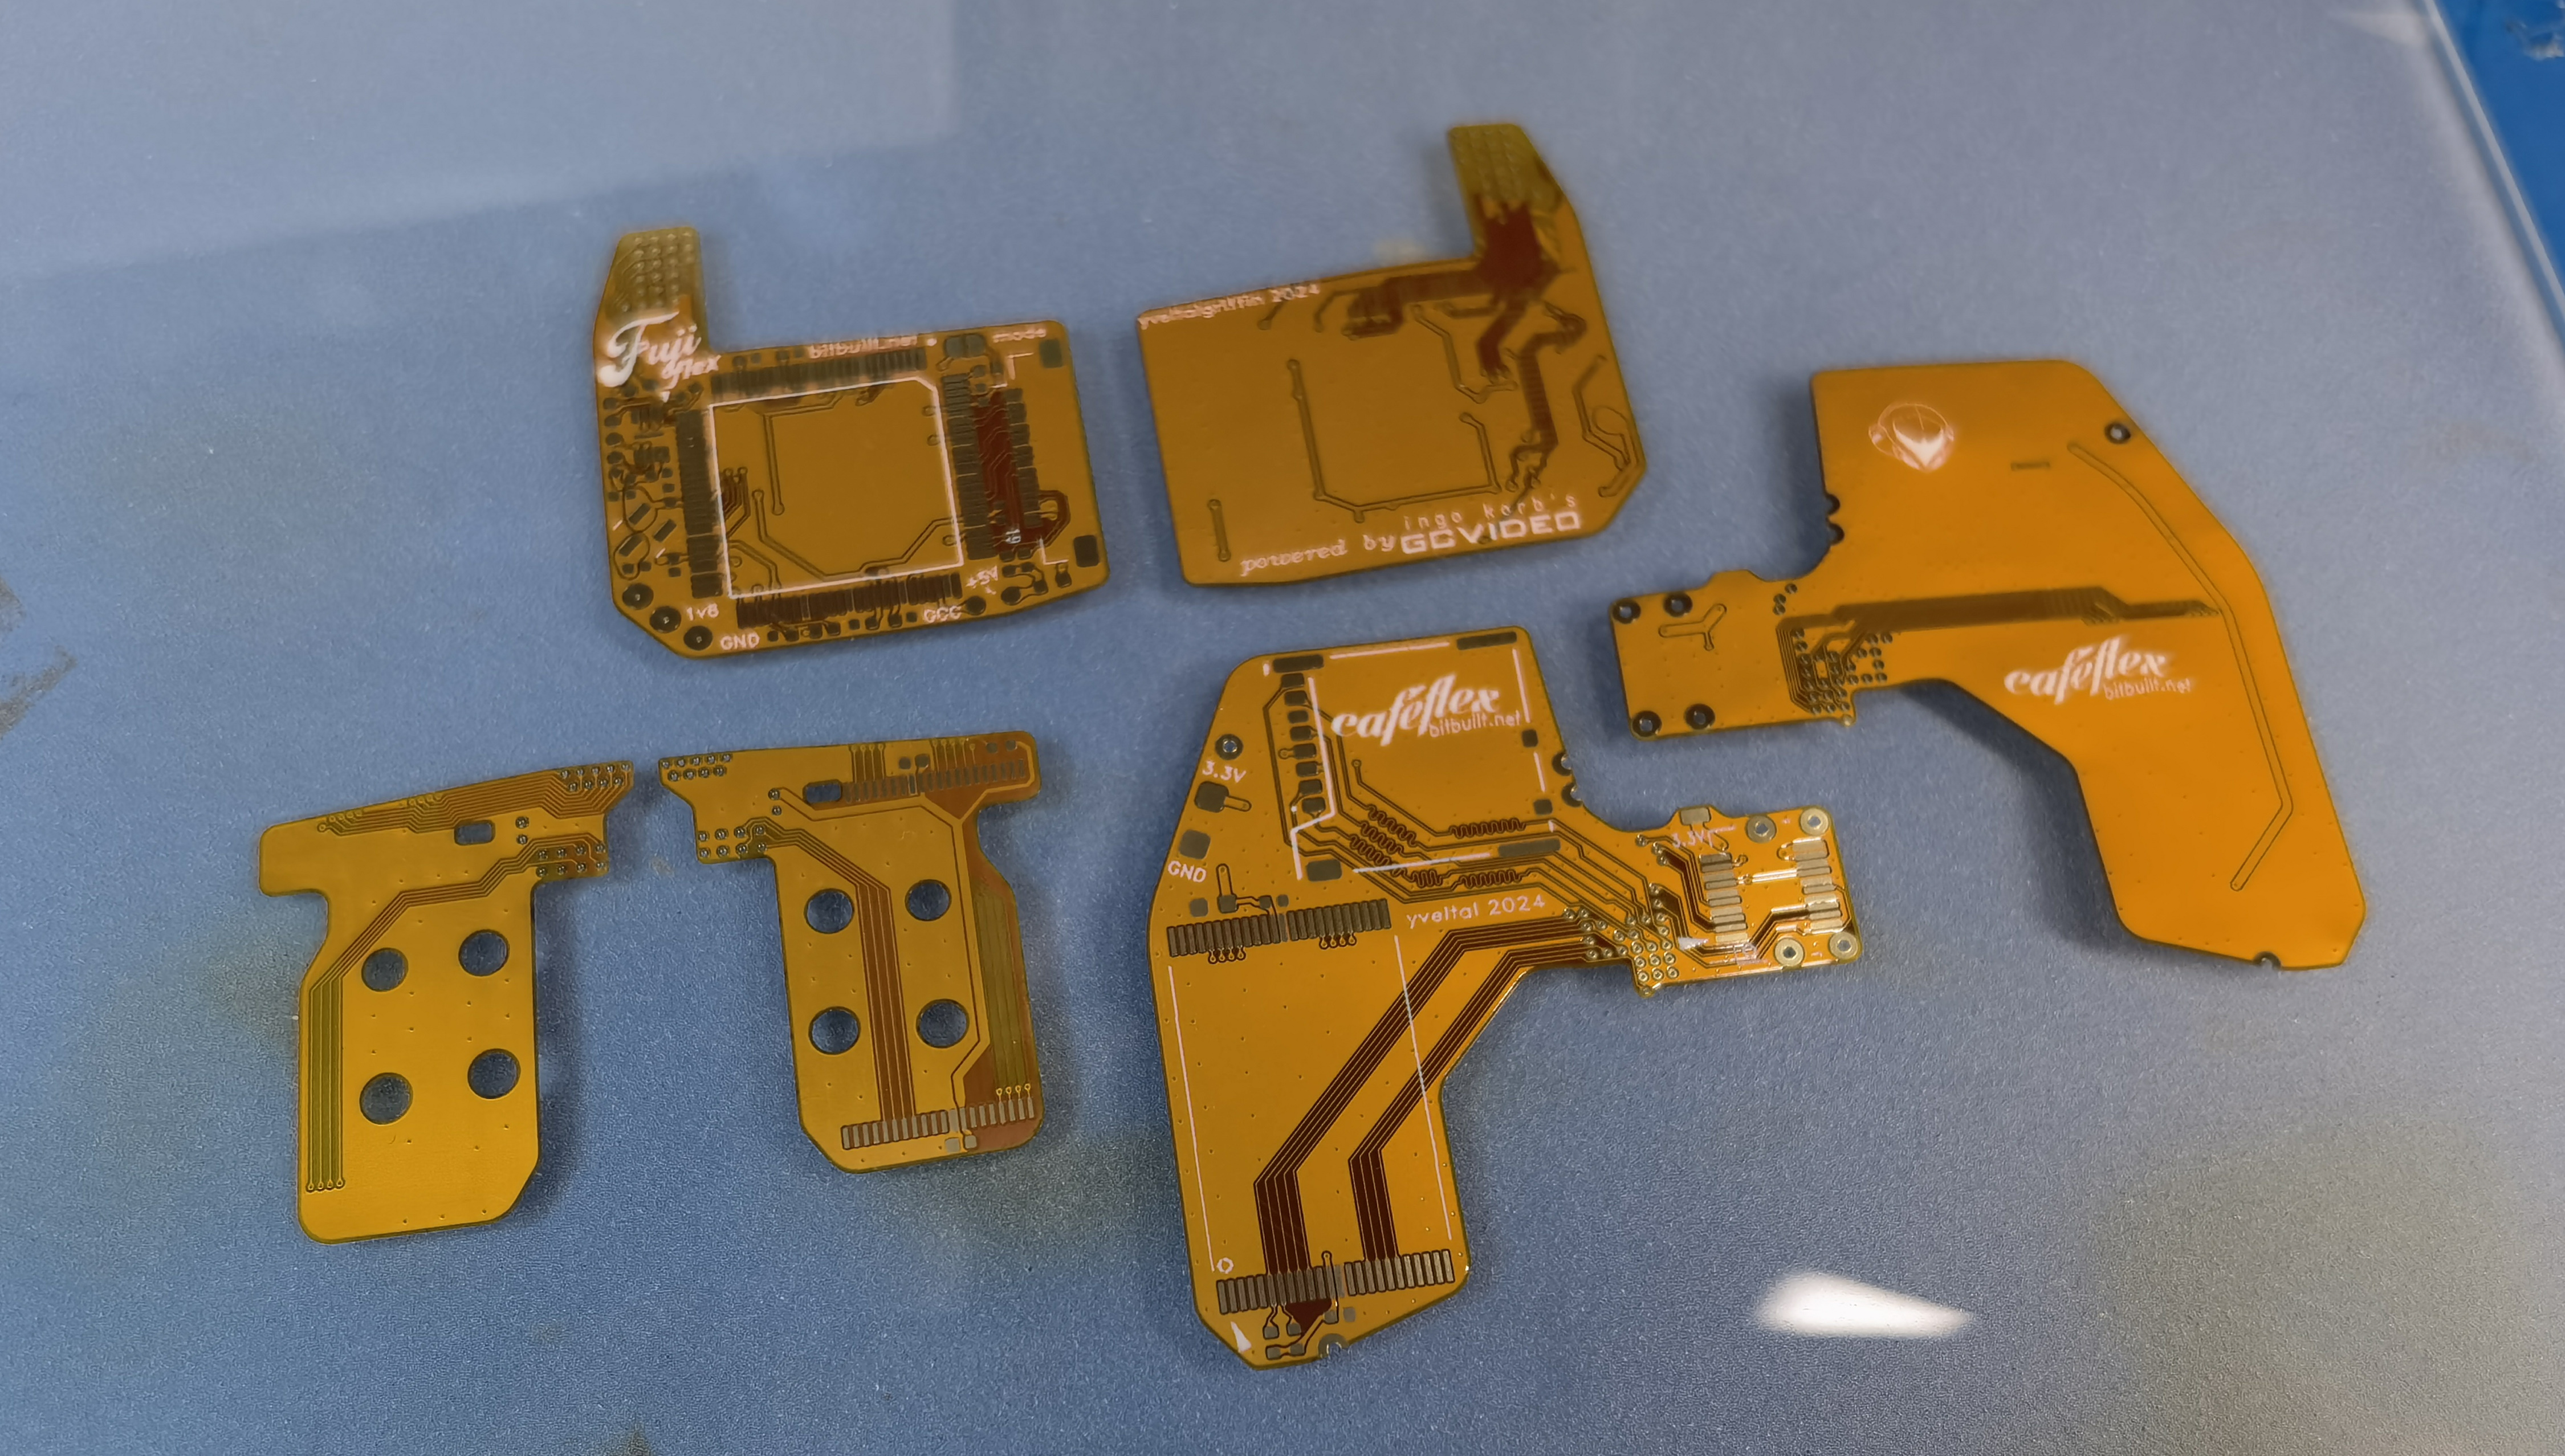
Caféflex is complete and open source on GitHub: LINK
Caféflex usage will eventually be integrated into the trim guide; in the meantime, this post will have some notes for early adopters!
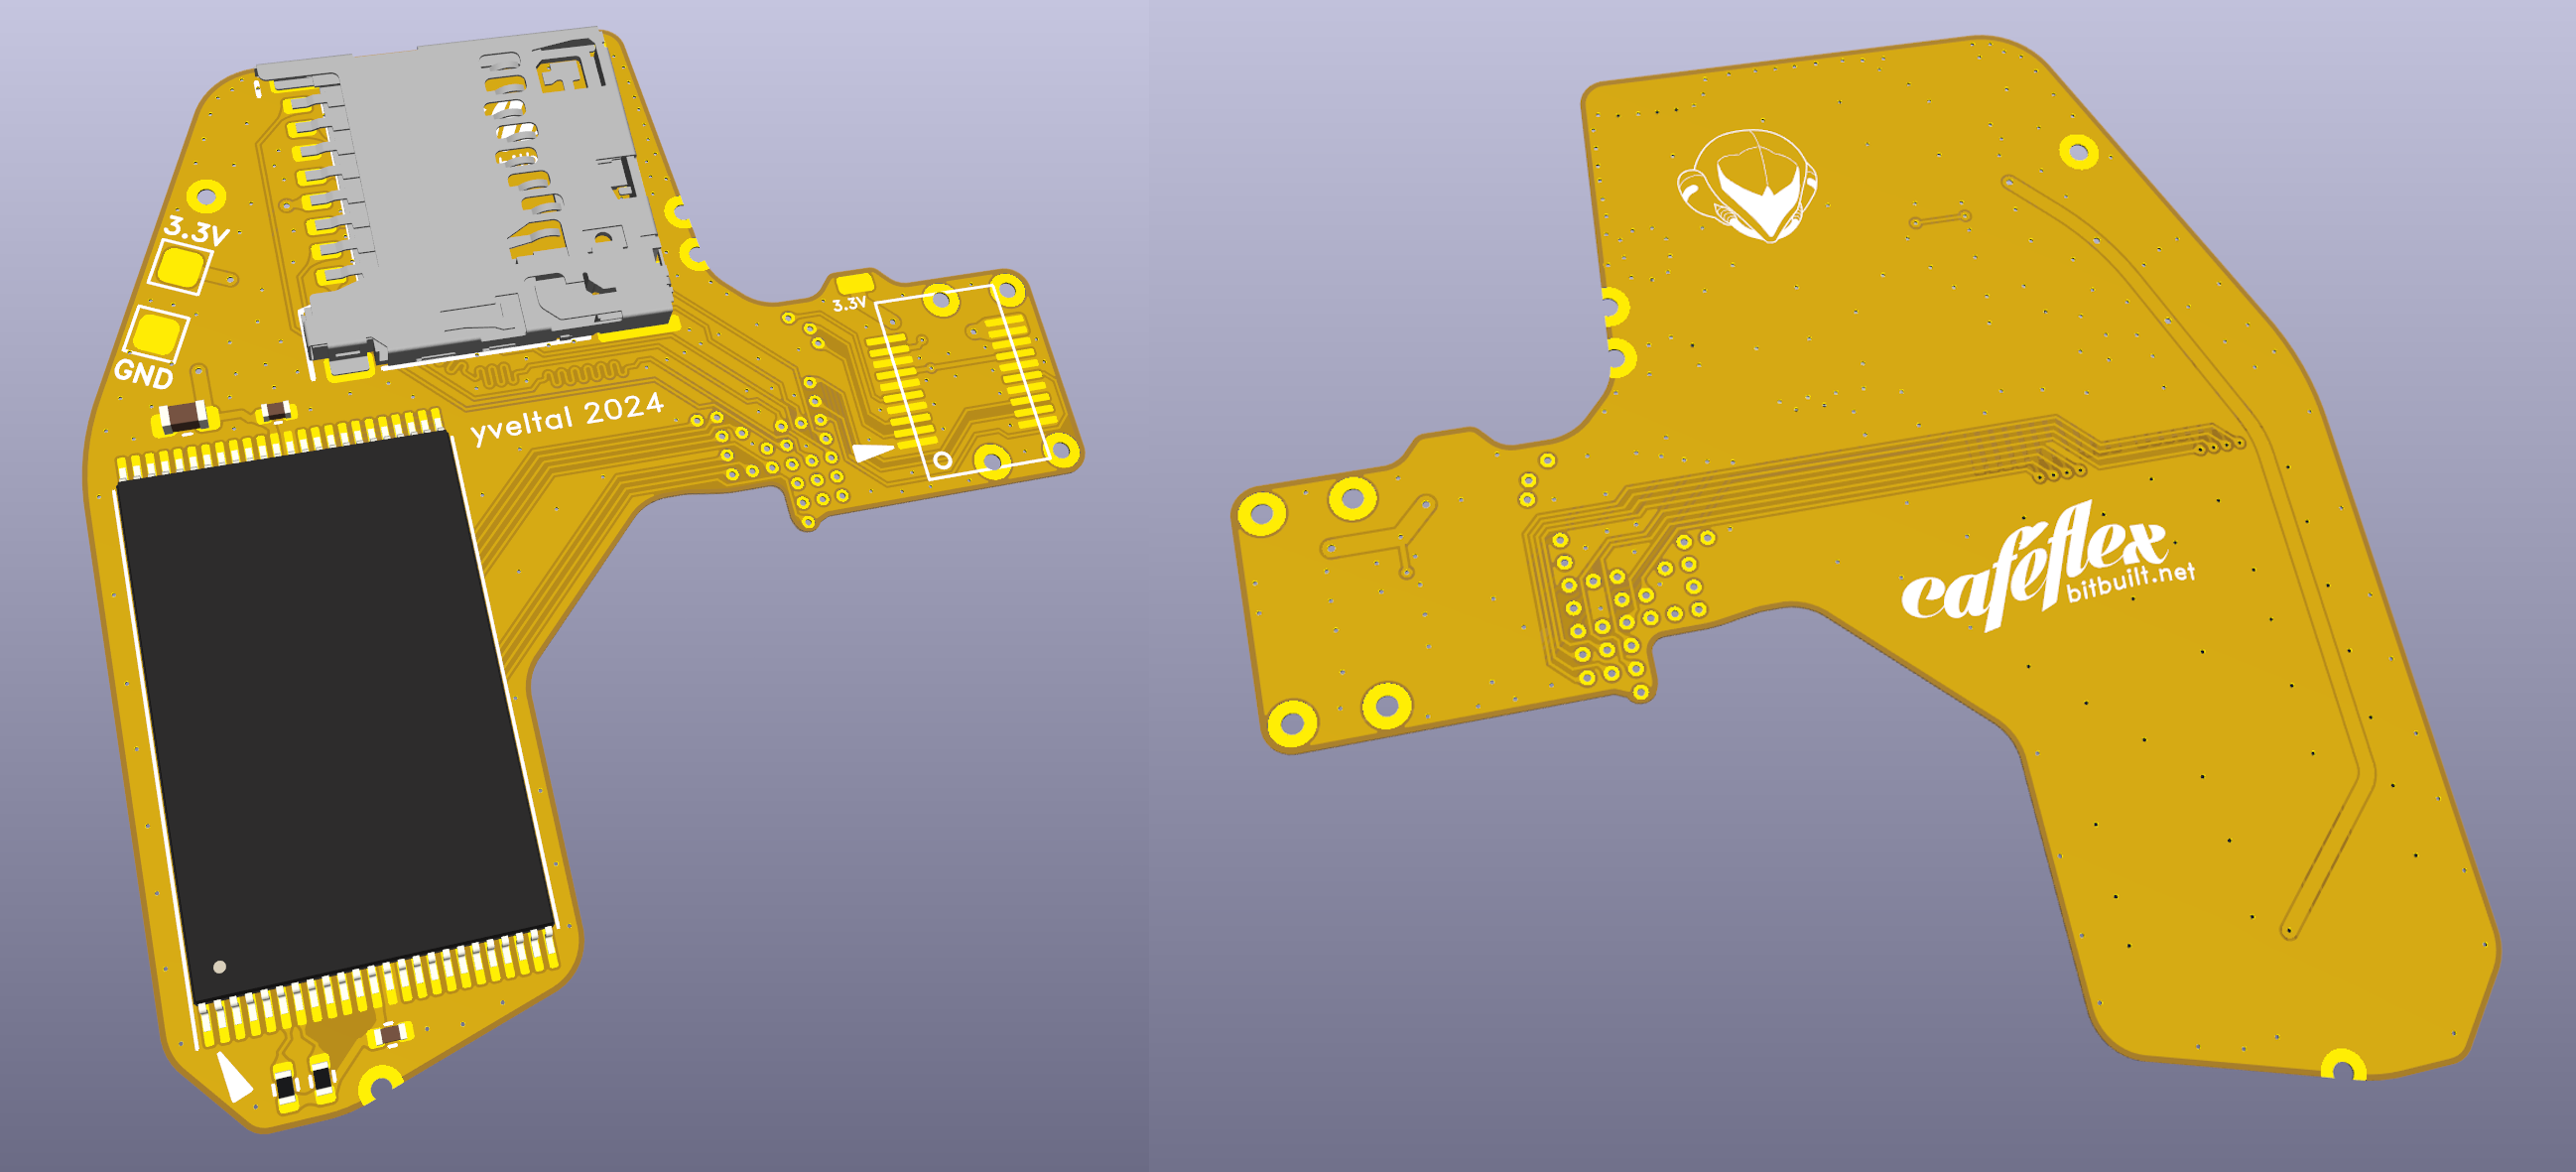
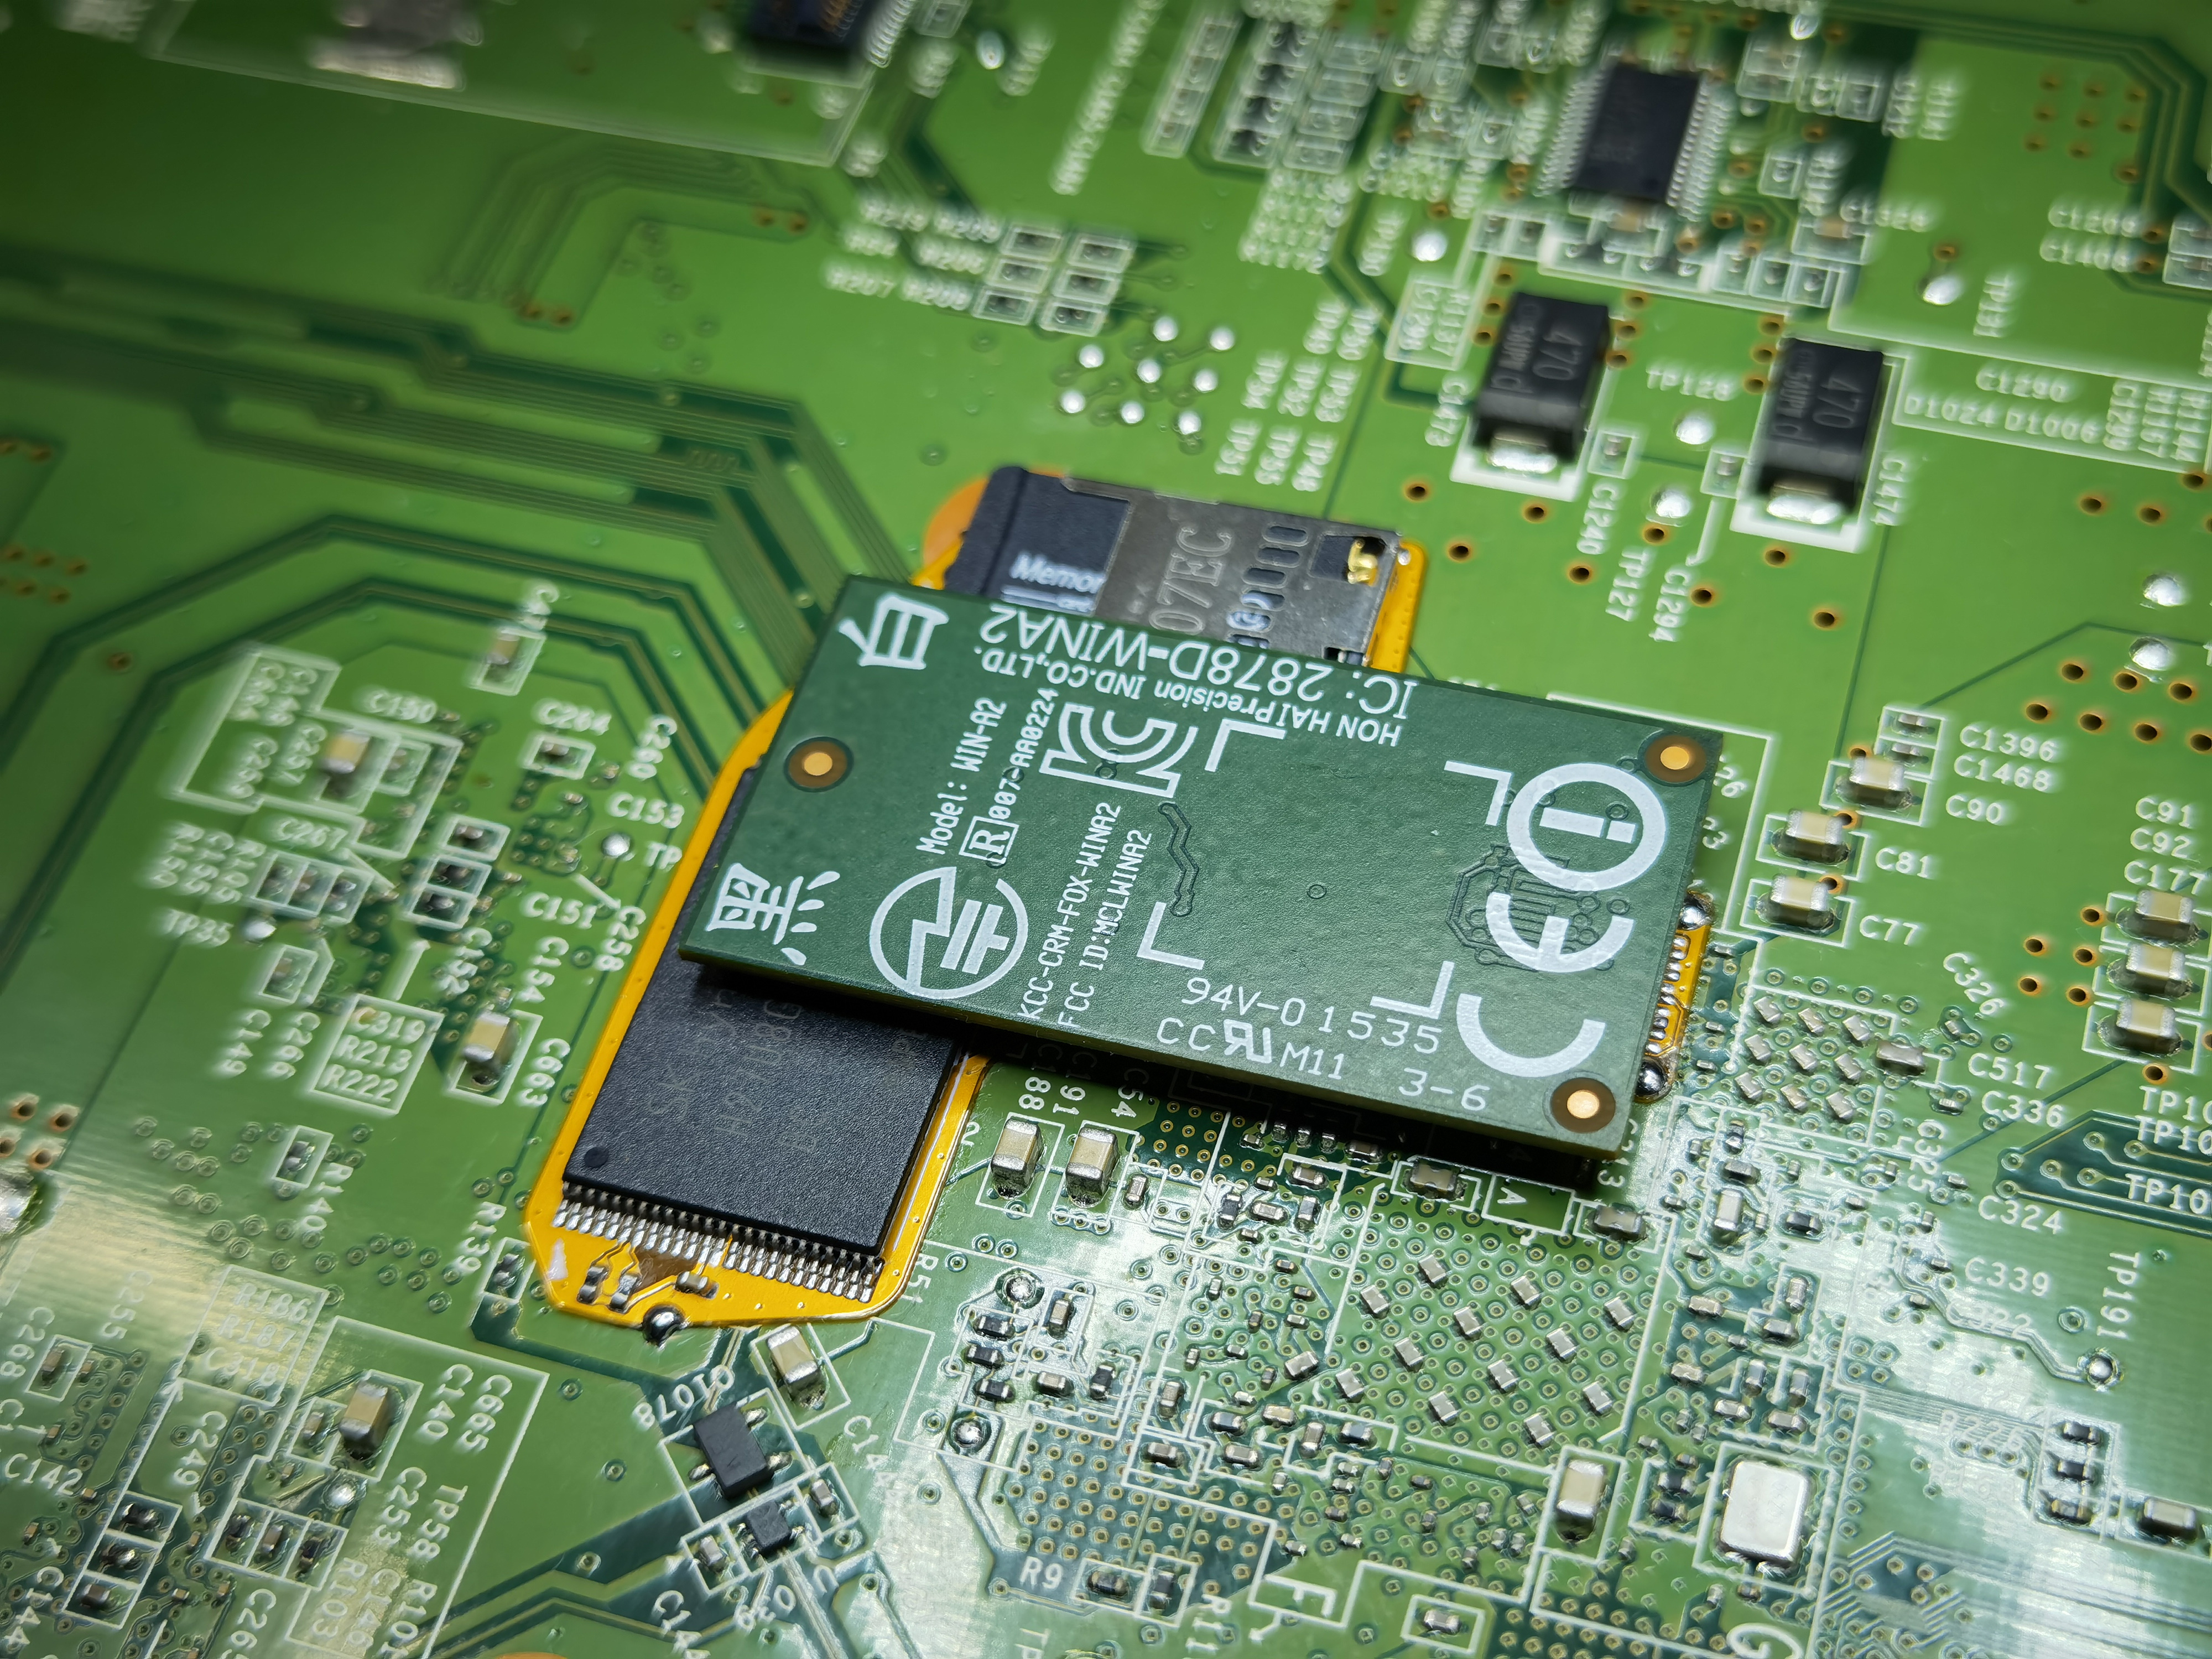
As planned, caféflex relocates the SLC (NAND), has a microSD slot for eMMC replacement, and a WiFi module connector. I searched long and hard for the Wifi B2B connector PN (with help from the Discord homies!) but it seems all the wireless modules on the Wii U use custom connectors. So the connector has to be harvested from a Wii U, which isn't a big deal since users will be trimming off that part of the board anyway. To avoid melting the connector, just blast the underside of the mobo with ~420C hot air until the B2B slides off.
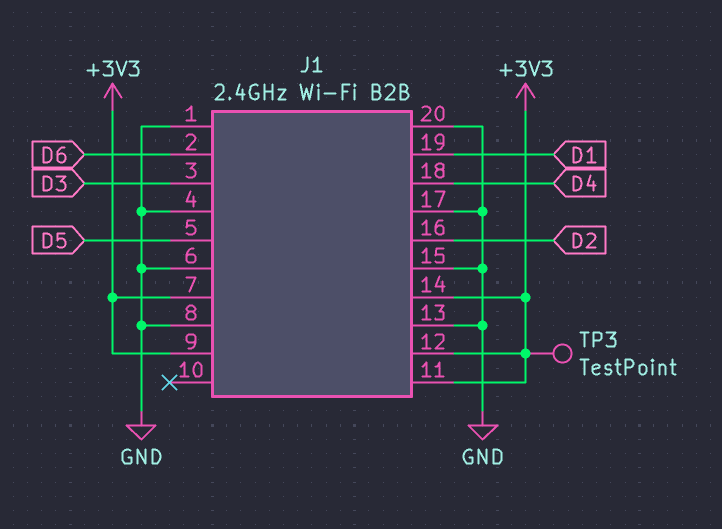
While designing the flex, I did some tests to see which WiFi module GPIOs are actually required. Turns out none of them are! Some need to be high, and others need to be low, but none actually need to be connected to the SMC/RTC/SOC. Again, this info will eventually be added to the trim guide. For now, here's a schematic snippet:
I ordered some flexes from PCBWay (0.12mm thickness, 0.5oz copper) and assembled them tonight. Always get an electropolished stencil, it makes pasting a breeze.
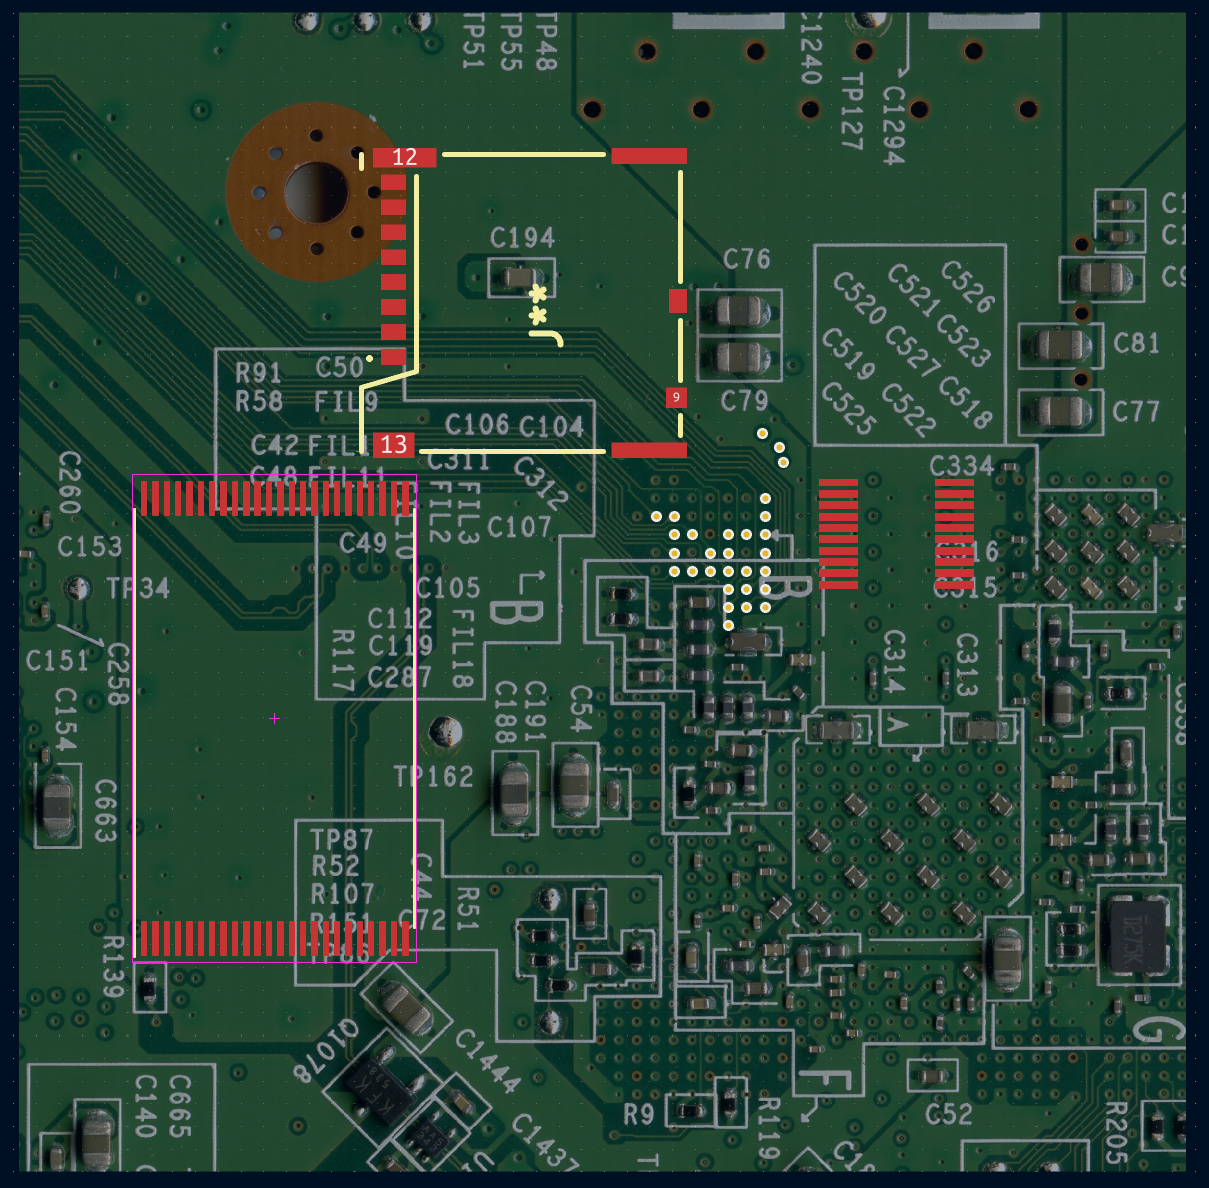
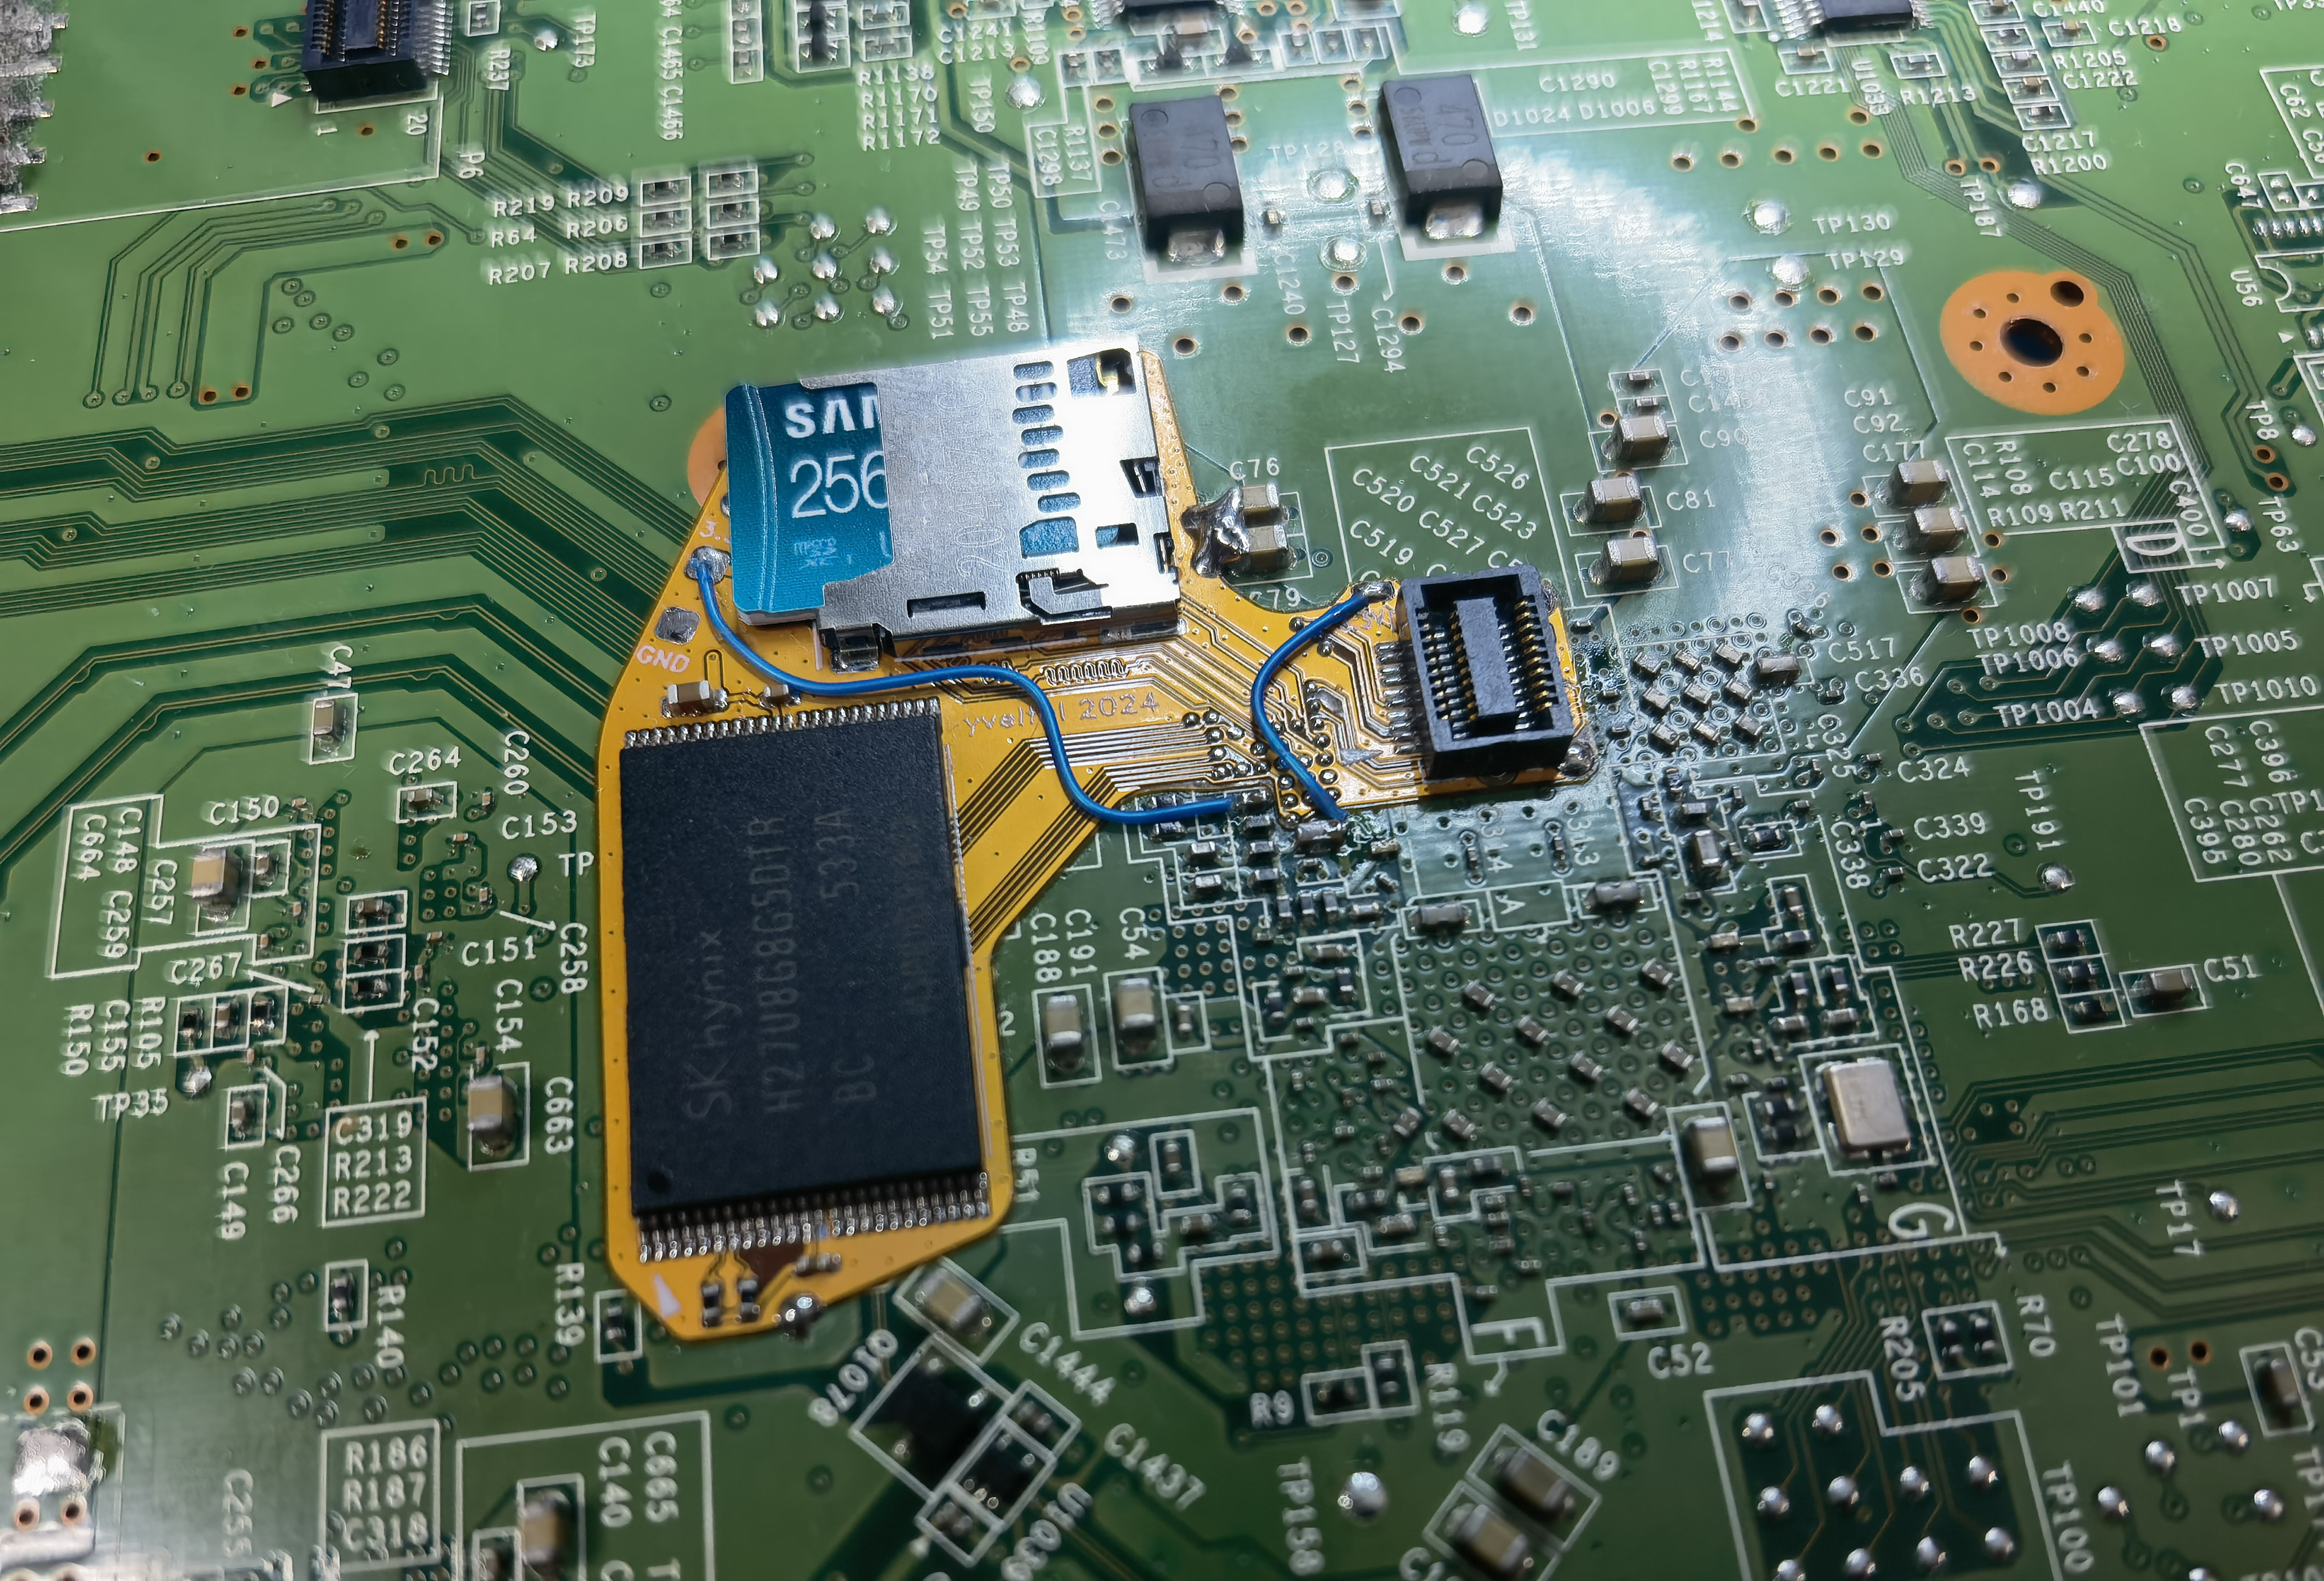
Removed C194 and wicked off the excess solder. I wicked off TP162 too. Then I scraped and tinned the 0.8mm pitch vias under the SOC. (I scraped more vias than necessary-- you only really need to expose the ones that align with the flex.)
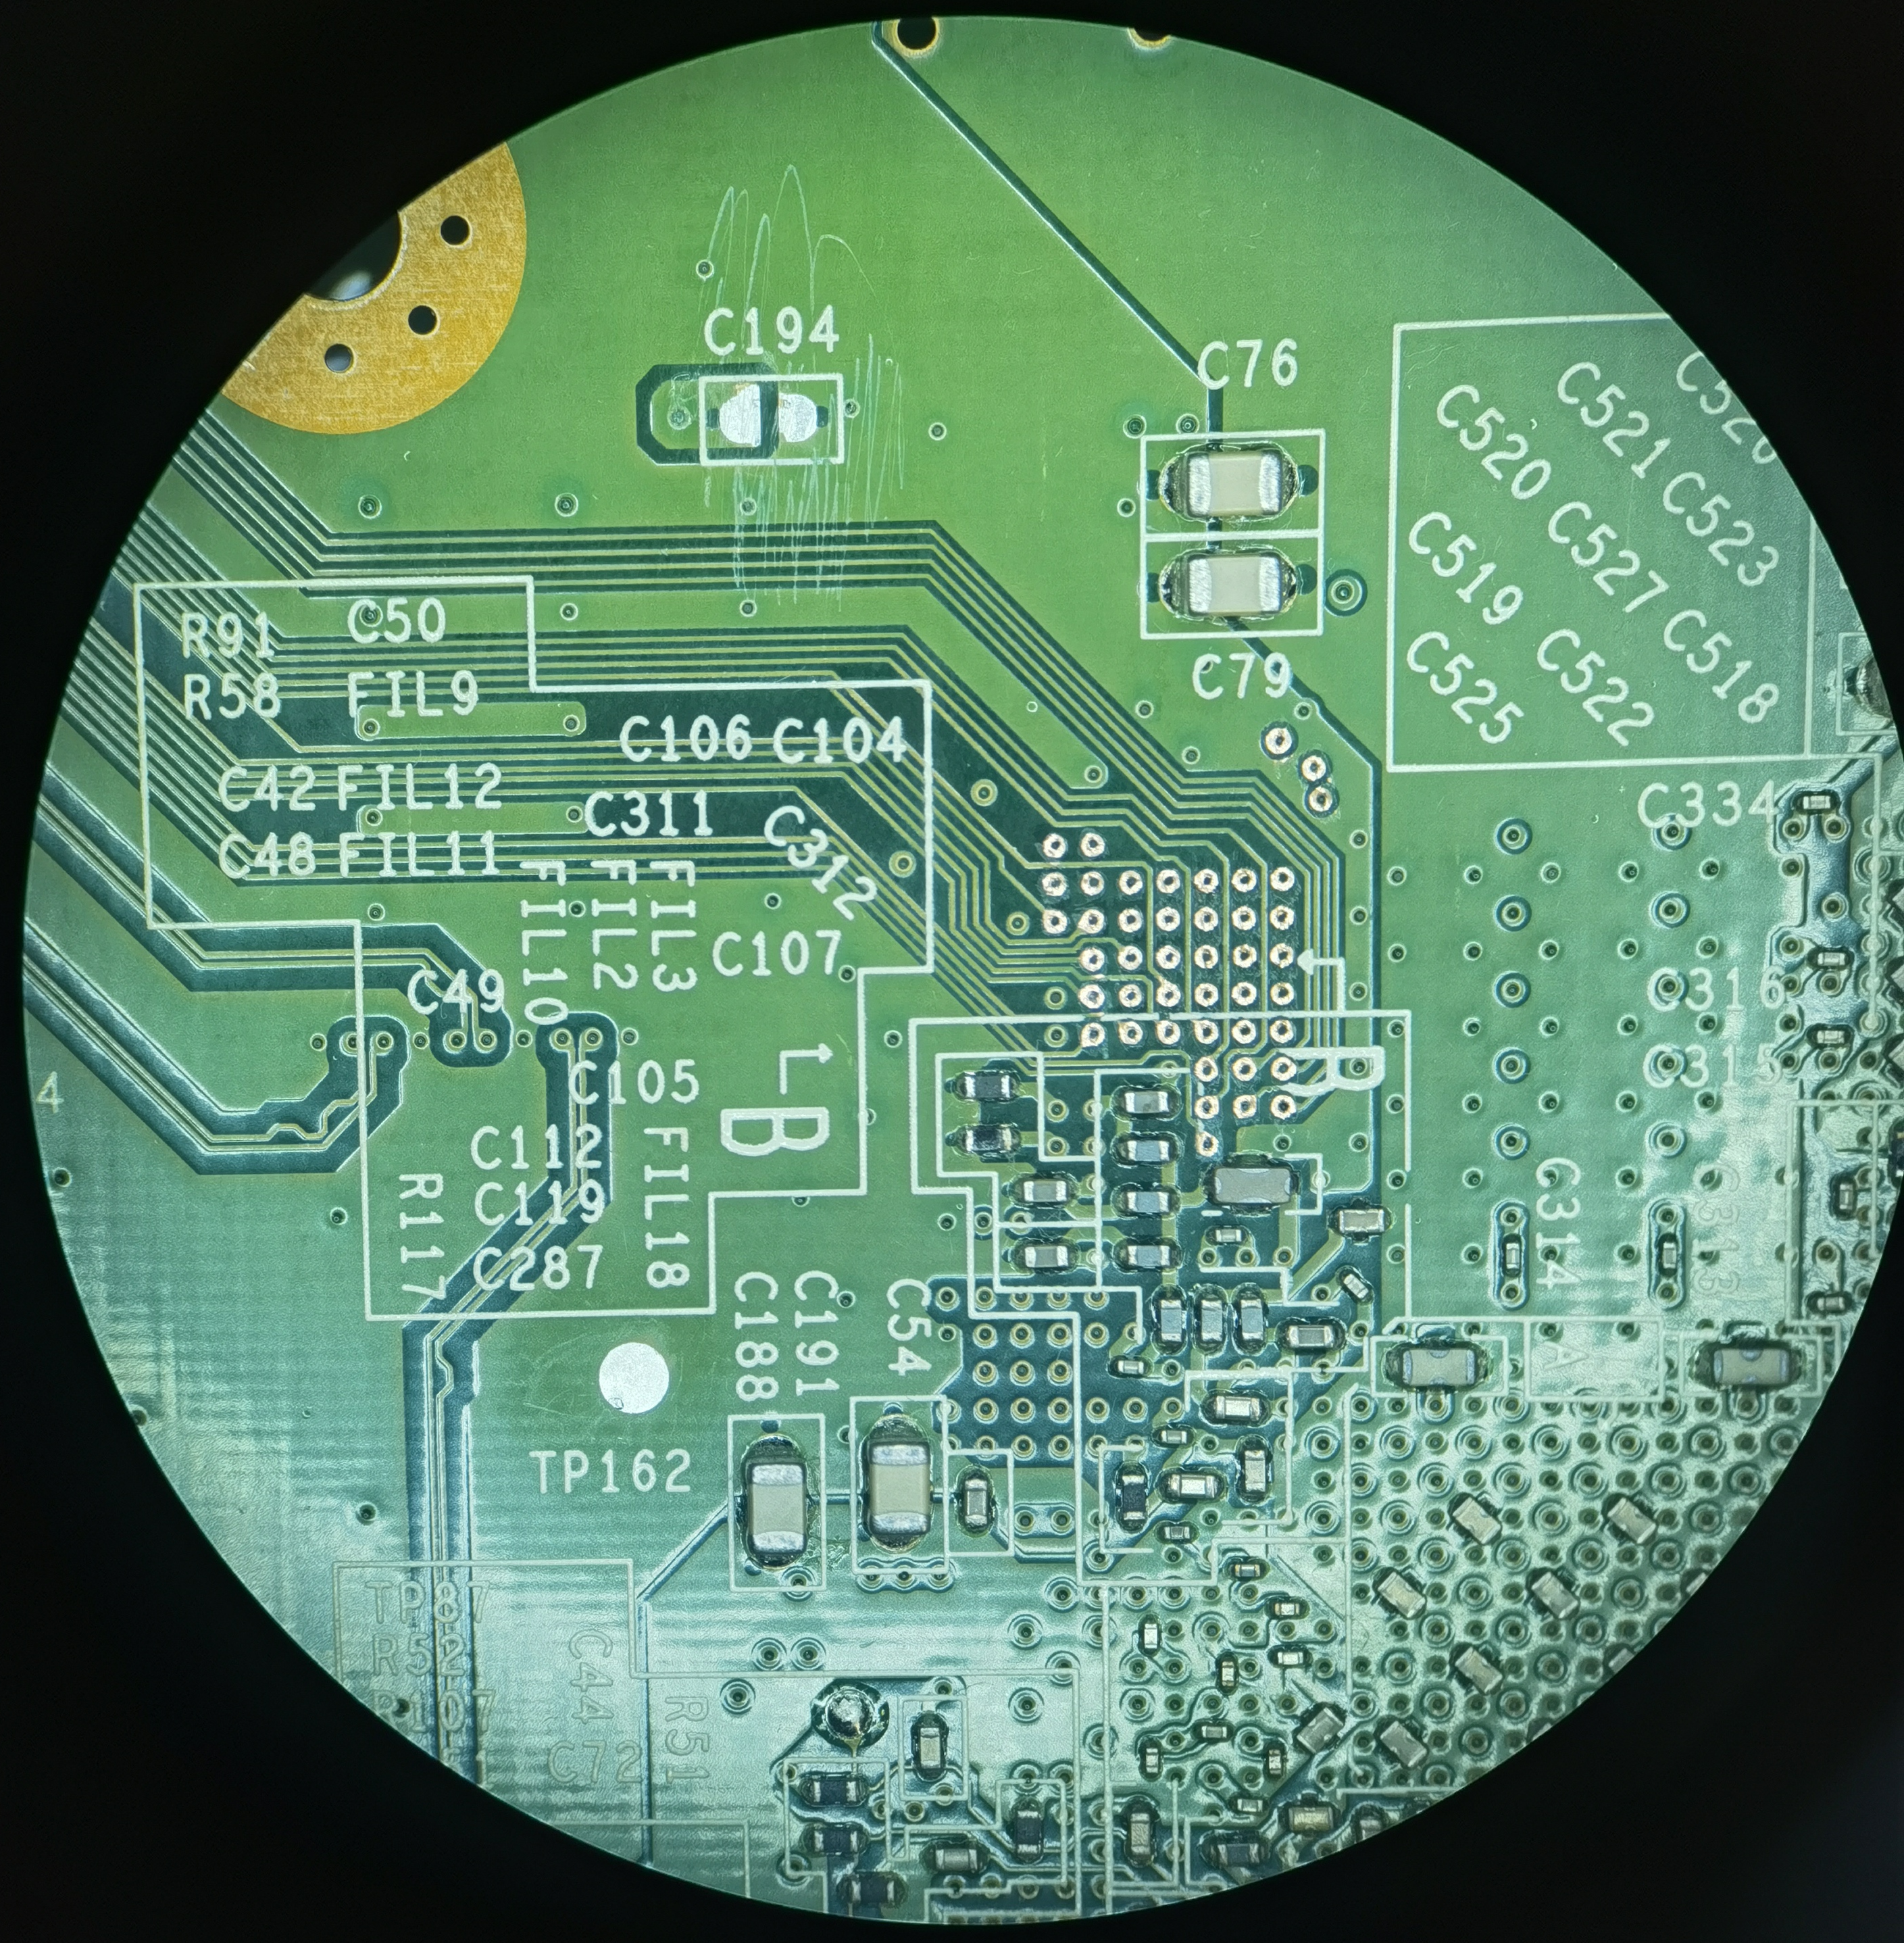
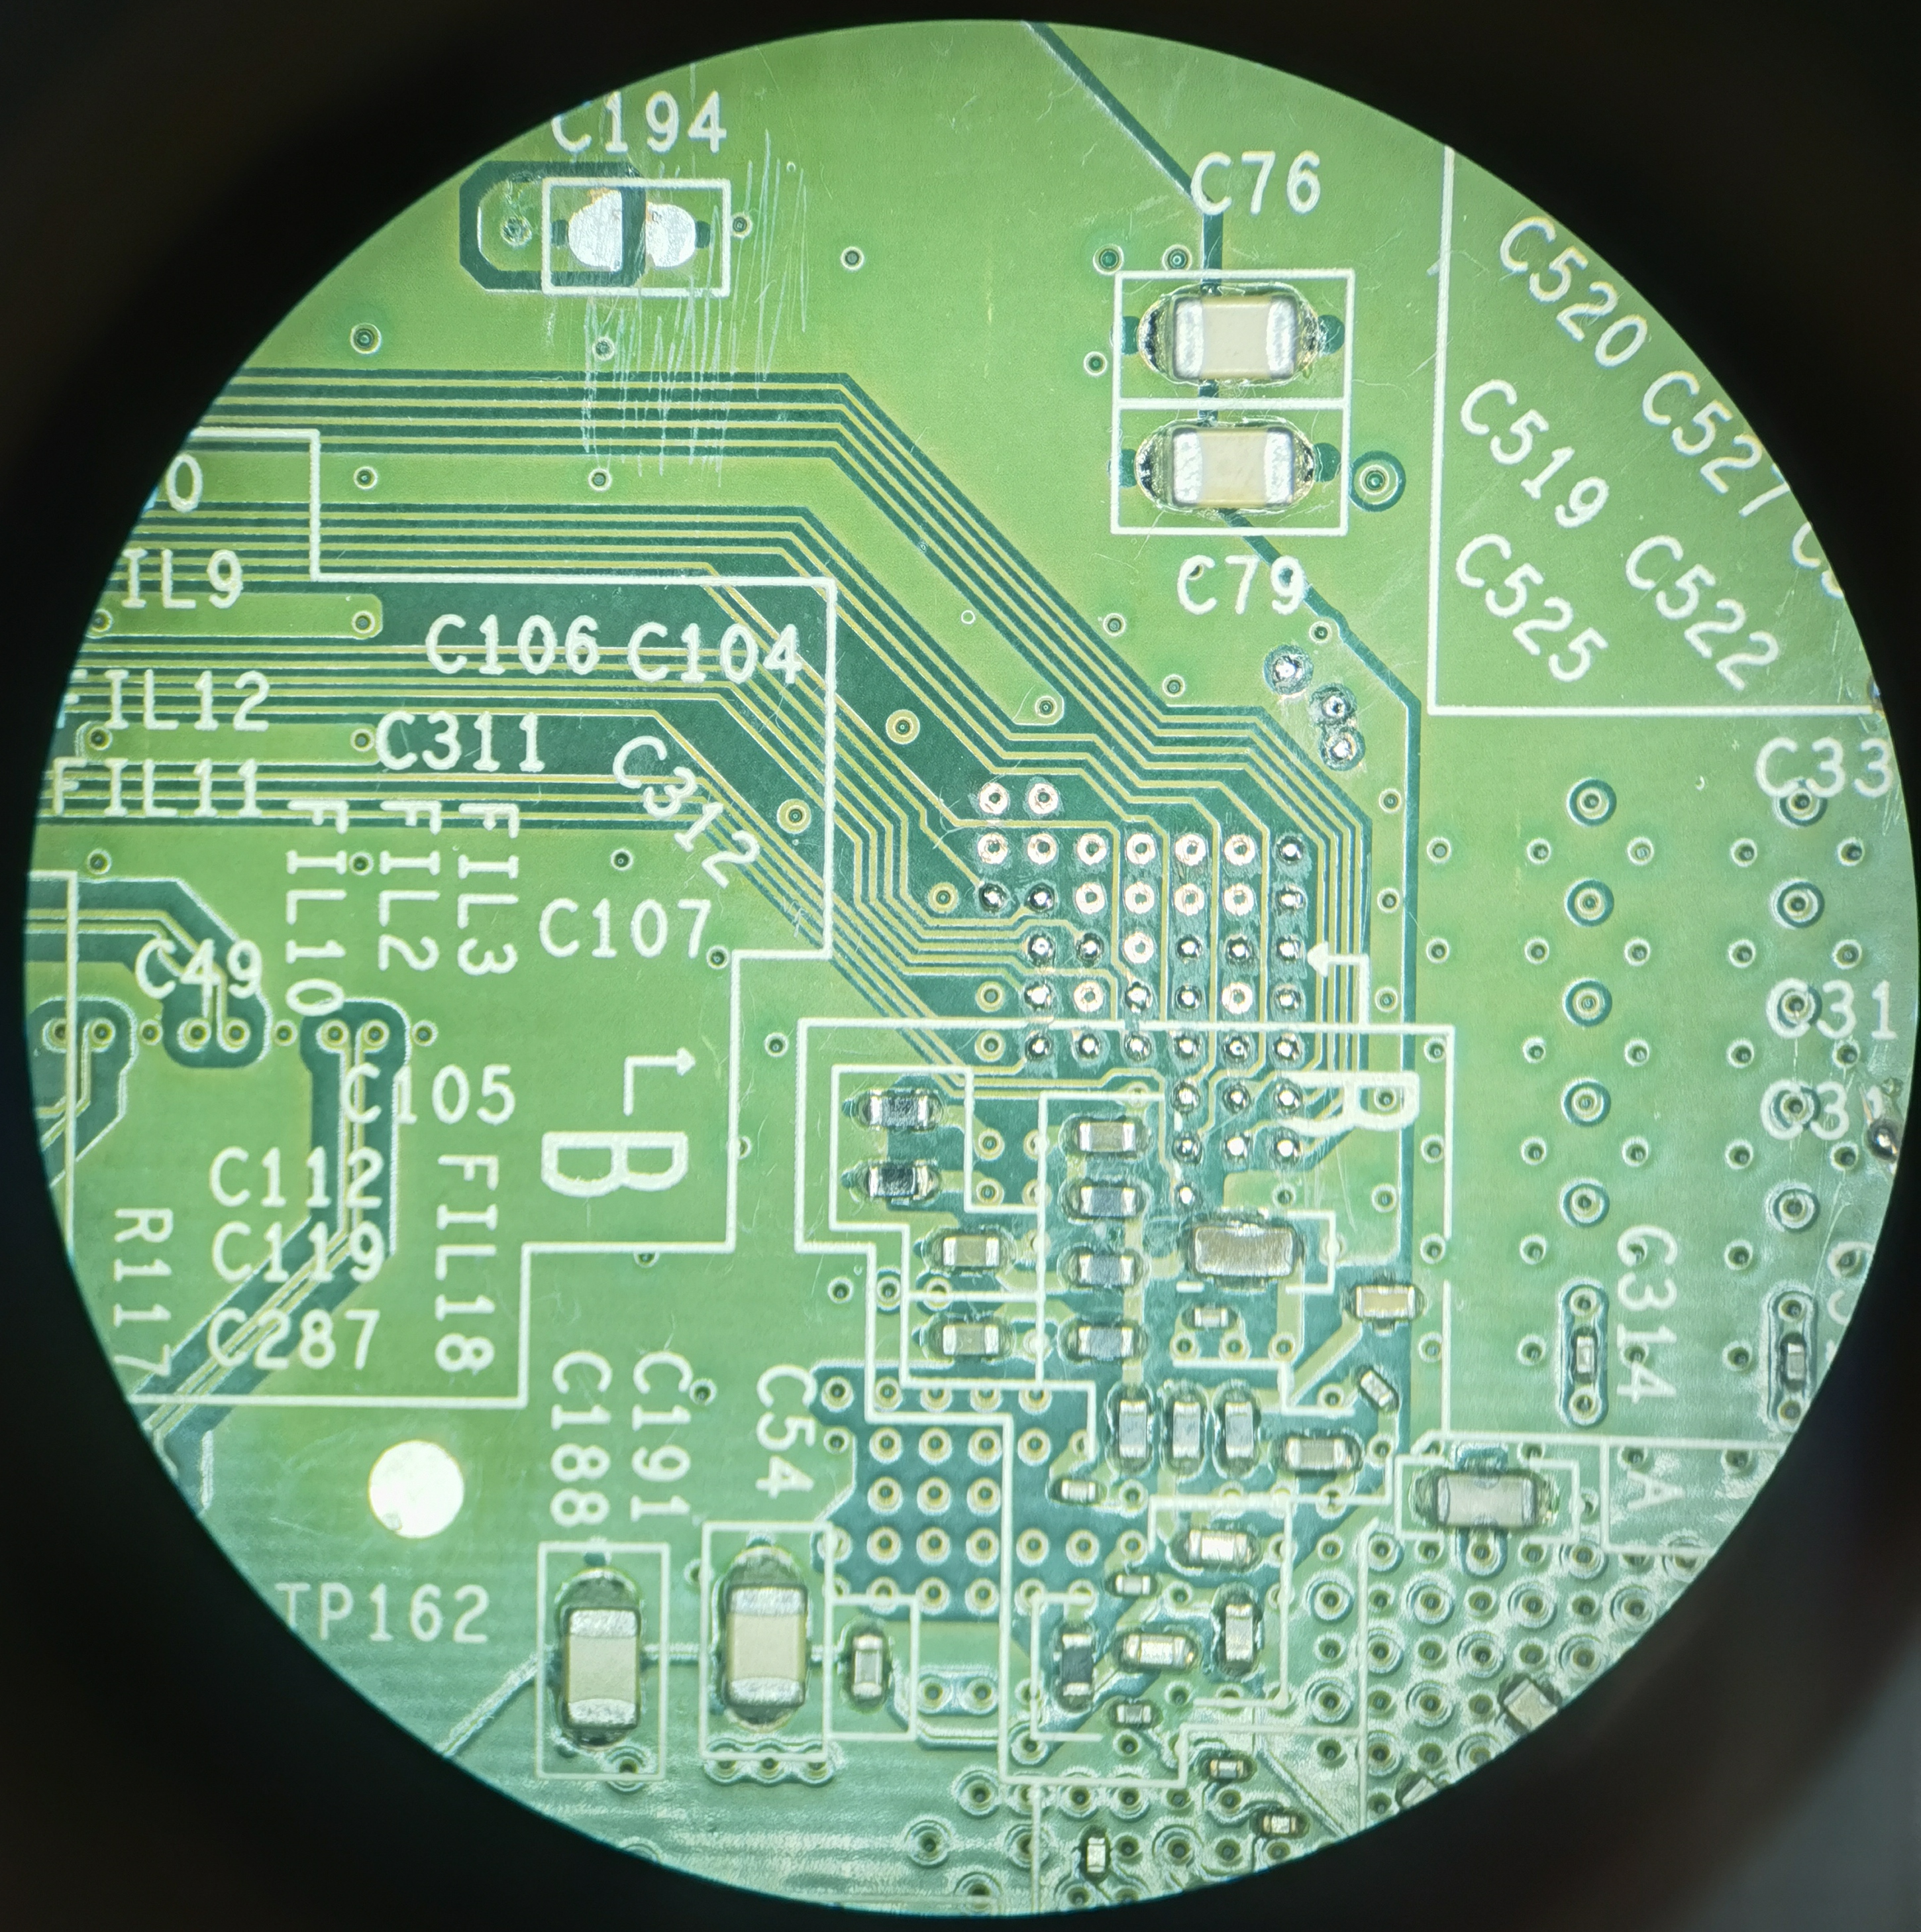
After tinning it was just a matter of aligning everything and soldering away!

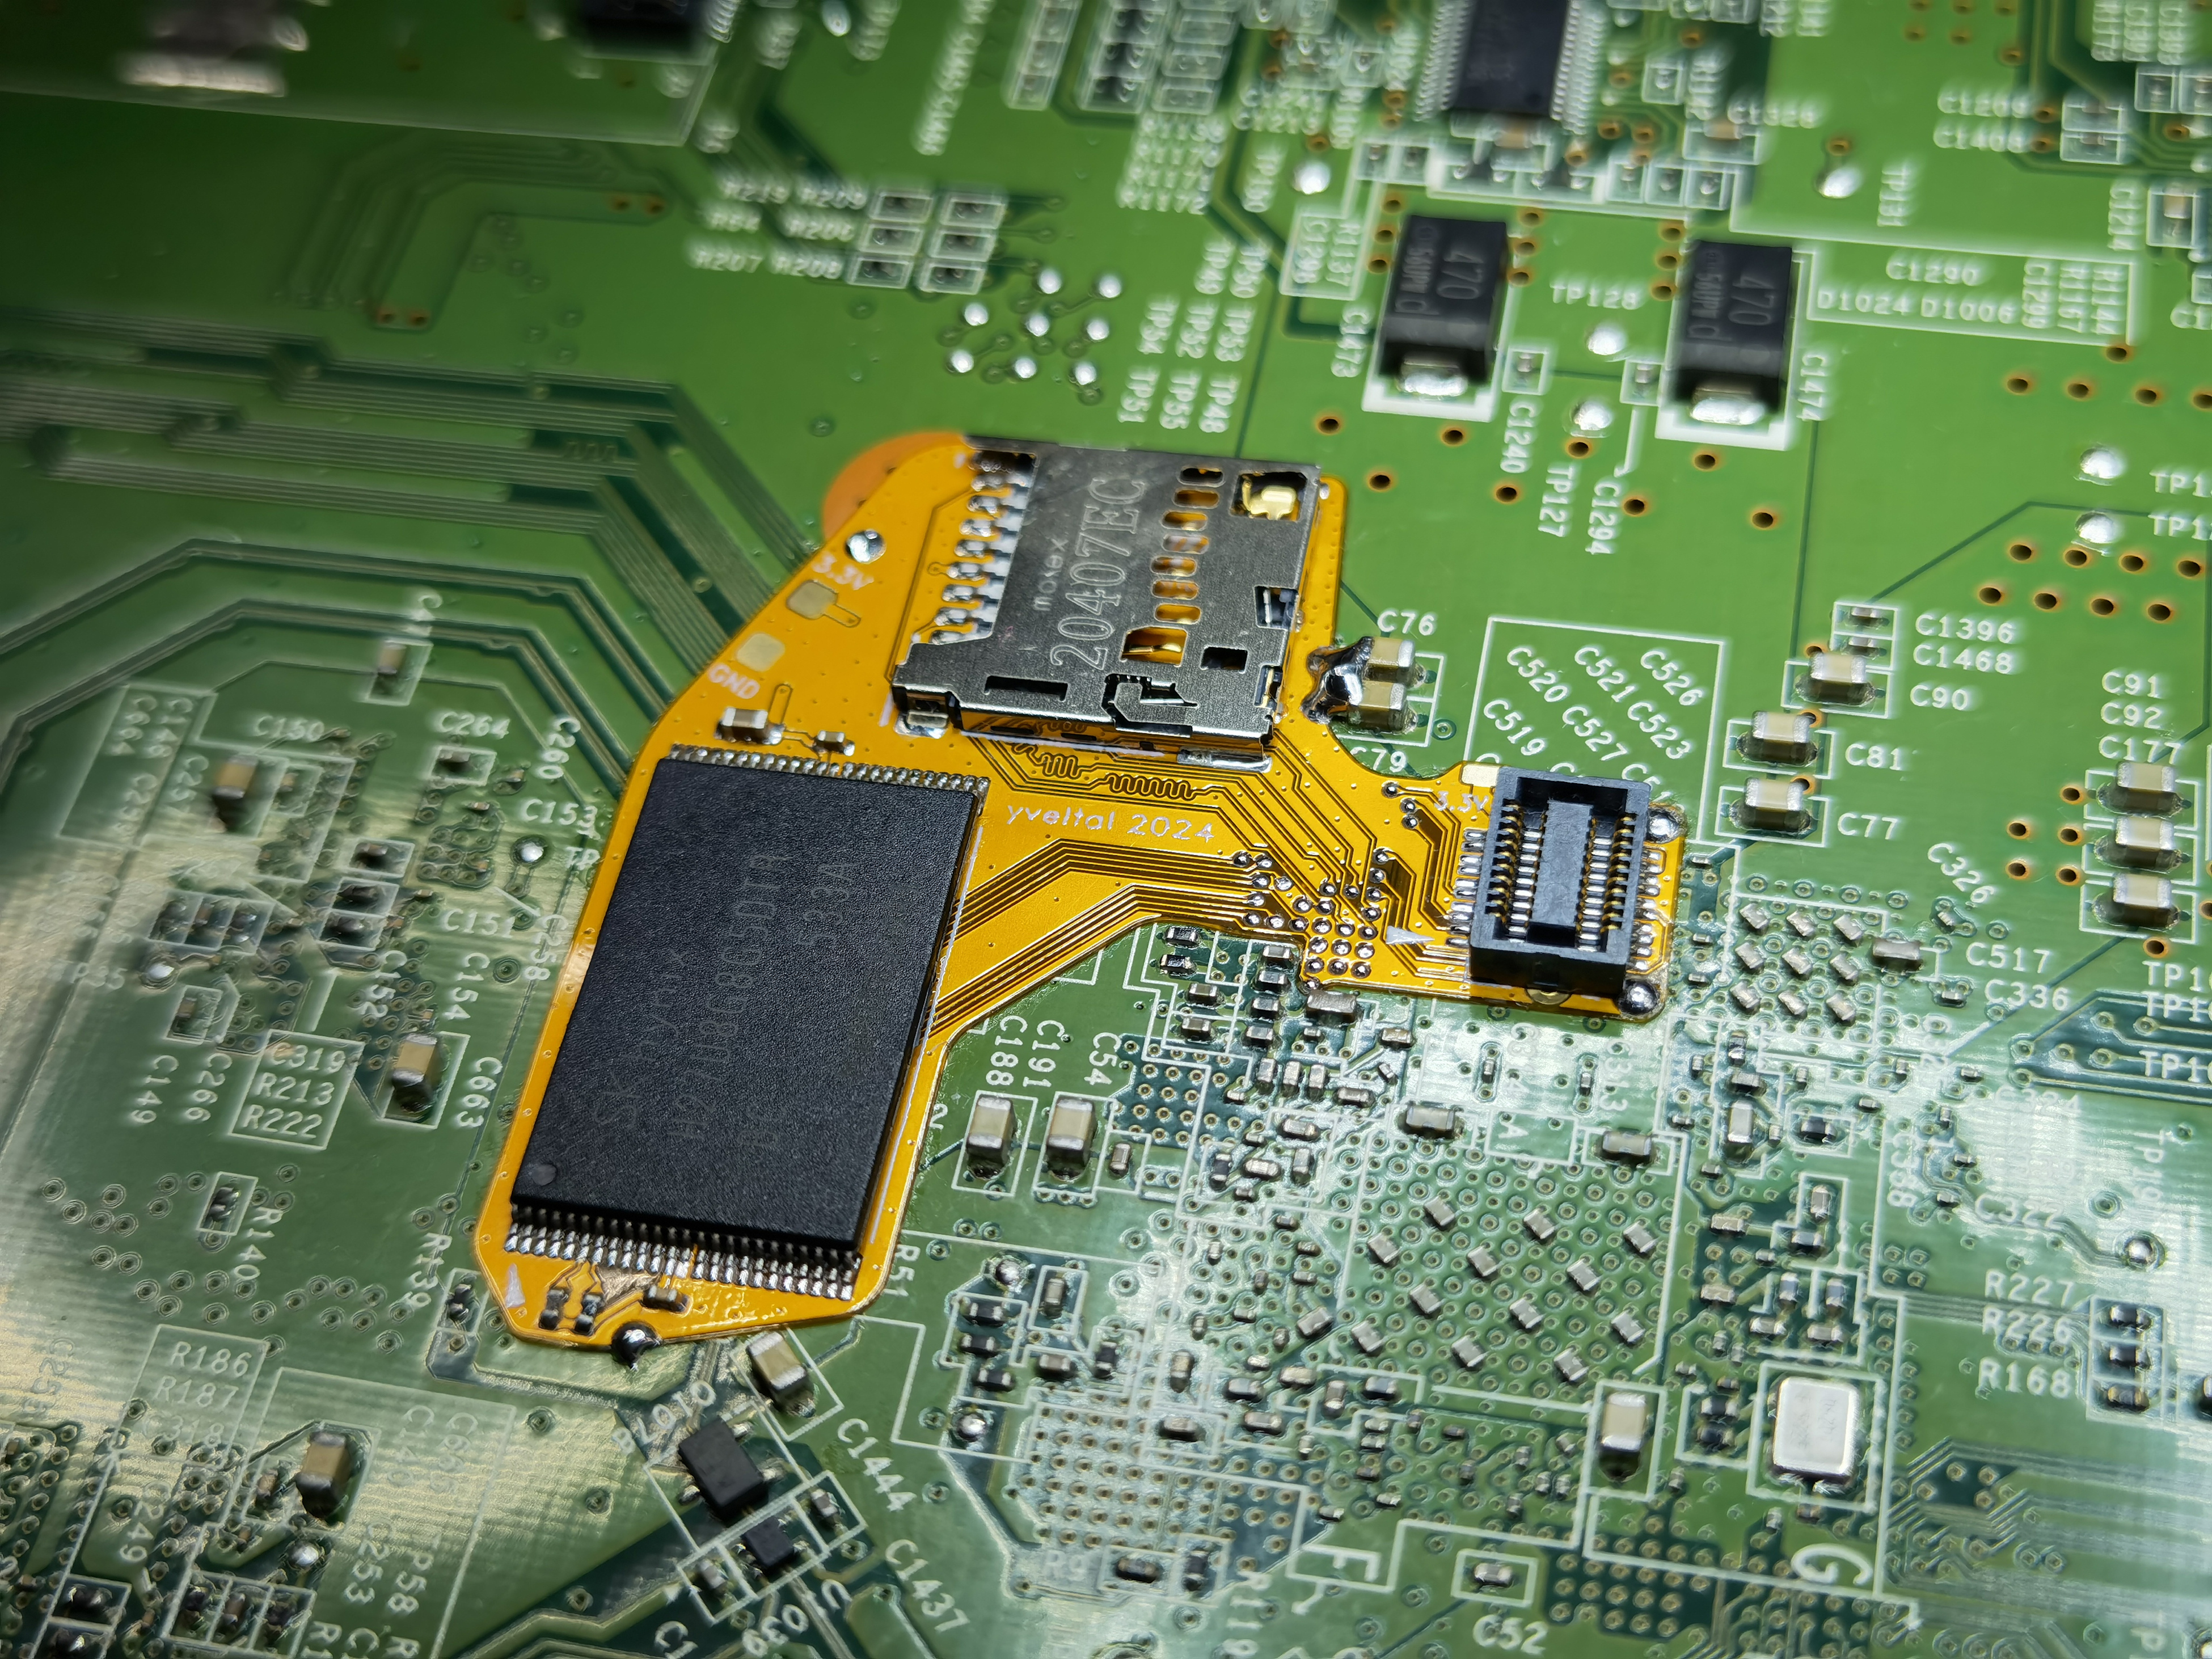
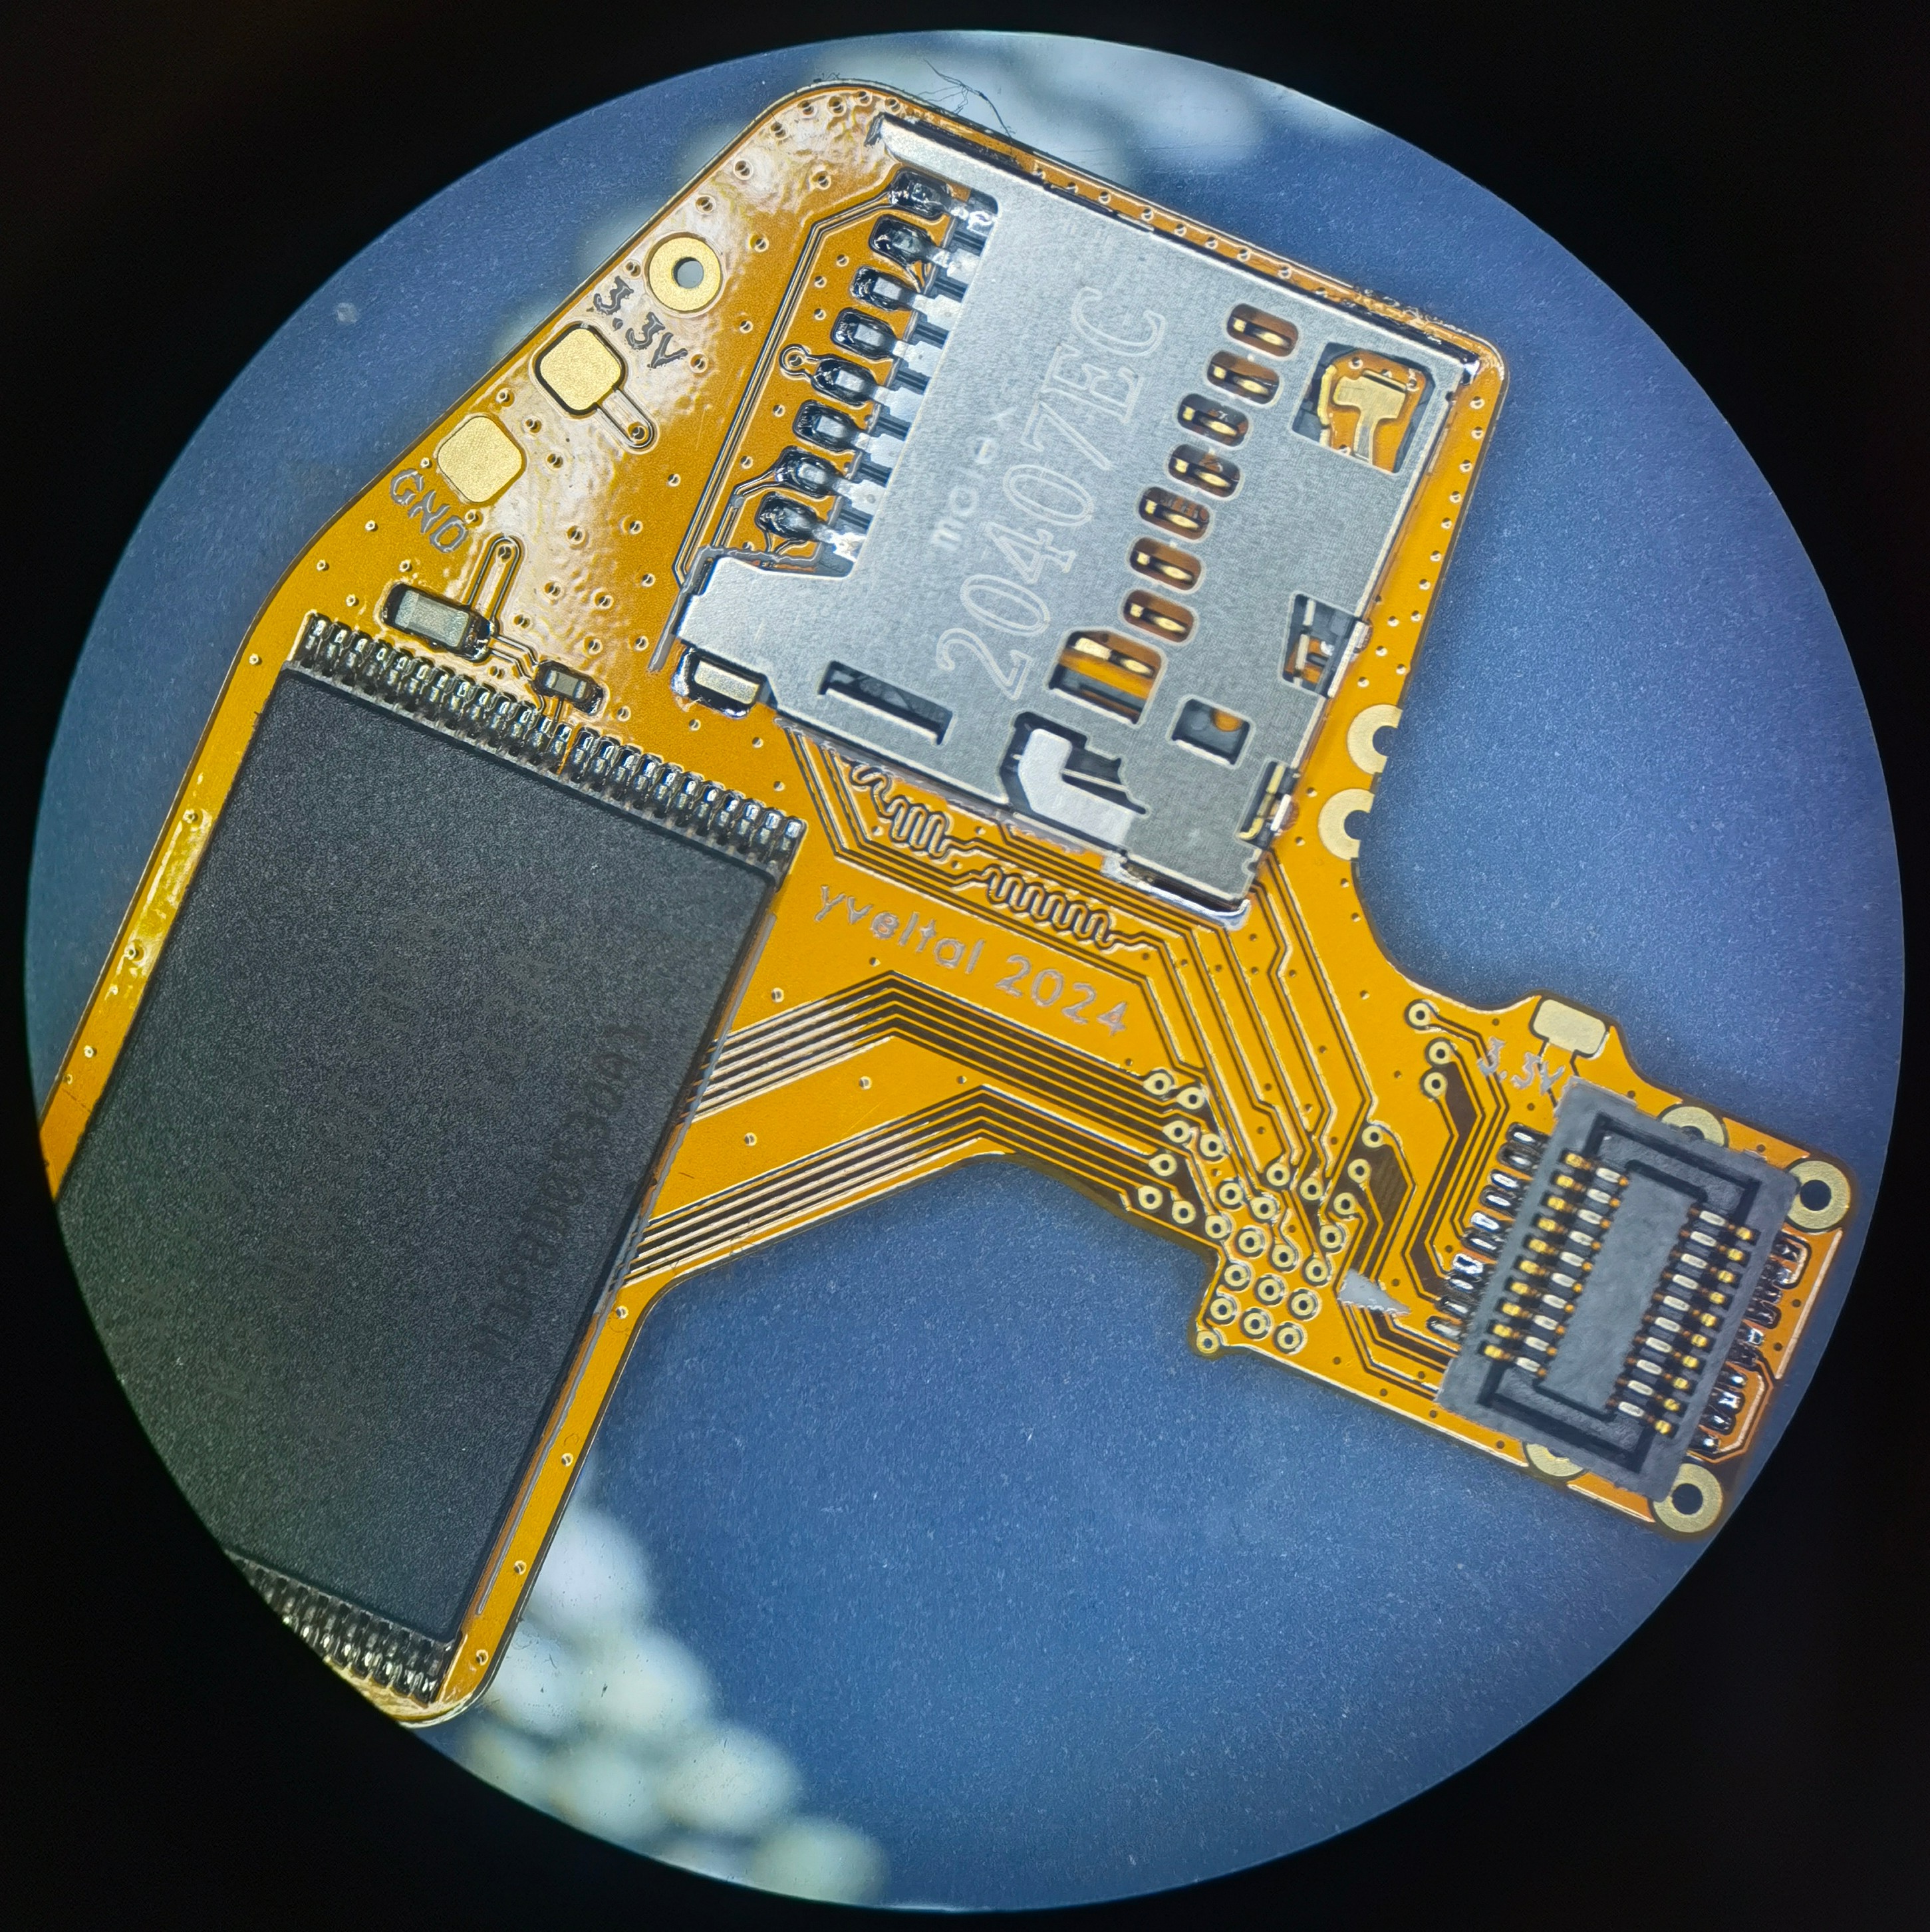
I added numerous mechanical solder pads to the design, to hold the flex down. This is critical when there are connectors on the flex! The ones near the SD card and NAND are GND points. But the ones under/around the Wifi connector are actually on the 1V pour, so beware.
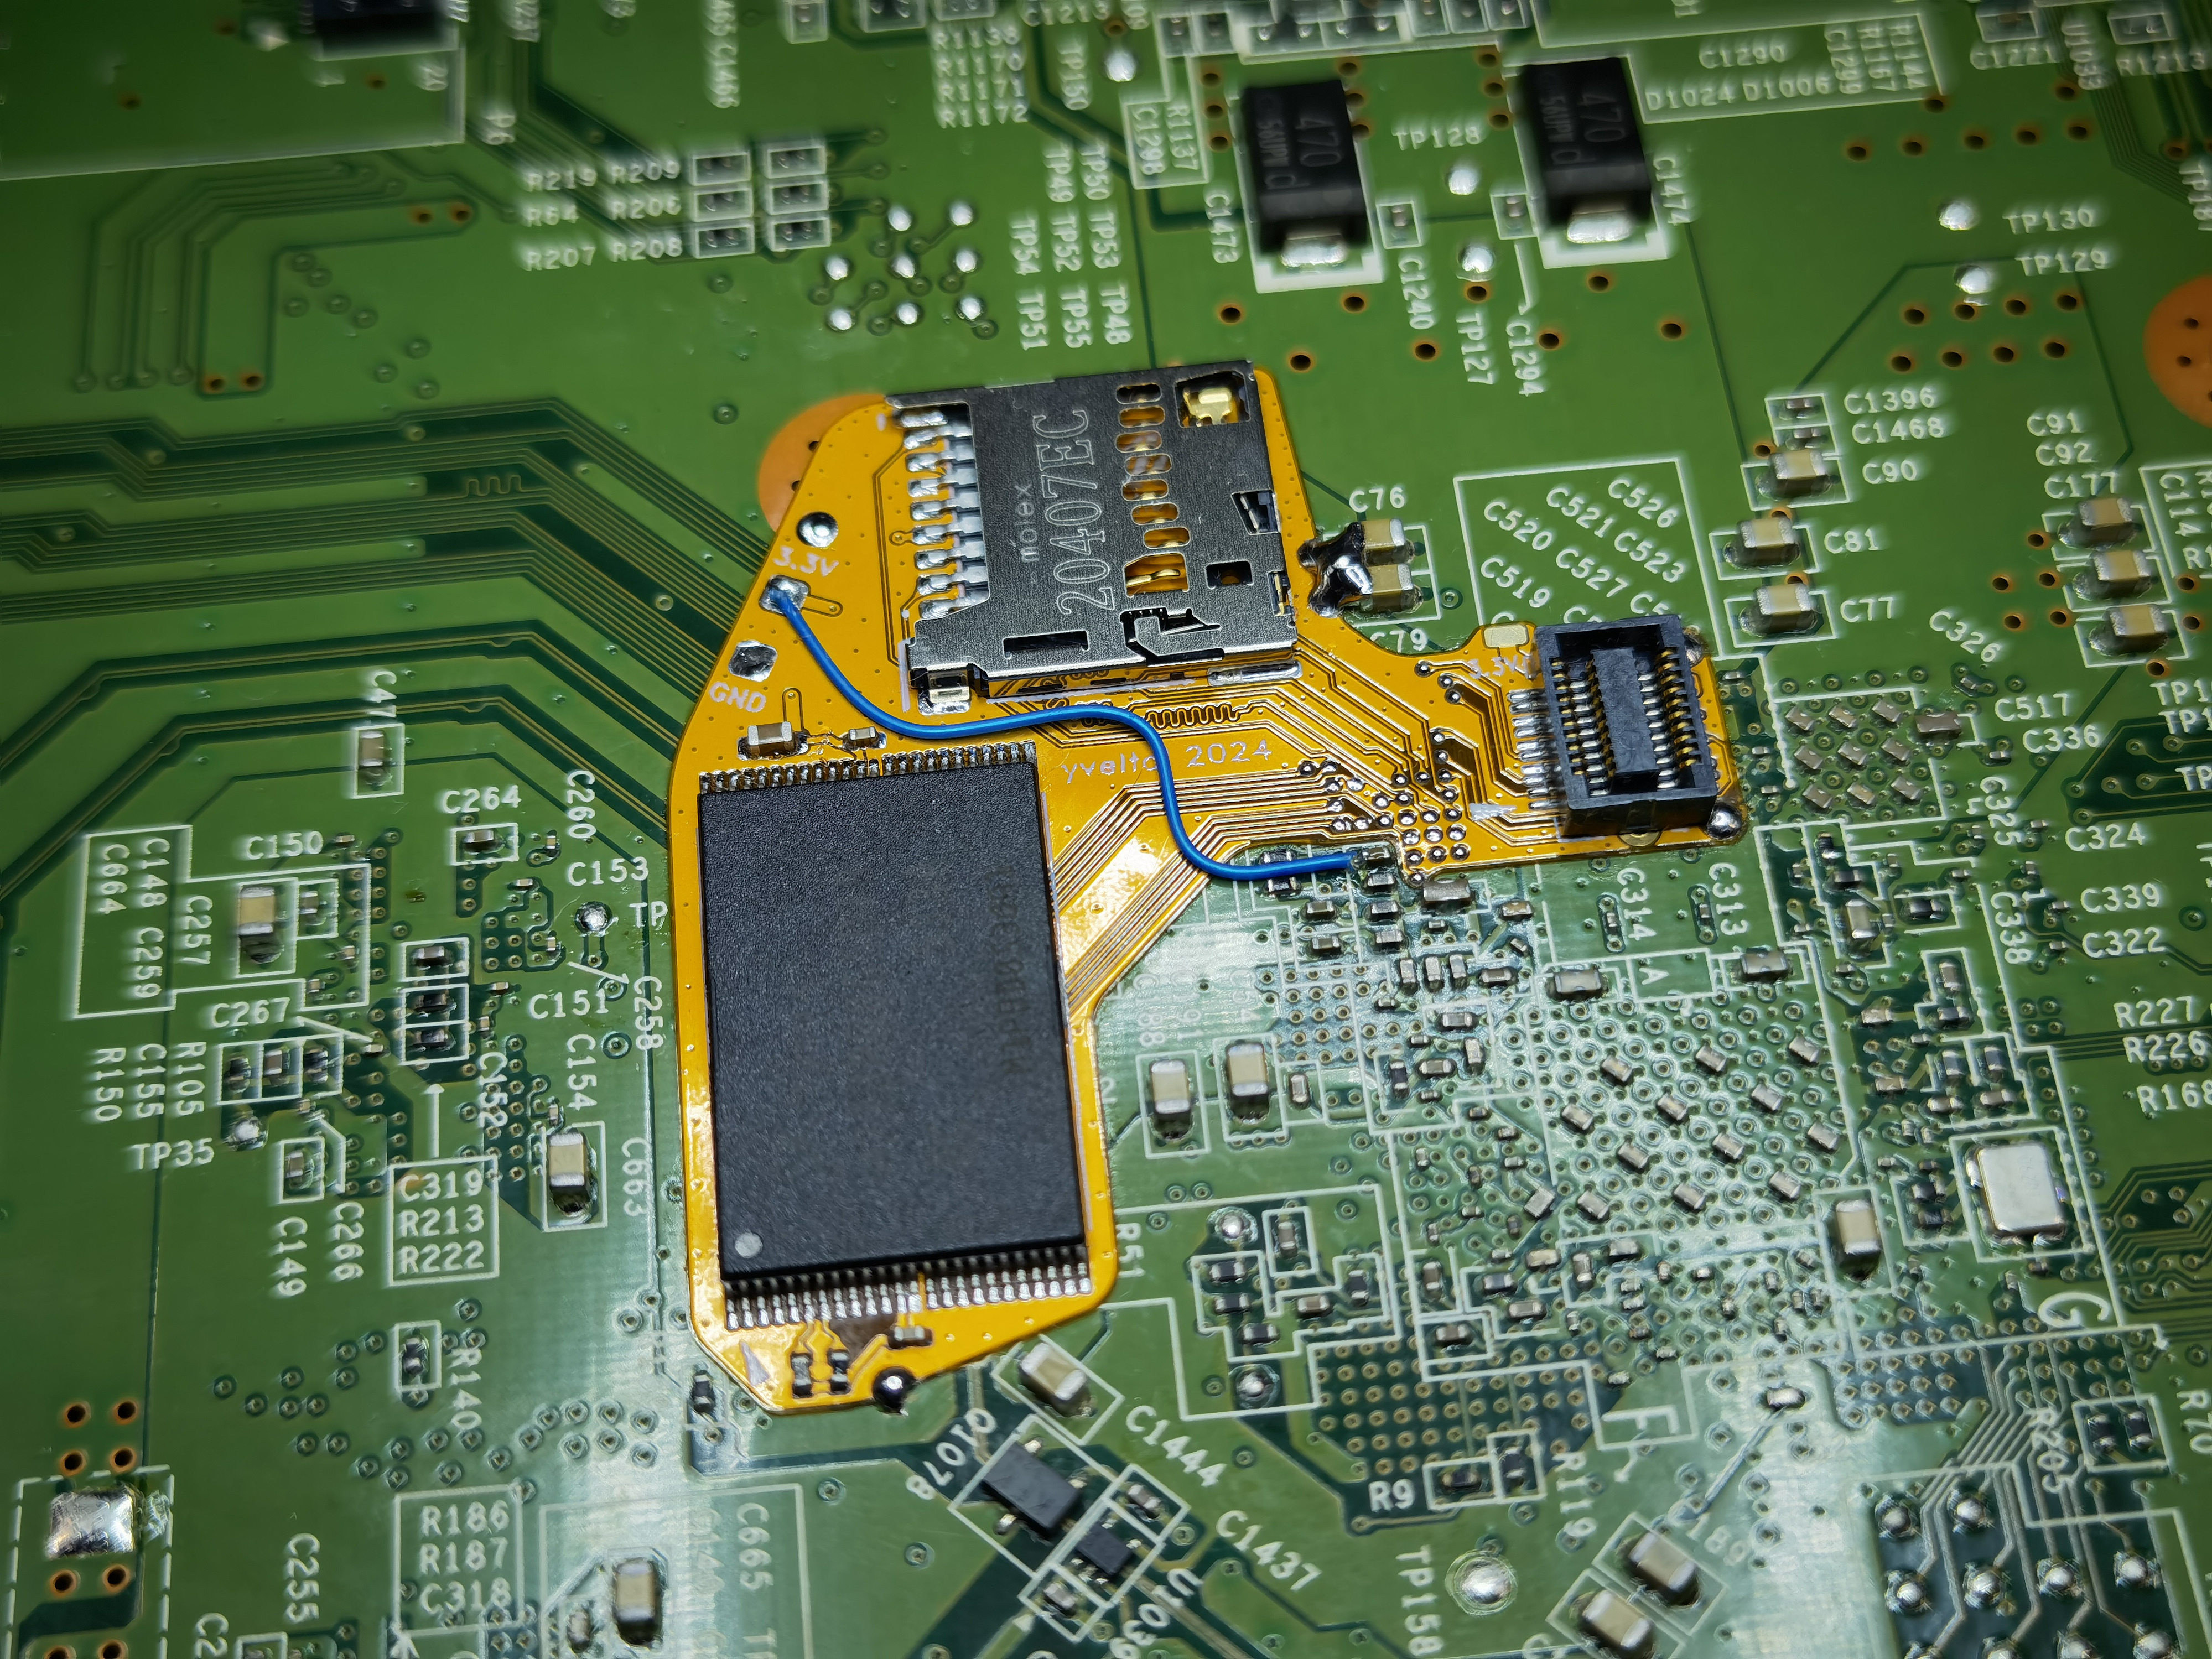
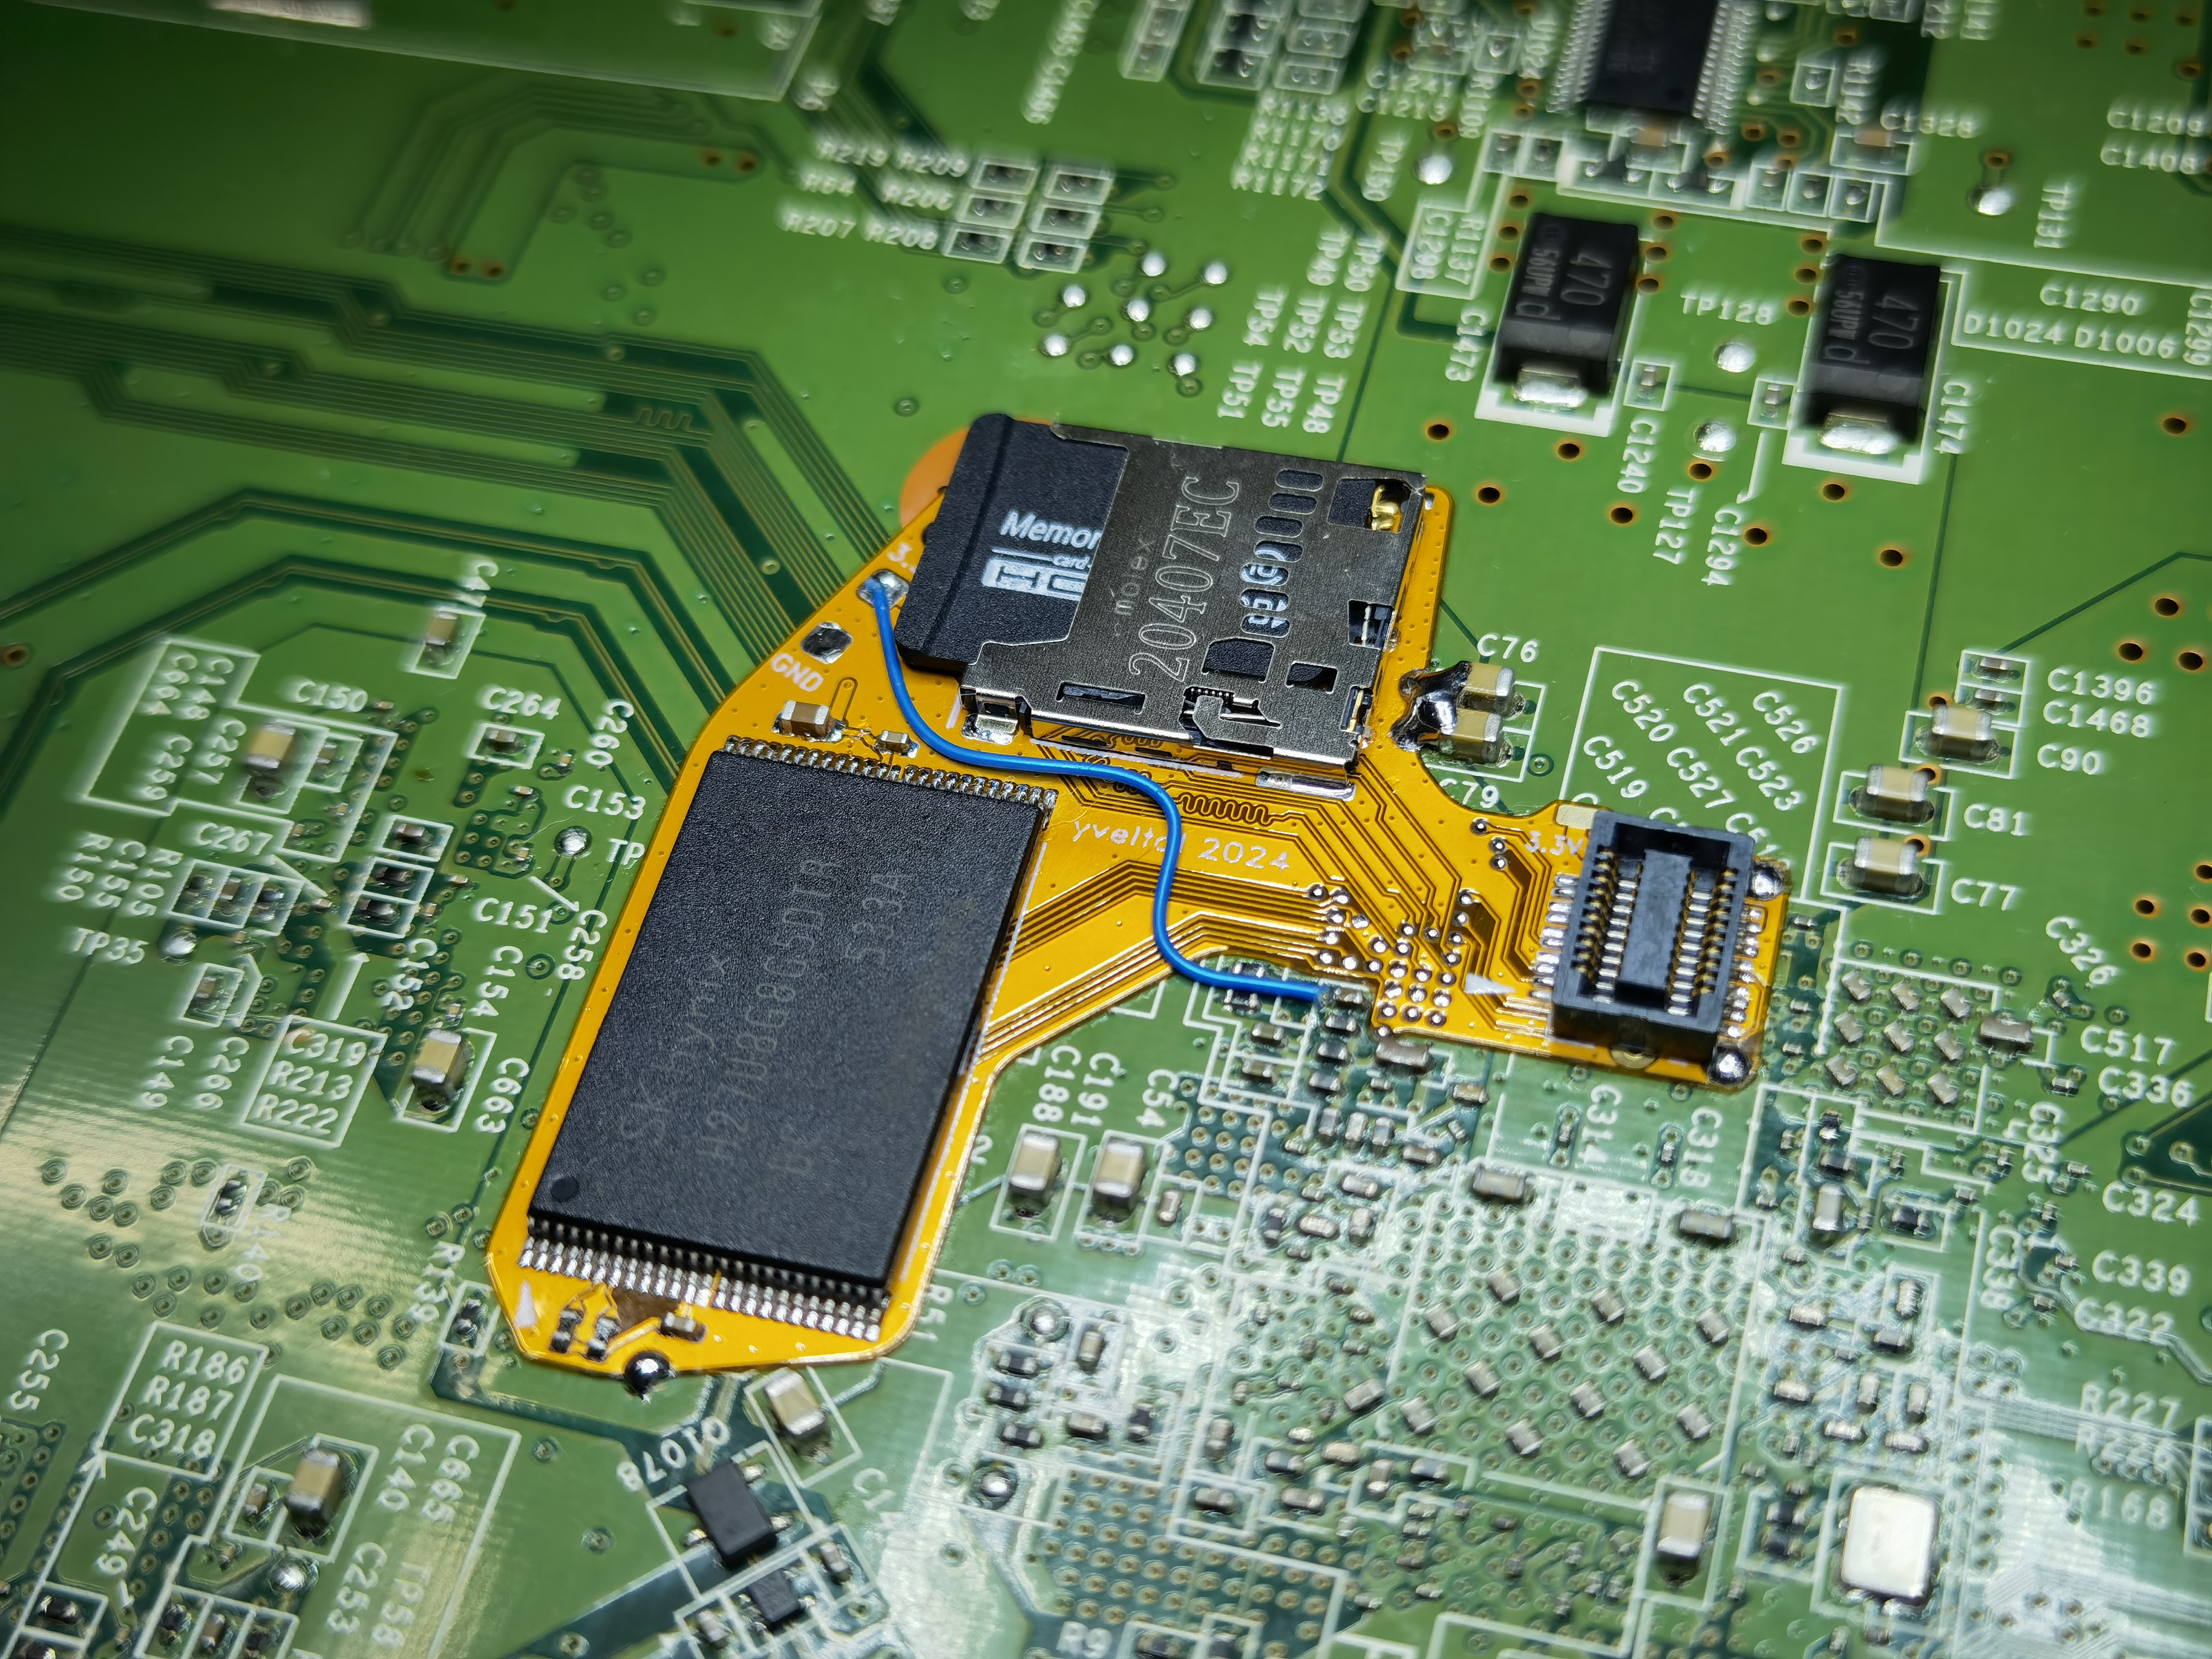
The 3.3V wire needs to be very low profile so as not to interfere with the microSD slot. I was lazy and omitted the GND wire, since there are already many GND solder blobs between the flex and mobo. The Wifi module also gets a 3.3v wire to its dedicated solder pad (not pictured).
The Wifi module had to be slimmed down so it wouldn't collide with the NAND and microSD slot.
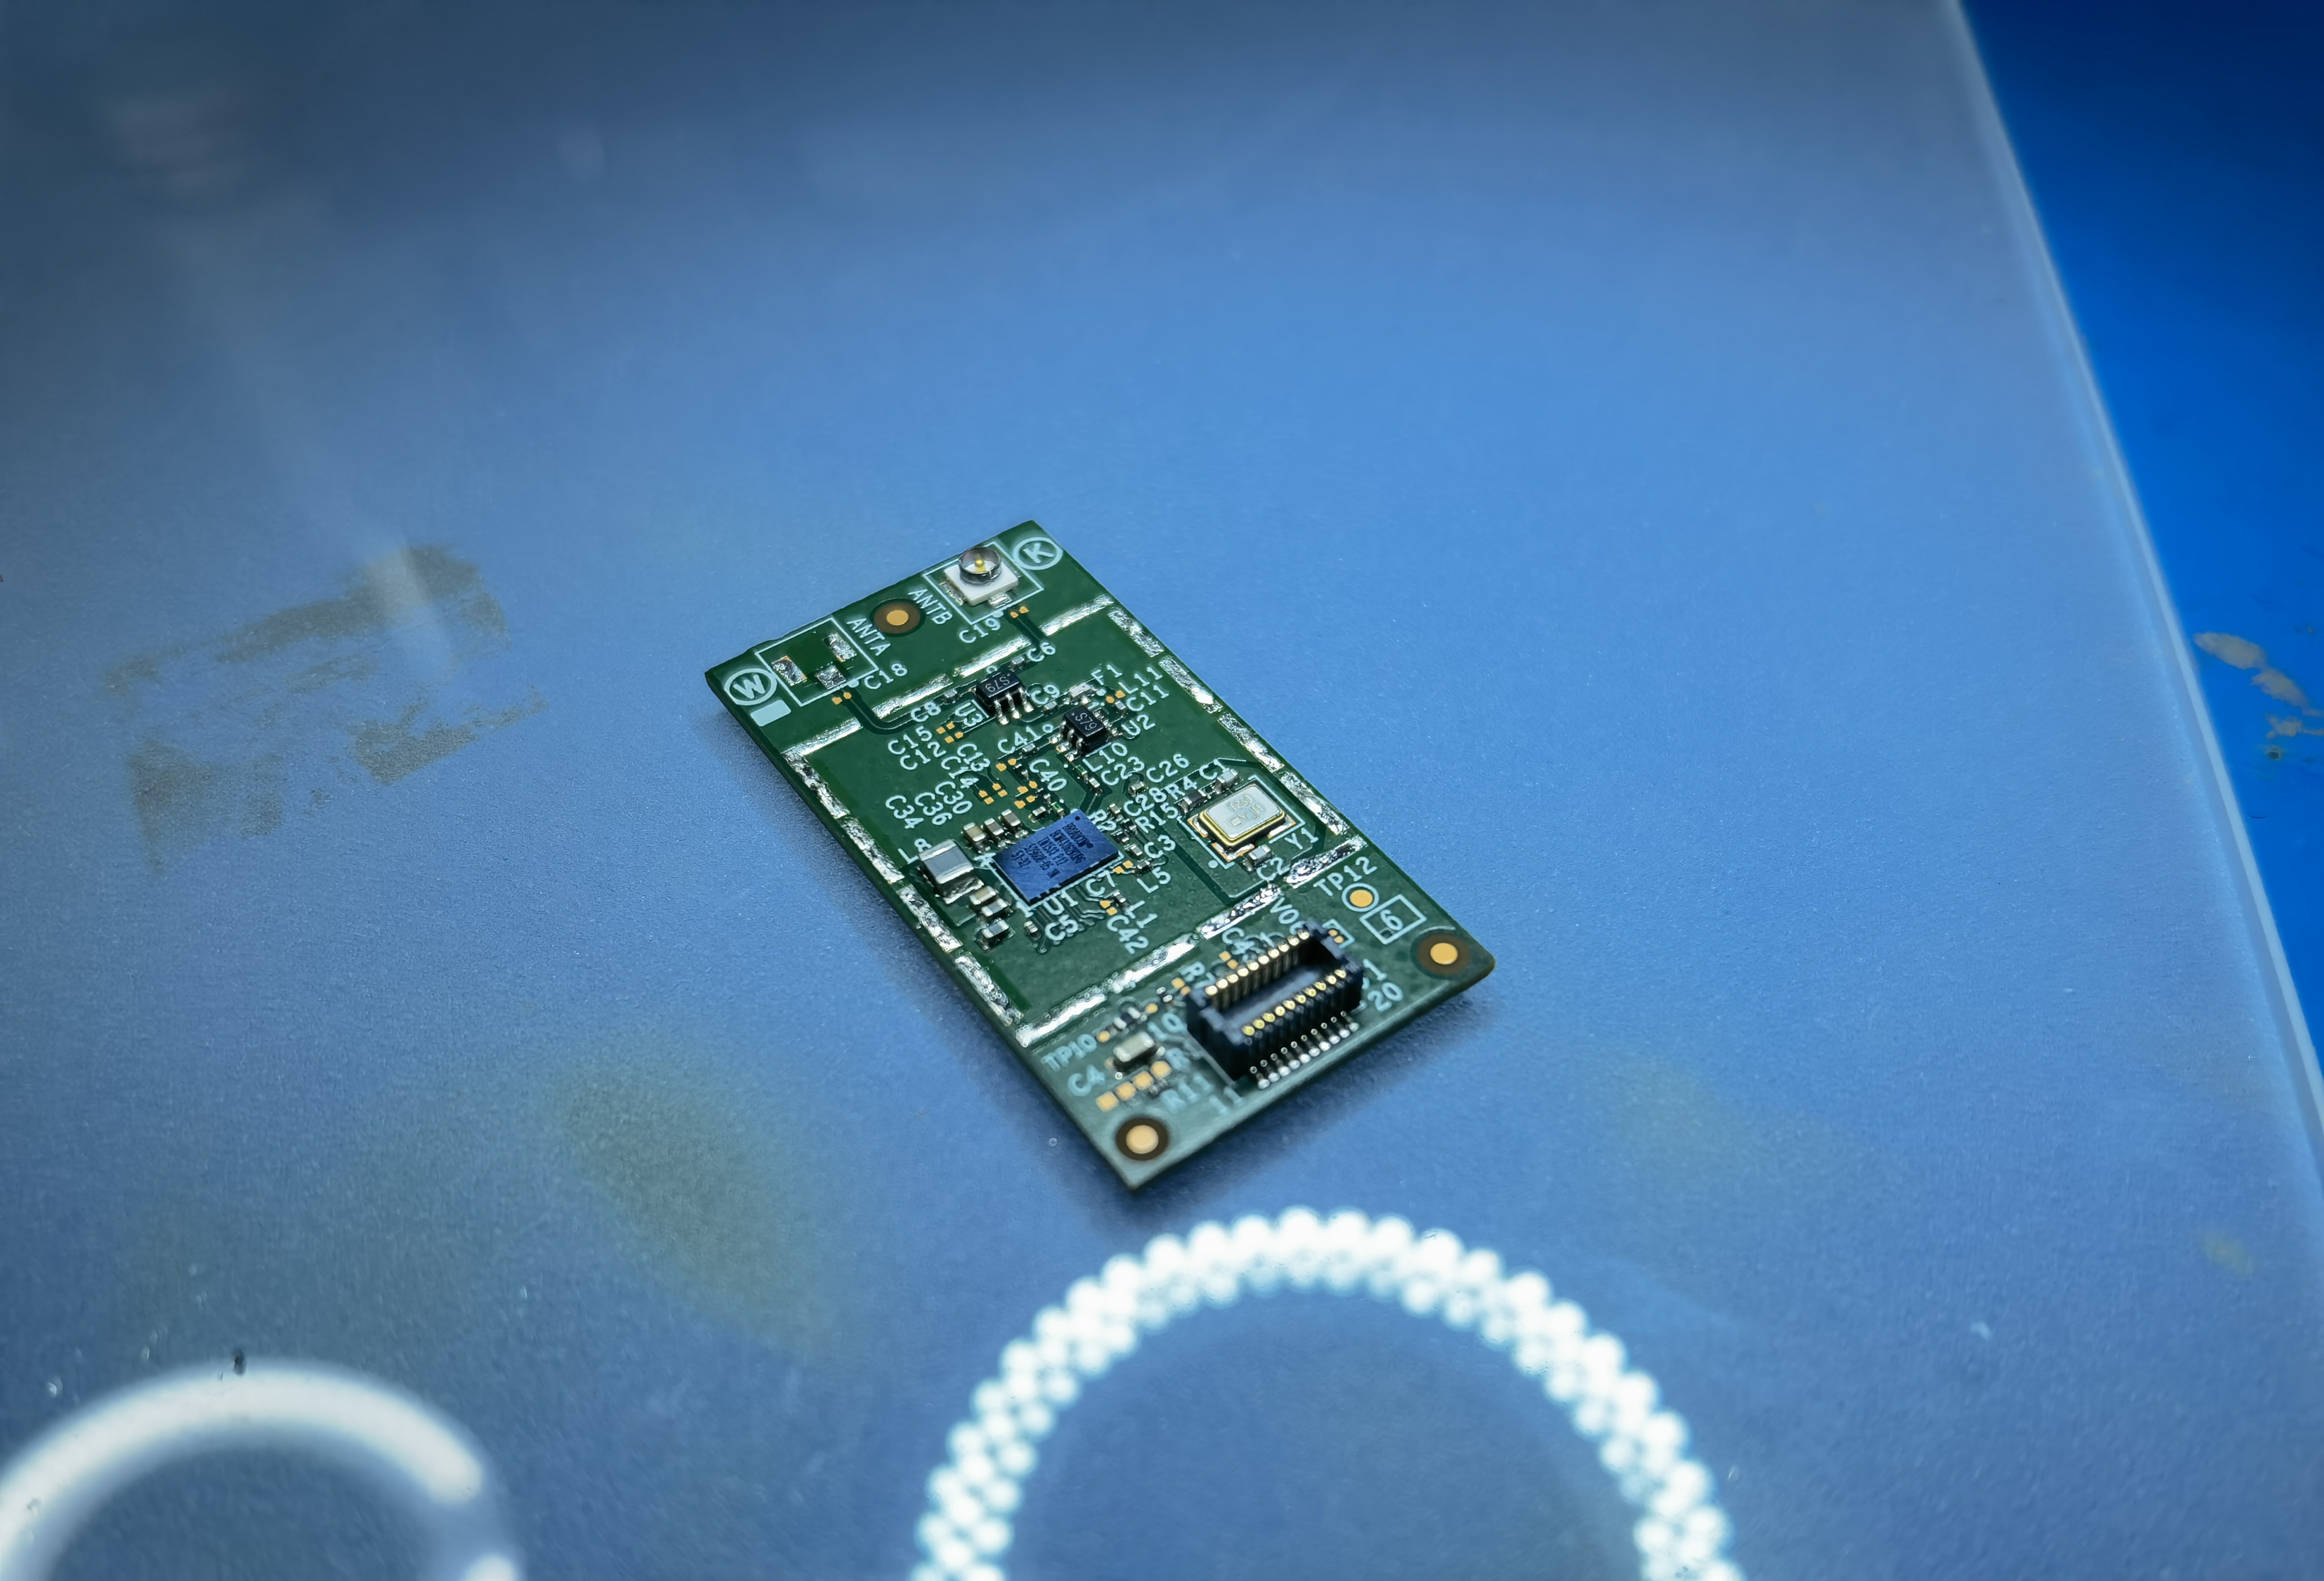
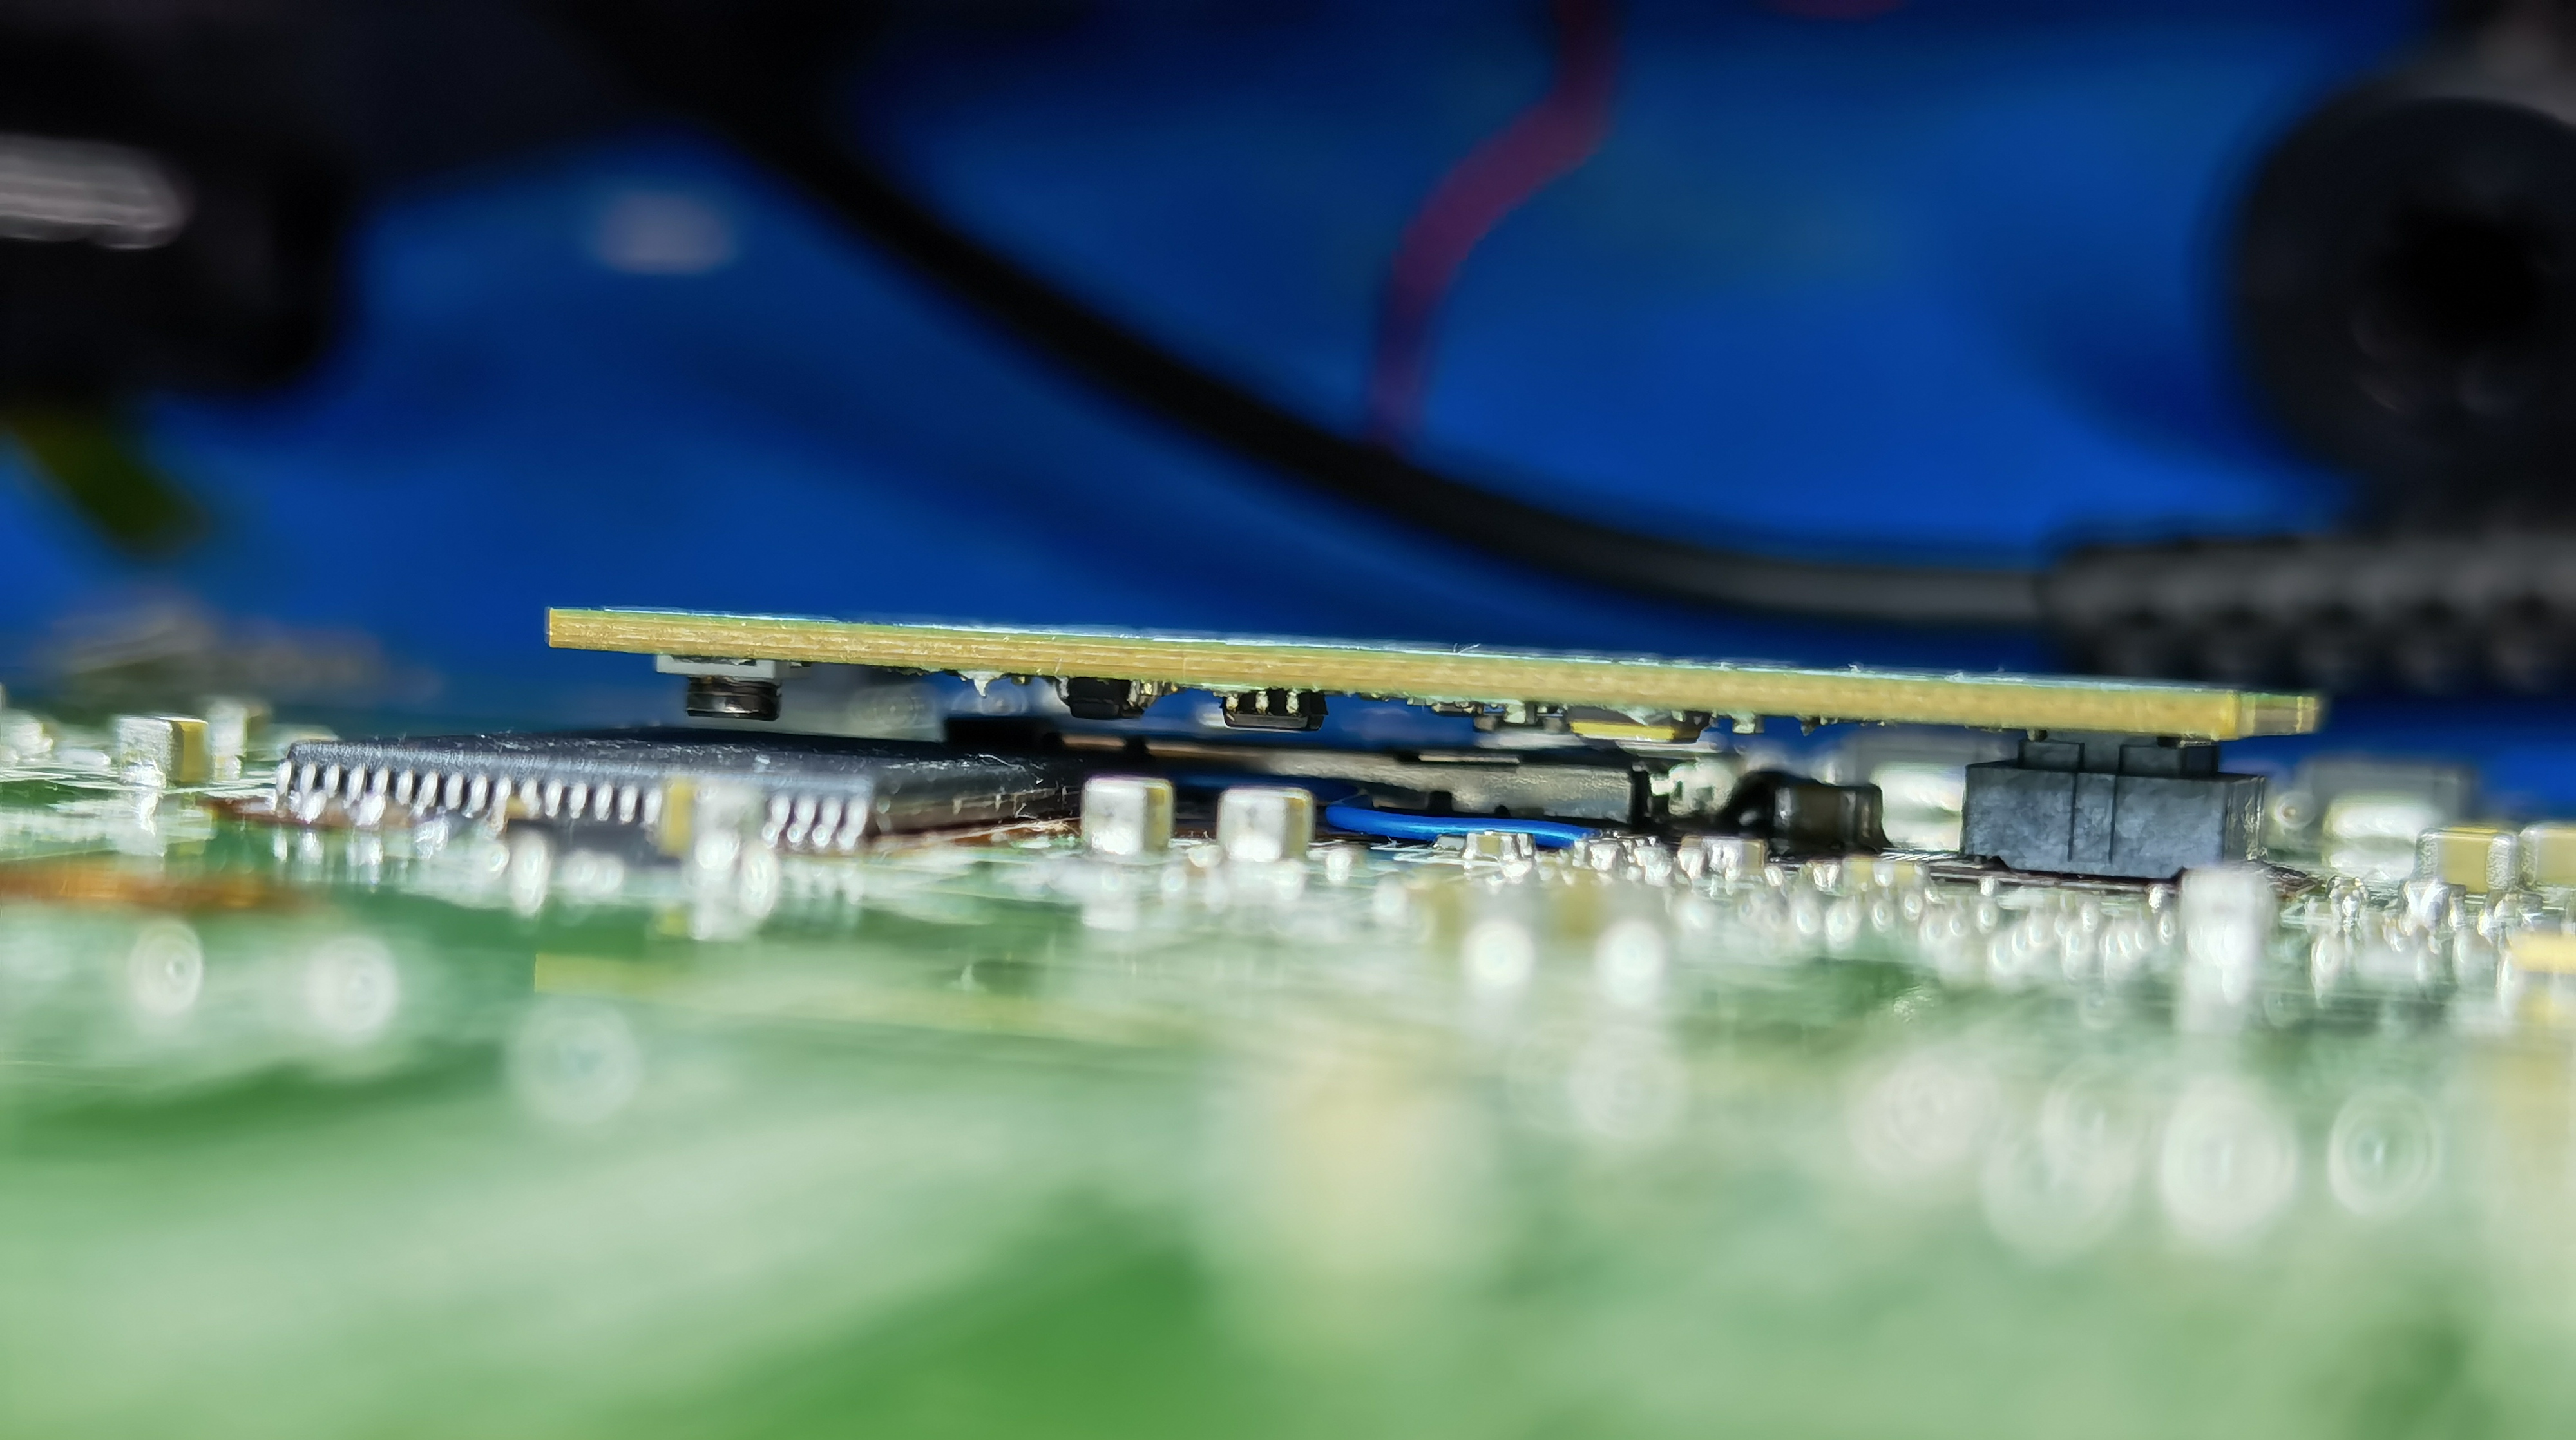
Plenty of clearance after desoldering the can! Final builds should still have some kapton between the module and flex.
The end result: an ISFSHax-modded Wii U with relocated SLC and WiFi module! Worked first try. I still need to rebuild the MLC and flash it to a high quality, high capacity SD card, so the SD part of the flex remains untested for now.

Very pic heavy post for testing a single flex. Oh well...
EDIT: Rebuilt the MLC onto a 256GB microSD. Everything is working perfectly! Goodbye, eMMC!
Caféflex usage will eventually be integrated into the trim guide; in the meantime, this post will have some notes for early adopters!
As planned, caféflex relocates the SLC (NAND), has a microSD slot for eMMC replacement, and a WiFi module connector. I searched long and hard for the Wifi B2B connector PN (with help from the Discord homies!) but it seems all the wireless modules on the Wii U use custom connectors. So the connector has to be harvested from a Wii U, which isn't a big deal since users will be trimming off that part of the board anyway. To avoid melting the connector, just blast the underside of the mobo with ~420C hot air until the B2B slides off.
While designing the flex, I did some tests to see which WiFi module GPIOs are actually required. Turns out none of them are! Some need to be high, and others need to be low, but none actually need to be connected to the SMC/RTC/SOC. Again, this info will eventually be added to the trim guide. For now, here's a schematic snippet:
I ordered some flexes from PCBWay (0.12mm thickness, 0.5oz copper) and assembled them tonight. Always get an electropolished stencil, it makes pasting a breeze.
Removed C194 and wicked off the excess solder. I wicked off TP162 too. Then I scraped and tinned the 0.8mm pitch vias under the SOC. (I scraped more vias than necessary-- you only really need to expose the ones that align with the flex.)
After tinning it was just a matter of aligning everything and soldering away!
I added numerous mechanical solder pads to the design, to hold the flex down. This is critical when there are connectors on the flex! The ones near the SD card and NAND are GND points. But the ones under/around the Wifi connector are actually on the 1V pour, so beware.
The 3.3V wire needs to be very low profile so as not to interfere with the microSD slot. I was lazy and omitted the GND wire, since there are already many GND solder blobs between the flex and mobo. The Wifi module also gets a 3.3v wire to its dedicated solder pad (not pictured).
The Wifi module had to be slimmed down so it wouldn't collide with the NAND and microSD slot.
Plenty of clearance after desoldering the can! Final builds should still have some kapton between the module and flex.
The end result: an ISFSHax-modded Wii U with relocated SLC and WiFi module! Worked first try. I still need to rebuild the MLC and flash it to a high quality, high capacity SD card, so the SD part of the flex remains untested for now.
Very pic heavy post for testing a single flex. Oh well...
EDIT: Rebuilt the MLC onto a 256GB microSD. Everything is working perfectly! Goodbye, eMMC!
Last edited:
loopj
.
Love to see it working first time!
Lazr
.
- Joined
- Oct 3, 2023
- Messages
- 7
- Likes
- 15
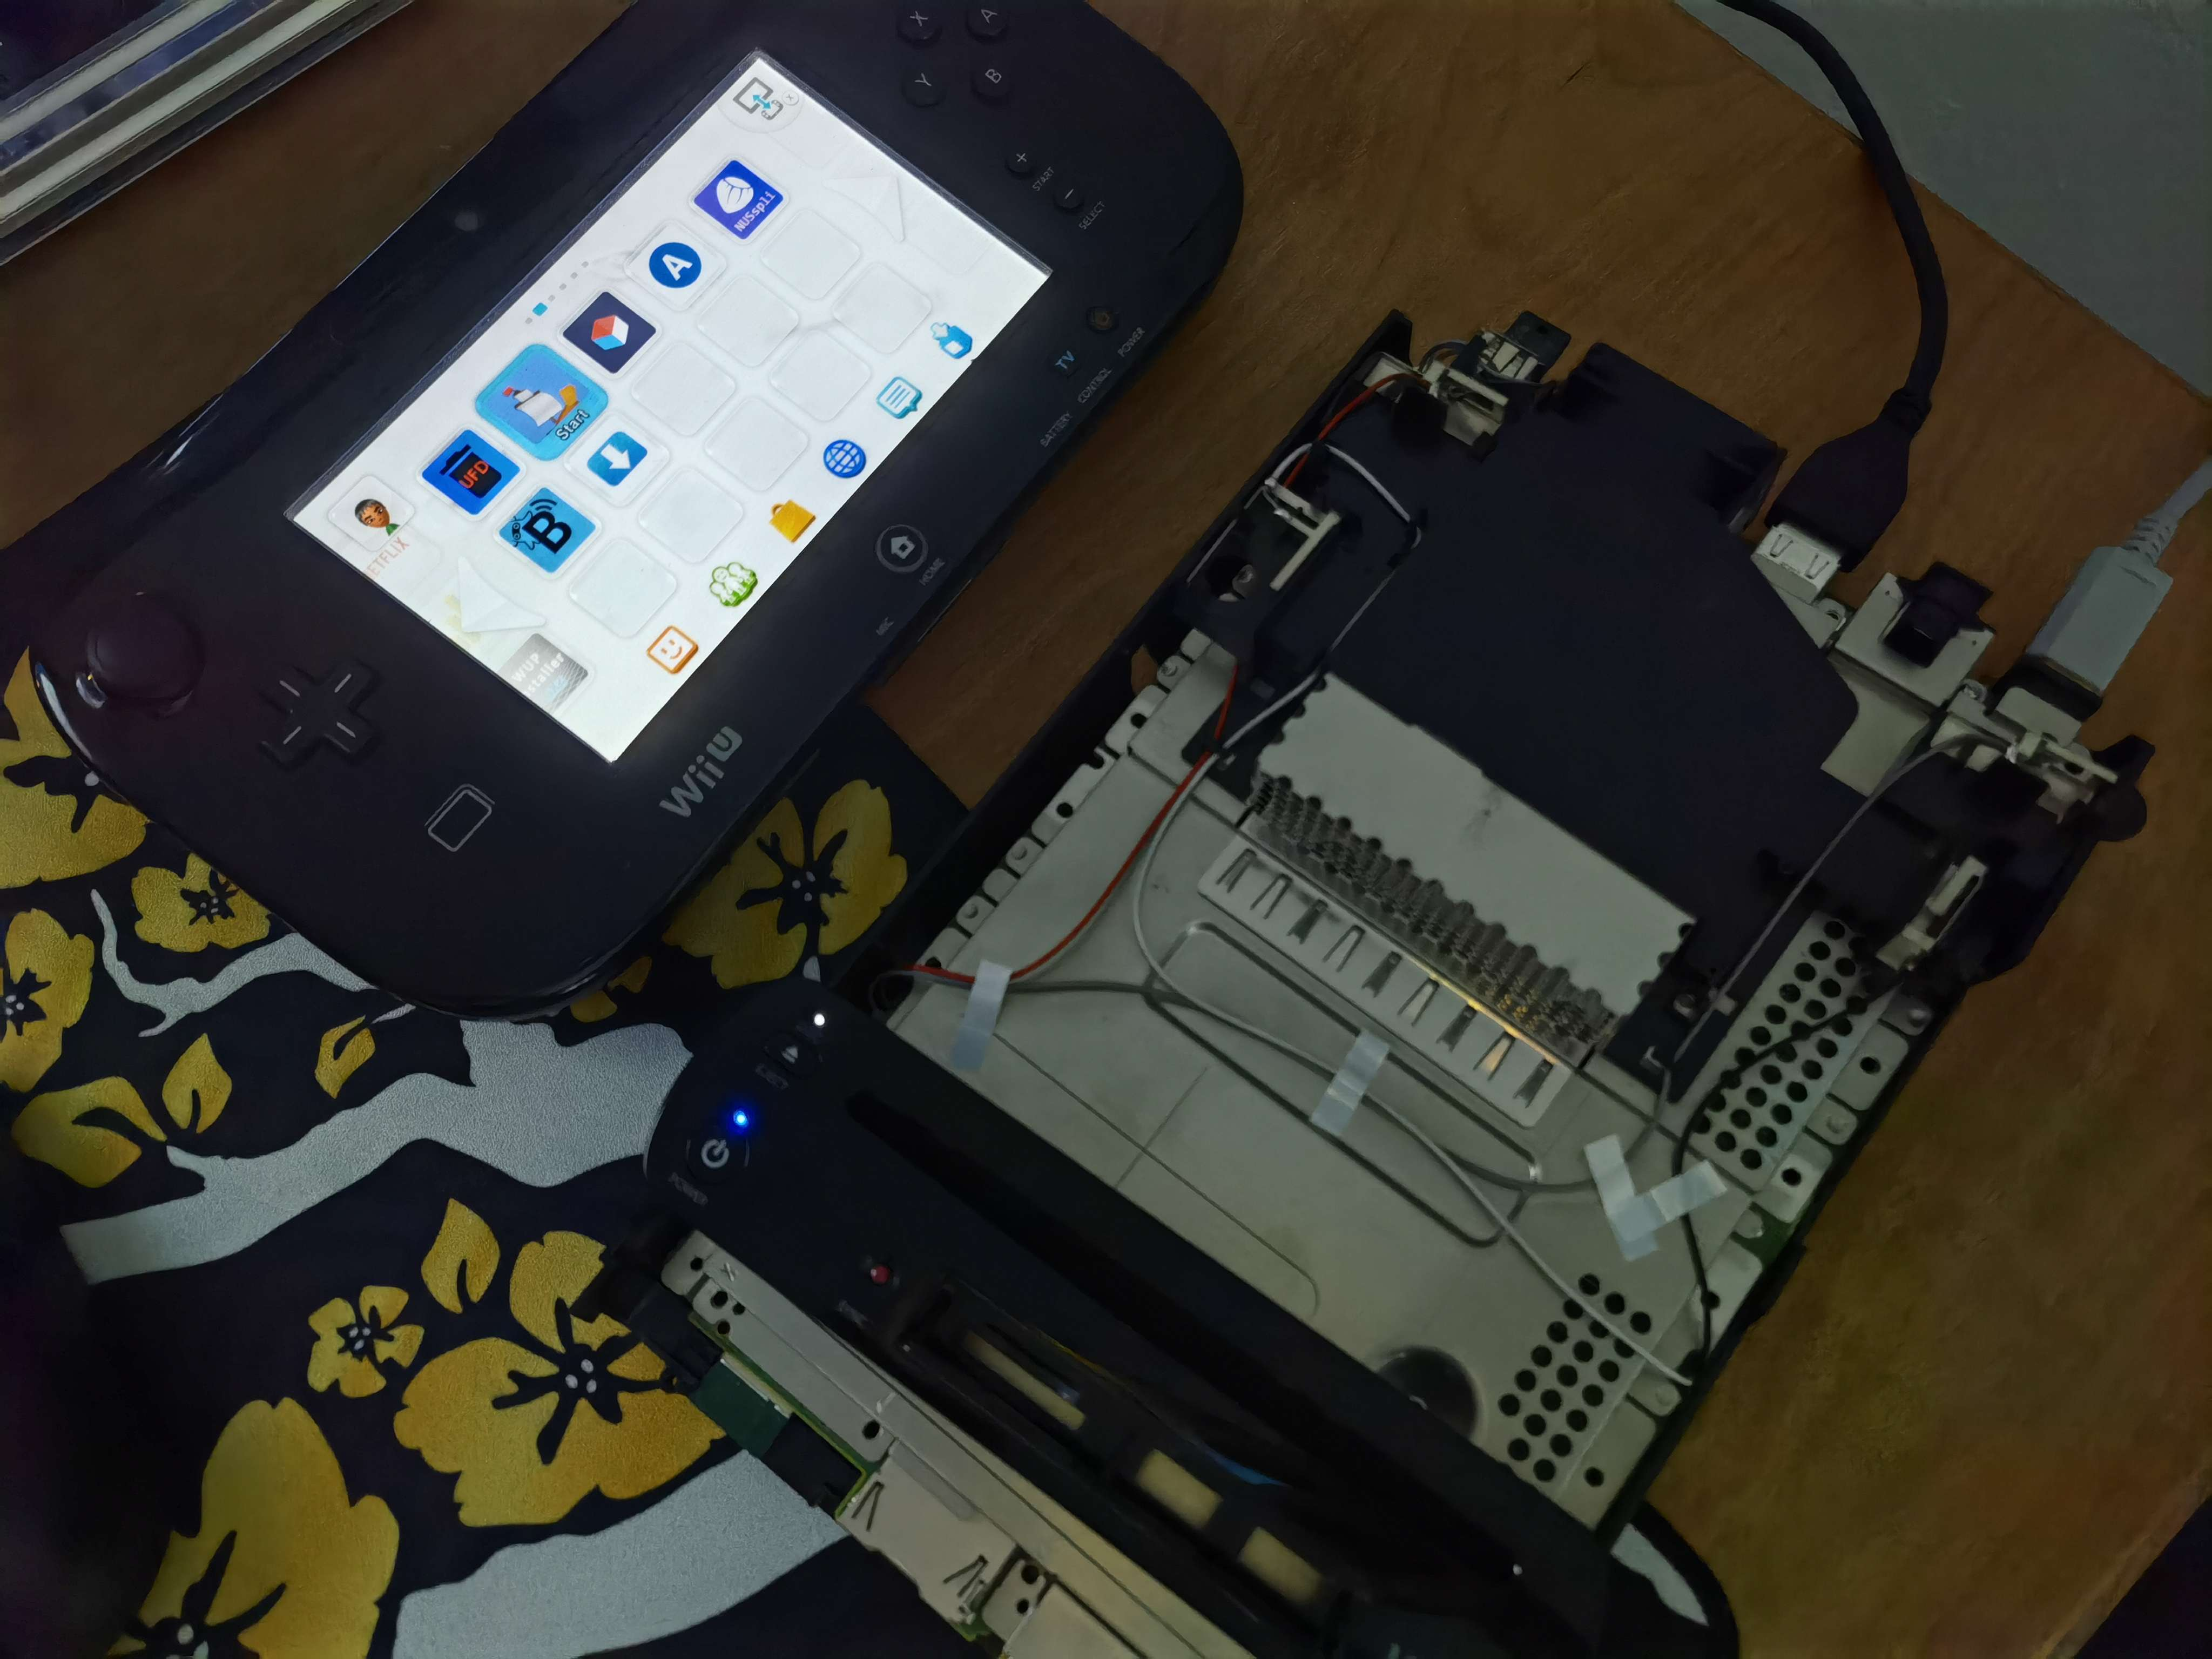
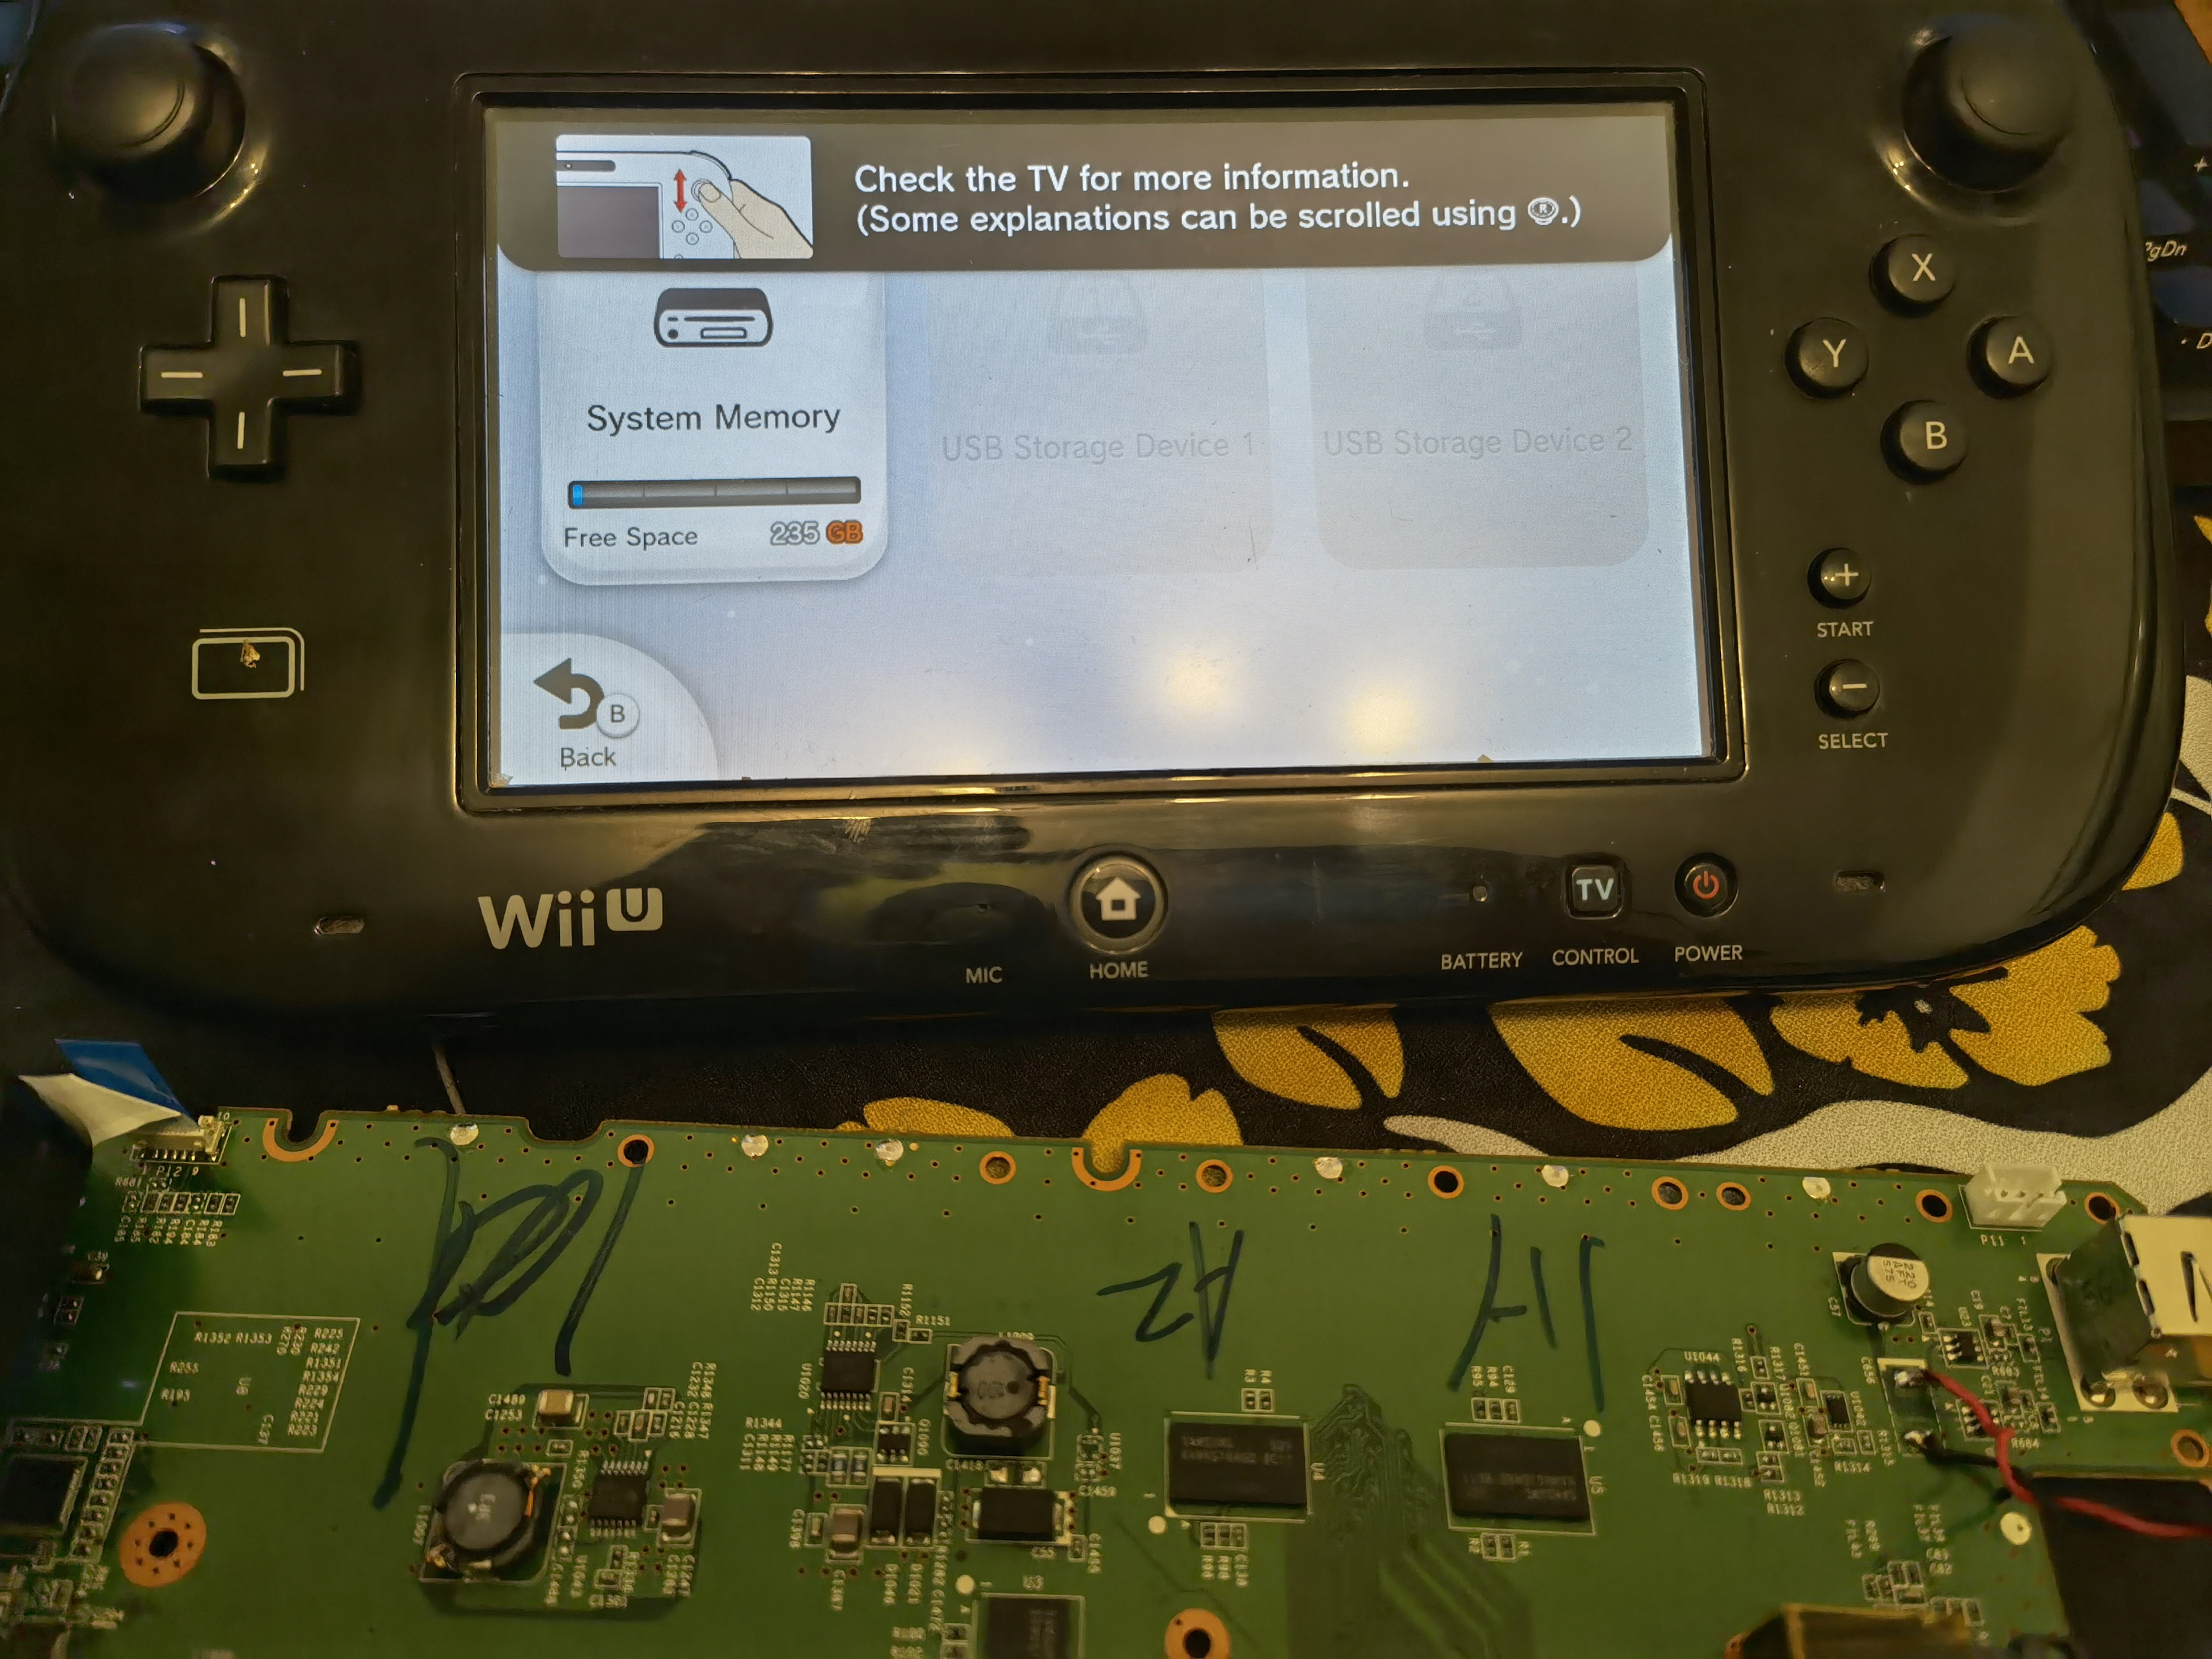
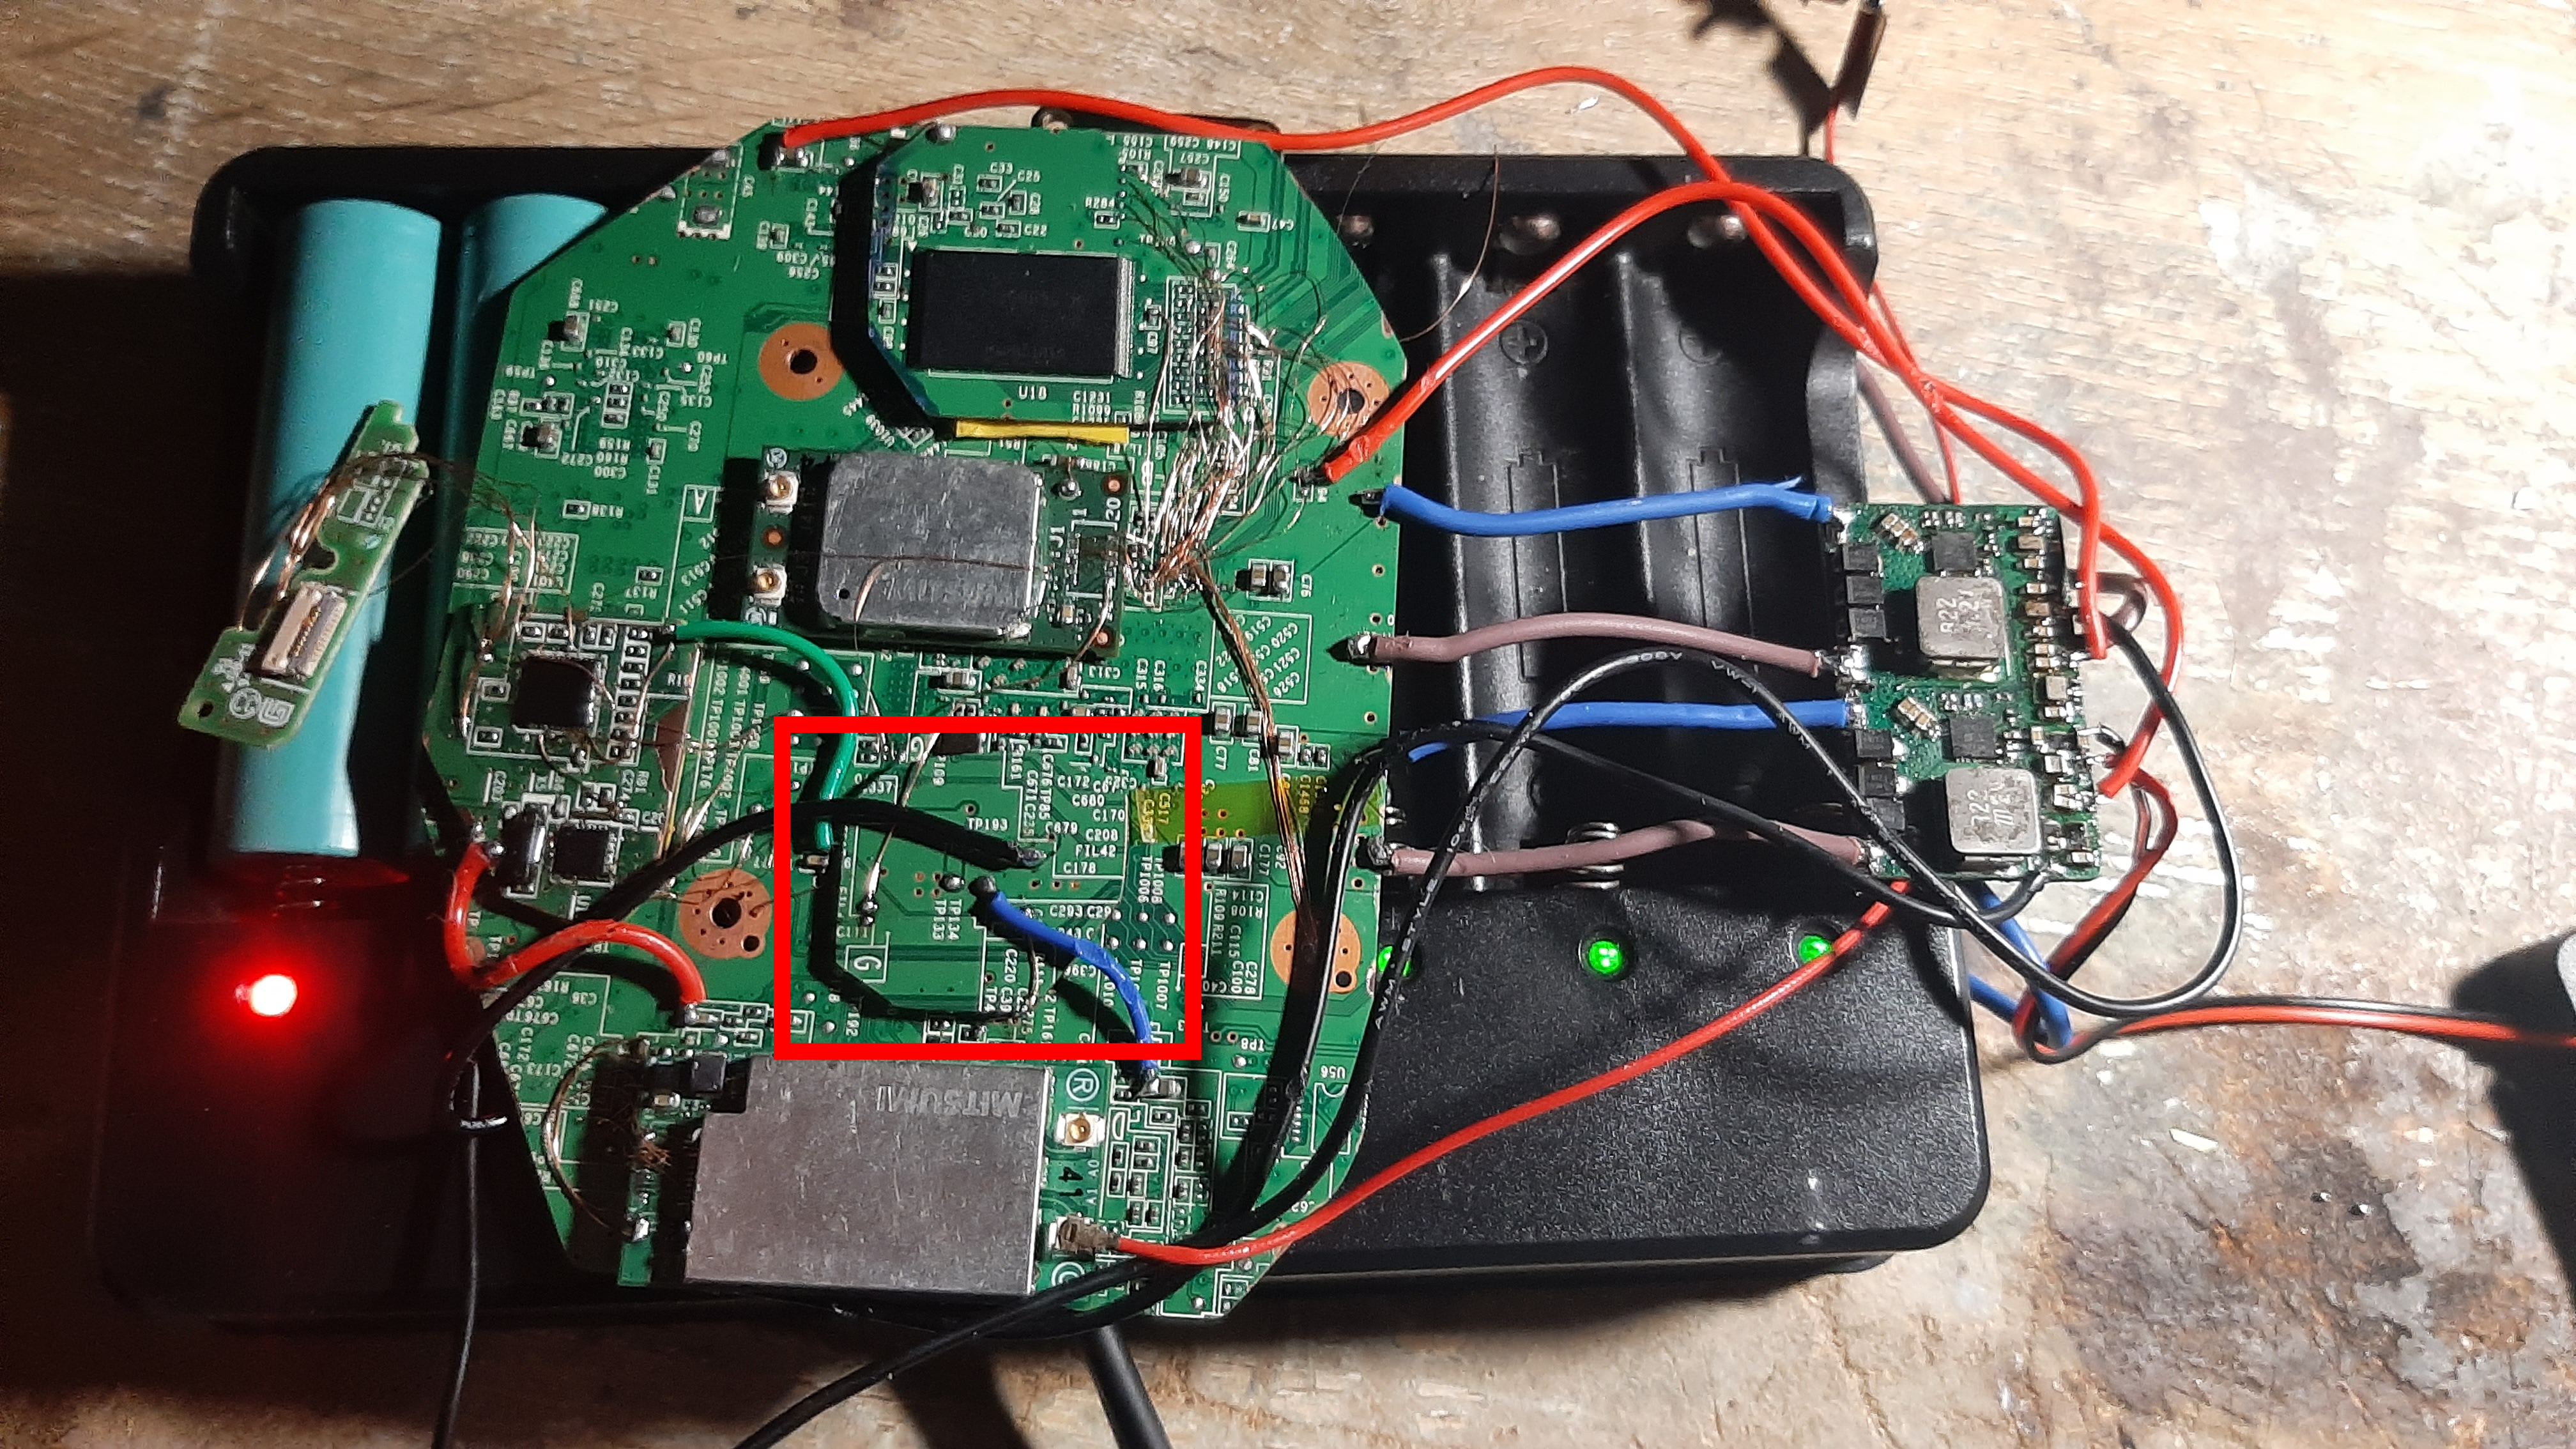
The LOLWUT trim is replicable (and no this isn't an April fools joke)! Thanks to Yveltal's guide (and my questions throughout these past few days (week?)), I have gotten the trim to boot into Wii U Menu!

The Wi-Fi module doesn't work atm, but it is probably due to my crappy wiring for it (SDIO is really bad; those cafeflex' will be incredibly useful for this relocation).
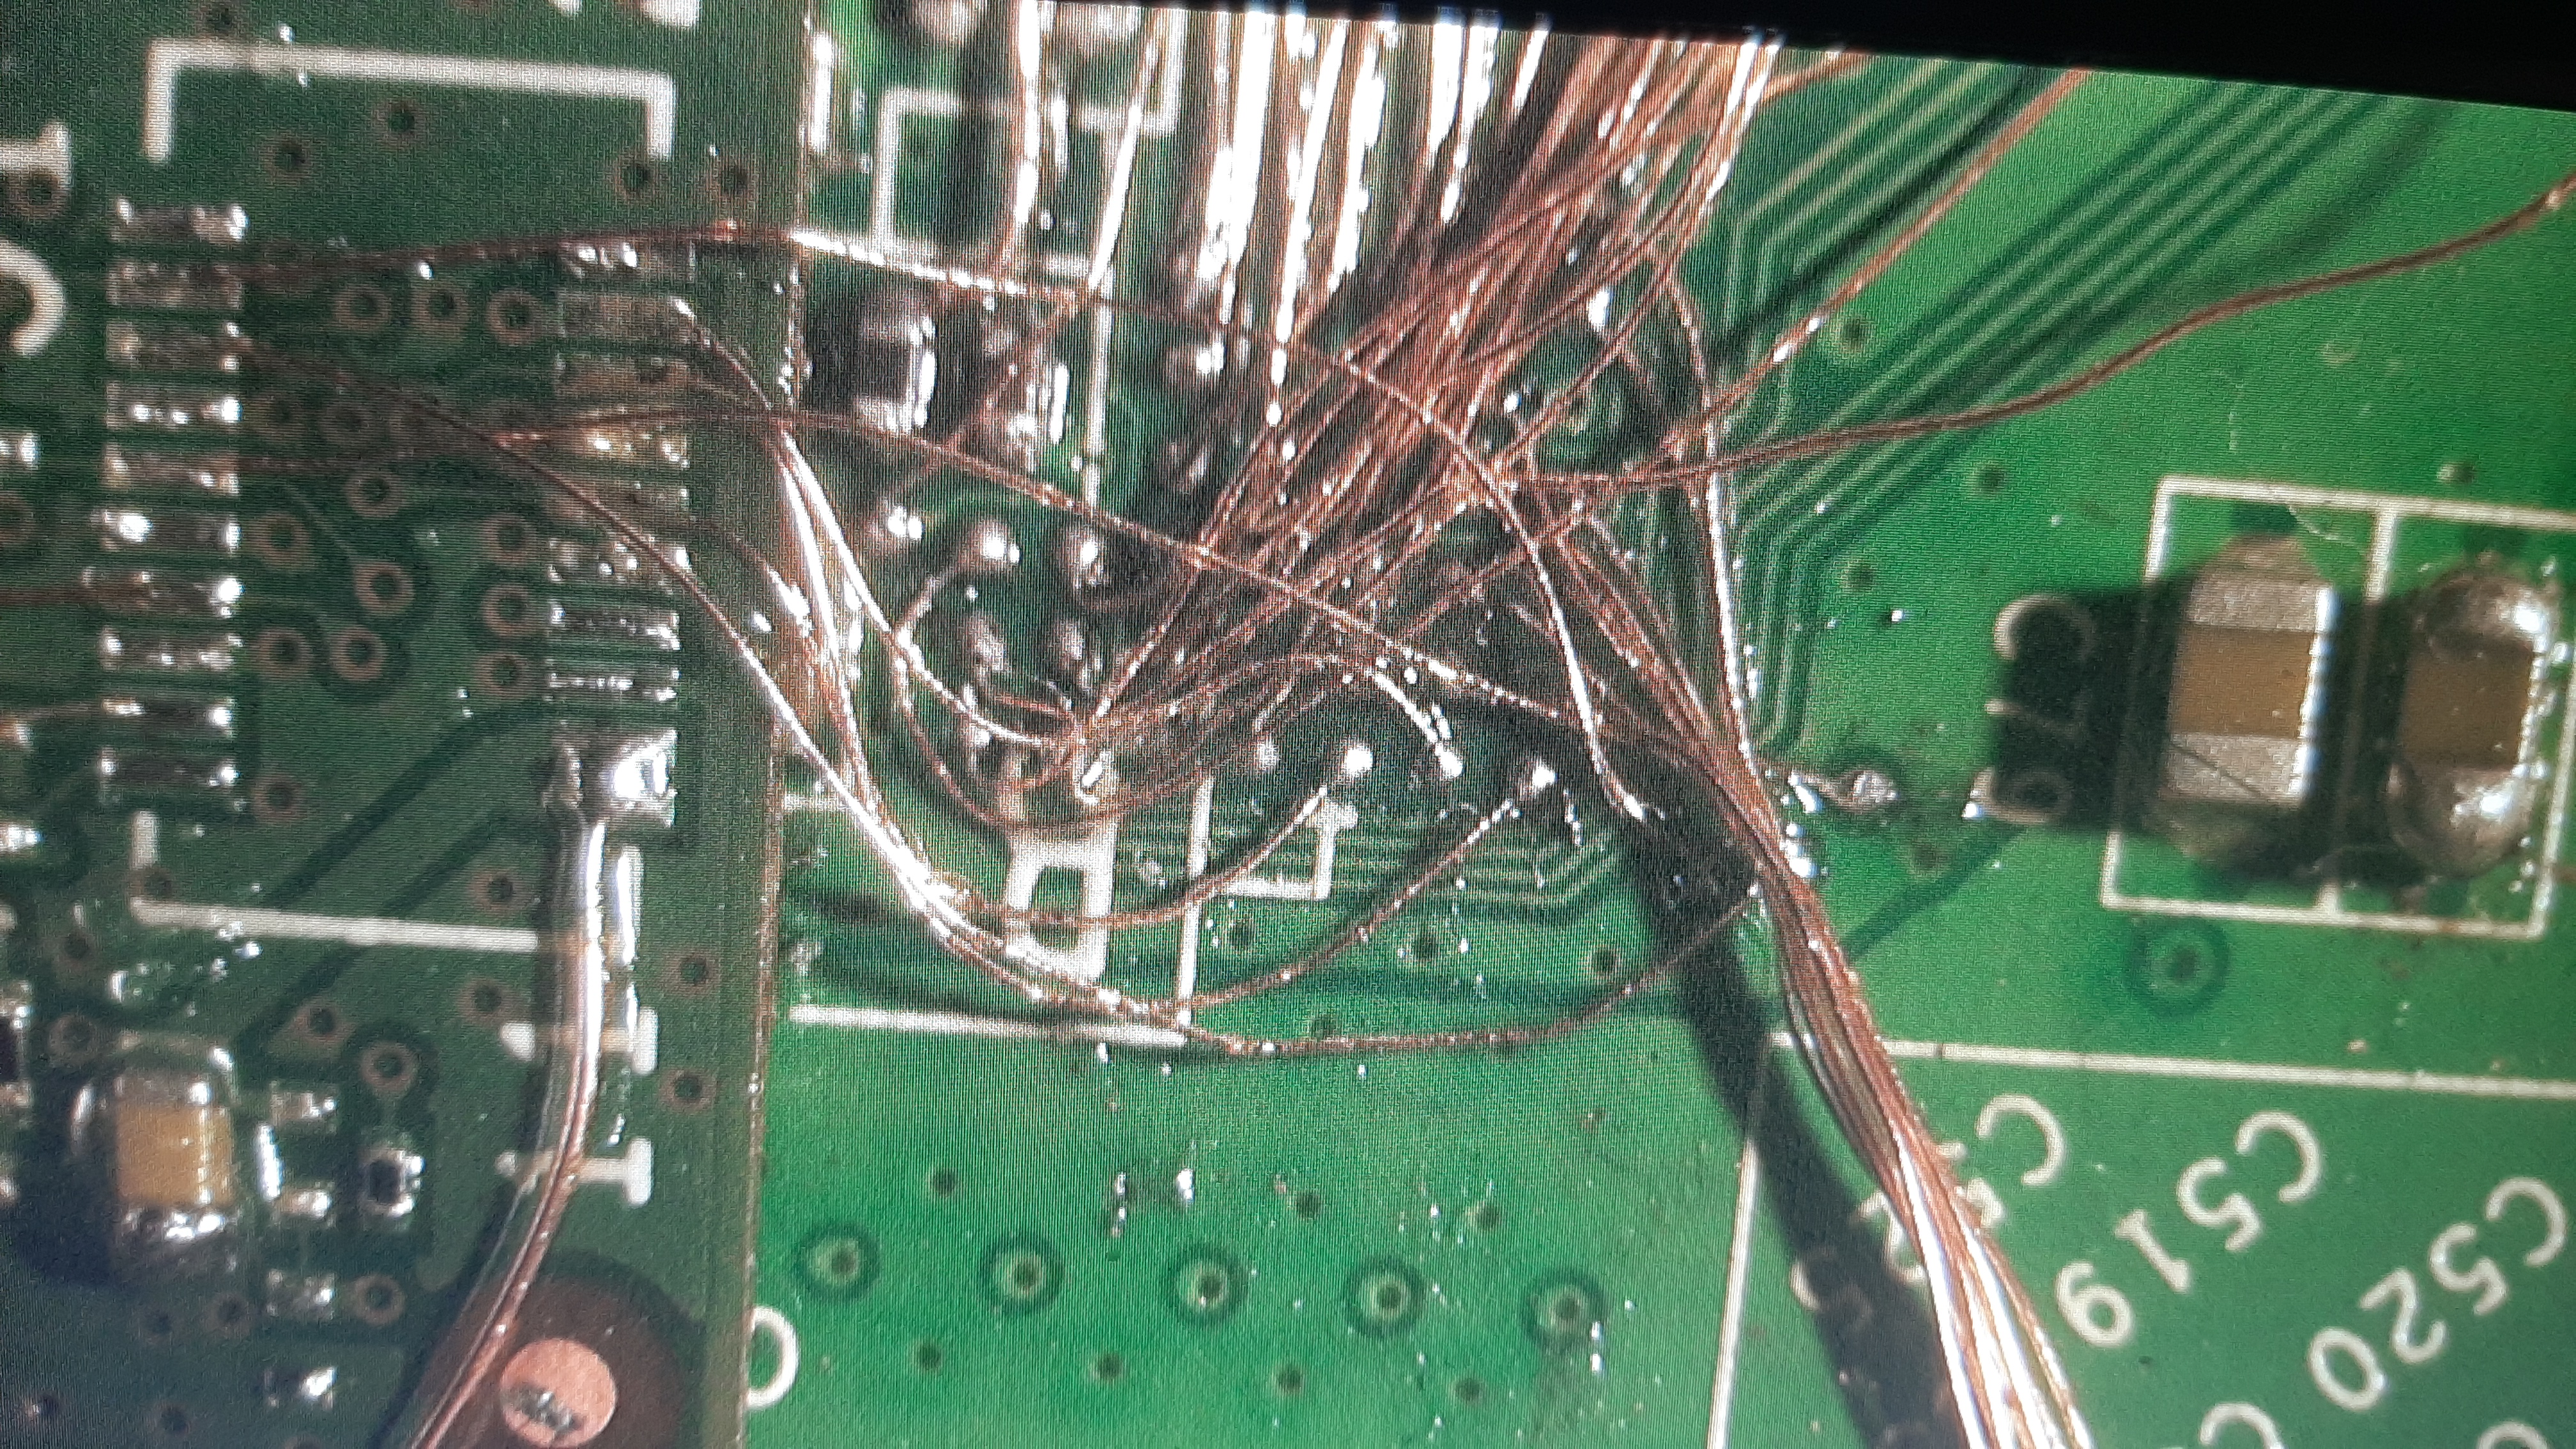
Pictures of the top and bottom of the Wii U:
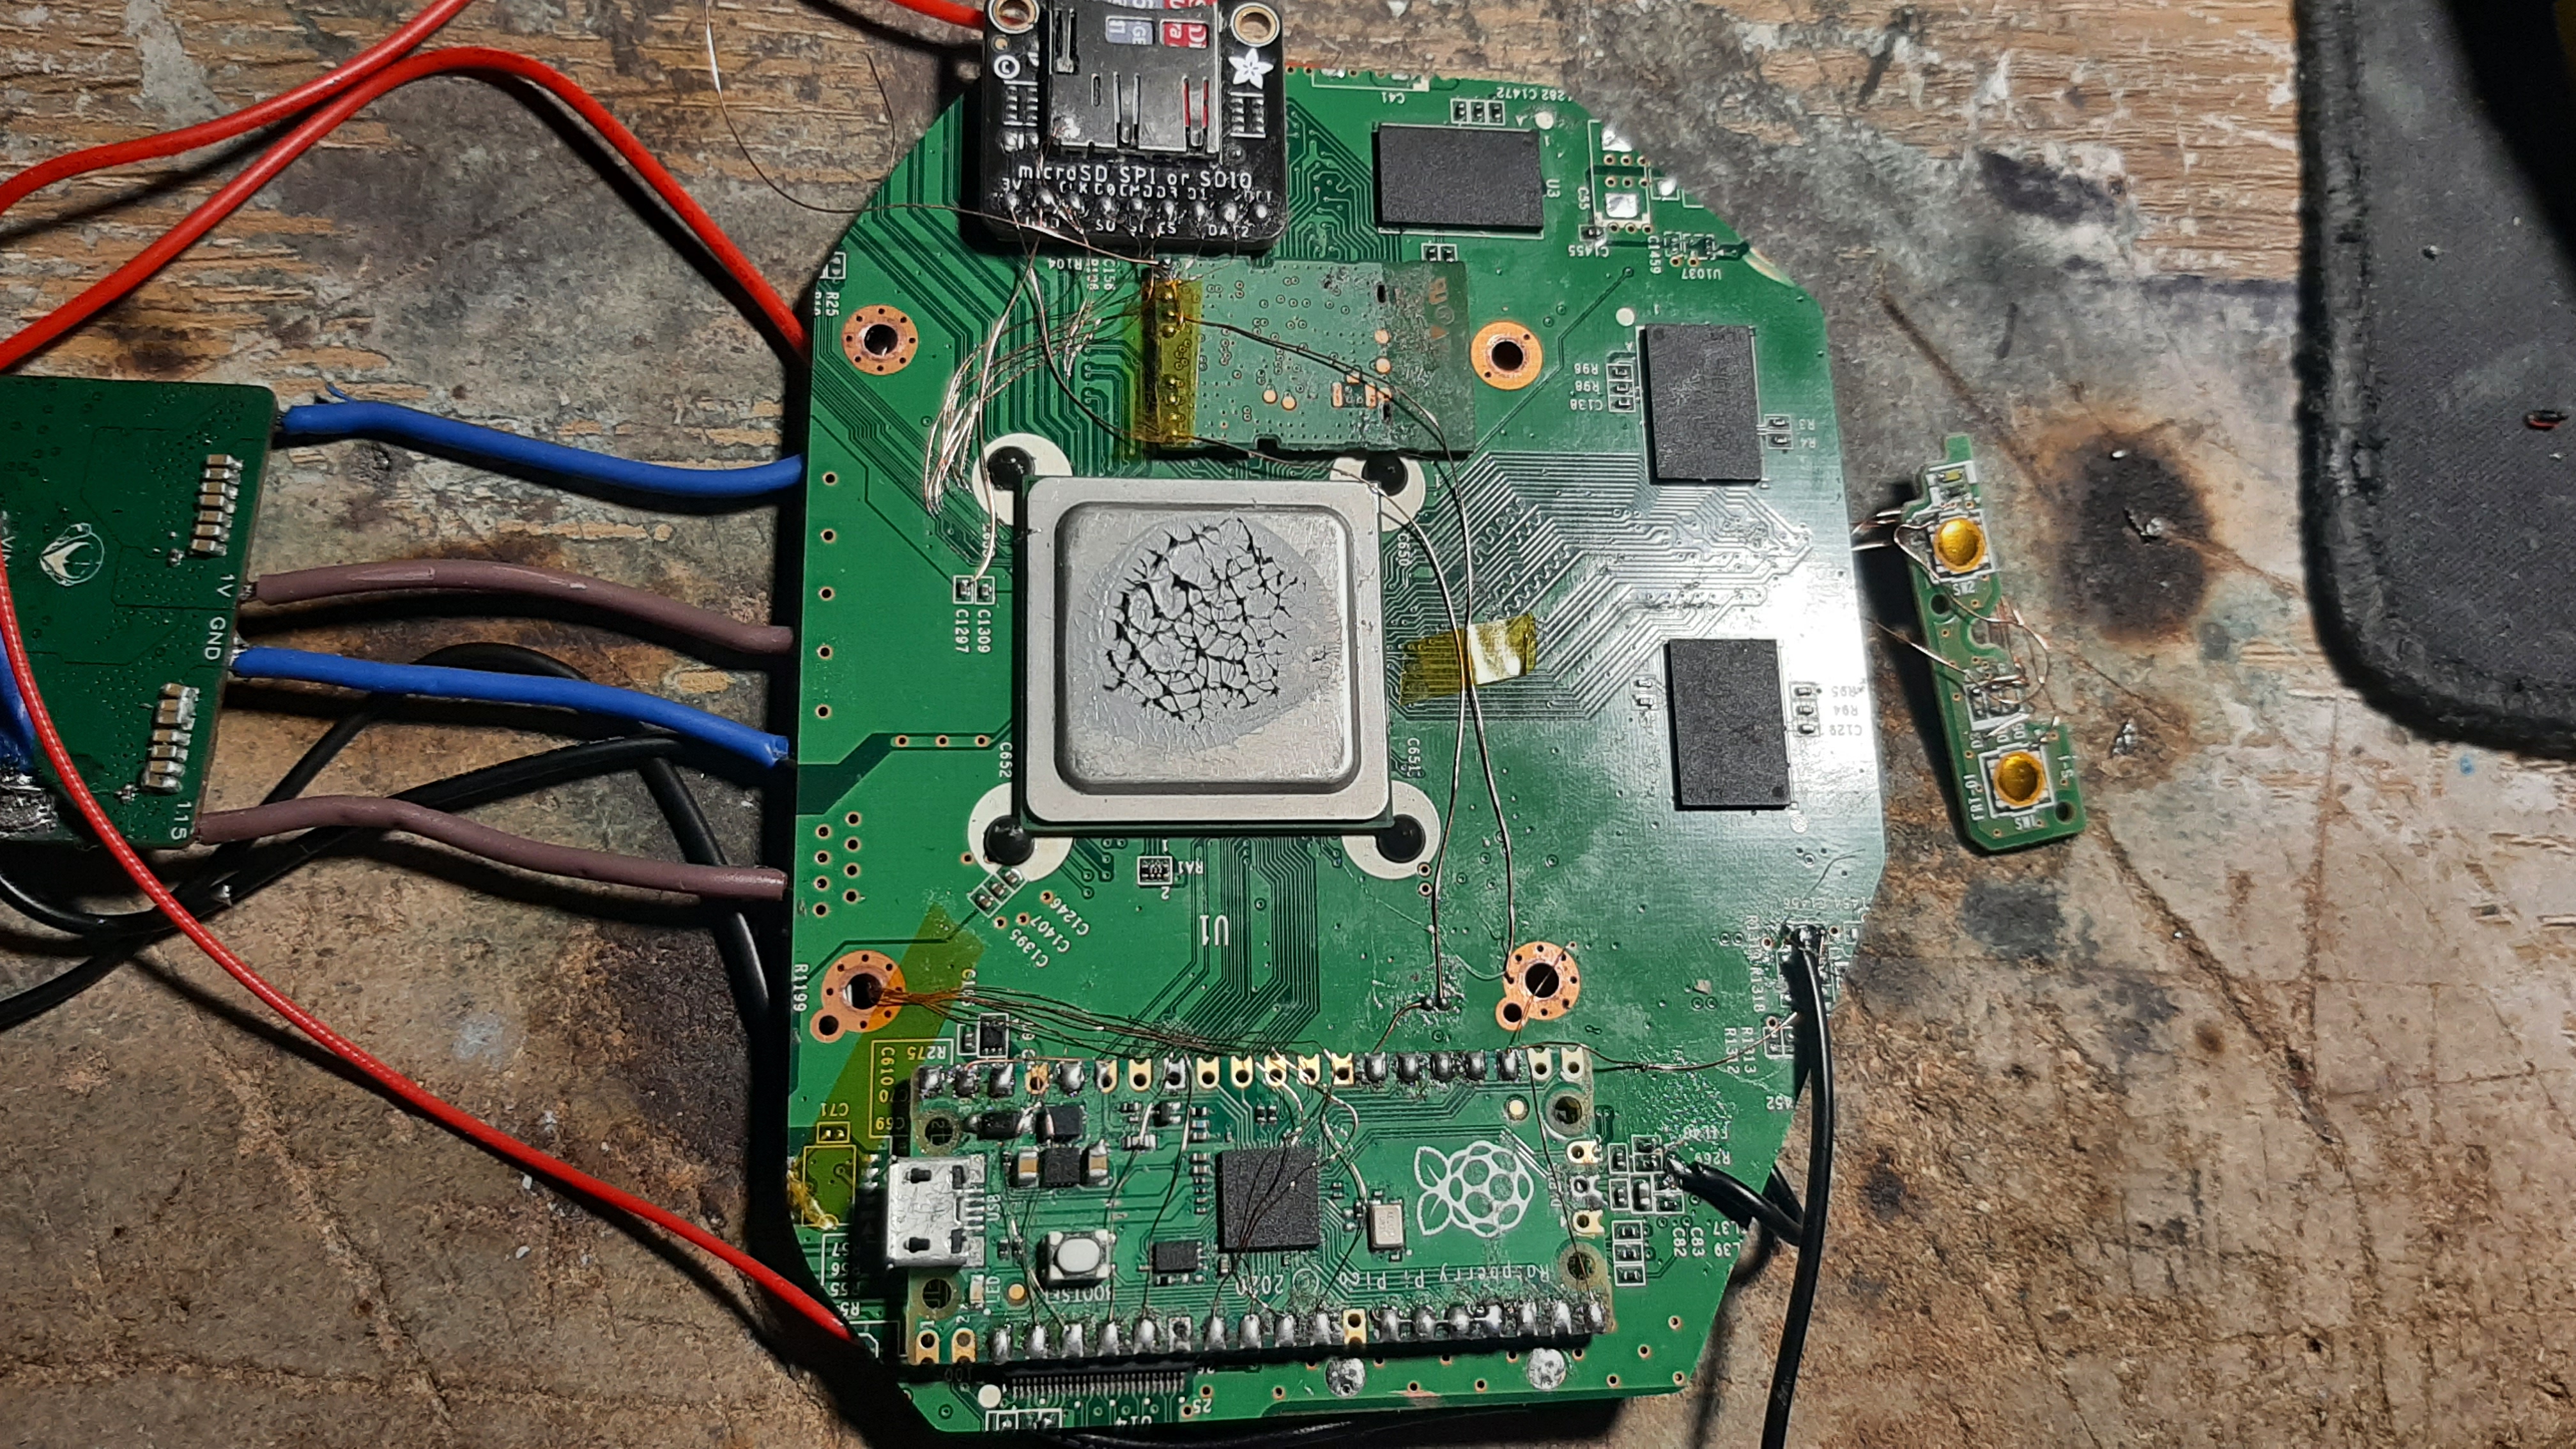
I found that none of the SMC pins for the BT module were needed, but the one to the SoC was

I also found that the SMC pins for the 5Ghz module aren't needed.
A few things I will say to those who are itching to get their dremel, sandpaper, and magnet wire out:
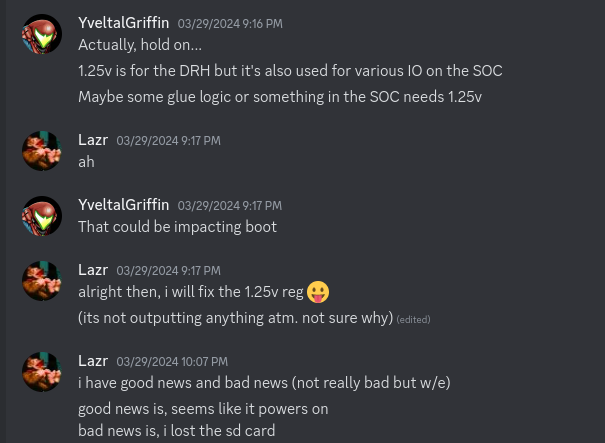
1. The voltages you must have connected to the board are 1v, 1.15v, 1.25v, 1.5v, and 3.3v. 1.25v is needed for everything you test. The SoC uses that rail for IO (that stumped me for a long while until I asked Yveltal). 1.1v is needed to test the DRH (and for it to function), and the 5Ghz module. DRH wont work without 5Ghz, and vice-versa.
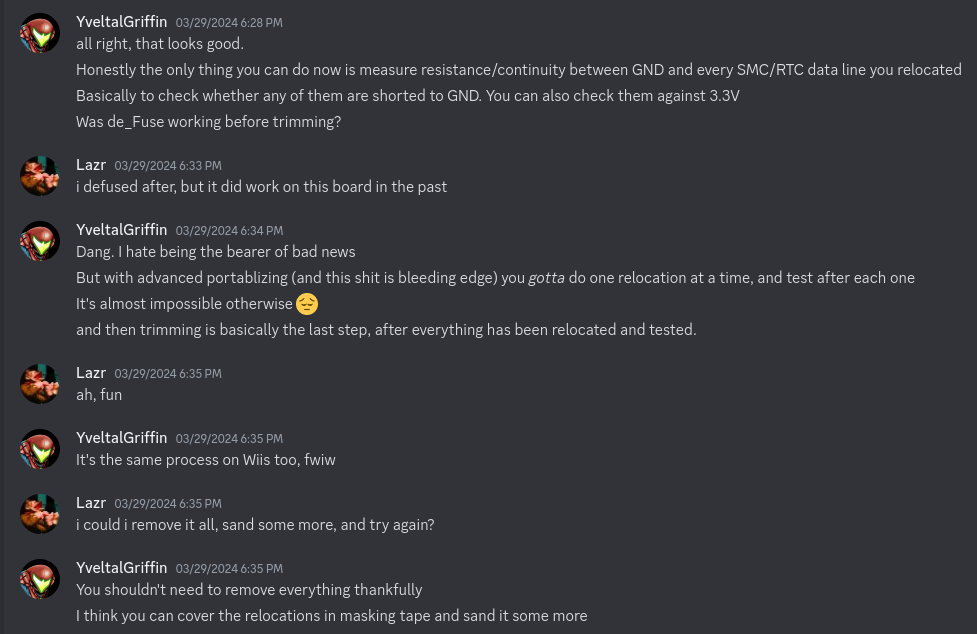
2. Don't have the newcomer mistake of trimming before relocating everything, and then it being impossible to debug because you relocated everything.
(yes, this was my first console trim ever)
3. Building the bistro regulator board by hand sucks, but despite that, the only rail that doesn't work is the 1.1v, but that is why I have an extra board that's not documented on the trim guide. The DRC is pretty stable in my experience, but I can only get to the Wii U Menu and no where else to fully test it.
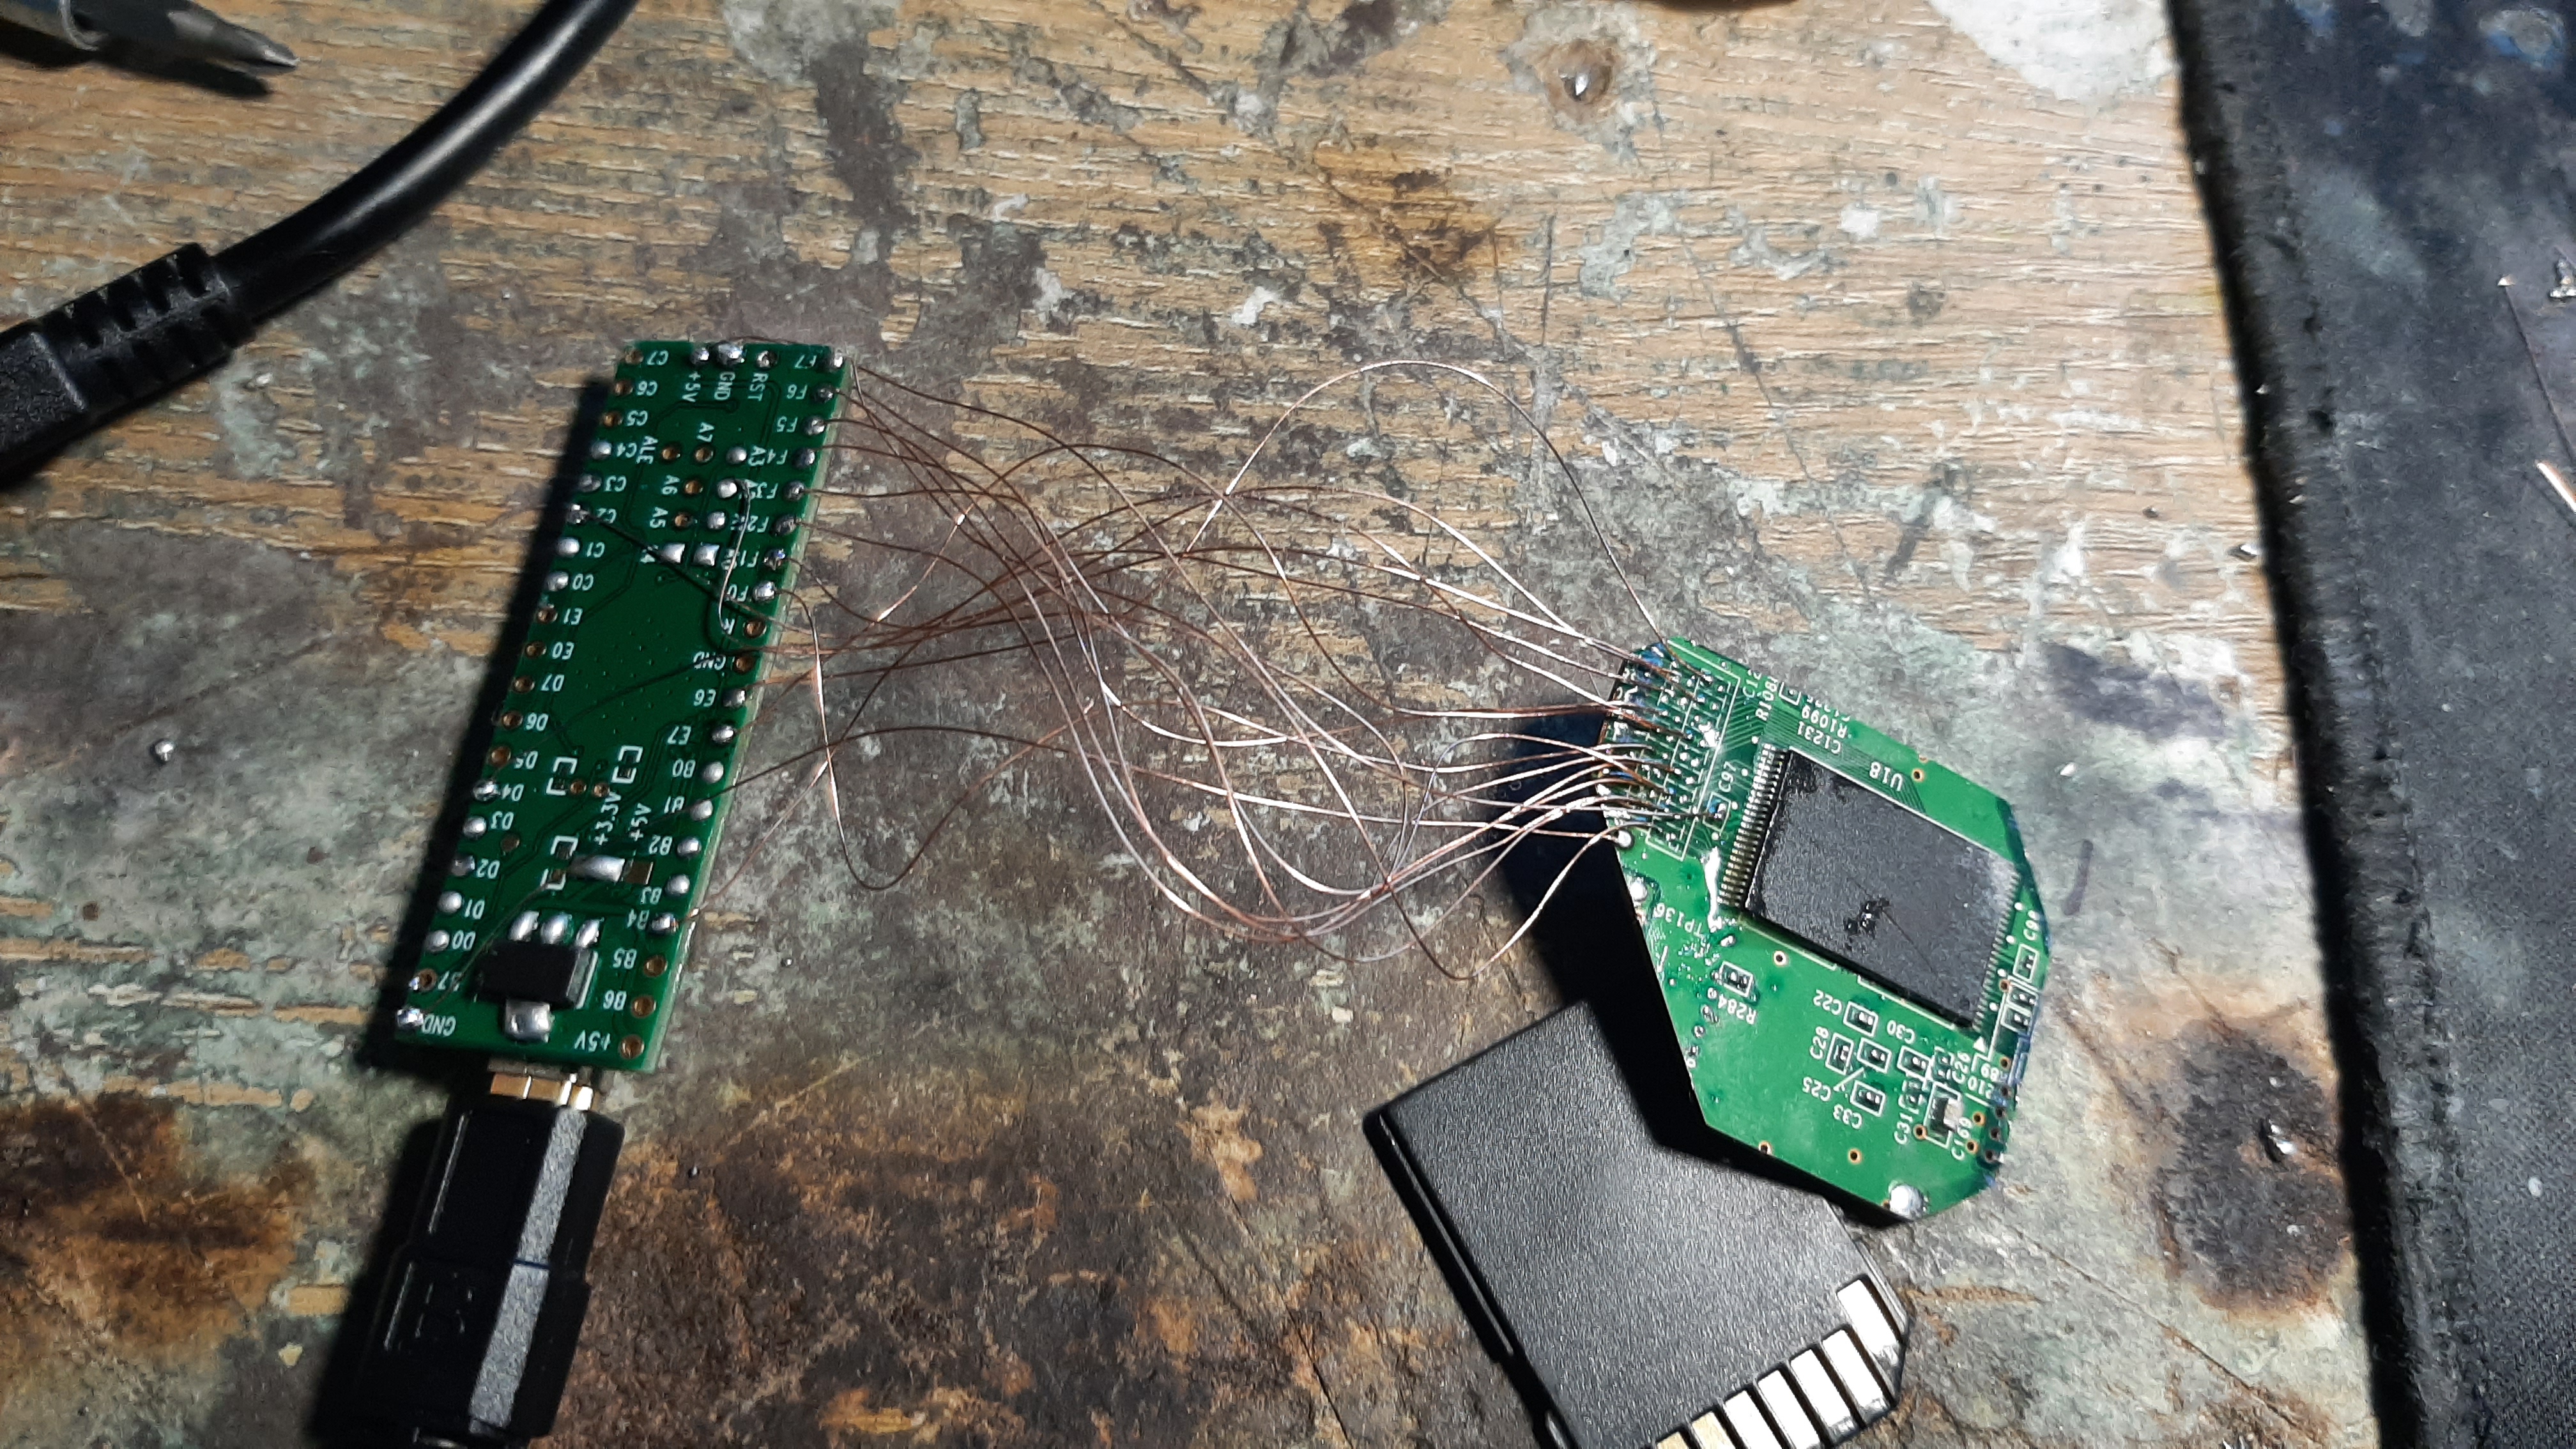
4. You likely wont have to do this, but I had to do this on hard-mode, since my only non-sdhc card died. I flashed the slccmpt boot1 blocks (which are normally blank) with the minute boot1. I finally had another use for the teensy I bought so long ago!
Hopefully as time goes on, the trim gets easier with the planned flexes. I know I am excited for what comes next
The Wi-Fi module doesn't work atm, but it is probably due to my crappy wiring for it (SDIO is really bad; those cafeflex' will be incredibly useful for this relocation).
Pictures of the top and bottom of the Wii U:
I found that none of the SMC pins for the BT module were needed, but the one to the SoC was
I also found that the SMC pins for the 5Ghz module aren't needed.
A few things I will say to those who are itching to get their dremel, sandpaper, and magnet wire out:
1. The voltages you must have connected to the board are 1v, 1.15v, 1.25v, 1.5v, and 3.3v. 1.25v is needed for everything you test. The SoC uses that rail for IO (that stumped me for a long while until I asked Yveltal). 1.1v is needed to test the DRH (and for it to function), and the 5Ghz module. DRH wont work without 5Ghz, and vice-versa.
2. Don't have the newcomer mistake of trimming before relocating everything, and then it being impossible to debug because you relocated everything.
(yes, this was my first console trim ever)
3. Building the bistro regulator board by hand sucks, but despite that, the only rail that doesn't work is the 1.1v, but that is why I have an extra board that's not documented on the trim guide. The DRC is pretty stable in my experience, but I can only get to the Wii U Menu and no where else to fully test it.
4. You likely wont have to do this, but I had to do this on hard-mode, since my only non-sdhc card died. I flashed the slccmpt boot1 blocks (which are normally blank) with the minute boot1. I finally had another use for the teensy I bought so long ago!
Hopefully as time goes on, the trim gets easier with the planned flexes. I know I am excited for what comes next
tealflip
.
- Joined
- Oct 27, 2022
- Messages
- 66
- Likes
- 51
Can't wait for someone to shove a whole ass Wii U into just the gamepad.The LOLWUT trim is replicable (and no this isn't an April fools joke)! Thanks to Yveltal's guide (and my questions throughout these past few days (week?)), I have gotten the trim to boot into Wii U Menu!
Hopefully as time goes on, the trim gets easier with the planned flexes. I know I am excited for what comes next
- Joined
- Feb 18, 2024
- Messages
- 69
- Likes
- 25
- Portables
- working on No.1
me too bud.Can't wait for someone to shove a whole ass Wii U into just the gamepad.
I'm surprised no one has even started a serious worklog for a Wii u portable.
R-Lad
.
- Joined
- Apr 4, 2024
- Messages
- 3
- Likes
- 2
Just for shit's and giggles I am curious if a PTM7950 thermal pad would be of any help with heat distribution when the portable wii u is eventually shoved into an enclosed space.
I'm not sure those would be worth the cost versus conventional thermal paste. Likely going to still be under 20 watts and I assume the bottle neck isn't going to be the thermal transfer from the die to the heatsink.
tealflip
.
- Joined
- Oct 27, 2022
- Messages
- 66
- Likes
- 51
That, and I think the pads you listed specifically might be too thin. I've seen thermal paste applications on Wii's, and it barely touches, hence why the pads are so thick on consoles such as the Wii and Wii U.I'm not sure those would be worth the cost versus conventional thermal paste. Likely going to still be under 20 watts and I assume the bottle neck isn't going to be the thermal transfer from the die to the heatsink.
R-Lad
.
- Joined
- Apr 4, 2024
- Messages
- 3
- Likes
- 2
oh that makes sense, thanks for the infoI'm not sure those would be worth the cost versus conventional thermal paste. Likely going to still be under 20 watts and I assume the bottle neck isn't going to be the thermal transfer from the die to the heatsink.