
- Joined
- Jun 28, 2017
- Messages
- 70
- Likes
- 114
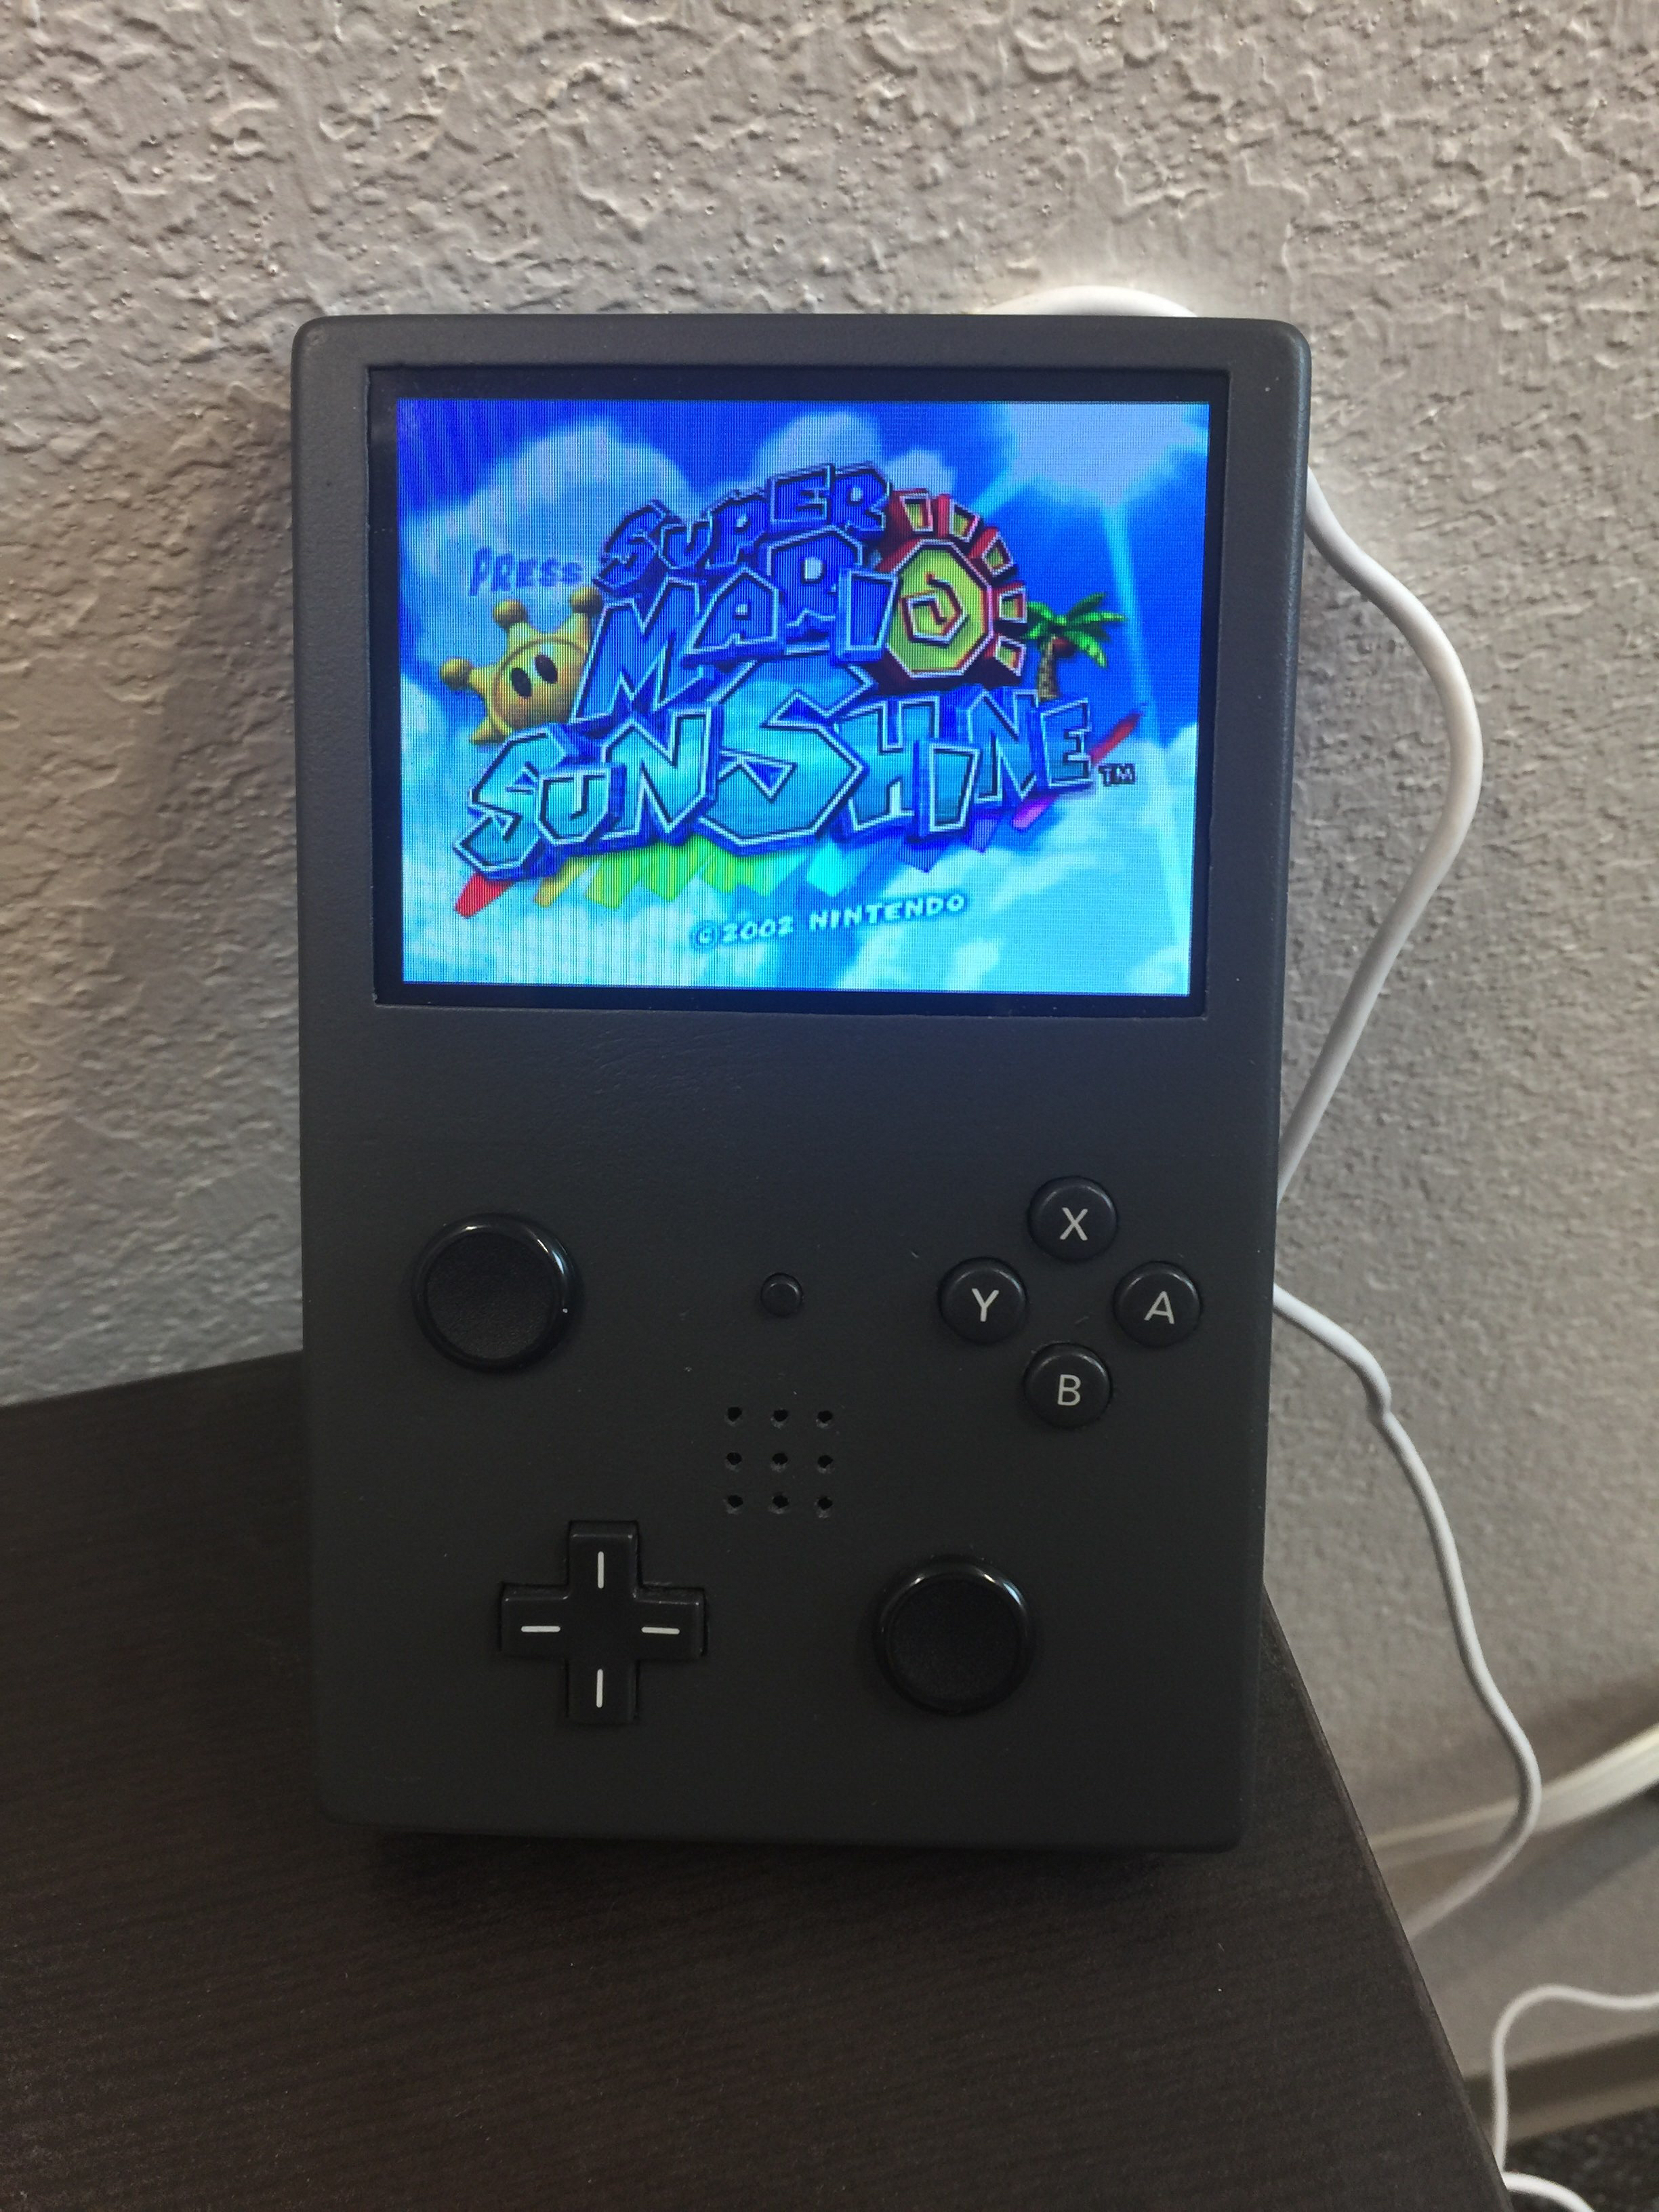
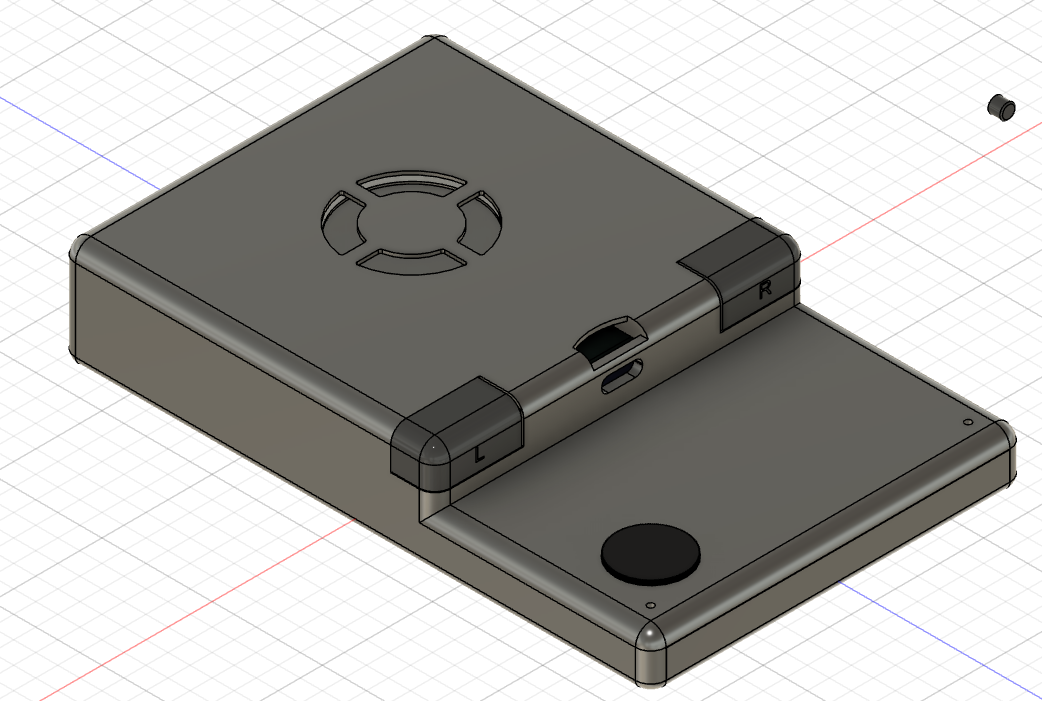
Here is my first wii portable, which I am naming the “SP Liite” I decided on that name because it has the same hand cramping form factor as my beloved childhood Gameboy, the Gameboy SP, and the fact that I used a ton of hardware from a broken DS lite that I scavenged for parts. There are also some design compromises that I had to make which I think is suitable for a “lite” version
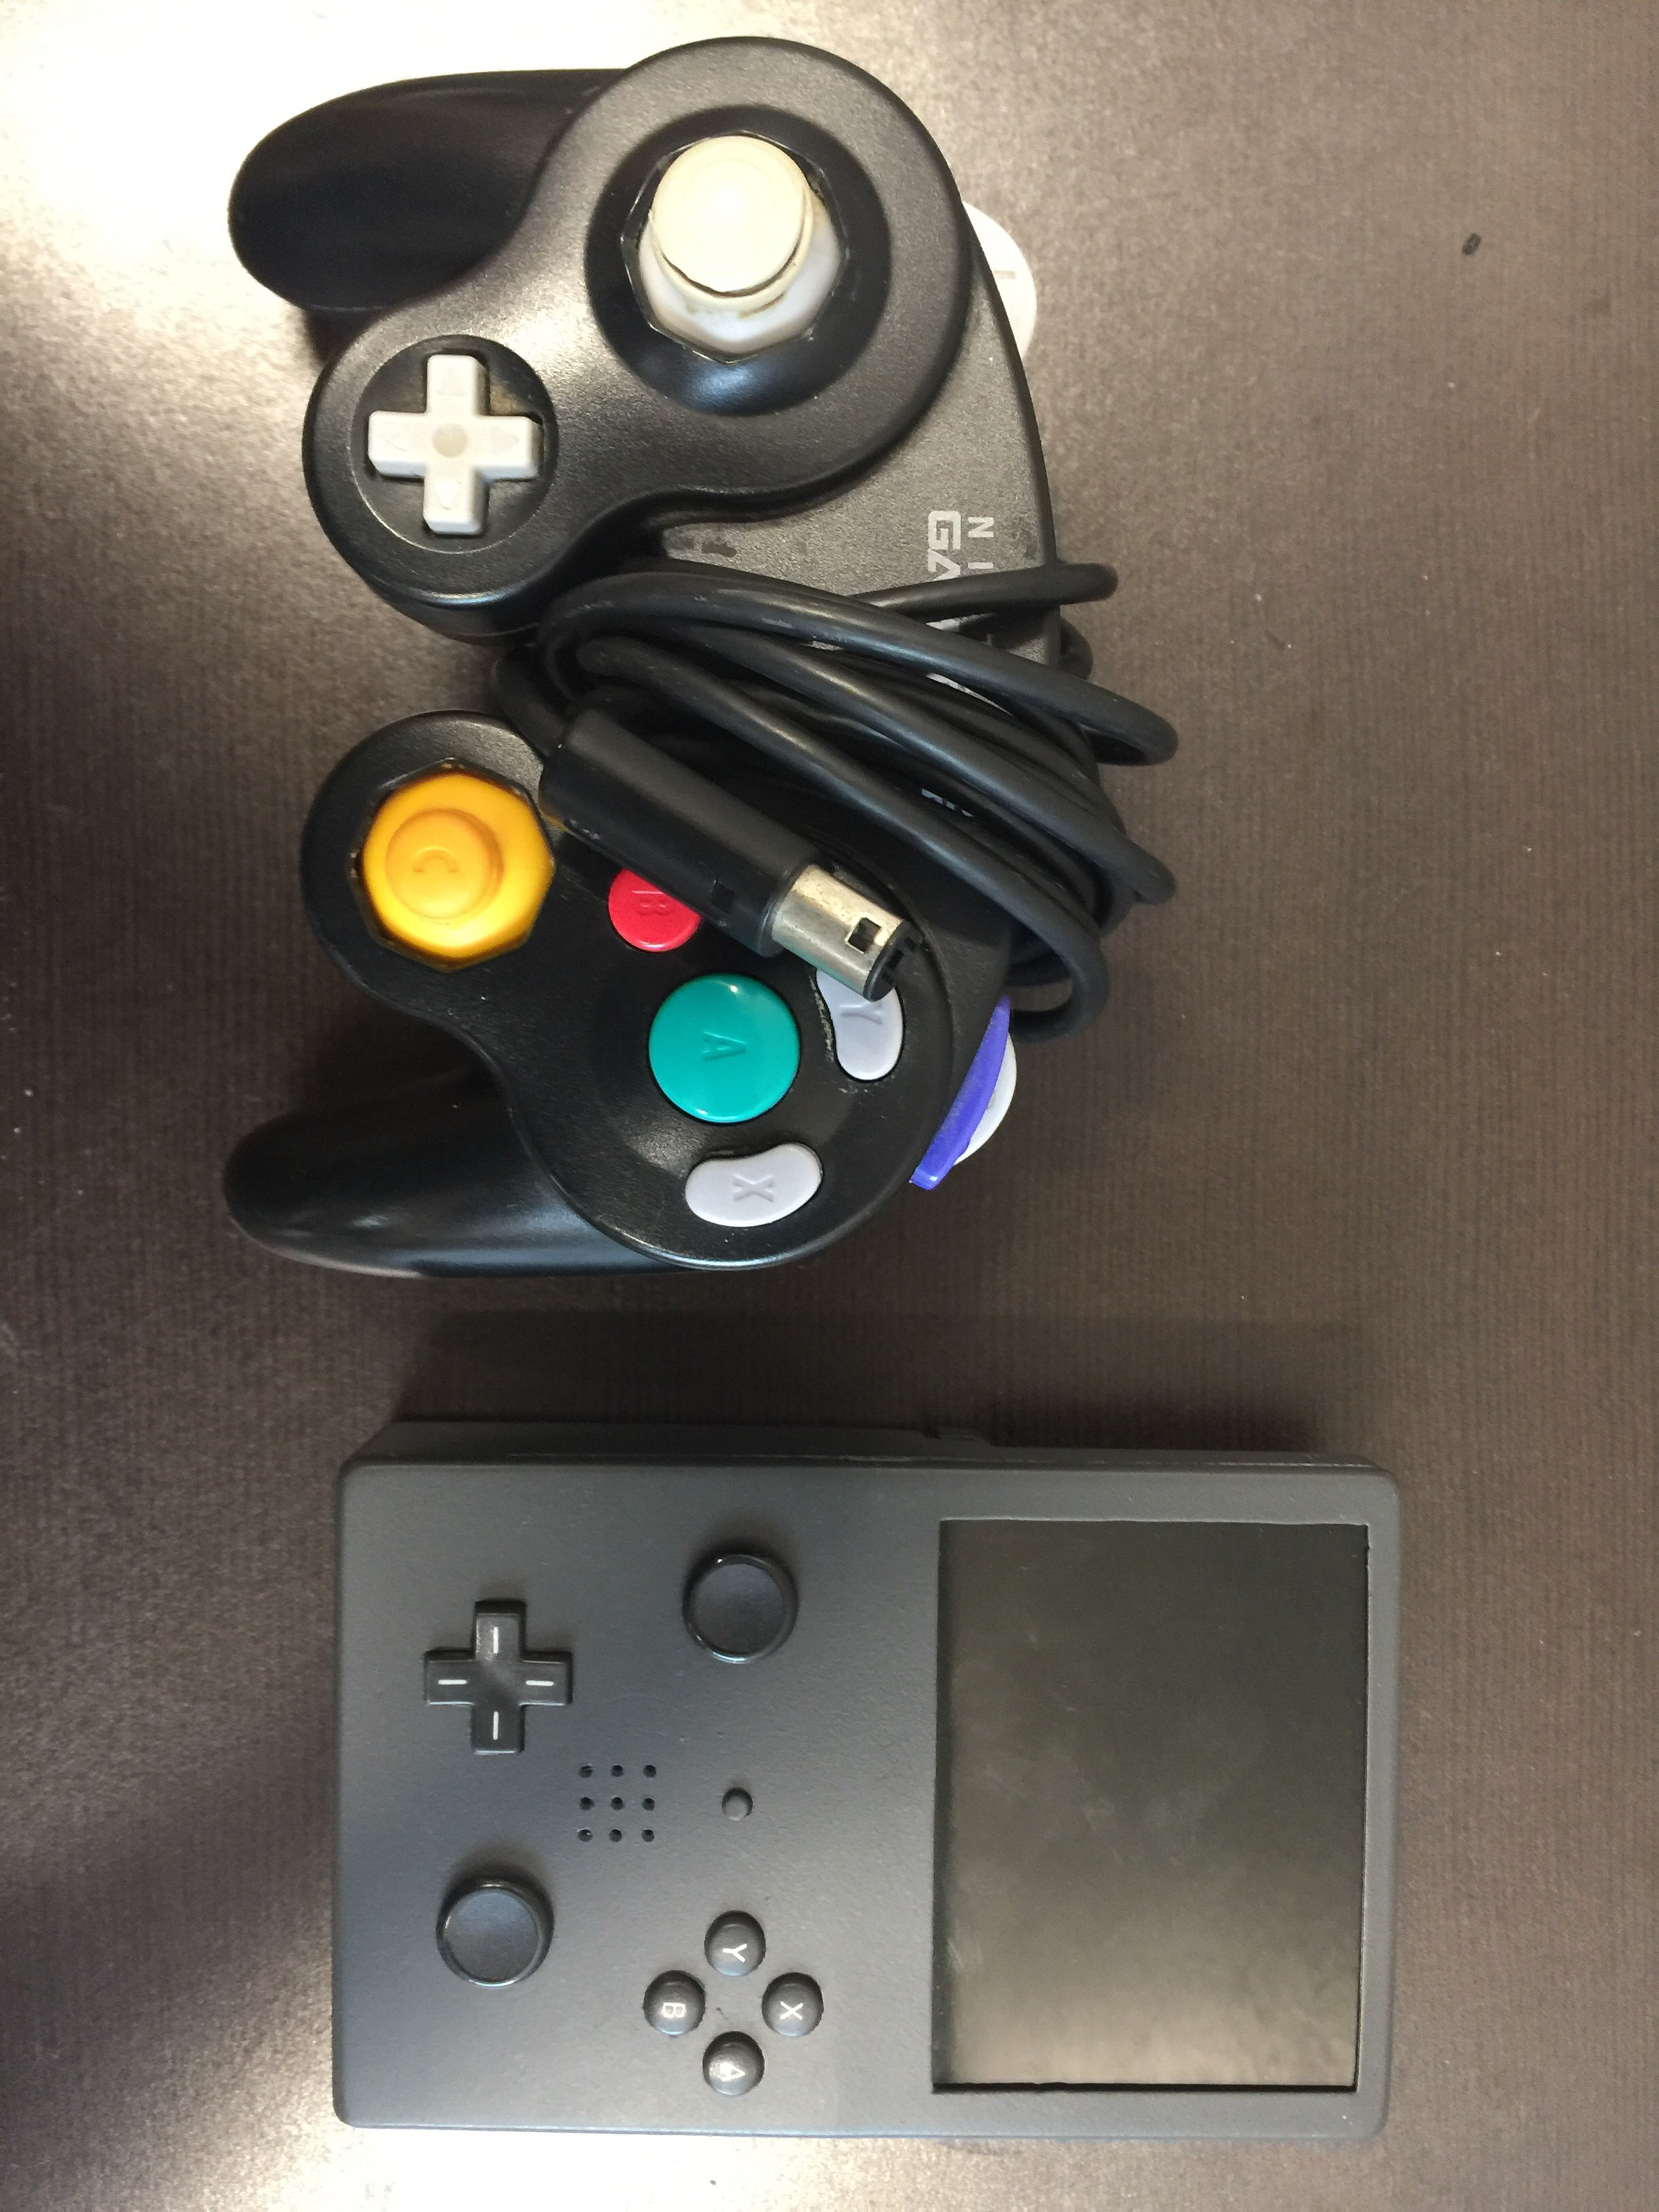
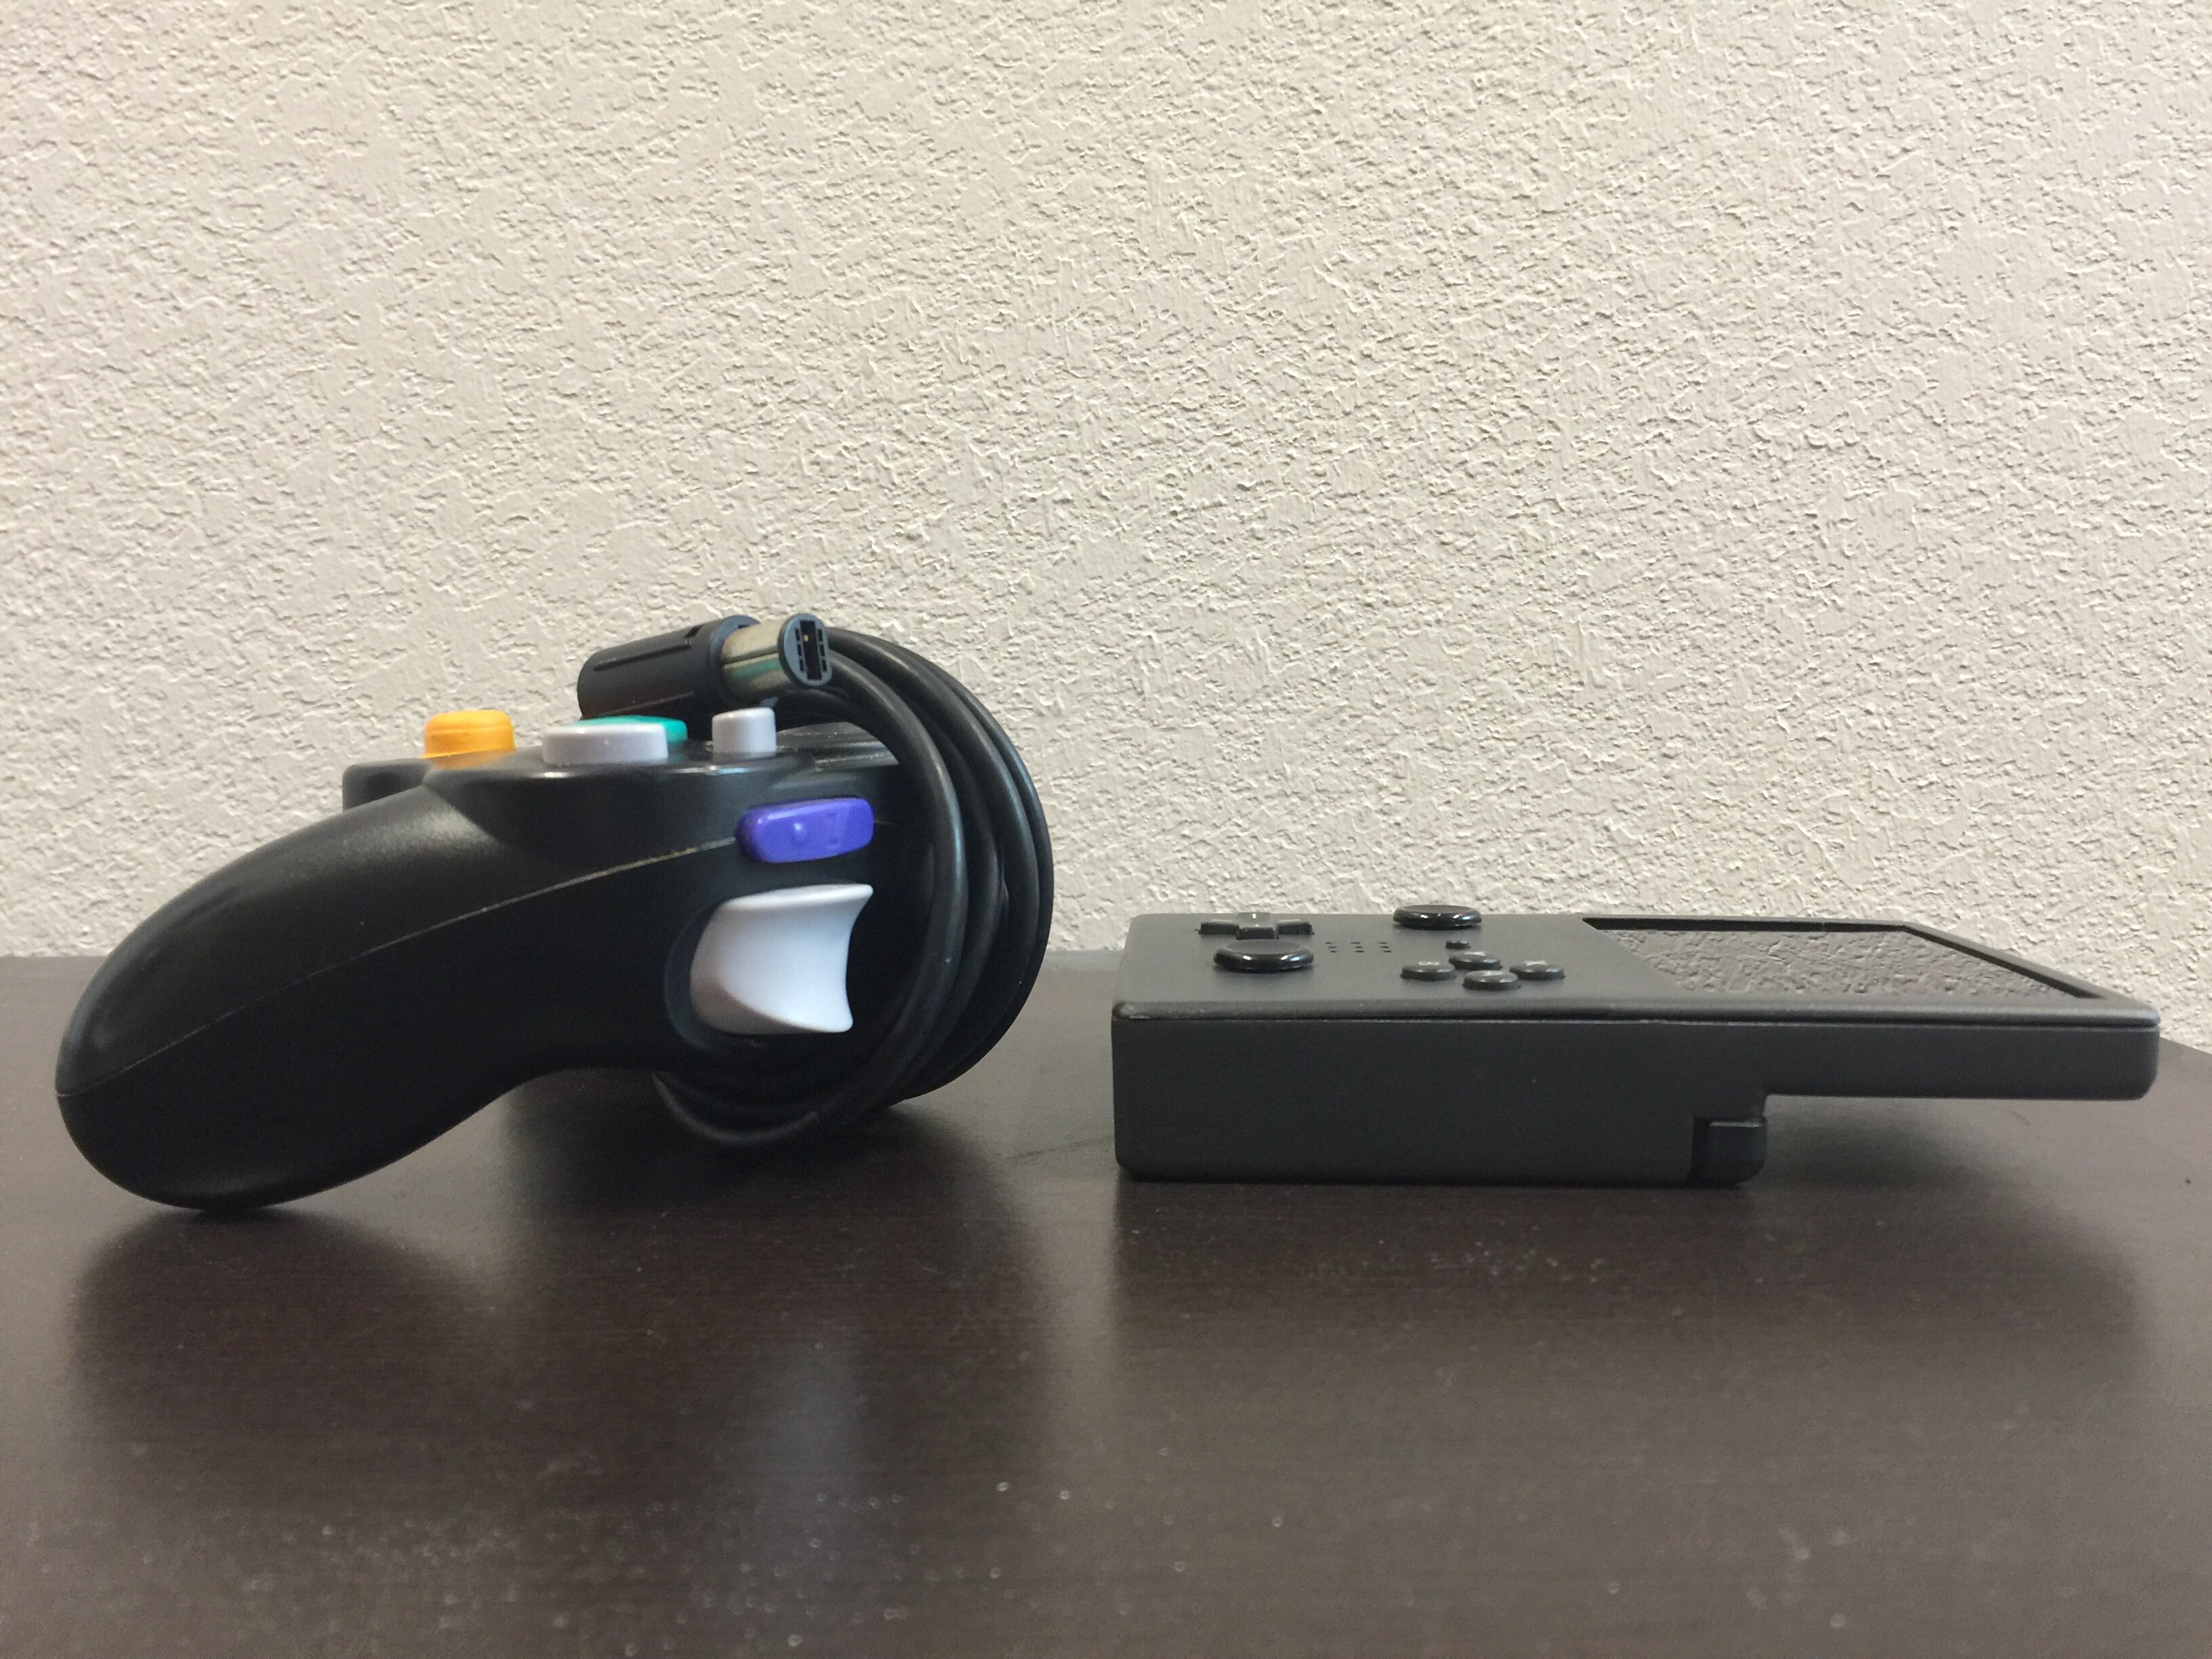
Like many portabilizers before me, after completing my first two projects, I decided to jump into the deep end and finally build a handheld wii. Here are some final pictures of the build and some comparison shots with an OEM gamecube controller so that you can get the idea of size. It was a long road from conception to execution, but I am pretty ecstatic with the finished product.
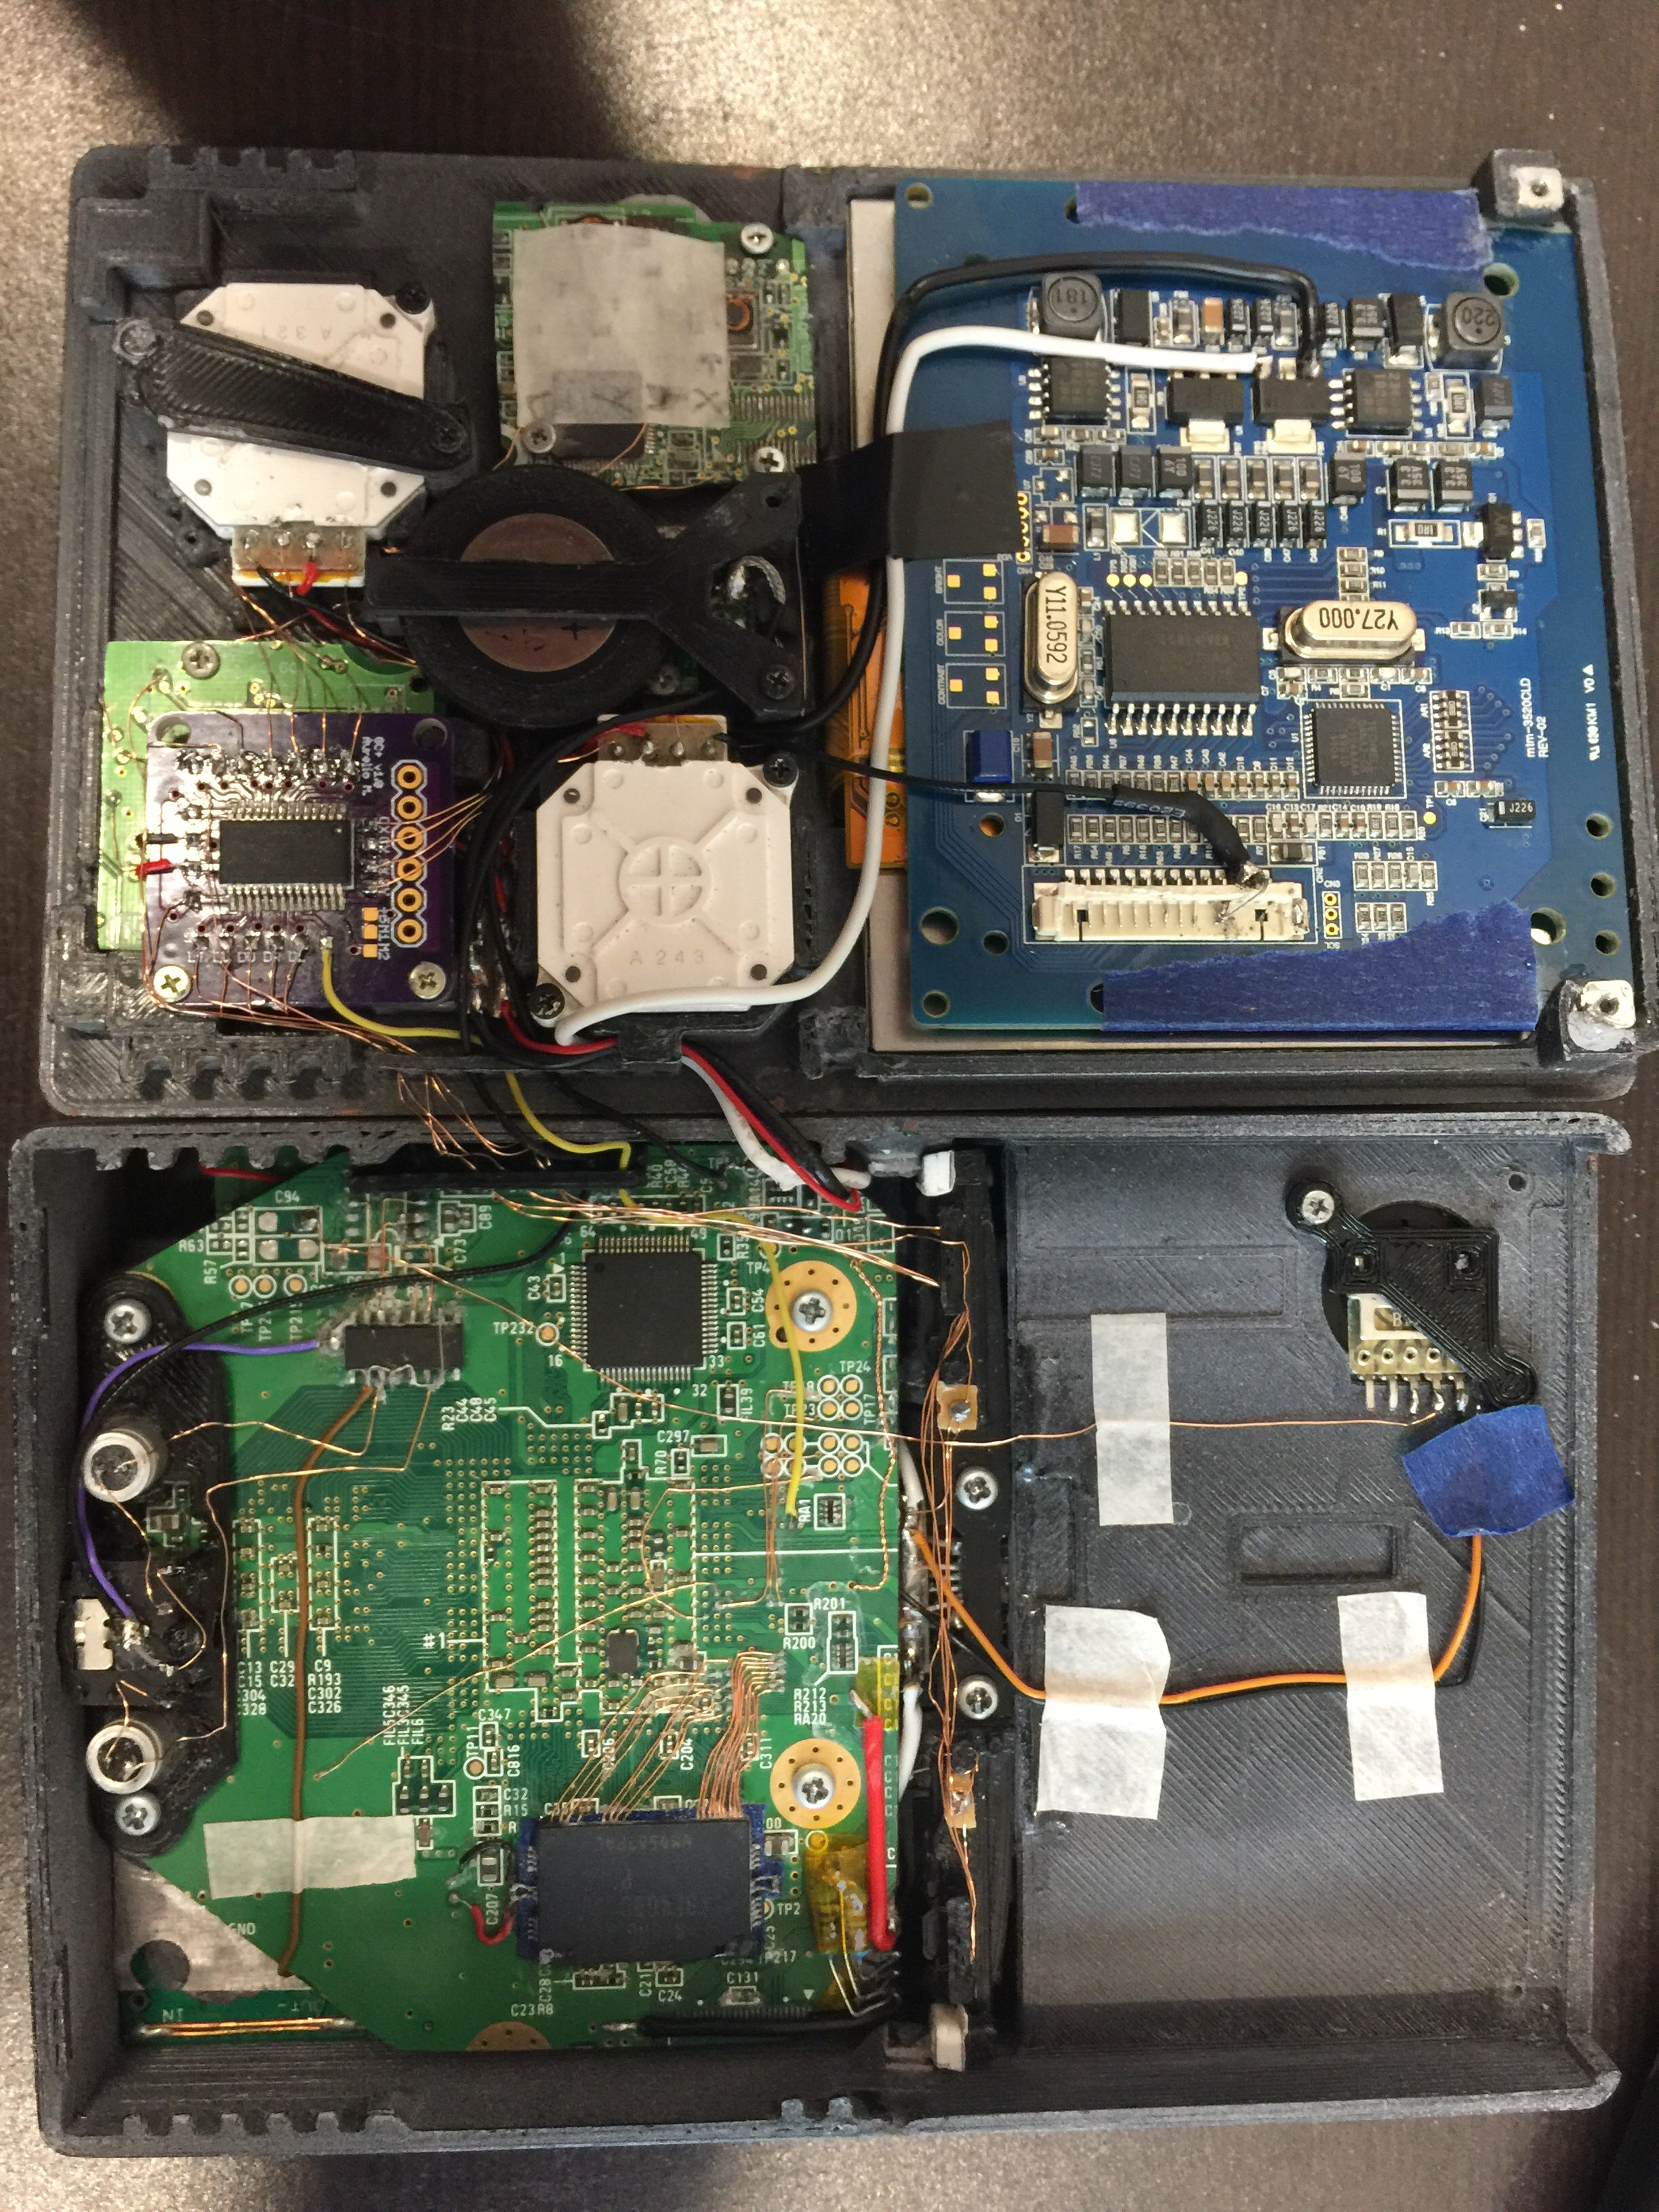
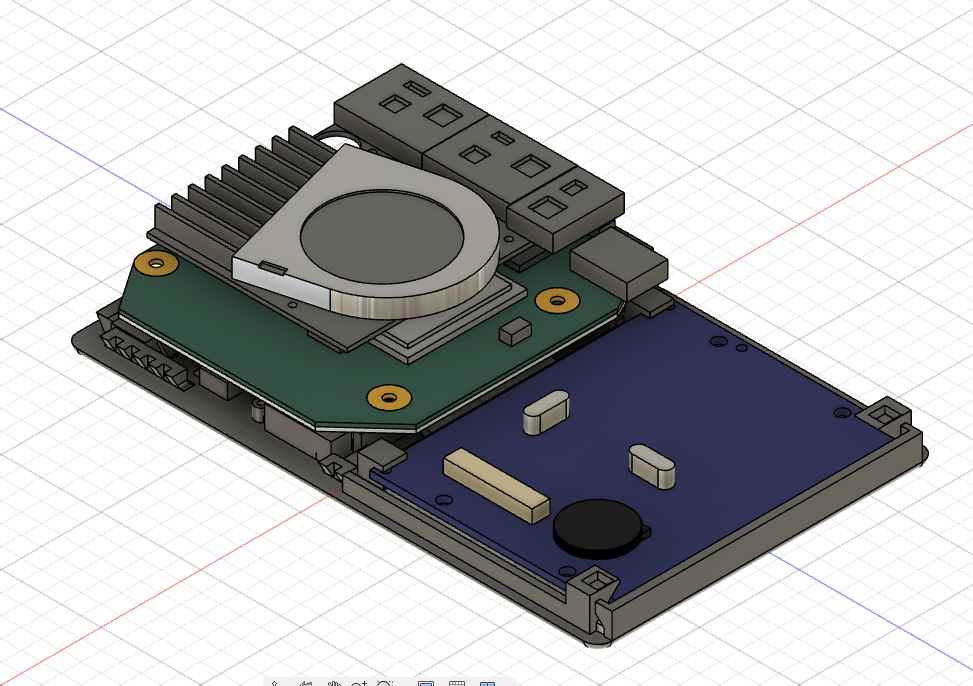
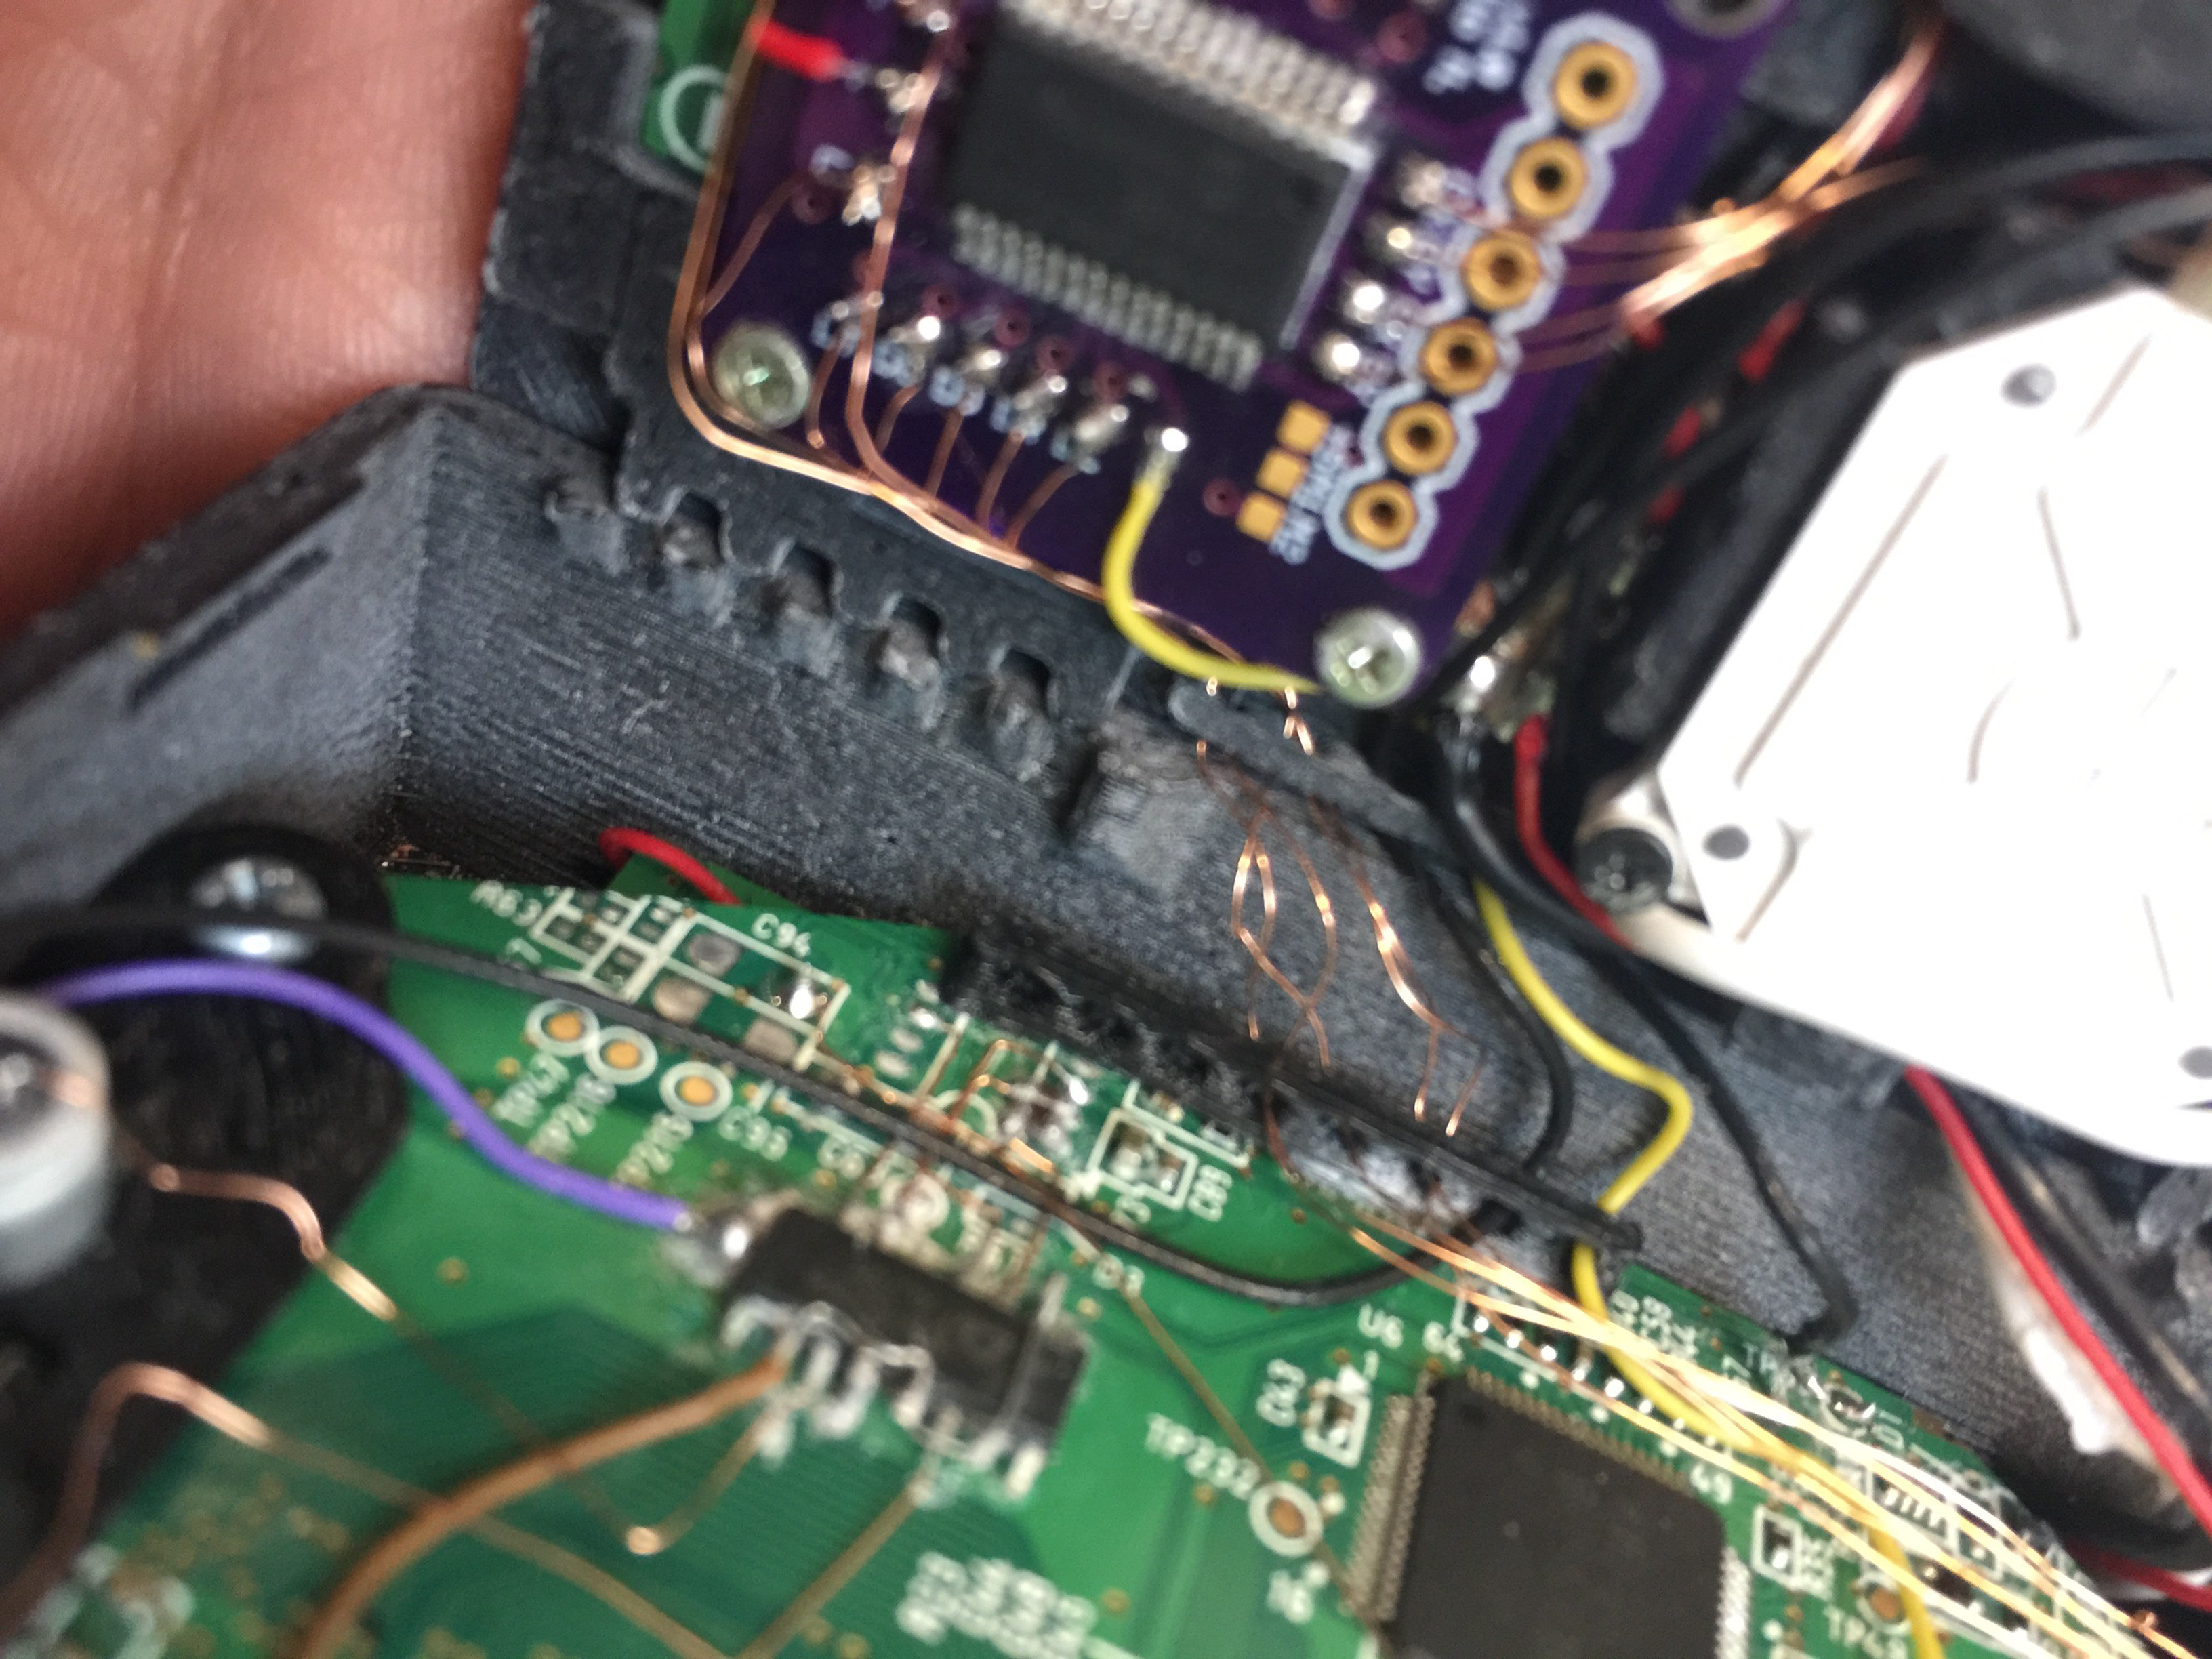
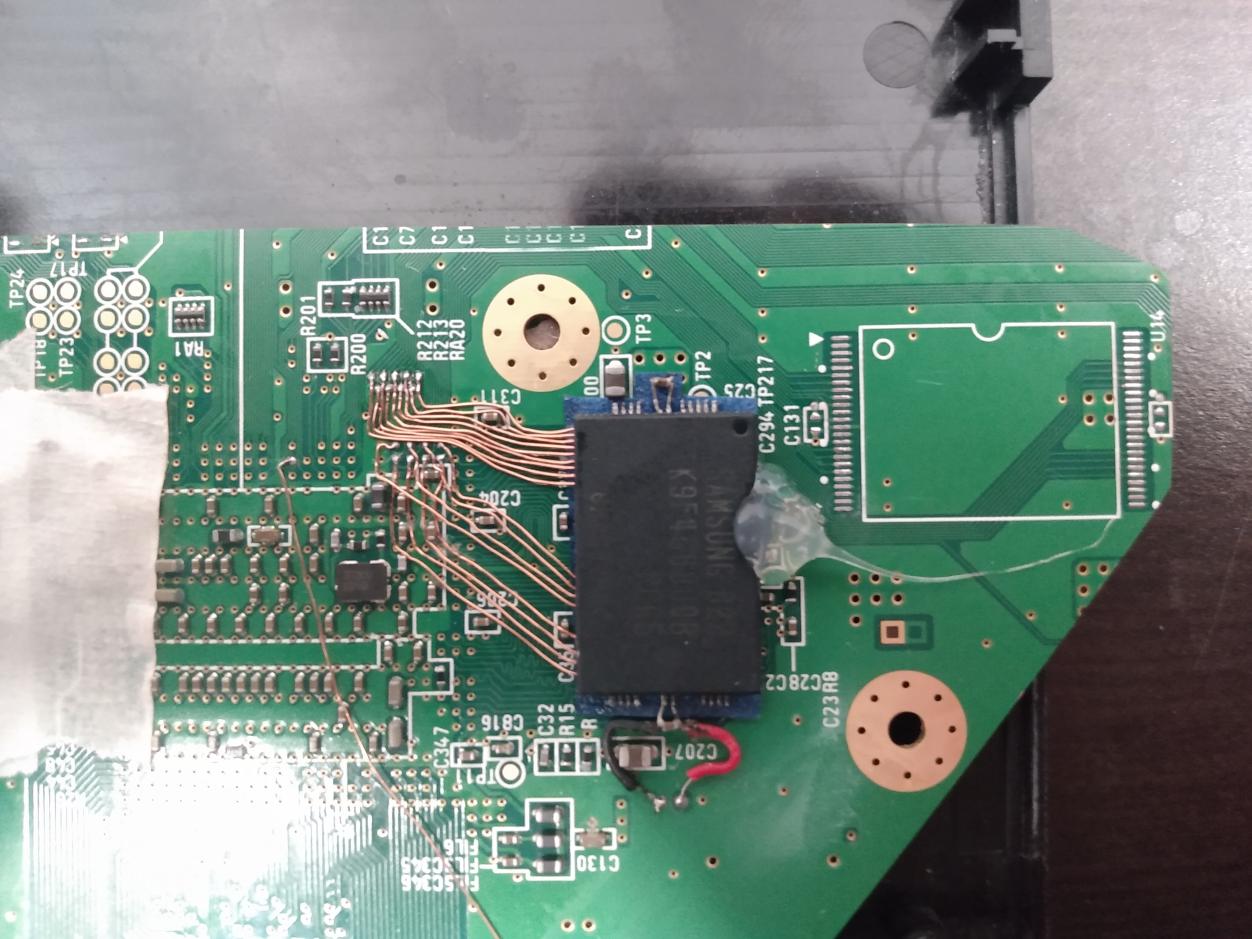
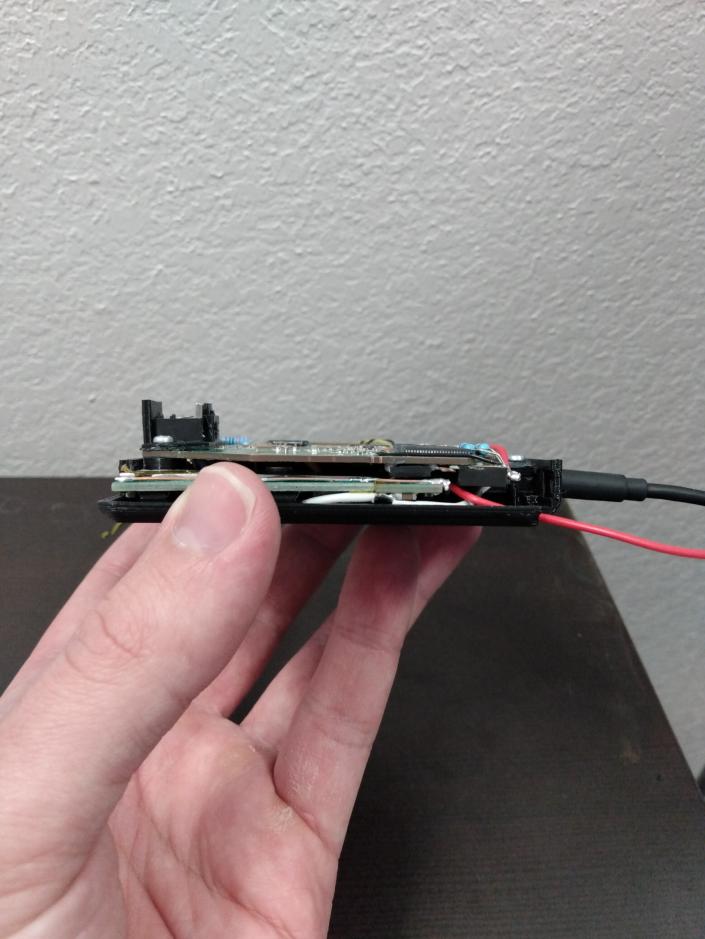
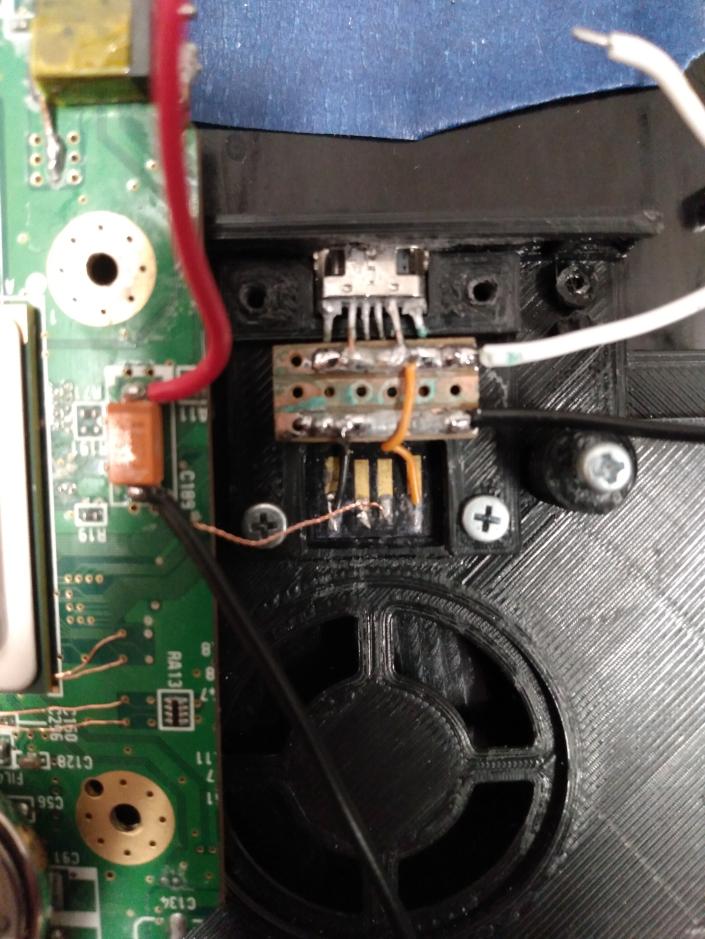
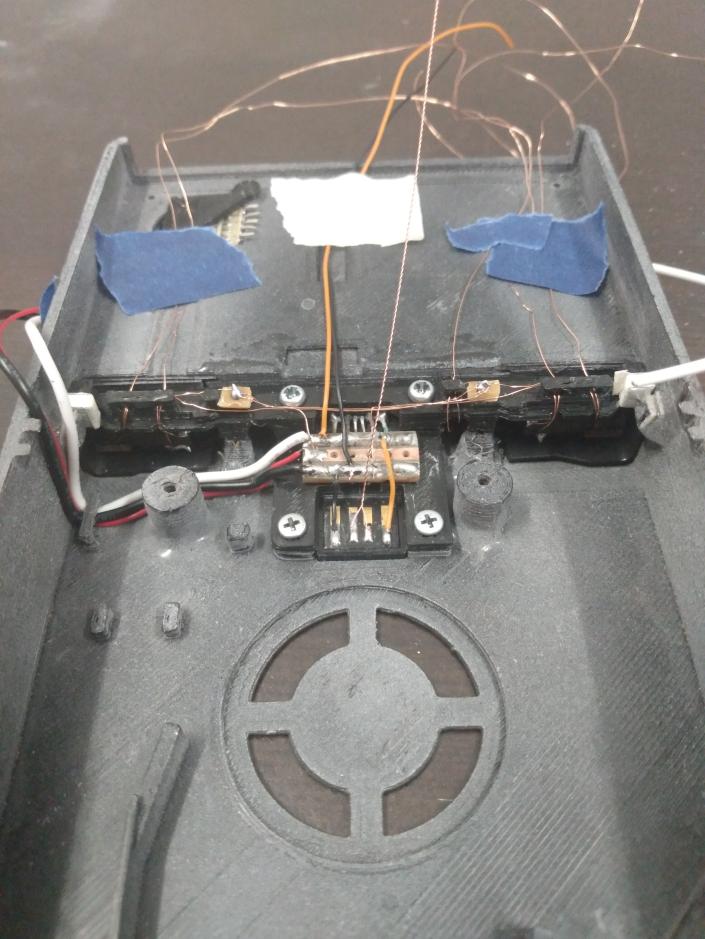
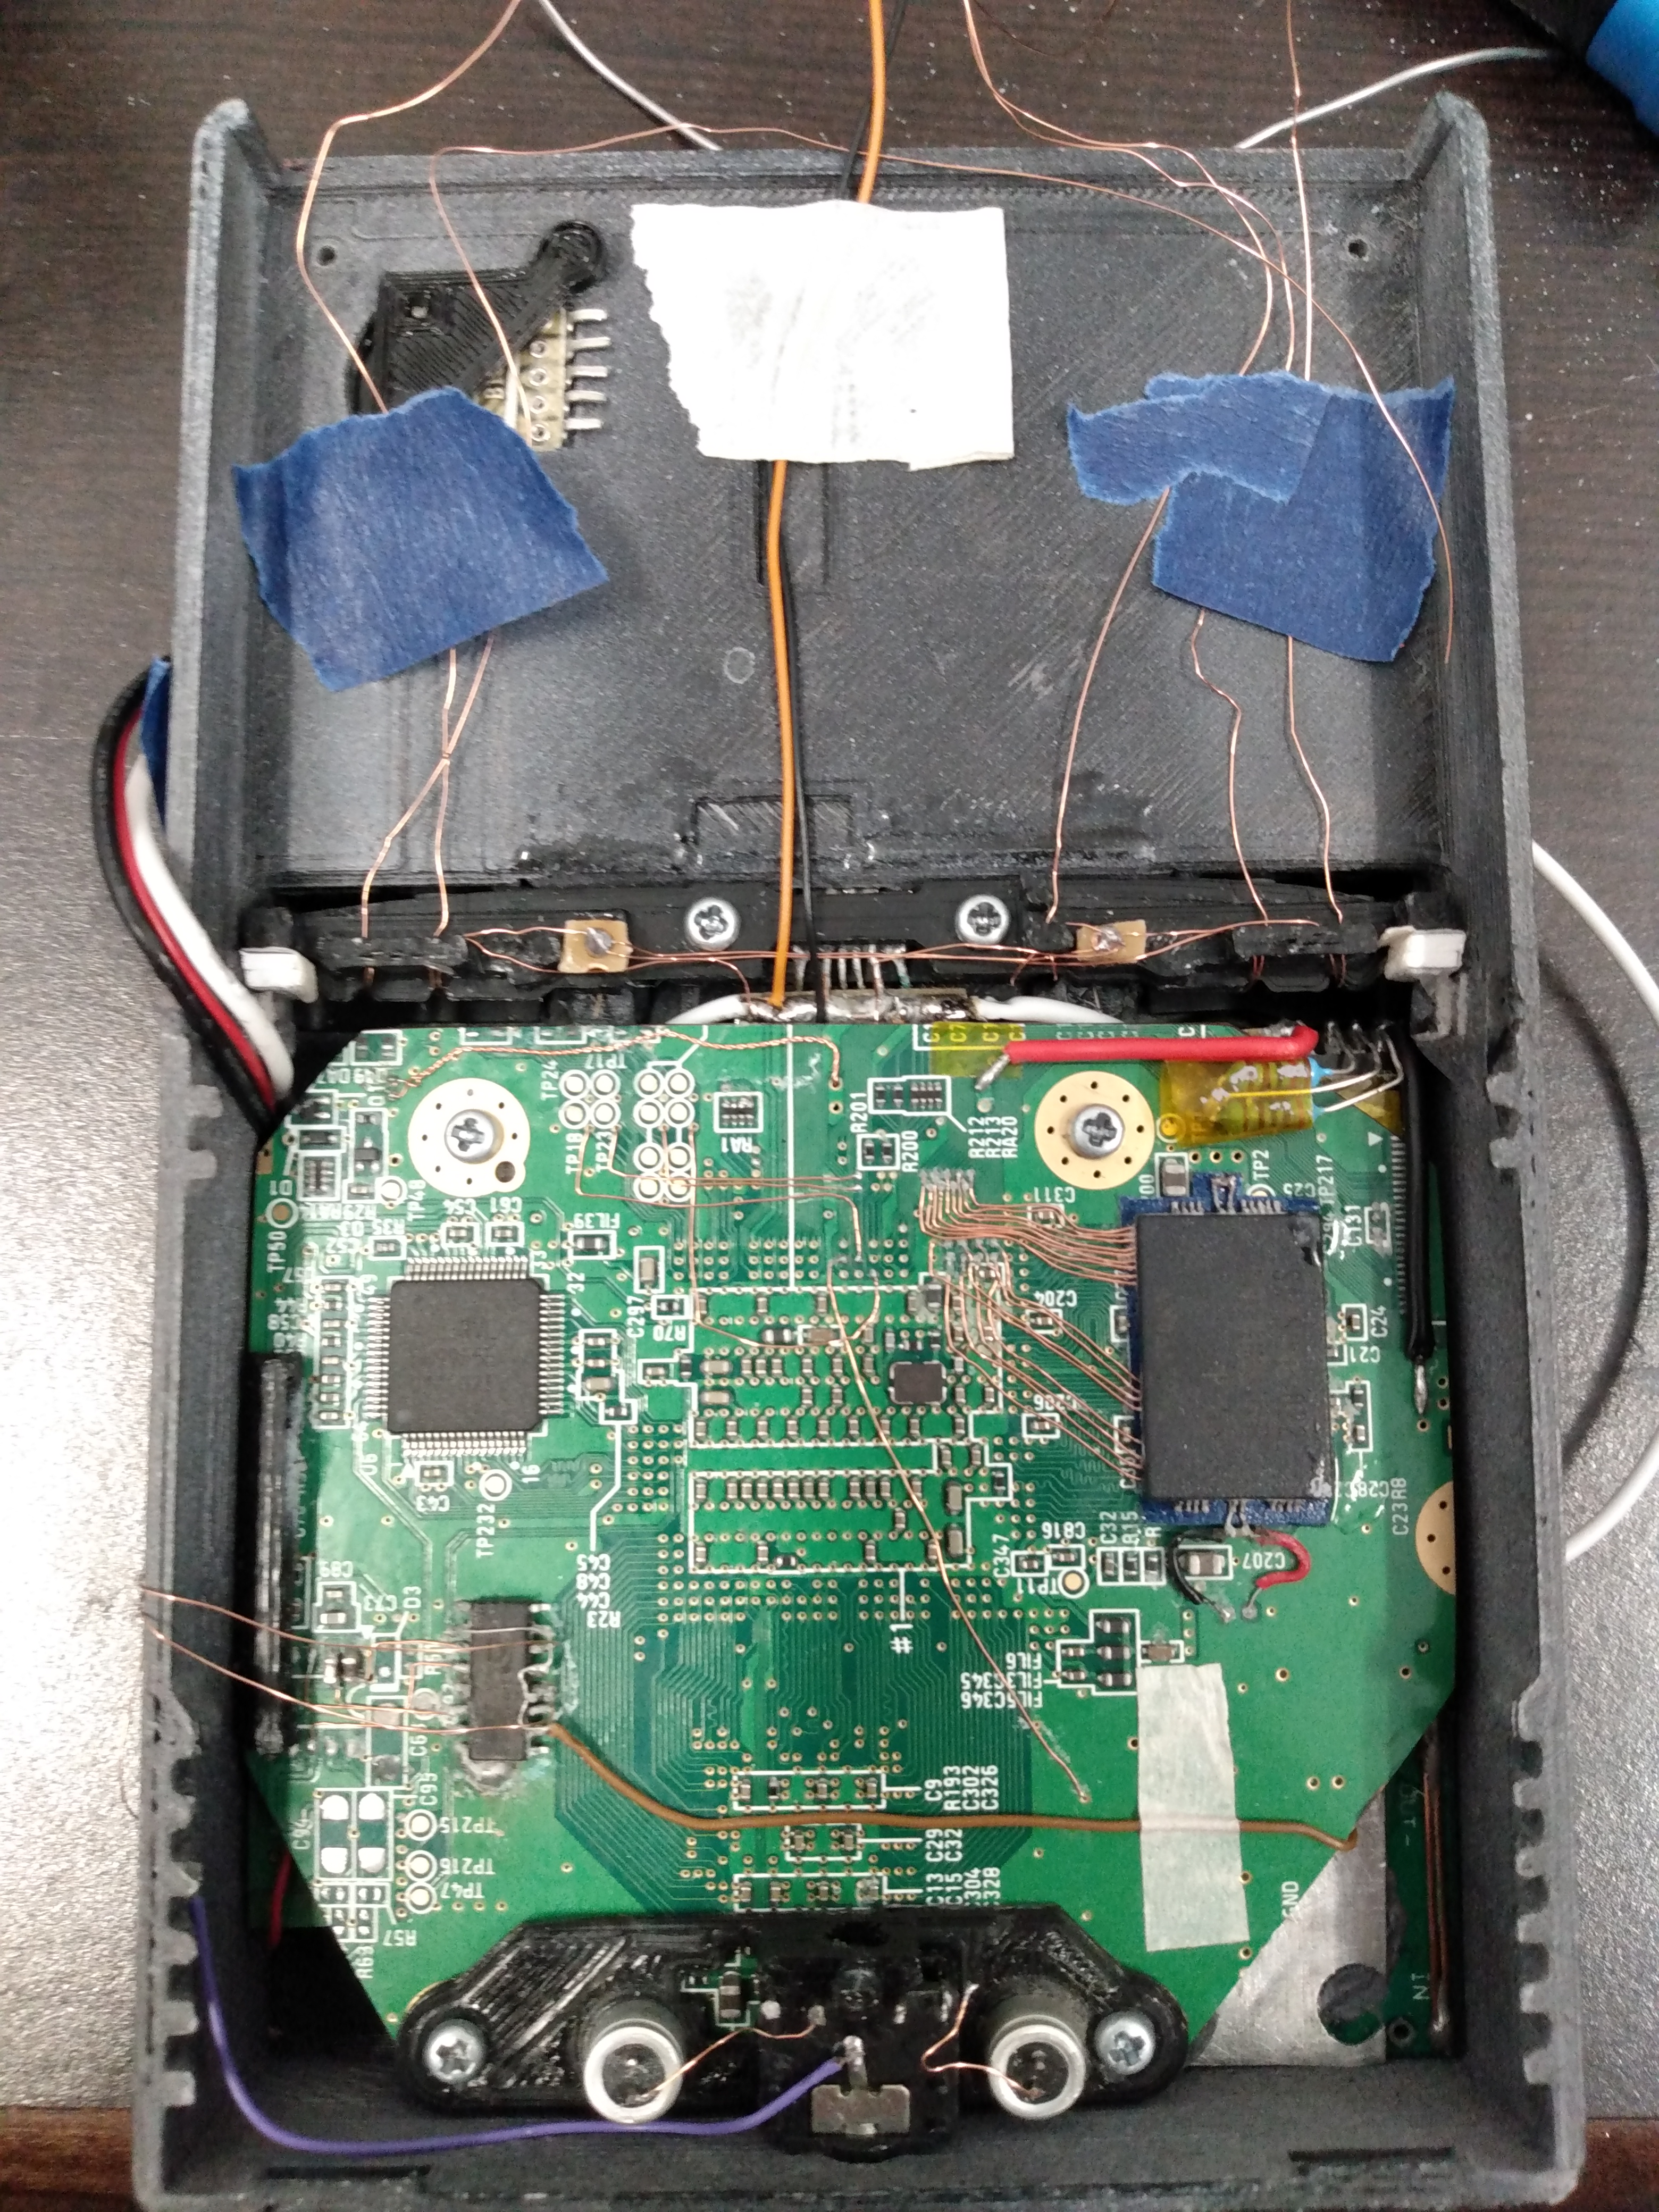
And of course the insides! I really tried to make everything as clean as possible, so that if there is any maintenance needed down the line it should be easy to find
Eventually I want to also rehouse the battery bank so that it also doubles as a protective case. Since I finished this before the entry deadline for the summer 2021 contest maybe that will be my entry haha
Here were some of my design goals I had throughout the whole process:
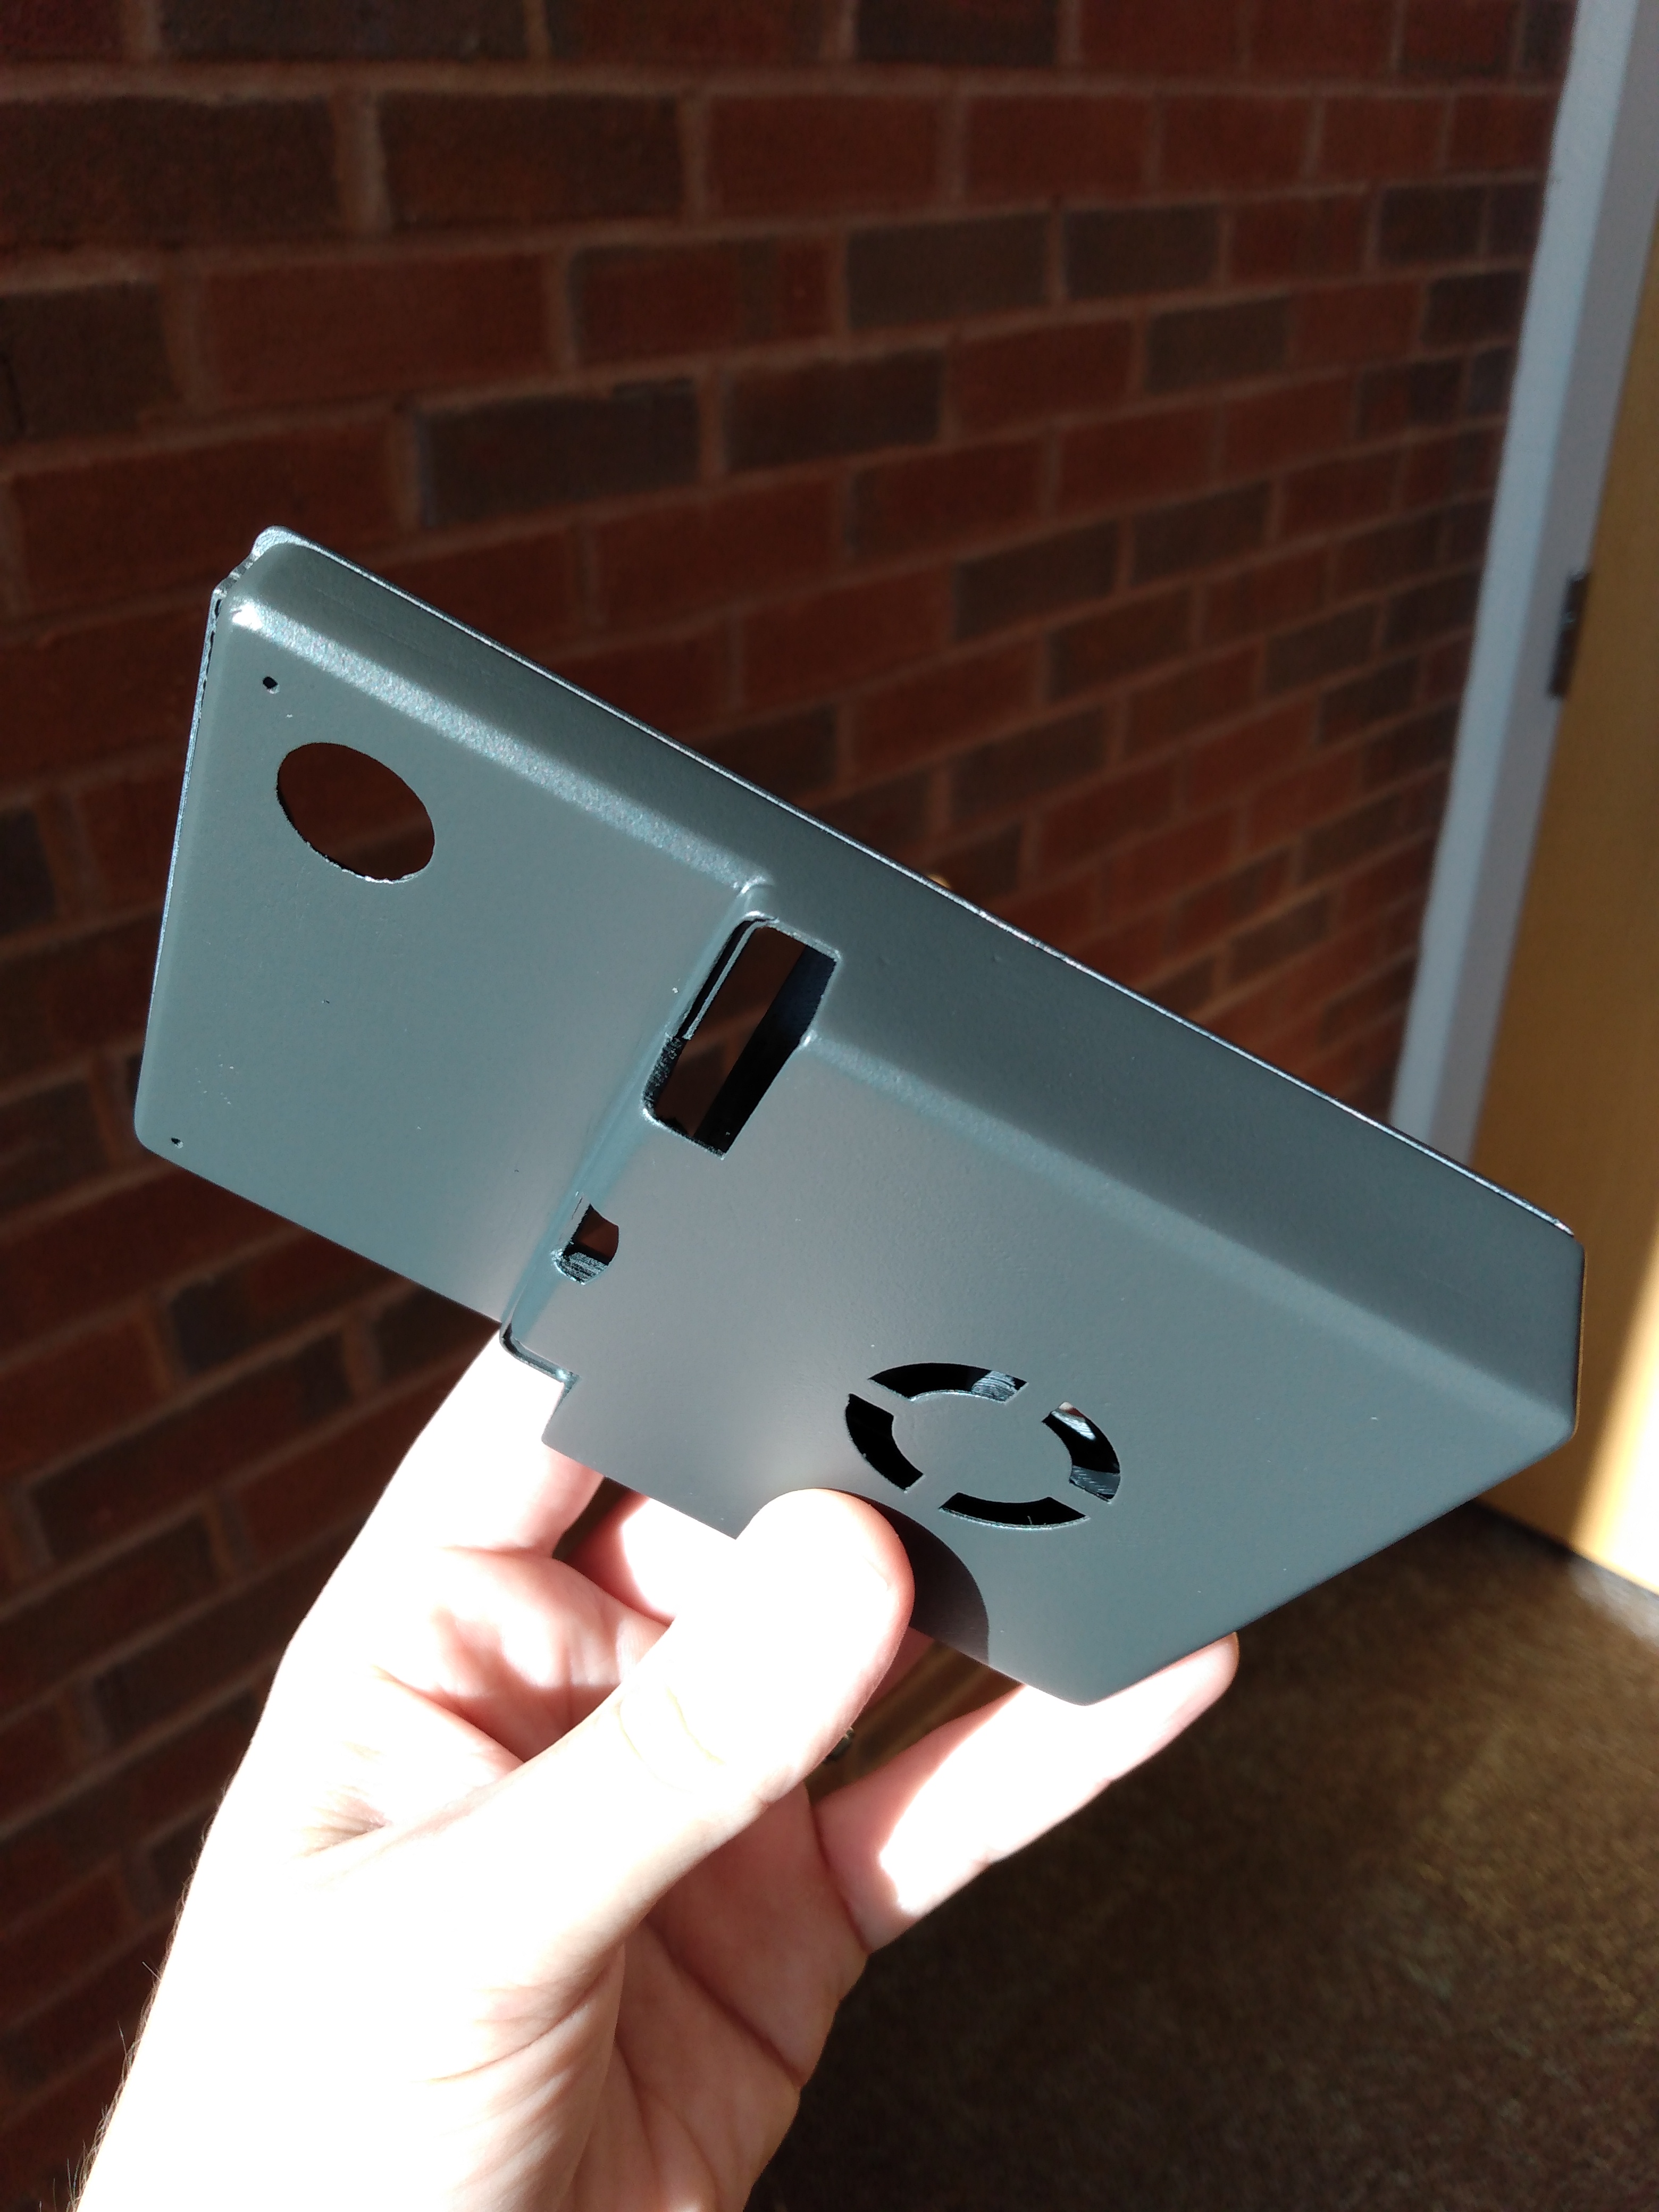
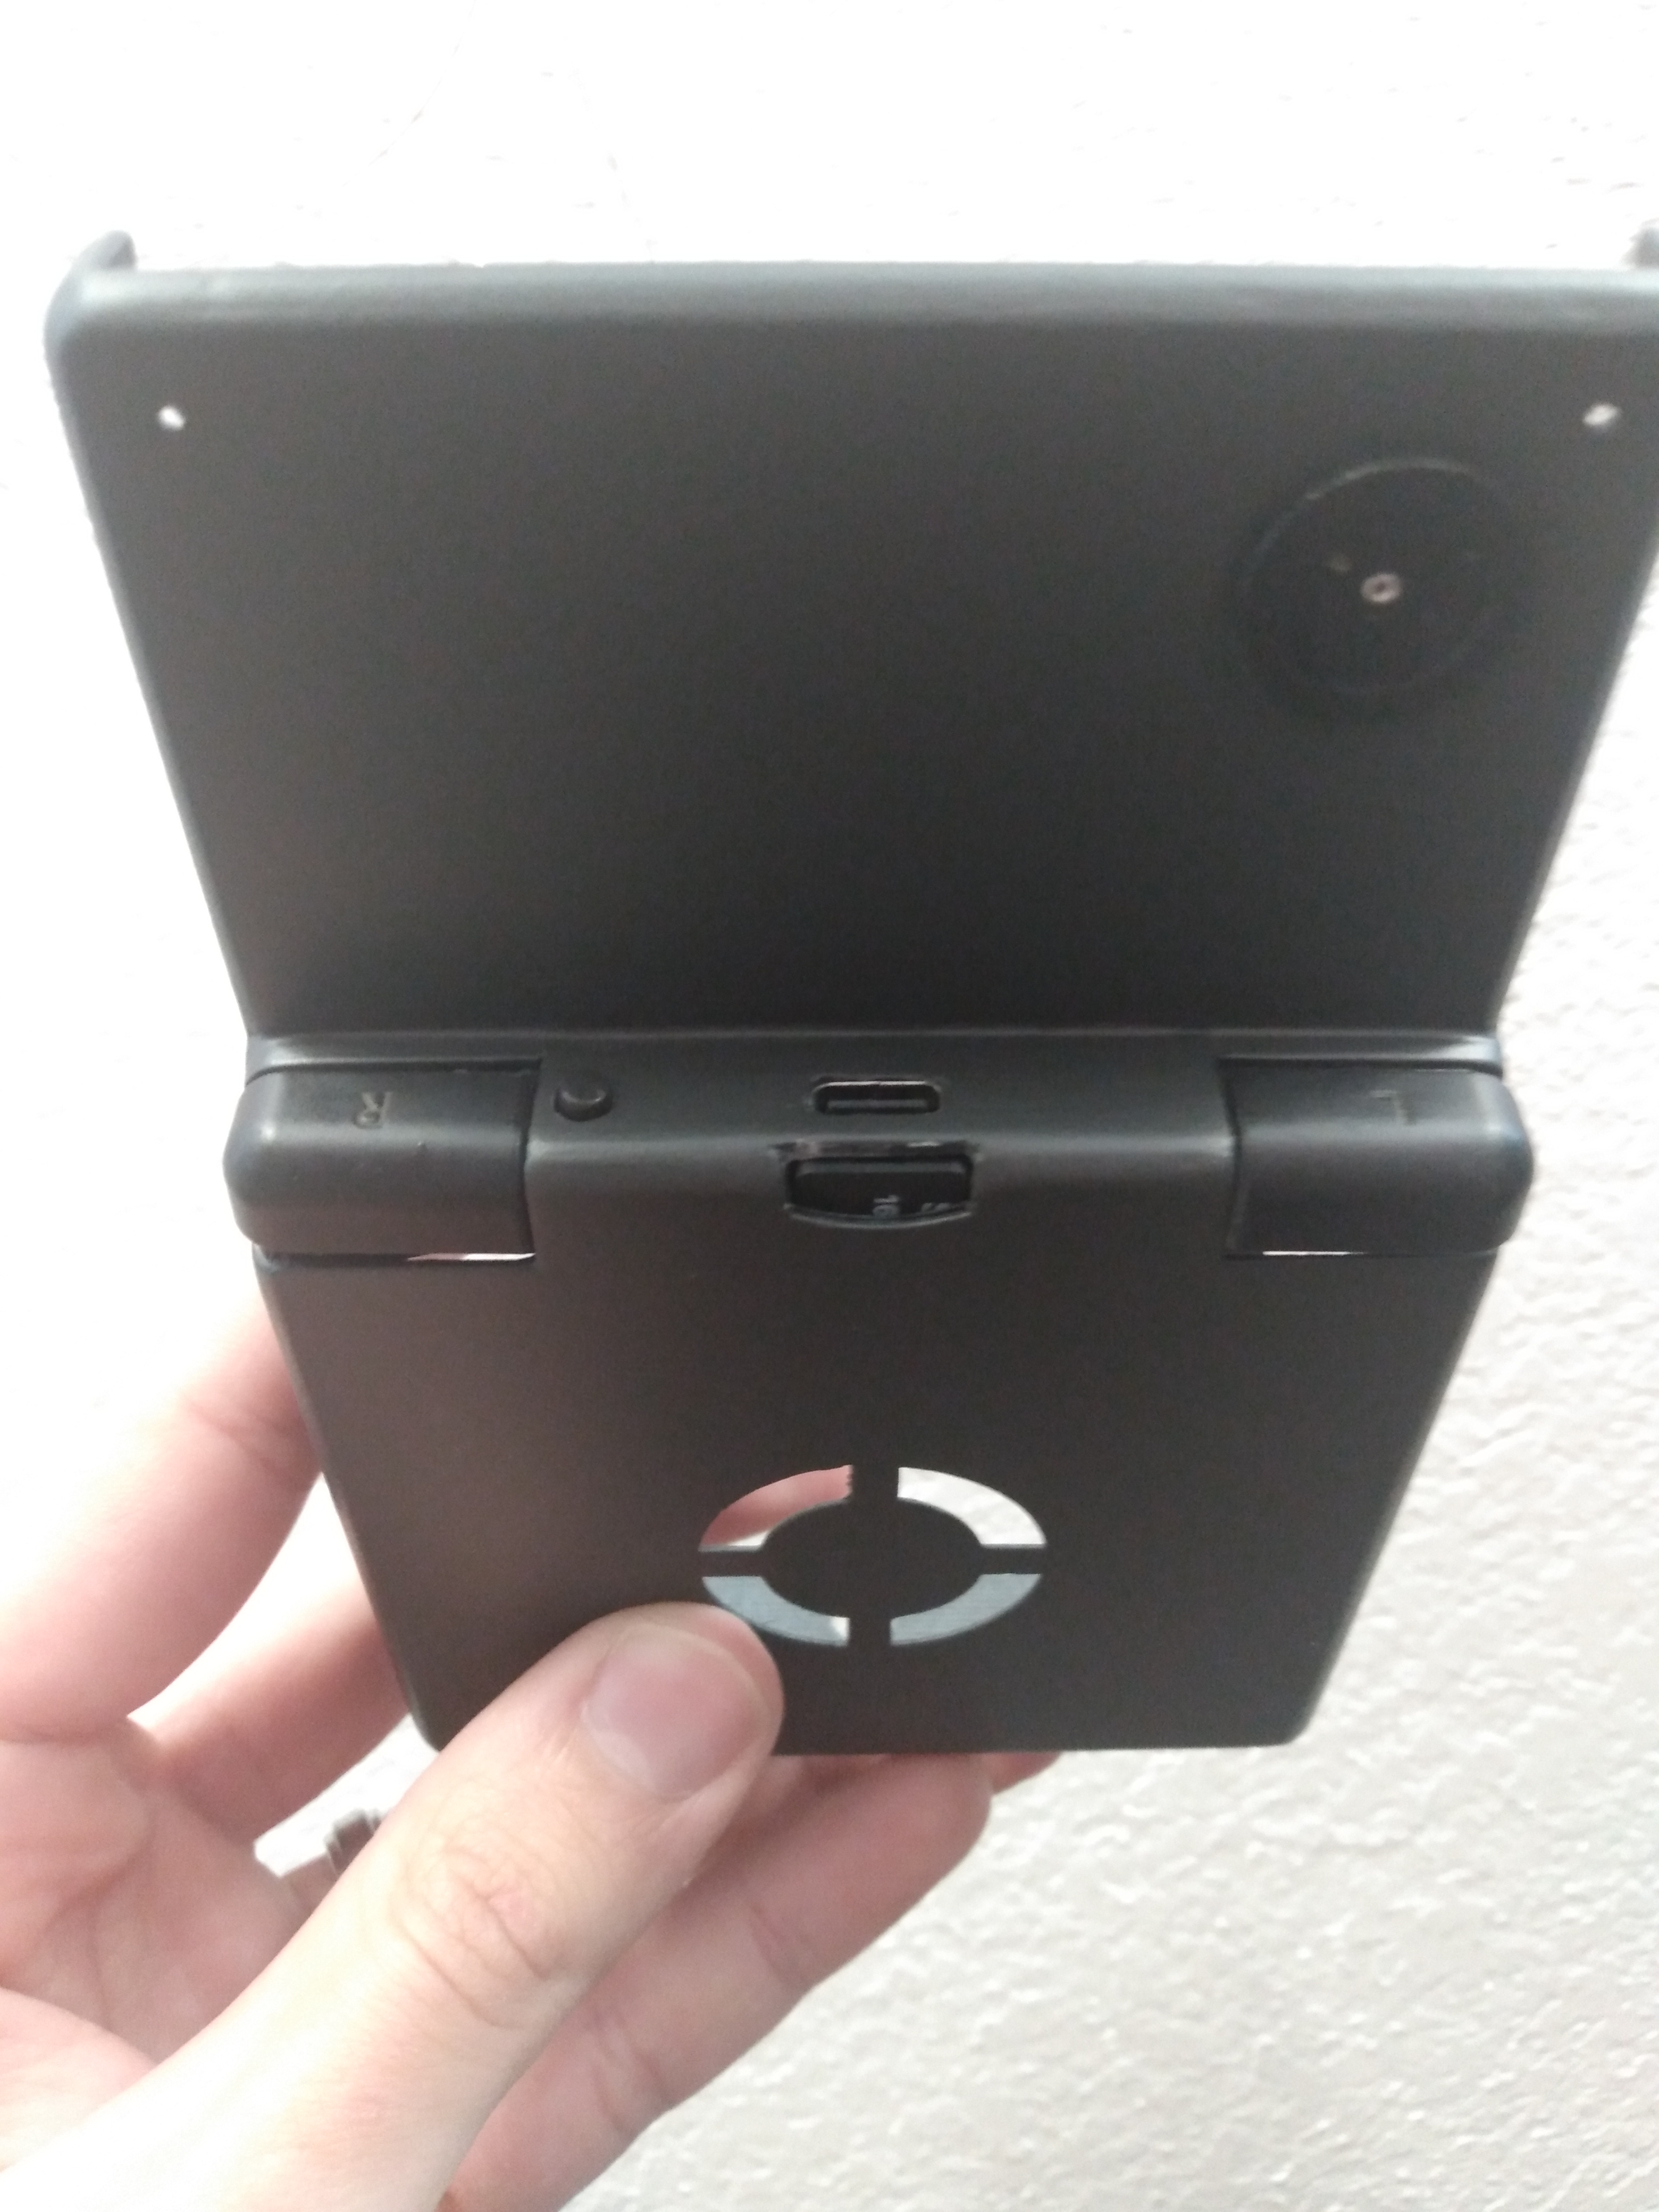
and then a picture showing what the locking mechanism looks like that holds the front half of the case to the bottom half without screws
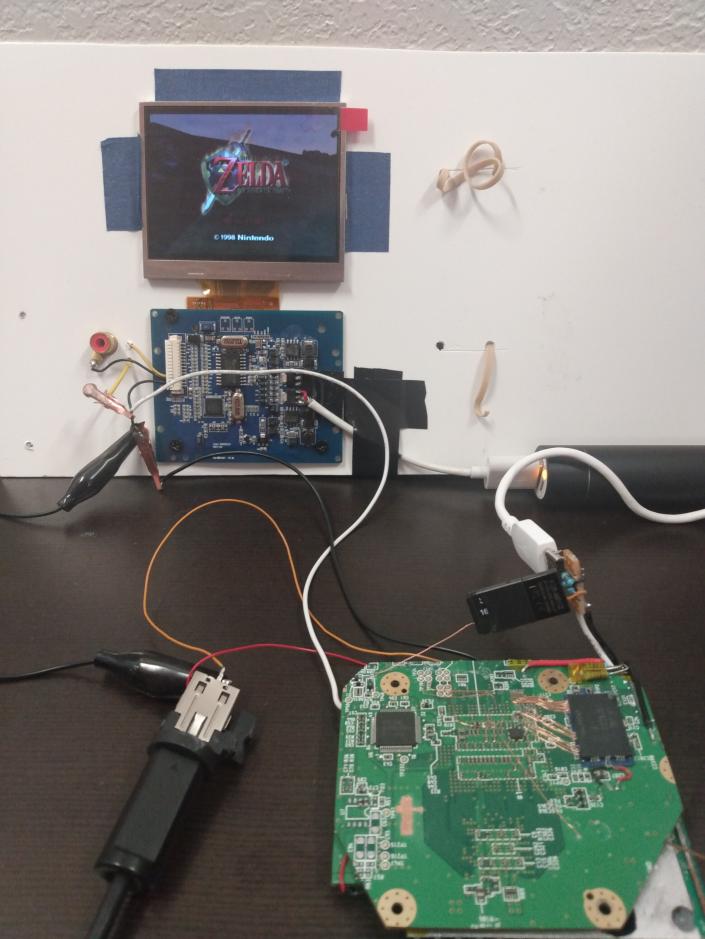
Proof it was working at one point haha (You can't play VC N64 games without it)

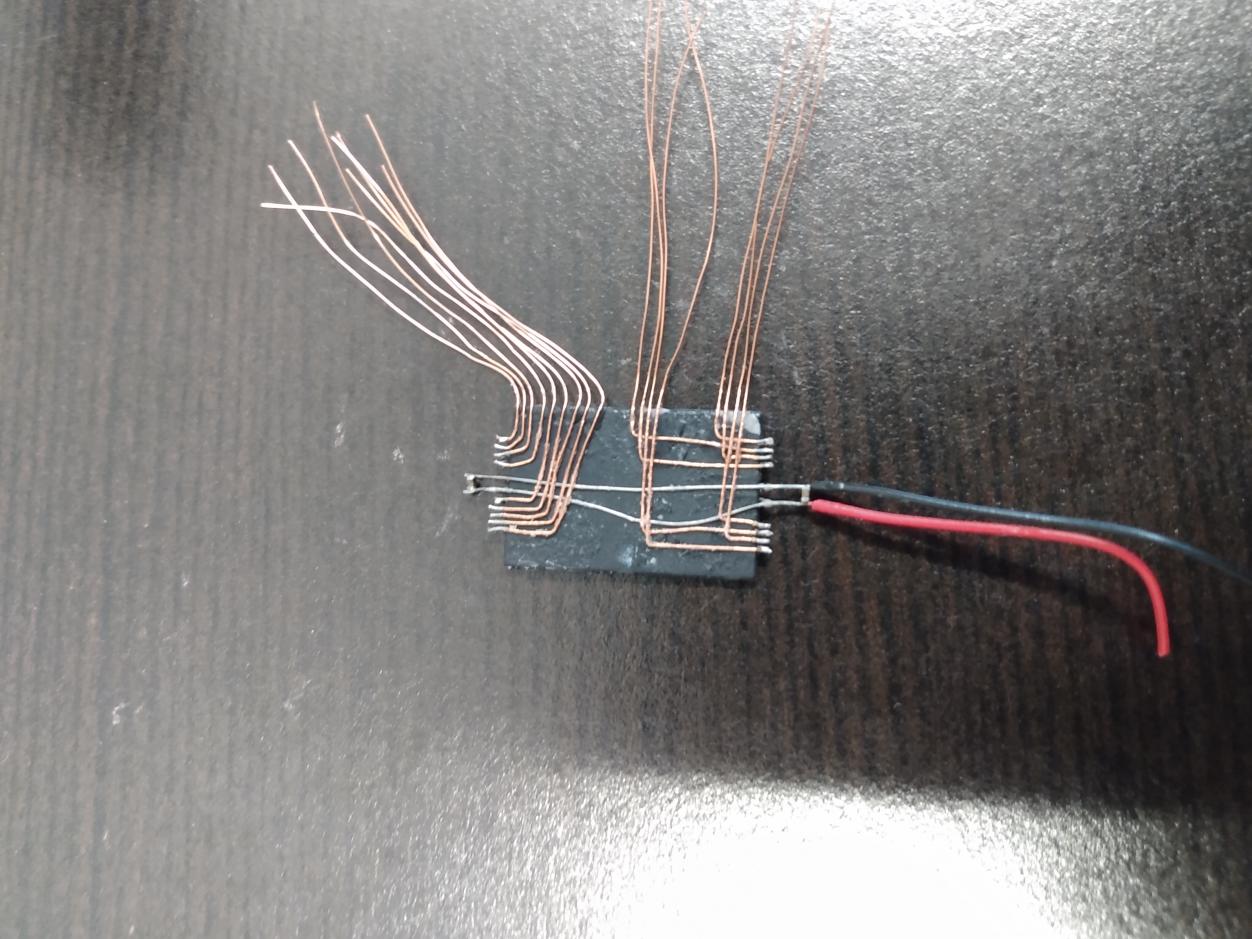
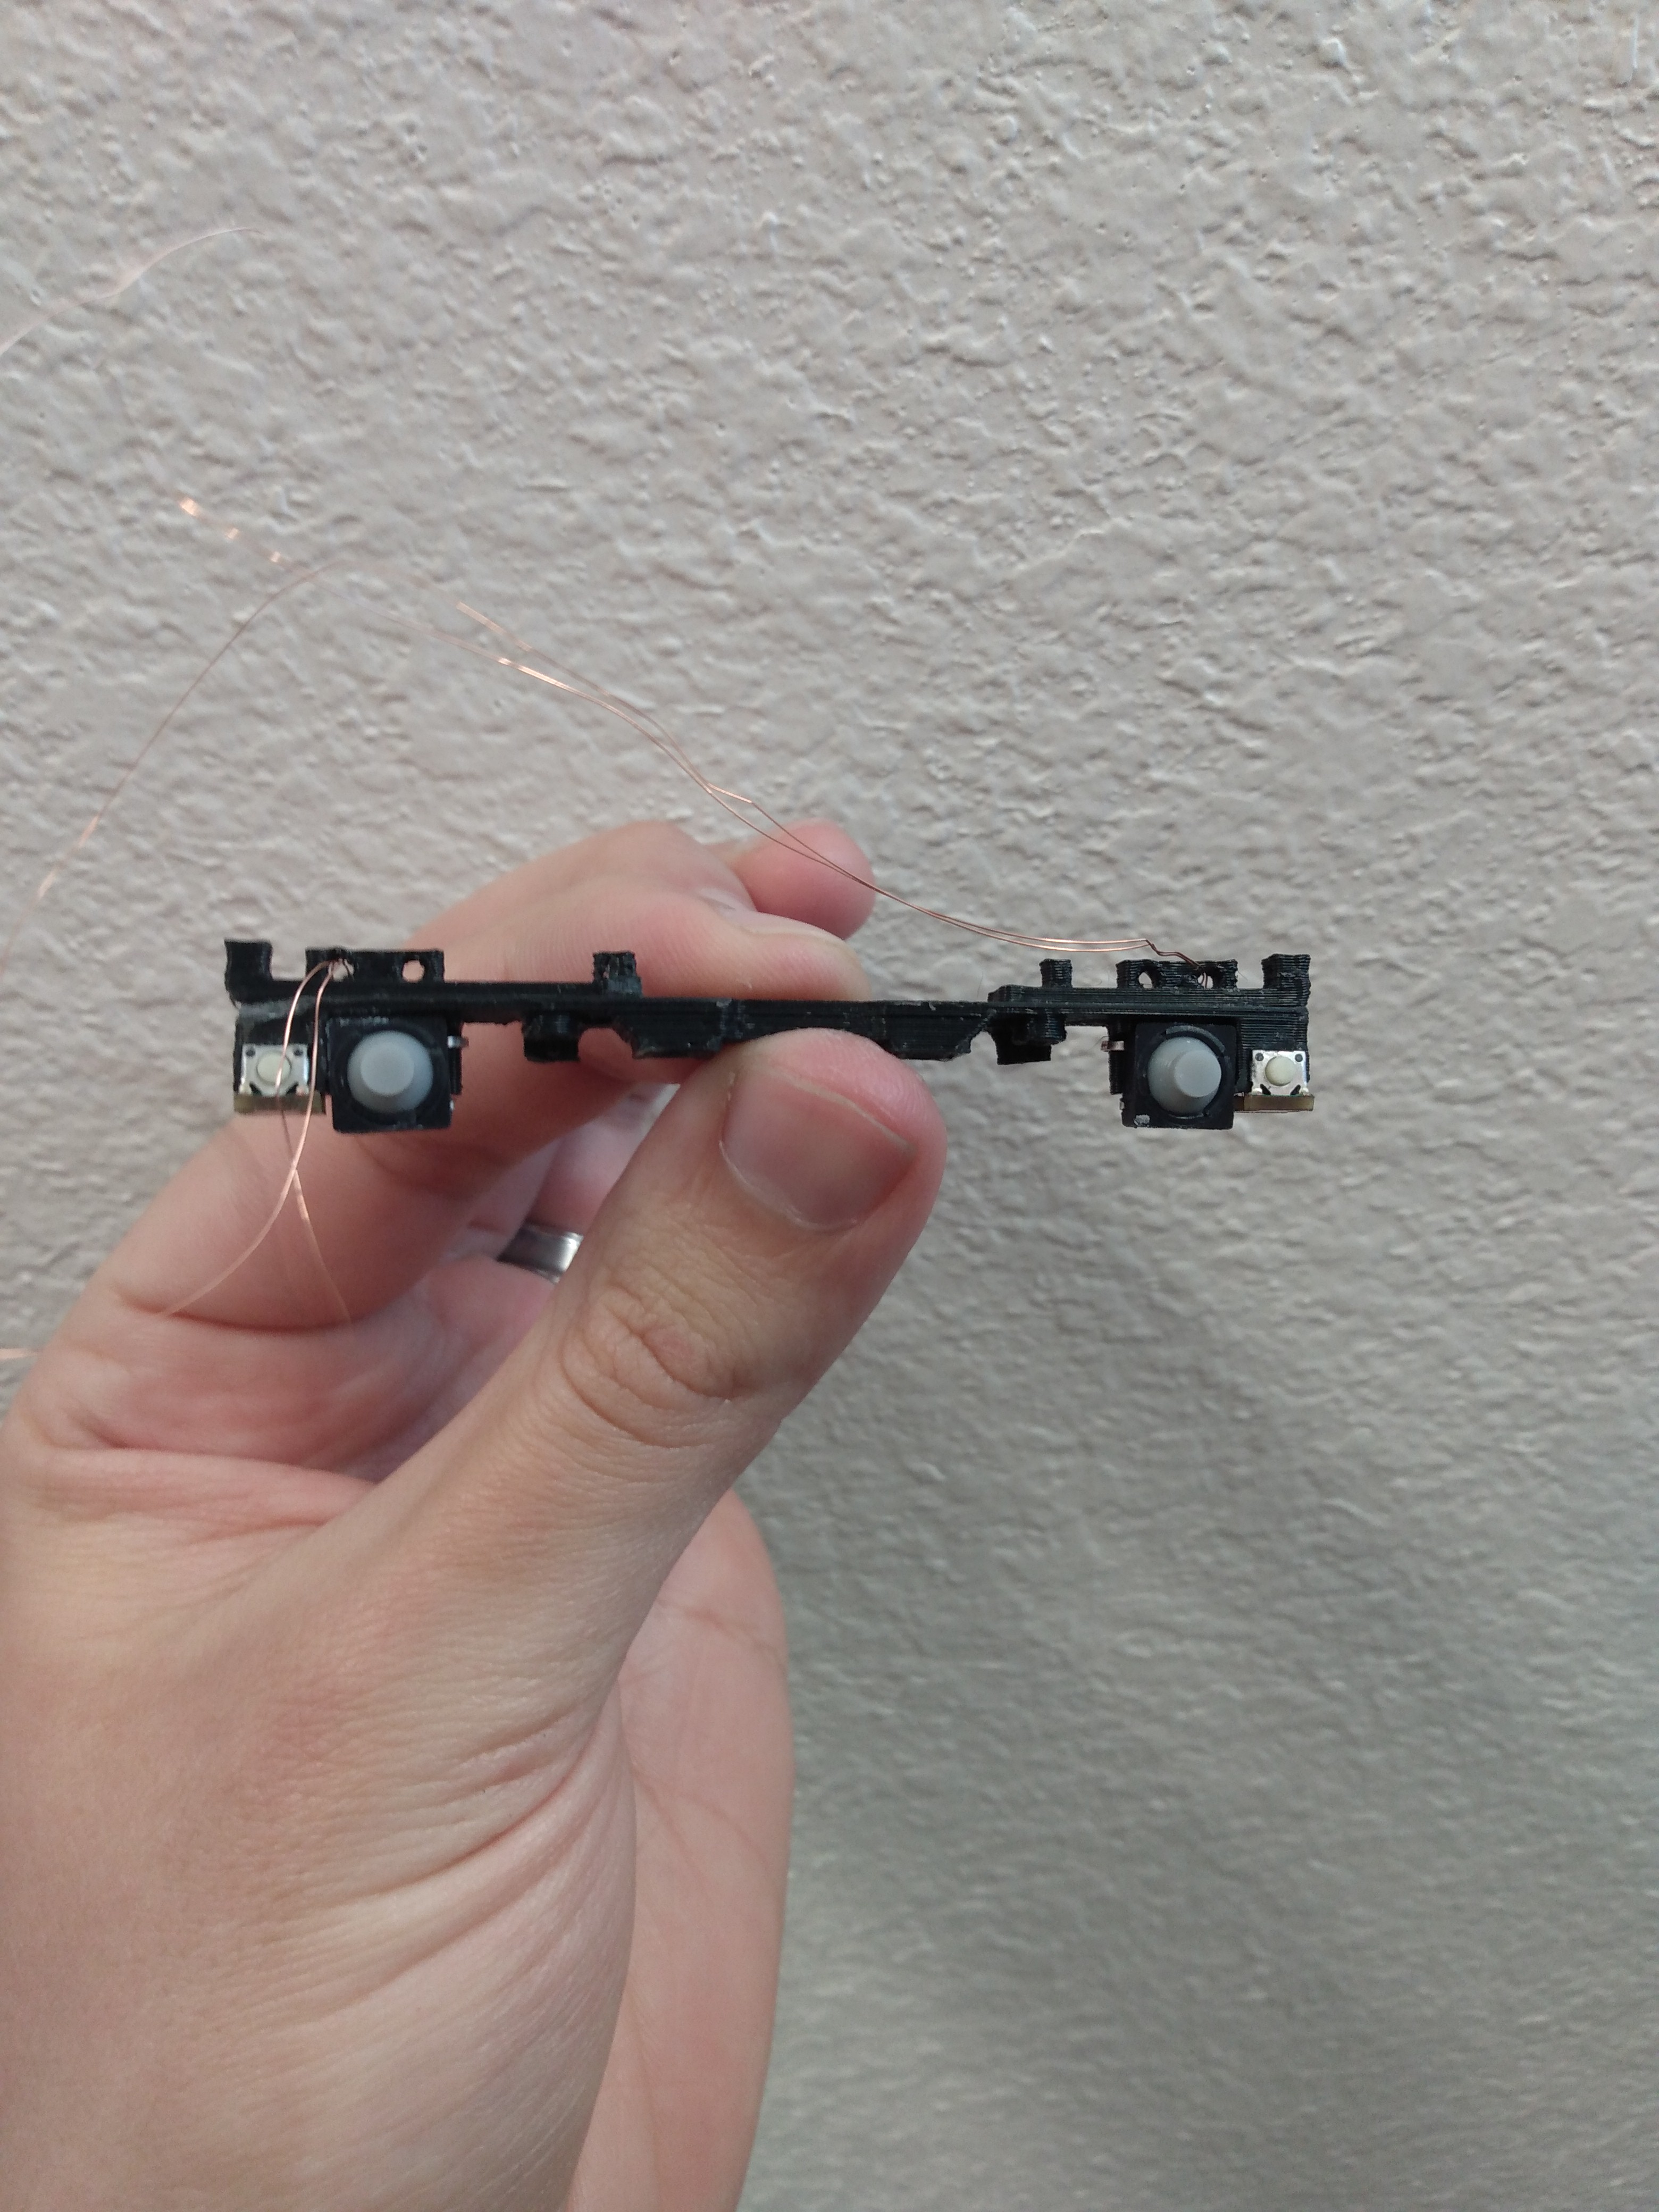
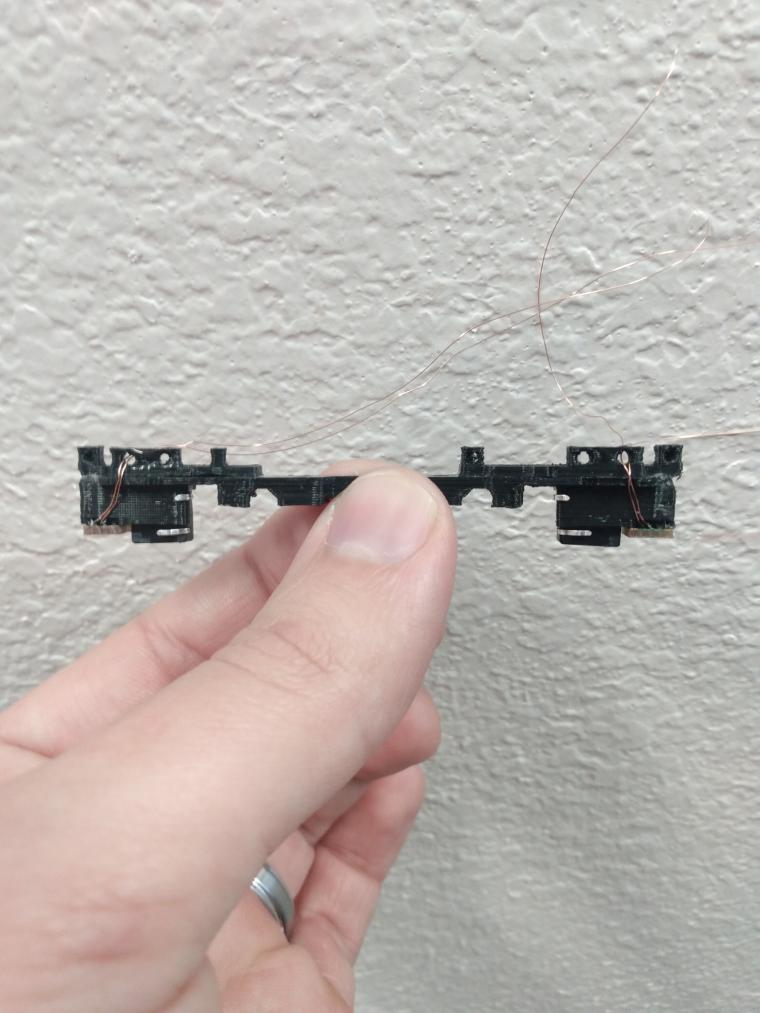
These are the brackets I modeled to hold the dual tacts and also the USB-C Jack
Like many portabilizers before me, after completing my first two projects, I decided to jump into the deep end and finally build a handheld wii. Here are some final pictures of the build and some comparison shots with an OEM gamecube controller so that you can get the idea of size. It was a long road from conception to execution, but I am pretty ecstatic with the finished product.
And of course the insides! I really tried to make everything as clean as possible, so that if there is any maintenance needed down the line it should be easy to find
Eventually I want to also rehouse the battery bank so that it also doubles as a protective case. Since I finished this before the entry deadline for the summer 2021 contest maybe that will be my entry haha
Here were some of my design goals I had throughout the whole process:
- To keep the entire cost of the project as cheap as possible without having an awful end product
- To not utilize any custom pcbs as I do not yet have any pcb design skills yet
- To be as thrifty as possible and utilize the parts that I already had on hand(more on this later)
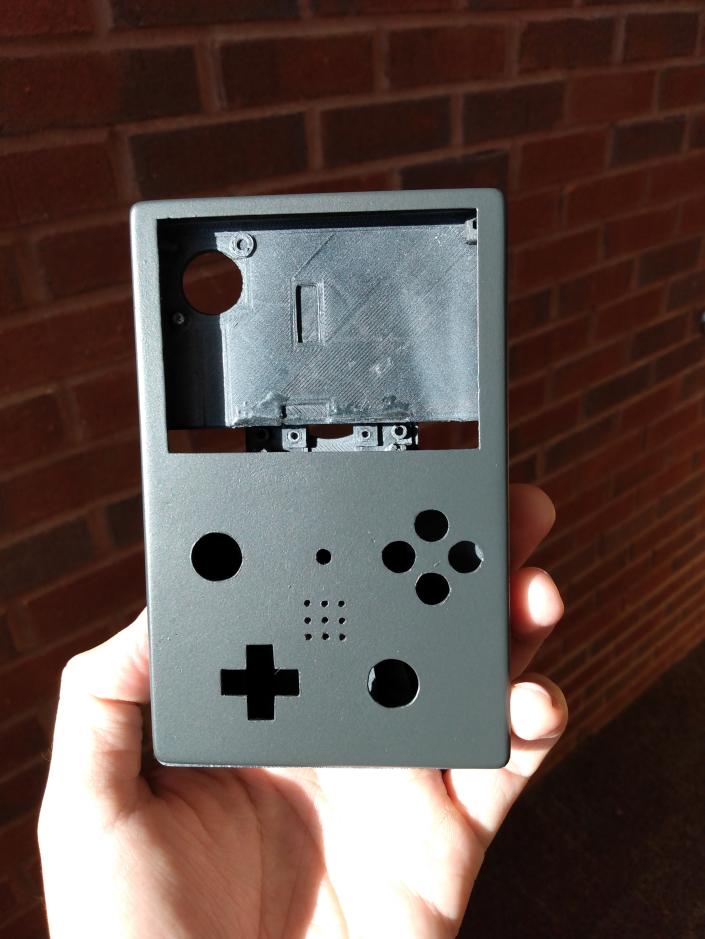
- To utilize the DS Lite buttons, membranes, shoulder buttons, shoulder tact switches, springs, screws, and the trimmed motherboard to use as the contacts.
- To have dual action tacts
- To 3d print the shell since my first foray frankencasing my wii laptop was waaayyyy too much work
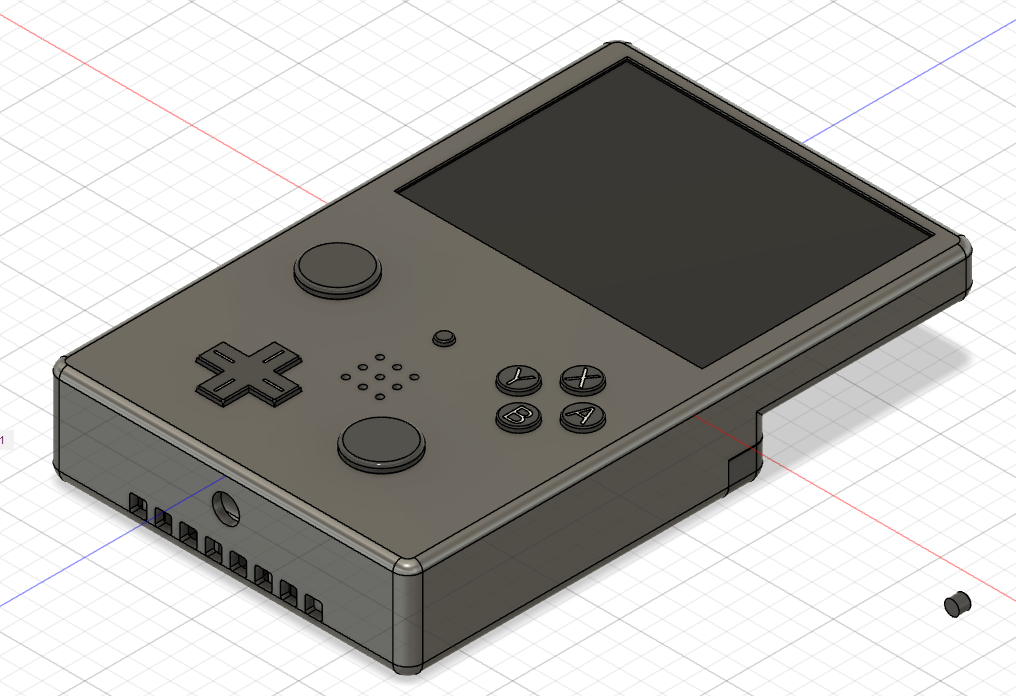
- To make the size in all dimensions as small as possible. (it ended up being 132mmx85mmx24mm)
- No hot glue!
- And for it to look good. I like the all gray/black look.
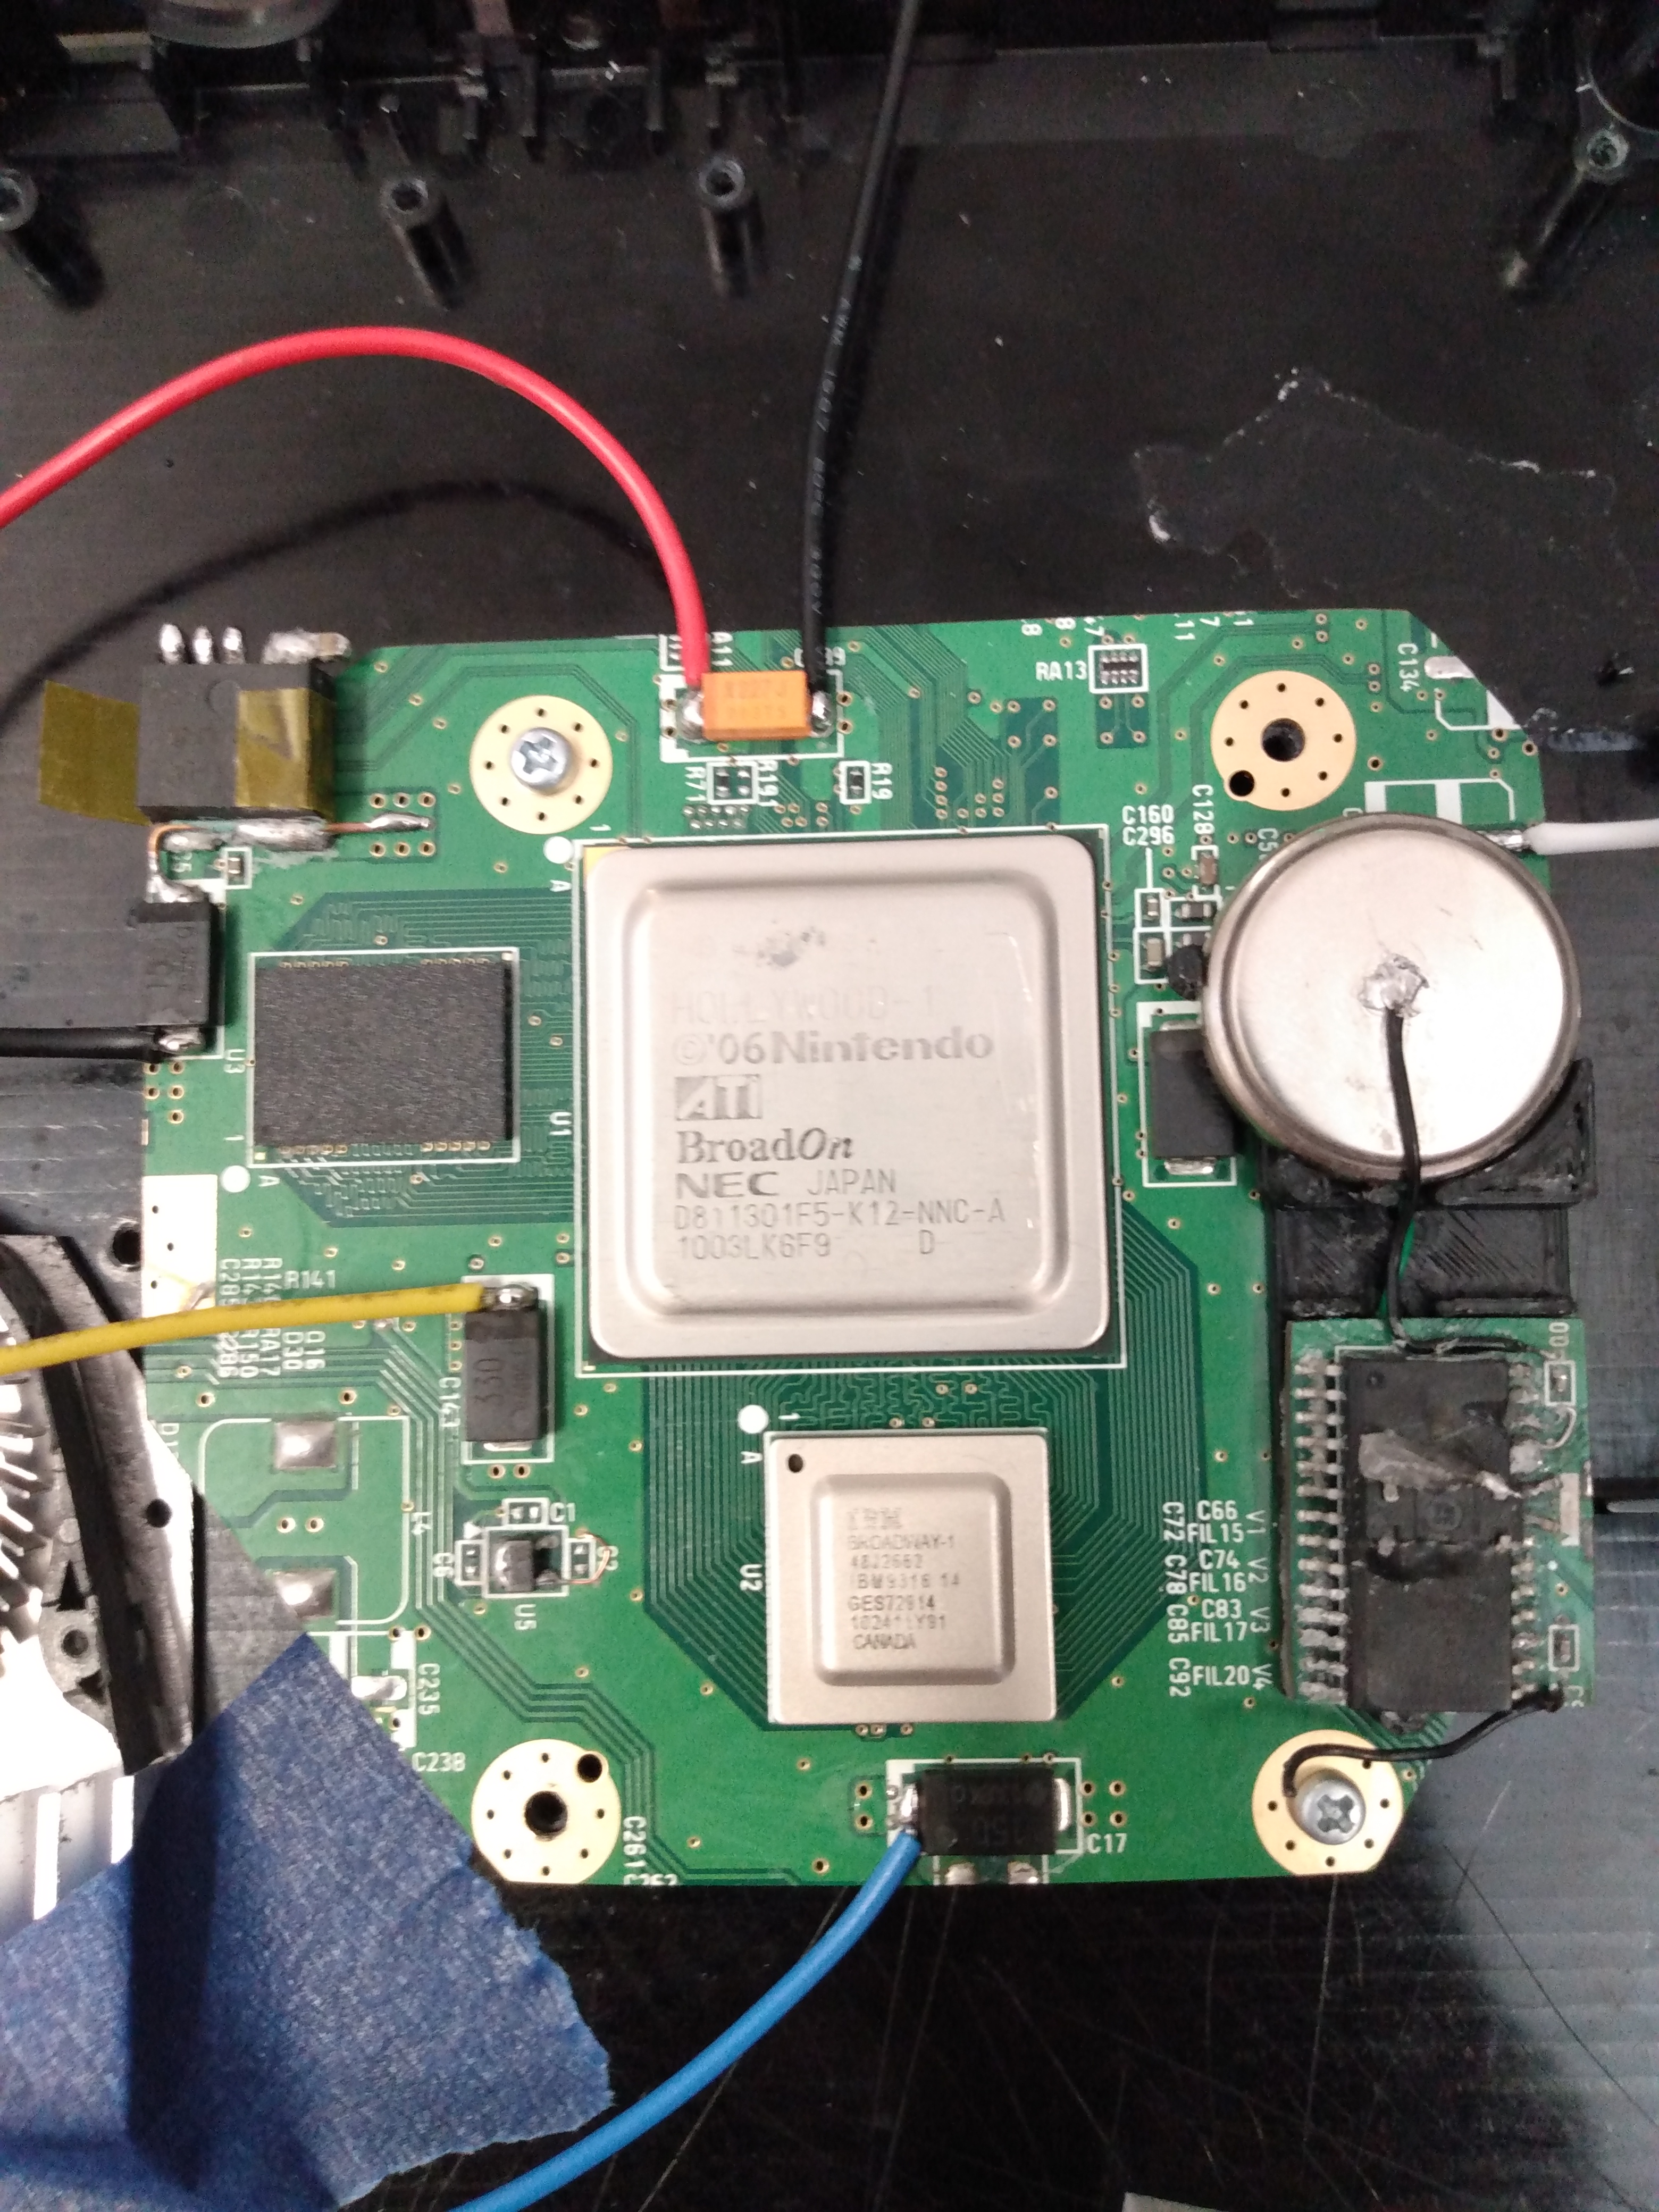
- LMAO v2-trimmed wii motherboard with a full nand relocation (without the flex)
- 3D printed case that I epoxied together and then spray painted with chalk paint since the printer I had access to only had a 120^3 bed size. It is also only held together by 2 screws and a sliding/locking mechanism so that it is easy to disassemble
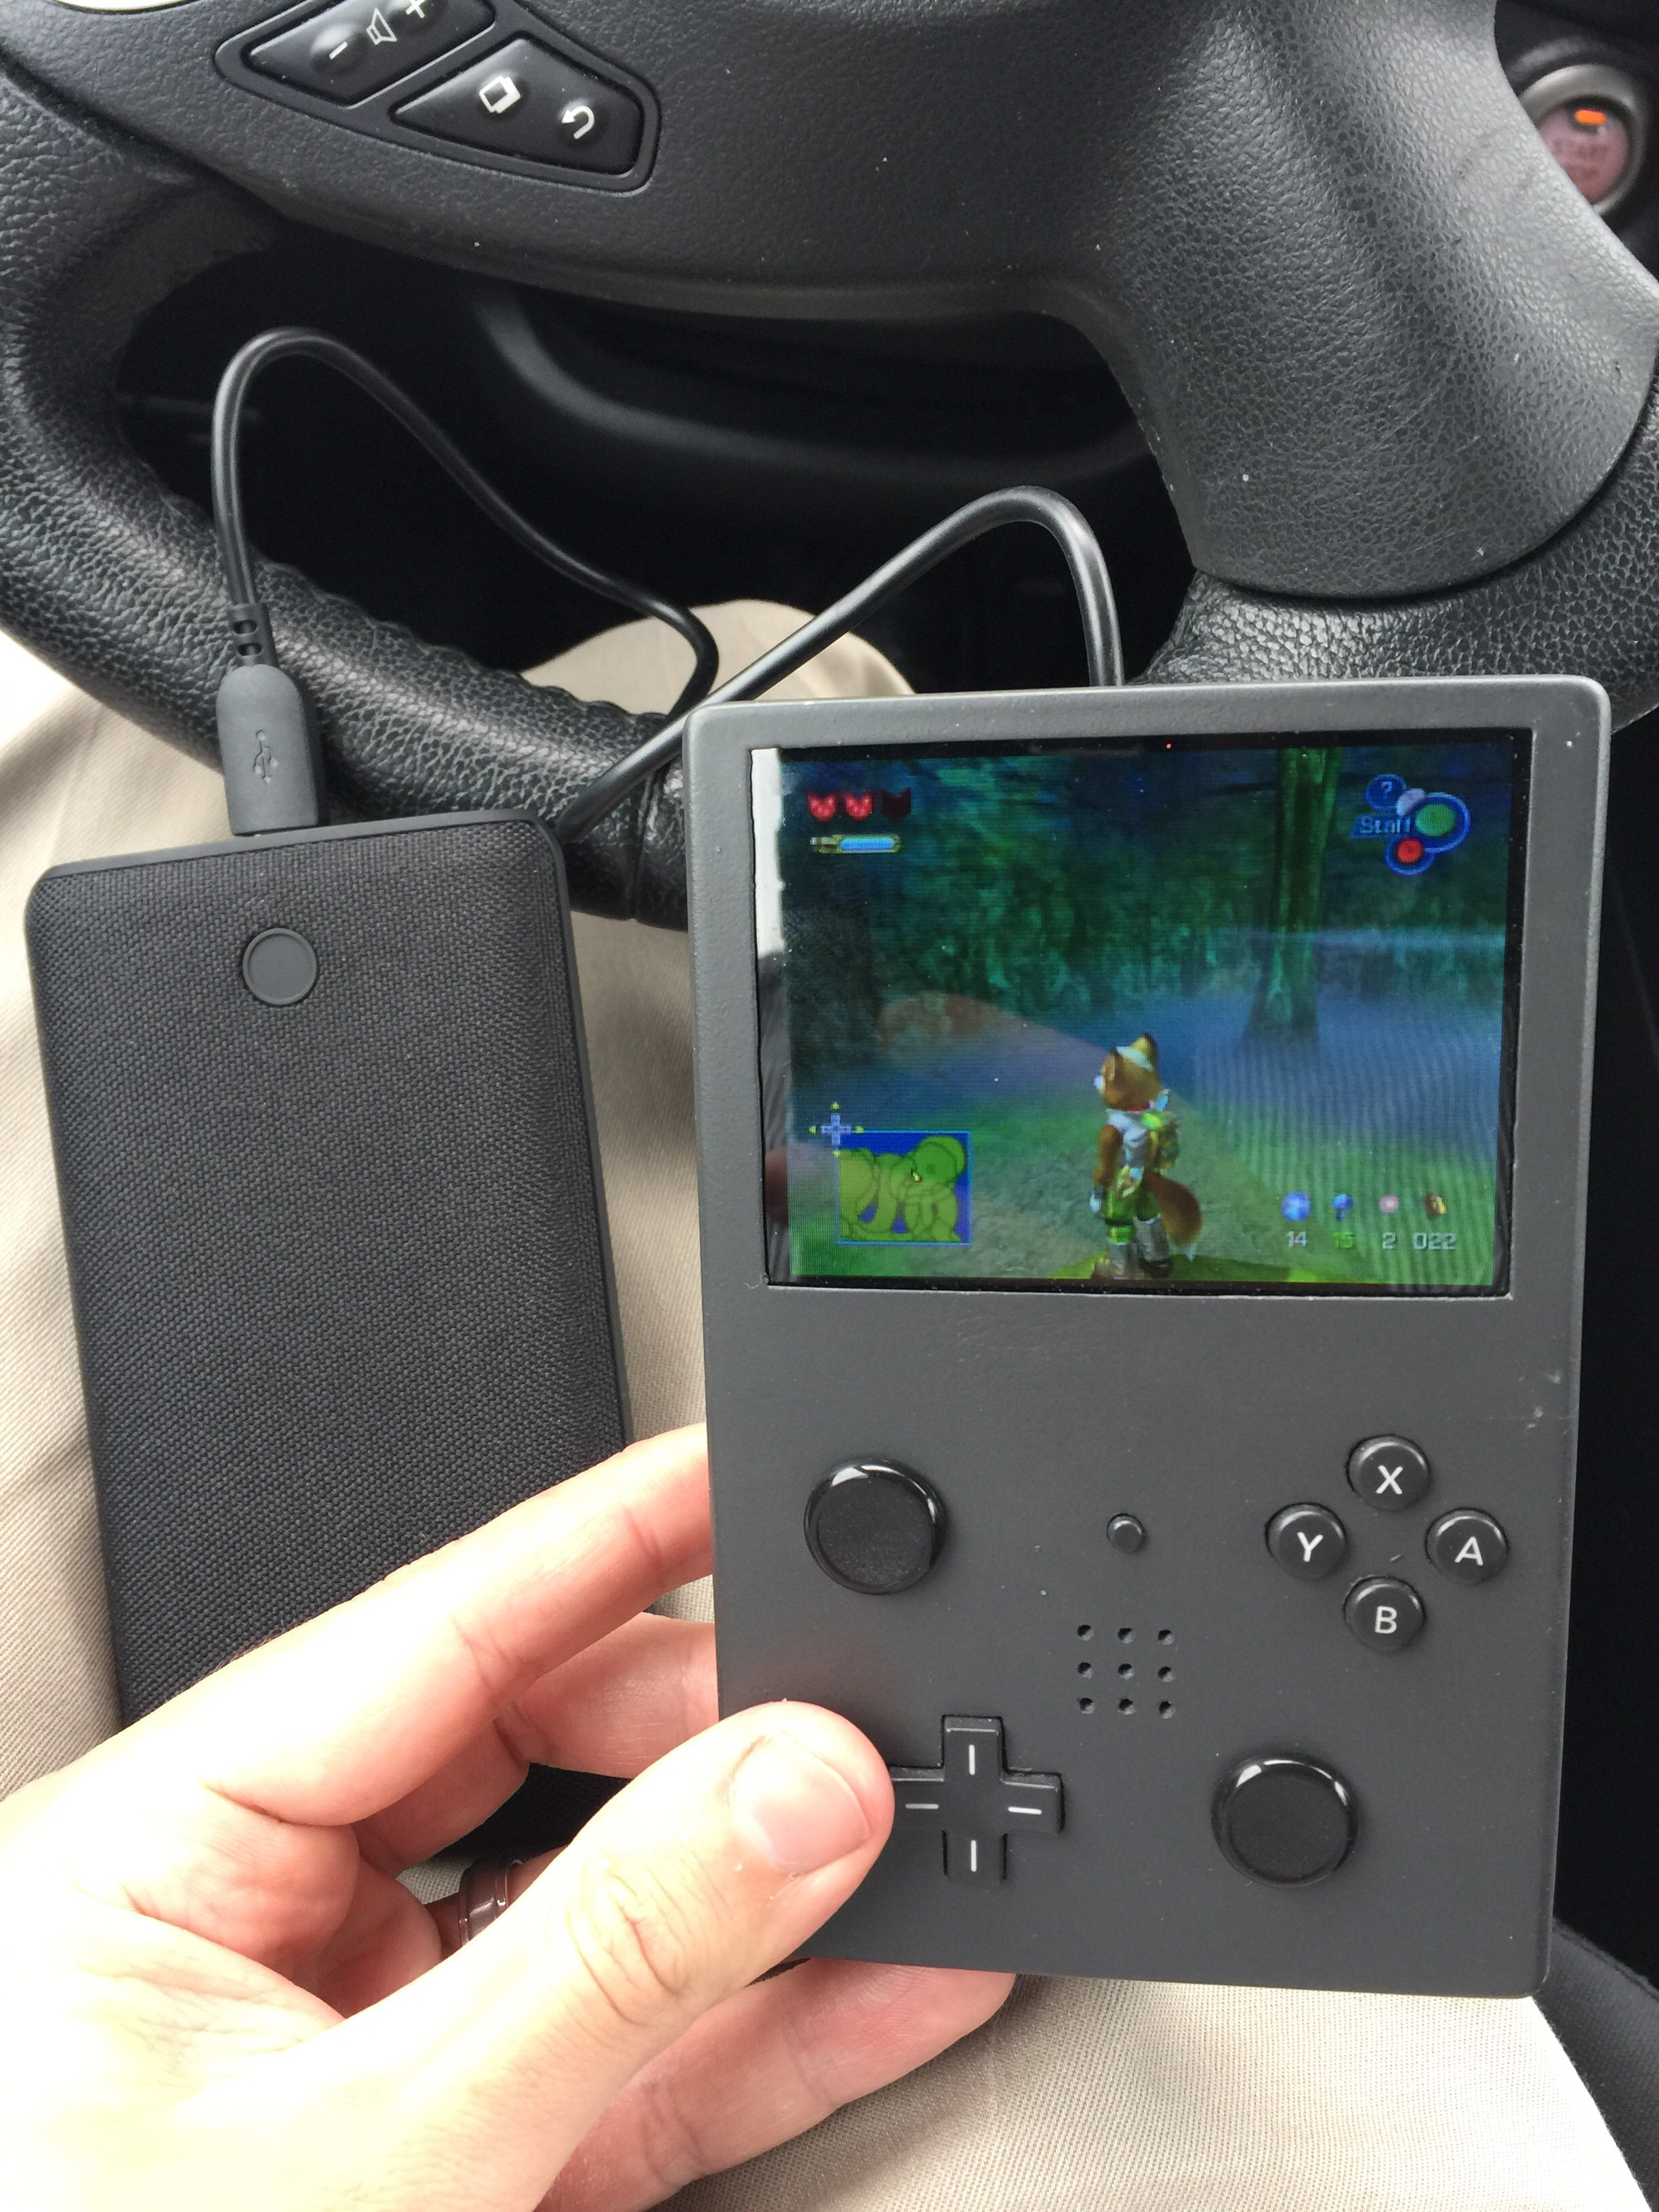
- 3.5” inch composite screen via the cheap $10 320x240 Tianma Screen
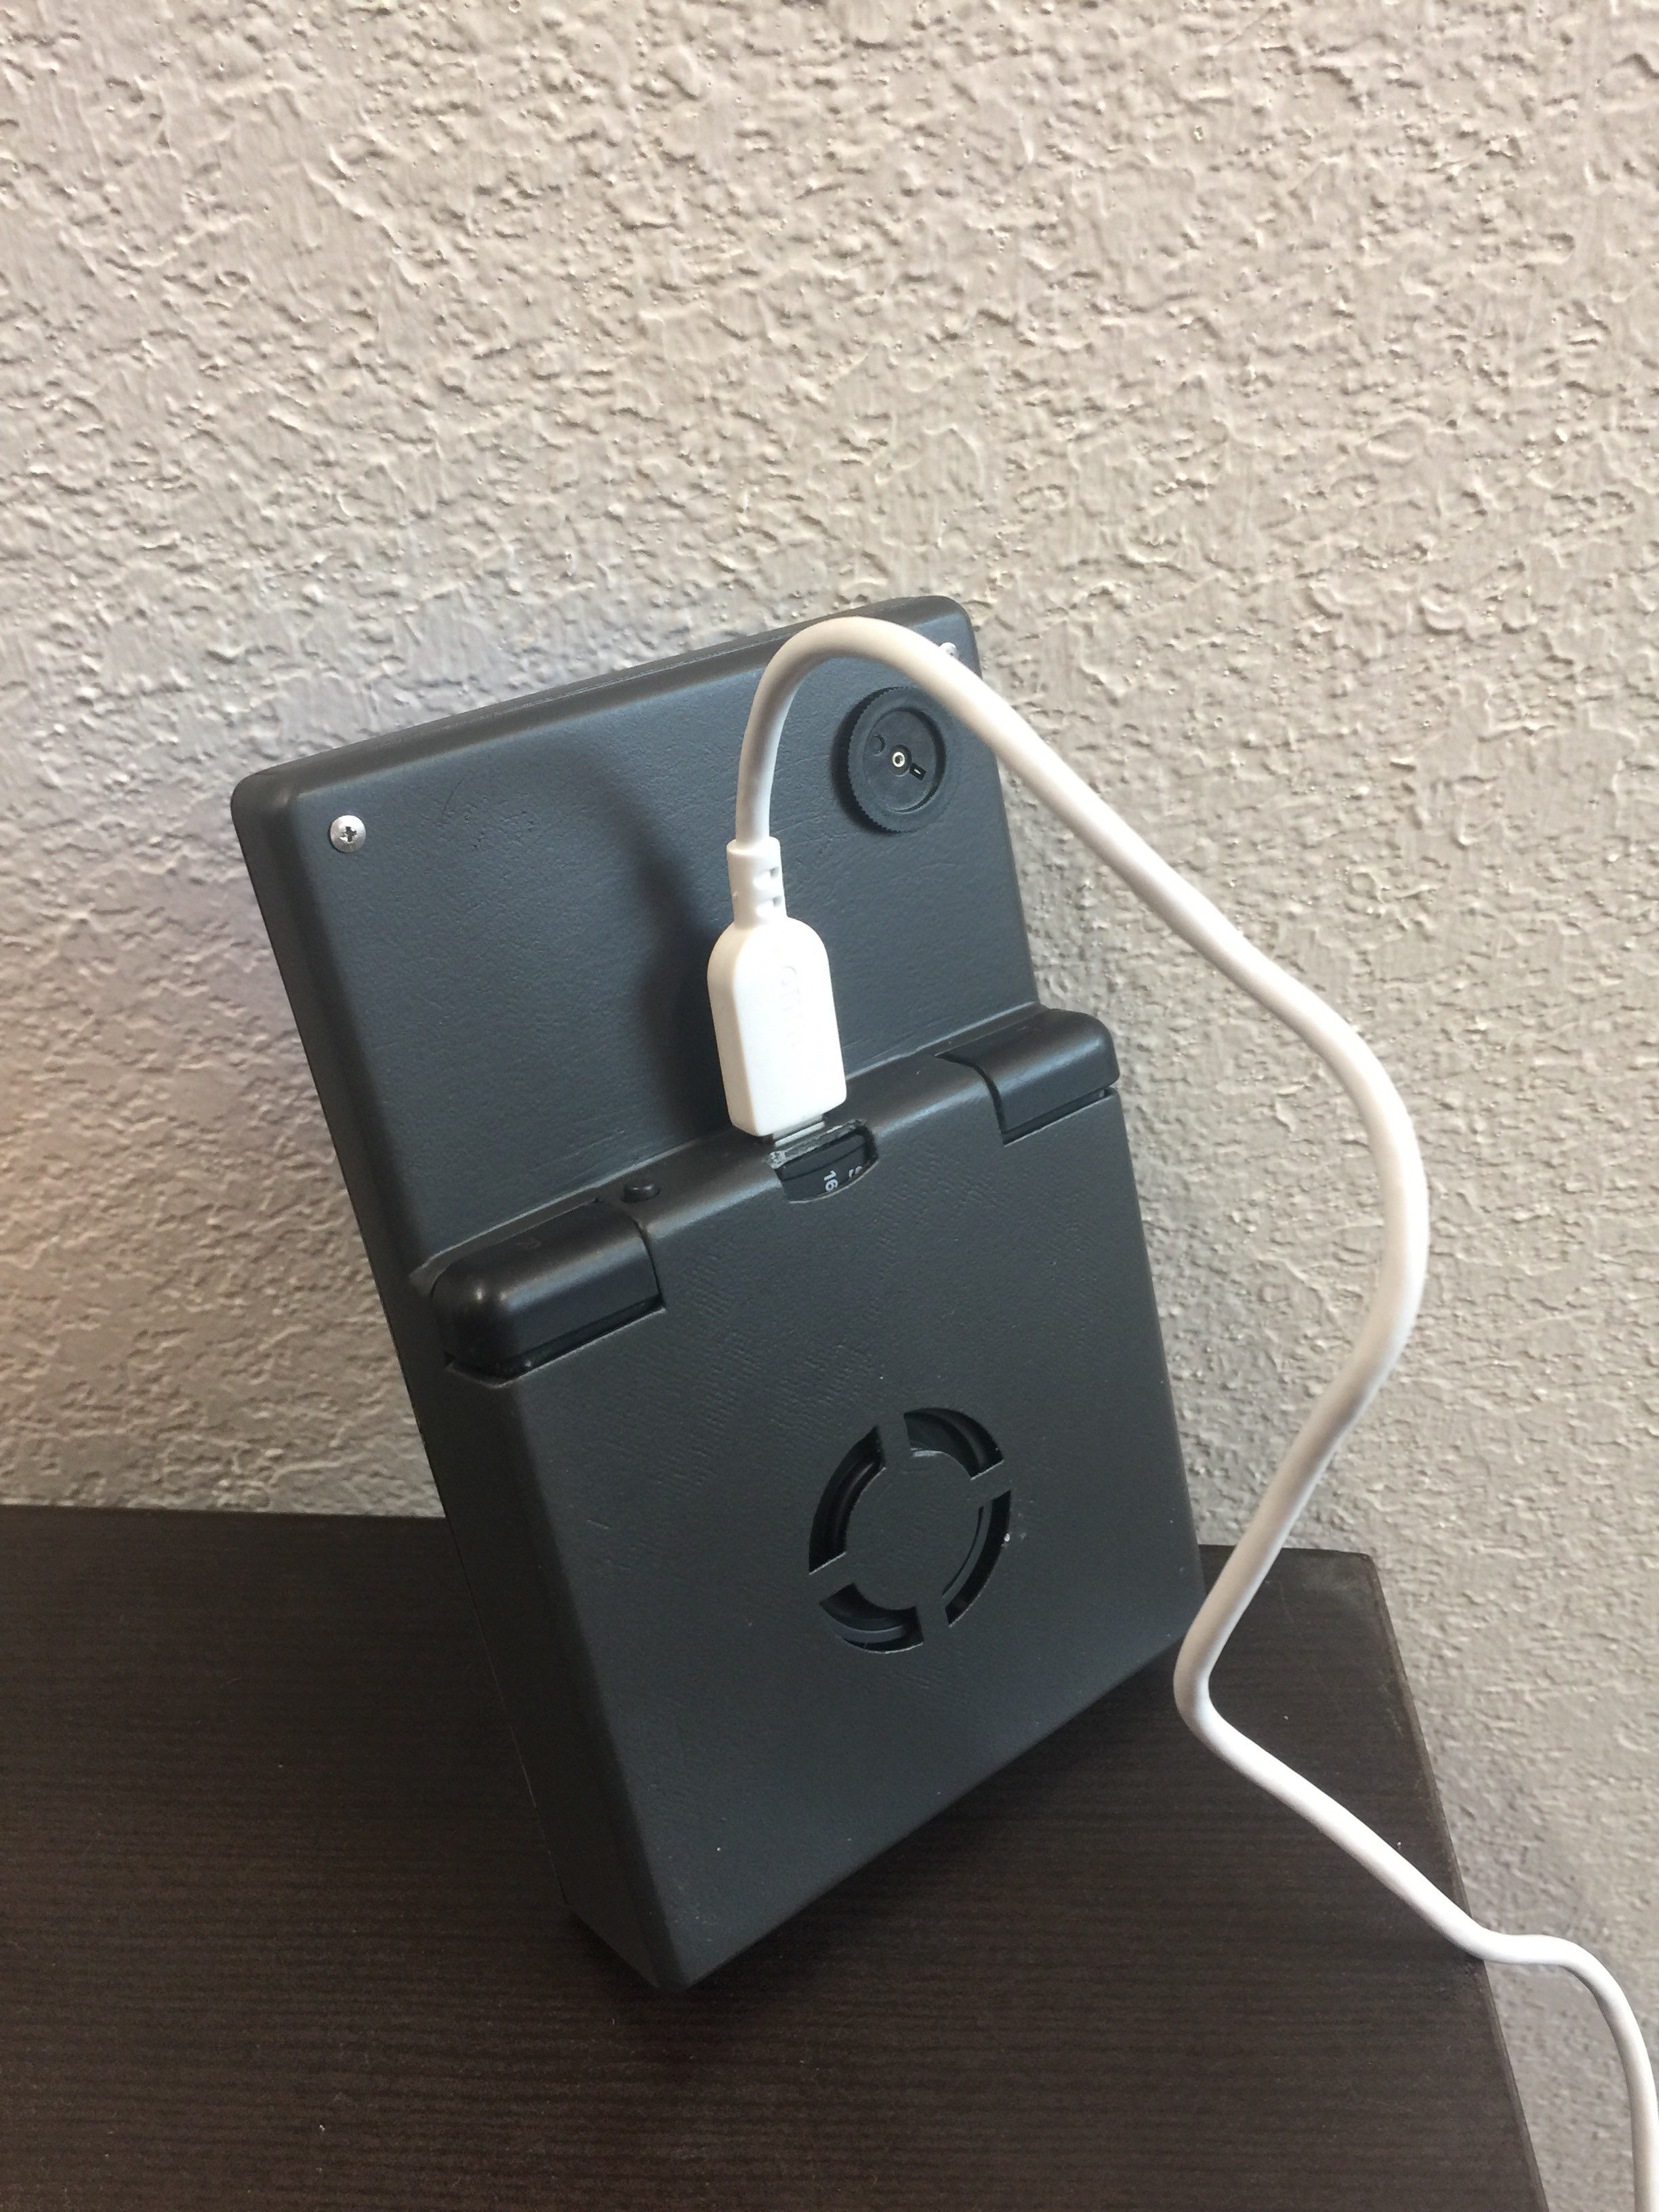
- Powered externally with a 5V 3A power bank (2.5 hour runtime) or wall wart via USB-C (not internalizing the battery saved a lot on cost and size)
- Custom regulators: 5v straight from the USB-C power source, 3.3v via a Mini 360 regulator board, relocated 1.8v LDO, and the 1.15v and 1v line with 2 mp1584en regulator boards
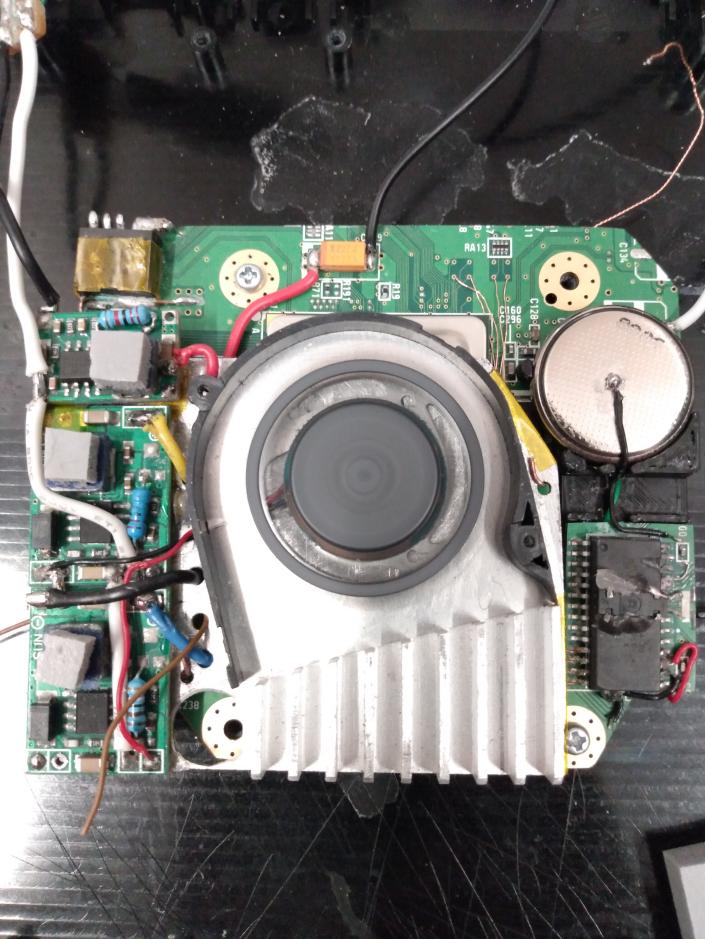
- Custom heatsink trimmed from the original Wii heatsink, and a laptop blower fan
- 3DS sliders
- DS Lite buttons, triggers and the select button being used as the Z-button
- All of the screws that are used to hold things together are either from the disassembled wii or DS lite
- Dual action shoulder buttons via a grey squishy tact and the wii power/eject button
- Analog audio via a deadbugged APA2068 that is controlled with a potentiometer wheel. This allows audio to be switched between mono via a single DS lite speaker and stereo headphones when a headphone jack is plugged in
- RVLoader v1.0
- GC+ 1.0
- Removable microSD card with the Kingston microsd to usb adapter
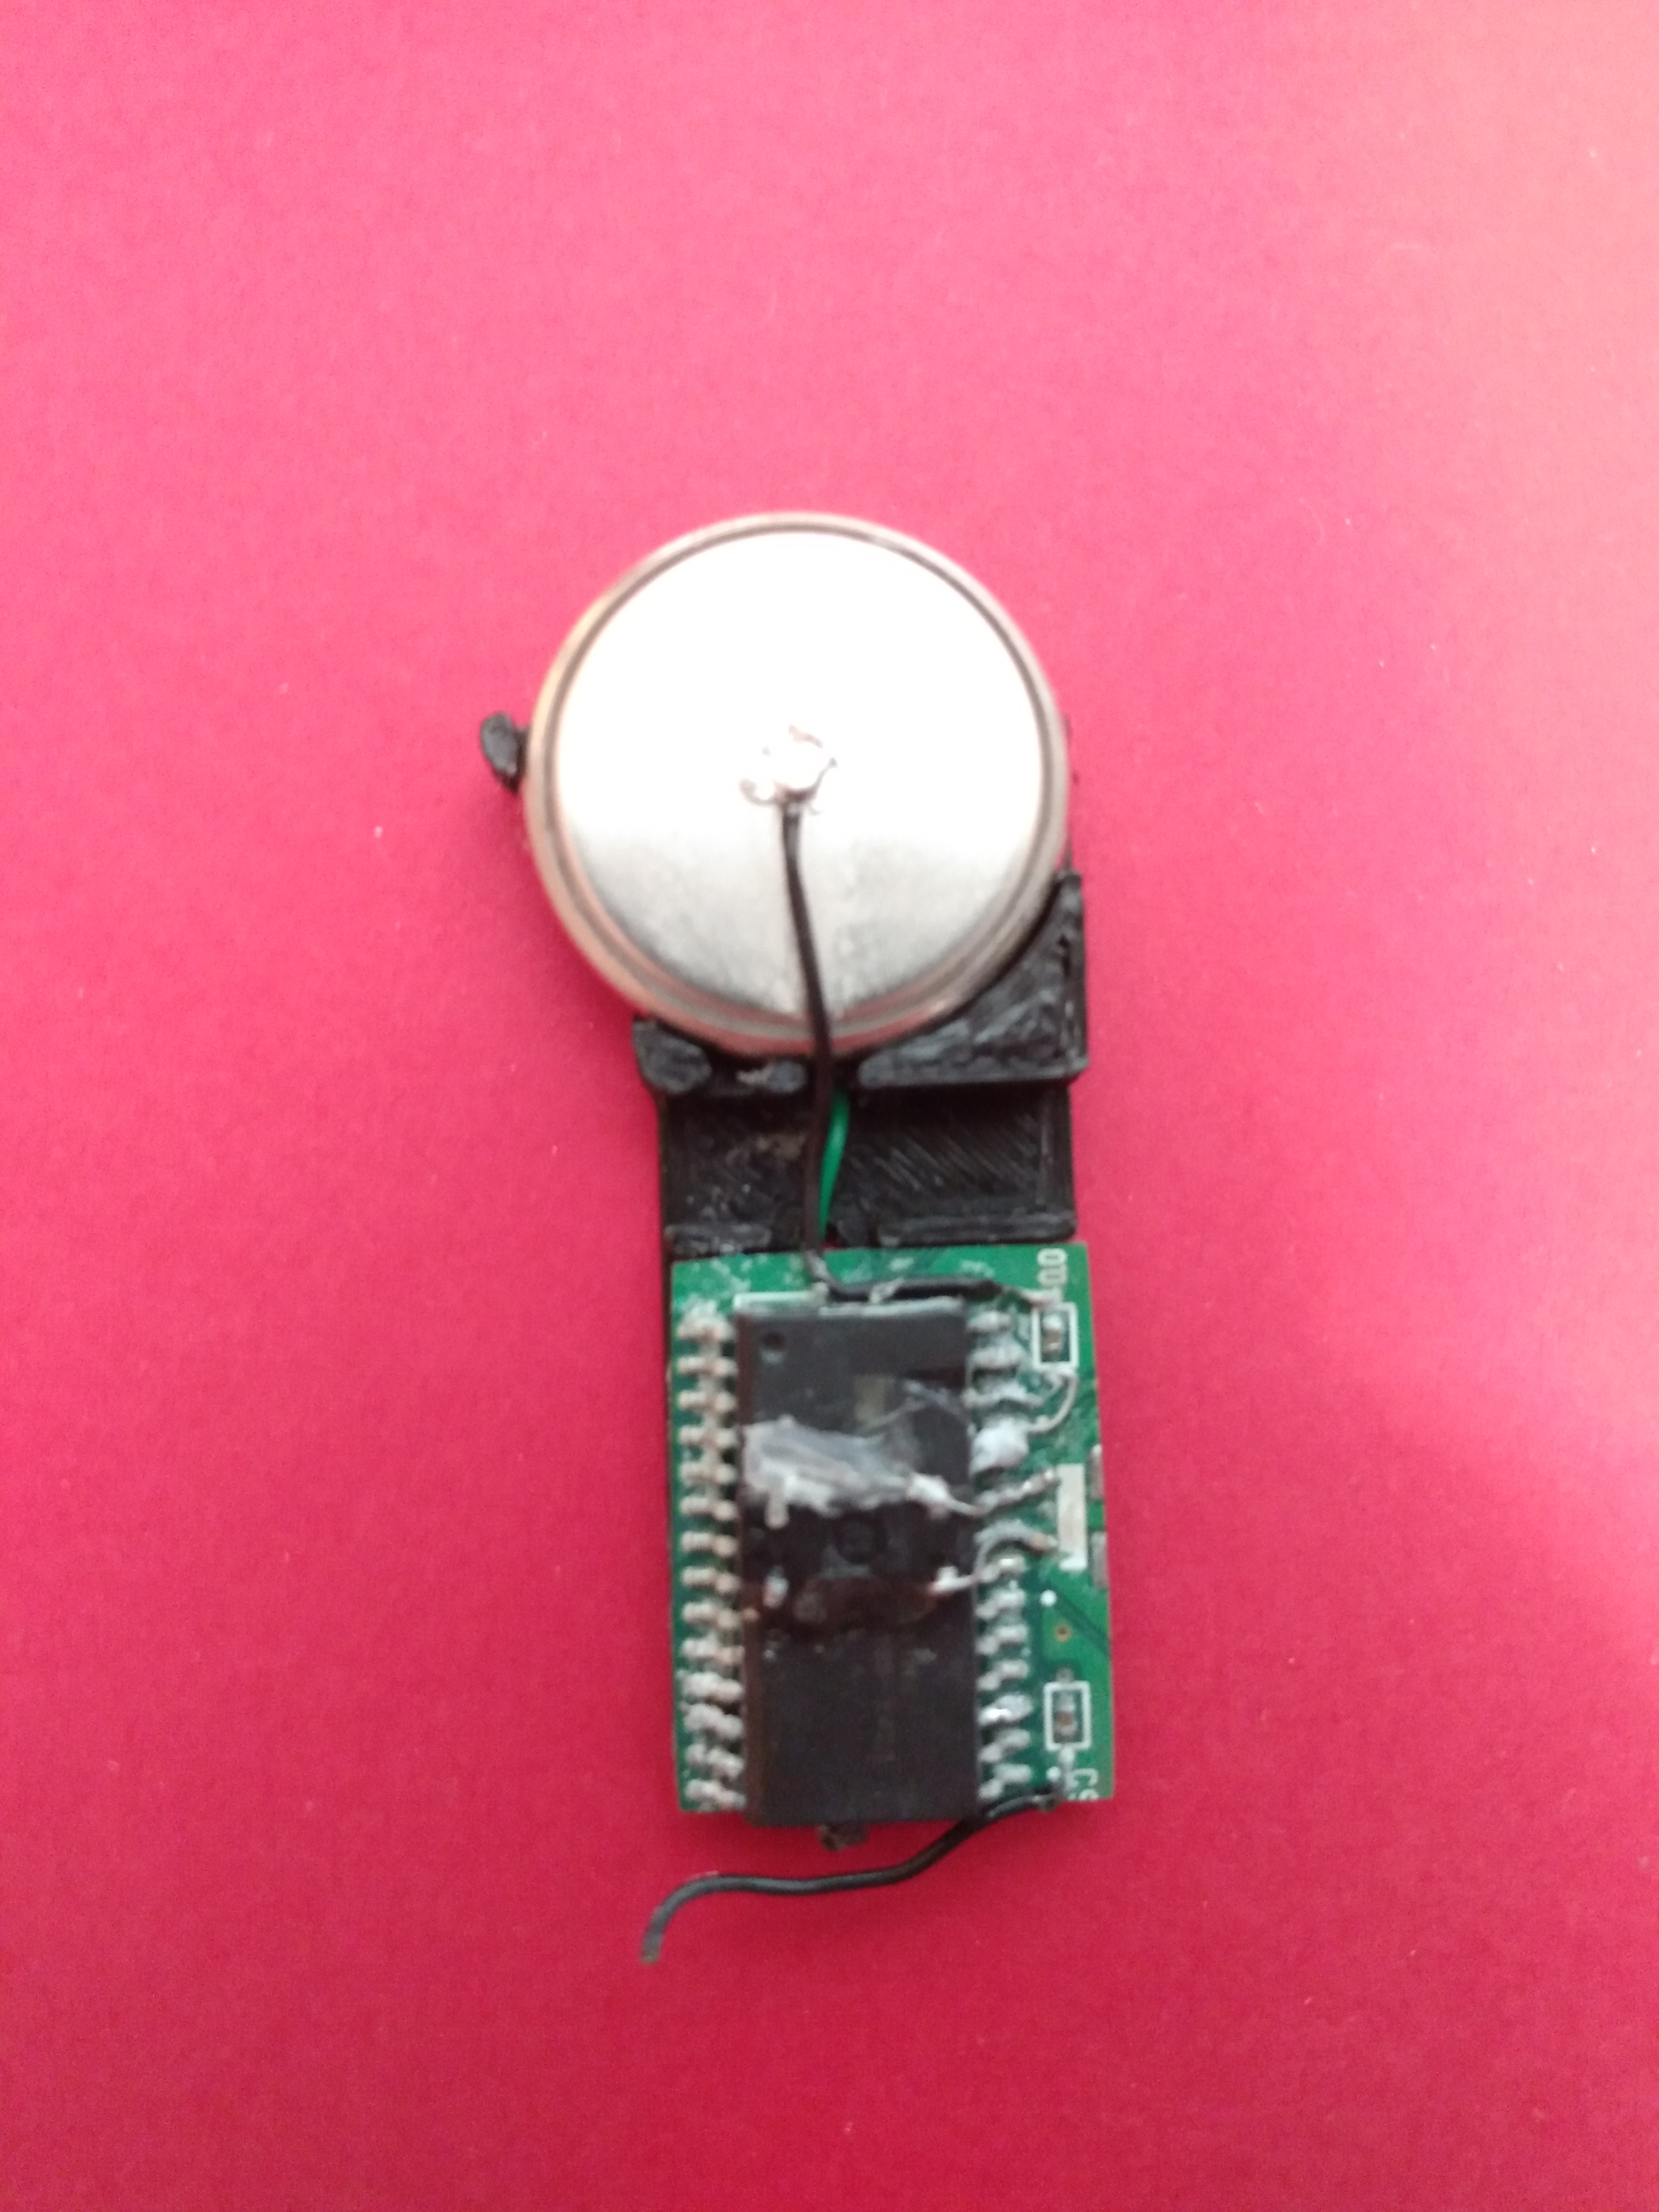
- Trimmed MX chip with the clock and caps relocated with a coin battery (is not currently working at the moment, but maybe I will get back in there and fix it)
- There is no internal battery and it has to be connected either to an outlet or powerbank (which has not been terrible at all)
- There isn’t the ability to “charge and play” as the power bank doesn’t support that, so when the battery bank dies, it is time to take a break and go outside until it juices back up again
- There was only room for one speaker, so I settled for mono audio
- There was no room for the Bluetooth relocation, but I don’t anticipate needing it
- I used the cheapest screen I could find, so the resolution is not as crisp and the viewing angles are not as good as it could be, but it is definitely still playable
- Because the regulators get so hot, I put them on the heatsink as well and therefore had to keep the fan going at full blast to prevent the wii from overheating. It can be a little loud but I don’t even notice with headphones
and then a picture showing what the locking mechanism looks like that holds the front half of the case to the bottom half without screws
Proof it was working at one point haha (You can't play VC N64 games without it)
These are the brackets I modeled to hold the dual tacts and also the USB-C Jack