Worklog GC Micro Worklog

Wesk

Undervolting....
Staff member
.
.
Joined
Jul 12, 2017
Messages
860
Likes
2,143
Location
Queensland, Australia
So this is something that I started a little while ago now but figured I should make a worklog.

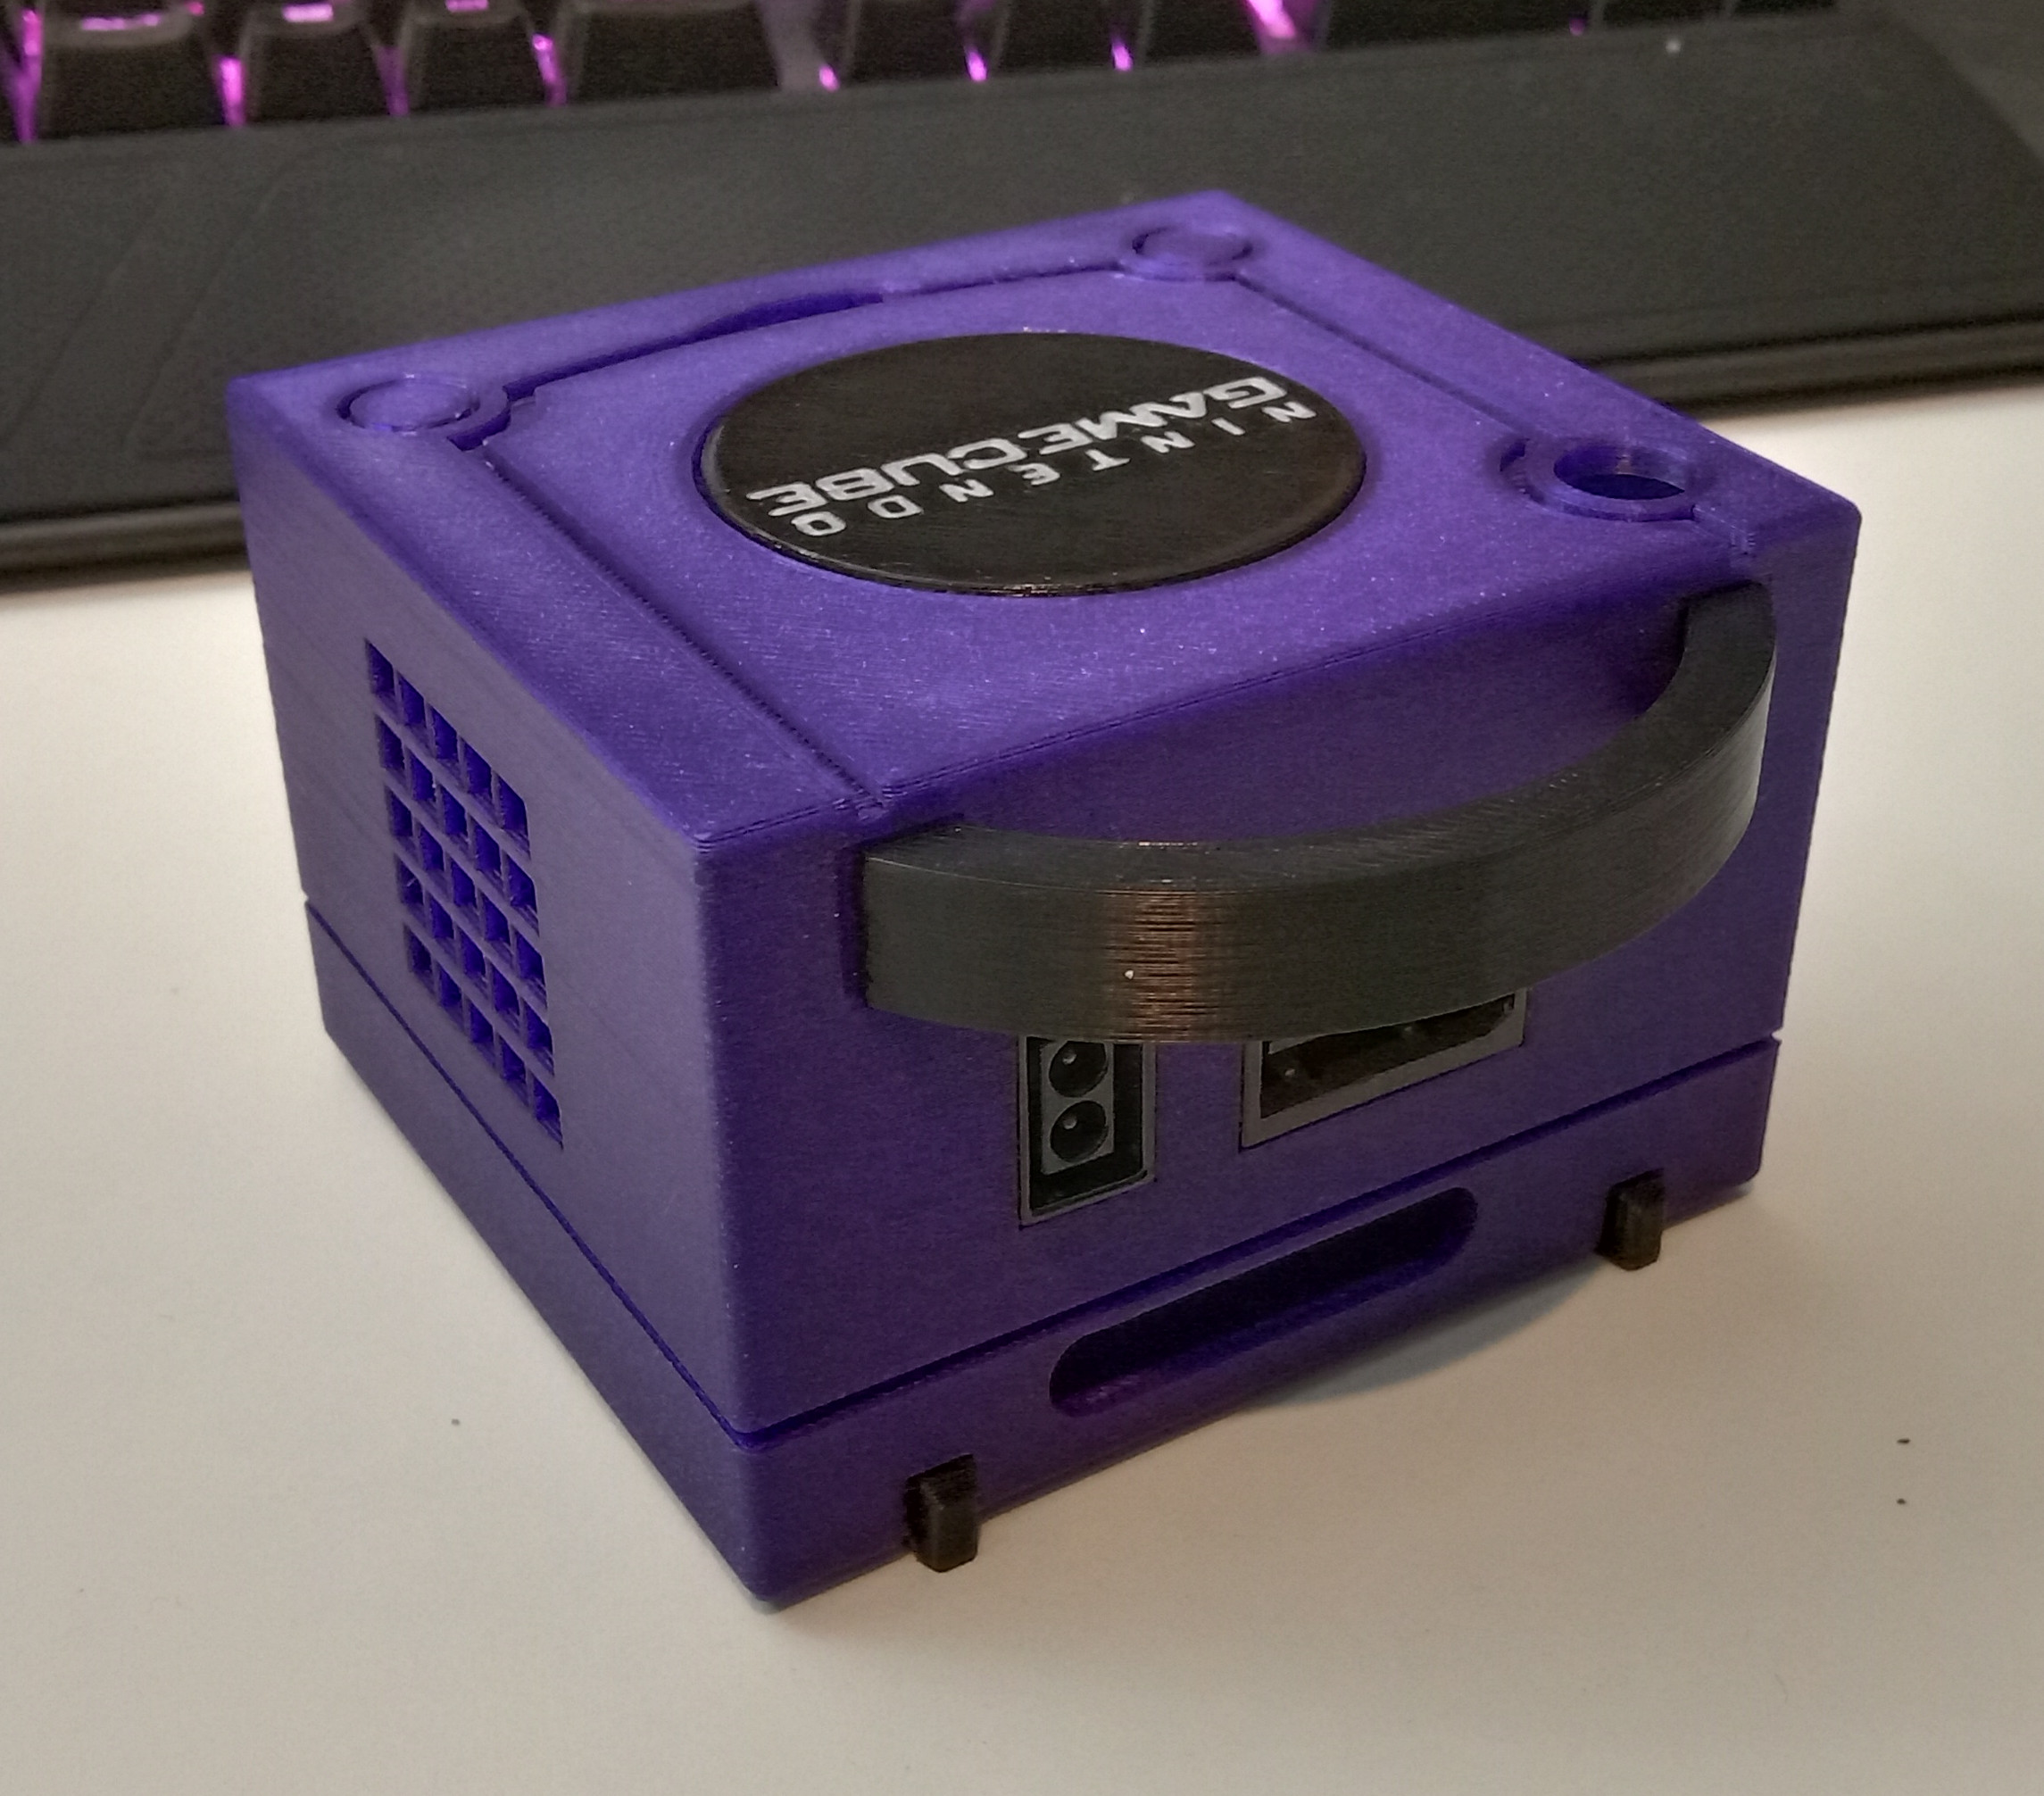
So what is it? It's a micro Gamecube console which was heavily inspired by @Madmorda's "Worlds Smallest Gamecube".
Although this is not as small as @Madmorda's it is 3D printable (Files will be released) and utilizes a LMAO trim, which is much easier to pull off as opposed to an OMEGA.

Planned features:

-4 fully operational controller ports using 4 pole headphone jacks to GC controller adapters.
-Powered by an RVL-PSU
-Original Wii AV and power ports with auto switching video modes depending on the cable used.
-Dual front USB ports

Potential future features:

-Fully operational reset button and eject button acting as BT sync.
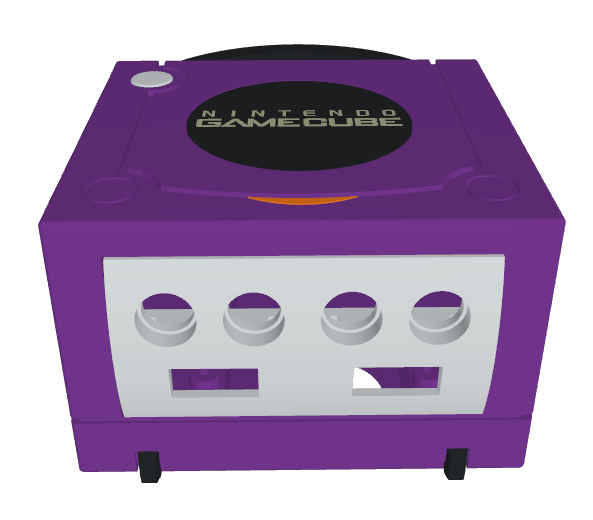
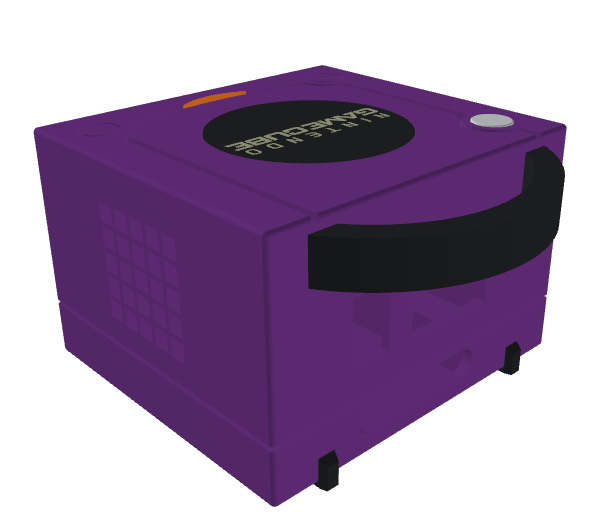
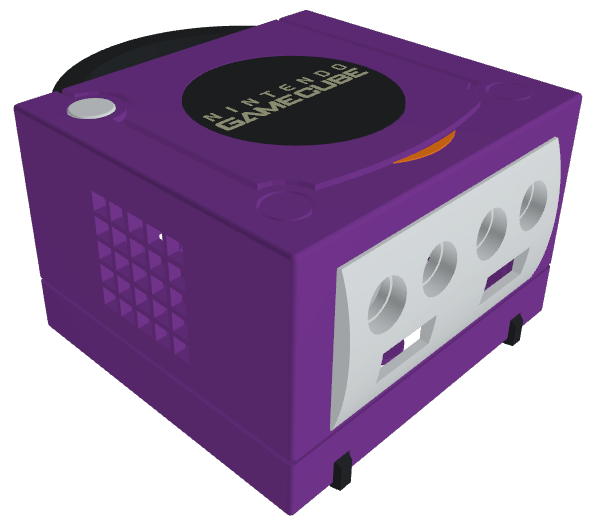
Renders:
GCMR1.png
GCMR2.png
GCMR3.png


Pics:

GC Micro 1.jpg


GC Micro 2.jpg

GC Micro 3.jpg


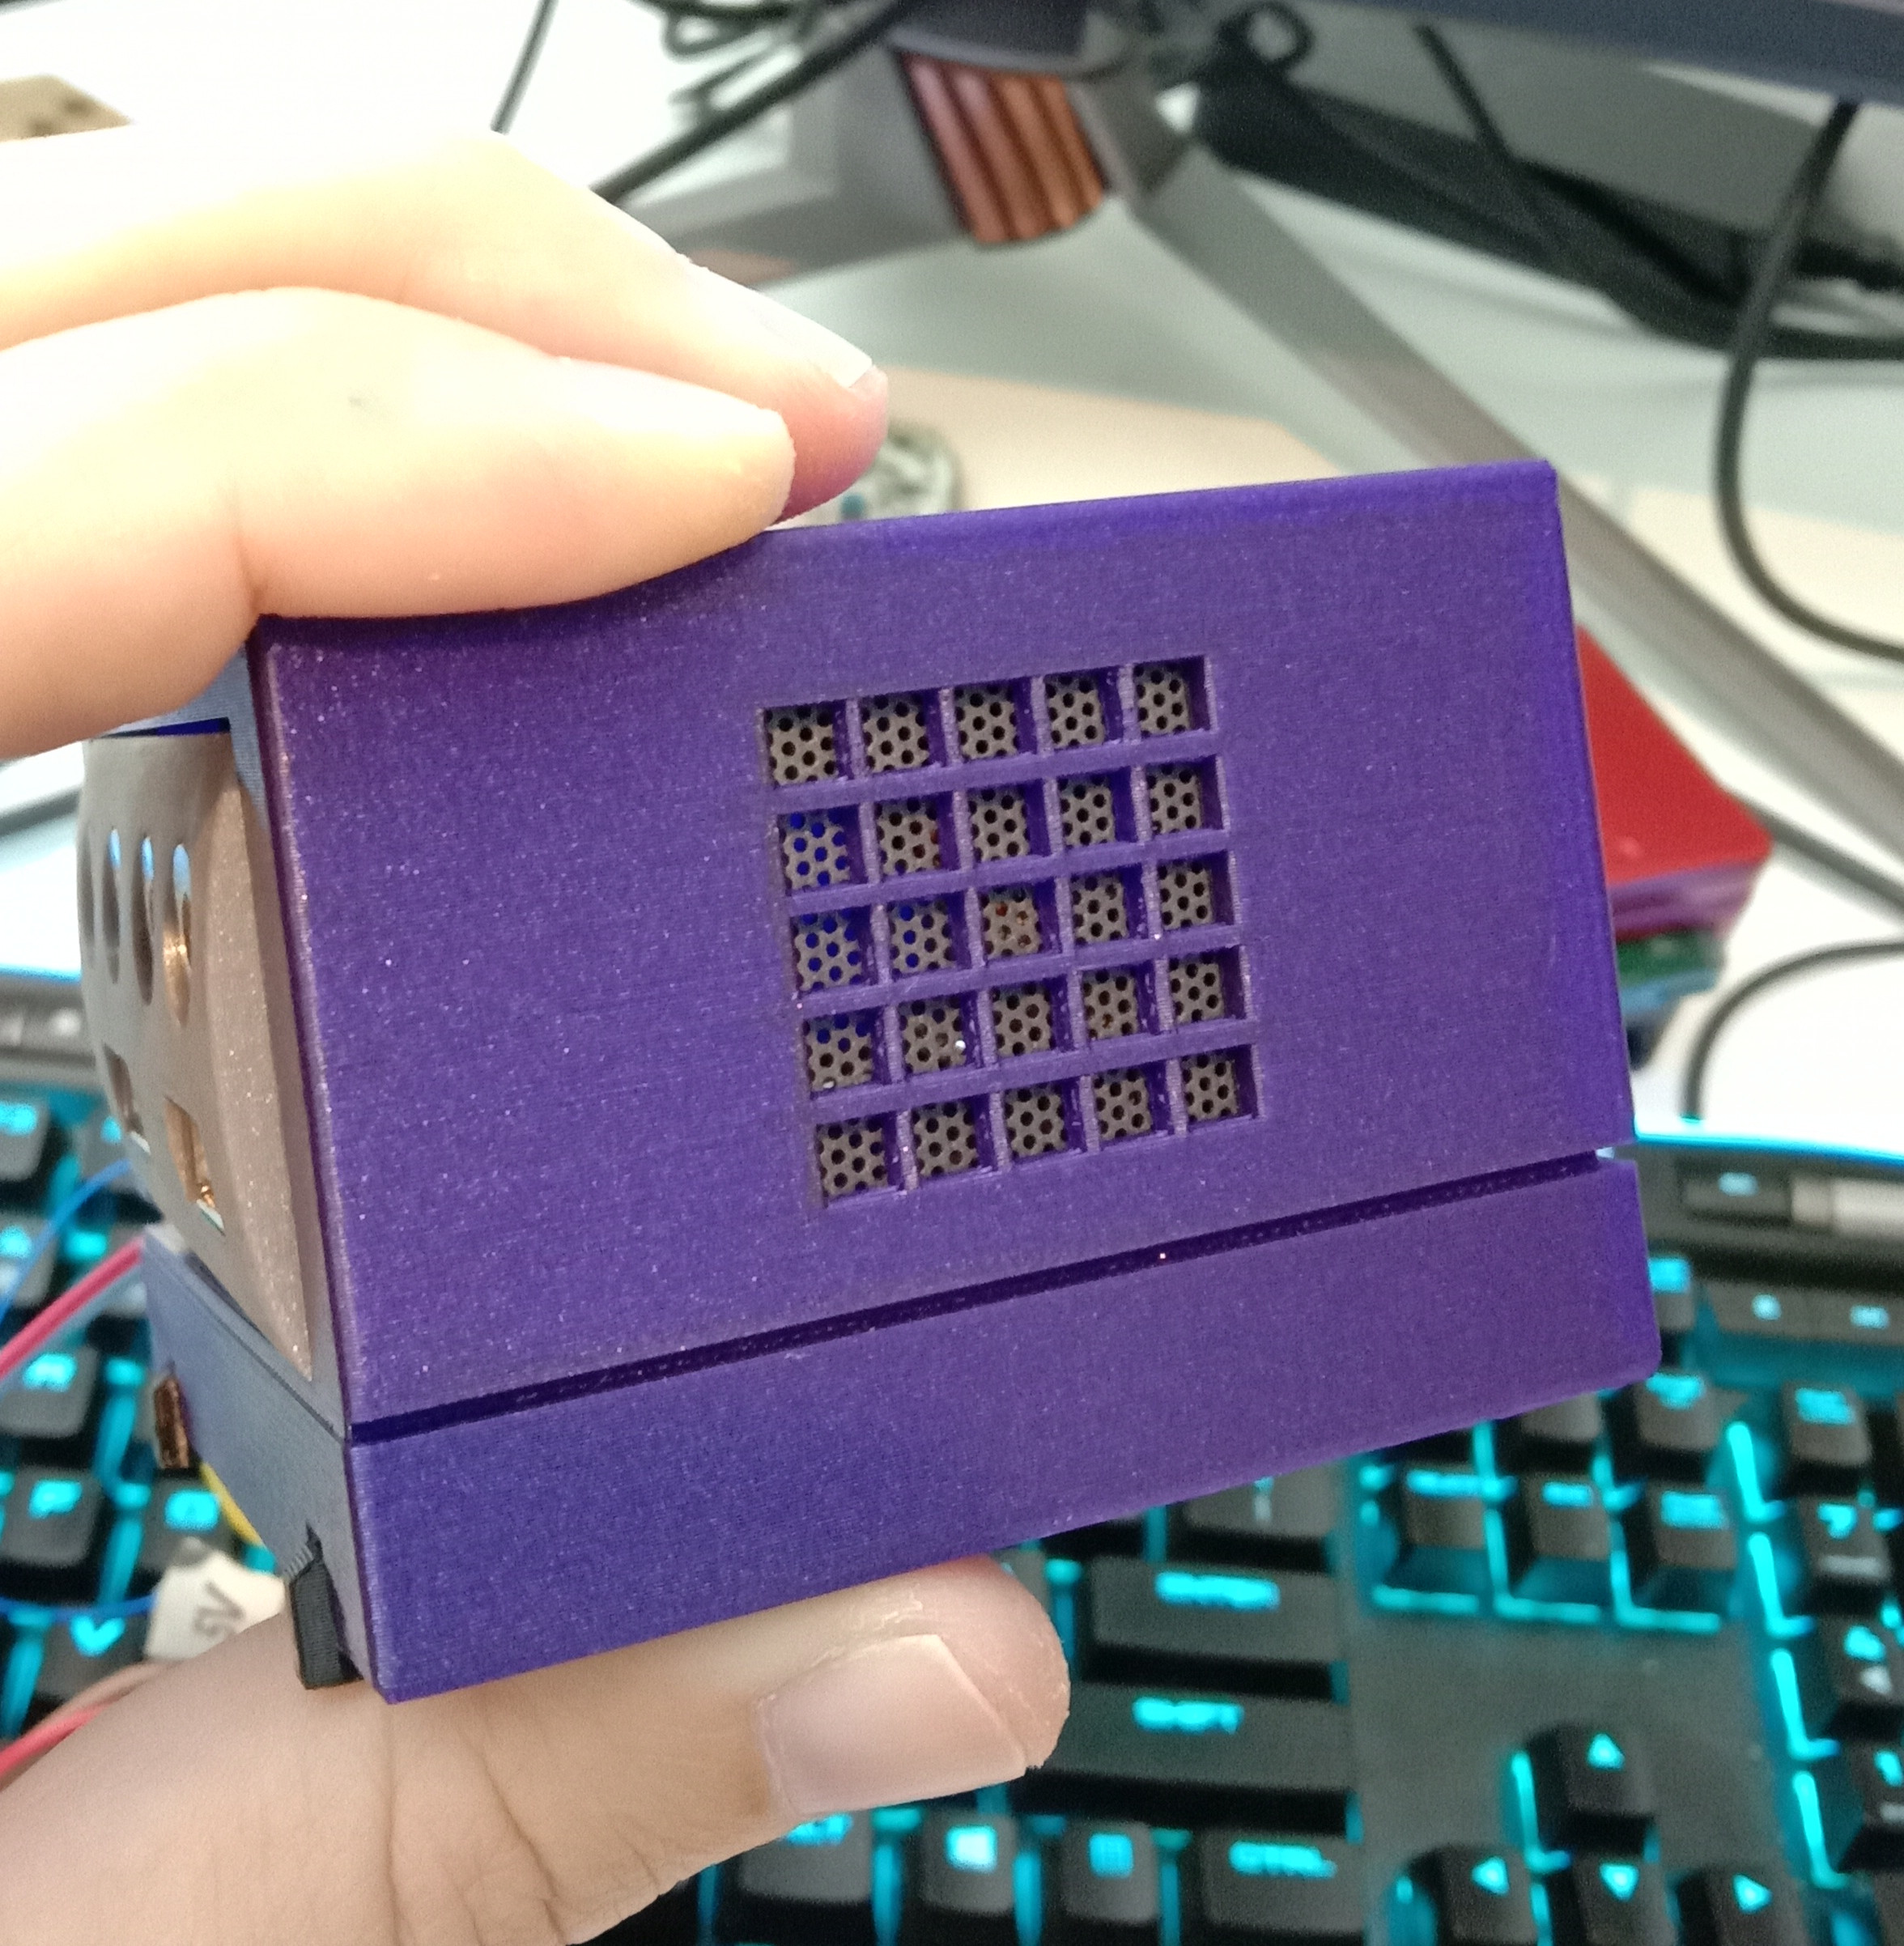
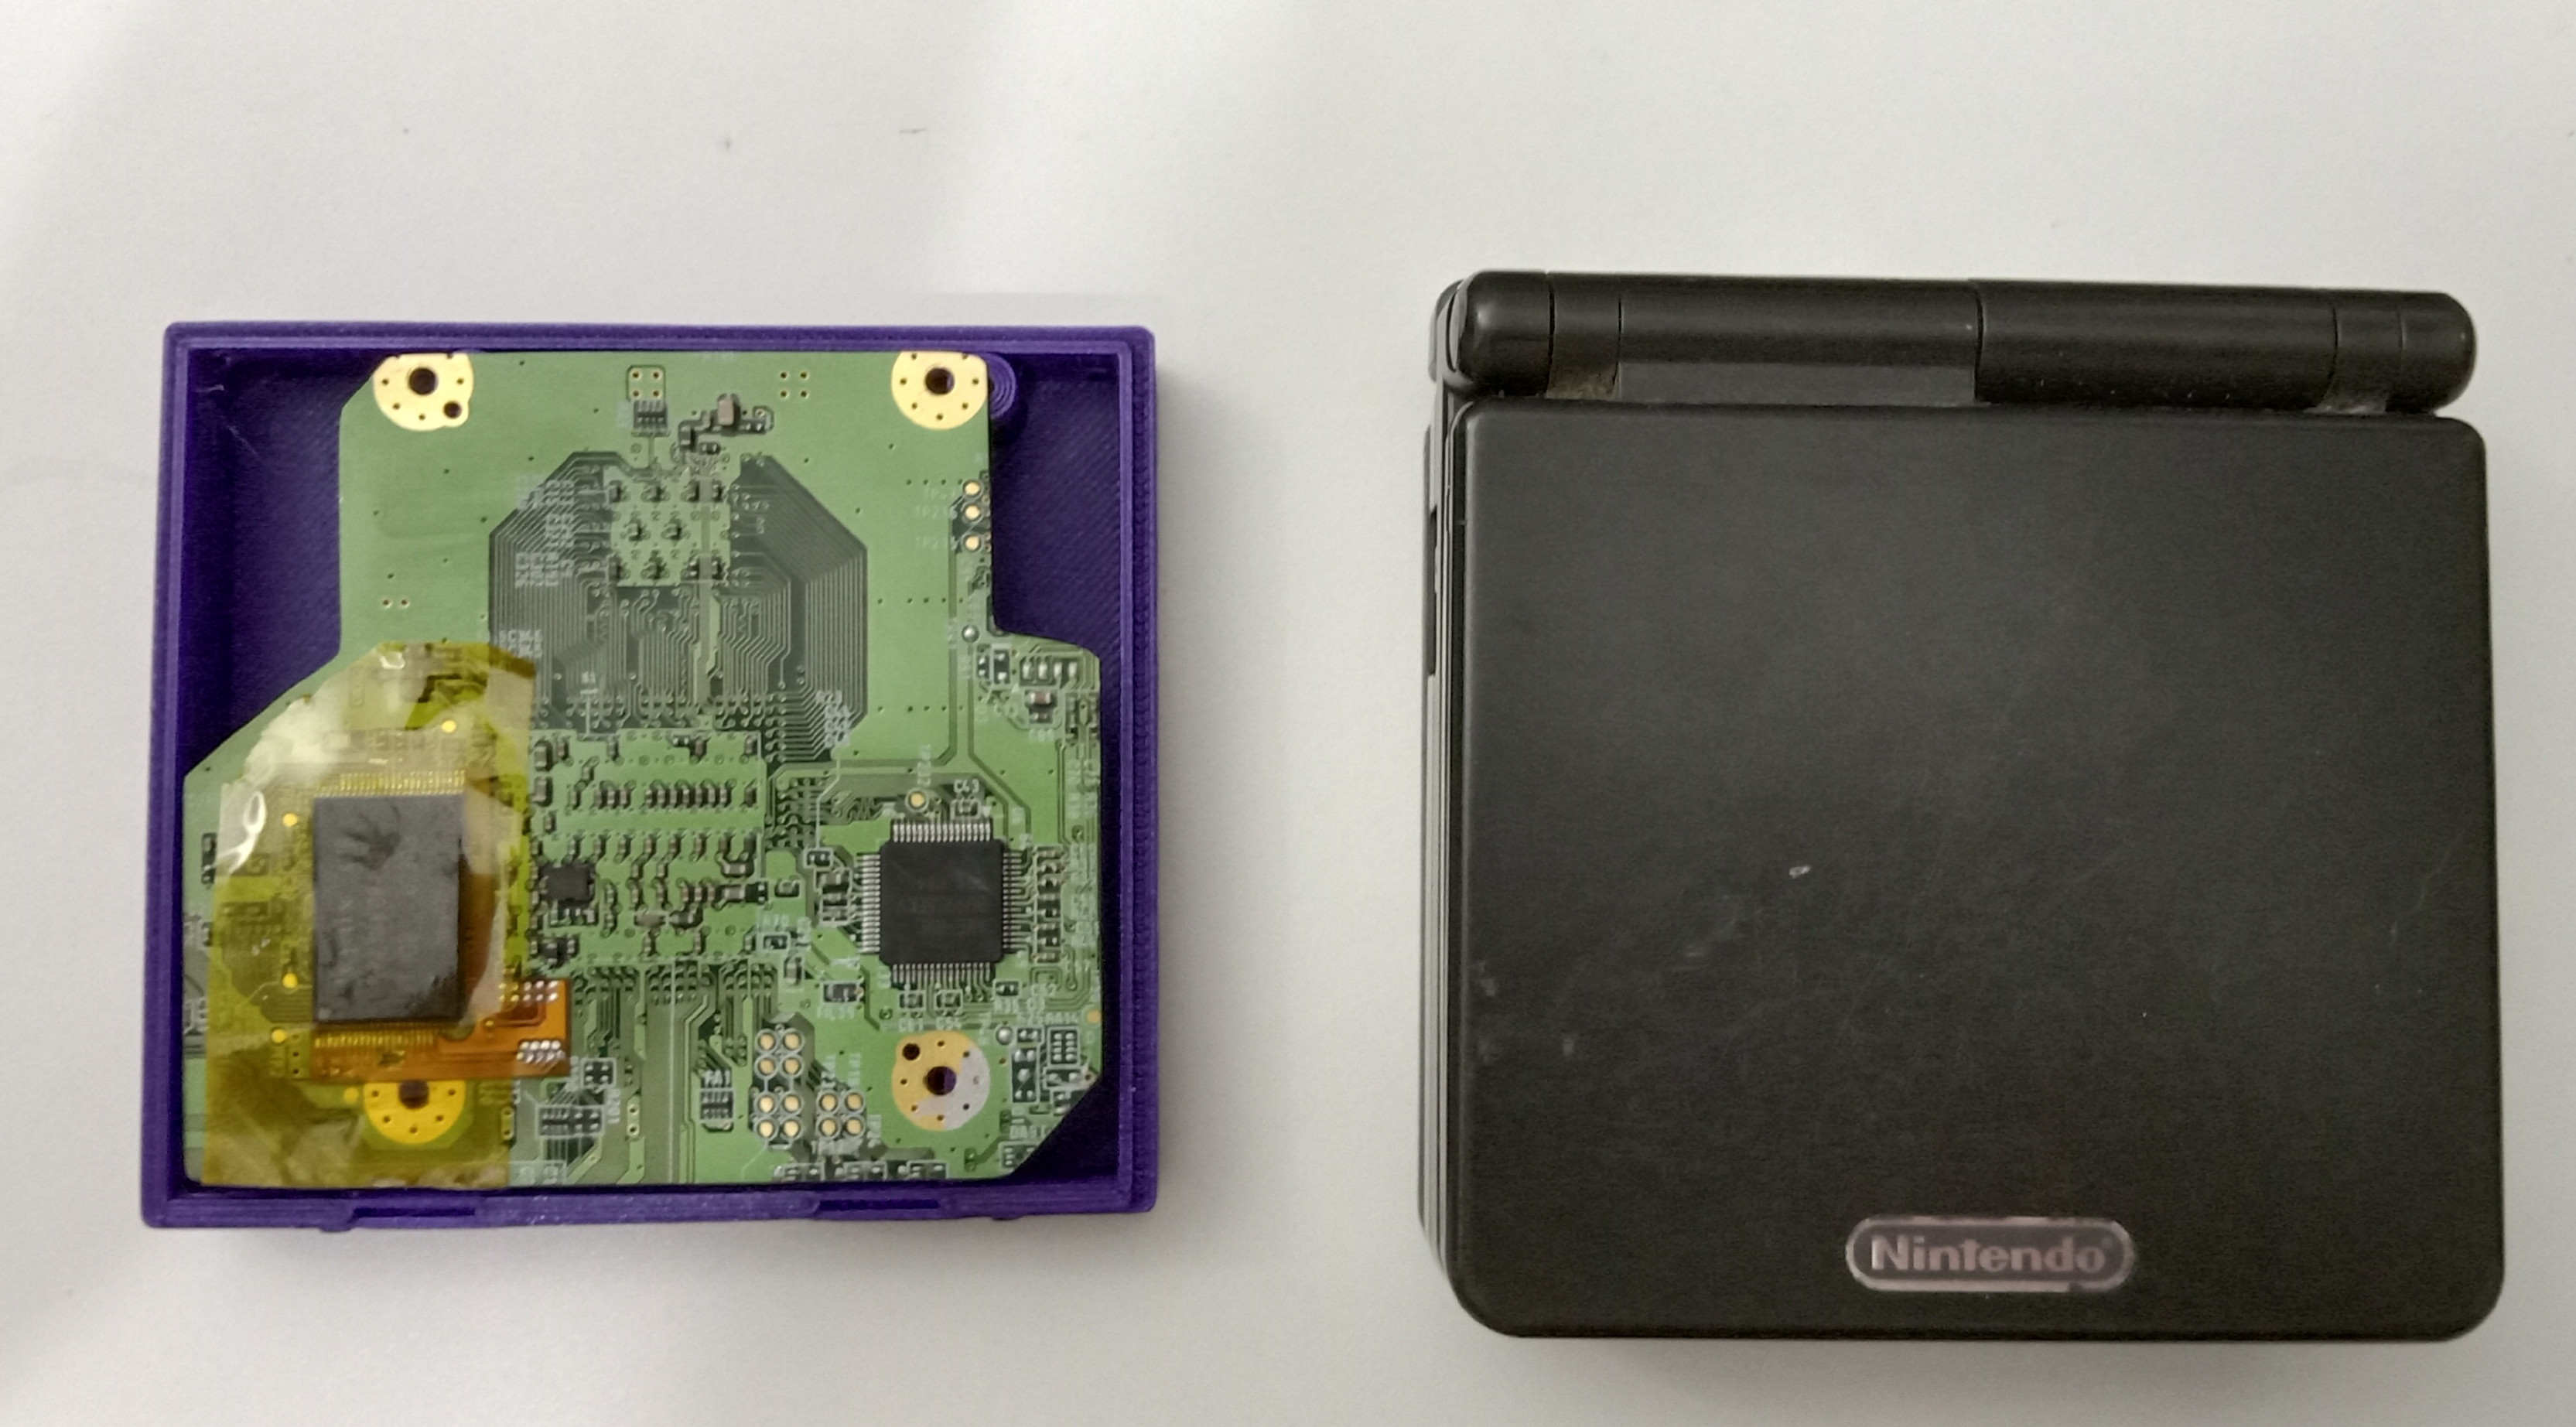
More pics coming later in the week.
 
Last edited:

Nold

real emulation, no hardware
Staff member
.
.
2021 1st Place Winner
Joined
Jul 16, 2017
Messages
443
Likes
1,607
Location
EU
Portables
5 + 1*π
this ... is ... so ... HOT! if you ever make the files available i would love to build one :mrgreen:

btw. which purple filament are you using? it looks great.
 

Wesk

Undervolting....
Staff member
.
.
Joined
Jul 12, 2017
Messages
860
Likes
2,143
Location
Queensland, Australia
this ... is ... so ... HOT! if you ever make the files available i would love to build one :mrgreen:

btw. which purple filament are you using? it looks great.
Thanks Nold

The files will be released with the cutting edge post. The filament used is Prusament Galaxy Purple and Galaxy Silver.
 

Wesk

Undervolting....
Staff member
.
.
Joined
Jul 12, 2017
Messages
860
Likes
2,143
Location
Queensland, Australia
A closer shot of the front, ignore the wires - I currently have it powered by PTH's:
IMG_20200914_182625.jpg


Here's a quick nude - the headphone and USB ports could really do with a single PCB once the design is finalised:
IMG_20200914_182248.jpg


Close-up of a controller adapter:
IMG_20200914_182743.jpg


And a shot of it running Wind Waker:
IMG_20200914_184110.jpg
 

Wesk

Undervolting....
Staff member
.
.
Joined
Jul 12, 2017
Messages
860
Likes
2,143
Location
Queensland, Australia
Mistakes were made.....

So my RVL-PSU's arrived today. Test fit went perfectly and I planned to install sometime tomorrow.

Flash forward to 1am and I'm having trouble sleeping so I thought I'd be productive and get a few hours of modding in before I attempt to sleep again.

I mount the RVL-PSU and start wiring the power lines.......but only now realize that it does not contain a 1.8v reg which is required if the LDO has been removed.

A little annoying but no biggy, I'll just use a PTH for that. It's not nearly as clean but it'll work.

IMG_20200923_023444.jpg


And now it's not booting
socail_media_annoyed.gif


Voltages look good but I may have bumped the NAND relocation so I'll try reflow that.

but it's now 3:30am and I'm going back to bed.
 

Wesk

Undervolting....
Staff member
.
.
Joined
Jul 12, 2017
Messages
860
Likes
2,143
Location
Queensland, Australia
200.gif


It's operational!

I found that the RVL-PSU I was using had a flaky 1.15v regulator that would drop to 0.5v when under load. I've swapped over to another RVL-PSU and everything is running peachy.

Final things to do are to replace the power LED because the one I had is far too dim and to finish wiring the 2-4 controller port and adapters.

Here's a clearer picture of the back panel:
IMG_20200923_205137.jpg


The bottom:
IMG_20200923_201825.jpg


And a size comparison next to an OG Gamecube:
IMG_20200923_202608.jpg
 

Wesk

Undervolting....
Staff member
.
.
Joined
Jul 12, 2017
Messages
860
Likes
2,143
Location
Queensland, Australia
A slightly overdue update:

It's complete! all 4 controller ports wired (with rumble) and the most important part added - an original Gamecube orange LED for authenticity.

I also re-did the video wiring, replacing the magnet wire with actual shielded cable. I was getting a bit of noise in the image due to the AV ports proximity to the mainboard (there's very little space between) but since changing to shielded cable the image is crystal clear.

I had a 2-3 hour session playing multiple games on it over the weekend and it was solid as a rock, not a single issue and it barely runs warm.

I have @Nold and @Madmorda doing some test prints and fittings to make sure the print files are 100% then will release the files with my cutting edge post.

Some final pictures of the project:
IMG_20200930_174759.jpg
IMG_20200930_174526.jpg
IMG_20200930_174444.jpg
IMG_20200930_174423.jpg
IMG_20200930_174400.jpg
IMG_20200930_174344.jpg
 
Top