Solved G-Wii misc questions

cy

.
Joined
Sep 3, 2020
Messages
116
Likes
325
Portables
6
So I've been working on a G-Wii lately as some of you know, and since I've got questions that have been piling up, I figured they would be best answered in the form of a thread.

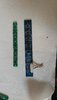
Firstly I wanted to ask, how do the screen controls get wired up? Is there a diagram or something? A little while ago I was using Noah's streams as a reference for this but they're no longer up. I've done a little digging and while I'm sure they're somewhere on the forums, I haven't been able to find them for the life of me.

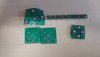
As for my other question, I'll be wiring up audio soon with an older U-AMP
I acknowledge this thread has all the documentation I should need, but I don't quite understand it all.

First off, I don't understand what voltages I'm supposed to wire up or what mode I'll even be using for audio. Does analog or digital make more sense for my G-Wii? And what voltages am I supposed to wire up depending on that? I think I understand that if the jumpers are closed that means they're connected via solder. But I don't understand if you're supposed to only wire up 3.3 Volts and 1.8 Volts, or if you're supposed to short the 3.3 Volt pad with the 1.8 Volt pad, or what. Maybe I'm just dumb, but I'm not following with how that part is written.

Second off, how exactly are the speakers supposed to be wired up? I think I know the solder points, but I was told that if you don't wire them up correctly, the audio will be desynced or something. Is someone able to explain to me how to correctly do this? A diagram would be ideal if possible.

Thank you for your patience, and sorry for my ignorance!
 

Ethan

.
Joined
Apr 20, 2019
Messages
39
Likes
37
HI there, for the screen controls you can remove the buttons you wish to have and just jump from where the buttons are to the new location on the 3d printed part. i have a PCB which i designed to elminate the screen control board and you just need to match the red green and black connections for it.
i sell it in a kit with the 5 3d printed mounts turned into PCBs

for the u amp if you do analog youll need power 3v3 and ivdd at 3v3 as well for digital i2s you need 1v8 at ivdd

for speackers just make sure that the negatives both go to the "same" side of the speacker and the positive to the other
 

Attachments

cy

.
Joined
Sep 3, 2020
Messages
116
Likes
325
Portables
6
HI there, for the screen controls you can remove the buttons you wish to have and just jump from where the buttons are to the new location on the 3d printed part. i have a PCB which i designed to elminate the screen control board and you just need to match the red green and black connections for it.
i sell it in a kit with the 5 3d printed mounts turned into PCBs

for the u amp if you do analog youll need power 3v3 and ivdd at 3v3 as well for digital i2s you need 1v8 at ivdd

for speackers just make sure that the negatives both go to the "same" side of the speacker and the positive to the other
Ah, alright, what you're saying about audio makes a lot of sense, thanks a lot for that! As for the screen controls, I believe what you're saying is to remove the buttons on the screen control board, and then connect the buttons that are attached to the 3d printed bracket which makes sense. Isn't there a way to connect them directly though without the need of the screen control PCB? This would remove the need to include the PCB which I feel is necessary due to a lack of space.
Also, those are some cool PCBs! If I didn't already have my controls wired up and in place I might consider that. Thanks again!
 

Ethan

.
Joined
Apr 20, 2019
Messages
39
Likes
37
yah you can, youll have to find which value resistor the button you are wanting is using and connect it in line, itll just be a simple case of understanding how the PCB works and replicating its function with new resistors
 

cy

.
Joined
Sep 3, 2020
Messages
116
Likes
325
Portables
6
yah you can, youll have to find which value resistor the button you are wanting is using and connect it in line, itll just be a simple case of understanding how the PCB works and replicating its function with new resistors
I remember it being a lot simpler than that when I was initially watching noah's streams. I thought what he did on stream was wire up the button to some of the pins that were on the connector for the controller board. I thought that was how the screen controls got wired up and I would've done that but I thought it was be easier going into it already knowing which pin does what. Maybe I'm mistaken though, thanks for the help anyways

Update:
I've got most of what I need set up for the screen controls. Thanks again for the help! I'll bump this thread if I have any other questions relating to this build.
 
Last edited:

cy

.
Joined
Sep 3, 2020
Messages
116
Likes
325
Portables
6
Bumping this thread because I've got a new issue. I wired up MC, C, D, & WS accordingly as well as 3.3v, GND, and I wired IVDD up to 1.8 volts.
I wired up the speakers like this:
2.png

(ignore the random wire, this was the only image I could find and I didn't wanna take pictures)the red spot represents where I wired up the positive wire, and black representing where I wired up the negative wire.
I also wired up Volume + and - as I wanted to make sure it wasn't just too quiet for me to hear. Idk if I was supposed to get an audio HUD, but I didn't get one when testing.
I did NOT wire up IL or IR as I was told by a community member they weren't necessary for digital audio. I decided not to take an pictures because I'm confident in my ability to solder and I'm certain it isn't my solder joints or anything else. I'm using an old U-AMP and none of the jumpers are connected. It's also worth noting I've not connected the headphone jack although I did try connecting S to ground and I'm getting the same result.

Anyone know what I might be doing wrong? I'm fairly certain I'm missing something, and as I said, I would provide images; but I'm convinced it's not my soldering or anything on the boards. Thanks
 

cy

.
Joined
Sep 3, 2020
Messages
116
Likes
325
Portables
6
Never mind, I figured out what the problem was. Probably should've tried a little longer before posting. Sorry for the double post, bump, and sorry to waste anybody's time.
 
Top