- Joined
- Nov 10, 2016
- Messages
- 607
- Likes
- 1,639
It's possible and not too terribly difficult to add multi color designs to cases or other 3D prints. This guide shows how this is done using Fusion 360 and Cura, but other modeling and slicing programs should have similar enough features to allow this.
Special thanks to @nobble for getting me started on multicolor prints. I showed off a print in the discord and he responded with, "Ayy sounds similar to how I did my DMG Consolizer boxes." Wrong. It's exactly how you did your DMG Consolizer boxes. I appreciate your guidance!

Special thanks to @nobble for getting me started on multicolor prints. I showed off a print in the discord and he responded with, "Ayy sounds similar to how I did my DMG Consolizer boxes." Wrong. It's exactly how you did your DMG Consolizer boxes. I appreciate your guidance!
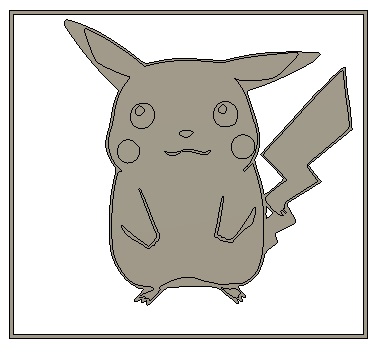
This process can be done using text, shapes, or other sketches, but I like to show off a little by using an image taken from somewhere else. For the sake of this guide, I am going to print a Pikachu.
Note: For best prints, simple images with low detail work best.
Also, this guide takes some liberties to assume the reader already knows some of Fusion's basic features such as extruding and scaling.
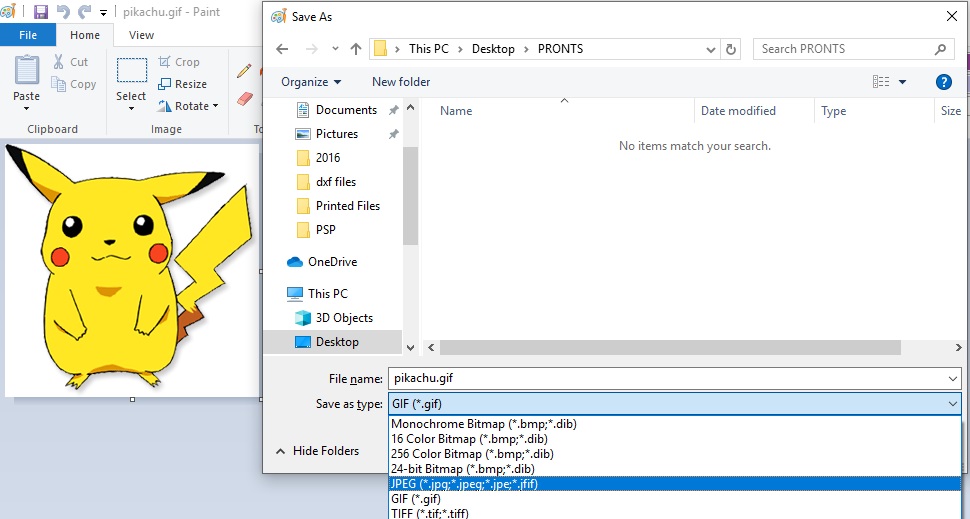
For the process I use, the image must be in .jpg format. So I start by opening the image (in this case a .gif) in Paint, then click File>Save As and save it as a .jpg.
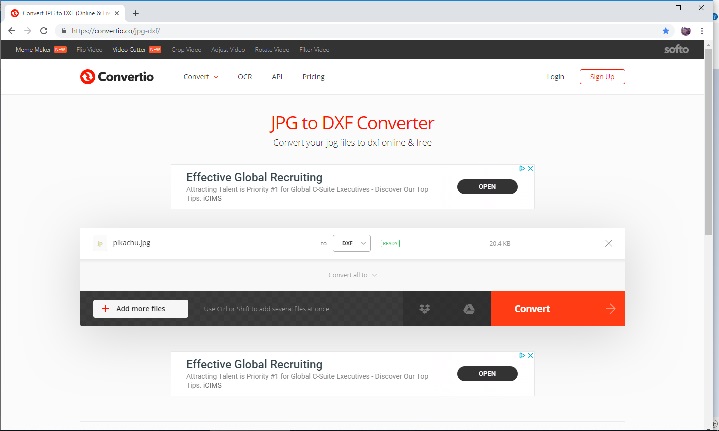
Next I convert the .jpg into something that Fusion will want to work with. In this case, it's a .dxf file, which is basically a sketch file. To do this, I use an online conversion tool:
https://convertio.co/jpg-dxf/
This page has ads, but they're not very intrusive and the converter itself is dead simple to use. Just upload .jpg, click Convert, download .dxf.
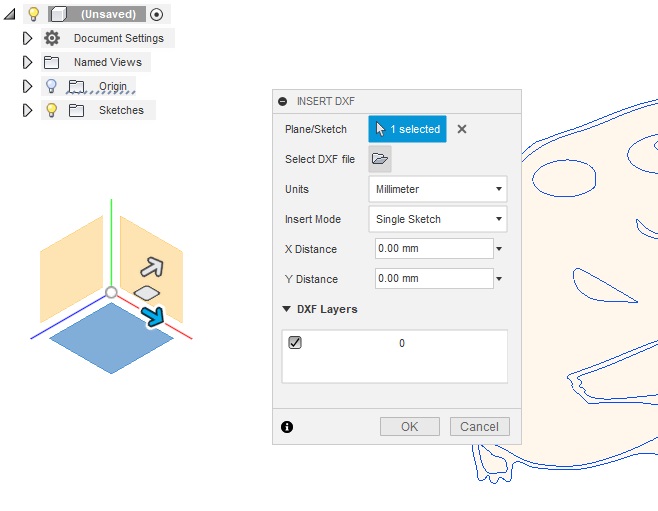
With the .dxf file in hand, it's time to insert it into your Fusion project. In Fusion, click Insert > Insert DXF. You then need to select the surface or plane (which can include the surface of an existing 3D model), then click the folder icon to browse for your .dxf file.
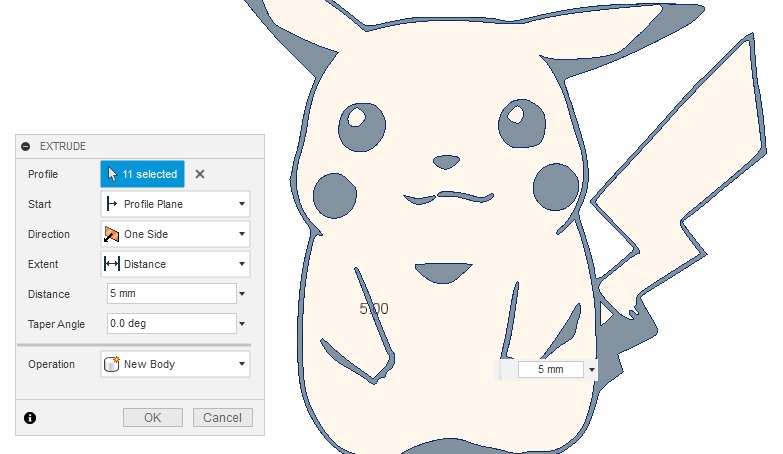
As you can see, Fusion inserted the Pikachu as a large sketch. Next, you will need to extrude parts of the sketch in order to make it a 3 dimensional body. DON'T extrude the entire sketch as this will only give you the silhouette of the image and you'll lose all detail. For Pikachu, I will extrude eyes, mouth, cheeks, and the outline.
Because all of the extruded pieces may not be touching, I then sketch a large rectangle over all of the bodies and give it some depth. This brings all the pieces into a single body. I then negatively extrude away everything not contained within Pikachu's outline.
This next step is optional, but I highly recommend it. Sketch two squares around the object and then extrude the space between the squares to form a frame. I call this my "calibration square" because it helps me keep the prints lined up later.
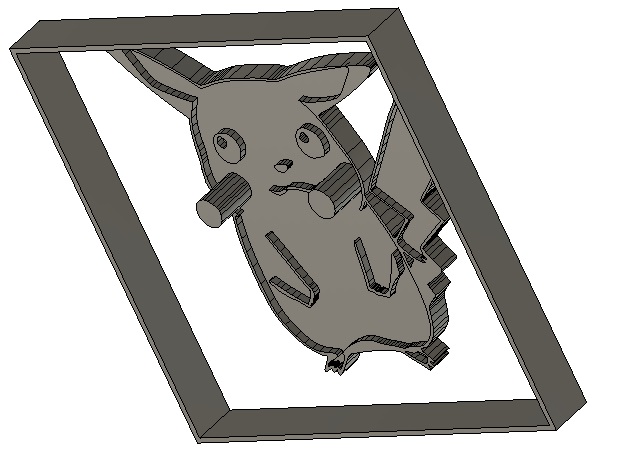
Next, choose which color to print first and extrude all of the features that will be printed in that color. The amount you extrude doesn't matter, as long as it sticks out like a sore thumb. Then, extrude your calibration square by the exact same amount.
The reason for this is because if you set your slicer to print a skirt around the print, it will do so around the square instead of the feature. So if I print the outline, then the eyes, the skirt around the eyes will overlap the outline, which I don't want.
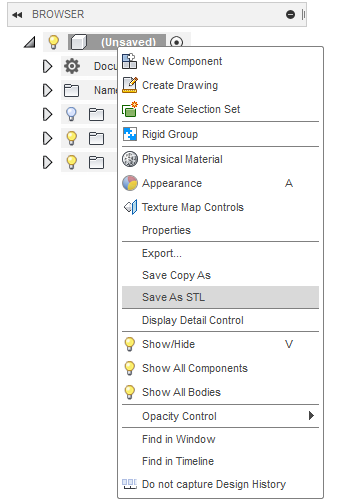
With that done, your first color is ready for the slicer. Because the main object and the calibration square are separate bodies, I find the easiest way to send them to the slicer is by right-clicking my project from the browser on the left and choosing "Save as STL".
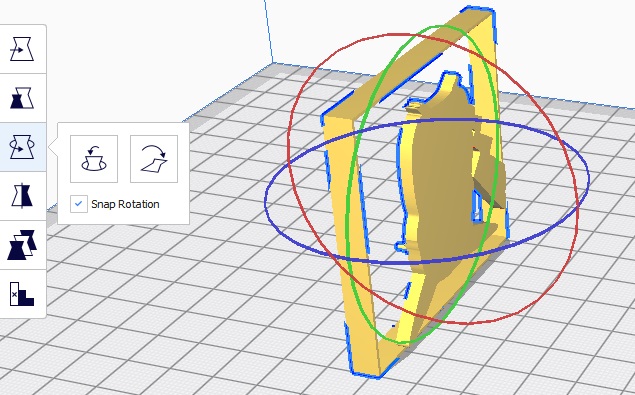
Cura always defaults to wanting to print my objects upright, so you will need to lay them flat using the rotate tool. This is where the calibration square really shines as it assures that each of your separate prints (one for each color) is centered perfectly.
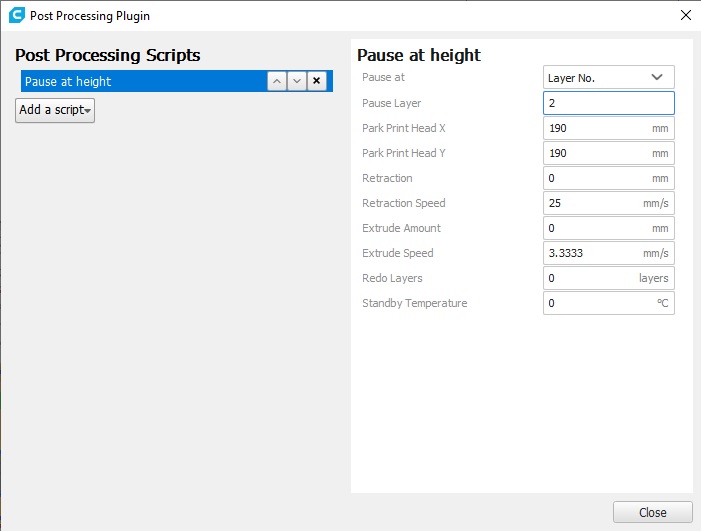
Before sending this to the printer, you want to make sure it doesn't print the whole thing. In Cura, select Extensions > Post Processing > Modify G-Code. In the Post Processing window, click Add a script > Pause at height.
Change Pause at to Layer No.
Change Pause Layer to 2.
For the rest of the settings, I like to make the print head get out of the way, so I set the Park Print Head variables as well. I also recommend changing the Standby Temperature to ~180 so that way it doesn't cool down right away and it'll be ready for the next color.
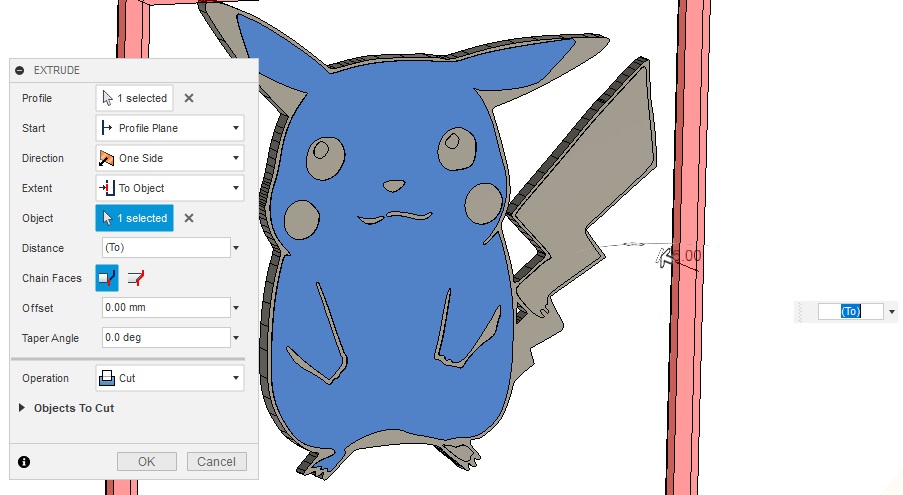
To prepare for the next color, flatten out the features (cheeks/eyes/mouth) from the first color in Fusion, then extrude the next feature. Be sure that whenever you extrude a new feature, it extrudes to the same degree as the calibration square.
Once all features (including the outline) are ready to print, it's time to send the final color (Pikachu's body and/or the main color of your project) to the slicer. To prep for that, you need to negatively extrude all features so that they are recessed/indented into the body of the model. I recommend having them indented by 0.1mm.
Also, negatively extrude the calibration square so that its surface is on the same plane as the model. Because you are now printing everything, make the square as thin as possible, again my recommendation is only 0.1mm thick.
Once you have all of your files, send them to the printer and print one color at a time. I recommend printing smaller details first, but you definitely need to save the main color for last.
As mentioned previously, your image should be as simple as possible and not have too much detail. In the case of Pikachu, when I scaled the image down after importing the .dxf, the outline was too thin, which caused distortion during printing.
Note: For best prints, simple images with low detail work best.
Also, this guide takes some liberties to assume the reader already knows some of Fusion's basic features such as extruding and scaling.
For the process I use, the image must be in .jpg format. So I start by opening the image (in this case a .gif) in Paint, then click File>Save As and save it as a .jpg.
Next I convert the .jpg into something that Fusion will want to work with. In this case, it's a .dxf file, which is basically a sketch file. To do this, I use an online conversion tool:
https://convertio.co/jpg-dxf/
This page has ads, but they're not very intrusive and the converter itself is dead simple to use. Just upload .jpg, click Convert, download .dxf.
With the .dxf file in hand, it's time to insert it into your Fusion project. In Fusion, click Insert > Insert DXF. You then need to select the surface or plane (which can include the surface of an existing 3D model), then click the folder icon to browse for your .dxf file.
As you can see, Fusion inserted the Pikachu as a large sketch. Next, you will need to extrude parts of the sketch in order to make it a 3 dimensional body. DON'T extrude the entire sketch as this will only give you the silhouette of the image and you'll lose all detail. For Pikachu, I will extrude eyes, mouth, cheeks, and the outline.
Because all of the extruded pieces may not be touching, I then sketch a large rectangle over all of the bodies and give it some depth. This brings all the pieces into a single body. I then negatively extrude away everything not contained within Pikachu's outline.
This next step is optional, but I highly recommend it. Sketch two squares around the object and then extrude the space between the squares to form a frame. I call this my "calibration square" because it helps me keep the prints lined up later.
Next, choose which color to print first and extrude all of the features that will be printed in that color. The amount you extrude doesn't matter, as long as it sticks out like a sore thumb. Then, extrude your calibration square by the exact same amount.
The reason for this is because if you set your slicer to print a skirt around the print, it will do so around the square instead of the feature. So if I print the outline, then the eyes, the skirt around the eyes will overlap the outline, which I don't want.
With that done, your first color is ready for the slicer. Because the main object and the calibration square are separate bodies, I find the easiest way to send them to the slicer is by right-clicking my project from the browser on the left and choosing "Save as STL".
Cura always defaults to wanting to print my objects upright, so you will need to lay them flat using the rotate tool. This is where the calibration square really shines as it assures that each of your separate prints (one for each color) is centered perfectly.
Before sending this to the printer, you want to make sure it doesn't print the whole thing. In Cura, select Extensions > Post Processing > Modify G-Code. In the Post Processing window, click Add a script > Pause at height.
Change Pause at to Layer No.
Change Pause Layer to 2.
For the rest of the settings, I like to make the print head get out of the way, so I set the Park Print Head variables as well. I also recommend changing the Standby Temperature to ~180 so that way it doesn't cool down right away and it'll be ready for the next color.
To prepare for the next color, flatten out the features (cheeks/eyes/mouth) from the first color in Fusion, then extrude the next feature. Be sure that whenever you extrude a new feature, it extrudes to the same degree as the calibration square.
Once all features (including the outline) are ready to print, it's time to send the final color (Pikachu's body and/or the main color of your project) to the slicer. To prep for that, you need to negatively extrude all features so that they are recessed/indented into the body of the model. I recommend having them indented by 0.1mm.
Also, negatively extrude the calibration square so that its surface is on the same plane as the model. Because you are now printing everything, make the square as thin as possible, again my recommendation is only 0.1mm thick.
Once you have all of your files, send them to the printer and print one color at a time. I recommend printing smaller details first, but you definitely need to save the main color for last.
As mentioned previously, your image should be as simple as possible and not have too much detail. In the case of Pikachu, when I scaled the image down after importing the .dxf, the outline was too thin, which caused distortion during printing.

