Worklog Blue G-Wii

Joined
Oct 5, 2019
Messages
132
Likes
122
Portables
2
Finally started my first portable!

I bought all the stuff for this thing probably 3 years ago and I'm just now getting the ambition to start it.

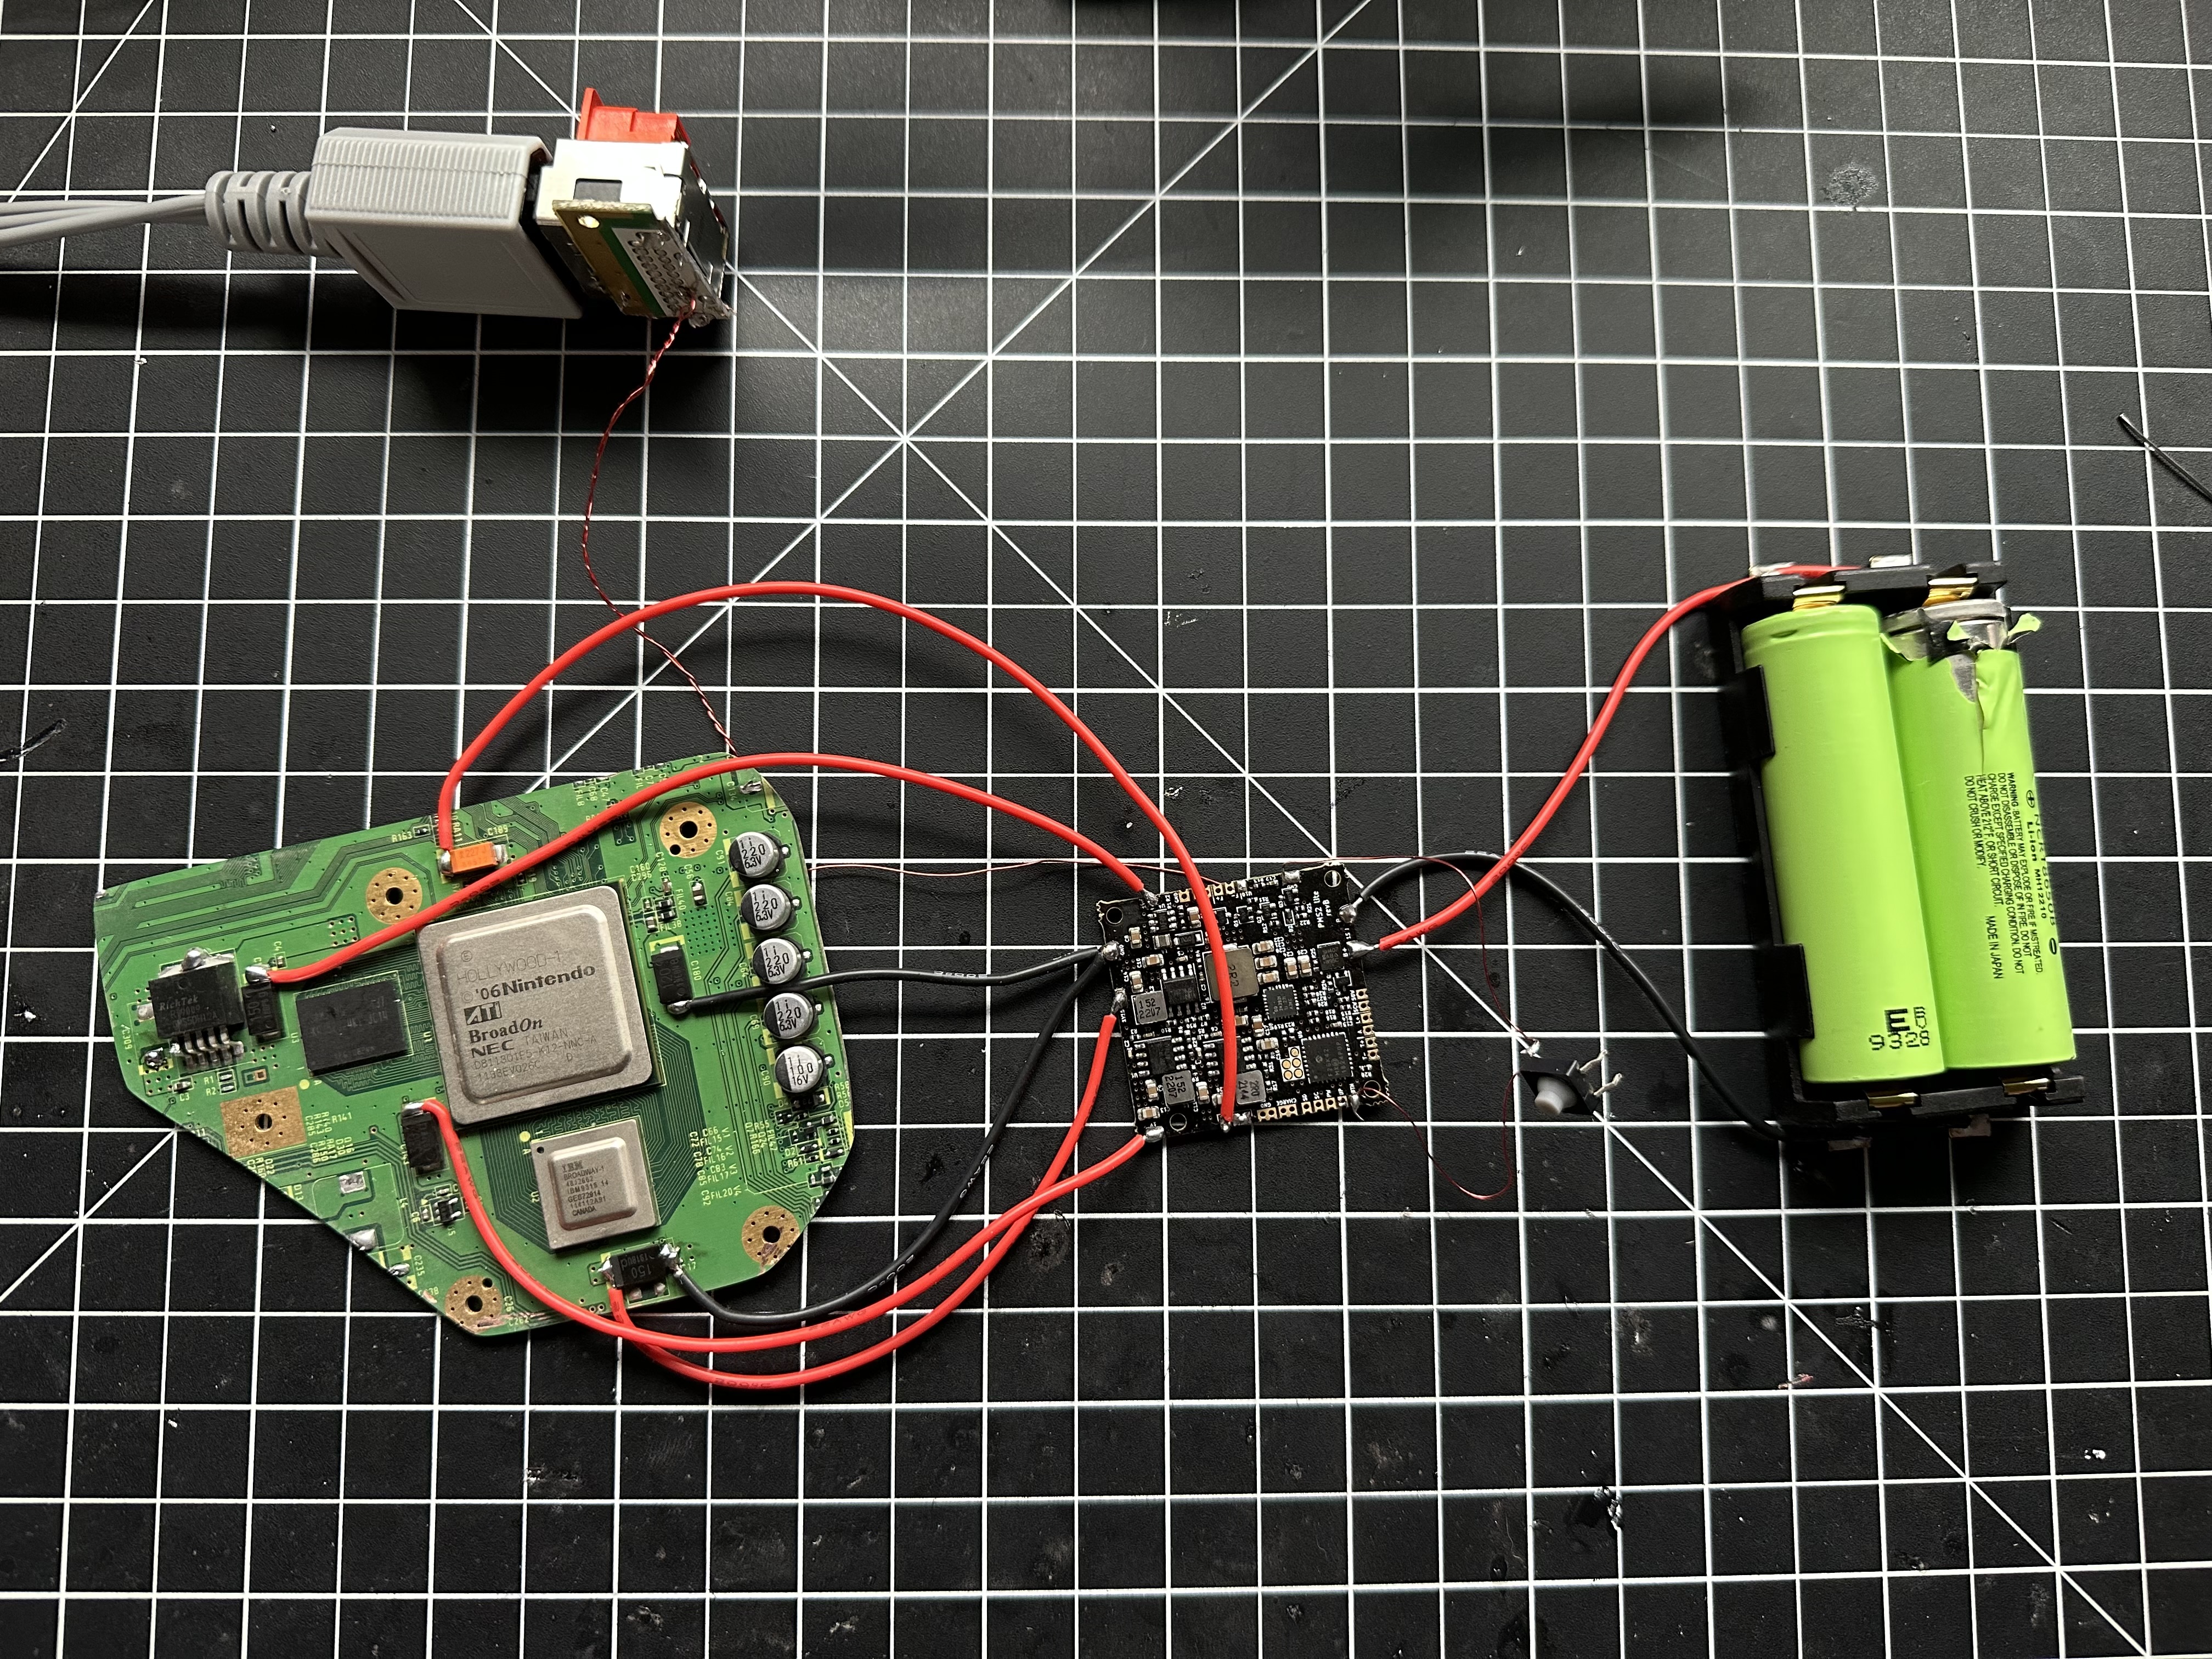
I've already got the trim done and tested that it's working.

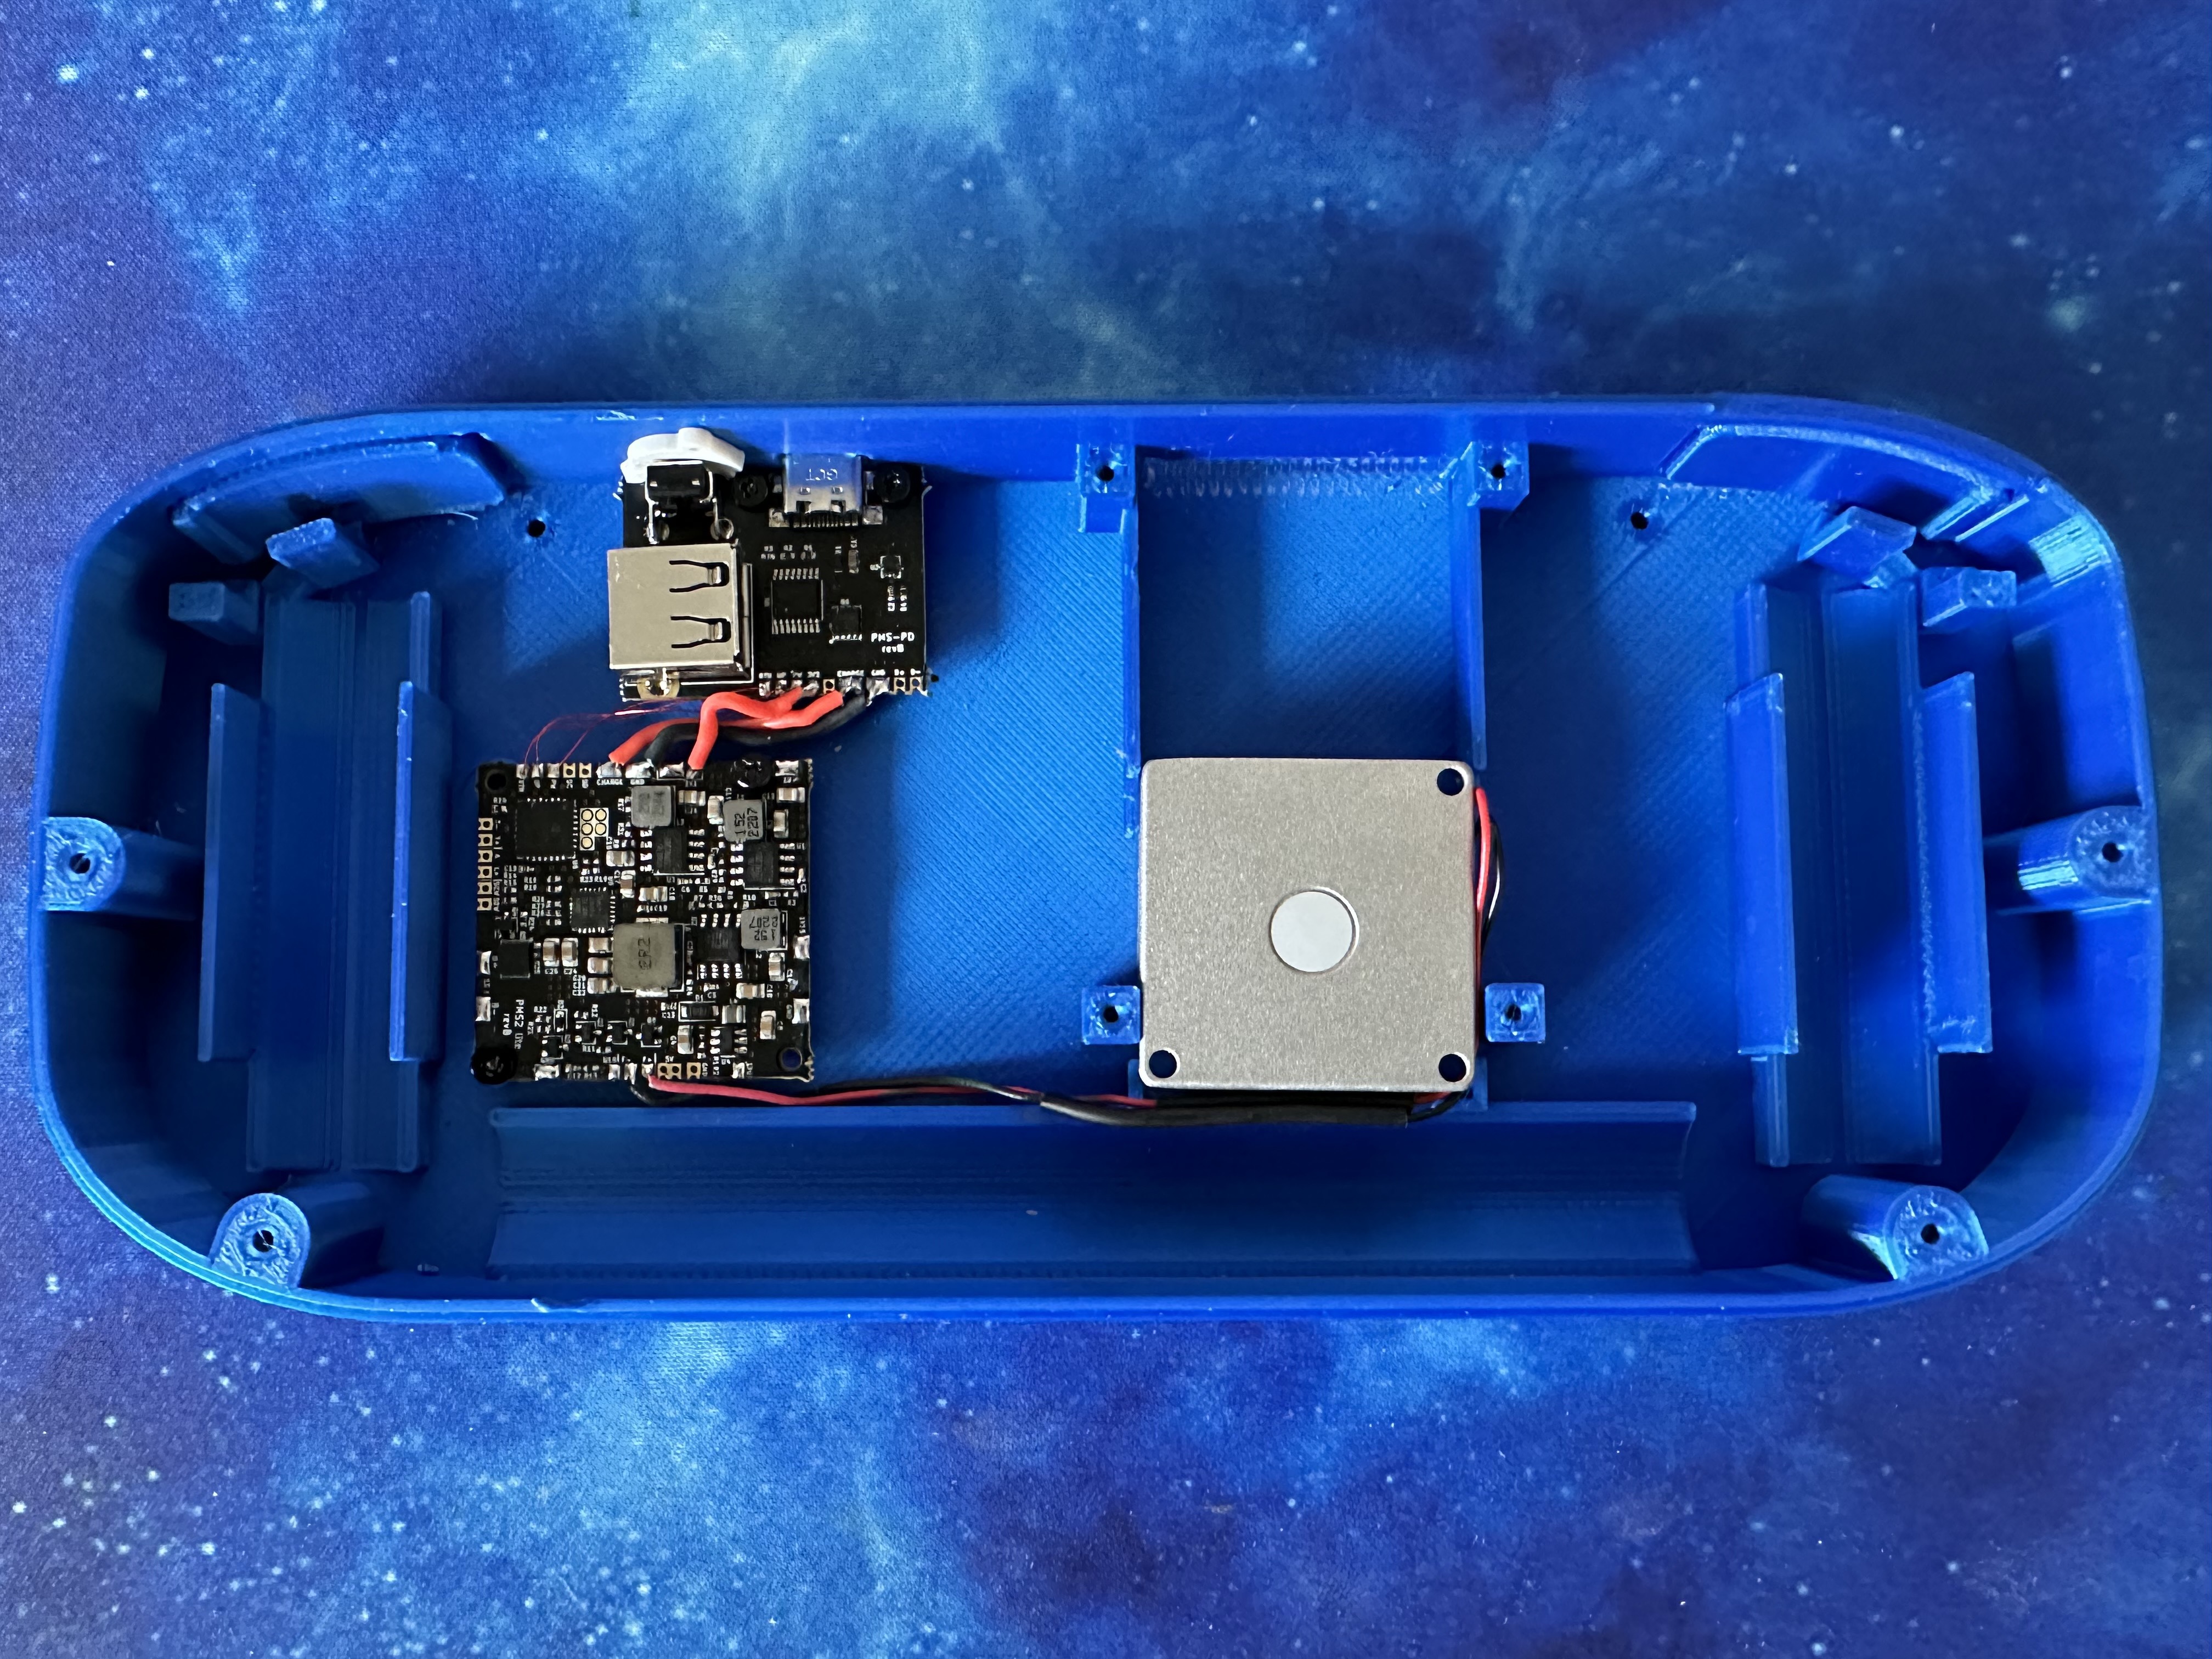
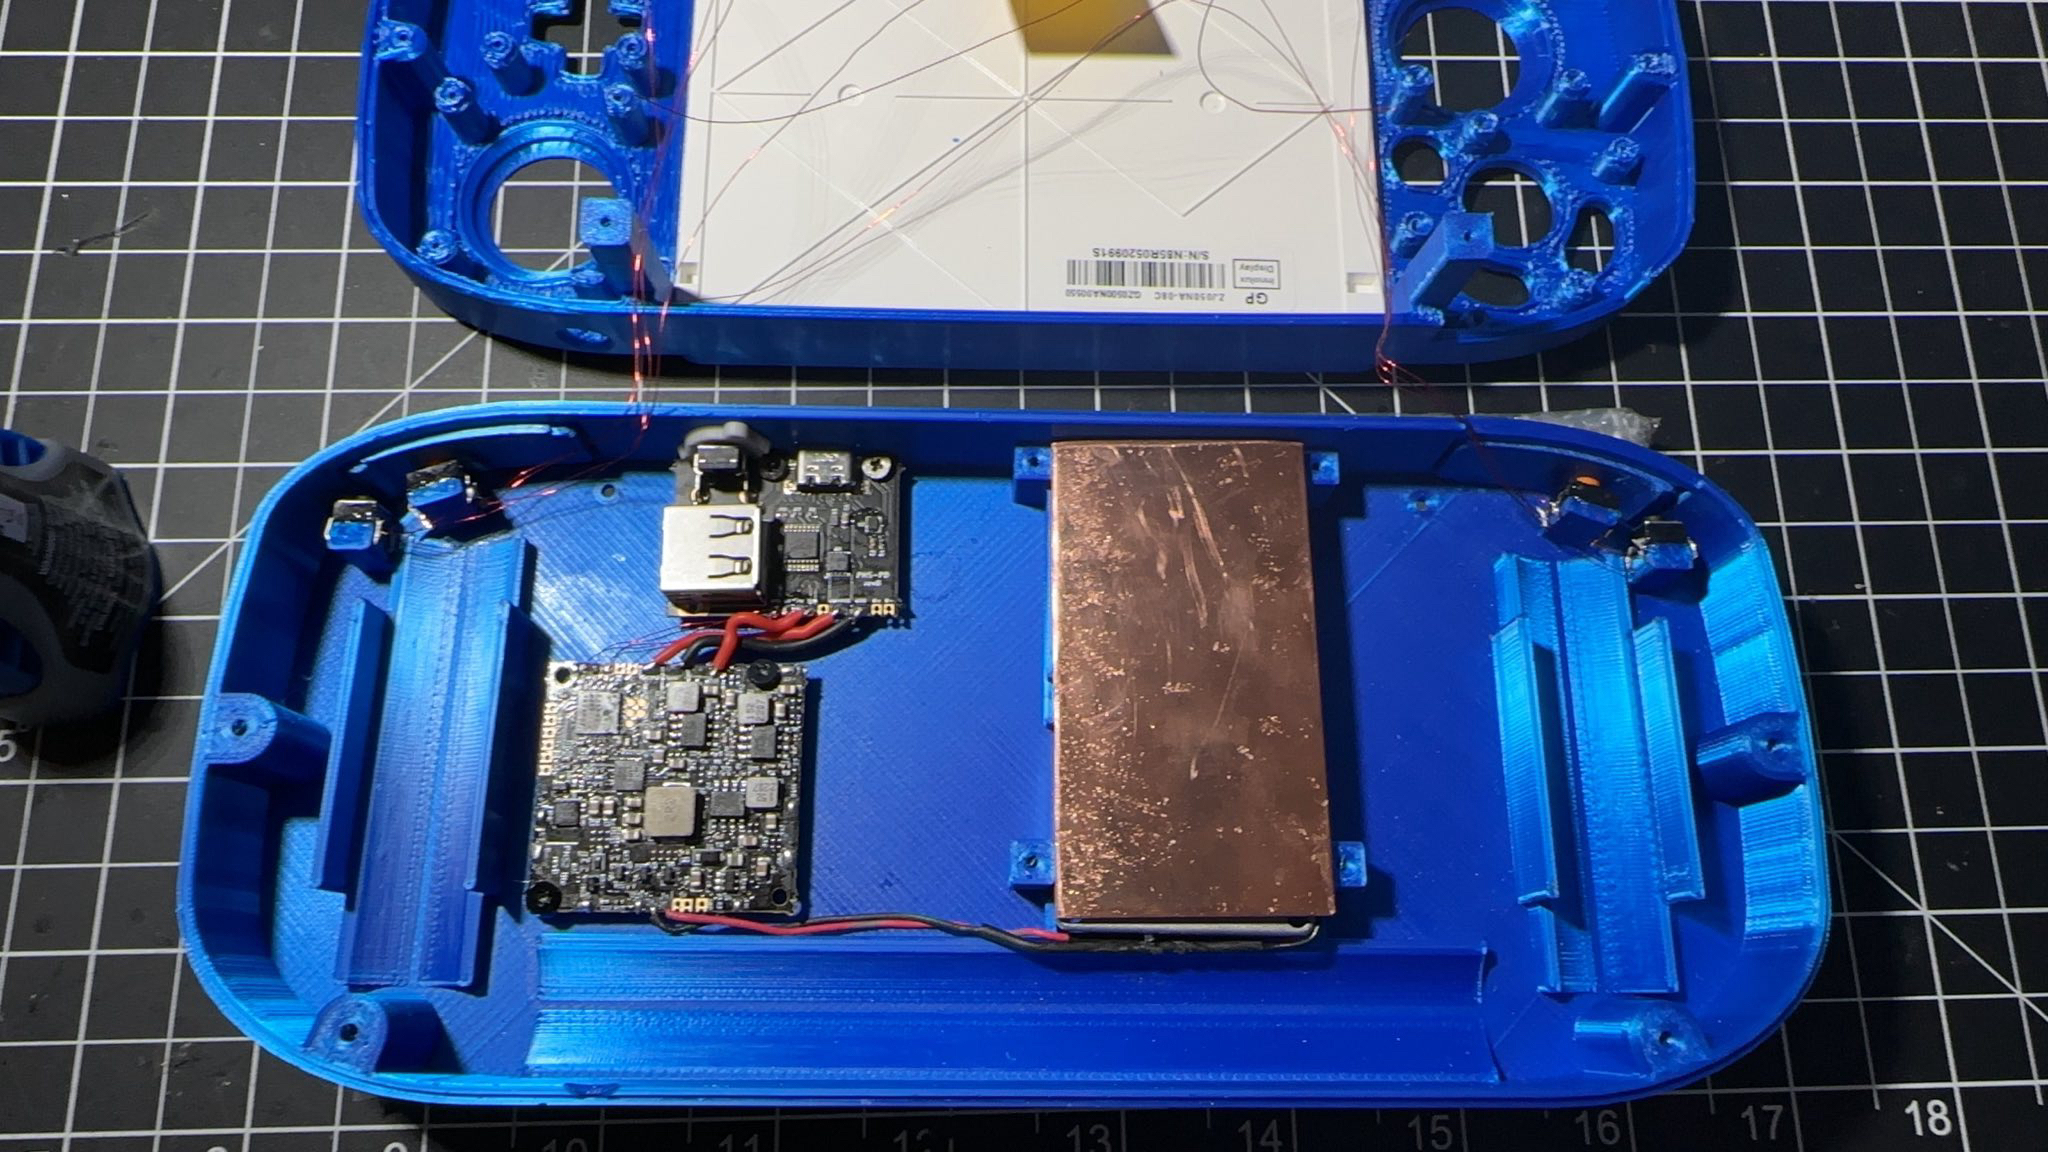
I started to mount the items in the case.

I'll be taking more photos when I get home to show everything I'm planning on!

Things finished so far:
- Wii trim
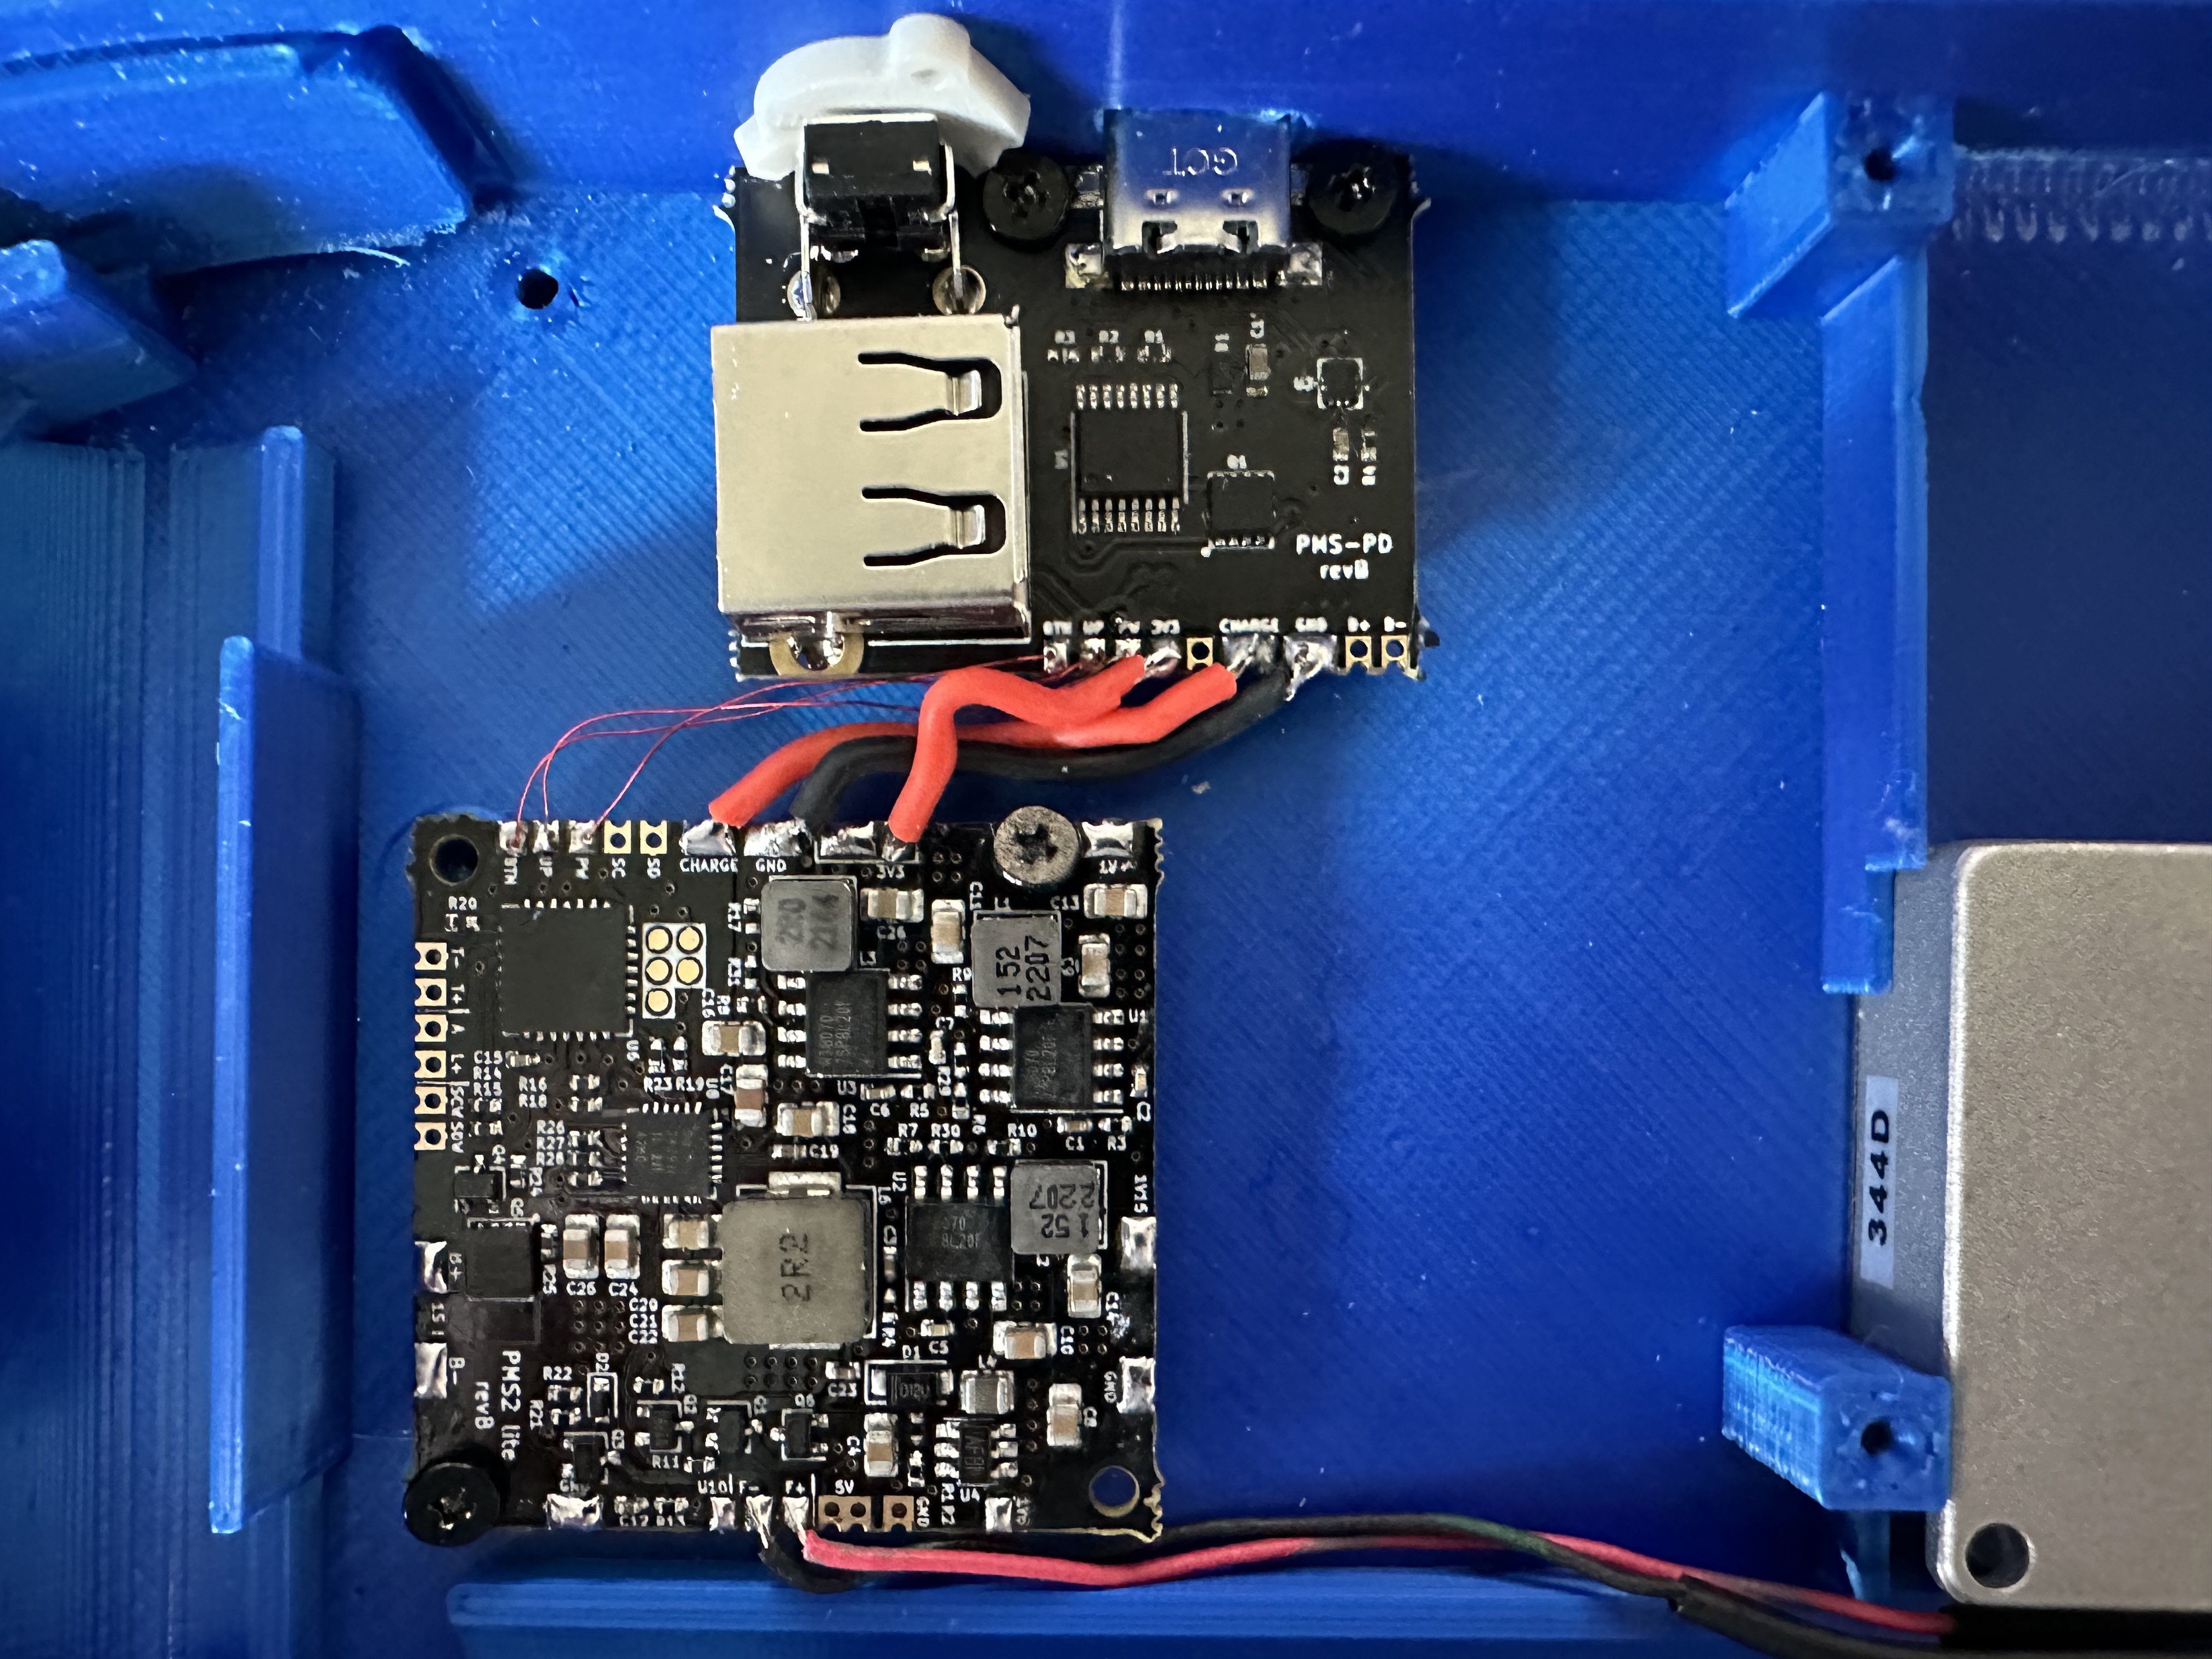
- PMS and PMS-PD mounted and wired to each other
- Copper plate cut and cooling system
- L and R switches wired up

IMG-3226.jpg


IMG-3227.jpg


IMG-3228.jpg


98517.jpg
 
Joined
Oct 5, 2019
Messages
132
Likes
122
Portables
2
Question for the buttons...

Do I need to ground each button individually or can I connect them all together to the GC+?
 
Joined
Mar 26, 2023
Messages
134
Likes
95
Every button needs one leg with ground. You can do this any way you want as long as a ground wire is connected. This means that you can have the ground touching the other grounds for other buttons. In an electrical circuit, all grounds can be together.

You can use any ground point also, but I would recommend just connecting them to the one on the GC+.
 
Joined
Oct 5, 2019
Messages
132
Likes
122
Portables
2
Got the Wii wired up along with the PMS-PD data lines.

unnamed.jpg


Next step is the one I'm most worried about, batteries. I just don't want anything to explode on me :|
 

cy

.
Joined
Sep 3, 2020
Messages
118
Likes
329
Portables
6
It's looking real nice so far! I especially love the shell color! I would suggest that when you connect the batteries to the PMS, you make the Ground wire extra long and then cut in half so you're able to solder to the batteries and the PMS without risking shorting anything. This would allow you to simply hold the wires together with your fingers or an small alligator clip to make the connection for testing, and then you can just solder the wires together and insulate them once you're ready to close the unit up. This is what I usually do when building these and it has served me quite well as it minimizes the risk of shorting anything.
 
Joined
Oct 5, 2019
Messages
132
Likes
122
Portables
2
Got the batteries all soldered up and tested! Everything seems to power on okay!

I won't be able to test the screen until I get VGA all finished since I removed the buttons to switch inputs already.

I'm a little nervous about the v-sync and h-sync lines since they are so small to solder to. I don't want to bridge the pins since my desoldering ability is awful.

IMG-3235.jpg


IMG-3236.jpg
 

CrazyGadget

Crazy Helpful, CrazyGadget
.
Joined
Jun 6, 2020
Messages
615
Likes
887
Location
Downing's Closet
Portables
???
You can test the wii / screen with composite before wiring VGA, in fact I highly recommend it. When you say you removed the buttons to switch inputs, do you mean you completely got rid of the button board? If you still have it, you can manually wire it back. Unfortunately you can't just wire the buttons to ground since the resistor ladder is on that button board...

On a separate note, are you sure that Wii is going to fit into the case when you go to screw it down? IIRC the cut lines by the 1v15 cap and by the NAND lines are a bit more aggressive. Just worth double checking.
 
Joined
Apr 27, 2023
Messages
91
Likes
52
Location
Michigan
Got the batteries all soldered up and tested! Everything seems to power on okay!

I won't be able to test the screen until I get VGA all finished since I removed the buttons to switch inputs already.

I'm a little nervous about the v-sync and h-sync lines since they are so small to solder to. I don't want to bridge the pins since my desoldering ability is awful.

View attachment 27451

View attachment 27452
looks clean, don’t forget the u10 line from the pms to the via on the back of the wii
 
Joined
Mar 26, 2023
Messages
134
Likes
95
Got the batteries all soldered up and tested! Everything seems to power on okay!

I won't be able to test the screen until I get VGA all finished since I removed the buttons to switch inputs already.

I'm a little nervous about the v-sync and h-sync lines since they are so small to solder to. I don't want to bridge the pins since my desoldering ability is awful.

View attachment 27451

View attachment 27452
Also, it's a good idea to solder a second ground wire on your Wii.
 

Stitches

2 and a Half Dollarydoos
Staff member
.
.
Joined
Feb 5, 2017
Messages
3,864
Likes
3,034
Location
Banana Bender Land, Australia
Portables
6
If you have some kapton tape, you can put a bit of it between the H and V sync pins when soldering the wires to them. The kapton tape will act as a solid barrier to prevent the pins from bridging
 
Joined
Apr 27, 2023
Messages
91
Likes
52
Location
Michigan
If you have some kapton tape, you can put a bit of it between the H and V sync pins when soldering the wires to them. The kapton tape will act as a solid barrier to prevent the pins from bridging
give this man an award i would have never thought of that i would just say use a thinner iron
 

Stitches

2 and a Half Dollarydoos
Staff member
.
.
Joined
Feb 5, 2017
Messages
3,864
Likes
3,034
Location
Banana Bender Land, Australia
Portables
6
Joined
Oct 5, 2019
Messages
132
Likes
122
Portables
2
If you have some kapton tape, you can put a bit of it between the H and V sync pins when soldering the wires to them. The kapton tape will act as a solid barrier to prevent the pins from bridging
That is a wonderful idea thank you!
 
Joined
Oct 5, 2019
Messages
132
Likes
122
Portables
2
VGA completed successfully! Thank you all for the tips!

New issue: The usb drive isn't showing RVLoader. The files are on the drive what could be the issue?

Not sure what's next but I'm getting close to the buttons next I think.

IMG-3249-2.jpg


84699-2.jpg
 

CrazyGadget

Crazy Helpful, CrazyGadget
.
Joined
Jun 6, 2020
Messages
615
Likes
887
Location
Downing's Closet
Portables
???
Let's see your usb file structure. The RVLoader files need to be copied to the root of the drive, and it has to be FAT32.
 
Top