Ashida

Joined
Mar 3, 2023
Messages
7
Likes
1
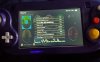
Hi, I'm completely new to this forum and to portables/electronics in general.
I have all of my PCBs assembled but am having issues finding diagrams when it comes to wiring.
My first roadblock is trying to figure out how to wire the Screen driver board.
If you have any tips or diagrams, I will be forever grateful, thank you!
 

Attachments

  • 20230314_014518.jpg
    20230314_014518.jpg
    2.2 MB · Views: 238
I figured out the wiring situation for the driver board (I think). I used the same color magnet wire for all points on the driver. Will that be something I'll need to change, or should it be okay?
 

Attachments

  • 20230314_233007.jpg
    20230314_233007.jpg
    1.3 MB · Views: 236
Ive been slowly chugging along and trying to find as much documentation as possible.
I trimmed my Wii today but am unsure if I clipped anything important.
I will start wiring up to see if the trim works. Either way the project goes, I'm happy to have tried my hand at something new!
 

Attachments

  • 20230320_183007.jpg
    20230320_183007.jpg
    2.1 MB · Views: 236
Love the color scheme of your print! Definitely want to see what it looks like when all put together.

I figured out the wiring situation for the driver board (I think). I used the same color magnet wire for all points on the driver. Will that be something I'll need to change, or should it be okay?

The wiring itself looks good (the twisted pairs for the colors plus h/v-sync look to be in the correct place), but when you say you used the same color for all points, do you mean even within the twisted RGB pairs? If so, I'd definitely recommend getting at least a second color, as otherwise when you wire it up to the Wii there will be a 50/50 chance you actually get the right wire to the right place

Finally, just because you said you were new, it looks like you're using a 6-layer trim, so make sure you're using that particular guide. You'll need to make sure you reconnect more components than a OMGWTF trim on a 4 layer Wii board. This might end up being a pretty big headache, as some parts for the Ashida (e.g. the RVL-NTC were not made with a 6-layer board in mind)

Oops, listen to CrazyGadget below.
 
Last edited:
You cannot use a 6 layer for a portable, especially if you're using a PMS. The PMS cannot supply enough current to power 6 layer boards.
Thank you for saving me some headache.
I'll be ordering the correct wii tonight.
As for the 6layer board, would it still be salvageable to make into a mini wii or just trash at this point?
 
Love the color scheme of your print! Definitely want to see what it looks like when all put together.


The wiring itself looks good (the twisted pairs for the colors plus h/v-sync look to be in the correct place), but when you say you used the same color for all points, do you mean even within the twisted RGB pairs? If so, I'd definitely recommend getting at least a second color, as otherwise when you wire it up to the Wii there will be a 50/50 chance you actually get the right wire to the right place

Finally, just because you said you were new, it looks like you're using a 6-layer trim, so make sure you're using that particular guide. You'll need to make sure you reconnect more components than a OMGWTF trim on a 4 layer Wii board. This might end up being a pretty big headache, as some parts for the Ashida (e.g. the RVL-NTC were not made with a 6-layer board in mind)

Oops, listen to CrazyGadget below.
Thank you for the imput, I'll grab some new wire just to make things easier to distinguish!
 
Thank you for saving me some headache.
I'll be ordering the correct wii tonight.
As for the 6layer board, would it still be salvageable to make into a mini wii or just trash at this point?
Keep it. There is nothing wrong with it and you can build a Noldendo Micro
 
Hey all. After shelving the Ashida. I finally ended up finishing it and everything seems to work pretty well. I am having issues adjusting the screen ratio and cant seem to figure out the issue. Any help would be appreciated!
 

Attachments

  • 20250211_092514.jpg
    20250211_092514.jpg
    1.1 MB · Views: 118
  • 20250211_092545.jpg
    20250211_092545.jpg
    1.4 MB · Views: 112
Back
Top