
You are using an out of date browser. It may not display this or other websites correctly.
You should upgrade or use an alternative browser.
You should upgrade or use an alternative browser.
A Side Project
- Thread starter Luke
- Start date
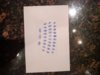
Some ink transfer magic, and hopefully soon a 3D model / SVG
Would've been easier with a flatbed scanner... meh. I'll open my own thread if I progress, just seemed relevant.
Would've been easier with a flatbed scanner... meh. I'll open my own thread if I progress, just seemed relevant.
Attachments
- Joined
- Nov 10, 2016
- Messages
- 607
- Likes
- 1,639
I think it's called basic human nature. But I concur - damn fine work, Luke!Is there an orientation for being attracted to perfect frankencasing jobs?
- Joined
- Mar 25, 2017
- Messages
- 21
- Likes
- 18
Any updates on this? Because I'm currently buying a bunch of parts to make my own DSPi and want to see what kind of decisions you have done in order to make this work. Perhaps we could help each other?
Shoot me any questions you have. Sorry I'm so bad at finishing projects. It's why I only have two portables to show for the past 9 years.Any updates on this? Because I'm currently buying a bunch of parts to make my own DSPi and want to see what kind of decisions you have done in order to make this work. Perhaps we could help each other?
- Joined
- Mar 25, 2017
- Messages
- 21
- Likes
- 18
Oh, I don't really have many questions to speak of. I just found it funny that I thought of this project without knowing you had make this thread!
Will the battery, even with the extension, be enough to power the Pi, screen and keyboard for a decent amount of time? And how are you going to interface the keyboard with the Pi?
Good luck and keep at this project! Once I get started with mine I'll make a separate thread.
Will the battery, even with the extension, be enough to power the Pi, screen and keyboard for a decent amount of time? And how are you going to interface the keyboard with the Pi?
Good luck and keep at this project! Once I get started with mine I'll make a separate thread.
I'm not incredibly concerned about power because the screen doesn't take that much and neither does the pi.
Stay away from the pi3 unless you really need it; in my opinion the upped processing speed and whatever it's costing to always have wifi on doesn't even come close to warranting the almost double power consumption, especially if you're only going to be playing retro games.
Most people I've seen doing this use the pi zero, but I'm going for the pi2.
The keyboard is usb, so, super simple, and the rest of the controls will be interfaced via teensy, which will be another usb. I am toying around with the idea of having a wifi dongle wired internally to a third usb with an on/off switch wired on the 5v line, and a 4th usb for external use, we'll see though. Might nix the wifi idea and just have two external usbs.
Maybe I'll work on it some tonight!
*cough*progress*cough*
Okay guys, I did a thing.
If anyone remembers, the thing that was holding me back was I was attempting to fit a 4.3" screen and its driver board into the top half of a standard 3DS. Well, I trimmed the driver board pretty well but it still wasn't fitting and even if I did get it to fit, the hinge system sure wasn't going to fit.
*close to a year goes by*
@Fruity_Grebbles shamed me over in his keyboard thread, and it inspired me to continue (though I have been somewhat inactive, I have been in wii modding land for quite a while). I spent several hours today designing and printing the top half of the top half of the case (if that makes sense), since the original piece just wasn't going to allow everything to fit. Two great things came from this: I have a semi-elegant solution to my screen-fitting problem, AND, because of the dimensions of the lower part of the print, the friction alone is enough to hold at a perfect viewing angle. So once complete, this will fit perfectly into the bottom half of the 3DS, without the need of hinges.
Expect more progress in the near future (and I mean it).
 hope to see more soon
 sorry.


Mostly just a few more pictures...
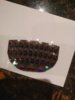
The screw posts that I epoxied in our mostly dried, so I fully assembled the top half of the project. I'm running the wires through the hinge on the right side, as you can see. The wires are... 5v, gnd, shielded composite, and the button signal. In order to make the screen controls operational again I need to ground the button wire through 3 different resistors as was originally done on the screen driver board.
That being said it appears that I left the screen in 4:3 mode so I can't demo widescreen until I rewire the buttons. But man am I happy with the size of the screen. It's amazing how close it was to not working out.
Things I still need to do:
Wire up all 3ds buttons and slider to teensy, and get it coded to work with the pi
Wire up internal wifi module (maybe?)
Mount USB ports (1 or 2?) and charging to the side of the case
Figure out a way to easily interchange micro sd cards (only thing that has me stumped at the moment)
View attachment 5299 View attachment 5300 View attachment 5301
Mostly just a few more pictures...
The screw posts that I epoxied in our mostly dried, so I fully assembled the top half of the project. I'm running the wires through the hinge on the right side, as you can see. The wires are... 5v, gnd, shielded composite, and the button signal. In order to make the screen controls operational again I need to ground the button wire through 3 different resistors as was originally done on the screen driver board.
That being said it appears that I left the screen in 4:3 mode so I can't demo widescreen until I rewire the buttons. But man am I happy with the size of the screen. It's amazing how close it was to not working out.
Things I still need to do:
Wire up all 3ds buttons and slider to teensy, and get it coded to work with the pi
Wire up internal wifi module (maybe?)
Mount USB ports (1 or 2?) and charging to the side of the case
Figure out a way to easily interchange micro sd cards (only thing that has me stumped at the moment)
Gourdgeous.
Edit: An actual response:
Wifi can always be handled by a Pi 3, should you choose to change the brain of your handheld.
What do you mean by interchanging SD cards?
Last edited:
Didn't go with pi3 because of extra processing speed that I didn't think I needed and always-on WiFi which I wouldn't need (both = less playtime).
I want it to function as "a general purpose computer", as emulation station, and as a media player. I was planning on having 3 separate micro sd cards for raspbian, retropie, and openelec. Let me know if there's a way to get away with just one.
I want it to function as "a general purpose computer", as emulation station, and as a media player. I was planning on having 3 separate micro sd cards for raspbian, retropie, and openelec. Let me know if there's a way to get away with just one.
You can install Kodi and EmulationStation on raspbian, but If you really want 3 separate cards an SD switcher could be as easy as protection diodes on the pins of each slot and a 3-way switch for power.
You can install Kodi and EmulationStation on raspbian.
Cool, I will look into this.
- Joined
- Jul 9, 2016
- Messages
- 37
- Likes
- 15
- Portables
- 9000+
Meh, just use BerryBoot, as it allows you to keep multiple OS's on the same card and boot from them individually.
Also, you can build RetroPie on top of full Raspbian and then also install Kodi in RetroPie. This would seem to accomplish your goals as well.
Also, you can build RetroPie on top of full Raspbian and then also install Kodi in RetroPie. This would seem to accomplish your goals as well.
Meh, just use BerryBoot, as it allows you to keep multiple OS's on the same card and boot from them individually.
Also, you can build RetroPie on top of full Raspbian and then also install Kodi in RetroPie. This would seem to accomplish your goals as well.
To be clear, these are two separate concepts. You either multiboot with the BerryBoot bootloader, or go the Raspbian route.
To further clarify, Kodi isn't installed "in RetroPie," per se, but on the base Raspbian and can be launched through the emulationstation frontend that RetroPie provides.
I actually forgot about berryboot and to be fair I think that's the most elegant solution.
- Joined
- Jul 9, 2016
- Messages
- 37
- Likes
- 15
- Portables
- 9000+
To be clear, these are two separate concepts. You either multiboot with the BerryBoot bootloader, or go the Raspbian route.
To further clarify, Kodi isn't installed "in RetroPie," per se, but on the base Raspbian and can be launched through the emulationstation frontend that RetroPie provides.
I actually forgot about berryboot and to be fair I think that's the most elegant solution.
You are completely correct. Thanks for clarifying this.
")
Similar threads
- Replies
- 4
- Views
- 2K
- Replies
- 0
- Views
- 6K
- Replies
- 1
- Views
- 2K