Worklog Wii Laptop

Joined
May 5, 2016
Messages
20
Likes
4
Alright so as suggested by @ShockSlayer I have decided to start a work log for my very first project, a Wii Laptop. For this project I am not overly concerned with being super compact or doing anything advanced.
Since I really don't have access to a 3D printer I'm going to be using an actual gutted laptop. I'll include details about the laptop when I get home from work. I will also be using a black Wii with GC ports that I'm told contains a 4 layer board.
This is going to be the biggest thing I've ever done with electrical components. The closest I've come to this is putting parts together to build my home PC. So, wish me luck!

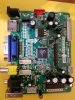
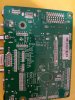
EDIT: So the specific laptop model is a Dell Inspiron 1545.
 
Last edited:

cheese

the tallest memer in town
Staff member
.
.
.
Joined
Mar 2, 2016
Messages
2,759
Likes
2,431
Location
Florida
Good choice with the laptop, it looks like it will be thick enough to easily house all the components, and you can probably even stick a decently sized battery in it as well. Assuming the screen, battery, speakers, or hard drive still work, you can probably re-use them with minimal effort. If the laptop has wifi, you may also be able to re-use the antennas in the screen with the Wii's wifi board to get better range. It may also be possible to re-use the original heatsink and fan that was on the laptop's processor.

All in all, solid build plan, can't wait to see more!
 
Joined
May 5, 2016
Messages
20
Likes
4
@cheese thanks! Now I need to start making a list of materials. What is everyone's go to source for electronic parts?

EDIT: Also just noticed I'm a member now, gratz to me!
 
Joined
May 5, 2016
Messages
20
Likes
4
labeled image.jpg
20160515_134850.jpg
Gutted the laptop today, I officially hate screws now. I removed everything but the fan that went above the heatsink and a few ports next to it (VGA, 2 USB, Ethernet). I'm not quite sure yet what I'm looking for in terms of the LCD connector but it looks like it was already fed through the casing to the motherboard. I would have liked to include a place for the Wii's disc drive but I'm not sure if that's the way to go anymore. I know for sure I will need places for GC controller input. Another concern is the place where the battery connects to the laptop. It appeared to hook directly into the motherboard and considering the battery is part of the case, I was wondering how exactly I might go about modifying it to work with my system. Probably all I'll be doing today until I find out more, will keep posting updates.
 
Last edited:
Joined
Apr 29, 2016
Messages
35
Likes
19
Location
Roswell, Georgia
Portables
1
The blue cable that came with your board that plugs in to the 40-pin connector goes to the connector on the back of your LCD. The cable I got with mine was too short, so I had to order an extension. I can't say whether or not you will need one, but if you have any doubt as to whether or not it will work, buy an extension. Here's the one I got: http://www.ebay.com/itm/170897391959
 

cheese

the tallest memer in town
Staff member
.
.
.
Joined
Mar 2, 2016
Messages
2,759
Likes
2,431
Location
Florida
Its probably worth mentioning I have no idea what to do from here.
Test what you've got, make sure everything works, and start planning on where you're going to put all your boards. Make sure to leave extra space for wires, and batteries if you plan on using ones besisdes the one that came with the laptop.
 
Top