Worklog Wii DsXL

Joined
Apr 26, 2023
Messages
11
Likes
11
I figured it was about time I started a post of my own.

After a few other projects I'm eager for the challenge a portable wii will provide.

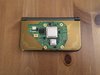
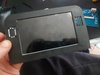
The plan is to create a portable that within the limits and follows the form factor of a 3DSXL as closely as I can get away with. Admittedly it will probably be a little "thicc"-er but Im chalking that up to creative/artistic licence.

I'd like to add the NGC controller ports where the lower screen would be (not that multiplayer on a small screen would be good) but id like to maintain as many of the original features as possible after all it is a Wii.

I plan to do the OMGWTF trim and use potentially a switch battery or flat lipos

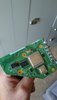
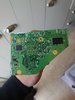
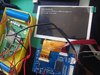
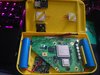
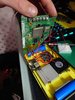
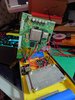
Ive got the Amp, pms2 and screen from 4 layer tech. Sadly the gc+ and pmspd aren't in stock. I have a NGC controller that can and will probably be sacrificed for the cause. One question I have is that will the gc+ configuration tool work with a chopped controller? As i plan to use 3ds sliders to keep the low profile (I read they need dead zone's altering?) Ive already soldered one to the controller board and tested in a gamecube it seemed to work with limited testing.

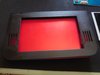
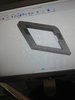
I will post photos and CAD drawings soon.

Looking forward to sharing my journey/project with you guys!
 

Stitches

2 and a Half Dollarydoos
Staff member
.
.
Joined
Feb 5, 2017
Messages
3,773
Likes
2,981
Location
Banana Bender Land, Australia
Portables
6
Joined
Apr 26, 2023
Messages
11
Likes
11
Madmorda once built a fully functional Wii portable using a DS Lite carrying case. Building a clamshell this small will be very fiddly, and you'll likely need to expand the bottom a bit, but you can definitely do it!

That's an interesting and helpful read. Thanks for pointing me in the right direction.

I appreciate that I may need to may need make it a little thicker, currently reworking the Cad files to better incorporate 18650 cells. Will probably end up something similar to the "bulge" in the spii. But id prefer to use flat lipos as mentioned previously. Tweeking the mock-ups to get a better idea of how to make everything fit. Everything fits in the footprint. It really is just a thickness issue.
 

Stitches

2 and a Half Dollarydoos
Staff member
.
.
Joined
Feb 5, 2017
Messages
3,773
Likes
2,981
Location
Banana Bender Land, Australia
Portables
6
Margins look good. Just clear off those components on the edge that you hit when trimming, they like to form shorts
 
Joined
Apr 26, 2023
Messages
11
Likes
11
Margins look good. Just clear off those components on the edge that you hit when trimming, they like to form shorts
The little resistors near f3 + f4 have been removed, aswell as C110 near fil27 on the reverse as that looked like it'd been cut. Thanks for the advice.
 
Joined
Apr 26, 2023
Messages
11
Likes
11
I tested the resistances, I "think" they seem normal, however im struggling to find a good spot to measure the 1.8v line. I'll do some digging and get back

Edit:

After rechecking and measuring the 1.8v lines I have these readings.


Anything jump out to the more experienced?

Thanks
 

Attachments

Last edited:
Joined
Apr 26, 2023
Messages
11
Likes
11
Roughed out the top portion of the clamshell to check dimensions and fitment for the screen

Happy with the size and proportions so far. Having bits like this helps the project feel more like a thing rather than an assortment of parts.

Batteries and gc+ are in the post so hopefully in the next update we'll have an image on the screen!

Included picture of the ds for comparison
 

Attachments

Joined
Apr 26, 2023
Messages
11
Likes
11
A small progress update

The case has had a few revisions, everything other than the triggers, dpad, abxy buttons, and fan/heatsink all have a place to screw down to. Took a little while longer than I hoped thanks to life and printer issues

Most importantly the screen outputs an Image (over composite, wiring VGA will come at the end)

I'm waiting on some button caps fan, heatsinks and hinges (not sure how im going to incorporate the clamshell yet) I've ordered from the internet, once they arrive ill ve able to finalise placement of the controlls on the top portion of the base,
I may even flip the wii board over having the fan and heatsink underneath apposed to over the top, as this seems to be the common convention and now I can see why.

I'm so glad I decided to build a portable in this manner as I feel I've managed to level up my CAD game significantly in a short time.

The eagle eyed people here may notice that its a different trim, this is soley because i didn't like how initially I lopped off one of the mounting holes, I'll use it for spares or perhaps another project down the line.

Please, any comments, criticism welcome!
 

Attachments

Joined
Apr 26, 2023
Messages
11
Likes
11
More of a bookmark date stamp than much of a progress update.

Gone and done more of a permanent job getting things wired and mounted in the bottom 3rd of the case, new radial fan and heatsink assembly too.

New batteries en route, figured I should get some branded ones to ease my mind once it's all buttoned up
 

Attachments

Joined
Sep 16, 2023
Messages
10
Likes
0
More of a bookmark date stamp than much of a progress update.

Gone and done more of a permanent job getting things wired and mounted in the bottom 3rd of the case, new radial fan and heatsink assembly too.

New batteries en route, figured I should get some branded ones to ease my mind once it's all buttoned up
have you finished it? im building a similar project called WiiDS but its based on the OG 2DS
 
Top