- Joined
- Nov 5, 2017
- Messages
- 406
- Likes
- 488
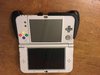
So about a month ago I decided to purchase a 3DS as I had loved the standard DS. Thing is there were a couple of shortcomings with the unit that I dearly needed to fix, and we need way more new 3DS XL love out here on the internet!
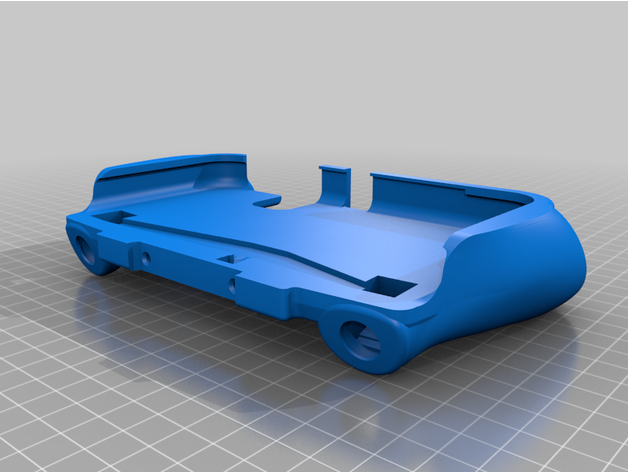
So, about my most pressing issue: Holding this thing is terrible. Nintendo made it all jazz, and zero comfort, and the internet provided with a really comfortable grip that changed how the hand rested around the shoulder buttons, meaning that a few tiny muscles in my hands were starting to get their cramp on. I found myself wishing that I could make a grip that had a place for the Z-buttons.
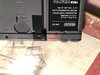
You'd be amazed how little there is out there on the test points for the new 3DS XL - but did manage to find a Japanese page on it, and it gave me everything I needed here: http://imaginglabo.web.fc2.com/new3DSLL-barabara.html
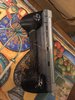
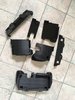
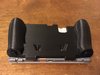
So at this stage I did a quick test with some tact switches before opting to hot glue everything together for a super-quick proxy")
It feels great, and it works great! My next step will be to design a two-part grip that includes positioning for the tact switches, and room in the handles for header connections for when I need to dismantle it and access the SD card. Problematically there's every possibility it might be accidentally ripped apart with a good tug, so I'd love suggestions from people about how to fix this - I've been thinking of something similar to a battery connection for making the "grip terminals" but don't know where to start looking there. I'm also open to suggestions for light-touch tact switches, or a good way to design the shoulder buttons etc.
Oh, and fluffy helped with the entire process
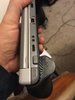
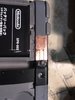
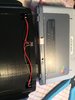
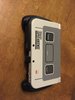
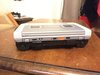
I was really unhappy with the whole "3DS needs a special cable" crap, and thought about replacing the standard port with a Type-C off the hammer. Thing is the widths essentially gave me 0.5mm between dreams and smoke on the standard port location. I could have brought a board off of Amazon, but try to give Bezos as little of my money as possible, so it was time to shop from SparkFun! This little guide was my solution:
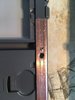
And a lesson about "why his his port on an angle?" so the board is clouting the plastic case on the inside, and mine ended up exactly the same!
And a lesson about "why his his port on an angle?" so the board is clouting the plastic case on the inside, and mine ended up exactly the same!
So, about my most pressing issue: Holding this thing is terrible. Nintendo made it all jazz, and zero comfort, and the internet provided with a really comfortable grip that changed how the hand rested around the shoulder buttons, meaning that a few tiny muscles in my hands were starting to get their cramp on. I found myself wishing that I could make a grip that had a place for the Z-buttons.
You'd be amazed how little there is out there on the test points for the new 3DS XL - but did manage to find a Japanese page on it, and it gave me everything I needed here: http://imaginglabo.web.fc2.com/new3DSLL-barabara.html
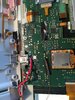
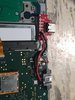
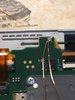
So this is right on the border of what I can actually do, and it took a frustrating number of attempts to get the magnet wire soldered on while keeping the board clear of shorts and other issues.
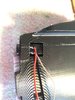
Z-Right:
Z-Left:
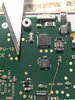
Commons (ground):
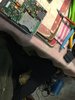
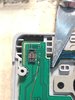
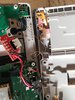
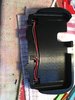
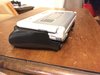
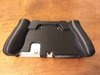
So my "master plan" here involves running wires through the two holes that use to be on the back of the stylus port. There was a bit going on with the internals and some shell trimming, but I didn't check the photos I took and they ended up a blurry mess. I'll try not to open the unit back up again so apologise for not getting these! One of my primary goals here was to make as few holes in the shell as possible, and I did consider trying to remake the bottom shell as a 3D printed part, but the tolerances were too fine for my FDM printer, and it'd take dozens of attempts to get right using a resin printer.
Side note: ever pulled apart the new 3DS shoulder buttons? Don't. Springs flick across the room, parts need to be positioned nearly perfectly, and things don't simply "sit in place". It's not as bad as taking apart a barometer, but it's up there.
Z-Right:
Z-Left:
Commons (ground):
So my "master plan" here involves running wires through the two holes that use to be on the back of the stylus port. There was a bit going on with the internals and some shell trimming, but I didn't check the photos I took and they ended up a blurry mess. I'll try not to open the unit back up again so apologise for not getting these! One of my primary goals here was to make as few holes in the shell as possible, and I did consider trying to remake the bottom shell as a 3D printed part, but the tolerances were too fine for my FDM printer, and it'd take dozens of attempts to get right using a resin printer.
Side note: ever pulled apart the new 3DS shoulder buttons? Don't. Springs flick across the room, parts need to be positioned nearly perfectly, and things don't simply "sit in place". It's not as bad as taking apart a barometer, but it's up there.
So at this stage I did a quick test with some tact switches before opting to hot glue everything together for a super-quick proxy
It feels great, and it works great! My next step will be to design a two-part grip that includes positioning for the tact switches, and room in the handles for header connections for when I need to dismantle it and access the SD card. Problematically there's every possibility it might be accidentally ripped apart with a good tug, so I'd love suggestions from people about how to fix this - I've been thinking of something similar to a battery connection for making the "grip terminals" but don't know where to start looking there. I'm also open to suggestions for light-touch tact switches, or a good way to design the shoulder buttons etc.
Oh, and fluffy helped with the entire process
Last edited:

")