
Worklog [2023 Contest Entry] The Chicken Nugget Boy!
- Thread starter Retro95
- Start date
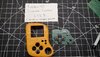
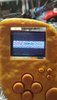
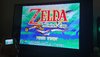
i love it and emerald to show off the display is beautifulScreen came in the mail today and I threw together a mock up after work, with some hot glue and loose wires. Just to get you guys stoked!
View attachment 28146
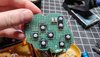
Finally got a few hours to myself this weekend and got the controller board put together.
I got everything to line up pretty well with some generic unpopulated PCB board, a Dremel, and my drill press.
The reason I have 2 buttons for the large button opening is because of how I have the two tall buttons. They sit nestled inside the large button and allow to press on the far end of either side for separate A and B button presses. This ultimately keeps the look of the original button too.
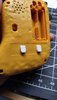
I finally figured out the trigger dilemma I've been facing. I 3D printed some little triggers and cut holes in the back (don't mind the sharpie marks)
I added USB C for data to the pi for adding roms and using external peripherals (this does not charge the cells though. I intentionally did not add battery charging due to space constraints, and the nostalgia of having to remove and replace the batteries when they die)
One set back I did encounter is in my excitement of nearing completion I accidentally reversed +/- on my screen driver board and it let it an actual puff of smoke. Whoops.
I decided this was a blessing in disguise because using the Pi Zeros NTSC output is horrendous since it is locked to an oblong resolution and cannot be changed to fit the screen so everything was skewed, the edges of the screen were pushed out, and the colors were washed out.
I hooked up a 2 inch SPI screen using ILI9341 drivers and the image clarity is sharp enough you can actually read very tiny text and I can set the output resolution to the native resolution of the screen. It looks much better. I still need to model and 3d print a bezel for it though.
After sitting there and pressing all the buttons I realized that the buttons ARE LOUD. So loud that you're sure to annoy anyone within 25 feet of you while you play.
I pulled all the buttons off my custom board and used Adafruit silent silicone buttons. Wow they're quiet!
I'm hoping to have this thing wrapped up in the next week. Stay tuned friends!
Resolution of the screen is 320x240 so doesn't take a lot of processing power off the pis CPU. I'm still experimenting with DIVISOR settings in my custom ILI9341 drivers to get smooth frame rate.
As for the triggers I just used another unpopulated PCB board and soldered Adafruit silicone buttons to it and placed directly behind the triggers. It takes up quite a lot of room but I managed to get everything I will be using into the enclosure and got it to close without bulging too badly.
As for the triggers I just used another unpopulated PCB board and soldered Adafruit silicone buttons to it and placed directly behind the triggers. It takes up quite a lot of room but I managed to get everything I will be using into the enclosure and got it to close without bulging too badly.
I'm pretty much nearing completion. I 3d printed a much nicer looking screen bezel and I trimmed the actual screen driver board with a diamond rotary tool to get it to fit nicely inside the nugget.
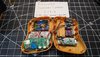
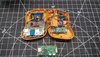
Here's a photo of the final placement of the boards:
At this point the last thing I am going to add is a TRRS 3.5mm jack that will do both composite video+L/R audio and just L/R audio with headphones.
That way you can plug your nugget into your CRT or any tv with RCA video jacks.
As much as I absolutely love that I was able to keep the original battery compartment and use 10440 batteries. Another part of me wants to cut the battery compartment out, upgrade the battery control board to one with charging. Then drop in a 1200-1400mah lipo flat pack and more than double my current battery life of 2-2.5 hours.
Anyways.. here's a little video of the Chicken Nugget Boy running doom:
 youtube.com
Here's a photo of the final placement of the boards:
At this point the last thing I am going to add is a TRRS 3.5mm jack that will do both composite video+L/R audio and just L/R audio with headphones.
That way you can plug your nugget into your CRT or any tv with RCA video jacks.
As much as I absolutely love that I was able to keep the original battery compartment and use 10440 batteries. Another part of me wants to cut the battery compartment out, upgrade the battery control board to one with charging. Then drop in a 1200-1400mah lipo flat pack and more than double my current battery life of 2-2.5 hours.
Anyways.. here's a little video of the Chicken Nugget Boy running doom:
- YouTube
Enjoy the videos and music you love, upload original content, and share it all with friends, family, and the world on YouTube.
youtube.com
Last edited:
Composite video out has been a fun little side adventure.
Apparently not only are there TS, TRS, TRRS 3.5mm jacks, but there's also CTIA and OMTP wiring methods for the TRRS jack.
The difference between the two being that video and ground swap connections.. WHY?!?!?
This makes having a plug and play solution for both an RCA to 3.5mm cable and headphones not feasible...
Unless I... You know... I purchase a 3.5mm TRRS CTIA to OMTP converter plug on amazon to use with the video out...
(╯°□°)╯︵ ┻━┻
EDIT: after digging through my junk cable bin I have the stuff to build my own adapter. Just gonna do that instead.
Last edited:
Alright I think this is nearing done. The only possible thing I could think of adding would be an analog volume wheel. Any ideas?
I made a CTIA to OMTP call inverter cable so now I can use headphones, and composite video cable from 1 headphone port.
I upgraded the battery control board so I can charge and play too, if I plan on playing on the big screen with a wireless controller I'll need to power it via USB C.
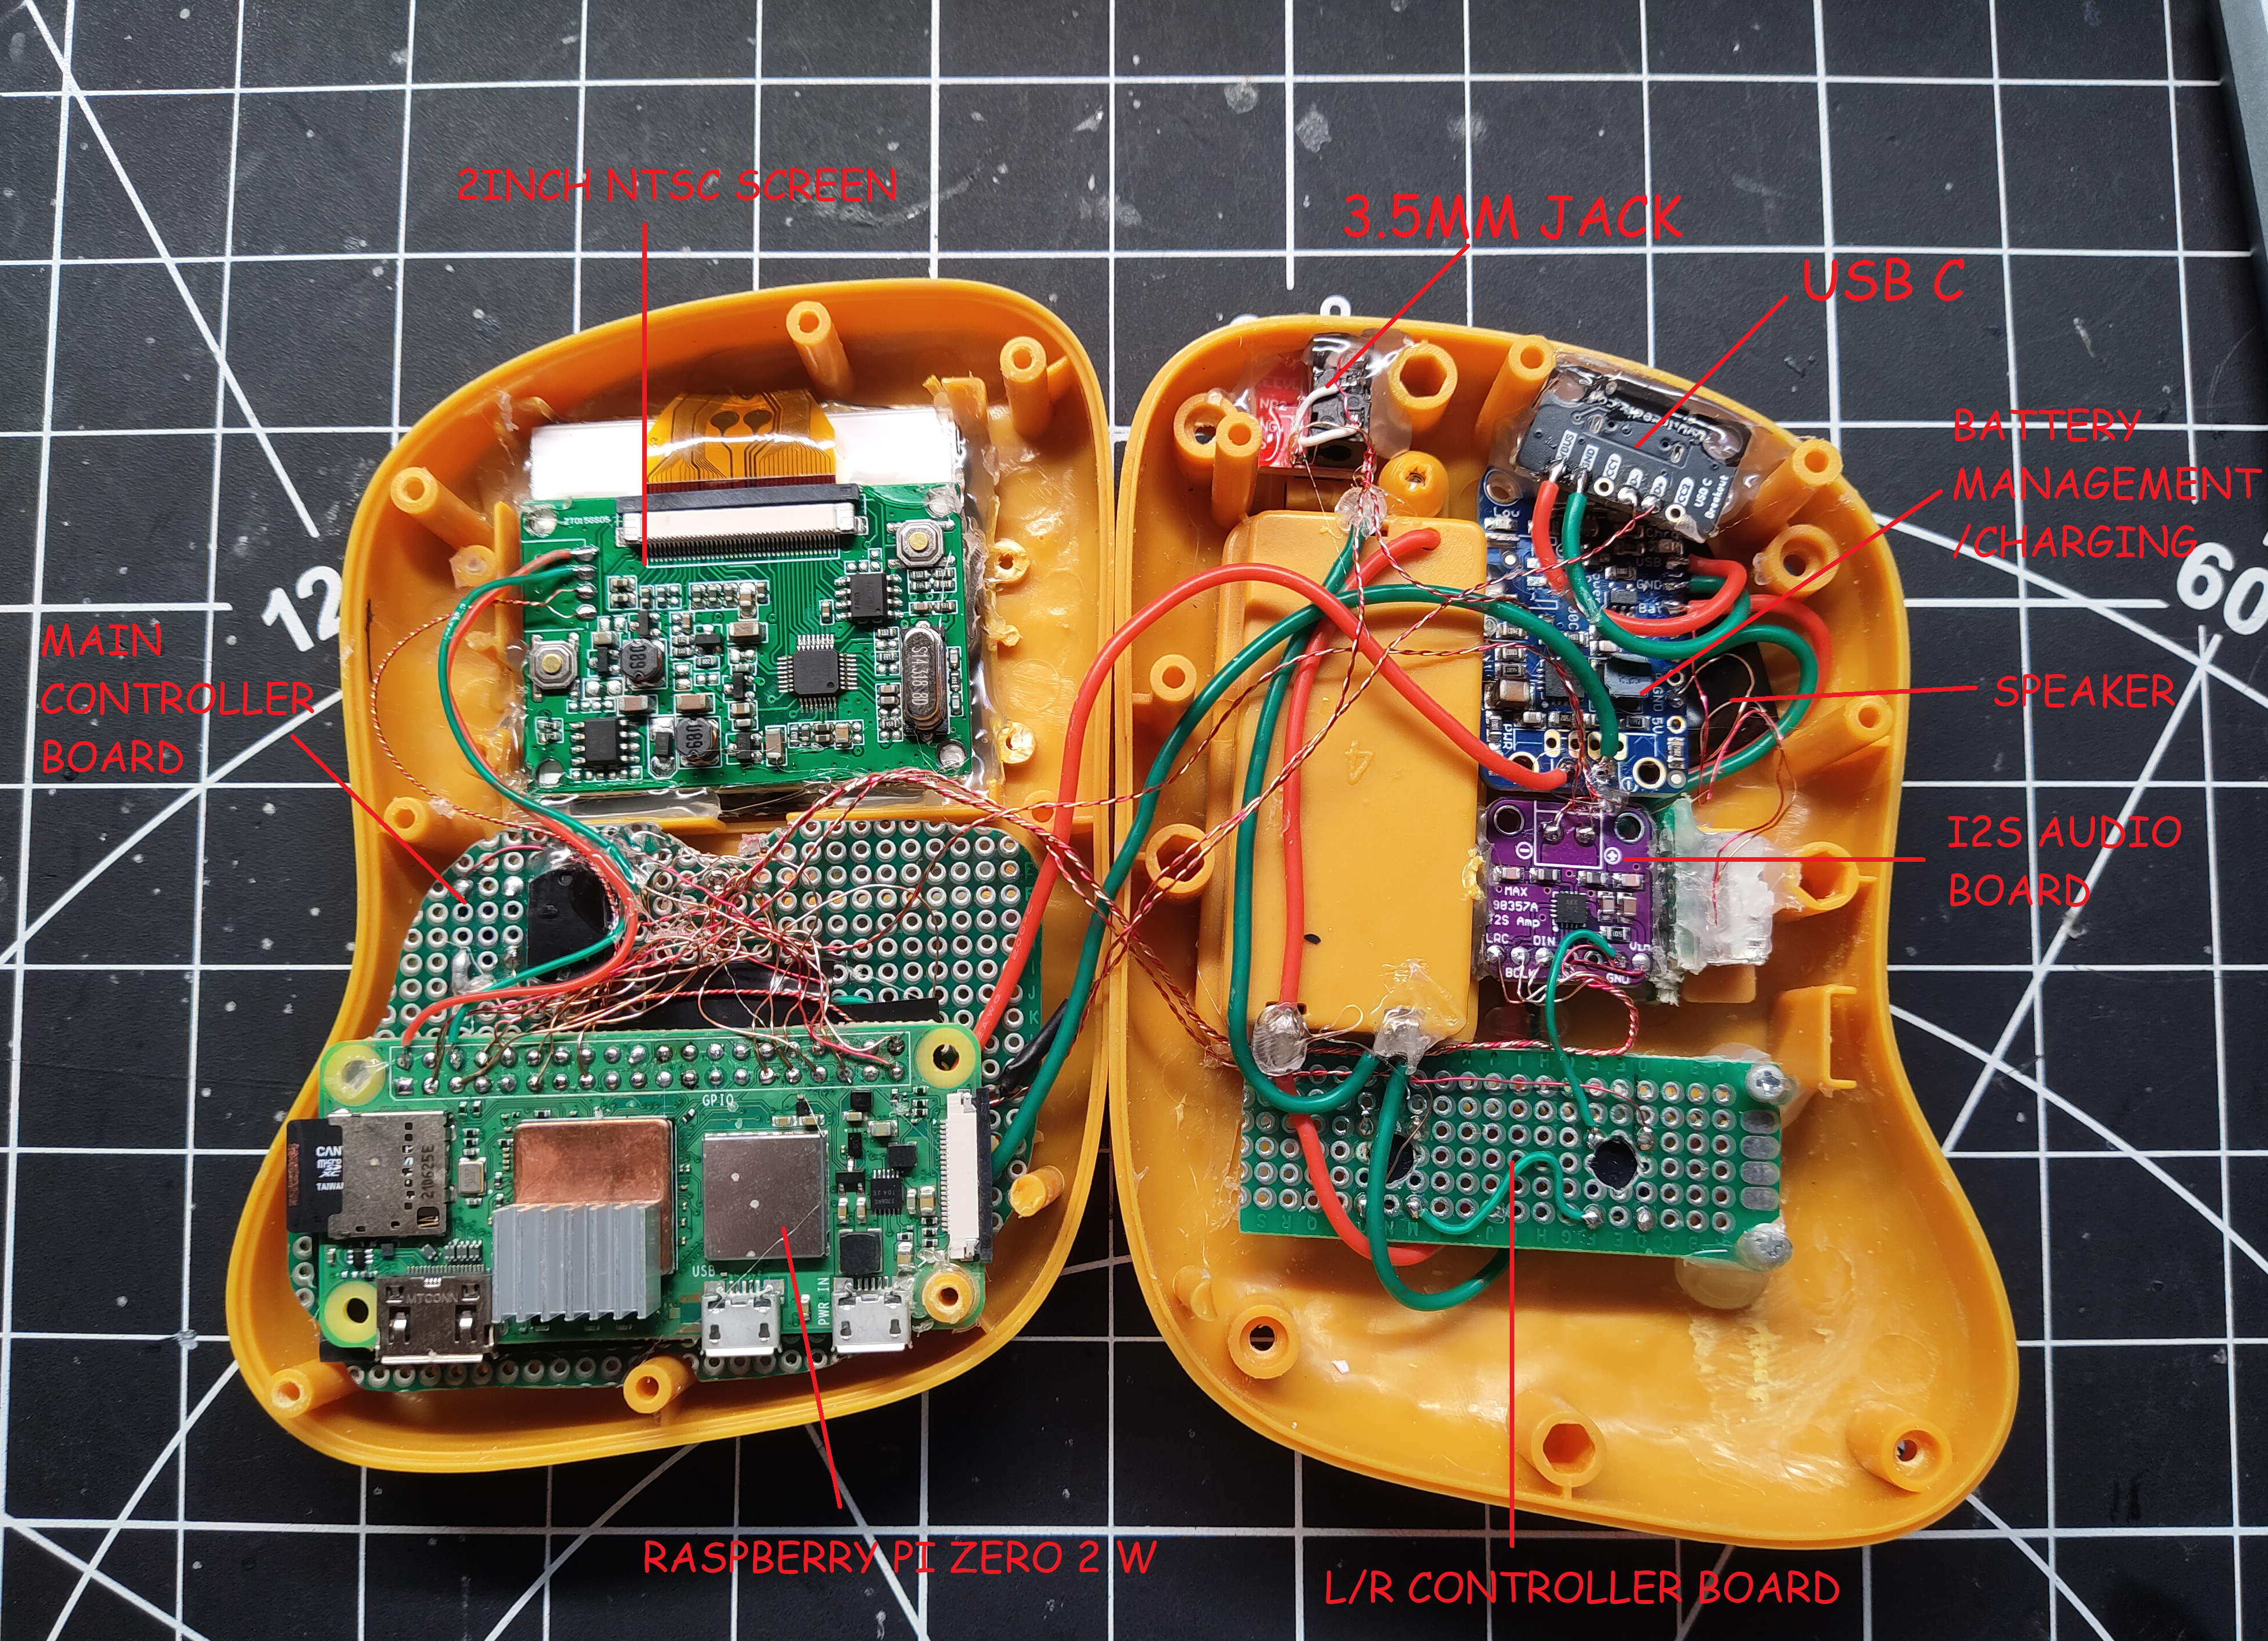
It has the following:
-Raspberry pi zero W running latest retro pi image
-Custom controller build in 2 halves (front half is dpad, start, select, A, B and back half is L and R triggers) with Adafruit silicone soft push buttons (I shimmed the buttons with index cards so they're 90 percent pressed down and require almost no force to finish pressing)
-Controller is controlled via GPIO pins using a python script called GPIOnext
-MAX98357 I2S digital to analog audio board from Adafruit (mines a clone I got off Amazon)
-Same speaker as the Ashida
-Audio is controlled by forcing GPIO pins into their alternate BCM mode by using a python script called AlsaAudio
-Qty 2x 10440 3.7v 350mah batteries (same form factor as AAA and go in the original battery compartment)
-Adafruit powerboost 500c battery and charger control board
-WaveShare 2inch IPS SPI driven board
-Screen is programmed to take image data from HDMI encoder and scale to 320x240. I am using a screen devisor of 6 to achieve 55-60fps
-This based off the ILI9341 SPI drivers but WaveShare specific. (Programmed off scripts from their wiki)
EDIT: I almost forgot. I added a physical audio toggle switch instead of implementing a headphone sense circuit. When I plug in my composite video or my headphones I just press the little speaker button and the onboard speaker is muted.
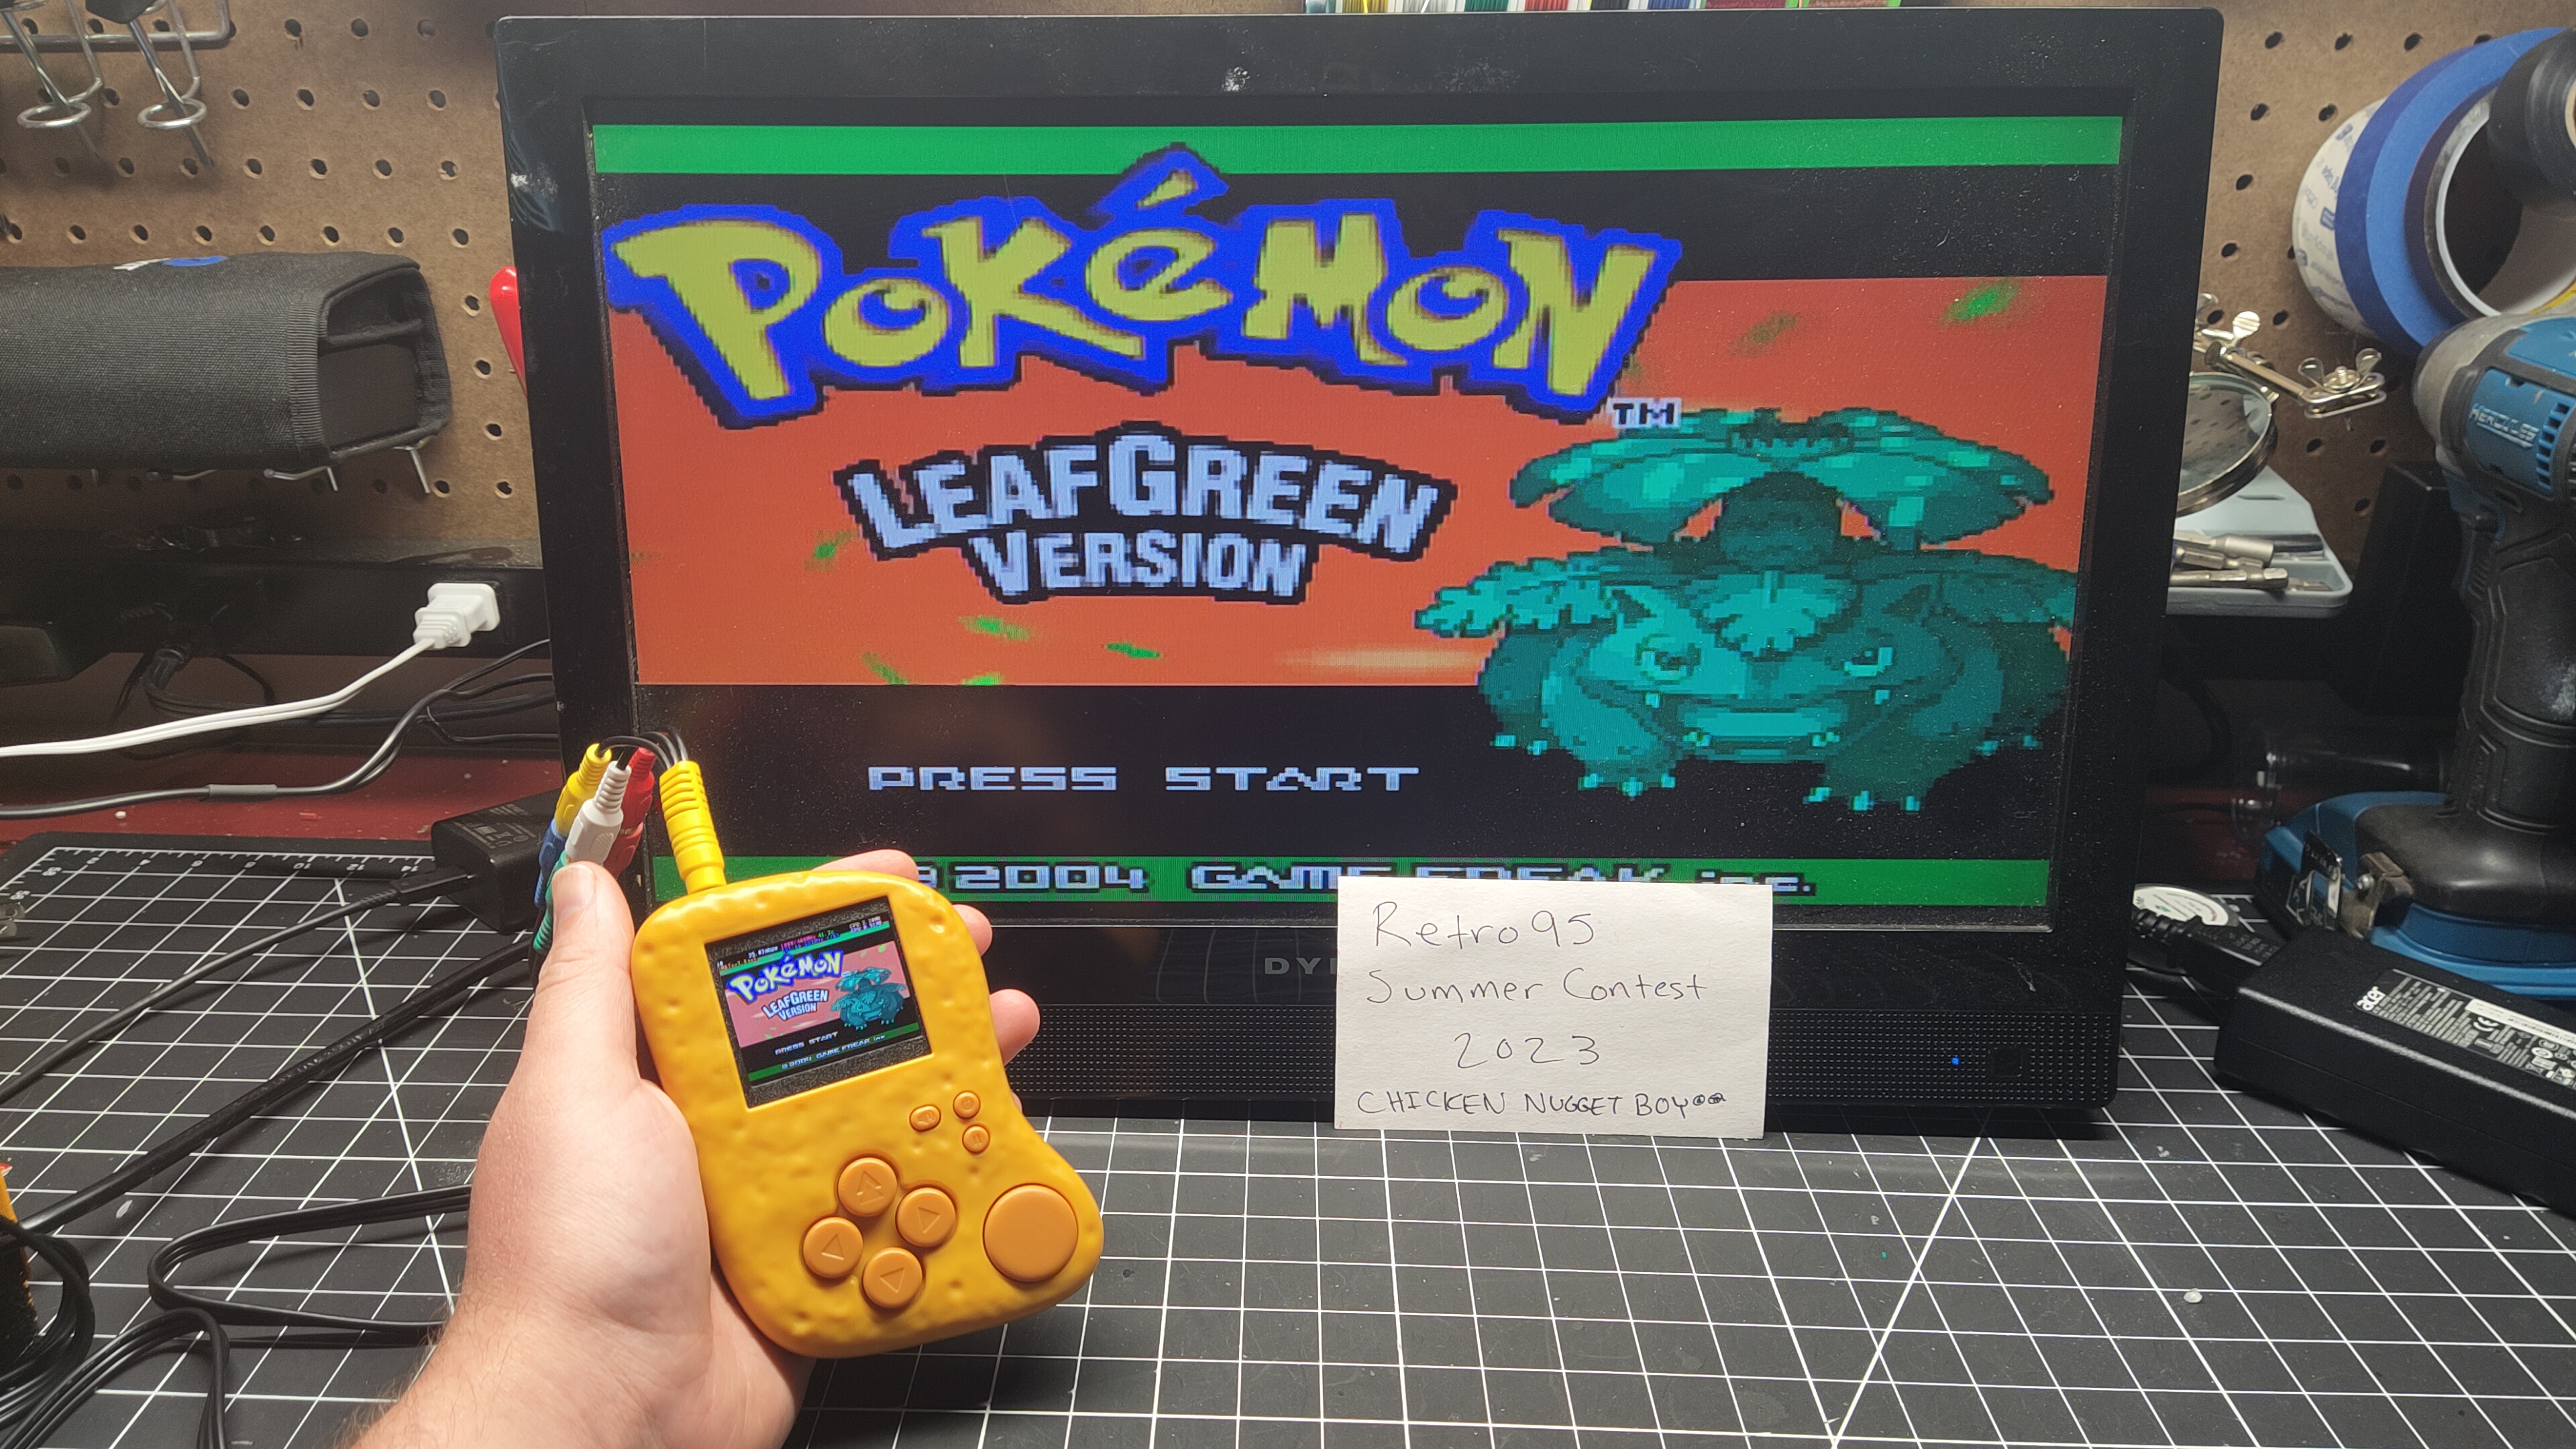
The image from composite video actually looks really good on my living room TV.
I made a CTIA to OMTP call inverter cable so now I can use headphones, and composite video cable from 1 headphone port.
I upgraded the battery control board so I can charge and play too, if I plan on playing on the big screen with a wireless controller I'll need to power it via USB C.
It has the following:
-Raspberry pi zero W running latest retro pi image
-Custom controller build in 2 halves (front half is dpad, start, select, A, B and back half is L and R triggers) with Adafruit silicone soft push buttons (I shimmed the buttons with index cards so they're 90 percent pressed down and require almost no force to finish pressing)
-Controller is controlled via GPIO pins using a python script called GPIOnext
-MAX98357 I2S digital to analog audio board from Adafruit (mines a clone I got off Amazon)
-Same speaker as the Ashida
-Audio is controlled by forcing GPIO pins into their alternate BCM mode by using a python script called AlsaAudio
-Qty 2x 10440 3.7v 350mah batteries (same form factor as AAA and go in the original battery compartment)
-Adafruit powerboost 500c battery and charger control board
-WaveShare 2inch IPS SPI driven board
-Screen is programmed to take image data from HDMI encoder and scale to 320x240. I am using a screen devisor of 6 to achieve 55-60fps
-This based off the ILI9341 SPI drivers but WaveShare specific. (Programmed off scripts from their wiki)
EDIT: I almost forgot. I added a physical audio toggle switch instead of implementing a headphone sense circuit. When I plug in my composite video or my headphones I just press the little speaker button and the onboard speaker is muted.
The image from composite video actually looks really good on my living room TV.
Last edited:
That is surprisingly good looking. Well done!
Coming from you, that genuinely means a lot. Thank you.That is surprisingly good looking. Well done!
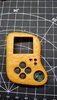
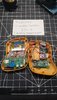
The transplant was a success!
After a few weeks of playing games on this. Gameboy advance emulation was decent, but the occasional hang ups or crashes was becoming increasingly annoying.
I managed to find a raspberry pi zero 2w on eBay, brand new, for 45$. Much better than what they're normally being scalped for.
After a few weeks of playing games on this. Gameboy advance emulation was decent, but the occasional hang ups or crashes was becoming increasingly annoying.
I managed to find a raspberry pi zero 2w on eBay, brand new, for 45$. Much better than what they're normally being scalped for.
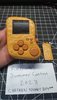
Well everyone, time to mark this complete. It's amazing how time flies. I've had a blast watching everyone's work logs and their projects develop.
I present to you!
The Chicken Nugget Boy!
Features:
I present to you!
The Chicken Nugget Boy!
Features:
- Dpad, start, select, L bumper, R bumper, A, B, hardware speaker mute button
- 2 inch color screen
- 2watt speaker
- USB C charging
- Video/Headphone output via 3.5mm jack
- Bluetooth controller support
- Plays Gameboy, Gameboy Color, Gameboy Advance, NES, SNES, ETC. All the way up to N64. (Anything that uses more than A/B and analog sticks will require connecting to your TV and using a Bluetooth controller)
- Raspberry pi zero 2 W (wifi ssh file management and Bluetooth support)
- Adafruit 2 inch NTSC screen
- Adafruit 500c battery management/charger board
- Adafruit soft silicone buttons (used on dpad, a, b, l, r, start, select) shimmed with index cards to lower travel amount for full press
- MAX98357 I2s digital to analog audio board
- 2watt speaker (same as in the ashida)
- 3.5mm TRRS jack for both video and headphones/audio output
- 2x 10440 3.7v batteries (same form factor as AAA batteries so I could keep the original battery compartment intact)
- USB C breakout board for USB C charging
- 3D printed screen bezel and L and R bumper buttons
Last edited: