
- Joined
- Dec 16, 2016
- Messages
- 1,138
- Likes
- 2,834
- Location
- The Oregon Wildlands
- Portables
- just so many i am so cool
I am so sick and tired of my YouTube comment section calling me offensive names like "string bean" and "twig-looking-ass". To fix this, I need to get absolutely shredded so that I can beat anyone who calls me names on the internet into a pulp.
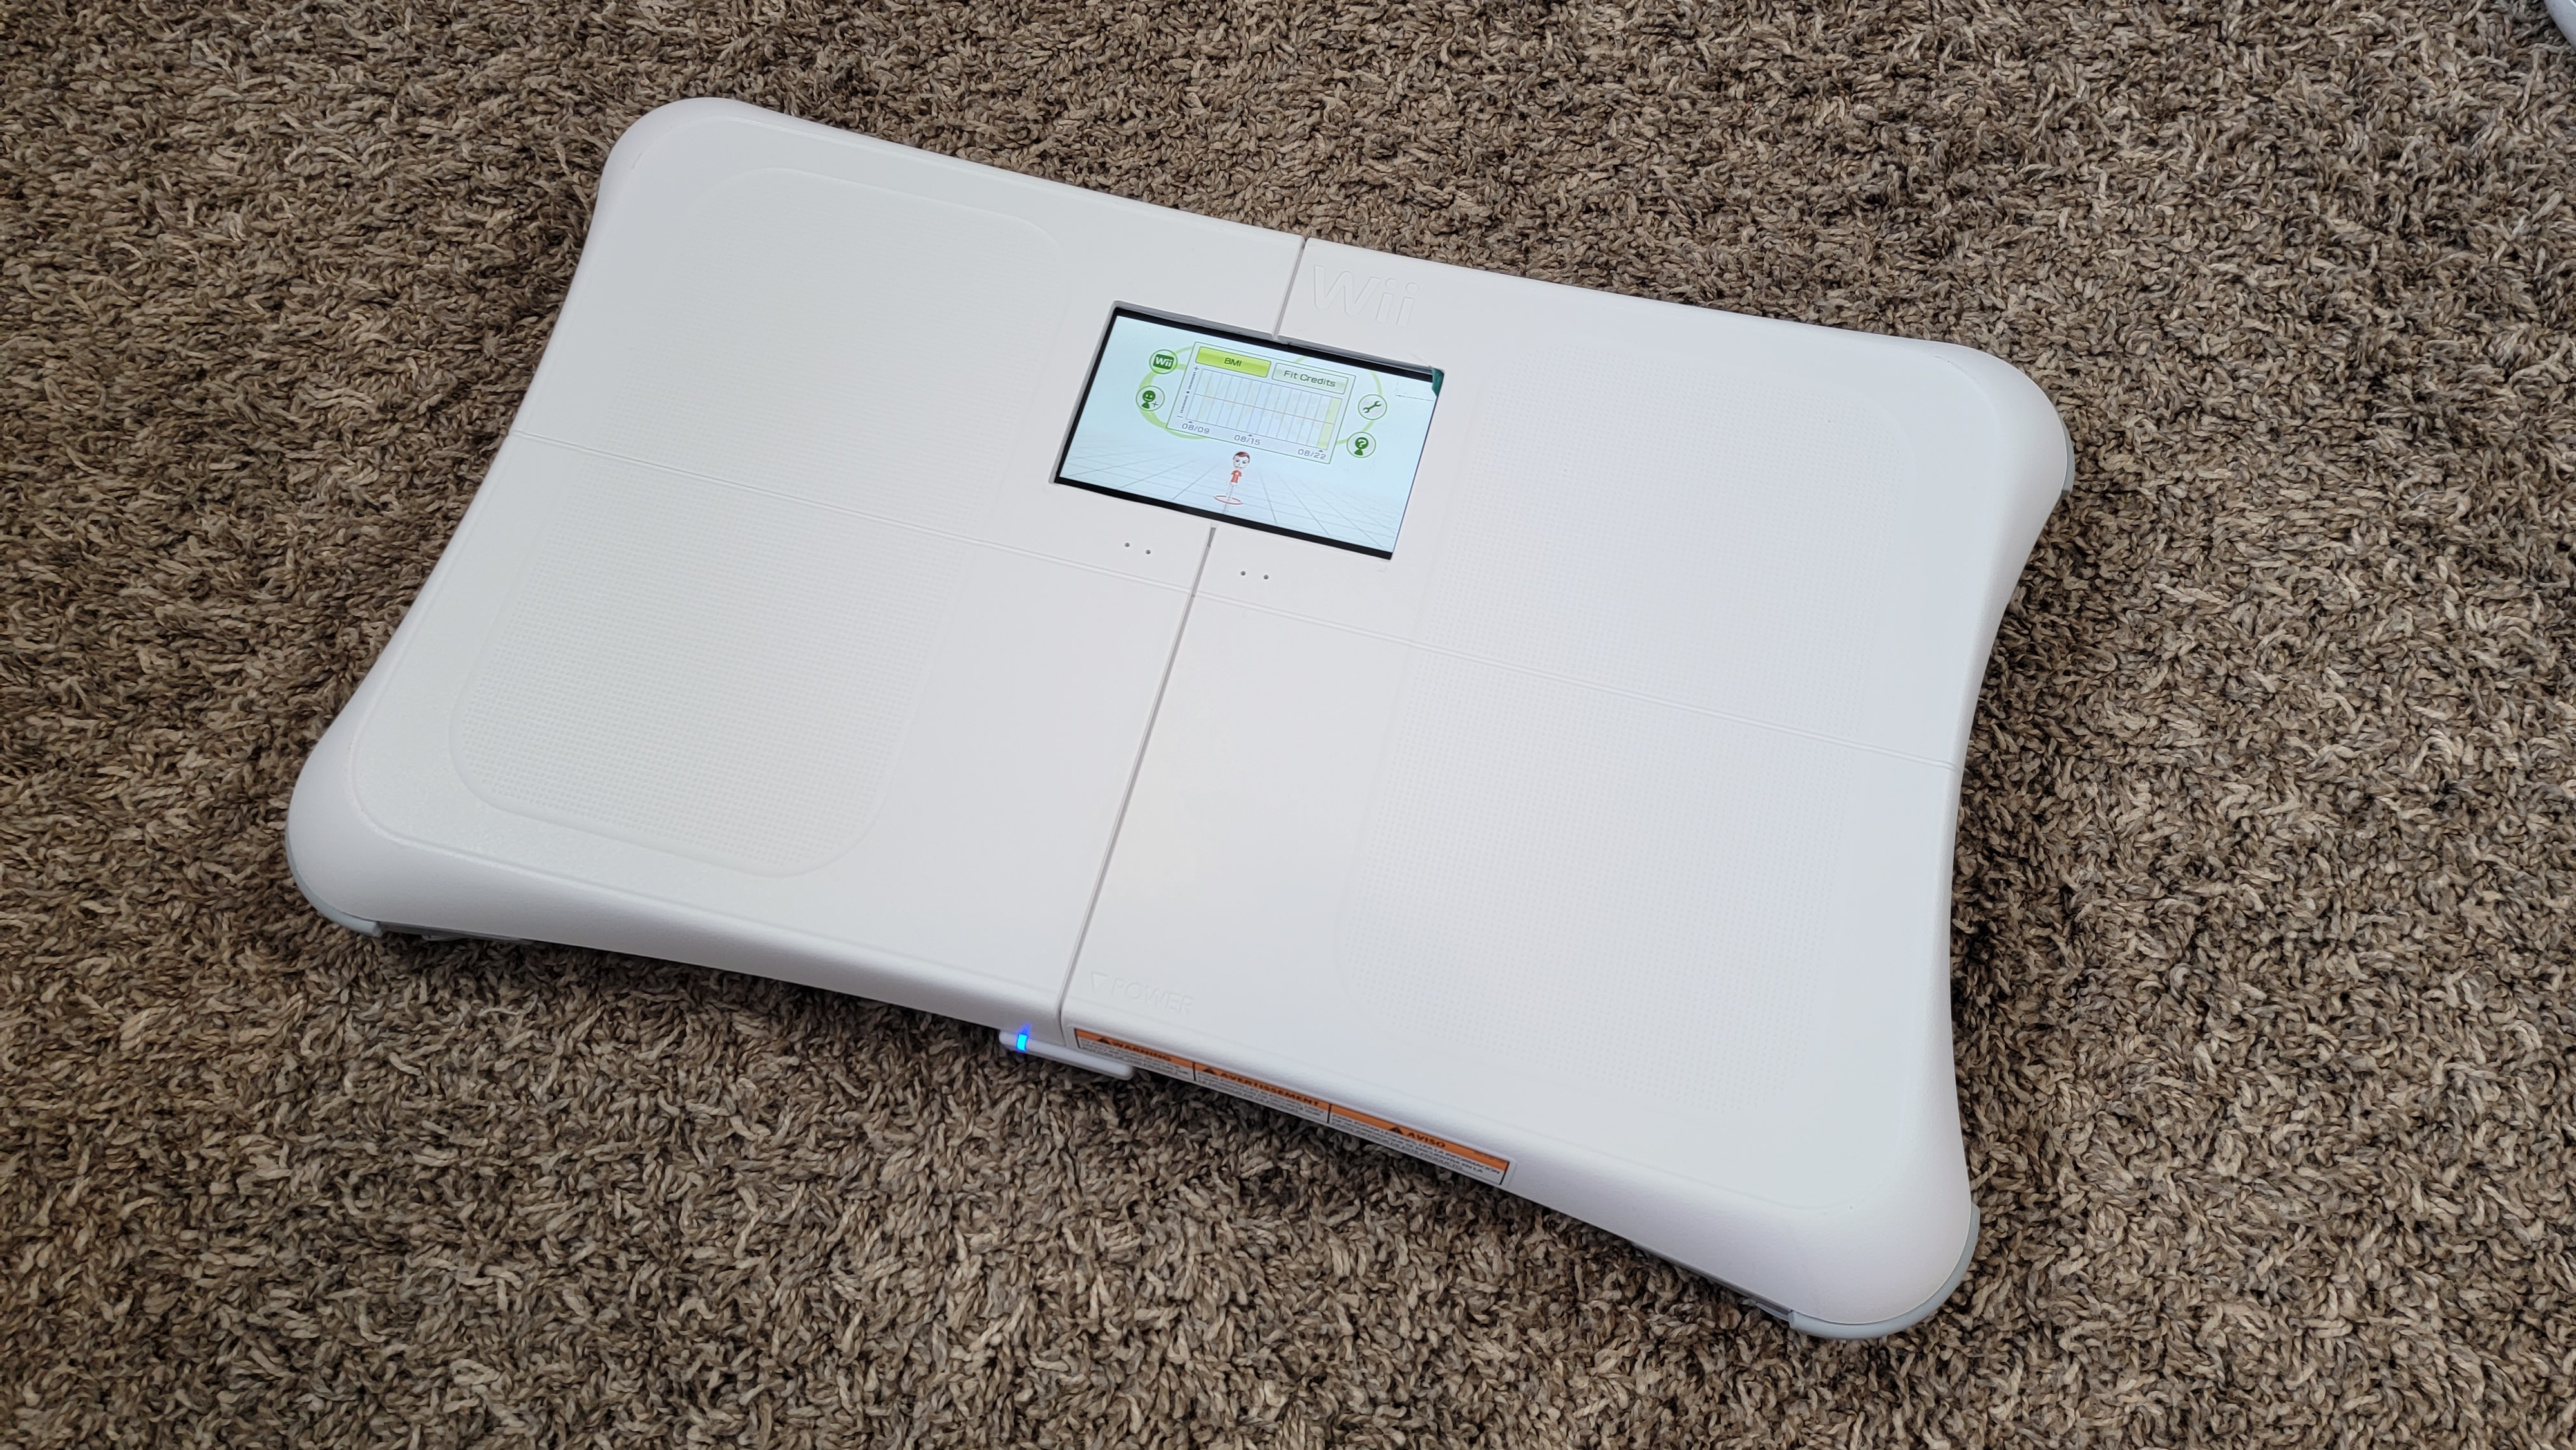
Wii Fit is obviously the best way to get into shape, so I decided to build a portable Wii into a Wii Fit balance board. The goal is to have a portable Wii Fit machine that I can exercise on no matter where I am so that I can be "on that grind :triumph: :100:" 24/7.
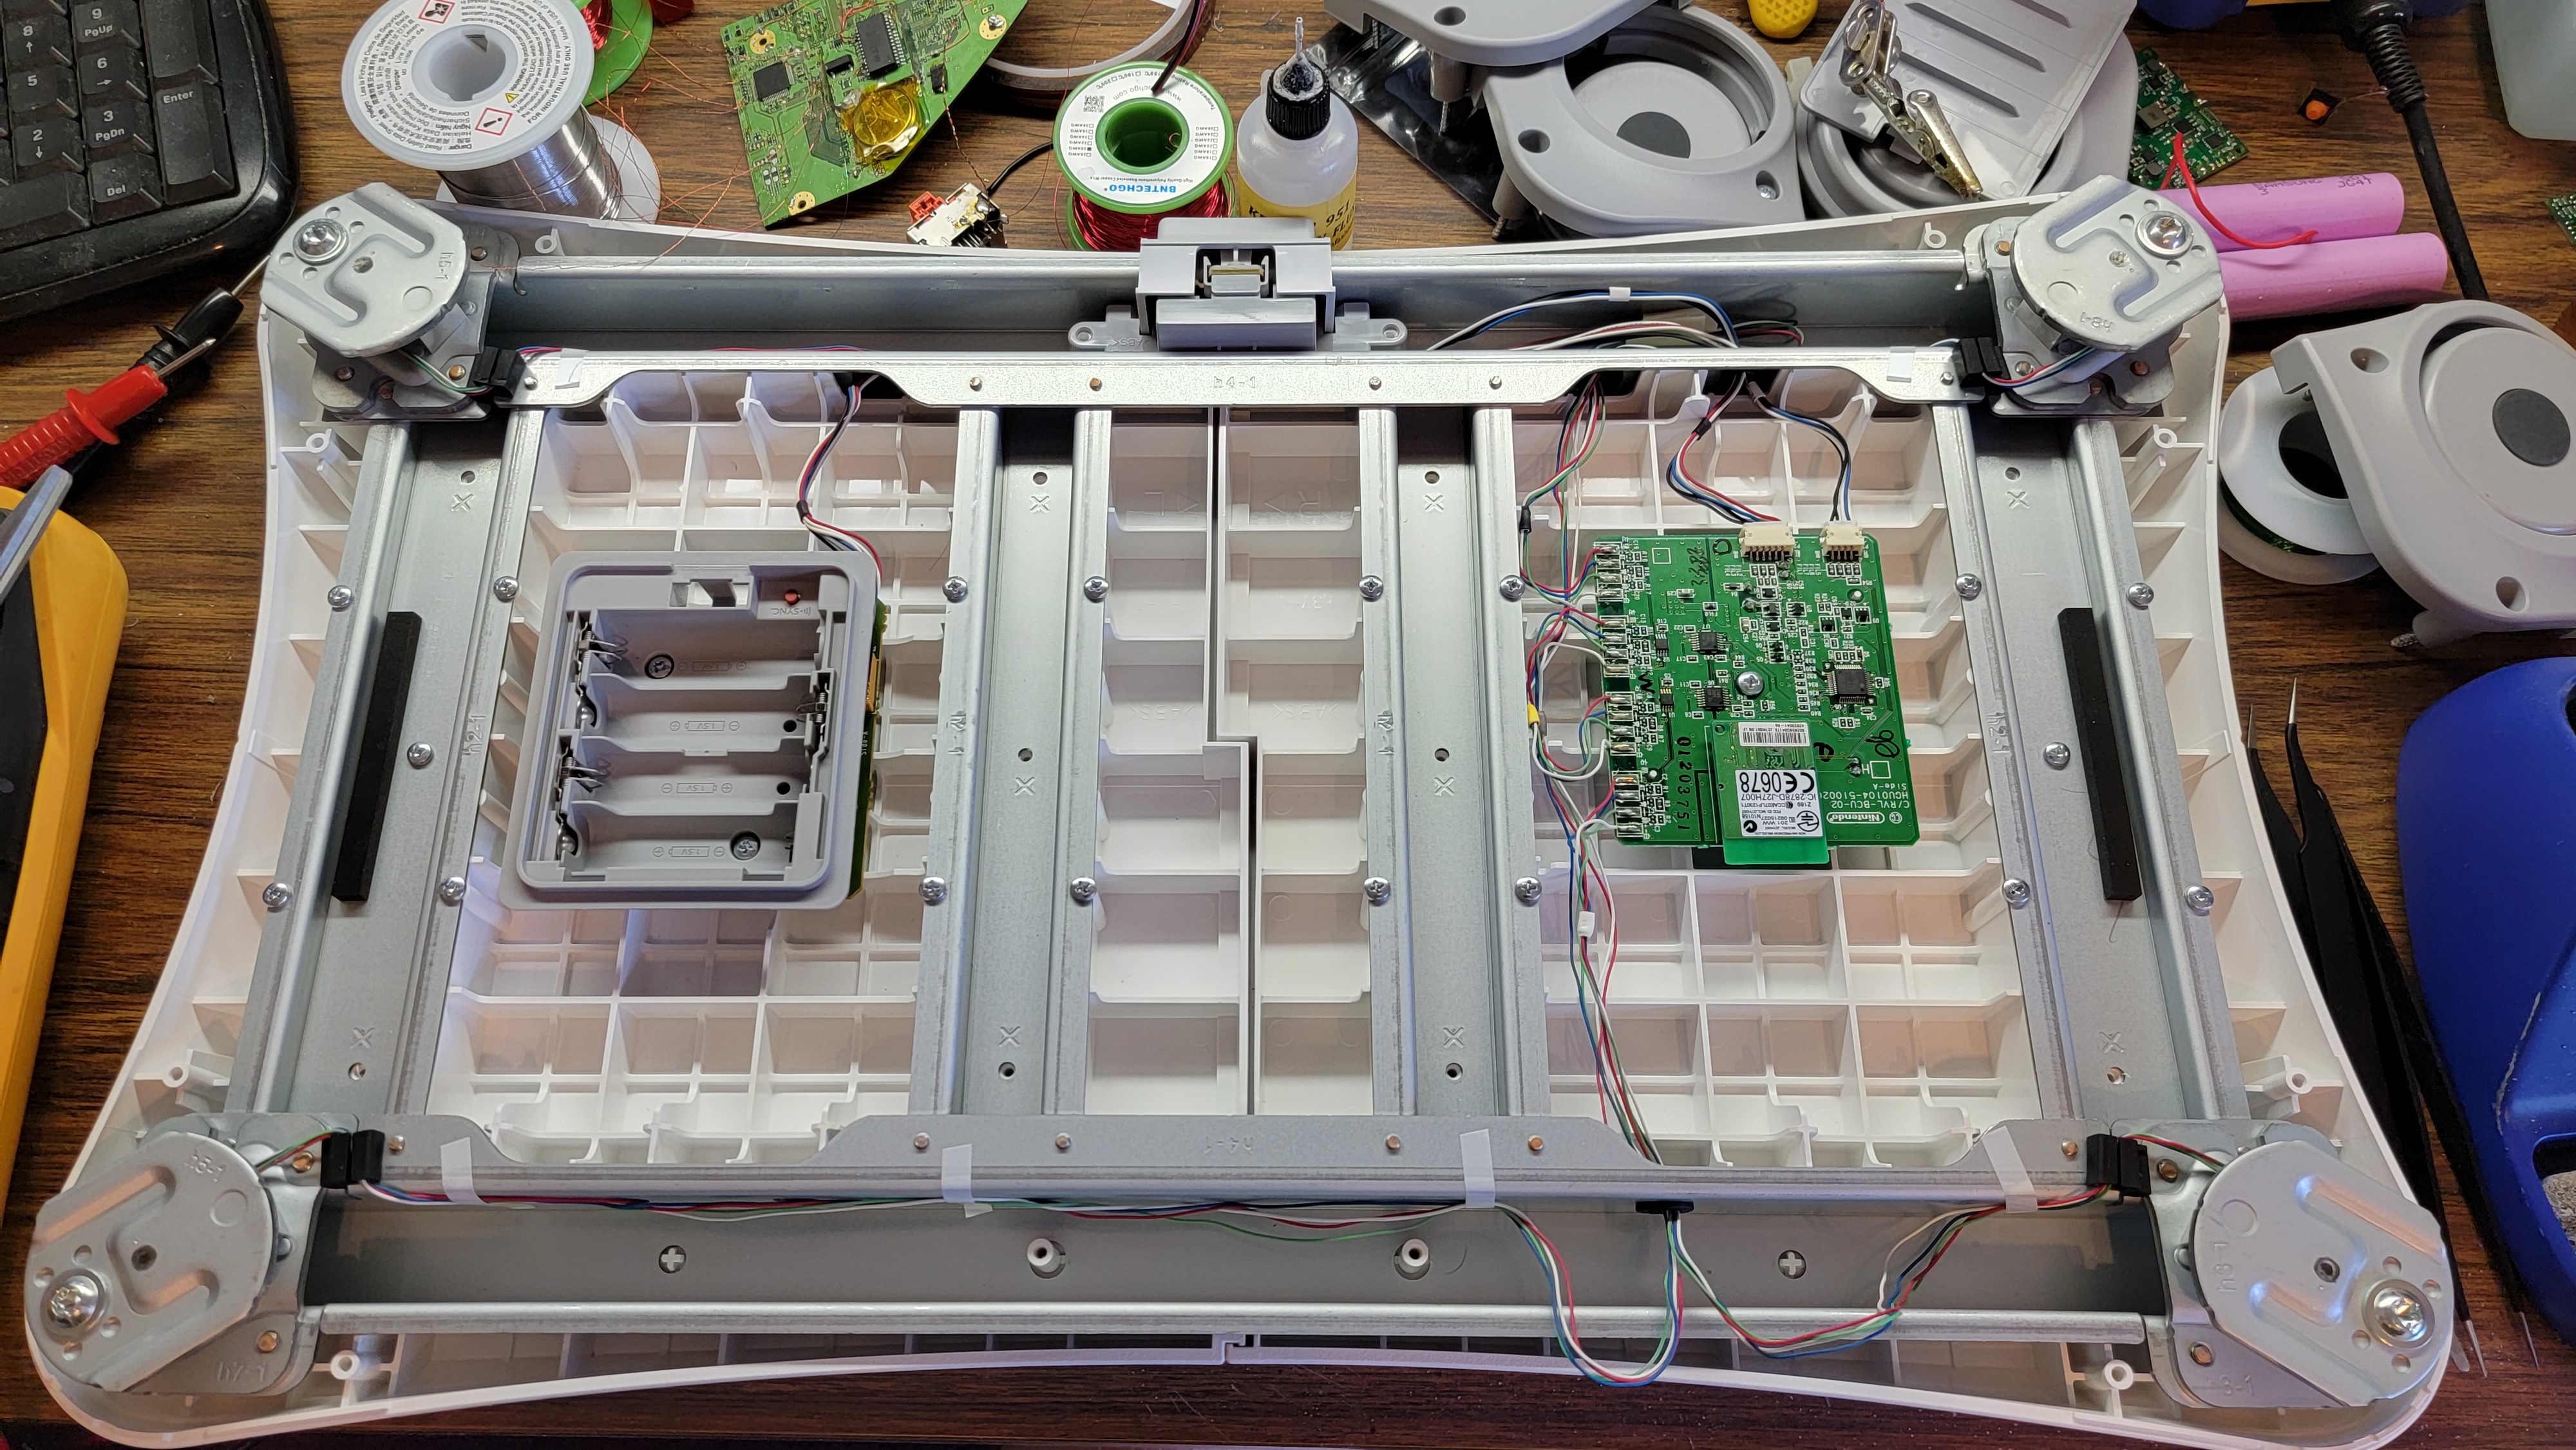
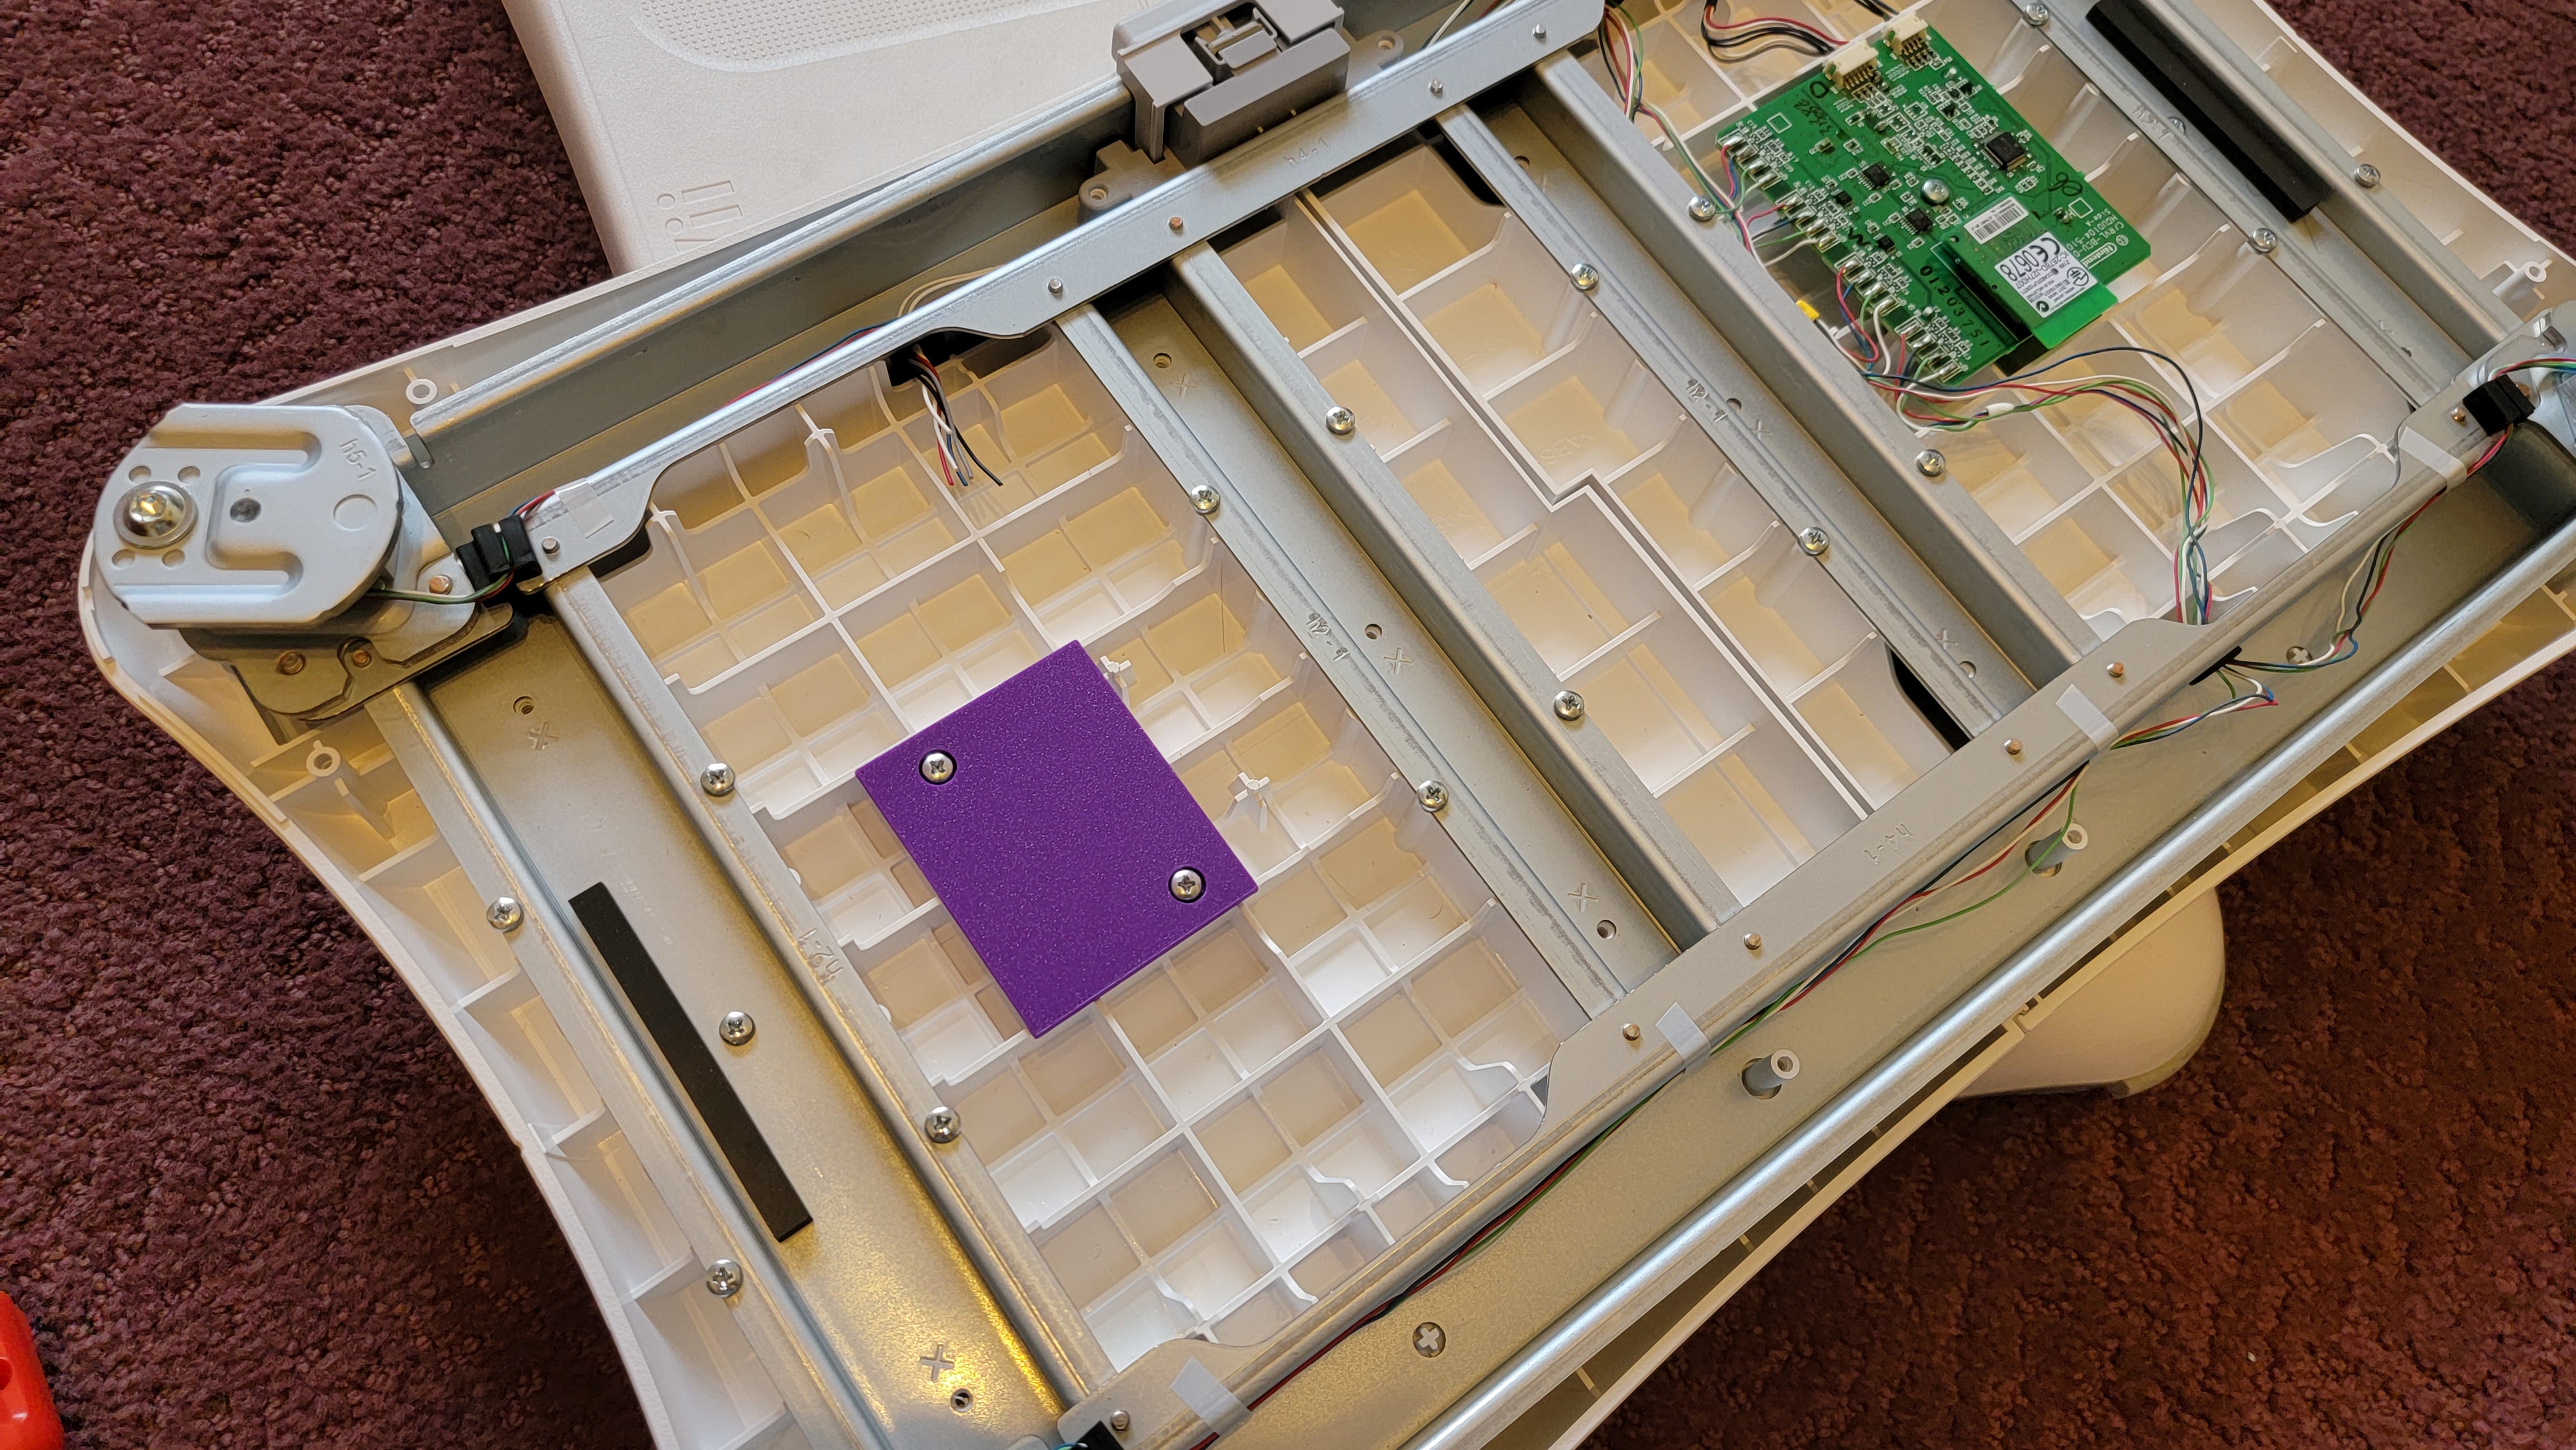
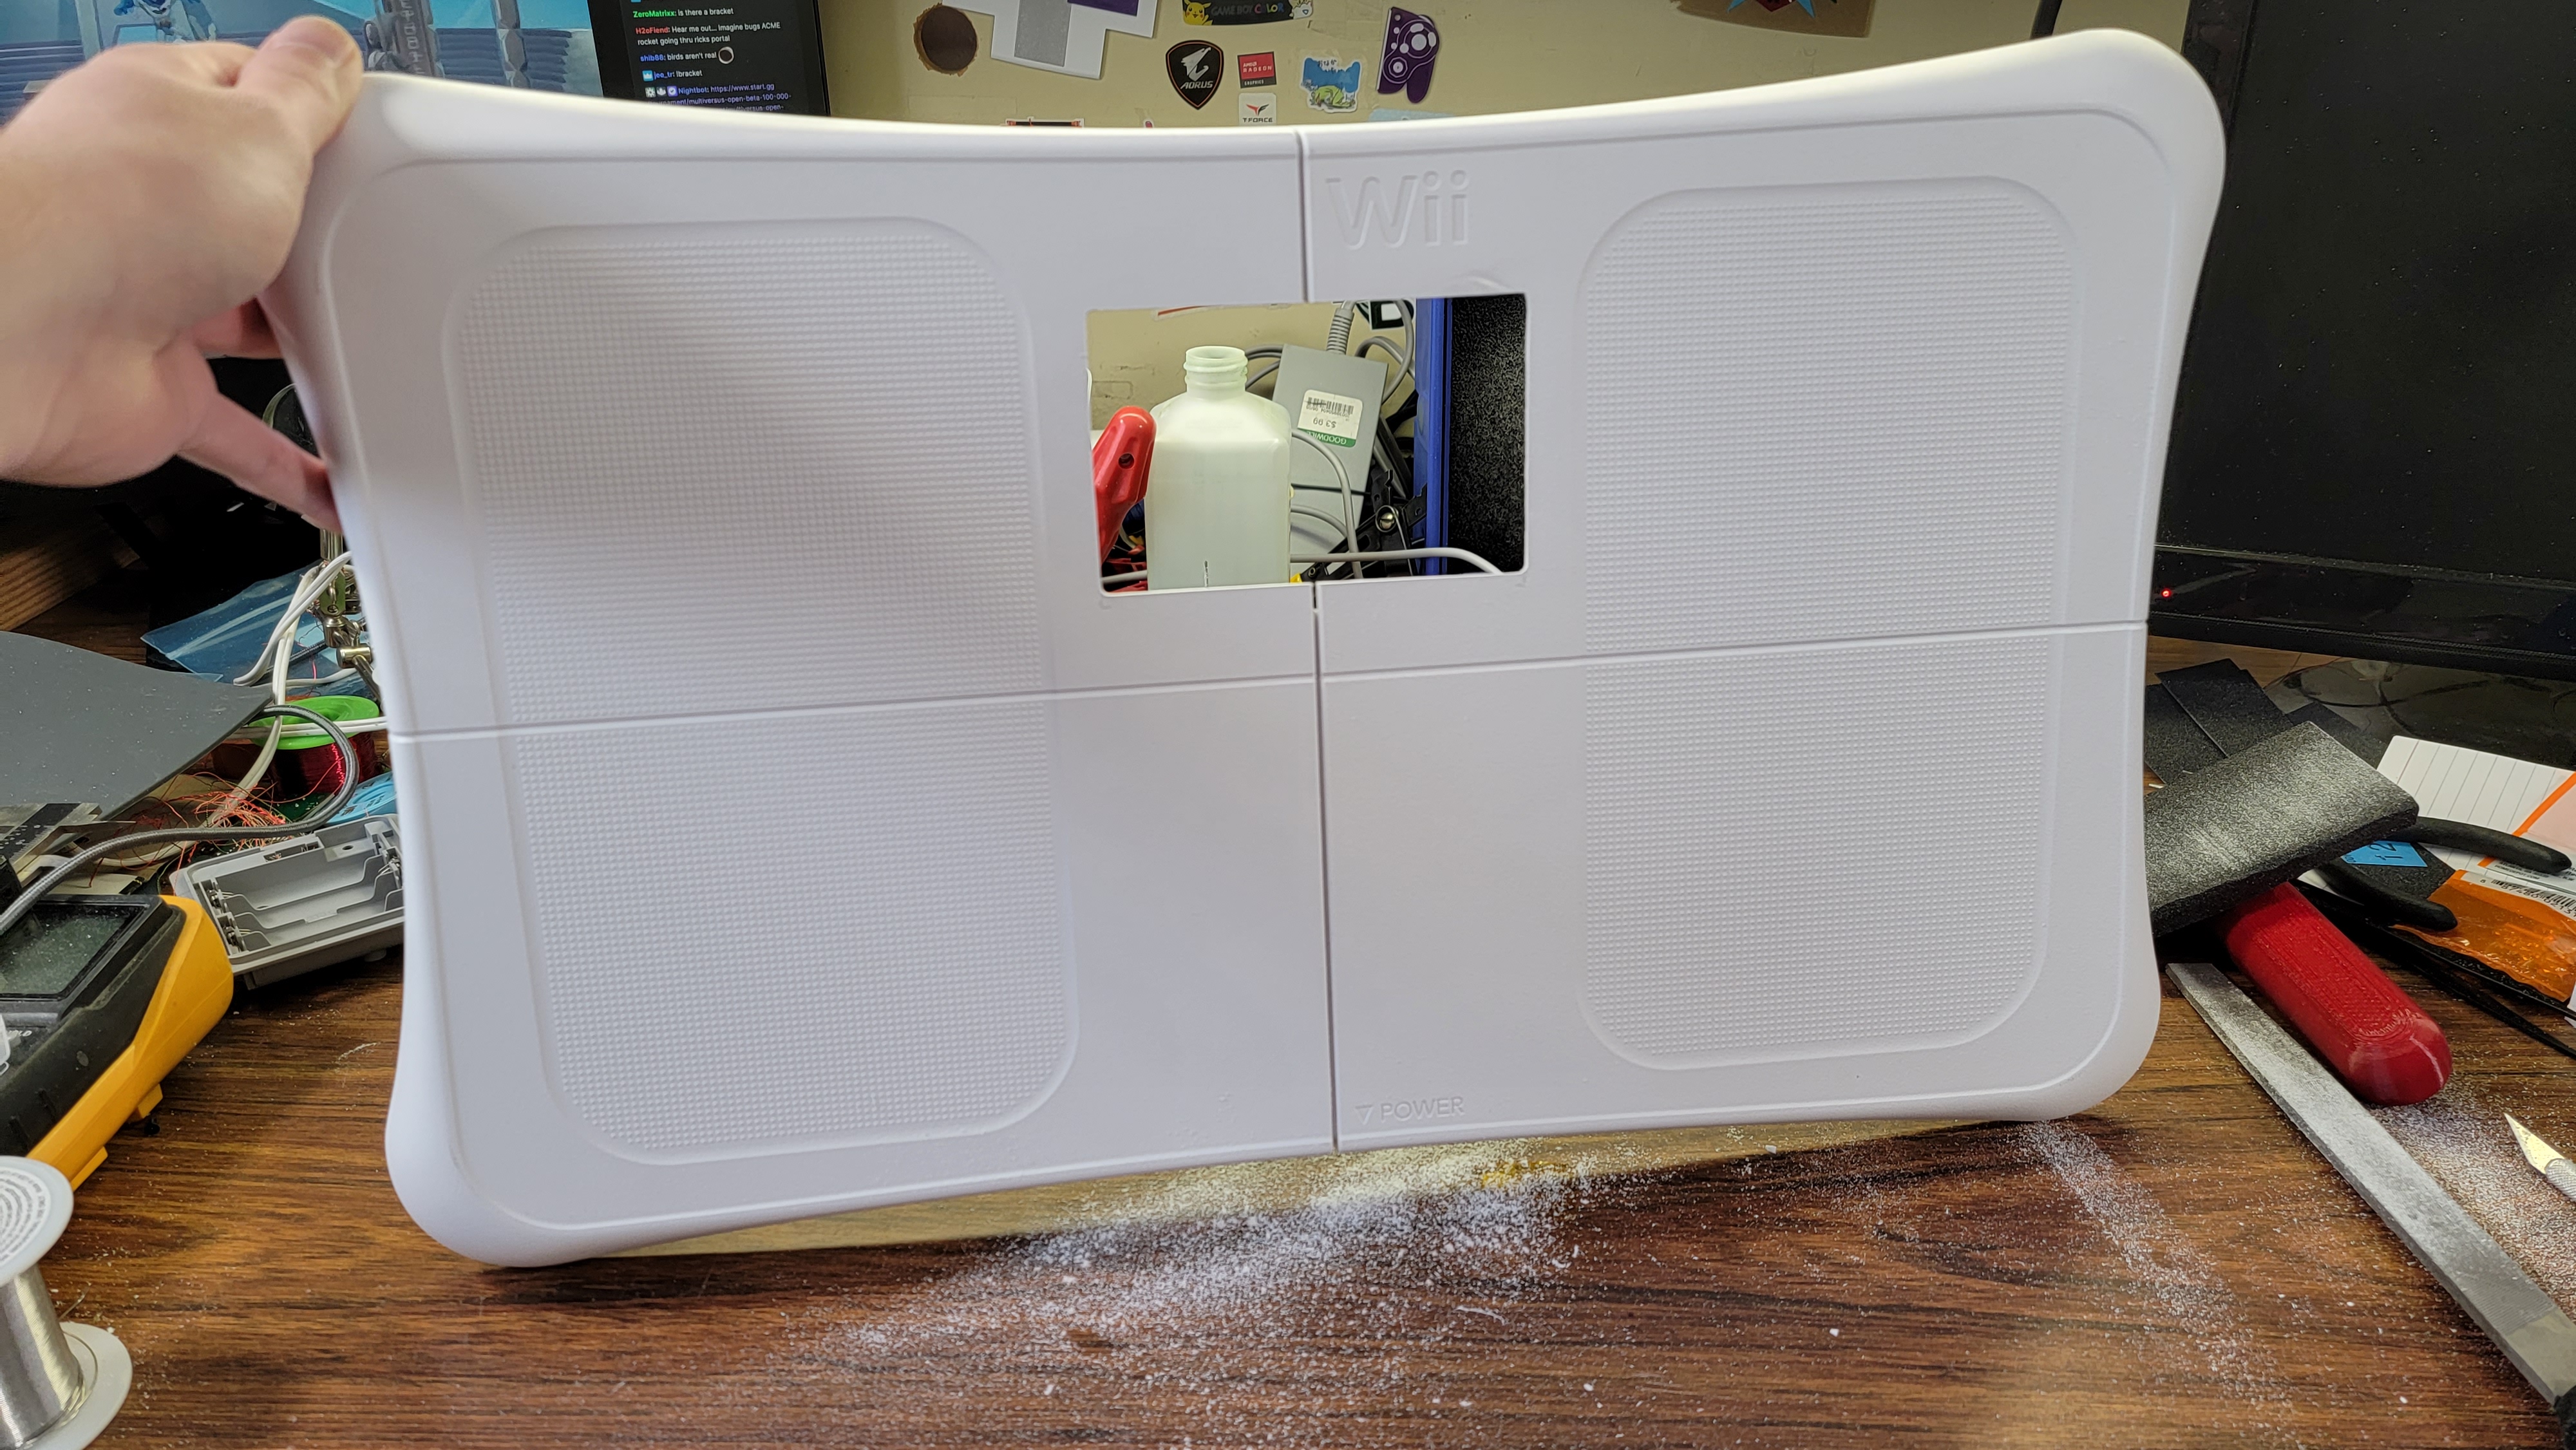
I started by taking apart a Wii Fit board to figure out how it works. The sensors are in the four feet, and each sensor basically acts like a scale to figure out which direction you're leaning. This means that I can cut a hole in the middle of the board for a screen, and not risk cutting into any critical sensors or anything.
Next up was to figure out how to power a Wii Fit board without any AA batteries. I spent some time doing reverse searches on all the identifiable chips on the main circuit board,and determined that the battery voltage is brought down to around 3.2v, a very convenient voltage for a portable Wii project. So I spent some time mapping out where the battery voltage and 3.3ishV needed to go, removed all battery power-related components, and then plugged 3.3v into the board.
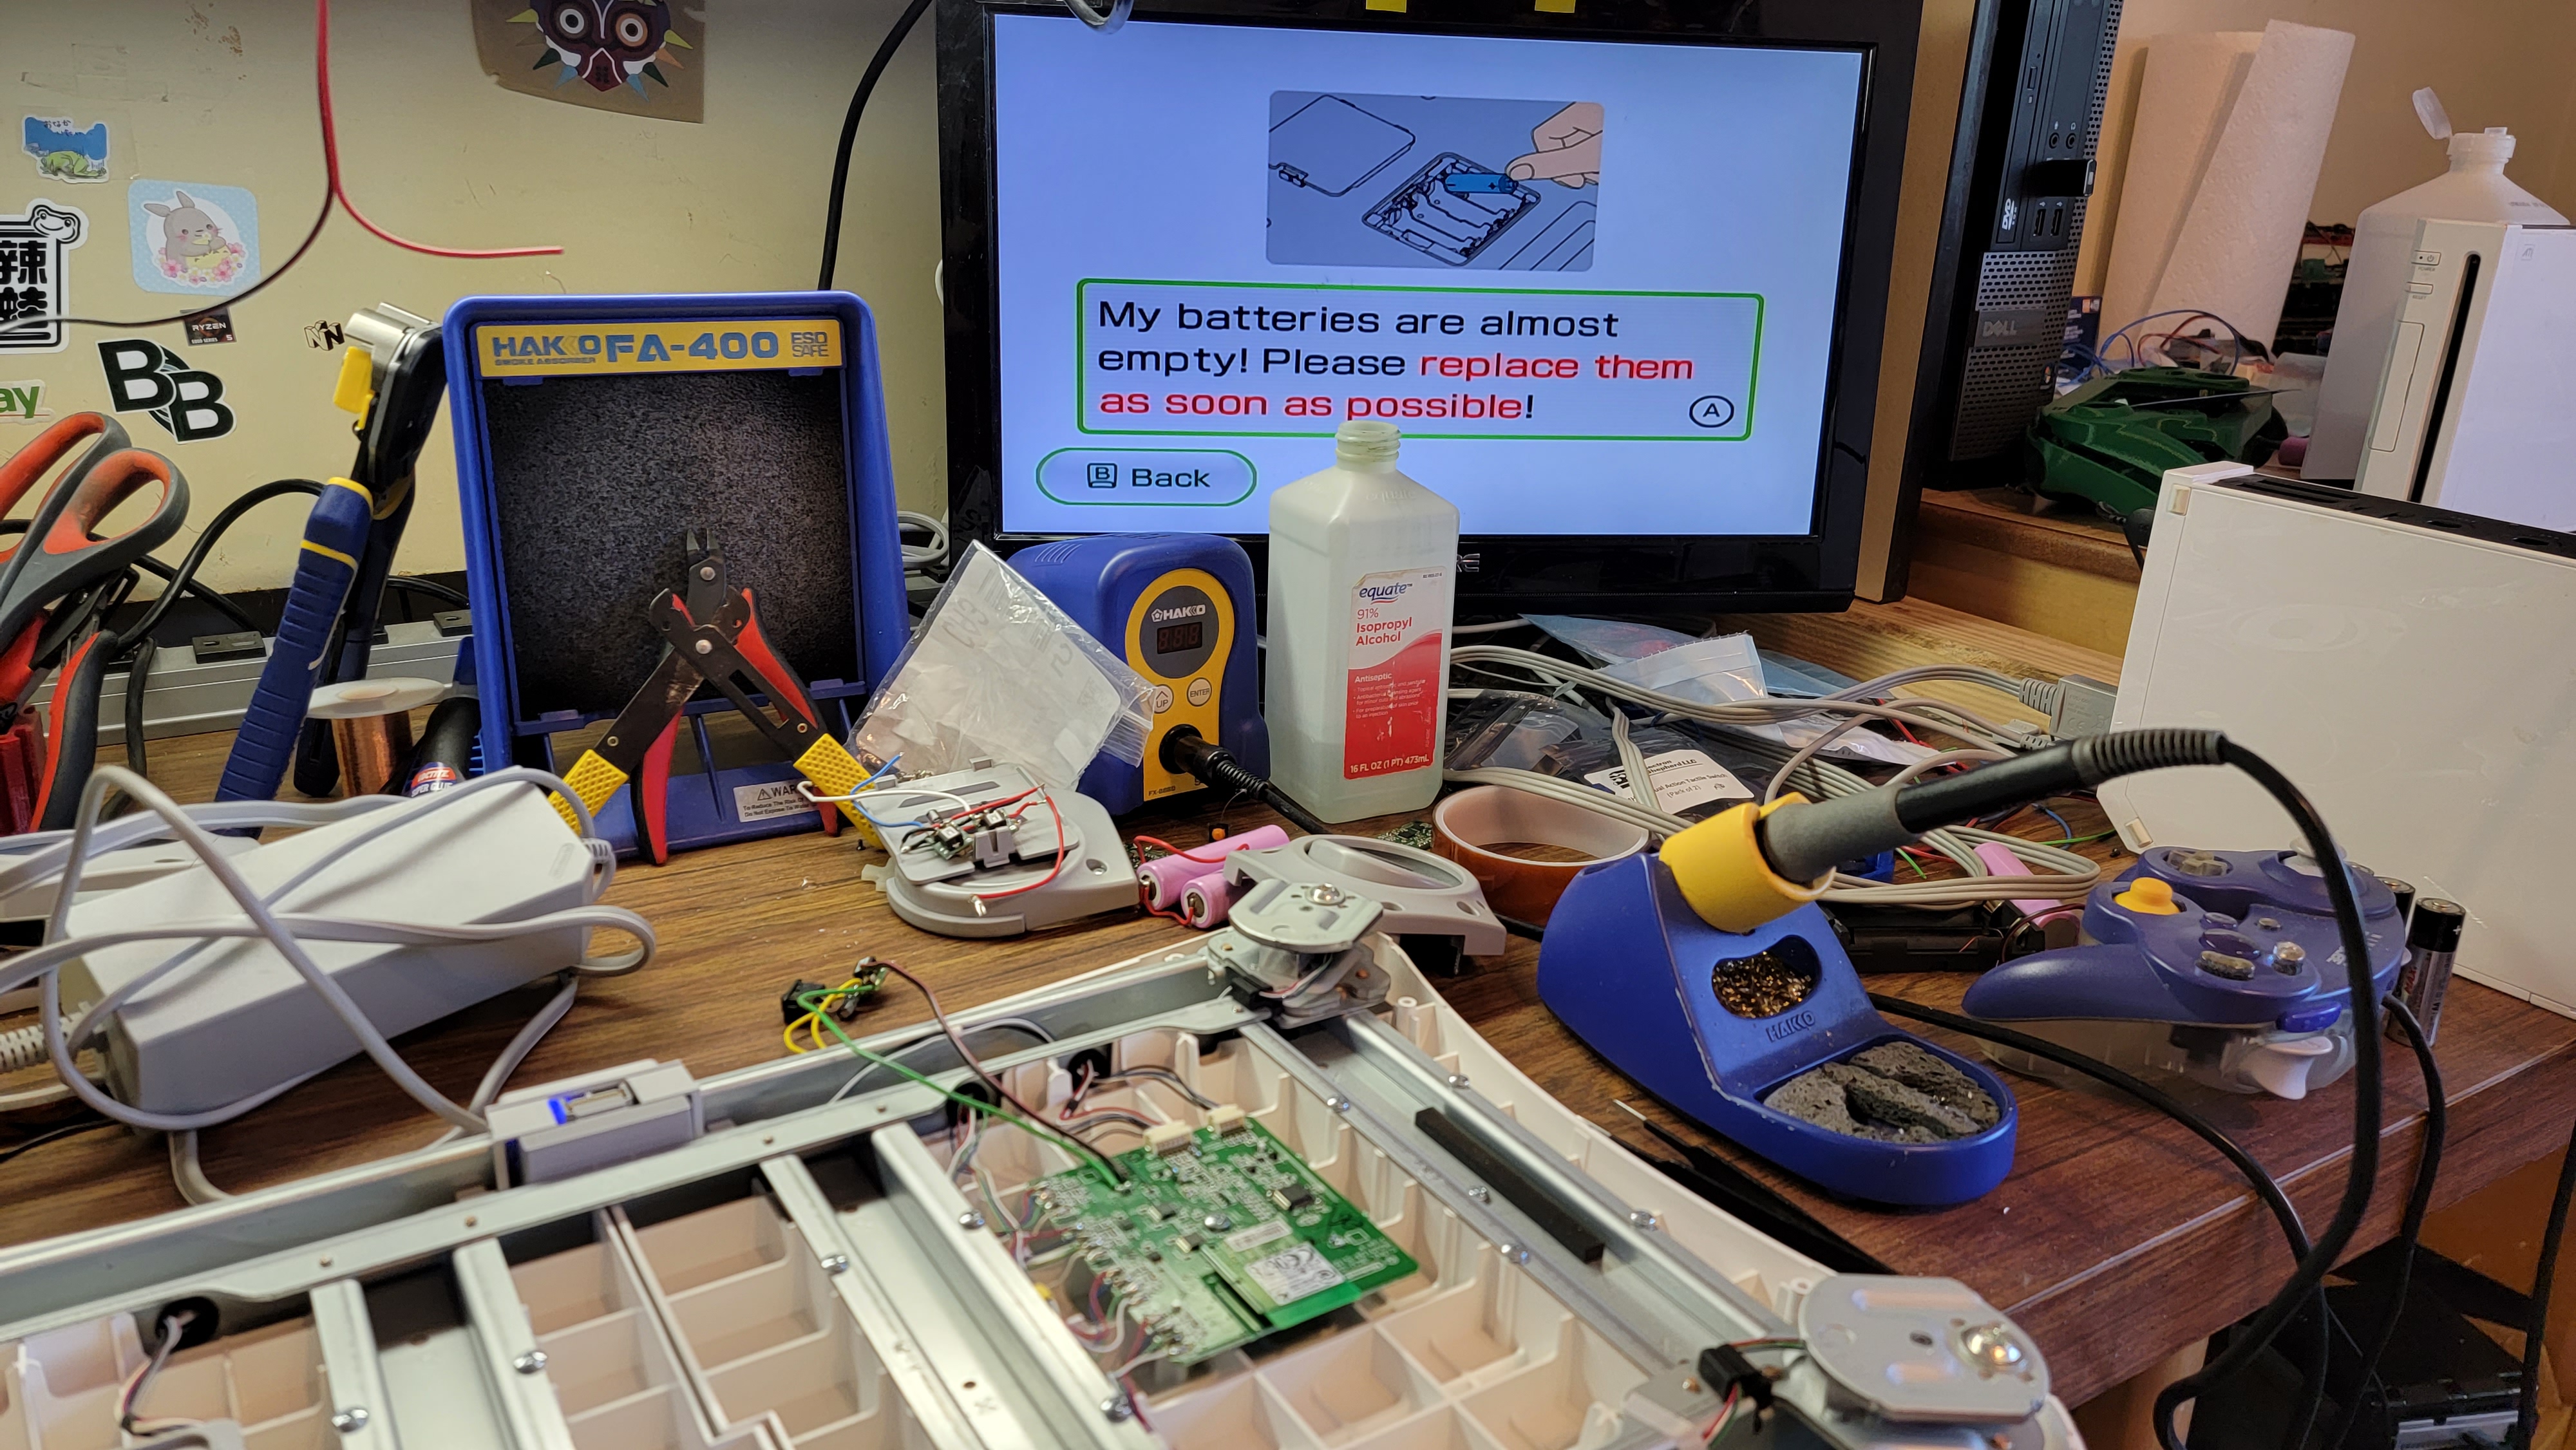
And this almost worked. I was able to successfully power up the board and get it to connect to the Wii, but the Wii Fit board is a little bit too smart/dumb to bypass the regulator like we do on Wii motherboards. One of the battery chips I removed was responsible for telling the Wii Fit board if the batteries are low, and since I bypassed that chip, the Wii Fit board thinks the batteries are at 0v and refuses to let you play anything until you "replace the batteries".
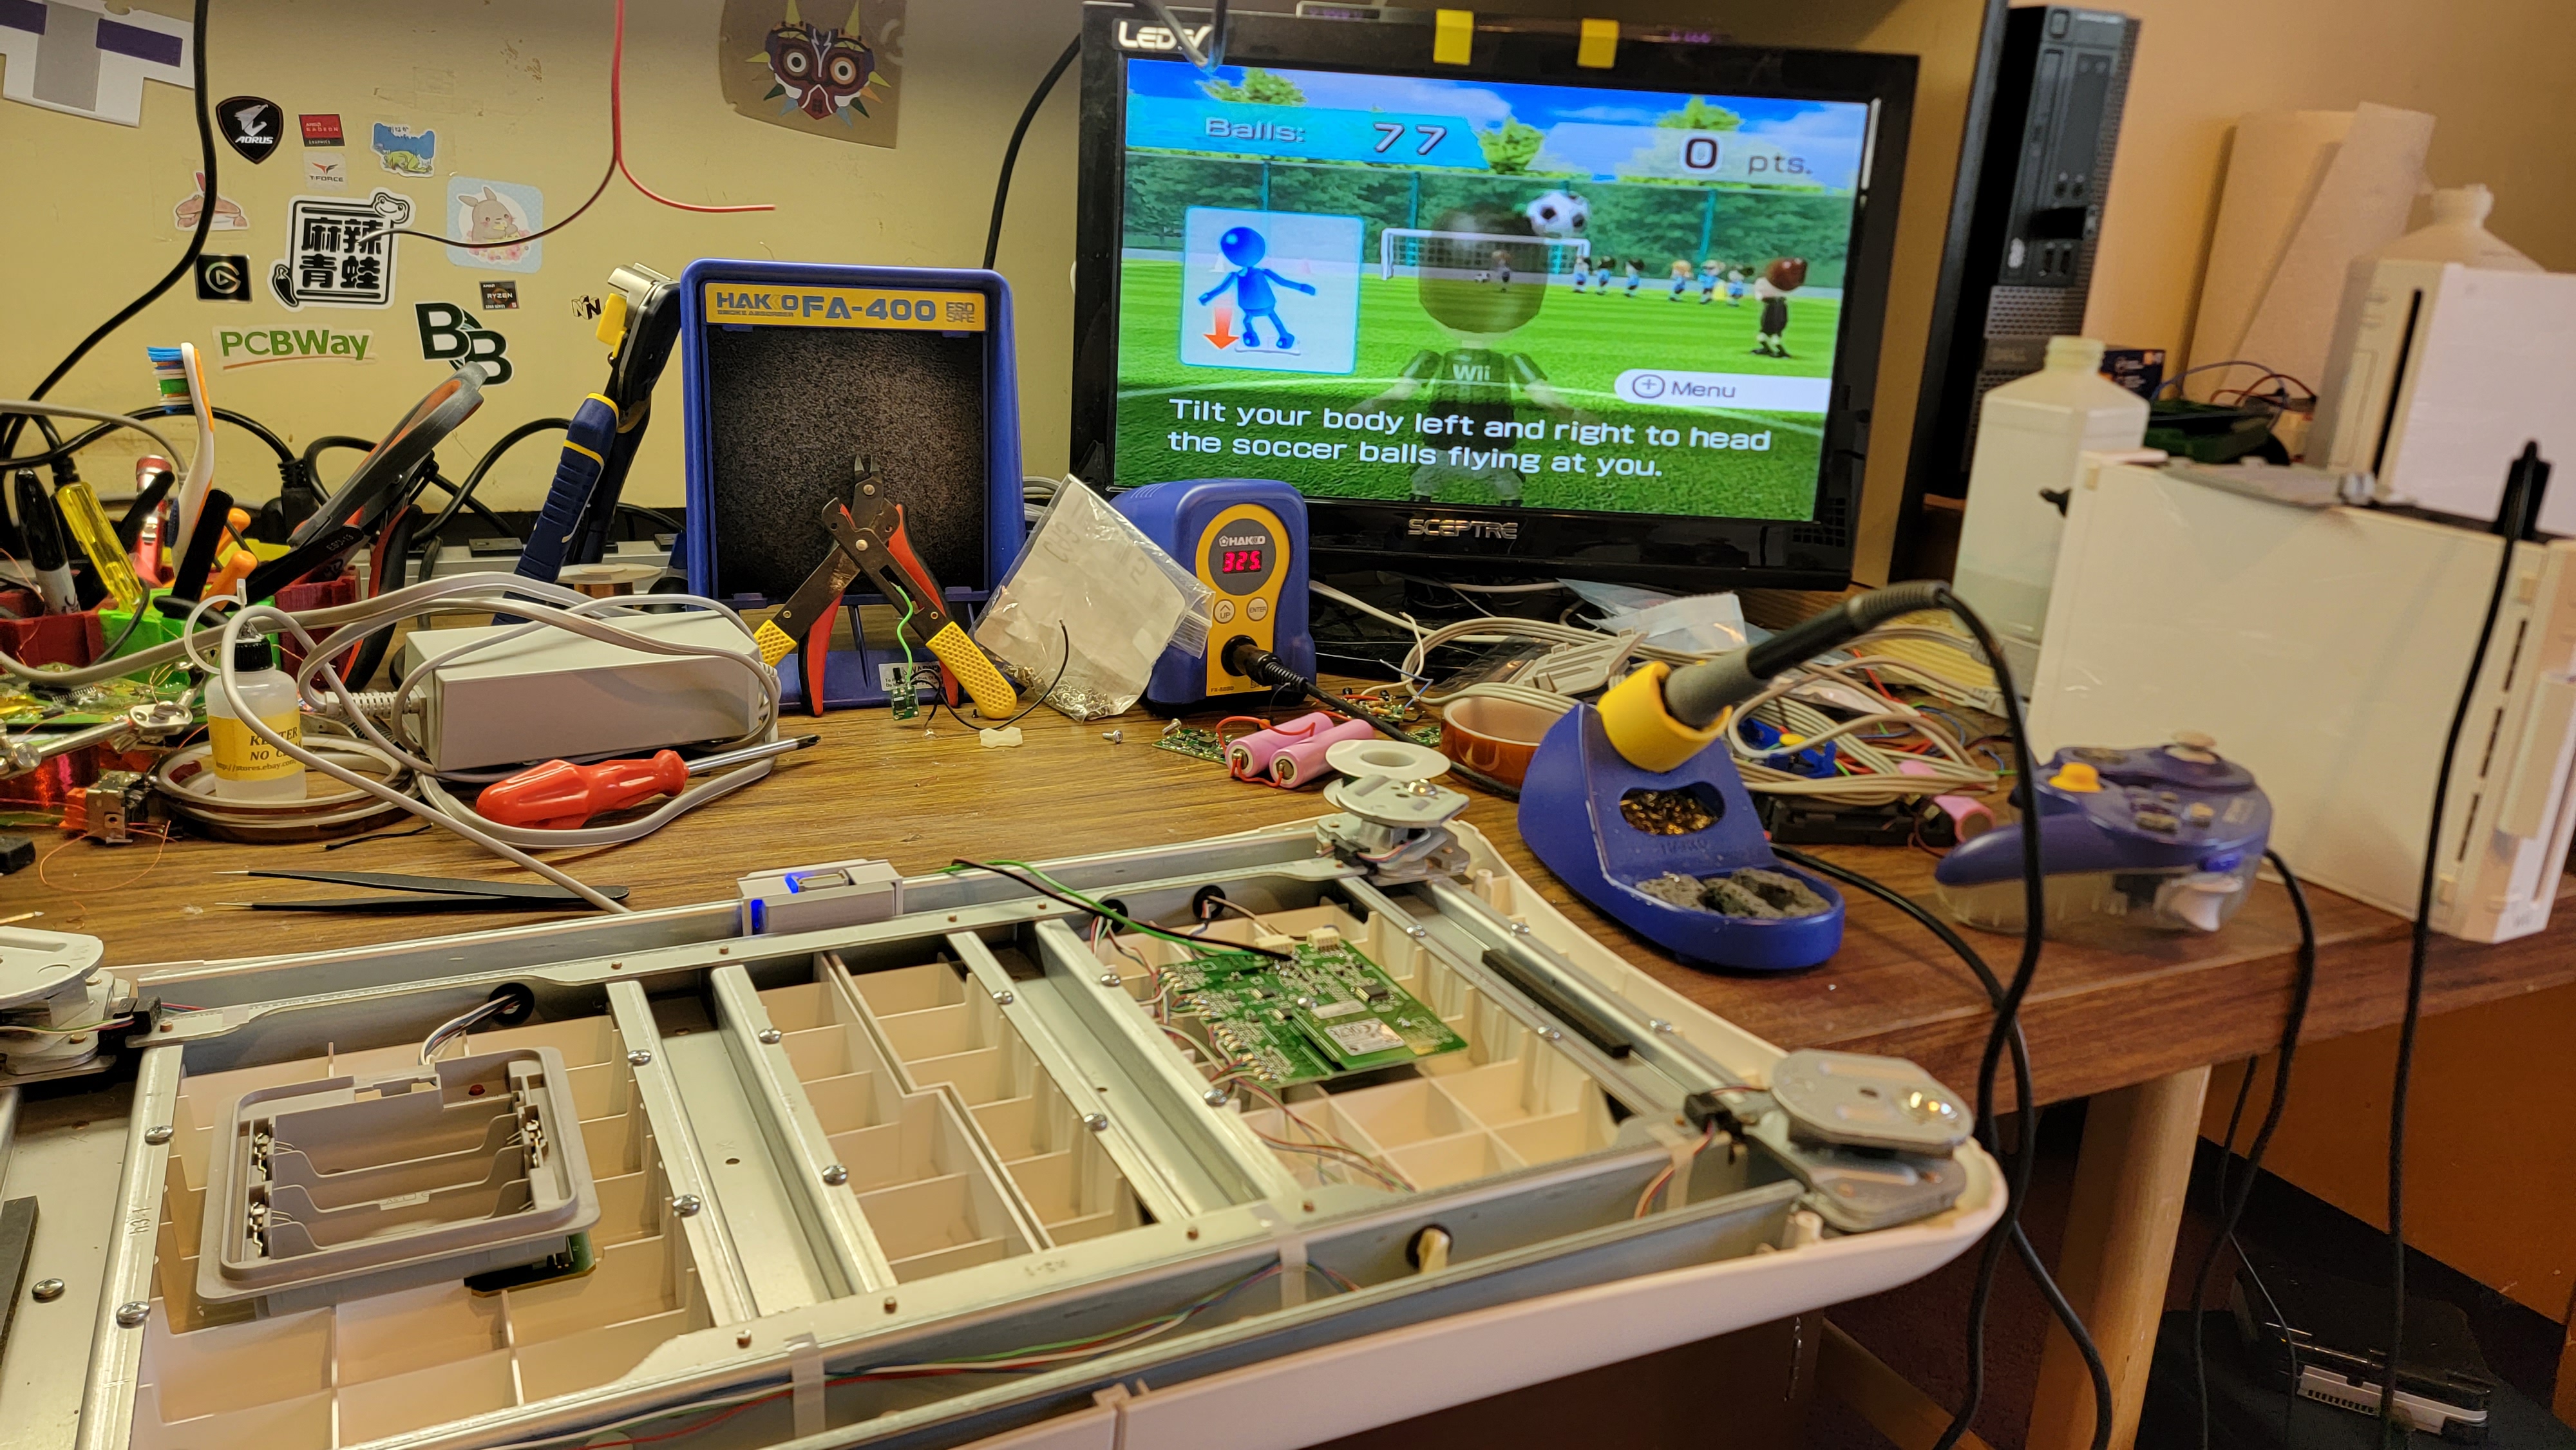
So I went "unga-bunga voltage time" and plugged 5V into the Wii Fit board's battery terminals, and that just worked.
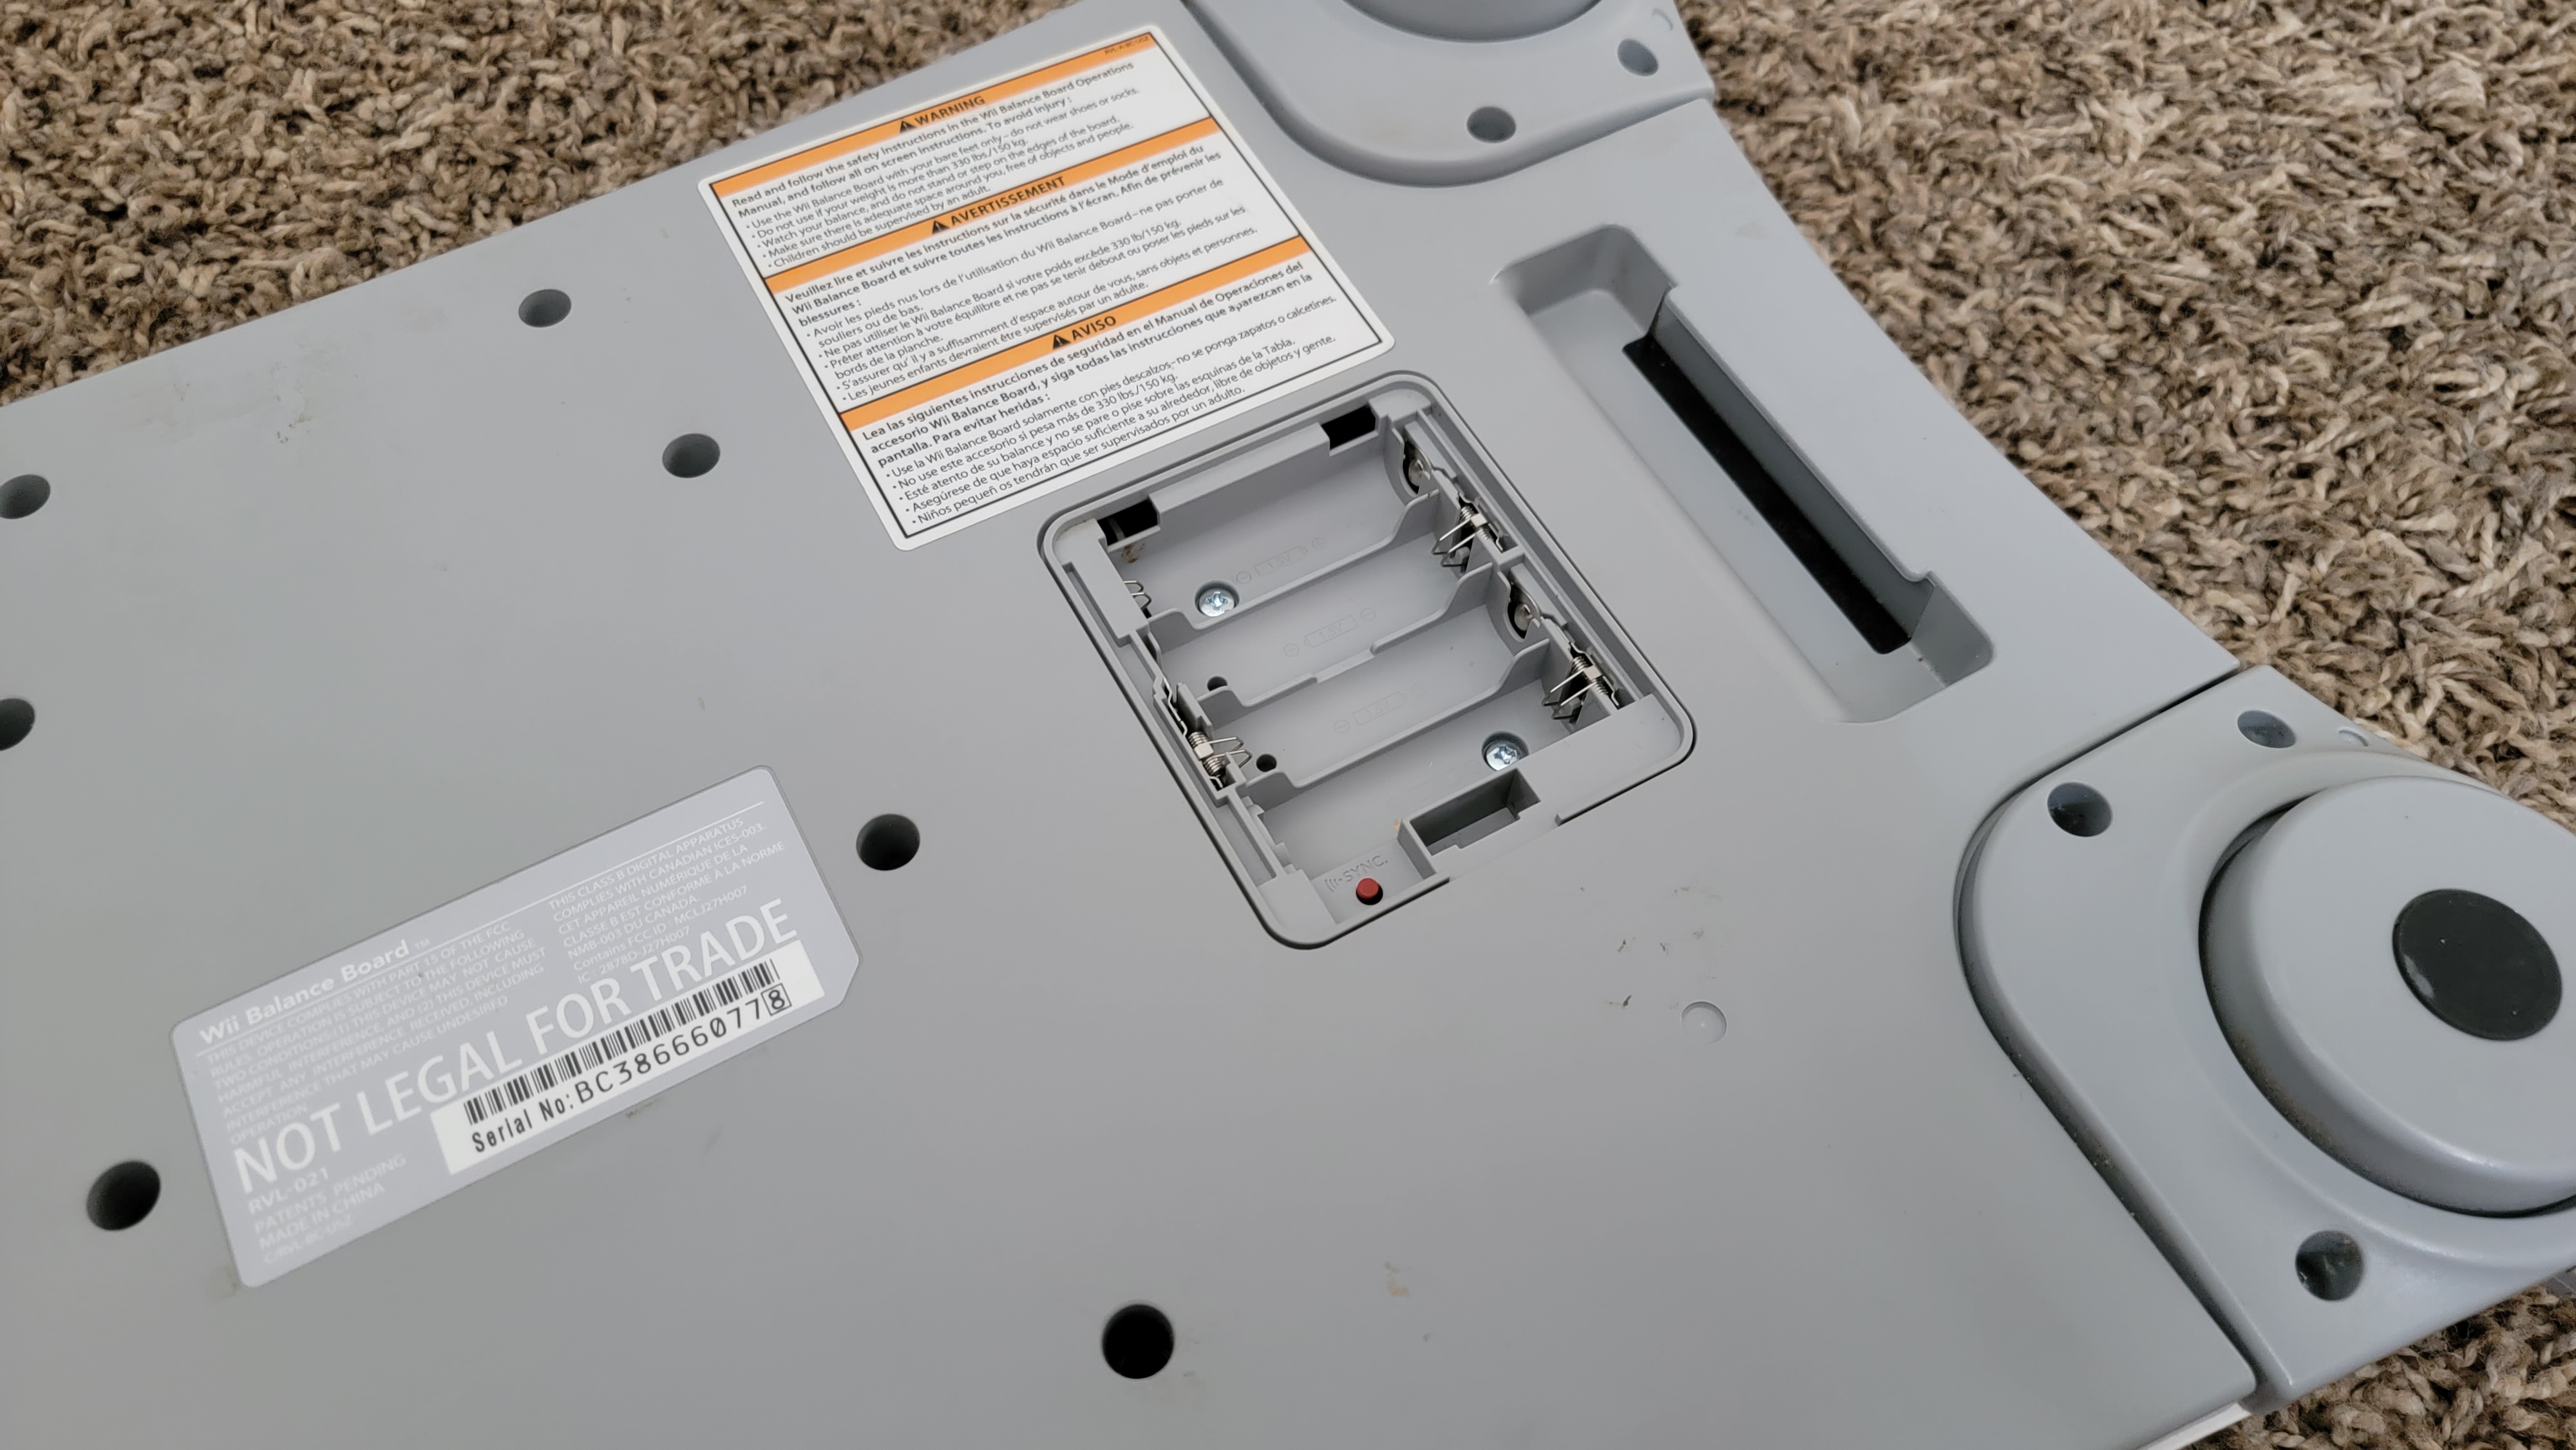
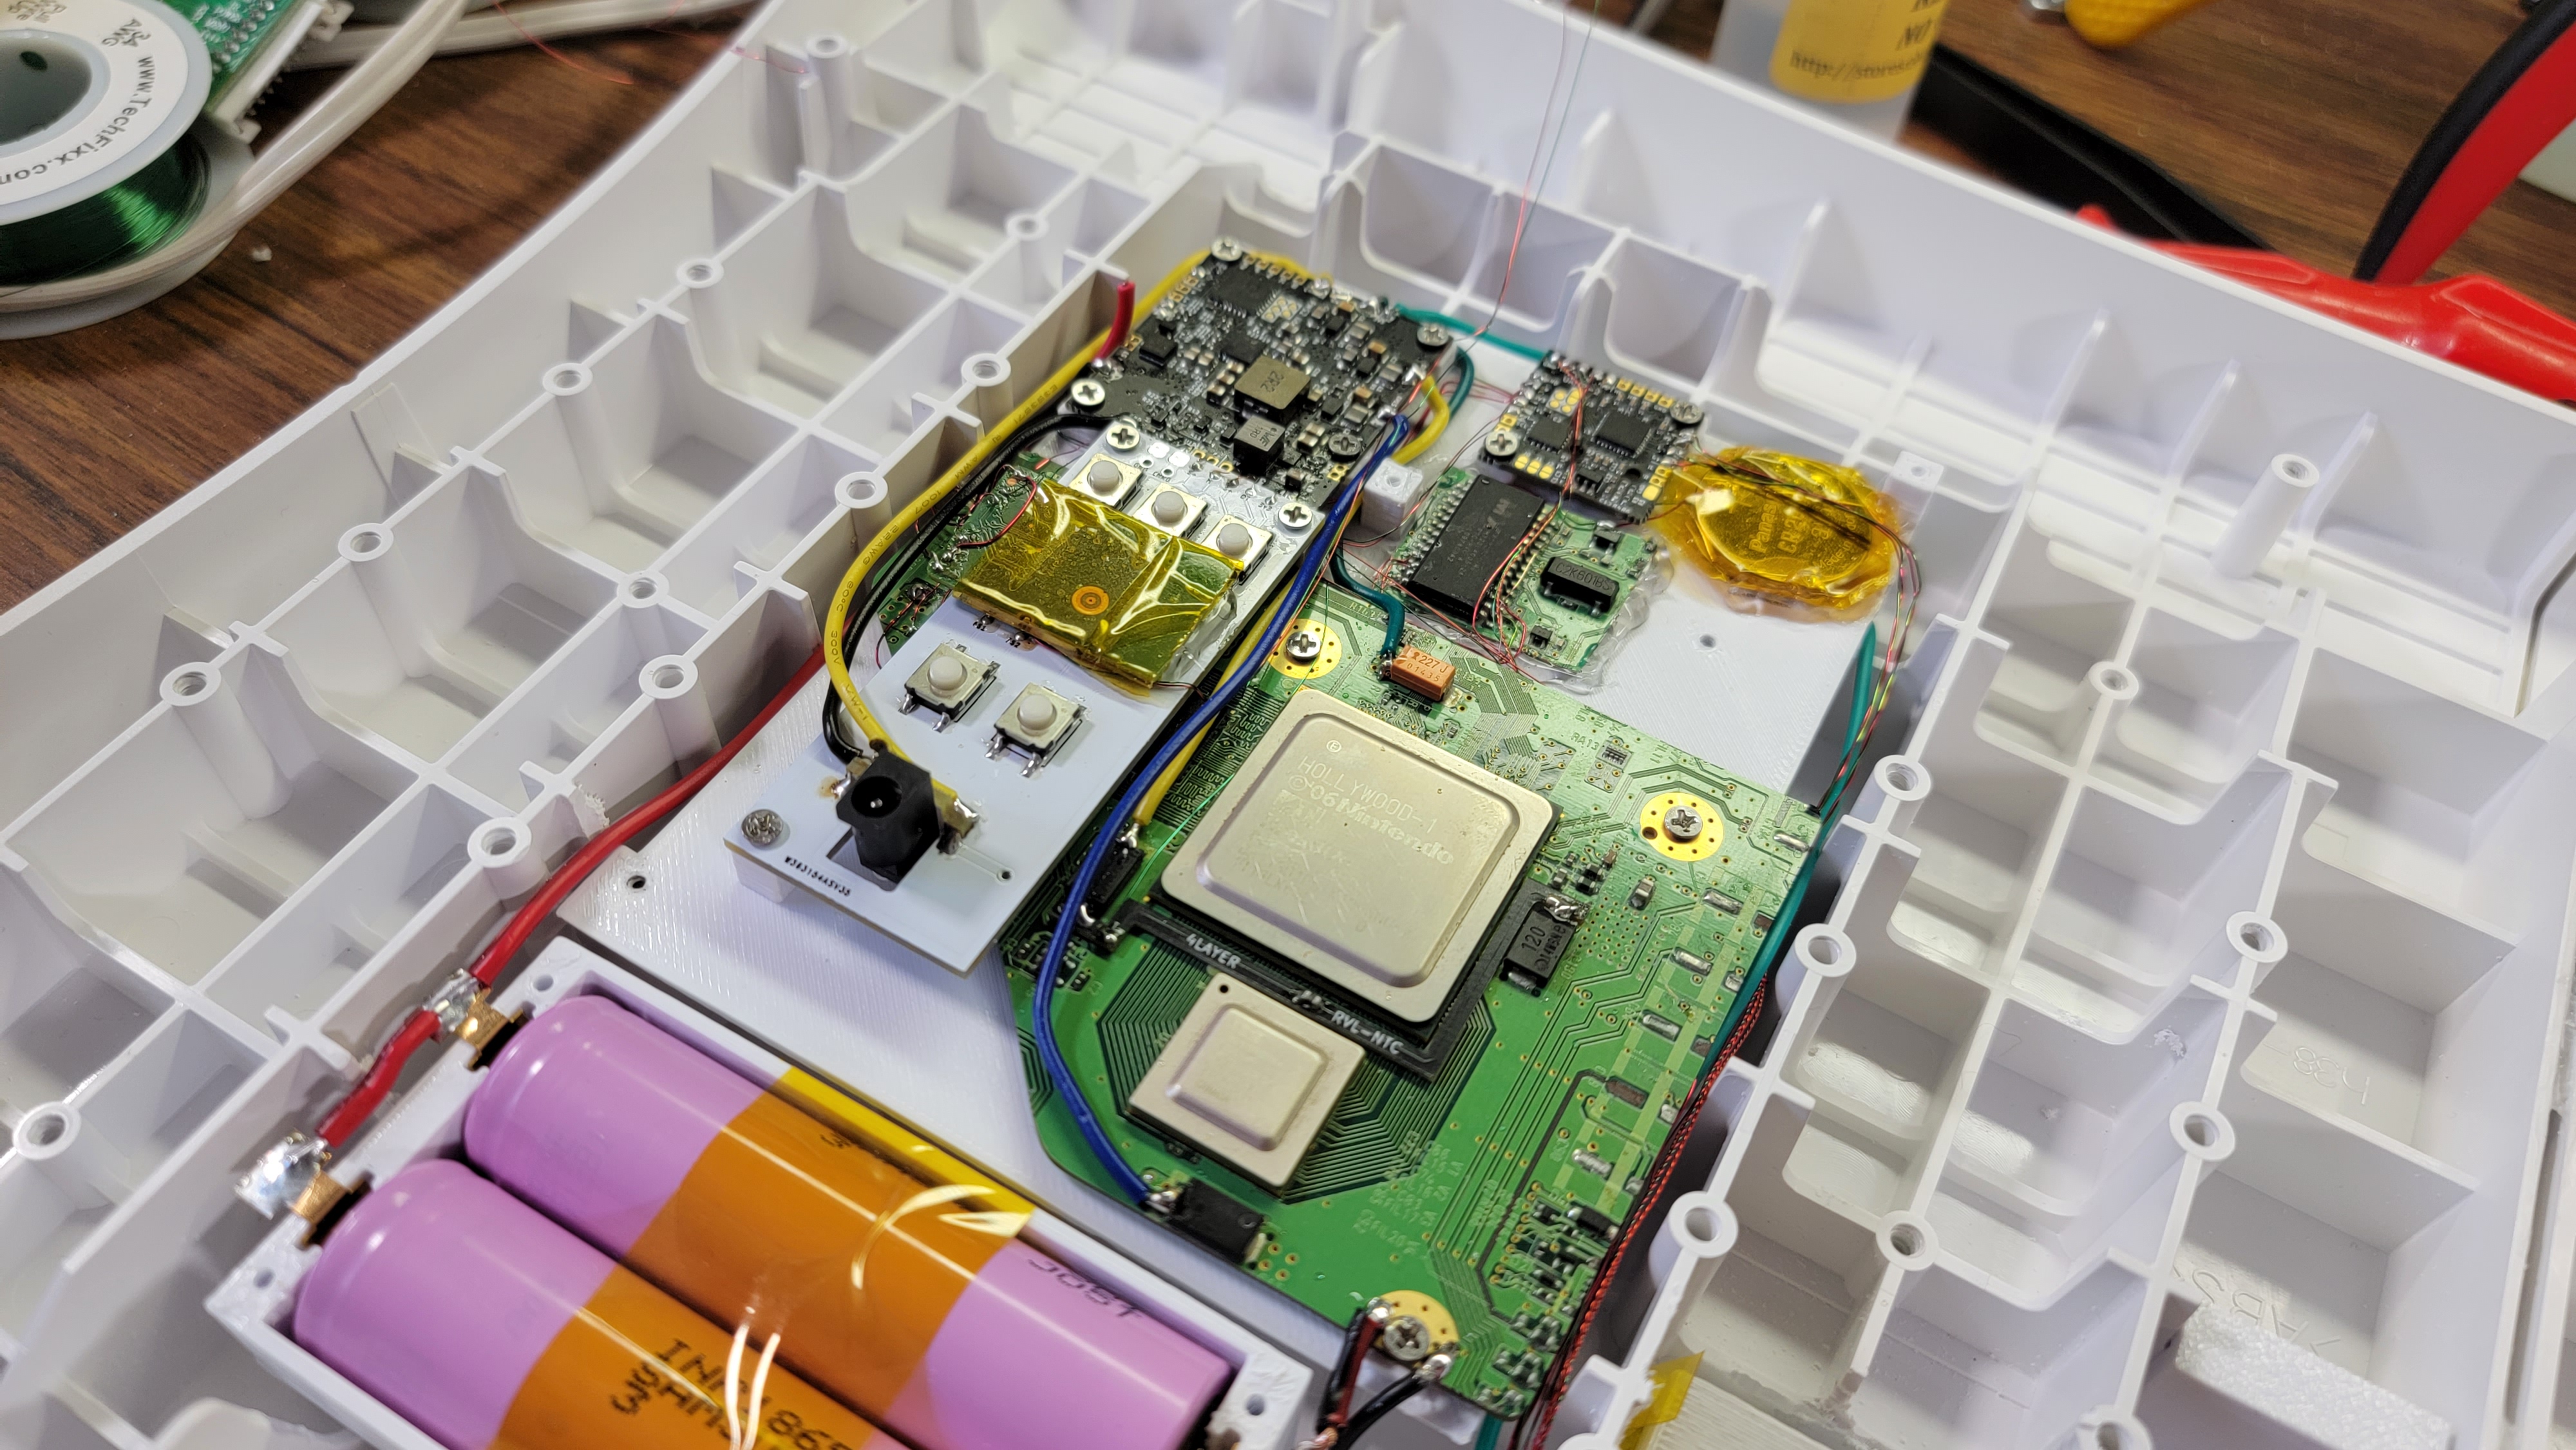
With the Wii Fit board stuff mostly figured out, I moved onto the design part of the portable. The Wii Fit board has one opening on the bottom of the board where the batteries go, so I decided to try and get all of my cooling and I/O stuff to fit into this little hole to avoid drilling more holes into the balance board.
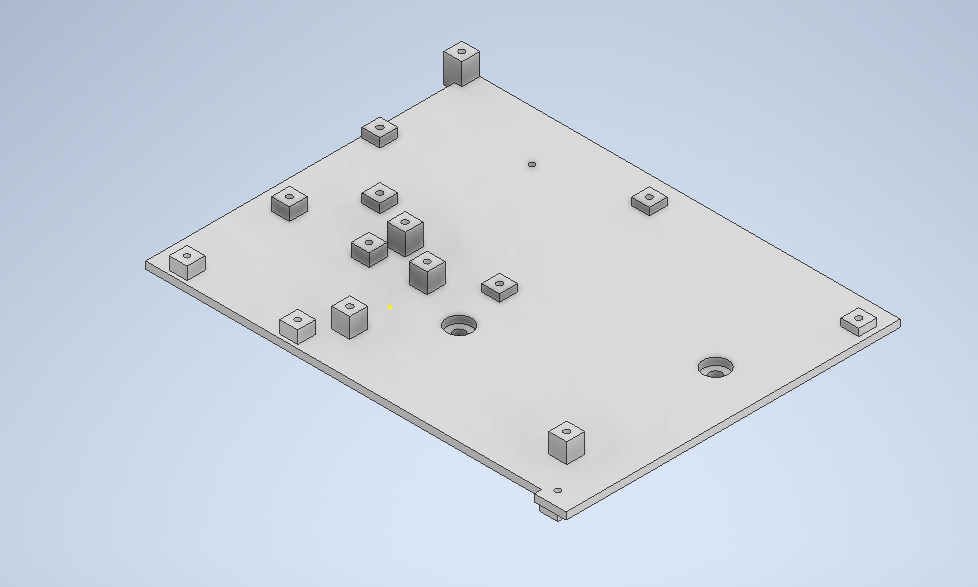
The first piece I designed was just a flat mounting block for just about everything the project needed. There are mounts for the Wii, PMS, U-AMP, and a button board for handling volume controls and sync buttons. This piece screws directly into the screw posts that are meant for the battery holder.
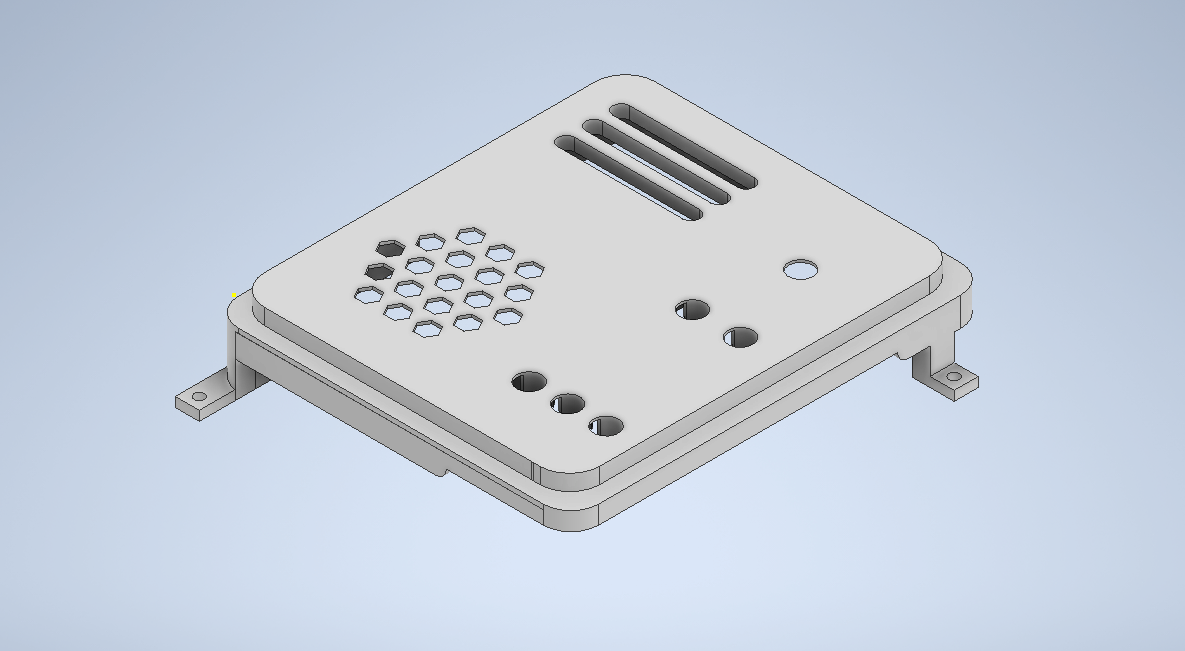
The second piece I designed was a replacement lid for the opening on the Wii Fit board. This piece holds the cooling setup and slots perfectly into the opening on the Wii Fit board, for as professional of a look as possible. Dialing in this piece so that it properly lined up with everything and fit the hole perfectly proved to be pretty tricky.

As far as circuit board design goes, this project really didn't need much. I just designed a simple board with buttons and then a funny little addon board to properly mount a charging jack to the design.
Cutting the hole for the screen was definitely the most intimidating part of the build, as I have zero frankencasing experience. I practiced the cut on a very beat up Wii Fit board, and then ordered a brand new Wii Fit board for the final build.
Cutting out the final hole went pretty all right. The screen hole is a bit taller than it needs to be, and there are a few flaws around the edged of the screen, but it's a pretty good cut considering it was done by hand. I ended up 3D printing some custom sanding paddles to help sand each of the screen edges evenly, as doing that with a file proved to be impossible for me.
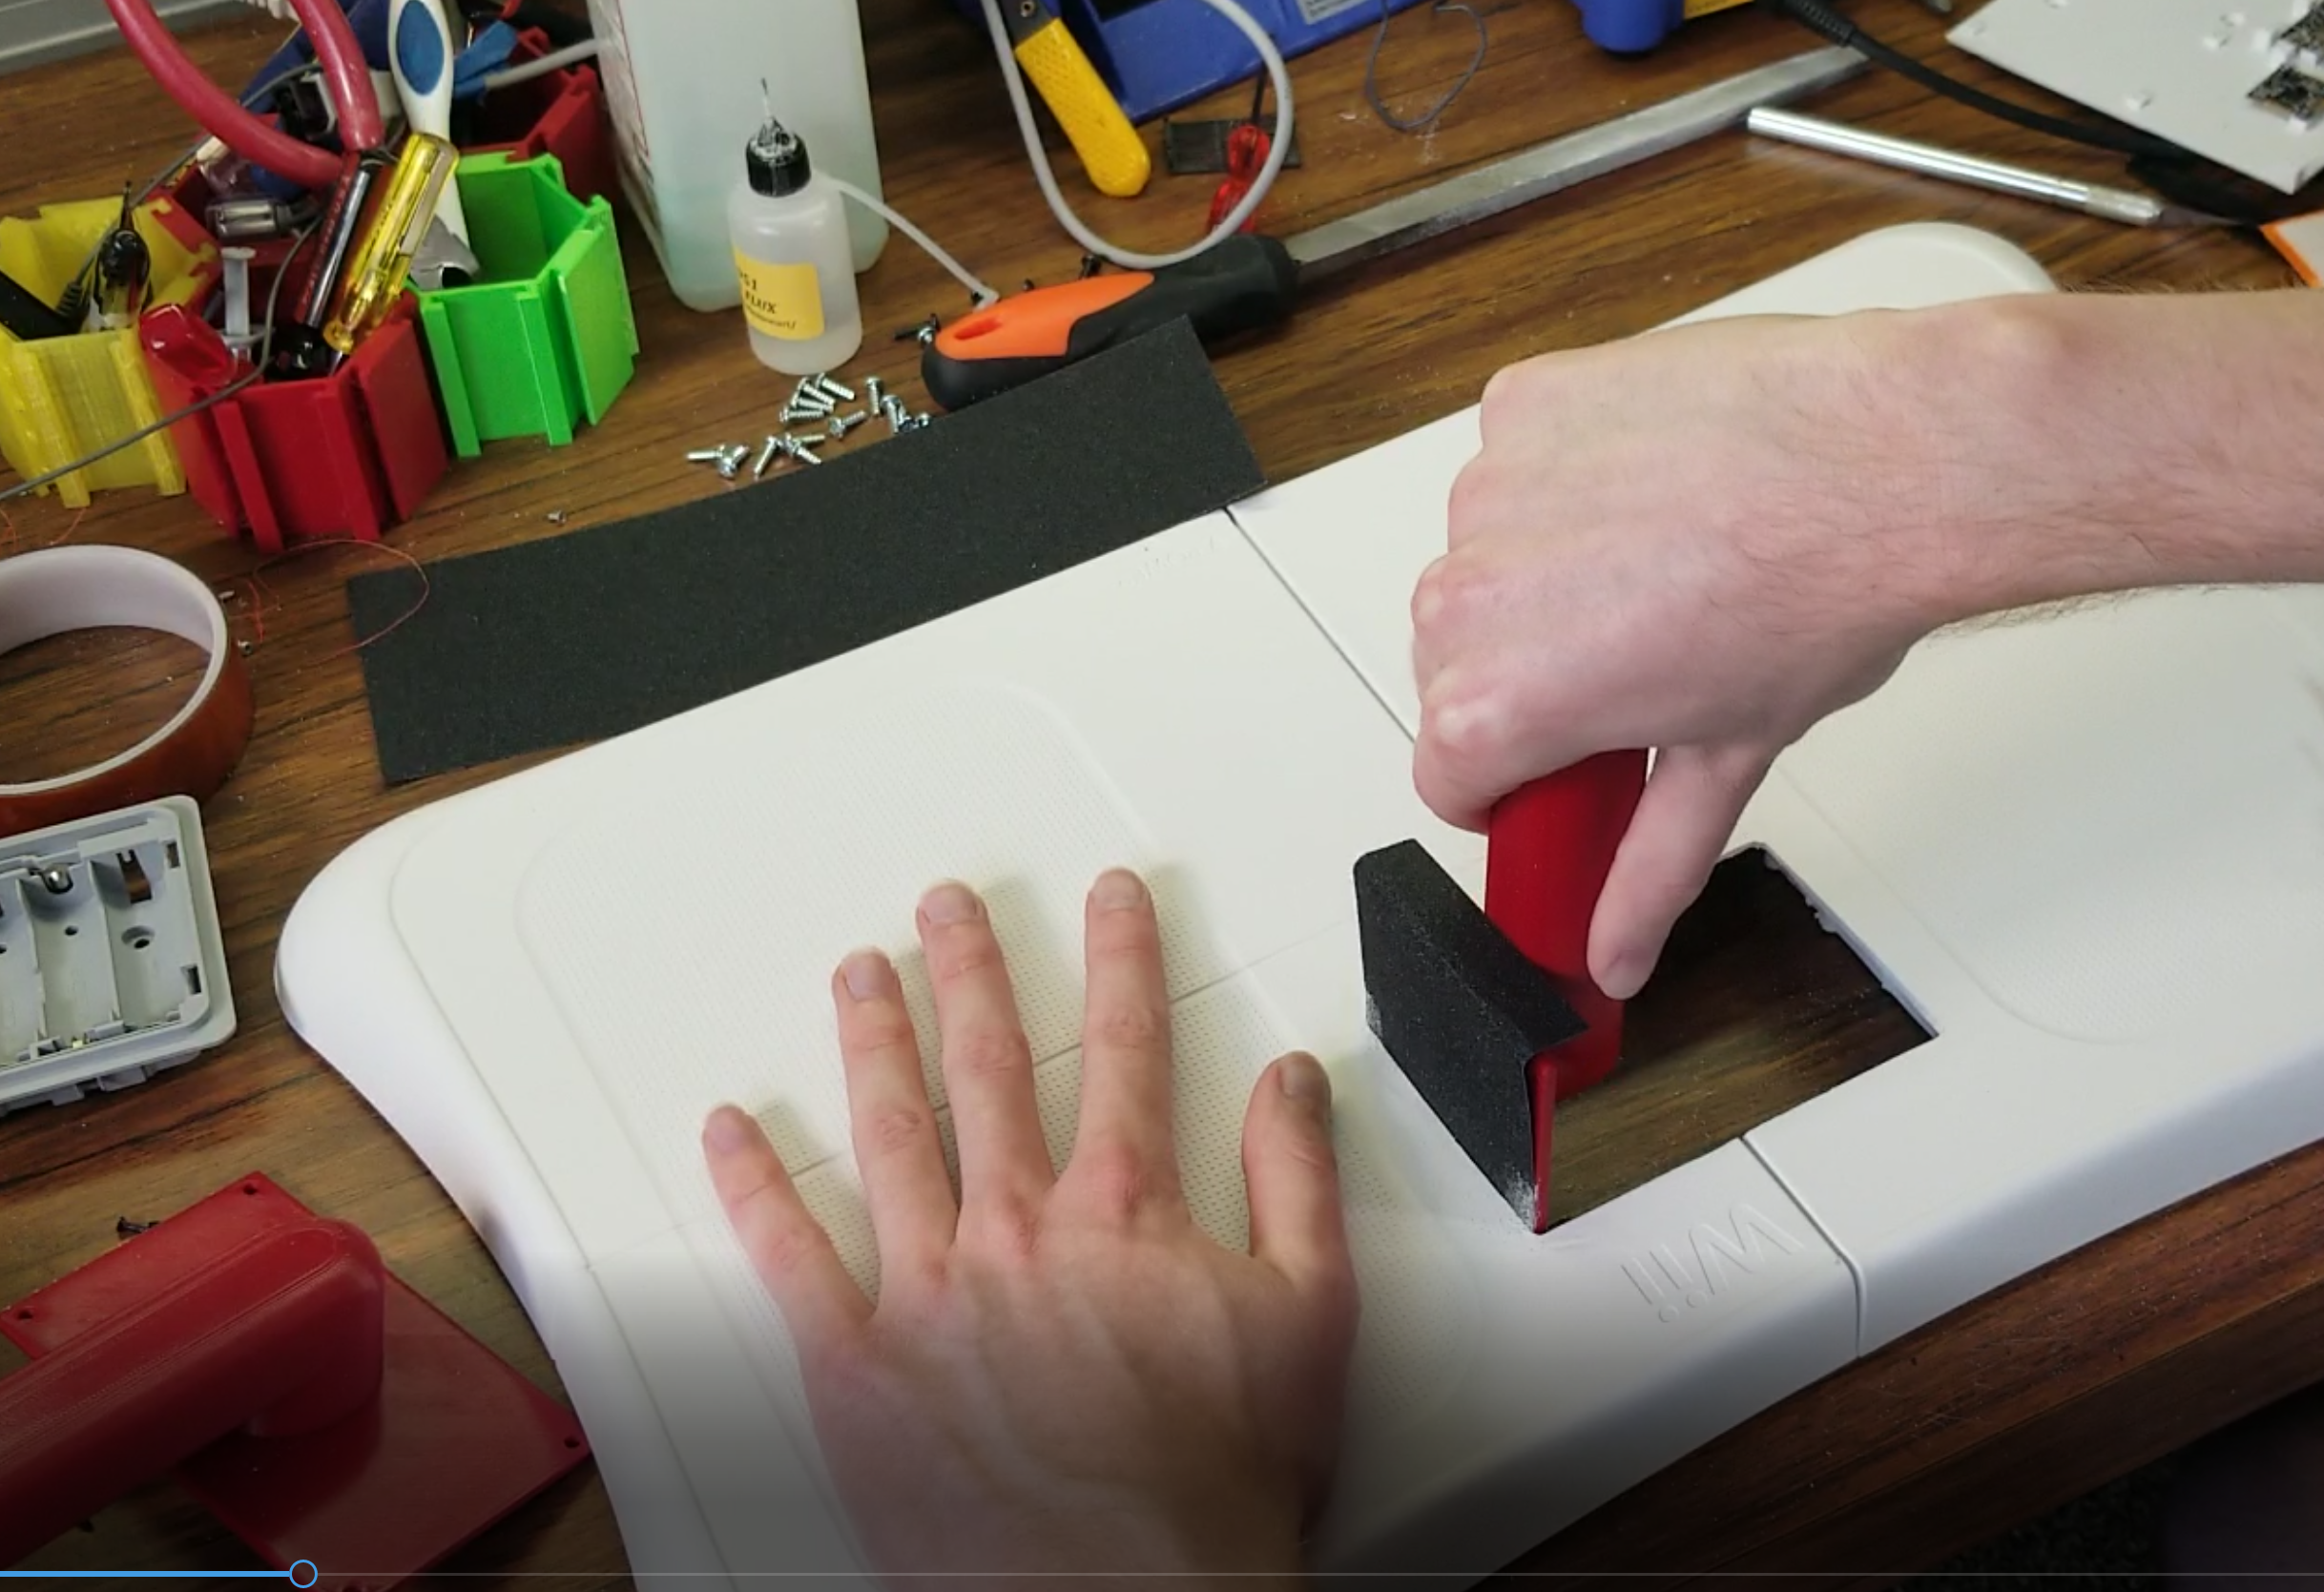
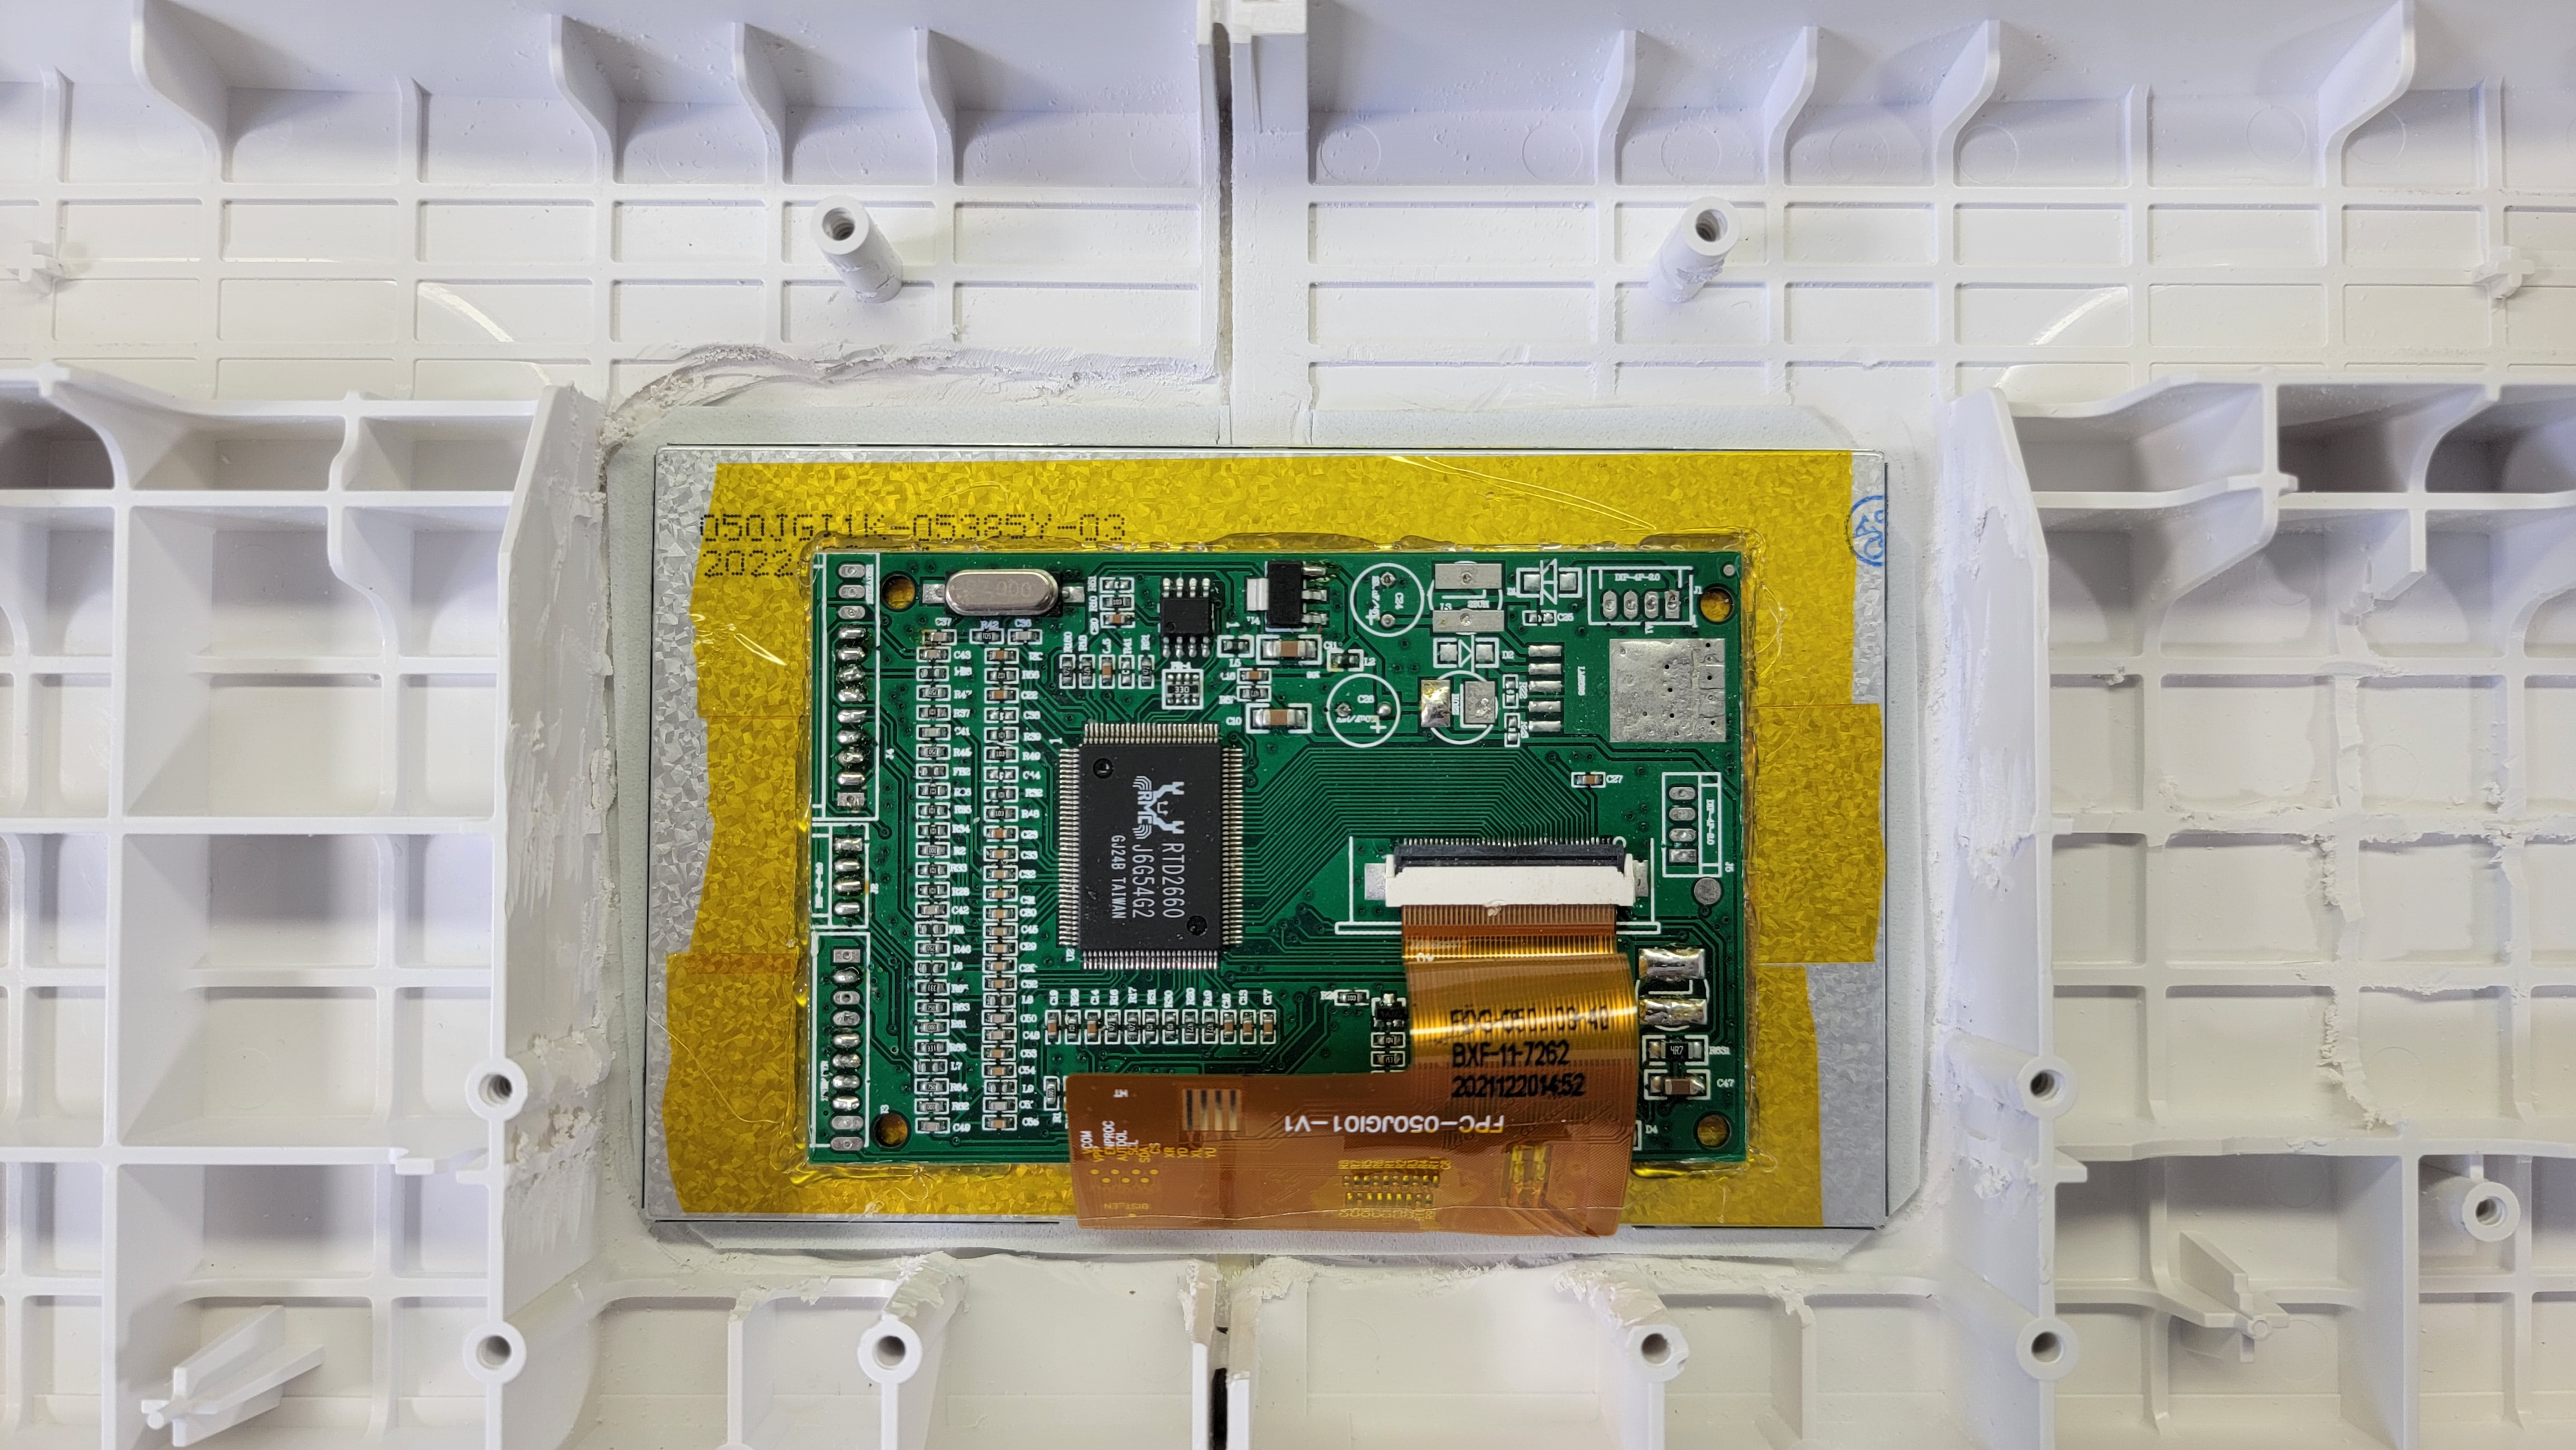
And finally, it was assembly time. I cut out some white foam to go between the screen and the Wii Fit board to help add some padding in case the board flexed a bit during use. I trimmed a Wii and relocated Bluetooth on it for the first time in several years. Then I mounted everything to the flat plate, wired it all together, repurposed the Wii Fit board's LED and power button for the PMS, and after some minor troubleshooting...

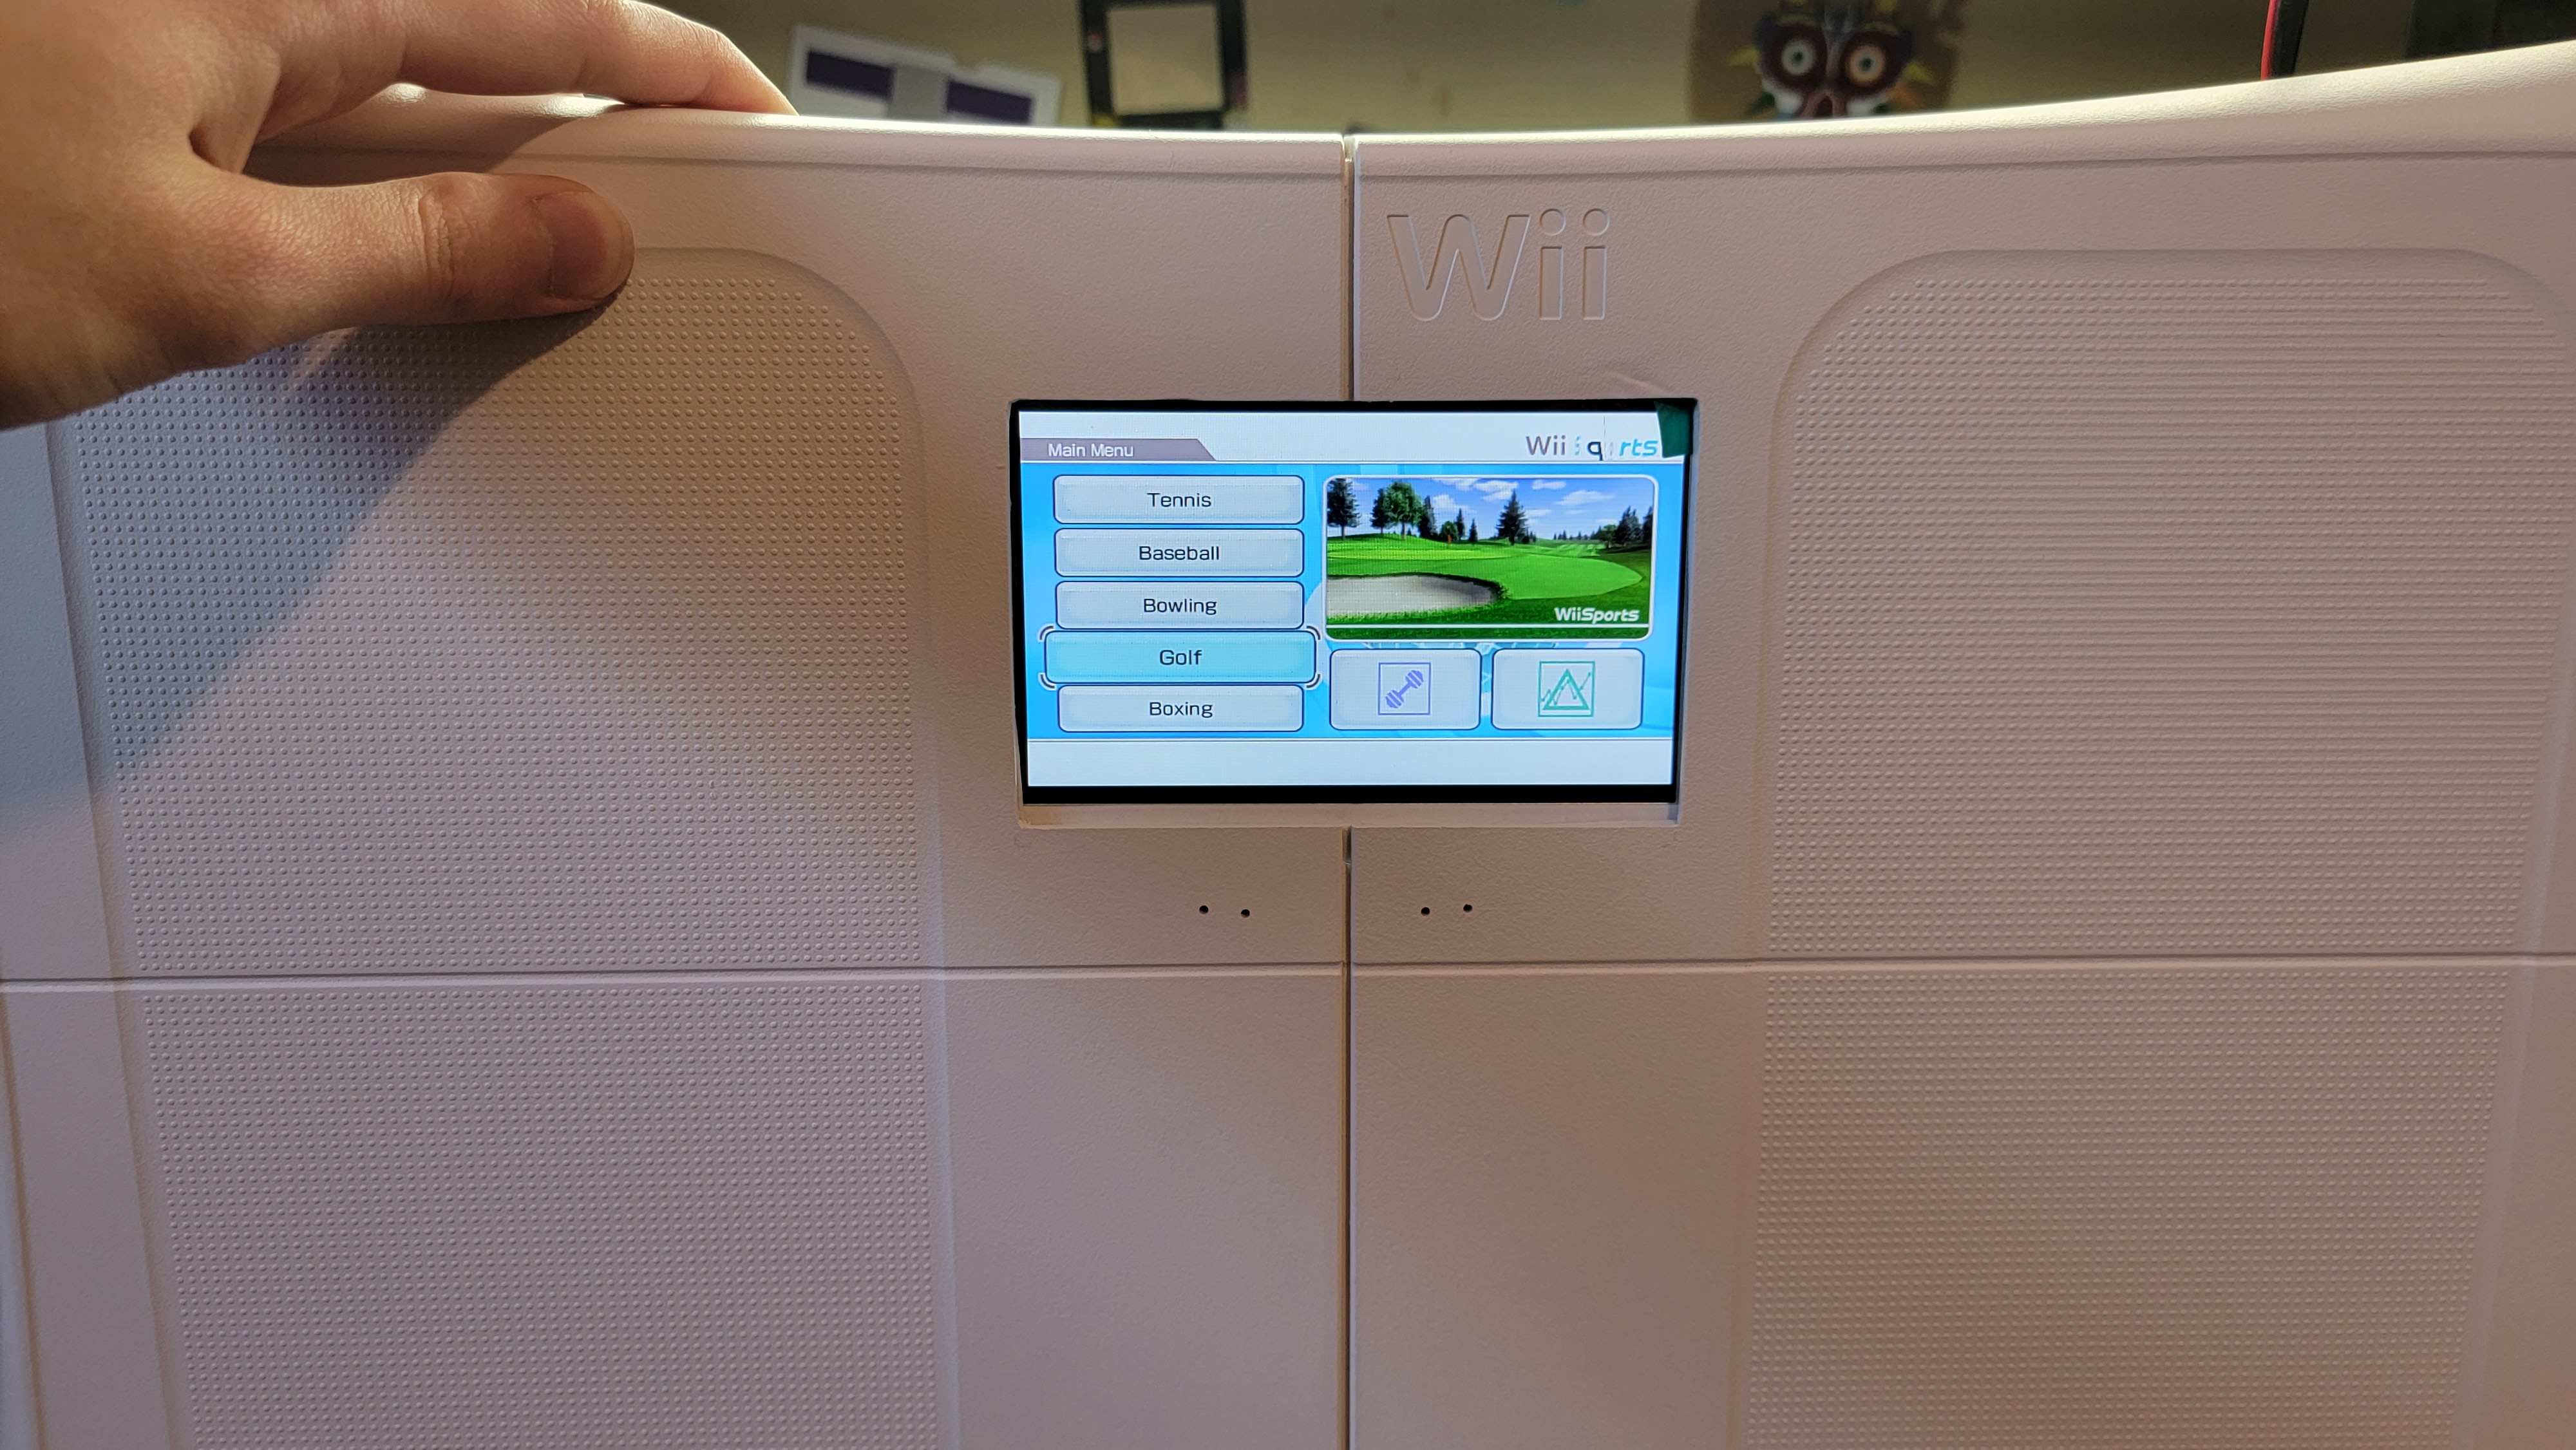
I got it almost working. Audio wasn't working at all and the clock wasn't syncing properly after setting it in the Wii menu. The audio issue ended up being that I needed to ground HS on the U-Amp, because my design doesn't have a headphone jack. The clock issue went away after replacing the MX chip with a new one (it seems like it might be best to always source your MX chip from the same Wii as your main trim, it might avoid this issue)

At this point, the project is in a very tentative "done" state. Everything is working so far, but I need to spend some solid time with it to ensure that this isn't a fake "done" with twenty hidden issues waiting for me tomorrow. I'm sorry I didn't upload periodic updates like a good worklogger; I had plans to but somehow never managed to sit down and upload bite-sized chunks of the project.
This was a very silly project, but someone needed to do it at some point. Here's one final teaser for the project, I'll be working on a more verbose video in the coming weeks:
Wii Fit is obviously the best way to get into shape, so I decided to build a portable Wii into a Wii Fit balance board. The goal is to have a portable Wii Fit machine that I can exercise on no matter where I am so that I can be "on that grind :triumph: :100:" 24/7.
I started by taking apart a Wii Fit board to figure out how it works. The sensors are in the four feet, and each sensor basically acts like a scale to figure out which direction you're leaning. This means that I can cut a hole in the middle of the board for a screen, and not risk cutting into any critical sensors or anything.
Next up was to figure out how to power a Wii Fit board without any AA batteries. I spent some time doing reverse searches on all the identifiable chips on the main circuit board,and determined that the battery voltage is brought down to around 3.2v, a very convenient voltage for a portable Wii project. So I spent some time mapping out where the battery voltage and 3.3ishV needed to go, removed all battery power-related components, and then plugged 3.3v into the board.
And this almost worked. I was able to successfully power up the board and get it to connect to the Wii, but the Wii Fit board is a little bit too smart/dumb to bypass the regulator like we do on Wii motherboards. One of the battery chips I removed was responsible for telling the Wii Fit board if the batteries are low, and since I bypassed that chip, the Wii Fit board thinks the batteries are at 0v and refuses to let you play anything until you "replace the batteries".
So I went "unga-bunga voltage time" and plugged 5V into the Wii Fit board's battery terminals, and that just worked.
With the Wii Fit board stuff mostly figured out, I moved onto the design part of the portable. The Wii Fit board has one opening on the bottom of the board where the batteries go, so I decided to try and get all of my cooling and I/O stuff to fit into this little hole to avoid drilling more holes into the balance board.
The first piece I designed was just a flat mounting block for just about everything the project needed. There are mounts for the Wii, PMS, U-AMP, and a button board for handling volume controls and sync buttons. This piece screws directly into the screw posts that are meant for the battery holder.
The second piece I designed was a replacement lid for the opening on the Wii Fit board. This piece holds the cooling setup and slots perfectly into the opening on the Wii Fit board, for as professional of a look as possible. Dialing in this piece so that it properly lined up with everything and fit the hole perfectly proved to be pretty tricky.
As far as circuit board design goes, this project really didn't need much. I just designed a simple board with buttons and then a funny little addon board to properly mount a charging jack to the design.
Cutting the hole for the screen was definitely the most intimidating part of the build, as I have zero frankencasing experience. I practiced the cut on a very beat up Wii Fit board, and then ordered a brand new Wii Fit board for the final build.
Cutting out the final hole went pretty all right. The screen hole is a bit taller than it needs to be, and there are a few flaws around the edged of the screen, but it's a pretty good cut considering it was done by hand. I ended up 3D printing some custom sanding paddles to help sand each of the screen edges evenly, as doing that with a file proved to be impossible for me.
And finally, it was assembly time. I cut out some white foam to go between the screen and the Wii Fit board to help add some padding in case the board flexed a bit during use. I trimmed a Wii and relocated Bluetooth on it for the first time in several years. Then I mounted everything to the flat plate, wired it all together, repurposed the Wii Fit board's LED and power button for the PMS, and after some minor troubleshooting...
I got it almost working. Audio wasn't working at all and the clock wasn't syncing properly after setting it in the Wii menu. The audio issue ended up being that I needed to ground HS on the U-Amp, because my design doesn't have a headphone jack. The clock issue went away after replacing the MX chip with a new one (it seems like it might be best to always source your MX chip from the same Wii as your main trim, it might avoid this issue)
At this point, the project is in a very tentative "done" state. Everything is working so far, but I need to spend some solid time with it to ensure that this isn't a fake "done" with twenty hidden issues waiting for me tomorrow. I'm sorry I didn't upload periodic updates like a good worklogger; I had plans to but somehow never managed to sit down and upload bite-sized chunks of the project.
This was a very silly project, but someone needed to do it at some point. Here's one final teaser for the project, I'll be working on a more verbose video in the coming weeks:
Attachments
-
 1.9 MB Views: 169
