- Joined
- Feb 5, 2024
- Messages
- 7
- Likes
- 1
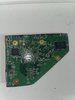
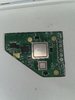
Hello! This is going to be a worklog for my first ever portable the modder's briefcase which I was hoping to enter into the summer contest but I seem to have missed the cutoff for that, oops. I've never cut up motherboards before, but I do have some soldering and solid works experience though, so bear with me. The idea for this project is a briefcase that will hold my GameCube controller modding tools in the bottom of the briefcase while also having a removable portable in the top half to play games on and run the homebrew software smash scope which is used for testing GameCube controllers. I'm planning on having a 10" screen, all 4 gcc ports, speakers, a 10hr battery life, and can be played on while charging all while hopefully being no thicker than 1.25in. From what I understand you need a couple things for a portable such as a trimmed wii, a pms to manage ac to dc conversions/stepdown voltages, some sort of cmb to ensure your batteries don't explode, batteries, a power switch, wires, a screen, and speakers (Let me know if I'm missing anything!) I have 2 4 layer wii's on the way and I plan to do the omgwtf trim after installing rvloader so that covers the trimmed wii, and I'm going to order the RVL-PMS-2 to use as my pms and cmb although I would love to hear yalls opinion on that. As for the actual charging port and SD card reading I'm ordering a PMS PD 3 for fourlayer tech for that. However I'm pretty lost when it comes to the other supplies especially the screen, I've been searching for a 10" 480p Ips screen to no avail and as for the wires I would like to have multiple different colors so I can tell what each is for at a glance but I'm not sure which ones to get, so if you guys know where I can find those things or recommend what I should do for batteries to achieve my desired battery life that would be amazing! Overall I know this is a pretty strange build, but I've been wanting to do it for years just cause I think it would be sick to roll up to a tournament with a briefcase and be able to do all my modding out of it, and I feel like documenting the whole build process would be amazing for my project portfolio. So sorry if I've asked some redundant questions I've tried my best to read up on the guides around the forums but this is my first time ever on a forum so I fear I may have missed some, if I have I would really appreciate a link. Here's the top part of the briefcase that I hope to fit the build into and the dimensions are Length 47cm Width 3.18cm Height 31cm View attachment Briefcase top (1).webp
Thank you guys for all the resources and for making this community!
Thank you guys for all the resources and for making this community!
")