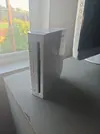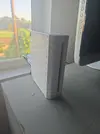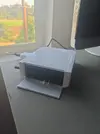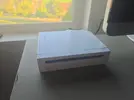
Worklog The Lonelii (Wii Micro Console with OEM housing)

Joined
Oct 5, 2020
Messages
11
Likes
16
Location
WA
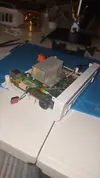
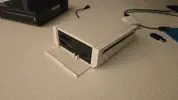
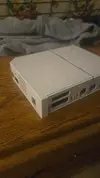
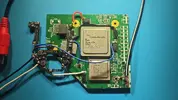
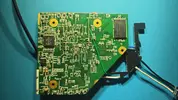
Hi just wanted to post a worklog of my project documenting what's been going on. Spoiler: It's 95% complete. And it's beautiful. I'm posting this as a worklog since I still need to work out a couple of issues

Thanks to @Nold for the name lol. Lazr called it the "ii" which I thought was hilarious since the console only has one gamecube port.

Initial main goals:
- Make a Wii portable console I can power off a 5v battery bank. I was thinking about making an Ashida, but I really want the convenience of a home console format. Mostly so my neck posture is better and I don't have to hold a heavy thick console
- Don't break the bank, keep it simple
- Functionality over form, but make it look good
- Reuse OEM shell
- Make it as easy as possible for me to get into Wii portablizing.


Features:
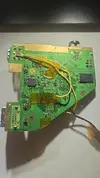
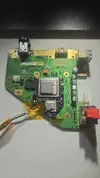
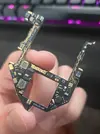
- Chud Trimmed Wii
- Single gamecube port, both USB, and video ports are preserved
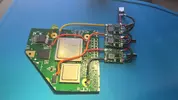
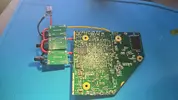
- Thundervolt lite with USB C input
- Bluetooth relocated
- Chopped up original housing
- Original fan and heatsink for cooling


However there are a few issues I am still working through... I'll post some more pics in the reply
 

Attachments

  • assdd.webp
    assdd.webp
    257 KB · Views: 3
  • IMG_20260707_193920.webp
    IMG_20260707_193920.webp
    892.2 KB · Views: 1
  • IMG_20260707_193929.webp
    IMG_20260707_193929.webp
    922.5 KB · Views: 1
  • IMG_20260707_193946.webp
    IMG_20260707_193946.webp
    688.1 KB · Views: 2
  • IMG_20260707_194005.webp
    IMG_20260707_194005.webp
    985.8 KB · Views: 1
  • IMG_20260703_215104.webp
    IMG_20260703_215104.webp
    748.9 KB · Views: 1
  • IMG_20260707_195430.webp
    IMG_20260707_195430.webp
    70.5 KB · Views: 2
  • IMG_20260707_195431.webp
    IMG_20260707_195431.webp
    61.9 KB · Views: 1
  • 7b1b6f28-fe70-4816-bcee-717219129b9f.webp
    7b1b6f28-fe70-4816-bcee-717219129b9f.webp
    3.9 MB · Views: 3
  • 20260622_235223.webp
    20260622_235223.webp
    3.6 MB · Views: 2
Last edited:
My previous attempt at this project was by using a 6 layer wii and this tutorial:
The main inspiration for this project was actually using that video. I already had a 6 layer wii with a broken disc drive, and realizing you could get a wii to work with $2 regulators was compelling. Though while technically it could have worked, it didn't. Those regulators sucked.

Then I bought a thundervolt and a 4 layer immediately after I failed because I really wanted to get something reliable.

The thundervolt lite actually arrived way before my new wii, so I hotwired it to my 6 layer and got to the RVloader screen exactly once. My best guess is that the 1v line was genuinely too long since I now know that line is especially touchy.

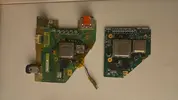
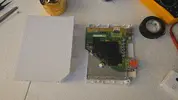
In that delay, one night I was marking out the potential trim line for the OEM housing I wanted to keep. I haven't bought a 3d printer yet, so I was just going to keep it simple and keep the original housing. Well that night I ended up discovering something awesome, and realized I could just cut the console in half, keep 1 gamecube port, and then glue the front housing on.

The issue was the for sure that the NAND was in the way and stuck out a fair bit past the first gamecube port, so I had to glue the front housing on. Initially, I didn't want to keep the disc drive faceplate, but I did end up needing to modify it and glue it down to make room.

Next time I make this project I will for sure use a 6 layer and probably four bucky regulators. Or just use a thundervolt and do a NAND relocation. Y'all might see the wackiest trim ever from me.
 

Attachments

  • IMG_20260612_185944.webp
    IMG_20260612_185944.webp
    943.3 KB · Views: 2
  • IMG_20260612_185958.webp
    IMG_20260612_185958.webp
    609.8 KB · Views: 2
  • IMG_20260615_122217.webp
    IMG_20260615_122217.webp
    614.8 KB · Views: 2
  • IMG_20260616_221051.webp
    IMG_20260616_221051.webp
    564.2 KB · Views: 3
  • IMG_20260616_221106.webp
    IMG_20260616_221106.webp
    839.5 KB · Views: 1
  • IMG_20260630_044306.webp
    IMG_20260630_044306.webp
    301.2 KB · Views: 1
  • e60e0ce5-1079-458f-98df-8f15d56a1db6.webp
    e60e0ce5-1079-458f-98df-8f15d56a1db6.webp
    3.9 MB · Views: 1
  • chud trim.webp
    chud trim.webp
    496.9 KB · Views: 1
Most things have worked

Main things I have learned as a beginner:

- Don't use crappy regulators even if some people have technically gotten them to work in hindsight an inexpensive option for a 6 layer should have been the bucky regulators from flashfi.re
- Don't use a 6 layer wii (...I will be trimming a 6 layer again)
- Sand thoroughly and check for shorts with a microscope
- Composite needs to be grounded. And if you remove the big capacitors, then the normal composite video wiring points won't work (unless you pull straight from the AVE presumably)
- Seriously don't cut too deep into the motherboard. On both of the trims I have had two close calls with initially marking a large area, and then actually cutting too deep either on accident, or without realizing those marks were too close for comfort.
- Relocating bluetooth isn't that scary, I was pretty psyched out and I'm glad I got it working first try. Something I was reminded of when using magnet wire to relocate the bluetooth module


Issues I still have:

- 5v line is overloaded. Gamecube rumble and 2nd usb port will not work.
- There's a tail on the console. I need to mount a female USB c port (I have plans for this later, but I'm too lazy right now...)
- Wire thundervolt data lines so I can actually undervolt (again, too lazy and I'm not super interested in undervolting right now)
 
I really want to remake this with a non family edition 4 layer and a NAND relocation. you know just something dumb but fun. those two reasons are so I can keep the gamecube memory card slot (literally for no real reason) and also ditch the front plate. but i dont feel like buying another wii, rvl-pms, and probably a new housing
 
But so far I am definitely happy with my progress. I just need to fix the 5v issues and order some female USB c boards
 
Back
Top