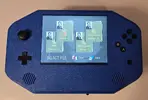
Worklog My first portable N64 is finally complete!

Joined
Nov 22, 2016
Messages
9
Likes
7
I actually started working on that over 10 years ago, but my electronics knowledge was basically inexistant and it feel apart quickly. Seeing the one made by Bacteria back then is what got me into learning electronics.

Now that 3d printers are a thing and pcb design is more easily accessible, I wanted to achieve that old dream of making a portable N64 myself. I've been working on that project for the past 3 months and it's now complete.

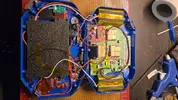
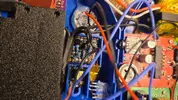
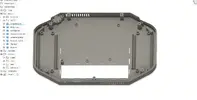
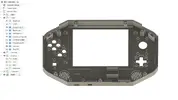
Designed the whole case myself in fusion 360, printed in PETG for heat resistance. Designed a few PCBs for controller and audio amplifier. I didn't like what I found for audio, and it either didn't have everything I wanted, or it was too expensive to ship. So I got into Kicad, learned it and designed an audio amplifier myself using a tpa6021a4 from TI. It works perfectly fine, I'm really happy with it.

At first, I got a rev 03 board and did a ram swap on it to avoid the expansion pack. It worked great but along the line I fried it, no idea how. I tried changing the CPU, as well as the RAM and the PIF chip, nothing. Since I didn't want to wait for another N64 to be delivered, I used a rev 08 on which I had taken the RAM for the swap, put the RAM back on it and used the expansion pak.

Here's a list of features:
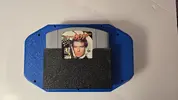
  • Complete N64 with expansion pak
  • 7Ah, 7.4v battery pack
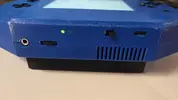
  • Speakers / Headphone jack / Volume knob combo PCB designed by myself. 0.5w speakers, surprisingly loud
  • Switch joystick and buttons, N64 original triggers
  • 4:3 5 inches LCD screen
  • USB-C PD, 9v charging port, can charge and play at the same time
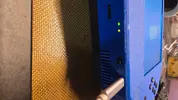
  • Green LED when on, turns red when battery low
  • Second, yellow LED that turns on when in charge, turns off when fully charged
  • Single L/Z combo trigger with a switch beside the trigger to change which it is
  • Memory Pak to come, waiting for PCB and FRAM chip
A bit on the thicker side, but I'm happy for a first time. I basically learned fusion 360 and Kicad for that project, glad I did!

Hope you guys like it!
 

Attachments

  • 20260131_200701.webp
    20260131_200701.webp
    632.9 KB · Views: 16
  • 20260131_200709.webp
    20260131_200709.webp
    1.7 MB · Views: 33
  • 20260131_200719.webp
    20260131_200719.webp
    1.7 MB · Views: 19
  • 20260131_200740.webp
    20260131_200740.webp
    2 MB · Views: 27
  • 20260131_201700.webp
    20260131_201700.webp
    1.1 MB · Views: 18
  • 20260131_201709.webp
    20260131_201709.webp
    995 KB · Views: 18
  • 20260131_202350.webp
    20260131_202350.webp
    709.6 KB · Views: 21
  • bottom case.webp
    bottom case.webp
    57.1 KB · Views: 22
  • cartridge slot.webp
    cartridge slot.webp
    14.6 KB · Views: 21
  • Top case.webp
    Top case.webp
    66.9 KB · Views: 20
Last edited:
I actually started working on that over 10 years ago, but my electronics knowledge was basically inexistant and it feel apart quickly. Seeing the one made by Bacteria back then is what got me into learning electronics.

Now that 3d printers are a thing and pcb design is more easily accessible, I wanted to achieve that old dream of making a portable N64 myself. I've been working on that project for the past 3 months and it's now complete.

Designed the whole case myself in fusion 360, printed in PETG for heat resistance. Designed a few PCBs for controller and audio amplifier. I didn't like what I found for audio, and it either didn't have everything I wanted, or it was too expensive to ship. So I got into Kicad, learned it and designed an audio amplifier myself using a tpa6021a4 from TI. It works perfectly fine, I'm really happy with it.

At first, I got a rev 03 board and did a ram swap on it to avoid the expansion pack. It worked great but along the line I fried it, no idea how. I tried changing the CPU, as well as the RAM and the PIF chip, nothing. Since I didn't want to wait for another N64 to be delivered, I used a rev 08 on which I had taken the RAM for the swap, put the RAM back on it and used the expansion pak.

Here's a list of features:
  • Complete N64 with expansion pak
  • 7Ah, 7.4v battery pack
  • Speakers / Headphone jack / Volume knob combo PCB designed by myself. 0.5w speakers, surprisingly loud
  • Switch joystick and buttons, N64 original triggers
  • 4:3 5 inches LCD screen
  • USB-C PD, 9v charging port, can charge and play at the same time
  • Green LED when on, turns red when battery low
  • Second, yellow LED that turns on when in charge, turns off when fully charged
  • Single L/Z combo trigger with a switch beside the trigger to change which it is
  • Memory Pak to come, waiting for PCB and FRAM chip
A bit on the thicker side, but I'm happy for a first time. I basically learned fusion 360 and Kicad for that project, glad I did!

Hope you guys like it!
I don't mean to necro bump here, but I found this thread while I was looking through worklogs trying to get more information on how thermals perform with passive cooling and expansion RAM. I'm curious to know, what are the thermals like on this build? Does it seem like it gets too warm? I'm not trying to talk smack when I say this, but the heatsinks look a bit small.

Also, this is just pure speculation, but if I had to guess how your RAM swap expansion RAM got fried, I'd put money on it being a 3.3v and GND pin being shorted somehow on one of the RAM chips. I have shorted the pins of the RCP, RAM, and CPU before when simply removing them as well as trying to put them back on the board. It's incredibly easy to do and a lot of the time when it happens, you won't even see the bridge between pins. For this reason I ALWAYS check with a multi-meter in continuity mode to ensure that the voltages and GND aren't shorted together, and I often check the individual pins to ensure nothing else got shorted somehow too.

Just worth considering because shorting the pins on any of the chips I mentioned above is NOTORIOUSLY easy... Even some of our most skilled members have struggled with this.

Having said all of that, this build hasn't gotten enough love! It's such a classy looking build if a bit humble. Really nice work dude!
 
Thanks for the feedback!

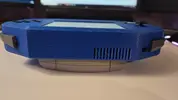
I haven't measured the exact thermals, but I stressed it for many hours and haven't had any issues. I disassembled it and checked the petg, no sign of bulging, so I take that as a good thing. I placed the vents so that natural convection would take cold air from the bottom and exhaust hot air at the top. I indeed feel hot air coming out from the top.

As for the fried board, I figured out what happened. I actually fried my test screen. I was still turning on, but not showing an image. I though I had fried the N64 but that wasn't the case. Before I figured that out, I tried many things to "fix" the N64, and I ended up frying it for real lol
 
  • Like
Reactions: cy
Thanks for the feedback!

I haven't measured the exact thermals, but I stressed it for many hours and haven't had any issues. I disassembled it and checked the petg, no sign of bulging, so I take that as a good thing. I placed the vents so that natural convection would take cold air from the bottom and exhaust hot air at the top. I indeed feel hot air coming out from the top.

As for the fried board, I figured out what happened. I actually fried my test screen. I was still turning on, but not showing an image. I though I had fried the N64 but that wasn't the case. Before I figured that out, I tried many things to "fix" the N64, and I ended up frying it for real lol
Dang, that's a rip on the N64 board. At least you know what it was!

That's good to know about your cooling setup! I've been researching passive cooling for my latest N64 project, and knowing that your setup is sufficient is really helpful. It's great to hear that hot air is indeed coming out the top as one would expect, heat rises as you were saying, but it really is good to know that it's getting cool enough with this setup.

Thanks for getting back to me so quickly and thanks for the info! :)
 
Back
Top