Question Ashida Final Touches

Joined
Apr 17, 2023
Messages
37
Likes
33
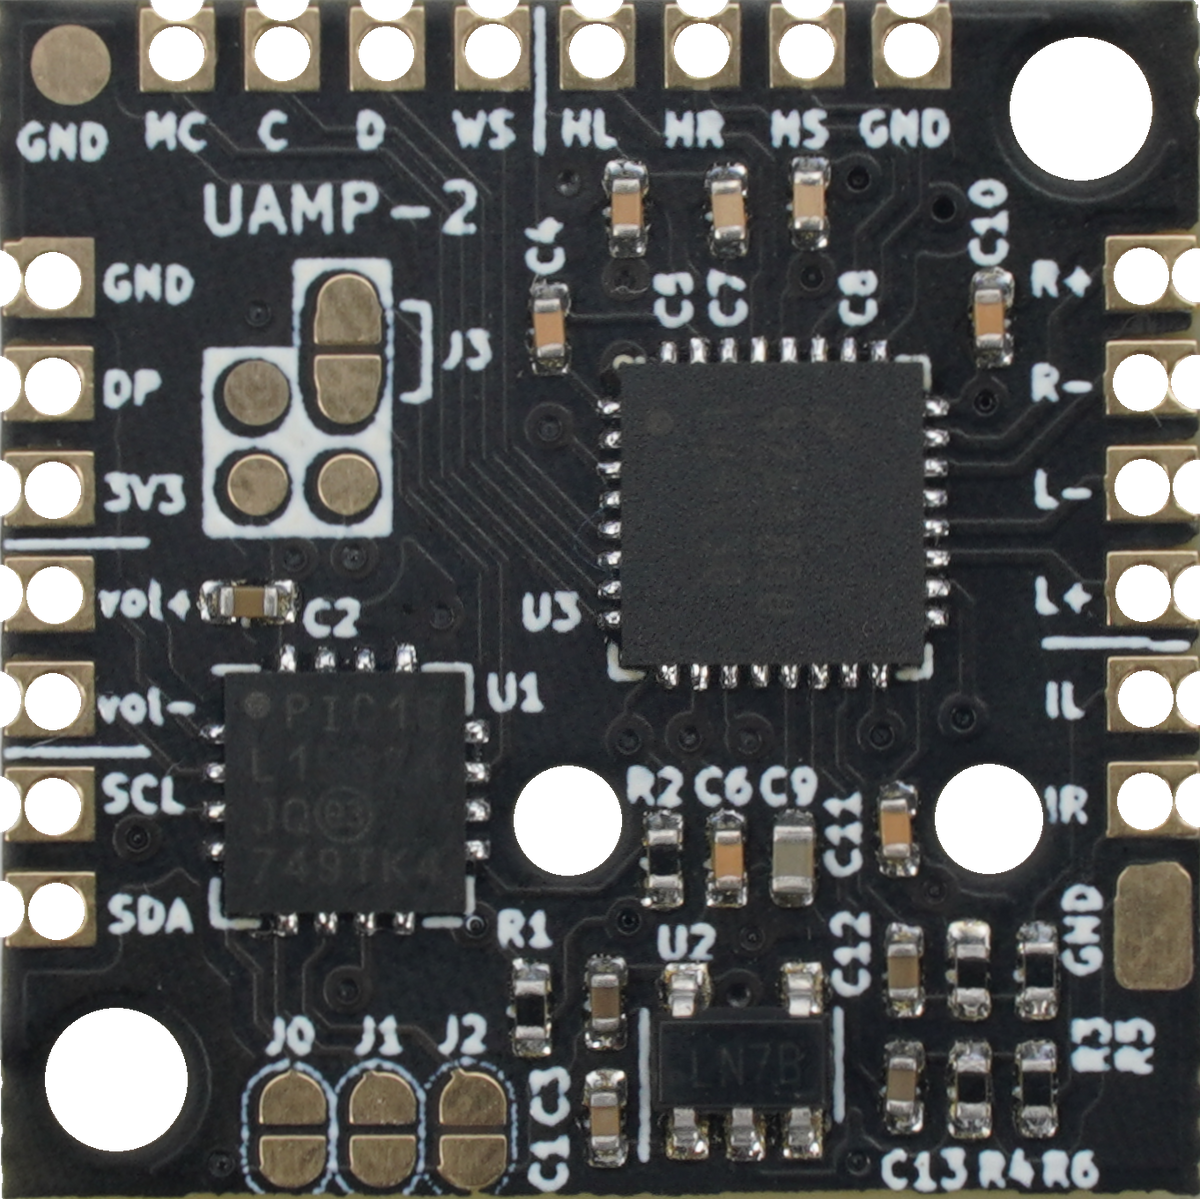
I have an Ashida I'm currently wrapping up. I need some help with a few issues though. For one the Audio is set to full blast and the volume pot does nothing. I used a U-Amp 2 for my build and there does not seem to be any good information on it like the RVL AMP. I also have an issue with the heatsinks sitting too low and not touching the CPU on the wii? I got my shell 3d printed by PCBWAY and it seems perfect but the heatsinks fall a little too deep into the shell... might have gotten some weird heatsinks as well. I can't remember where I ordered them from but I'm sure it was Digikey. I was thinking of cutting a square of cardboard out to use as a gasket to lift the fan up some putting just enough pressure to put the heatsink on the actual chip. The farther back heatsink touches the GPU so I think it could be the fan is slim too??? Either way I think that a cardboard gasket would suffice. Any input on the U-AMP or heatsinks would be appriciated!
 
Joined
Jul 31, 2022
Messages
47
Likes
57
Location
Oregon
Okay well for the uamp I would check to make sure your audio and I2C lines are making a good connection. Secondly there is a jumper you have to solder if you’re using an analog volume control which sounds like the issue you’re having. There is documentation on the 4 layer ashida and uamp page.
IMG_4027.jpeg


Secondly for the heatsinks it might be more of an issue of your wiring adding that extra space. I would be more inclined to think it’s a user defect than a print defect especially if both of them aren’t making contact. Make sure your wiring does not stick out higher than the gpu and cpu or hit one of the screw posts. (Pictures would be helpful) hope this helps and good luck!
 

Stitches

2 and a Half Dollarydoos
Staff member
.
.
Joined
Feb 5, 2017
Messages
3,848
Likes
3,025
Location
Banana Bender Land, Australia
Portables
6
The heatsink gap is because you're meant to use thermal pads to interface the Wii to the heatsink. You can re-use the pads that came with the Wii, or you can buy some 3M blue silicon thermal pads from amazon/ebay/digikey
 
Joined
Apr 17, 2023
Messages
37
Likes
33
The heatsink gap is because you're meant to use thermal pads to interface the Wii to the heatsink. You can re-use the pads that came with the Wii, or you can buy some 3M blue silicon thermal pads from amazon/ebay/digikey
Well now i feel dumb lol
 
Joined
Jul 31, 2022
Messages
47
Likes
57
Location
Oregon
The heatsink gap is because you're meant to use thermal pads to interface the Wii to the heatsink. You can re-use the pads that came with the Wii, or you can buy some 3M blue silicon thermal pads from amazon/ebay/digikey
If he’s using the ones from the bom they come with thin adhesive pads that I had good adhesion and pressure to the heatsinks
 

Stitches

2 and a Half Dollarydoos
Staff member
.
.
Joined
Feb 5, 2017
Messages
3,848
Likes
3,025
Location
Banana Bender Land, Australia
Portables
6
The Wii is very thermally forgiving. You could even just use a glob of thermal paste and run low fan speed for an hour to bake it in
 
Joined
Apr 17, 2023
Messages
37
Likes
33
If he’s using the ones from the bom they come with thin adhesive pads that I had good adhesion and pressure to the heatsinks
Yeah those are the ones I'm using. I thought Stitches meant they needed changed out with the ones from the Wii. As for the Audio i did rewire everything and it works now!
 
Joined
Jul 31, 2022
Messages
47
Likes
57
Location
Oregon
Yeah those are the ones I'm using. I thought Stitches meant they needed changed out with the ones from the Wii. As for the Audio i did rewire everything and it works now!
Yay I’m glad you got audio figured out! And for the heatsinks they “should” contact your Wii just fine if you’re following the bom (and you removed the adhesive protection on the heat sinks aka the blue plastic). I don’t think you could go wrong with the silicone pads though. I haven’t used them on wiis but on my other projects they were pretty nice and easy for simple solutions. Plus Stitches does kind of have a lot more experience than me. But I did just complete mine, I have no thermal issues, my Wii adhered to the heat sinks just fine and a little too well when I had to go solder wire to the Bluetooth.
 

Stitches

2 and a Half Dollarydoos
Staff member
.
.
Joined
Feb 5, 2017
Messages
3,848
Likes
3,025
Location
Banana Bender Land, Australia
Portables
6
In the event that the included pads don't contact the Wii, you can stack an additional pad on top of it and it'll be fine. Or you could do the cardboard gasket trick that you initially proposed. The method doesn't really matter, so long as the heatsink has good contact with the CPU/GPU
 
Joined
Apr 17, 2023
Messages
37
Likes
33
Okay so I thought my audio issues were solved but turns out I was wrong...

The Volume potentiometer does nothing the system just stays at the same volume. I have the pms, uamp2, and wii all wired together via the SD and SC line and I'm getting the Audio menu in rvloader. If I select potentiometer in RVLoader it still does nothing. I also updated my PMS to 1.2 even though it already said it was on 1.2.

So do I need to manually solder a wire from 1.8v or 3.3v to the PD contact on the UAMP2? Also I was watching GingerofOz wire up his clear blue ashida and he did not connect the SD or SC line to the PMS/Wii and his jumper j3 was nit bridged. I know that build had audio issues but if I disconnect j3 on mine it just screams full volume like its trying to blow out the speakers.

I've been racking my head against my desk for hours now and I'm about to give up and just let it sit at a single audio level.

Starting to think it's something mechanical like the potentiometer not being the correct resistance or something. I'm not very familiar with potentiometers so how does one go about checking the resistance of it? I'm sure it's a 10k but you never know if a part is defective.
 

Stitches

2 and a Half Dollarydoos
Staff member
.
.
Joined
Feb 5, 2017
Messages
3,848
Likes
3,025
Location
Banana Bender Land, Australia
Portables
6
Some photos of the wiring would be helpful
 
Top