Been bouncing the idea around for a little while now of doing something like a g-boy inspired portable, my ps2 portrait portable turned out well in the end, chunky but working, so I inevitably ended up tackling the first bits of a Wii portable.
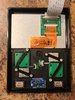
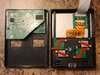
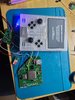
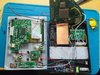
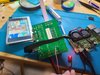
Just concept phase currently with some hardware stuff collected.
Features list will be aimed at the following:
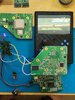
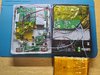
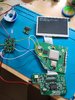
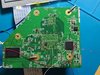
Next phase, board assembly RVL and 2 wii trims. USPS shipping is lagging behind with my GC+, nand flex, cooling and dual tacs so stuck waiting on that for now.
Just concept phase currently with some hardware stuff collected.
Features list will be aimed at the following:
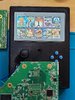
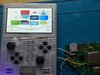
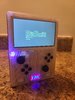
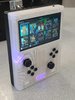
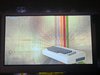
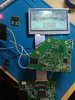
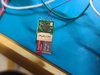
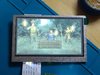
- 4.3" IPS 800*480, have 2 and both look amazing and working
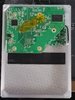
- driver board for the screens is similar to Benge's O-Wii so thanks to him I have a 3.3v conversion
- GC+
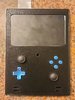
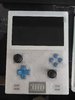
- joy-con styled pcb breakouts and joysticks
- aiming for 2x 26650 cells but I'm also looking at my 1s4p 20,000mah pack, both fill a similar volume
- dual tac buttons for the rear
- heatsink that was sold on bitbuilt store
- Uamp, cause digital is awesome
- Standard OMG trim for the 4 layer, although I may consider nand relocation for some layout adjustments
- USB Pd Decoy 12v/9v, maybe a DC jack as well for redundancy
- RVL-PMS from JLCPCB
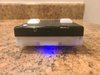
- 1s Power indicator like my ps2
- PUI speakers like those in my ps2 portable 20*15mm
- external usb or sd card, leaning sd card cause 512gb microsd is a small decent footprint but may have both wired up
- Small tactiles for necessary buttons, vol +/-, power.. etc
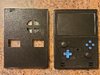
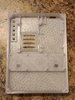
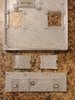
- The case I'm aiming for is about 115mm w * 155mm H not sure how thick yet, when it's finished I'm hoping to get it outsourced in MJP semi clear
Next phase, board assembly RVL and 2 wii trims. USPS shipping is lagging behind with my GC+, nand flex, cooling and dual tacs so stuck waiting on that for now.
.png")