
Kamp
.
- Joined
- Jun 25, 2021
- Messages
- 18
- Likes
- 54
Hello all,
First time posting here, but I was encouraged to create a build log for a project that I recently started to see what people think and to get suggestions for any improvements to the project.
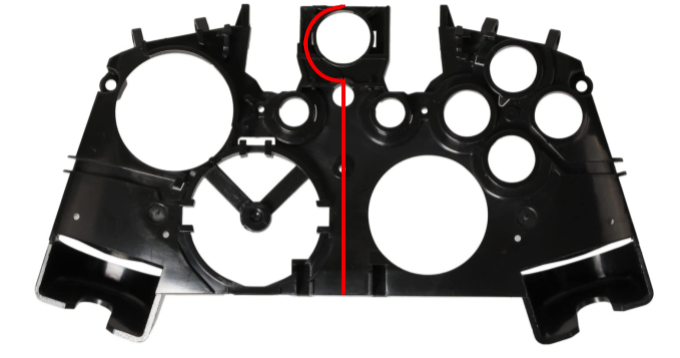
To start off, I was inspired to begin my project by a number of things. I play PC games with an Xbox one controller (Sorry!). I wanted to be able to send messages with a keyboard while playing games, but I didn’t want to give up using a controller and I wanted to save space on my desk. Then I remembered the GameCube keyboard controller, pictured below:
 However, I want to be able to type comfortably, and the GameCube keyboard controller uses miniature keycaps. Making it so that the keyboard could be used without dongles was also important to me. This way, it could be used seamlessly between my PC and my Xbox and retain the keyboard functionality for both.
Here are all of the features I kept in mind for my design:
I needed to start by modifying the upper and lower Xbox one controller shells to fit a keyboard in the middle. I’d like to thank Wesk for getting me and the community very nice 3D scans of the Xbox one controller shell components. It was a great help to me and the quality of the scans surely saved me lots of time messing around with scans I found online. Unfortunately for me, his scans were for the original Xbox one controller, but I only have Xbox one S controllers on hand. The rear shell is more or less identical, but I wasn’t able to use the front shell, so I found a free model online. I had to reduce the mesh qualities quite a bit so that fusion 360 could work with them (SolidWorks was being a pain in this step). The reduced meshes are below:
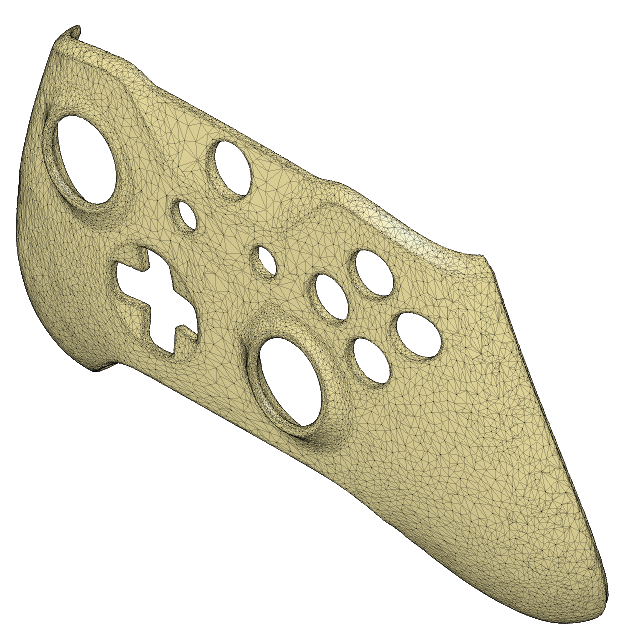 With now workable meshes, I split the halves into multiple pieces. The top was split down the middle. The bottom was split into the left handle, the middle, and the right handle. With an overlay of the 60% layout, I moved the parts into a position that would fit the keys, about 300mm of extra width inserted into the controller. Here’s a picture of the bottom plate after that process:
 I began with the top shell because I thought that it would be easiest to create the top with the keyboard layout and then use the top shell to create a matching bottom shell. To begin, I made a series of sketches to trace out where I wanted the edges of the form to be to have enough room for the keyboard. This was a big, somewhat arbitrary task that took quite a bit of fine tuning. From those, I used lofts to create a smooth transition from the controller mesh to the new keyboard body area. Here’s the end result for the top plate:

 In hindsight, I should have made the top and bottom bezels much larger. However, I didn’t want them to be too much larger and it would be a pain to change them now. So, for now, I’m going to see if I can get away with them as is. I will likely increase the overall width so that I can have more space between the keyboard and the 'Xbox' button, as that area is too thin.
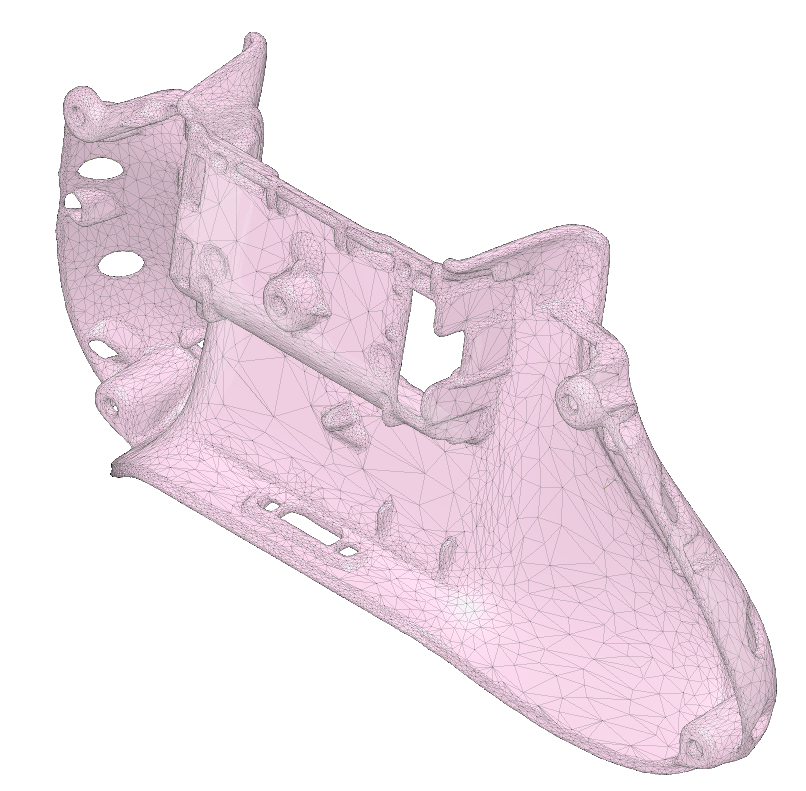
With the top shell completed, I used it as a template for the bottom shell. This was much more involved because of the 3 part split and needing to match up the top to the bottom. Alignment took quite a while. I further split up the middle section and duplicated it for the left and right handle parts. Then, I repeated the process of creating guide sketches for lofts to build out the form. I’m glossing over a lot of the other steps, but I’d be happy to provide more detail into what I did to the controller shells. Here’s the result for the bottom shell:

 And here are the shells together with some keycap models that I found, though I’d probably go for lower profile caps:

 I have the 3 battery compartments because:
I did a test print of the sides of the shell and they are promising despite some 3D printing artifacts:

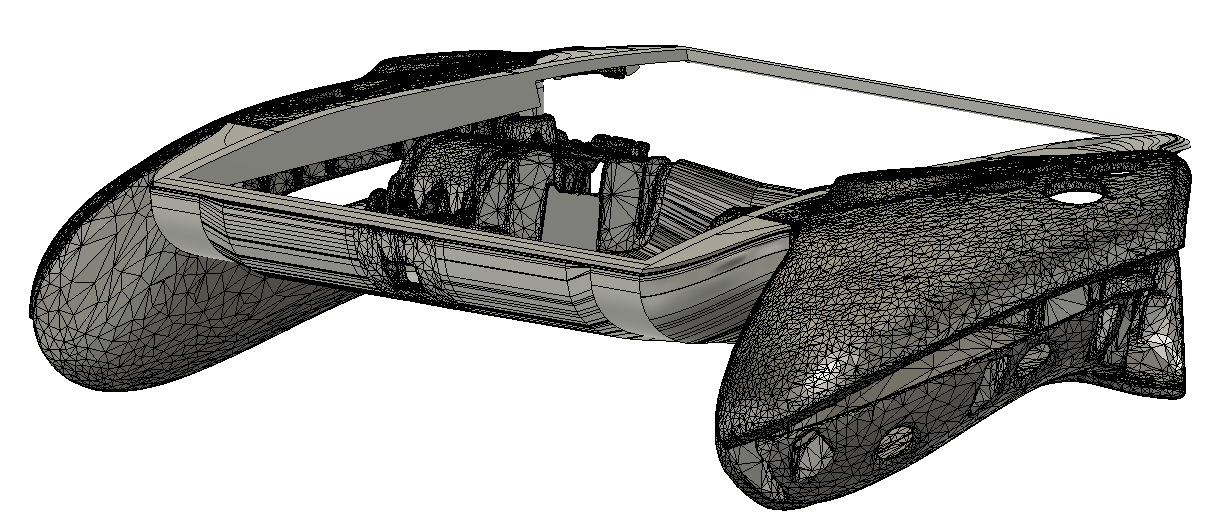
The shells fit together well with the PCB, except for the small gap at the bottom. Before I alter my model, I need to cut a stock inner shell part in half (like shown below) and see how it interacts with the shell:
 For the final shell, I’ll be sanding, filling, priming (and repeating ad infinitum), and painting for a clean look and smooth feel in the hands.
I haven’t started on the electronics, but here is my plan for them:
 The chatpad has 2 “layer” buttons, the orange and green circles that correspond to their respective legends. When a certain combo of keystrokes are pressed (Ex 1: the number ‘1’, Ex 2: the ‘&’ symbol) on the keyboard, the Arduino will translate that into chatpad presses: (Ex 1: Changing the 1 input on the chatpad from NC to ground to “press” it, Ex 2: “pressing” the green button, “pressing” the U button, and then “pressing” the green button again for ‘&’).
My next step is to make sure that the top and bottom shells fit together well. Then, I’ll be able to create another part to close up the section between the bumper buttons:

 After that, I’ll begin wiring the controller PCBs. Then, it's time to hand wire the keyboard, wire that to the Arduino, and wire the Arduino to the chat pad. If I have room after that, I’d like to include a USB hub as well. The keyboard and the controller would then be connected to the USB hub so that both the controller and keyboard can be wired to the PC/Xbox with a single cable.
And that is everything that I have so far! I’ll try to update this as I accomplish those next steps. Please let me know if you have any suggestions or comments, I’d love to hear them. Hopefully this post wasn’t too long/rambly, but still had sufficient detail. This isn't a portable, but I felt like the process that I've done would apply to modeling a shell for a portable. When I’m done, I’ll probably release the shell models, just in case anyone can use them for a portable. Thank you for reading!
First time posting here, but I was encouraged to create a build log for a project that I recently started to see what people think and to get suggestions for any improvements to the project.
To start off, I was inspired to begin my project by a number of things. I play PC games with an Xbox one controller (Sorry!). I wanted to be able to send messages with a keyboard while playing games, but I didn’t want to give up using a controller and I wanted to save space on my desk. Then I remembered the GameCube keyboard controller, pictured below:
Here are all of the features I kept in mind for my design:
- Add keyboard keys to the Xbox controller handle geometry
- Reuse some stock controller parts where possible
- Standard 60% layout with mechanical key switch compatibility
- Seamless compatibility with both PC and Xbox
- And some other minor ones that might be negotiable
I needed to start by modifying the upper and lower Xbox one controller shells to fit a keyboard in the middle. I’d like to thank Wesk for getting me and the community very nice 3D scans of the Xbox one controller shell components. It was a great help to me and the quality of the scans surely saved me lots of time messing around with scans I found online. Unfortunately for me, his scans were for the original Xbox one controller, but I only have Xbox one S controllers on hand. The rear shell is more or less identical, but I wasn’t able to use the front shell, so I found a free model online. I had to reduce the mesh qualities quite a bit so that fusion 360 could work with them (SolidWorks was being a pain in this step). The reduced meshes are below:
With the top shell completed, I used it as a template for the bottom shell. This was much more involved because of the 3 part split and needing to match up the top to the bottom. Alignment took quite a while. I further split up the middle section and duplicated it for the left and right handle parts. Then, I repeated the process of creating guide sketches for lofts to build out the form. I’m glossing over a lot of the other steps, but I’d be happy to provide more detail into what I did to the controller shells. Here’s the result for the bottom shell:
- I wanted to have some choices for the electronics setup:
- Use 2 controller PCBs, 1 actual working board on one side, and 1 “dummy” board to hold the buttons and sticks. The buttons and sticks would then be wired to the actual board --OR--
- Use 1 complete PCB in the middle with 2 “dummy” halves on either side to hold the buttons and sticks. The buttons and sticks would then be wired to the actual board in the middle
- As it turned out. There was no room for the 1st option with the keyboard section, so the 2nd option is what I plan to use.
- The middle battery compartment will still house the 2 AA batteries/rechargeable battery pack
- I plan to use the other 2 battery compartments as feet that can swivel out to prop the controller up at an angle for typing.
I did a test print of the sides of the shell and they are promising despite some 3D printing artifacts:
The shells fit together well with the PCB, except for the small gap at the bottom. Before I alter my model, I need to cut a stock inner shell part in half (like shown below) and see how it interacts with the shell:
I haven’t started on the electronics, but here is my plan for them:
- Use the Microsoft chatpad so that the controller works perfectly with the Xbox one without any dongles.
- Use Kailh Choc low profile key switches so that everything is as compact as possible
- Use an Arduino for 2 purposes:
- Act as a normal keyboard device when plugged into the PC (take keyboard matrix input and send to the PC --AND--
- Act as a “translator” between the normal keyboard presses and the Xbox one chatpad
My next step is to make sure that the top and bottom shells fit together well. Then, I’ll be able to create another part to close up the section between the bumper buttons:
And that is everything that I have so far! I’ll try to update this as I accomplish those next steps. Please let me know if you have any suggestions or comments, I’d love to hear them. Hopefully this post wasn’t too long/rambly, but still had sufficient detail. This isn't a portable, but I felt like the process that I've done would apply to modeling a shell for a portable. When I’m done, I’ll probably release the shell models, just in case anyone can use them for a portable. Thank you for reading!