
I hope you're putting some paper/tape on the back of that LCD panel to prevent shorts, or those regs are going to mumble it.View attachment 4602
I have been wrapping up the layout of all the electronics, trying to make everything fit well. Mainly now I've been slowly cutting away plastic and drilling the holes for ports. The back of the casing needs to be finished up with some fine sand paper, but is almost completely done. I just need to cut the USB ports before applying the clear coat. Hopefully I'll have time to post another update video by the beginning of next week. For now, I'll try to wire up the batteries.
Worklog Wiikipad Switch: Wii/Raspberry Pi Zero W (2-in-1 Portable)
- Thread starter nobble
- Start date
nobble
.
- Joined
- Apr 30, 2017
- Messages
- 170
- Likes
- 268
Yes. Good eye. Like I said, nothing has been hooked up yet. Before I wire things up, I will add some sort of shielding between.I hope you're putting some paper/tape on the back of that LCD panel to prevent shorts, or those regs are going to mumble it.
nobble
.
- Joined
- Apr 30, 2017
- Messages
- 170
- Likes
- 268

The 2p2s battery assembly is now complete along with my switch/charger jack assembly. I may need to shorten wires once I fit everything, but that's not hard. Next is to test the screen and eventually wire up the Wii. I still have to do further testing with it to make sure all is good to go. But I have no doubt all will go well as long as I continue to go at my pace.
I have yet to finish up the last bits on the case, that is holding up the next update video. But I did buy a microphone for my computer and will finally be able to do voice overs quickly for my videos. Since my old cameras batteries decided to resist any charge and I have been forced to use my smart phone, that is taped under my lamp, as a tripod...
I can say that I have been recording 90% of my hours spent into this project and will hopefully have a very detailed build process in the end.
Oh yeah, I got my Dayton audio speakers in the mail today! They fit snug right where the old vents were to shoot the Android tablet speakers' sound out the front. It's a small spot, but these speakers are very thin. I'm wondering how well they will sound. Should work out..
More soon!
Attachments
-
 656.1 KB Views: 236
Last edited:
nobble
.
- Joined
- Apr 30, 2017
- Messages
- 170
- Likes
- 268
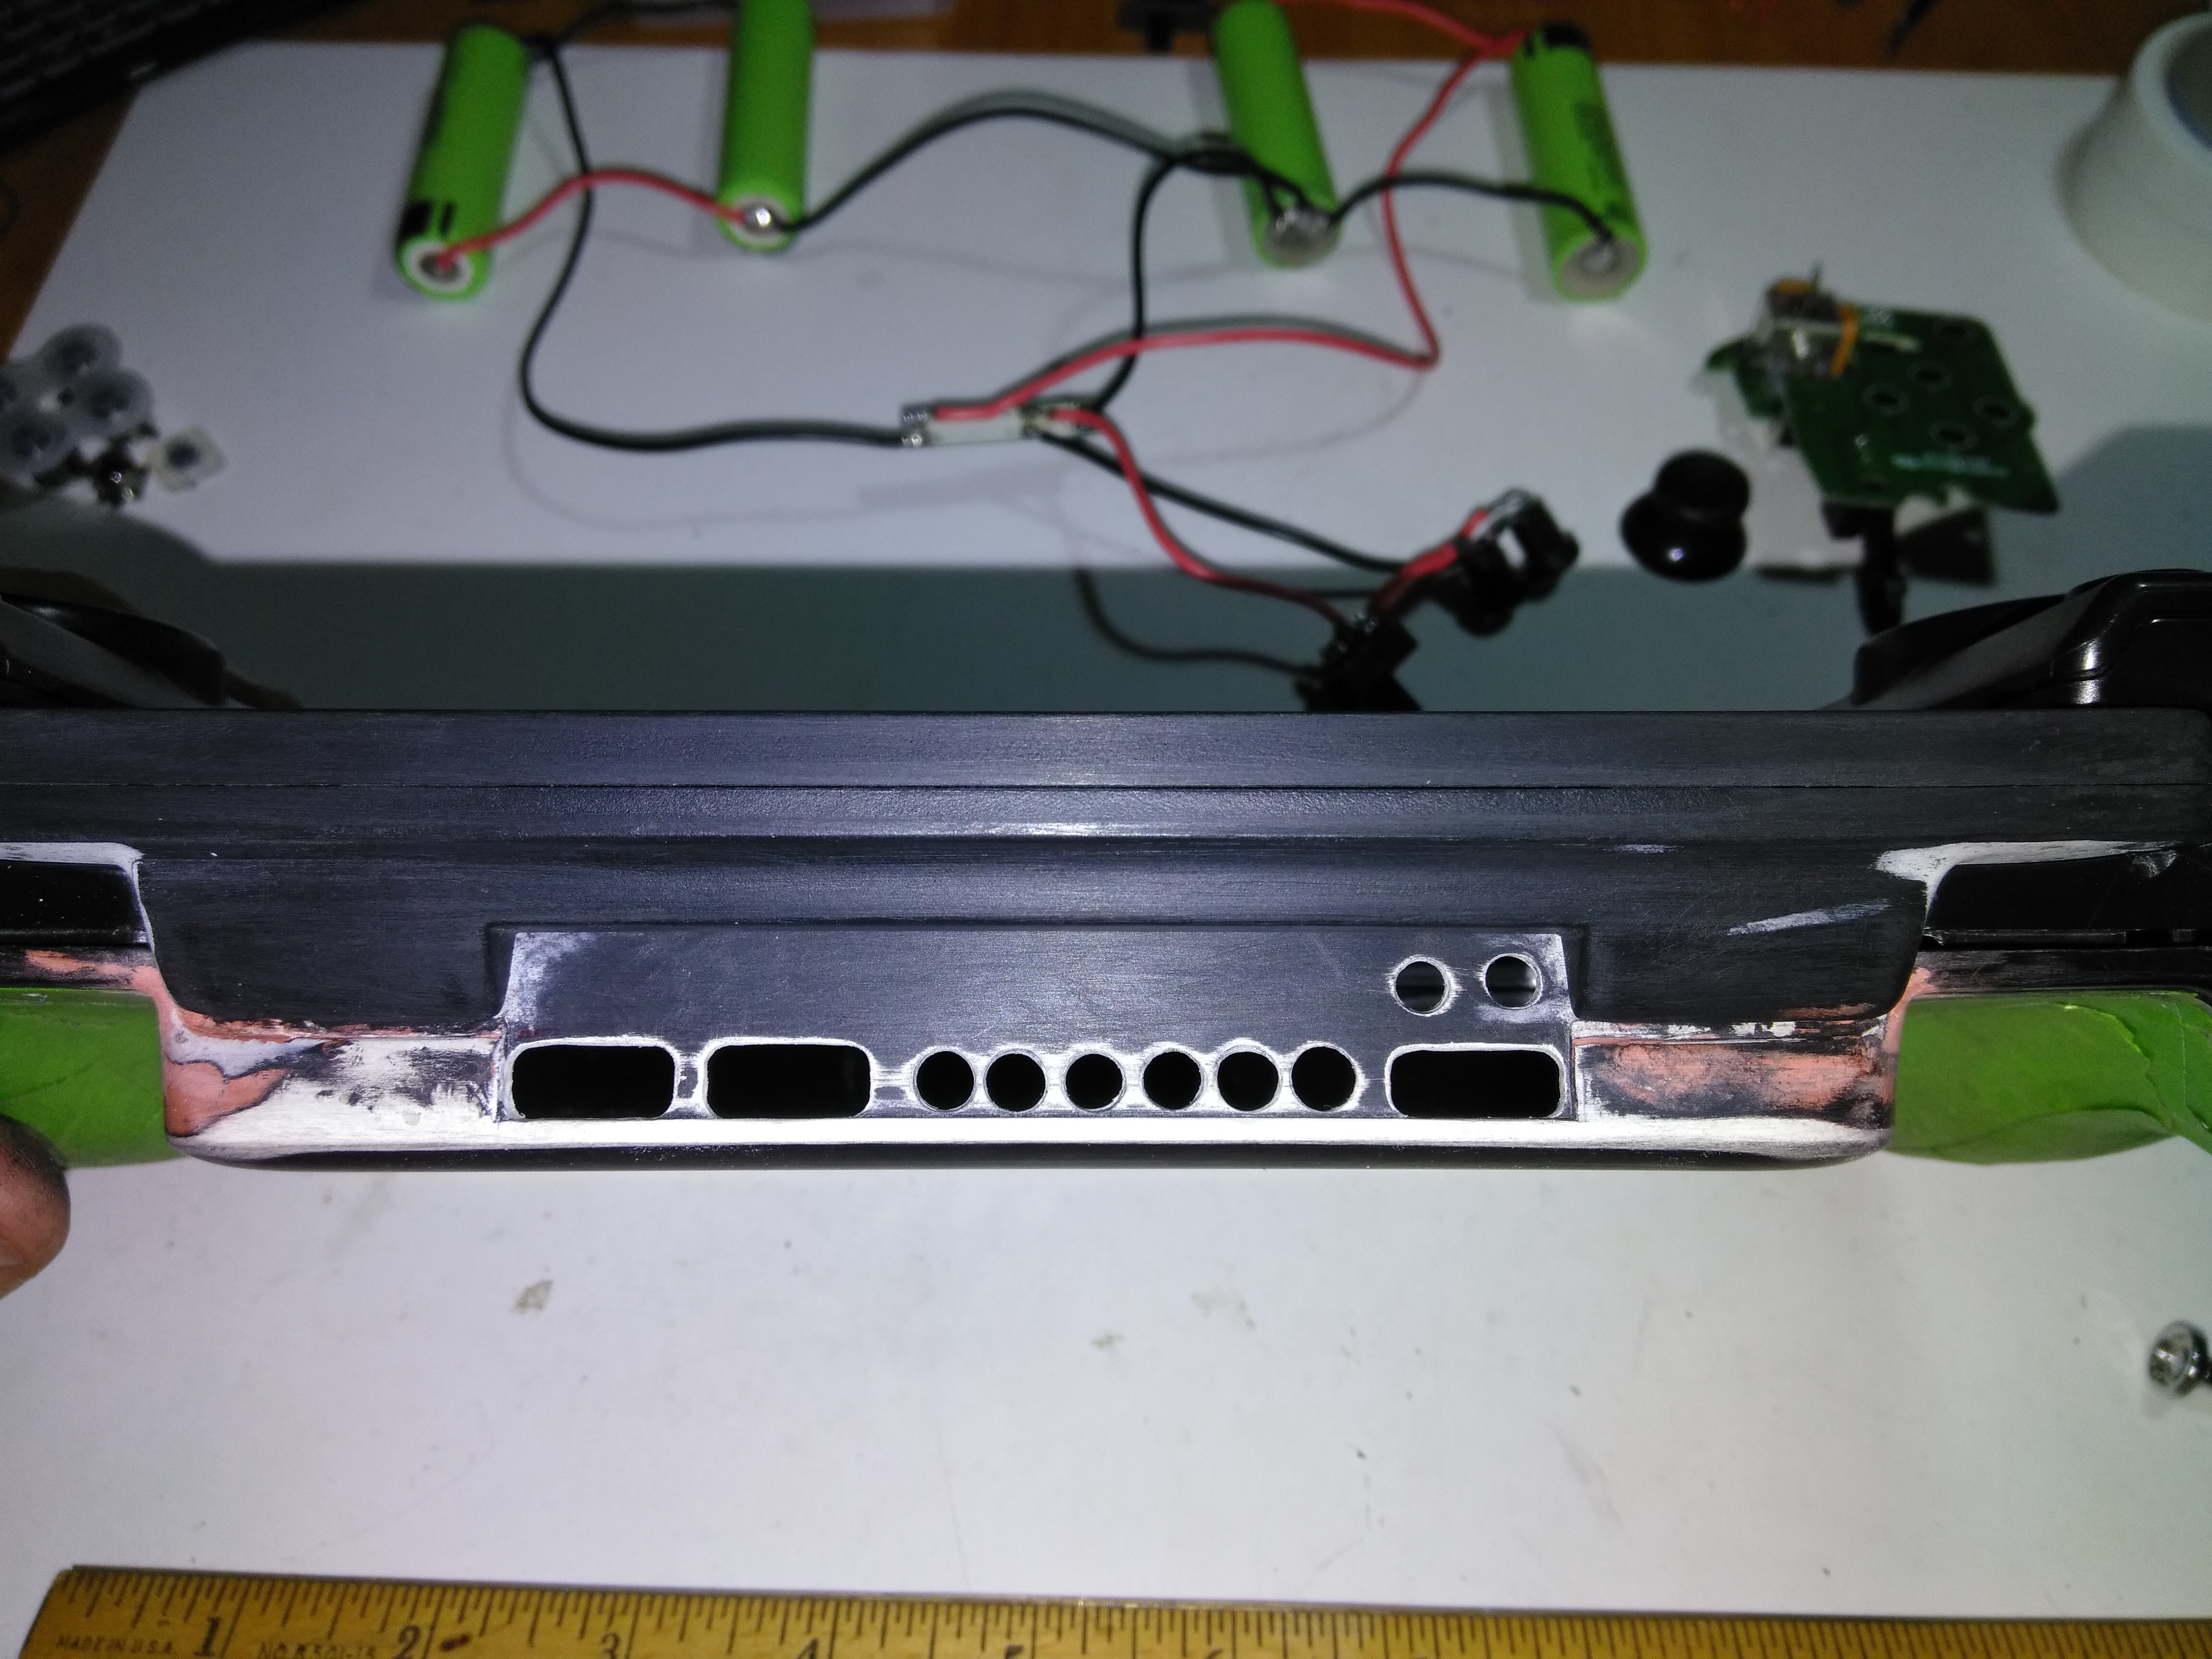
More progress on the case! I drilled the holes for it's fan exhaust vents, along with 3 USB ports  and two buttons for the Wii. I still need to drill a hole for switch between Wii/RPi. I need to check the spacing inside case first. I'm contemplating whether or not I should double the amount of fan holes by making another row on top? Seems like a lot of air will still get through currently. I'll hook up the regs and the fan later to poke around with it some. I'm really liking how this came out, even being drilled by hand.
and two buttons for the Wii. I still need to drill a hole for switch between Wii/RPi. I need to check the spacing inside case first. I'm contemplating whether or not I should double the amount of fan holes by making another row on top? Seems like a lot of air will still get through currently. I'll hook up the regs and the fan later to poke around with it some. I'm really liking how this came out, even being drilled by hand. - Joined
- Dec 10, 2016
- Messages
- 578
- Likes
- 663
- Location
- Constant Fear
- Portables
- sin^2(x) + cos^2(x) +e^(i*pi)
Those button holes thoughMore progress on the case! I drilled the holes for it's fan exhaust vents, along with 3 USB ports
nobble
.
- Joined
- Apr 30, 2017
- Messages
- 170
- Likes
- 268
The MEME intensifies.Those button holes though
- Joined
- Dec 16, 2016
- Messages
- 1,122
- Likes
- 2,709
- Location
- The Oregon Wildlands
- Portables
- just so many i am so cool
WAKE WII UP IN-PI'D
WAKE WII UP IN-PI'D
SAVE WII
nobble
.
- Joined
- Apr 30, 2017
- Messages
- 170
- Likes
- 268
Secret Piig Memes.
I think I'm finally going to release another update video. I've been holding it back for too long.
*The case is almost complete. I still need to finish with a final clear coat. May just wait to buy a better enamel than Rust-Oleum 2x semigloss.
Time to film more soldering. Woo!
I think I'm finally going to release another update video. I've been holding it back for too long.
*The case is almost complete. I still need to finish with a final clear coat. May just wait to buy a better enamel than Rust-Oleum 2x semigloss.
Time to film more soldering. Woo!
nobble
.
- Joined
- Apr 30, 2017
- Messages
- 170
- Likes
- 268
Frankencasing video update!
Edit: While I am waiting for Power Mii development to be finished by Aurelio, I decided I should finally wire everything up this week and test things out myself. In the mean time I made sure I didn't Mega my components running from the Ti regulators, by adding the output capacitors. (Oops.)
Edit: While I am waiting for Power Mii development to be finished by Aurelio, I decided I should finally wire everything up this week and test things out myself. In the mean time I made sure I didn't Mega my components running from the Ti regulators, by adding the output capacitors. (Oops.)
Last edited:
- Joined
- Dec 16, 2016
- Messages
- 1,122
- Likes
- 2,709
- Location
- The Oregon Wildlands
- Portables
- just so many i am so cool
I see a Waluigi meme and I am pleased
Oh, and nice case work or whatever you were doing.
Oh, and nice case work or whatever you were doing.
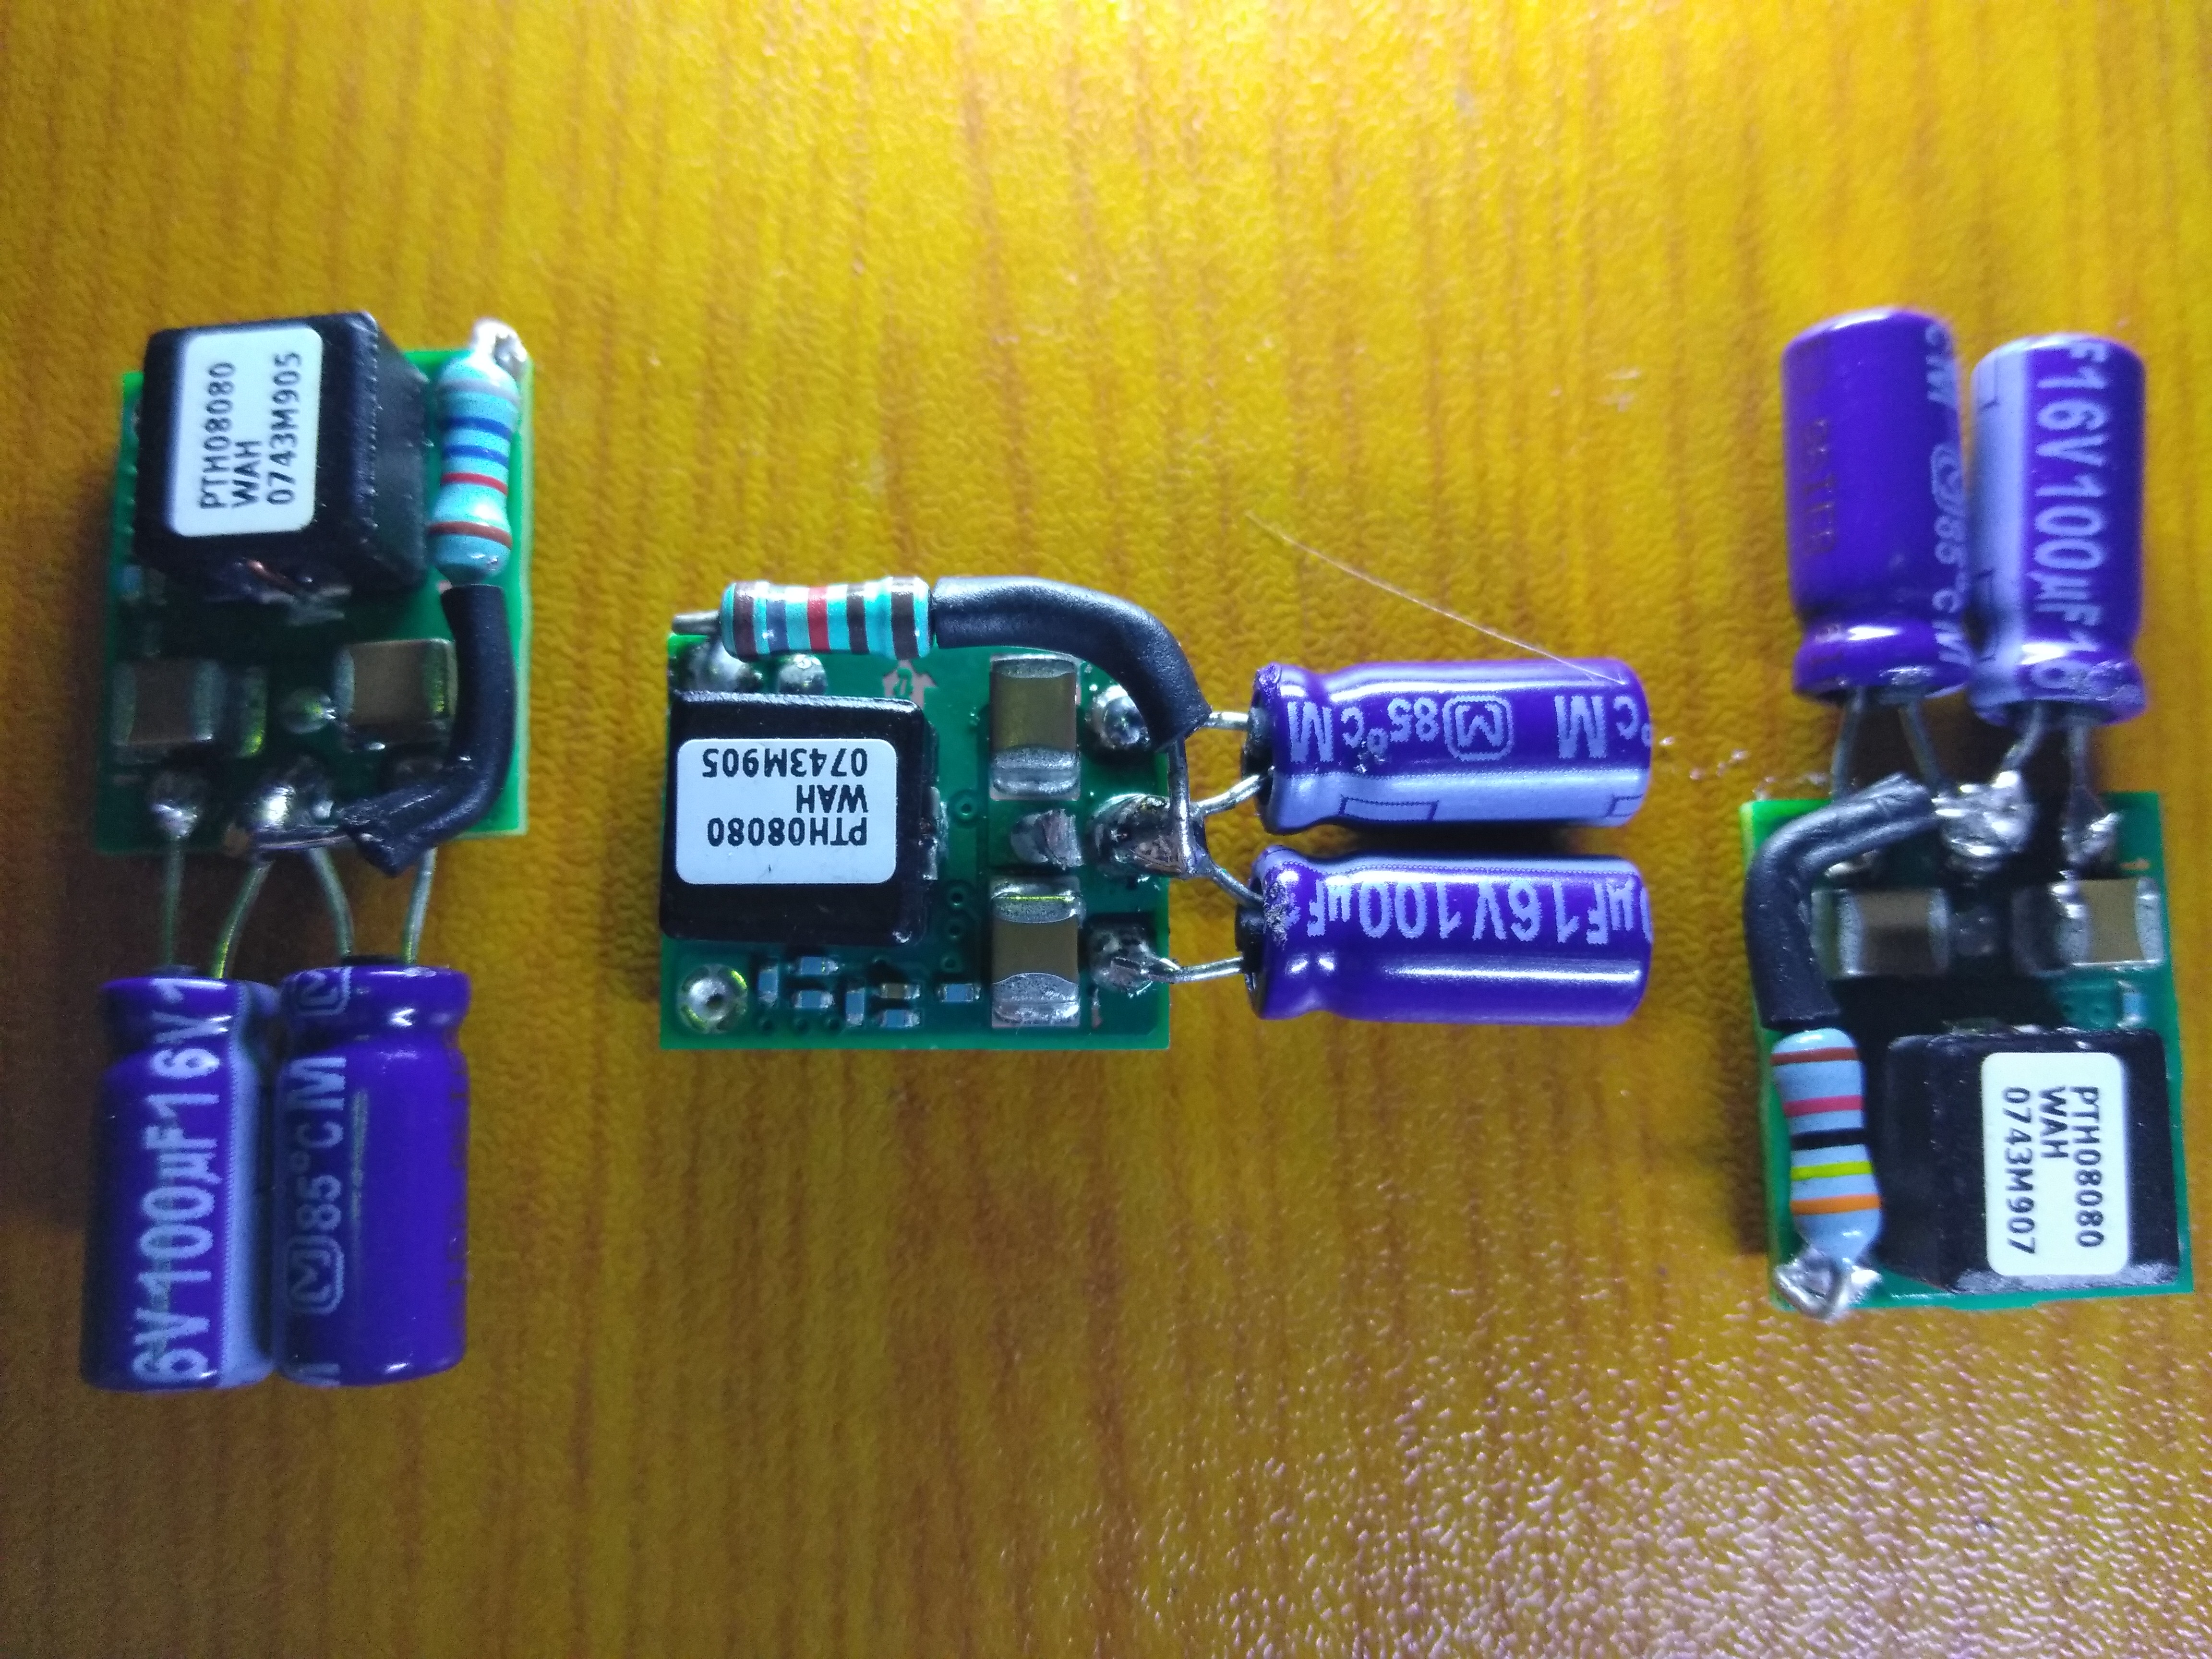
Those are really pretty. Perhaps I should rebuild my reg circuit. Having them all on one board isn't all that great when dead bugging can look that pretty anyway and be SO much smaller. Nice job.Frankencasing video update!
Edit: While I am waiting for Power Mii development to be finished by Aurelio, I decided I should finally wire everything up this week and test things out myself. In the mean time I made sure I didn't Mega my components running from the Ti regulators, by adding the output capacitors. (Oops.)
View attachment 4963
Hello. What are you?Say hello to this little guy!View attachment 5165
nobble
.
- Joined
- Apr 30, 2017
- Messages
- 170
- Likes
- 268
Thanks! I really tried to make it as compact as possible. I'll need it with the slim profile of my case.Those are really pretty. Perhaps I should rebuild my reg circuit. Having them all on one board isn't all that great when dead bugging can look that pretty anyway and be SO much smaller. Nice job.
Hello. What are you?
That circuit buddy met his Dremel demise after a short lived moment of pure Bliss. I needed to mount the USB ports, using the pcbs it fits just right. Then it is easier to solder the leads from the ports. Win/Win. Except for circuit buddy..