Worklog The SixtyForce

Joined
Feb 7, 2018
Messages
29
Likes
63
Location
Alaska
Portables
1
Hello all!

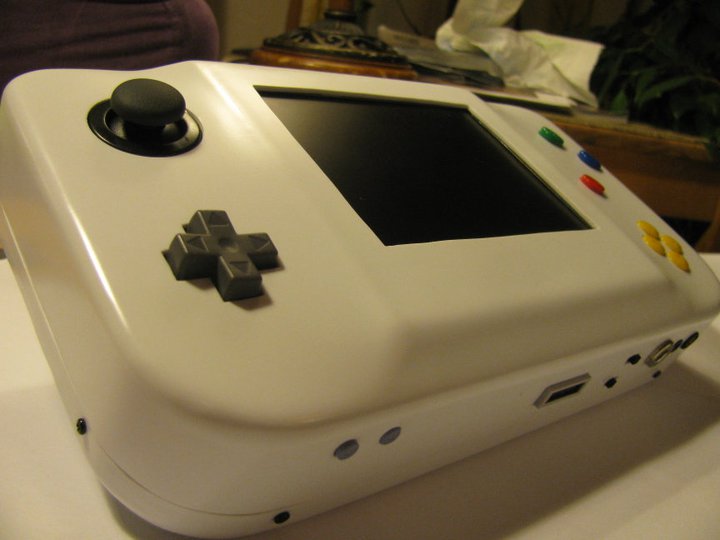
I had a ton of fun making my first portable N64 quite a few years ago, and was very satisfied with the result, but had a few issues with it down the road. I used more hot glue than I'd like to admit, had spaghetti-wiring up the wazoo, often had the batteries come loose and flop around, and wasn't happy with the cart sticking out the back as it caused freezing issues with the console in tabletop mode. The nail in the coffin was a power short while charging, which fried the BMS and melted the case slightly. (Before anyone asks, the 9V battery was for testing the audio amp ;) )

164088_1521458071835_3265219_n.jpg
165100_1517891662677_6762988_n.jpg


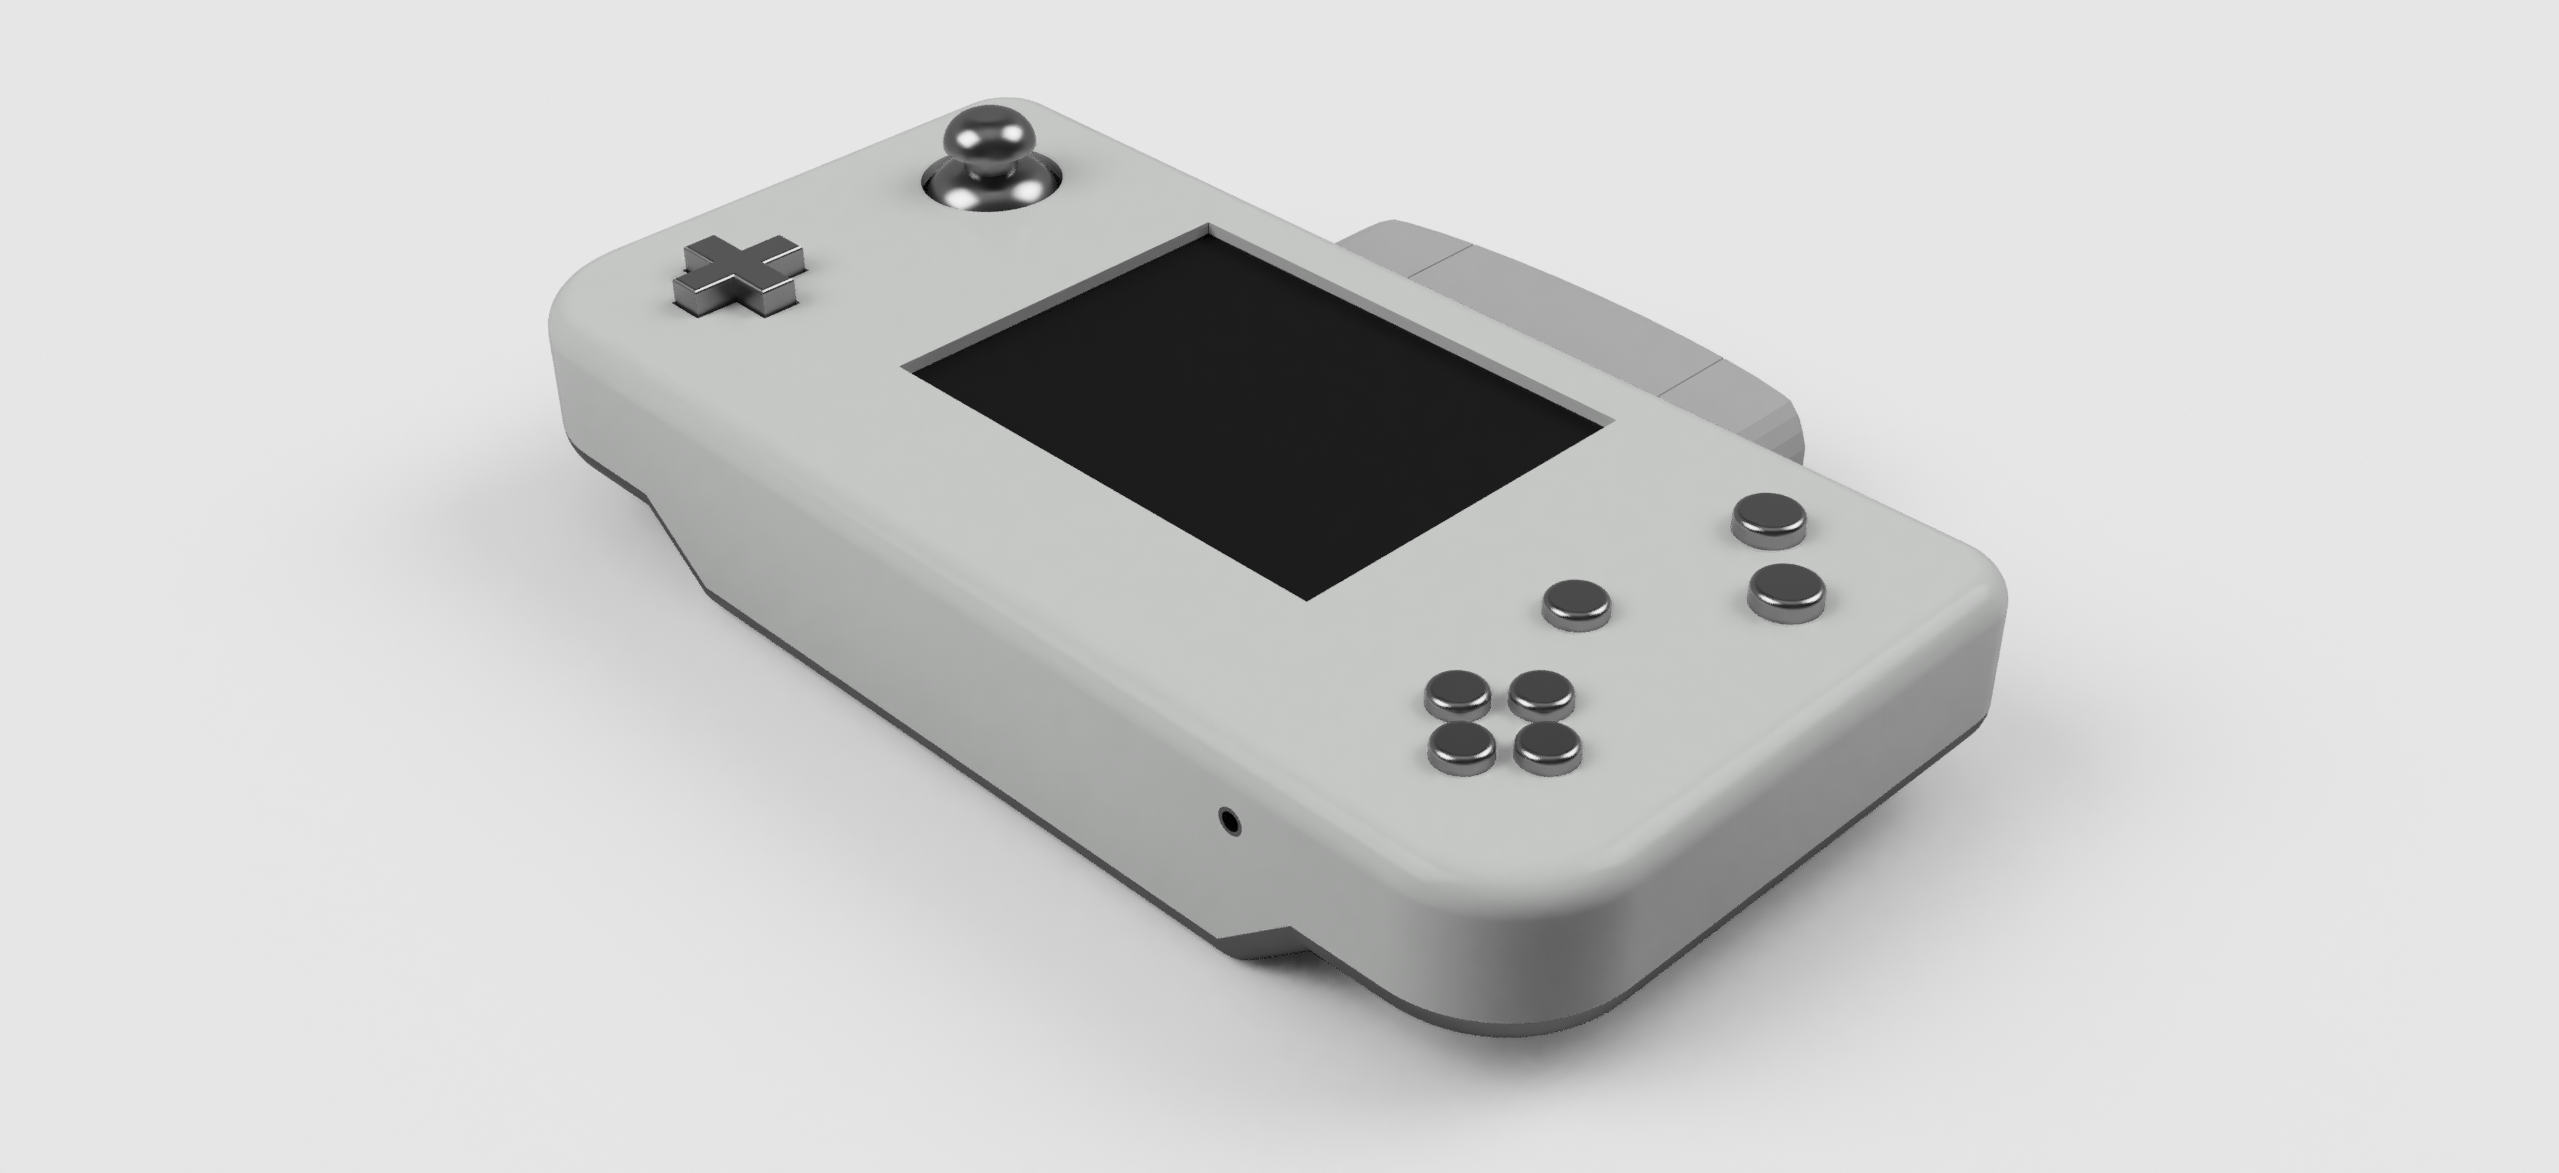
A while back, I stripped it down and started dreaming about recasing and re-engineering it to be bulletproof, more attractive, and more serviceable down the road. I'm aiming for having every board screwed down instead of glued, obsessively-clean wiring, and a unique case design. Basic details:
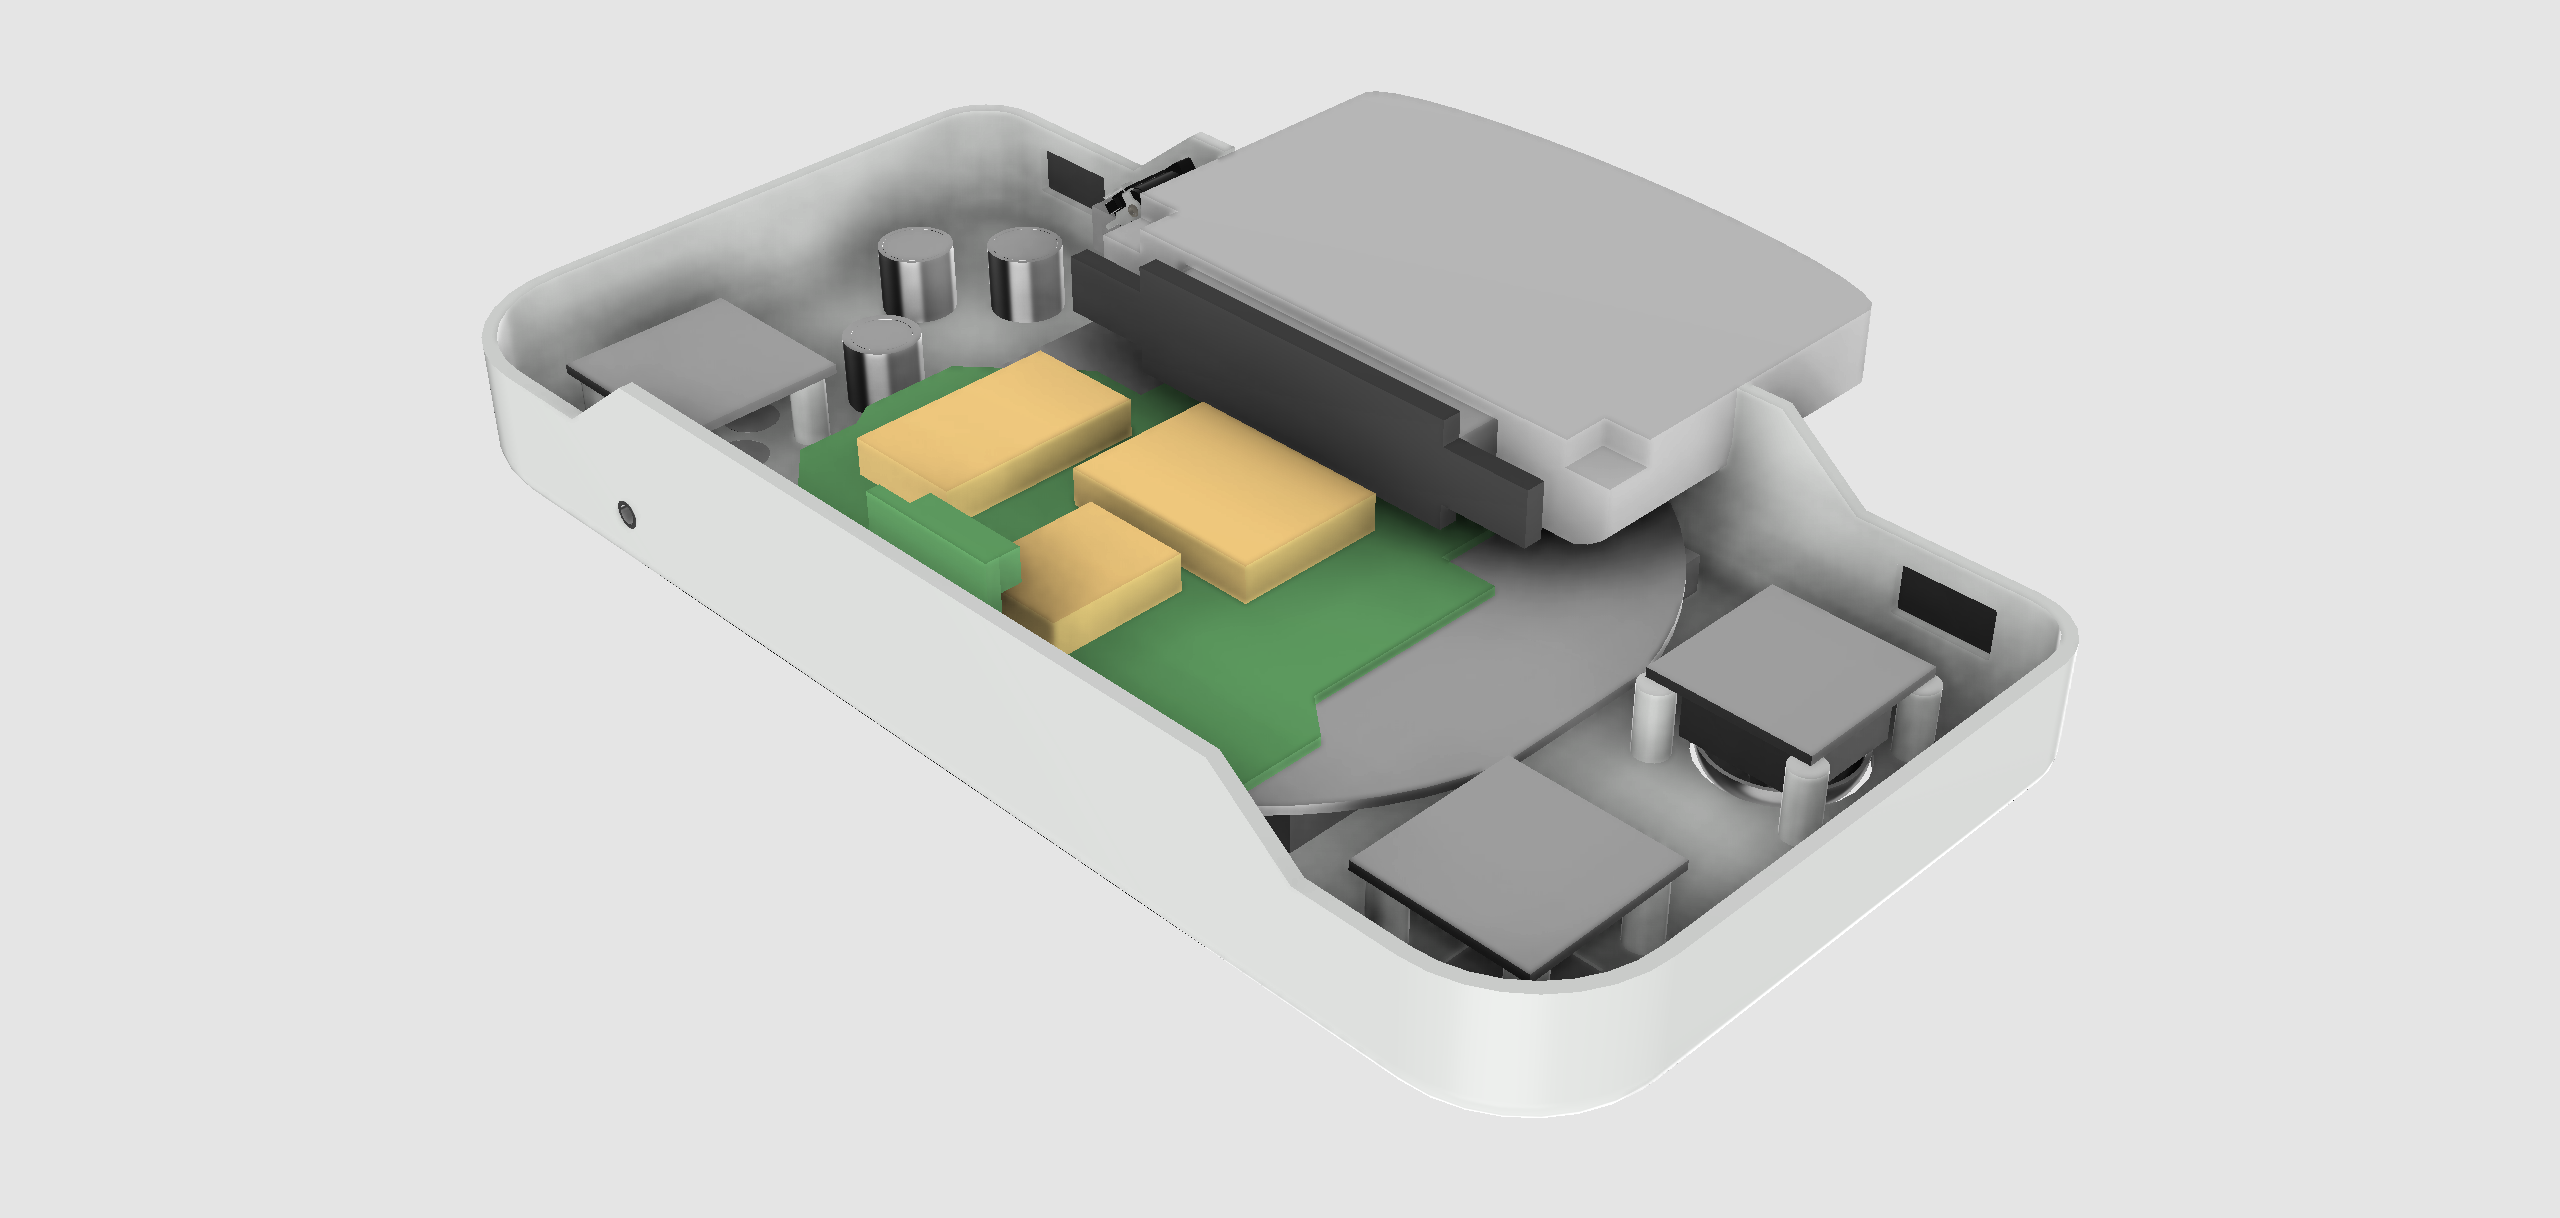
  • Red board BMS/charging
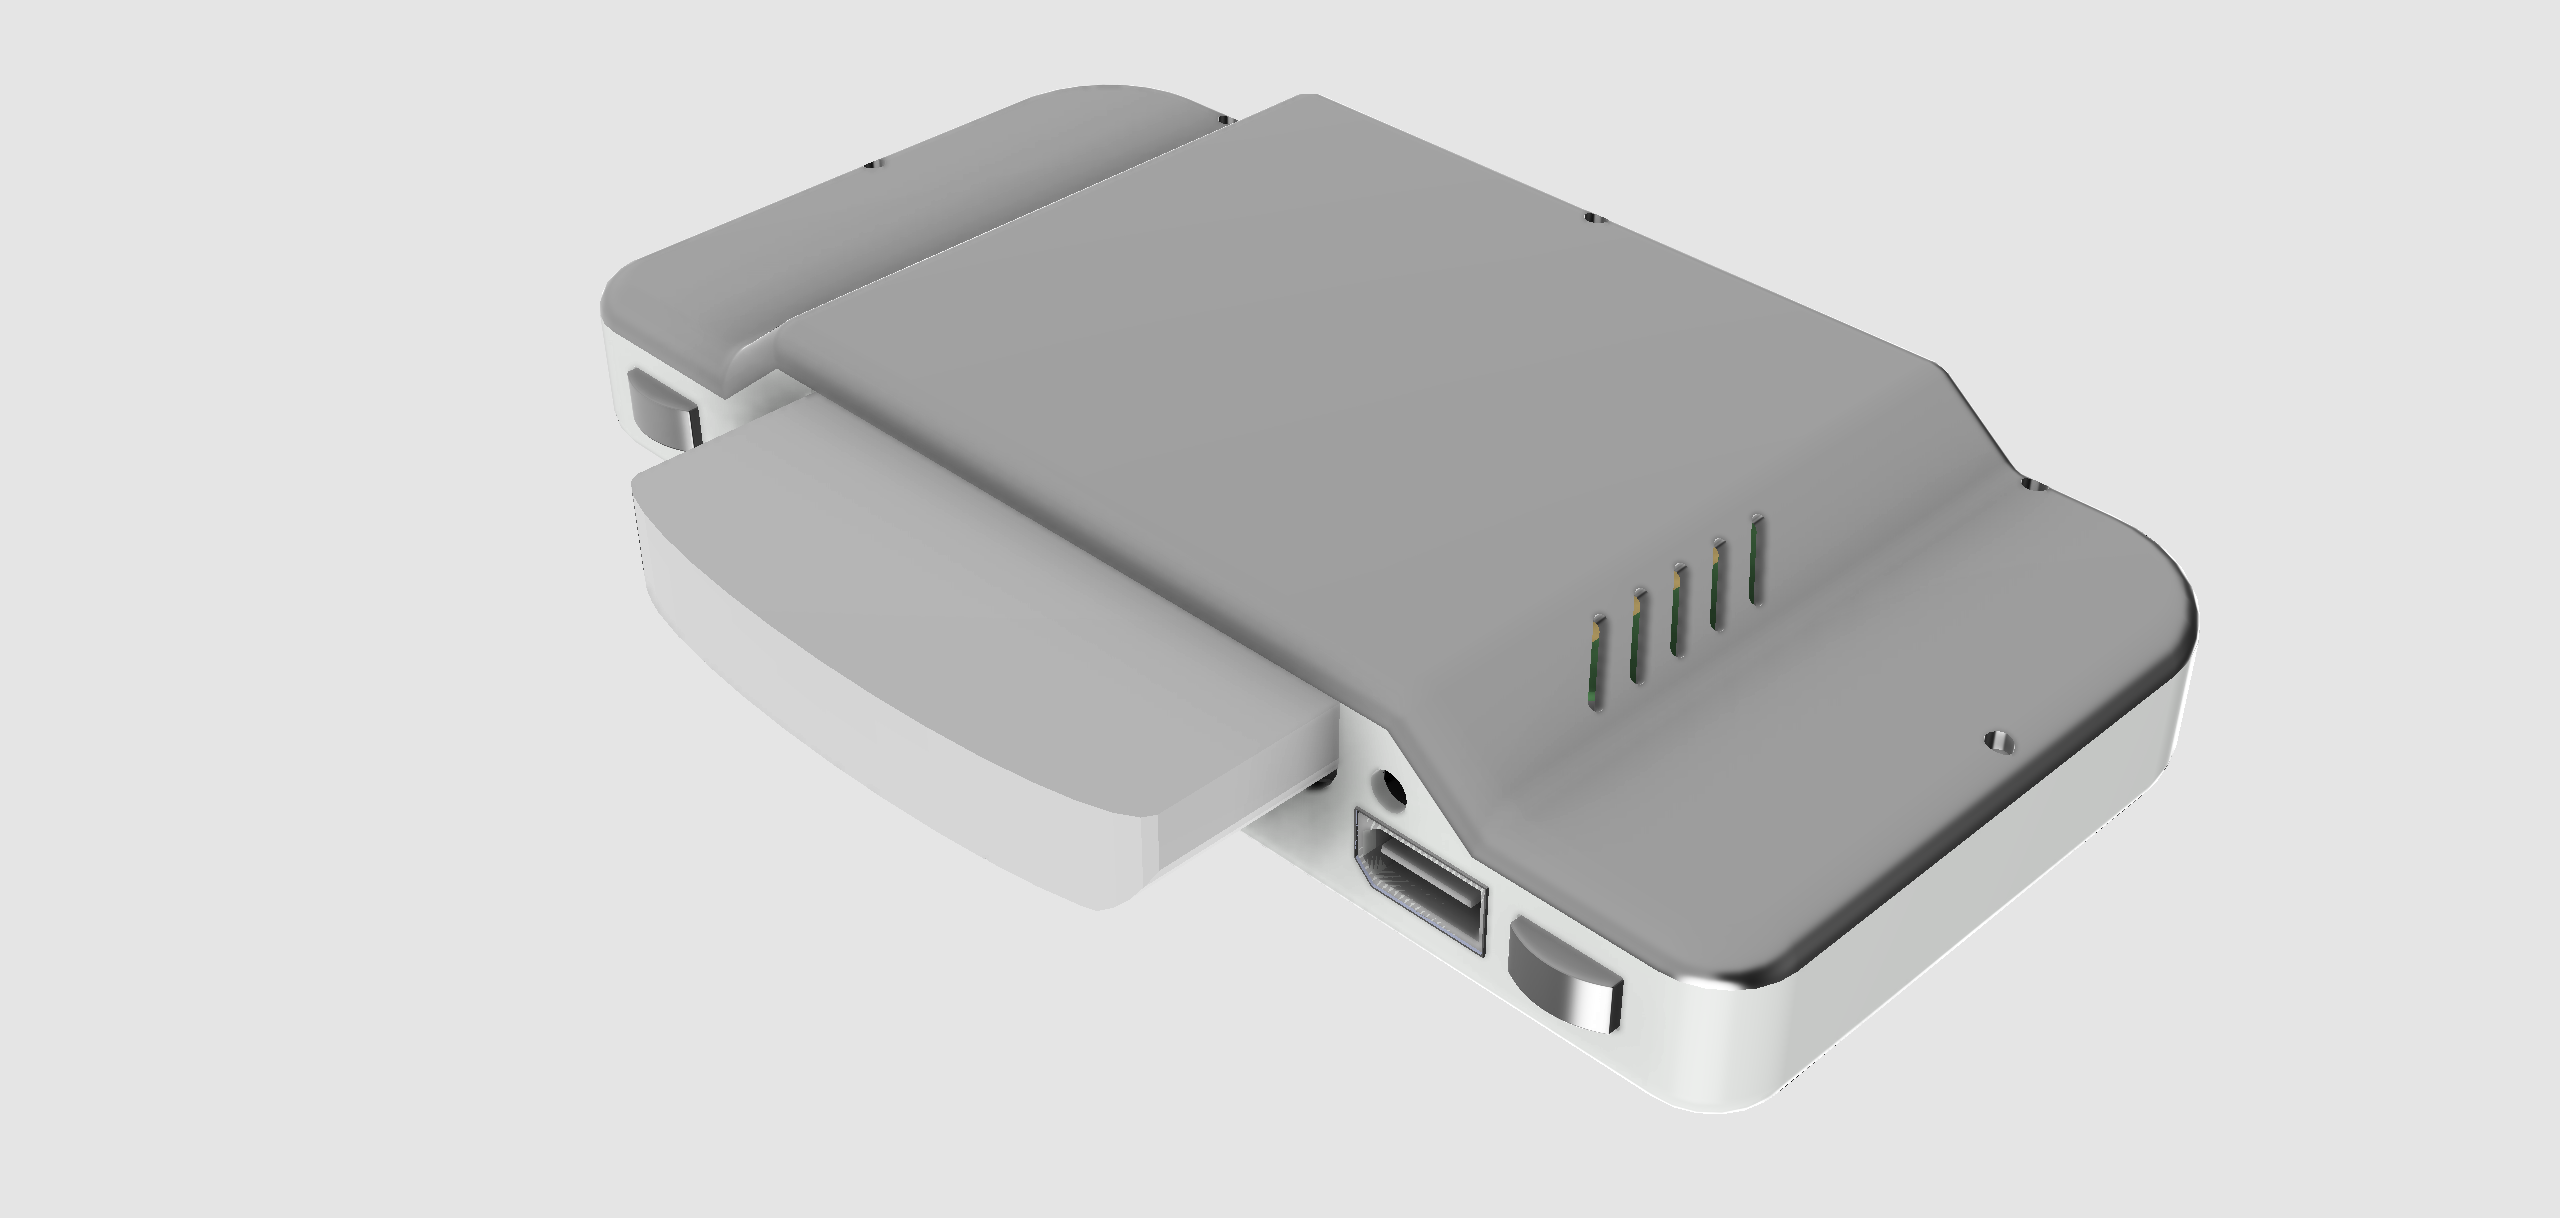
  • Wii A/V plug for external connections and multiplayer breakout box
  • Dualshock stick with click wired to L button
  • Fan-less design (subject to change)
  • Flat battery cells (open to recommendations)
I've started picking up Fusion 360, and laid out the basic concept this week. The overall X/Y dimensions are about set in stone, but I'd like to make it as thin as possible without having a separate cart slot cover.

I'm thinking of sending the design off to be 3D printed, but what I'd really love to do, although it would be labor-intensive, is braze the case together out of aluminum sheet stock. I haven't seen it done and I also love the idea of anodizing and bead blasting for a durable and tactile finish.

Recase Main.png
Recase Back.png
Recase Internals.png
 
Joined
Feb 7, 2018
Messages
29
Likes
63
Location
Alaska
Portables
1
Thanks, man. I have to say, vacuum forming cases really appeals to me. The only reason I'm not doing it again is I'm stoked to try out some 3D printing to compare. For anyone considering building a table, it was way easier than expected and worked like a champ. I had a lot of anxieties going into it, but keeping the case design simple and not doing any frankencasing made it a cinch.
 
Joined
Sep 21, 2017
Messages
150
Likes
129
It looks great, but how does it feel to play? The layout of the B, A, C buttons looks like it would be tricky to handle.
 
Joined
Feb 7, 2018
Messages
29
Likes
63
Location
Alaska
Portables
1
Eh, button placements are more arbitrary than anything at this point. I more or less traced them 1:1 from the old case just to get them in the design. Tonight, I built a cardboard mockup that has given me a better idea of how it'll play. I'm considering moving the C buttons a lot closer to the A/B, and putting Start alongside the screen controls. I have big hands, so the A/B placement is actually super comfortable ¯\_(ツ)_/¯

The big thing the mockup revealed is my L/Z buttons need to be a looooooot closer to the corners. I'm not a gorilla.
 

jefflongo

Broke BitBuilt
Staff member
.
.
Joined
Dec 15, 2016
Messages
1,017
Likes
1,361
Location
Santa Barbara, CA
Portables
3
Eh, button placements are more arbitrary than anything at this point. I more or less traced them 1:1 from the old case just to get them in the design. Tonight, I built a cardboard mockup that has given me a better idea of how it'll play. I'm considering moving the C buttons a lot closer to the A/B, and putting Start alongside the screen controls. I have big hands, so the A/B placement is actually super comfortable ¯\_(ツ)_/¯

The big thing the mockup revealed is my L/Z buttons need to be a looooooot closer to the corners. I'm not a gorilla.
It may not be a bad idea to put the start button in the same spot but on the other side of the case. That way it will still be reachable and you can move the c buttons up.
 
Joined
Aug 14, 2016
Messages
86
Likes
65
Portables
1
That's a beautiful looking vacuum case. I like the design of the 3-d rendered one too. Very nice work. Looking forward to how this turns out.
 
Joined
Feb 7, 2018
Messages
29
Likes
63
Location
Alaska
Portables
1
I've got the final version of the case ready to be printed, and am starting to get all the internals back up and running. The TI regulator also blew up along with the BMS, so I wired up a spare and got the N64 operational. Next, I stripped down the old PsOne screen and put four extra LEDs in the backlight, as I wasn't super happy with the evenness and intensity of the four I had in there already.

IMG_6742.jpg


Literally a couple minutes after that victory, OFC I broke the ribbon cable :eyeroll: Luckily I had a spare lying around, so I swapped the LCD. Unfortunately, in my infinite wisdom, I was using a 12V supply and (I assume) overvolted the screen, killing both driver boards.

If anyone can confirm or deny that 12V would kill these screens, I'd love to hear. It's been a while since working with one and I feel pretty boneheaded. Of course, I'm not above buying a cheaper, smaller, brighter, newer screen from the BOM, but it feels like a bummer after sinking 2 hours into the LED project :(
 

Luke

.
Joined
May 23, 2016
Messages
209
Likes
221
Location
Texas
Portables
2
It's been a while for me as well but I am 99% sure that 12V is too much. I feel like I remember reading that 8.5v was the absolute max... meaning that even with two fully charged lipos, it felt too close for comfort, for me :P

I know the feel of sinking hours into a psone LED mod. I think a non-outdated screen will be worth it to you, even with the loss of time :P
 
Joined
Sep 21, 2017
Messages
150
Likes
129
Man that's a bummer. Hope you find a new solution that doesn't set you back too much.
 
Joined
Feb 7, 2018
Messages
29
Likes
63
Location
Alaska
Portables
1
Would you look at that! I must have called it a wash too early on that screen. Just for kicks, I tried hooking it up again today, this time through the stock connections. Works like a dream! Guess my earlier trial was just a fluke. Holding my breath that everything holds intact.

And woah, is that 8 LED backlight bright! I'd say it might even be brighter than the stock CFL. My next question is if it would be more efficient to power the backlight straight off of the 3.3V regulator, or to use a resistor and tap into the 5V on the screen board?

IMG_6744.jpg


Glad I hadn't pulled the trigger on the $65 screen from the BOM quite yet. Cheers.

EDIT: Boy, what a rollercoaster of a time. After cutting the cart slot connector off the board and starting my relocation, the 3.3 line has shorted to ground. Is it a possibility that the vibration of cutting might have zapped a chip? I made sure to blow the board off with compressed air afterward, and all the components' connections to the board look flawless.

My hail-mary is maybe to trim the board and see if whatever was fried was in the "useless caps" section.

EDIT 2: Fuego alert! Spend the afternoon tearing apart another N64 and accomplished my first cart slot relocation! I was super happy to find that with some minor pin-bending, IDE headers plug right into the slot! They sure made everything way slicker. Also, my wire run turned out to be just the right length (~3.5").

IMG_6748.jpg
IMG_6749.jpg
 
Last edited:
Joined
Feb 7, 2018
Messages
29
Likes
63
Location
Alaska
Portables
1
Got a lovely package in the mail yesterday from @Matthew! It's going to need quite a bit of touching up, but the bones are there. I'm more than happy with my first 3D printing experiment. @Booshman, I took your advice and moved the buttons to a more traditional arrangement.

I'm pretty sure I've got everything I need except case screws, spray paint, and the CMB, which is en route from China. Time to trim a PSone screen.

IMG_6791.jpg
IMG_6792.jpg
 
Joined
Feb 7, 2018
Messages
29
Likes
63
Location
Alaska
Portables
1
I've bondo'd and sanded the heck out of the case, and it's ready to be painted once I've gotten the last details worked out. This week:
  • Cut spaces for a power switch and volume controls
  • Installed nuts in most of the standoffs
  • Trimmed the PSone board and attached headers
  • Started on the Dpad, analog stick, and C button boards
We're going mega modular on this thing! I got this sweet little ribbon-cable kit that I intend to use to connect everything together. I learned my lesson about not making things serviceable!

Glad I used inches in the case design now – tacts mounted right on the perf board fit the buttons PERFectly. It's a feature, not a bug :awesome:

What is the rule of thumb for power wiring? I overkilled it in the original Nomad with 22g, but the ampacity charts I'm finding online are all over the place. It'd be dope if I could get by with 28g power to the screen.

IMG_6797.jpg
IMG_6798.jpg
IMG_3010.jpg
IMG_3067.jpg
IMG_3066.jpg
 
Top