Worklog Real Boy

Shank

Moderator
Staff member
.
.
Joined
Jan 31, 2016
Messages
1,287
Likes
2,726
Portables
6
oYvHA5iWkXxD8dmEJzs8b1qEudxAQOxAMDCUaJg3VfA.png

ITT: Shank does something that has nothing to do with the Wii

The Real Boy will be a pocketable, Virtual Boy handheld.
-4.3" 480p 16:9 IPS fed by VGA (via Virtual Tap with custom firmware with a modified resolution. It'll put out 800*480 instead of 800*600 with a letterboxed 2x2 pixel doubling for crispy video)
-VB+ New controller replacement MCU board for Virtual Boy, NES, and SNES I'm working on. Essentially a fancy shift registered with hopefully a few extra features
-Type C charging. 5v charging only, but VB uses barely any power compared to normal consoles
-2 18500 batteries @ 2040mah each. Estimated battery life TBD, but should be a few hours
-N64 PMS battery management and regulation
-U-Amp (analog) with speakers and headphone jack. Virtual Boy has its own audio setup, but this'll save me some space and should provide better audio quality.
-HDMI out via VGA to HDMI converter, hopefully it should play nice with the odd resolution
-Link cable port to connect to another Virtual Boy for multiplayer (assuming I ever find someone else with a virtual boy)
-Controller port, allowing me to connect an external VB controller (or NES/SNES controller) to play it as a console.
-No cooling because power consumption is tiny
-2DS doorstop geometry
-Virtual boy A E S T H E T I C
-No eye cancer

Mockup:
wDfboOj.png


Virtual boy portablizing is pretty much completely uncharted territory, so we'll see how it goes. Hopefully I can pull it all off
 

Shank

Moderator
Staff member
.
.
Joined
Jan 31, 2016
Messages
1,287
Likes
2,726
Portables
6
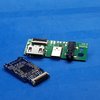
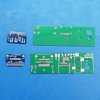
Some boards and the components to populate them came in the mail. One is a PCB for some of the ports. For HDMI out, I plan to use a VGA to HDMI circuit stolen from a cable of the aforementioned function. The 75 ohm resistors will be removed from the converter board, and the screen will function as the 75 ohm load. This will let it output to both the internal VGA screen and the HDMI out at the same time. I designed a stupid little PCB to interface a 19 pin ffc with it. I wasn't able to jumper it with just solder, so I had to run 30awg solid core wire across the gap. Hopefully this all works. I have also been slowly dialing in the cad design. Will post more after finals week.
20200508_143339.jpg 20200508_152800.jpg 20200508_153345.jpg
 

Ollie

.
Joined
Jul 21, 2020
Messages
35
Likes
20
its nice to see people doing different things for this competition
 

Shank

Moderator
Staff member
.
.
Joined
Jan 31, 2016
Messages
1,287
Likes
2,726
Portables
6
Most of the updates so far are tweaking code and tweaking cad files slightly. Once assembly starts I'll post updates
 

Shank

Moderator
Staff member
.
.
Joined
Jan 31, 2016
Messages
1,287
Likes
2,726
Portables
6
Whats this? Shank actually being responsible and updating his worklog for once? A rare sight to behold.
Anywho, A lot of this project has been tentative and experimental. I don't like sharing info I'm not sure about. A lot of this stuff is unsure, because nobody has ever really made a virtual boy portable before.

So first up today, we have the virtual boy's controller. Like the NES and SNES, the Virtual Boy controller is just a shift register, specifically 16 bits. While I could have just wired up to two 8 bit shift registers, I wanted to add a few more features, and push myself to learn code. I originally tried to implement the entire shift register within the microcontroller, but the interrupts within the chips weren't fast enough. So instead I had to to have the chip function as a "man in the middle" between the buttons and the shift register. This let me control what inputs get passed along to the shift registers, enabling features like button remapping and additional features activated by various button presses. Wiring up 16+ inputs and 16+ outputs and probing everything became a huge mess, so I developed and assembled this development board! It features dissconnect-able LEDs so I can see which bits are activated, and lots of easily accessible stuff to test things. I did a few oopsies, so the switches needed to be soldered on sideways, and I had to convert the QFP into a QFN for it to fit. With @CrashBash's help we wrote the foundation for the code that would run on the final board.

20201102_182428.jpg


Once that was completed, I ordered and assmebled the actual PCBs. Crash and I spent several all nighters debugging this one.


20201102_180313.jpg
20201102_180319.jpg


We also modifed the code of the U-Amp to have analog volume controls. Crash and I went crazy working on it for a few nights, and eventually gave up and just used @StonedEdge's code, which worked quite well. The Uamp just looks like a Uamp, but heres a pcb I designed to ount the analog volume control wheel

20201102_180419.jpg


The code of the PMS was also modified to pull the auxiliary pin when the battery reached red level, allowing me to trigger the virtual boy's on-screen low battery indicator when the PMS reads a low voltage. No picture caus its just a PMS.


I also designed a PCB that will let me mount the Virtual Boy ports to the case without using any glue.
20201102_180327.jpg
20201102_180338.jpg


Test print. Everything fits nicely and snaps shut with 3d printed snap fits on the edges. The goal is to have this build be completely glue free.
20200924_104422.jpg


The servo emulator is a tiny25 that tricks the console into thinking the servo motor is present, because without it, the console wont boot. I tried programming the hex on a SMD version for about a week, but could NOT get it to work for some reason. The chip+board was too thick to fit, so I had to wire it up by hand. Even broke a leg and had to carve into the body to solder to the inside of the leg. But it works, and its stable. Good enough
20201029_021154.jpg


Now comes the fun part. The 60 pin cart slot needed to be rewired by hand.
20201029_021210.jpg


AND she boots
20201029_015345.jpg

In the mean time, more test prints

20201025_124323.jpg

Lookin snazzy.
Got my roommate and resident ape with a knife Bassline25 to resin cast me some forbidden jolly rancher buttons. All I had to do was offer him free exposure and shoot him with a nerf bazooka
20201102_180140.jpg

20201008_215503.jpg


These were just my test prints. I wanted my final print to use multi-material 3d printing to be more virtual-boy like. Heres my final mockup of the design:
9LdAOZZ.png

My friend TheMitch22 AKA Mitch 3D is a 3d printing wizard with multi material printing. Heres his first test print he gave me:
9MZ5T2f.jpg

Now doesn't that look nice! But hes been refining it and made it look even better. With this print, I did some wet sanding to see how it behaves. Little to no color shmearing, and the seams disappear with sanding. This was just 100 grit wet sanding. With some ascending grit and clearcoat, the white color should be gonezo.
20201102_154927.jpg
20201102_154918.jpg
20201102_154913.jpg

Here's with a little water applied to show how what it should look like.
20201102_180201.jpg
20201102_155140.jpg


Anyway, yea thats an update. Working as fast as I can. Hope to have it done and the video posted by the end of the year. Thanks for your patience :D
 

A_s6

.
Joined
Apr 15, 2020
Messages
152
Likes
104
Location
jack frost sanctuary
Portables
i don’t give a hee ho
thank god gman suggested magnet wire for the cartridge slot connections, those look like a nightmare to wire
 

Shank

Moderator
Staff member
.
.
Joined
Jan 31, 2016
Messages
1,287
Likes
2,726
Portables
6
thank god gman suggested magnet wire for the cartridge slot connections, those look like a nightmare to wire
For sure. At first I was paranoid about magnet wire not delivering enough current... then I remembered the whole system load is less than 1.5 watts, at 5v, and the cart slot has 60 pins. Fortunately, Gman is always there to solve my problems.
 

Stitches

2 and a Half Dollarydoos
Staff member
.
.
Joined
Feb 5, 2017
Messages
3,817
Likes
3,011
Location
Banana Bender Land, Australia
Portables
6
Got my roommate and resident ape with a knife Bassline25 to resin cast me some forbidden jolly rancher buttons. All I had to do was offer him free exposure and shoot him with a nerf bazooka
When the free exposure hits
shank shot.PNG
 

Shank

Moderator
Staff member
.
.
Joined
Jan 31, 2016
Messages
1,287
Likes
2,726
Portables
6
Final PCBs, assembled and programmed. I went with red, because... well... Duh
20201222_032852.jpg
 

Shank

Moderator
Staff member
.
.
Joined
Jan 31, 2016
Messages
1,287
Likes
2,726
Portables
6
Case was wet sanded with 100, 220, 500, 1000 grit sandpaper. Wetsanding in the shower is a big brain strategy.

Sanding prints allows you to smooth out the lines, but leaves the case pale, white, and faded. A coating of clear coat restores it's original, vivid colors. I used matte clearcoat, still drying in photos.

Text is black primer. Vinyl decal served as a template. Cut/weeded a negative, sprayed, then removed the template.
20201226_192601.jpg
20201226_200748.jpg
20201226_200836.jpg
 
Last edited:

aaaa

.
Joined
May 6, 2020
Messages
1
Likes
2
If this performs even a fraction as well as the quality of this concept then it will have been time and money well spent. Looking forward to future updates!
 
Top