Well i figured it's time I should start a worklog. I've been around the forums for a little while now reading the guide and a bit on discord so here goes my progress so far.
** April 18 2021
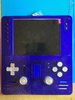
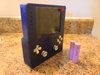
Finished Product
**Update Mar 14 2021
Some minor project changes:
Requirements for my portable:
** April 18 2021
Finished Product
**Update Mar 14 2021
Some minor project changes:
- Moved from standard trim to advanced for part placement
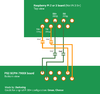
- Pi 3b is now working with ethernet to ps2 and will have an usb ssd attached
- Not thinking ahead or looking at the bit built store USB Pd charger closer, it would have been a great addition for internal storage out to pc
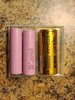
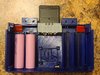
- Switched to 1s4p layout with 18650 Cells, charging and output all handled by PS2 PMS
- Current charger is just a simple 12v 3a external hdd power adapter, might consider a different programmable usb pd converter ex. ZY12PDN
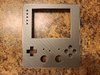
- Case modifications coming for L/R button comfort
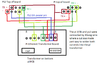
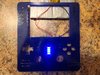
- The 2s battery level indicator thankfully can be swapped out for a 1s indicator in the same format so using a 2n3015 transistor I could use vsys or similar to display a different style of visual indicator
Requirements for my portable:
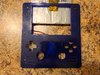
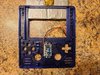
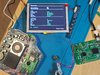
- PS2 standard trim modified for ethernet
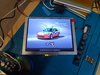
- 5" vga compatible screen from the store
- Cooler kit from the store
- Pi 3b smb
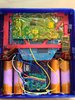
2s battery system, 22650 cells or flat lipo currently have a 10000mah 2s pack built waiting on my 26650 cells5v switching reg not a linear reg, pololu or the one from the guide, i was calling it the wrong thing initially2s charging board currently 2a tp5100Mosfet switch circuit- Possibly extra LEDs for charge indicator
- PS4 button swap kit aluminum
9v 5a charger maybe a 12v 5a charger- 64mb fcmb slot 2
- External slot 1 mem and usb
- TTX aftermarket controller for board
- More TBD later
Attachments
-
 3.3 MB Views: 538
 -
 1.7 MB Views: 539
 -
 1.9 MB Views: 519
 -
 449.7 KB Views: 498
 -
 1.8 MB Views: 484
 -
 2.1 MB Views: 500
 -
 2.2 MB Views: 476
 -
 3.2 MB Views: 483
 -
 2.6 MB Views: 464
 -
 5.3 MB Views: 505
Last edited: