
Worklog PS2 portable (not named yet)
- Thread starter Notjohnny
- Start date
I knowThat is a lot of batteries, it will be very heavy to hold.
Here is the inside of the lower bottom half (it isn't going to have all those batteries, just a few. The vent holes may change a bit).
You may want to extend the hinge part that sticks into the tube on the left, seems like that could be a weak point... Also make sure you can put your cables through it, the inside may be a touch too thin... You may also cover the vent on the left with your hands, probably scoot it a little closer to the center.
The external memory card looks pretty neat
The external memory card looks pretty neat
Thank you, I'll take care of that.You may want to extend the hinge part that sticks into the tube on the left, seems like that could be a weak point... Also make sure you can put your cables through it, the inside may be a touch too thin... You may also cover the vent on the left with your hands, probably scoot it a little closer to the center.
The external memory card looks pretty neat
I'm going to test (again, just to make sure) if the driver board can accept YPbPr/RGsB through the VGA port. Does the PS2 outputs video in both RGB/YPbPr and Composite at the same time?
No, RGB and ypbpr are one or the other.Thank you, I'll take care of that.
I'm going to test (again, just to make sure) if the driver board can accept YPbPr/RGsB through the VGA port. Does the PS2 outputs video in both RGB/YPbPr and Composite at the same time?
- Joined
- Feb 25, 2016
- Messages
- 1,437
- Likes
- 2,887
YesI think I didn't express myself correctly. I wanted to ask if the ps2 composite output is always enabled so you can connect composite+RGB or composite+YPbPr and get video from both at the same time
Well, after a lot of time I have received a message saying that my battery capacity testing PCBs will arrive in 1-2 days and I have my last exam this Friday so this is going to be a weekend full of testing (yay, at last some free time to work on my project, I'm almost crying of happiness) there will be some updates soon, I promise.
- Joined
- Mar 10, 2018
- Messages
- 1
- Likes
- 0
I wanted to ask if you do ps3 exploit with rebug latest firmware? Are you gong to do ps3 portables in the future?
- Joined
- Dec 10, 2016
- Messages
- 578
- Likes
- 663
- Location
- Constant Fear
- Portables
- sin^2(x) + cos^2(x) +e^(i*pi)
He's making a ps2 Portable....I wanted to ask if you do ps3 exploit with rebug latest firmware? Are you gong to do ps3 portables in the future?
story of being a portiblizer my friend. Good luck on everything, I hope that you will be able to come back and finish this project soon.Well, I don't have enough time to push this forward so I'm officially putting this aside until (at least) summer. The only thing that I can say about this project: "Mistakes were made".
Soooo here I am with news about the project ( ͡° ͜ʖ ͡°)
I`m posting this so that means that I finally have some time to work on the PS2p. The frame-based desing is actually easier than I expected, bought 2 200x1x1cm wood pieces and started cuting them with 45 degrees angles
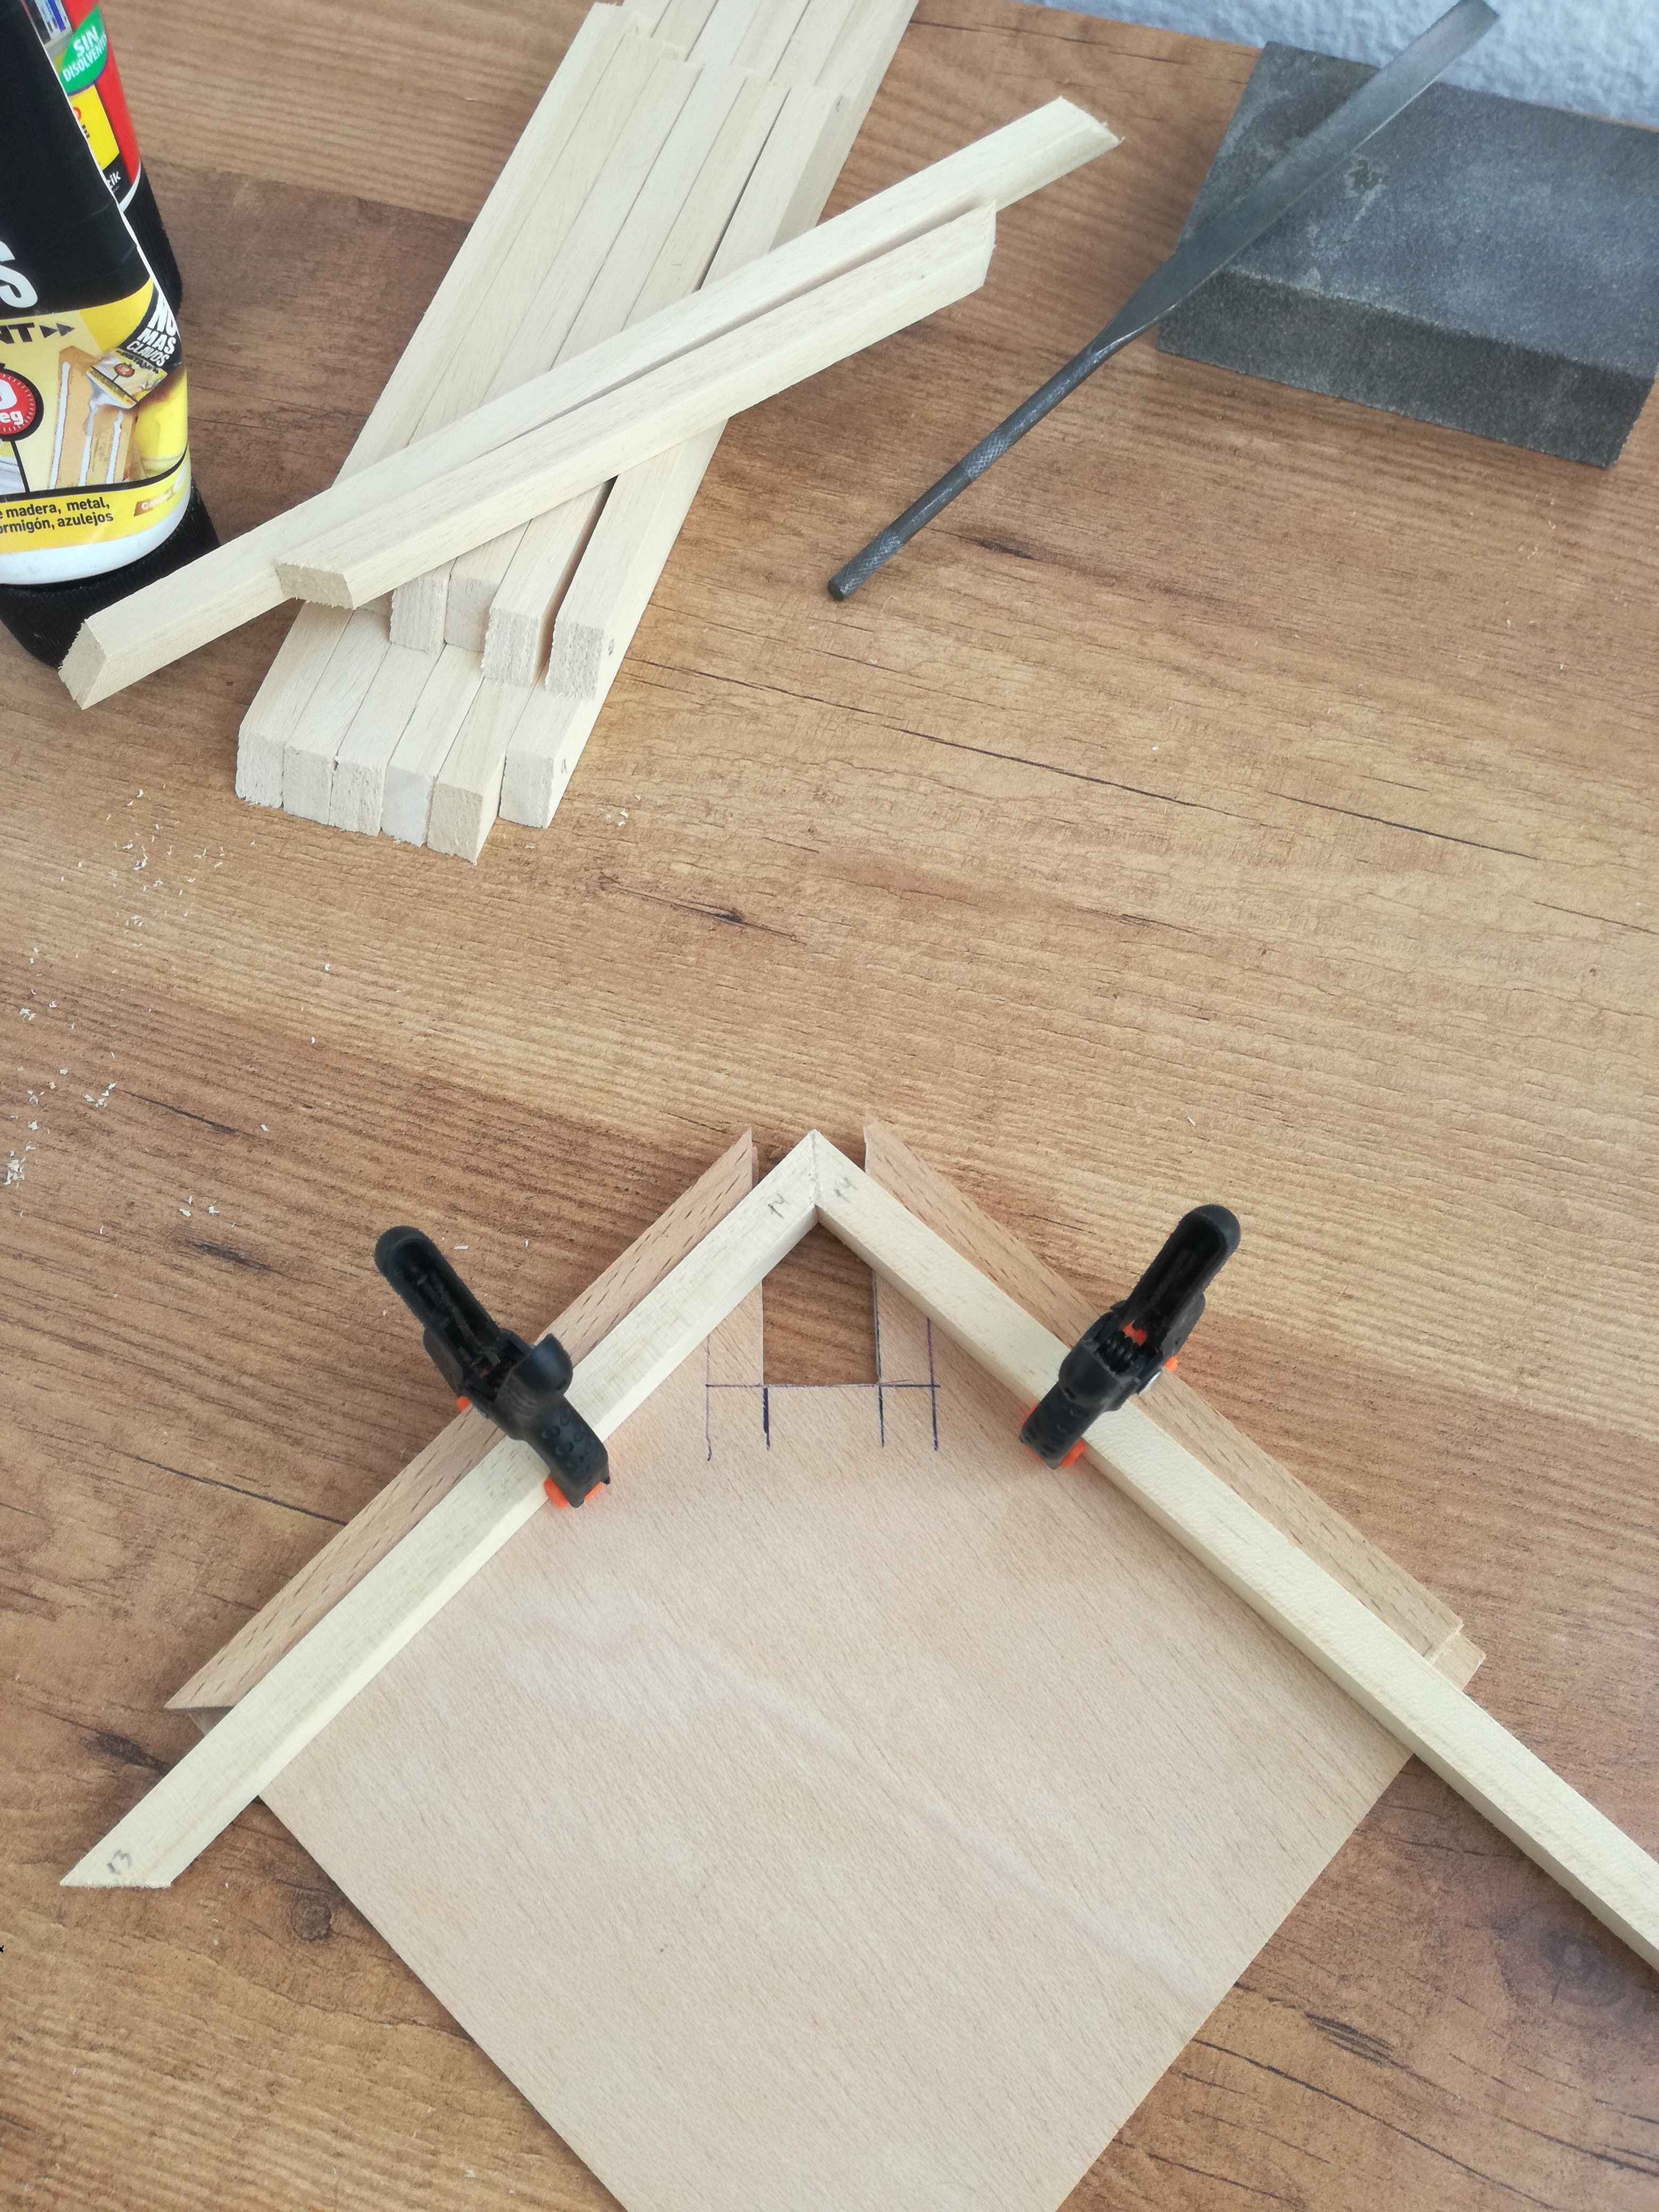
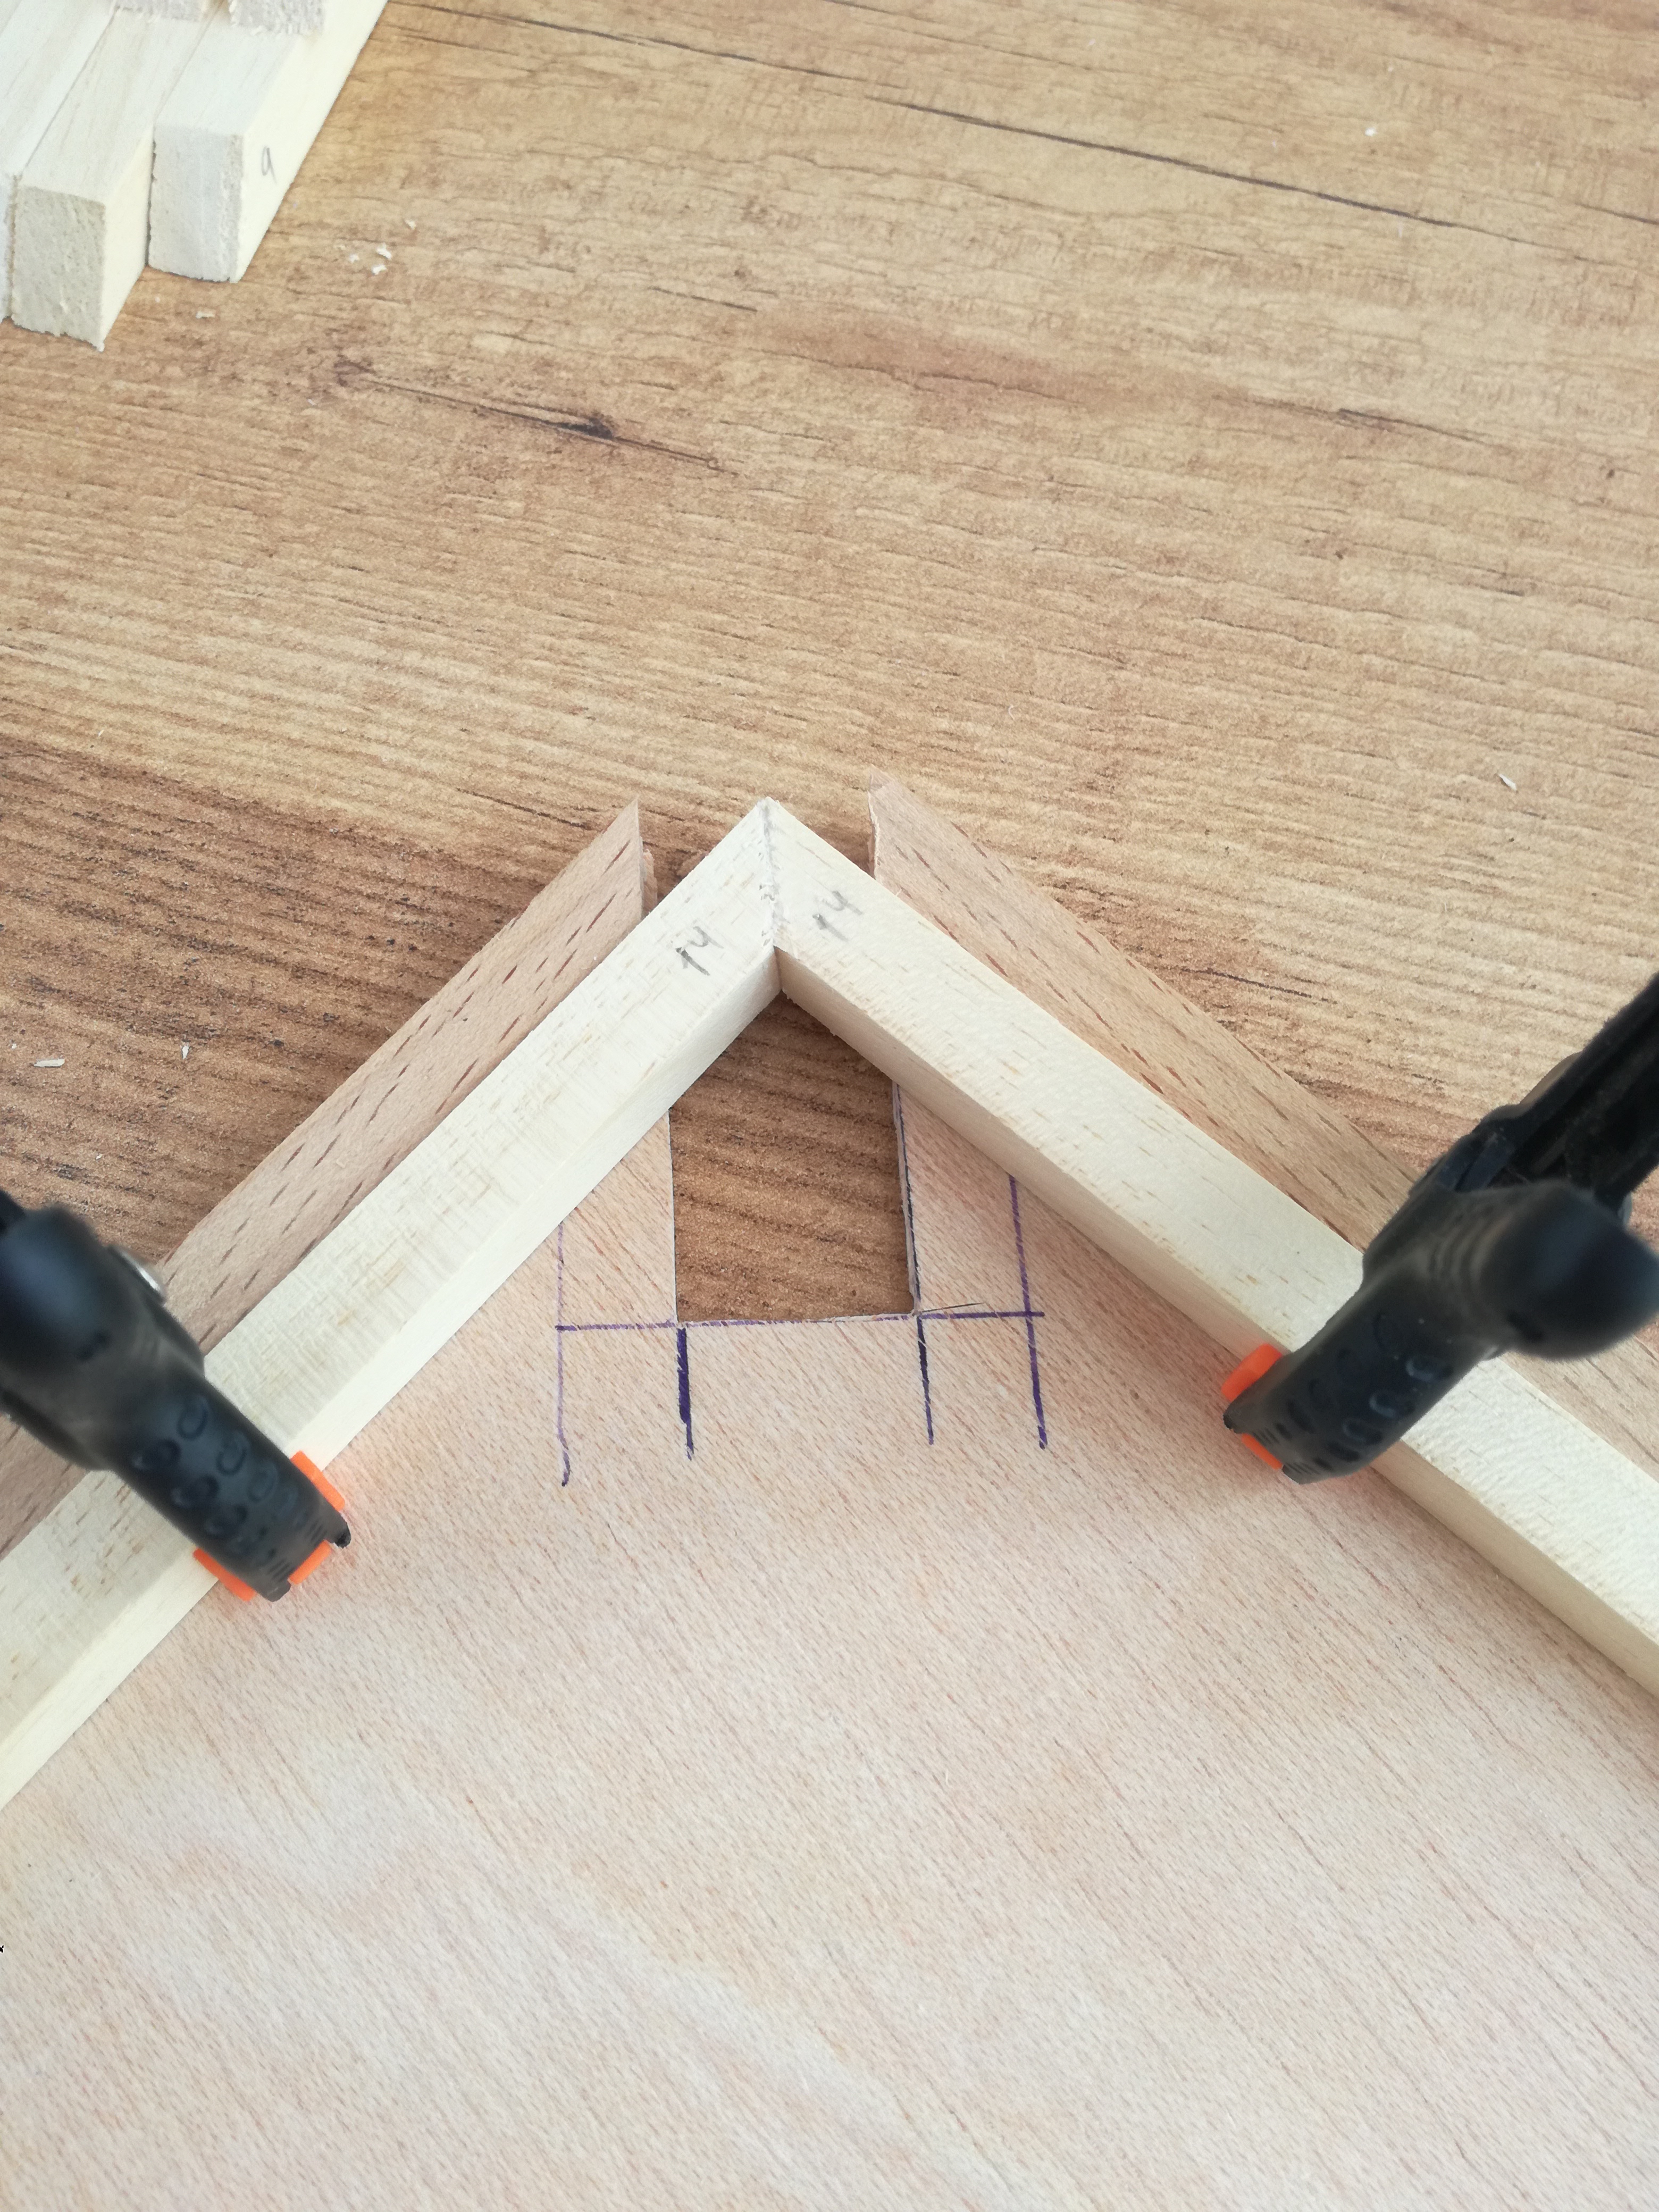 mmm perfection made corners
After cutting them I started assembling the 4 frames (one of them is actually a leftover because I misscalculated the top half height )
)
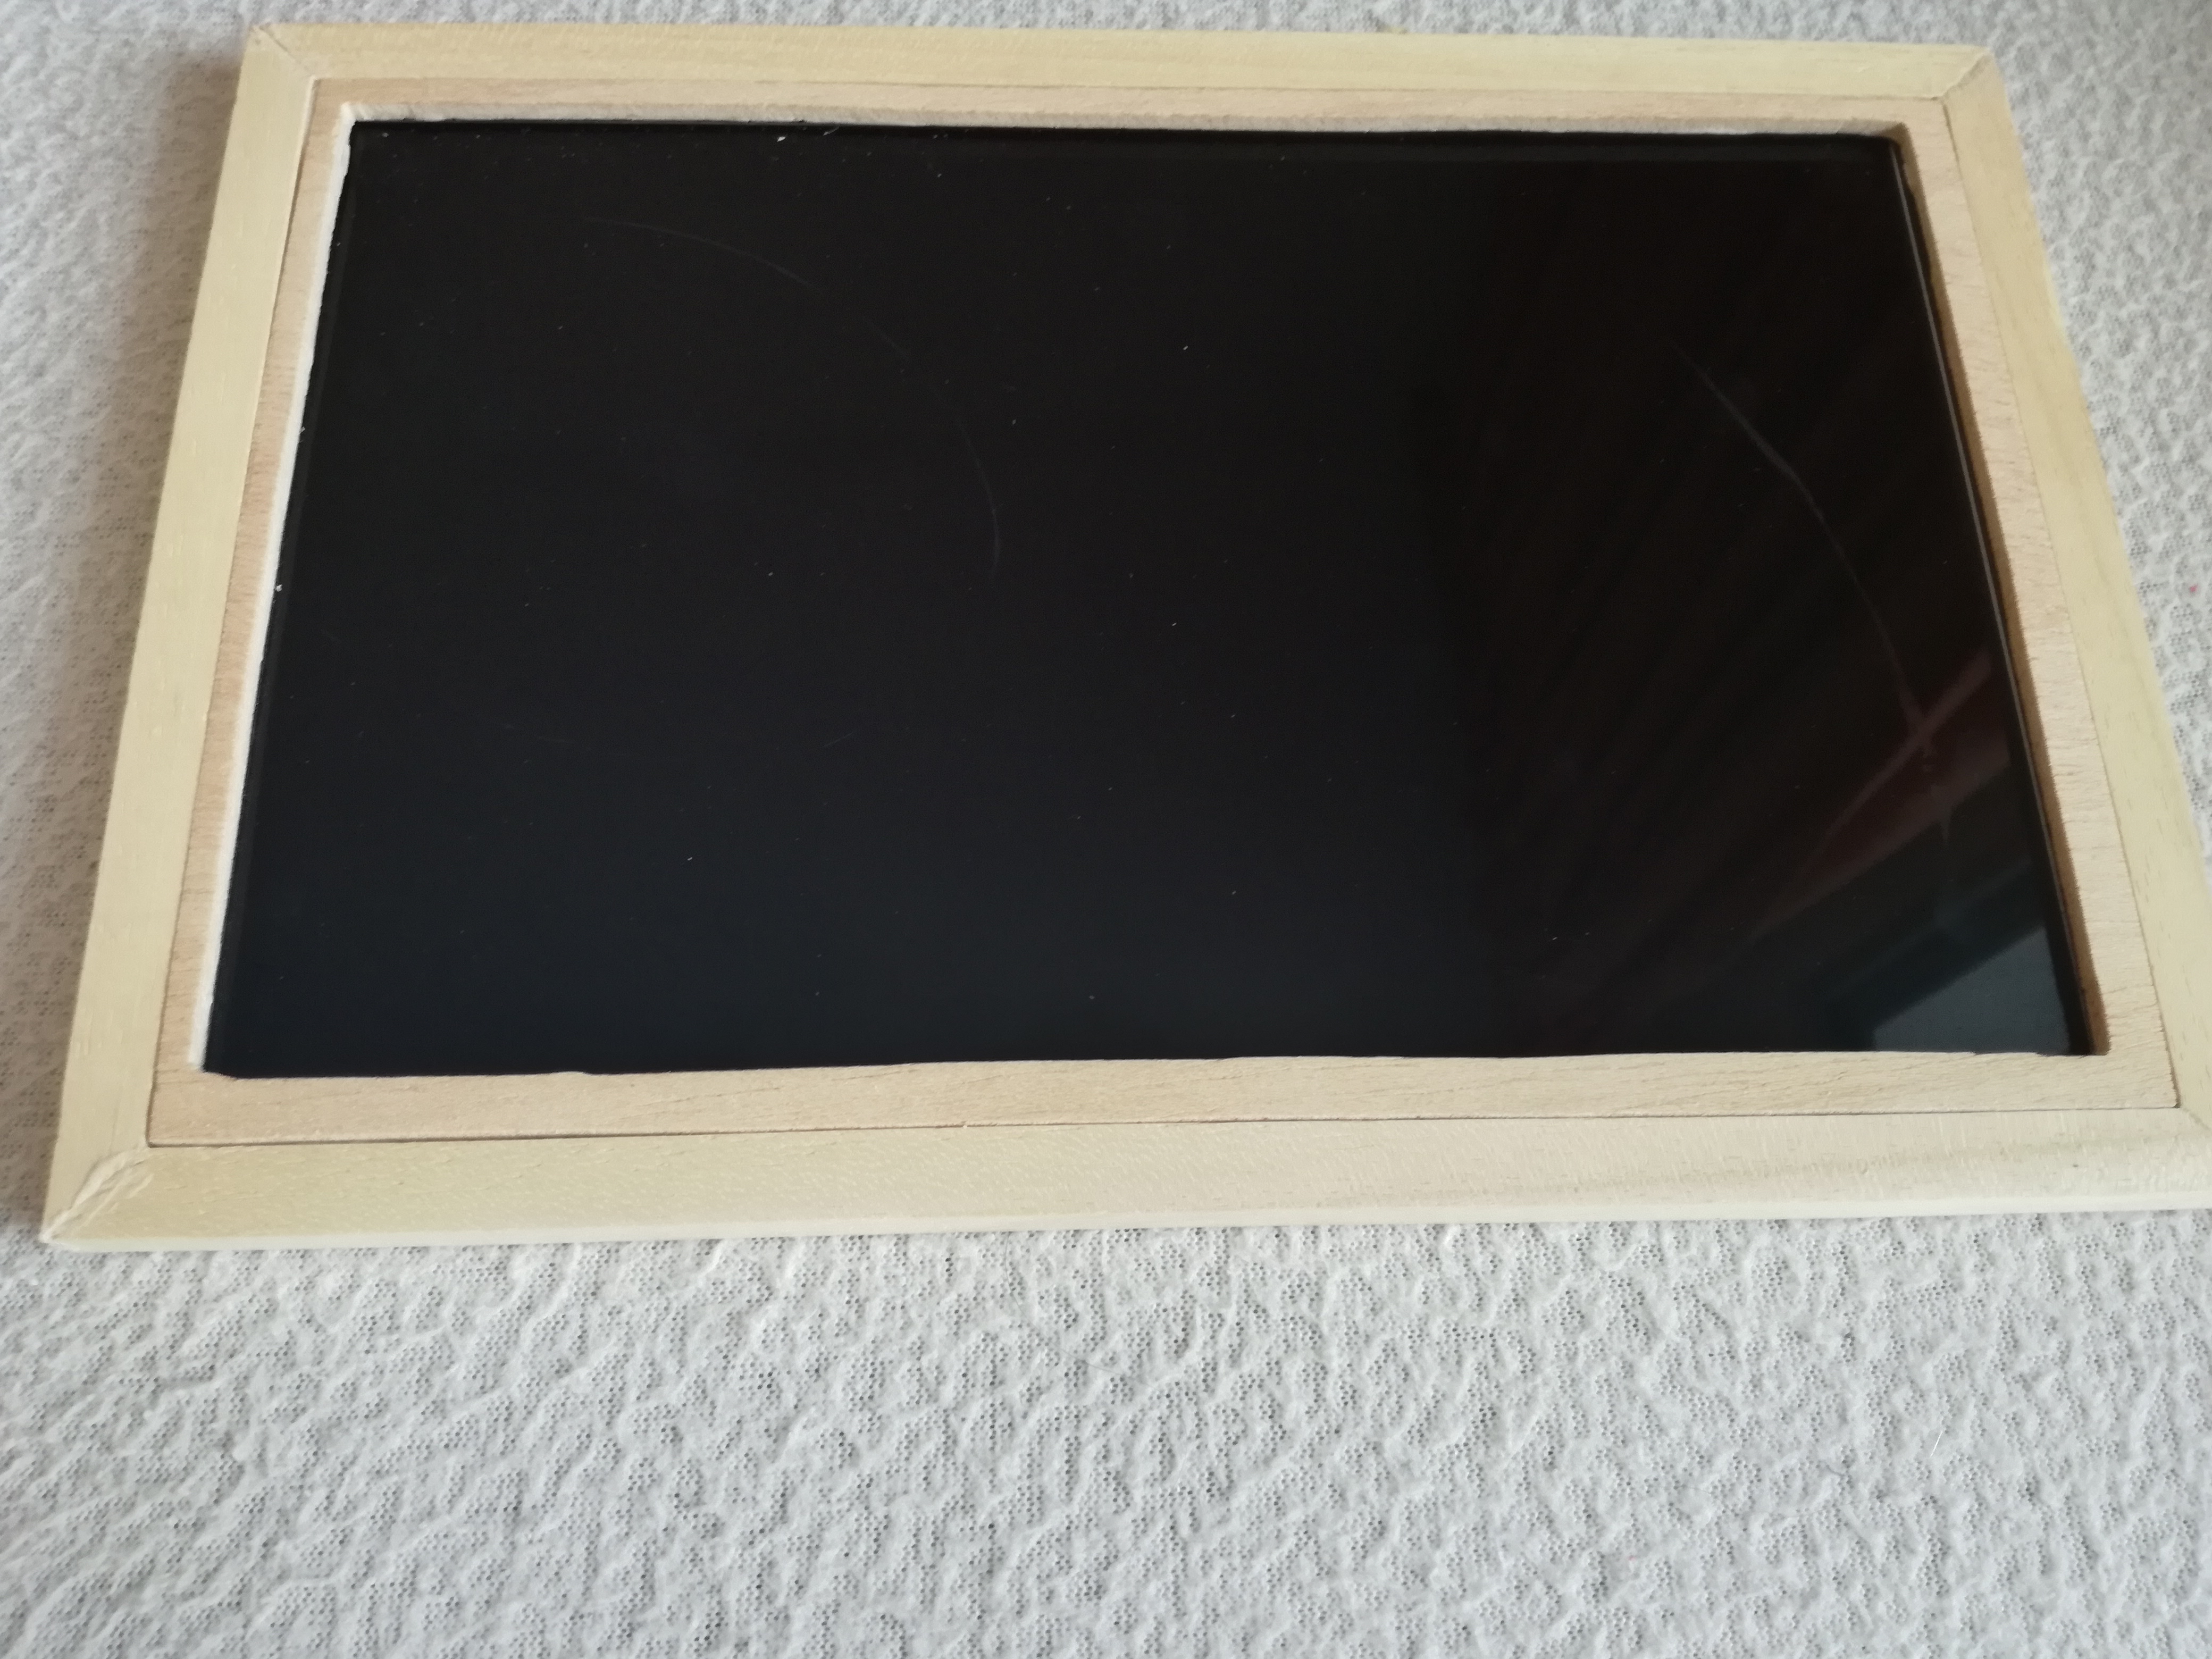 This is the top frame before sanding the inner part and filling the gaps between the screen frame and the full frame. These frames have been carefully measured so the screen is held mostly by friction (I will add some suport to the cover in the back to make sure that it stays in place)
Once I finished the frames and the top part I started working on the bottom half. I found a small heatsink lying around that has more surface area than the stock one, the wood glue that I´m using works on metals too so I only need to sand a bit the edge and it will be ready to glue
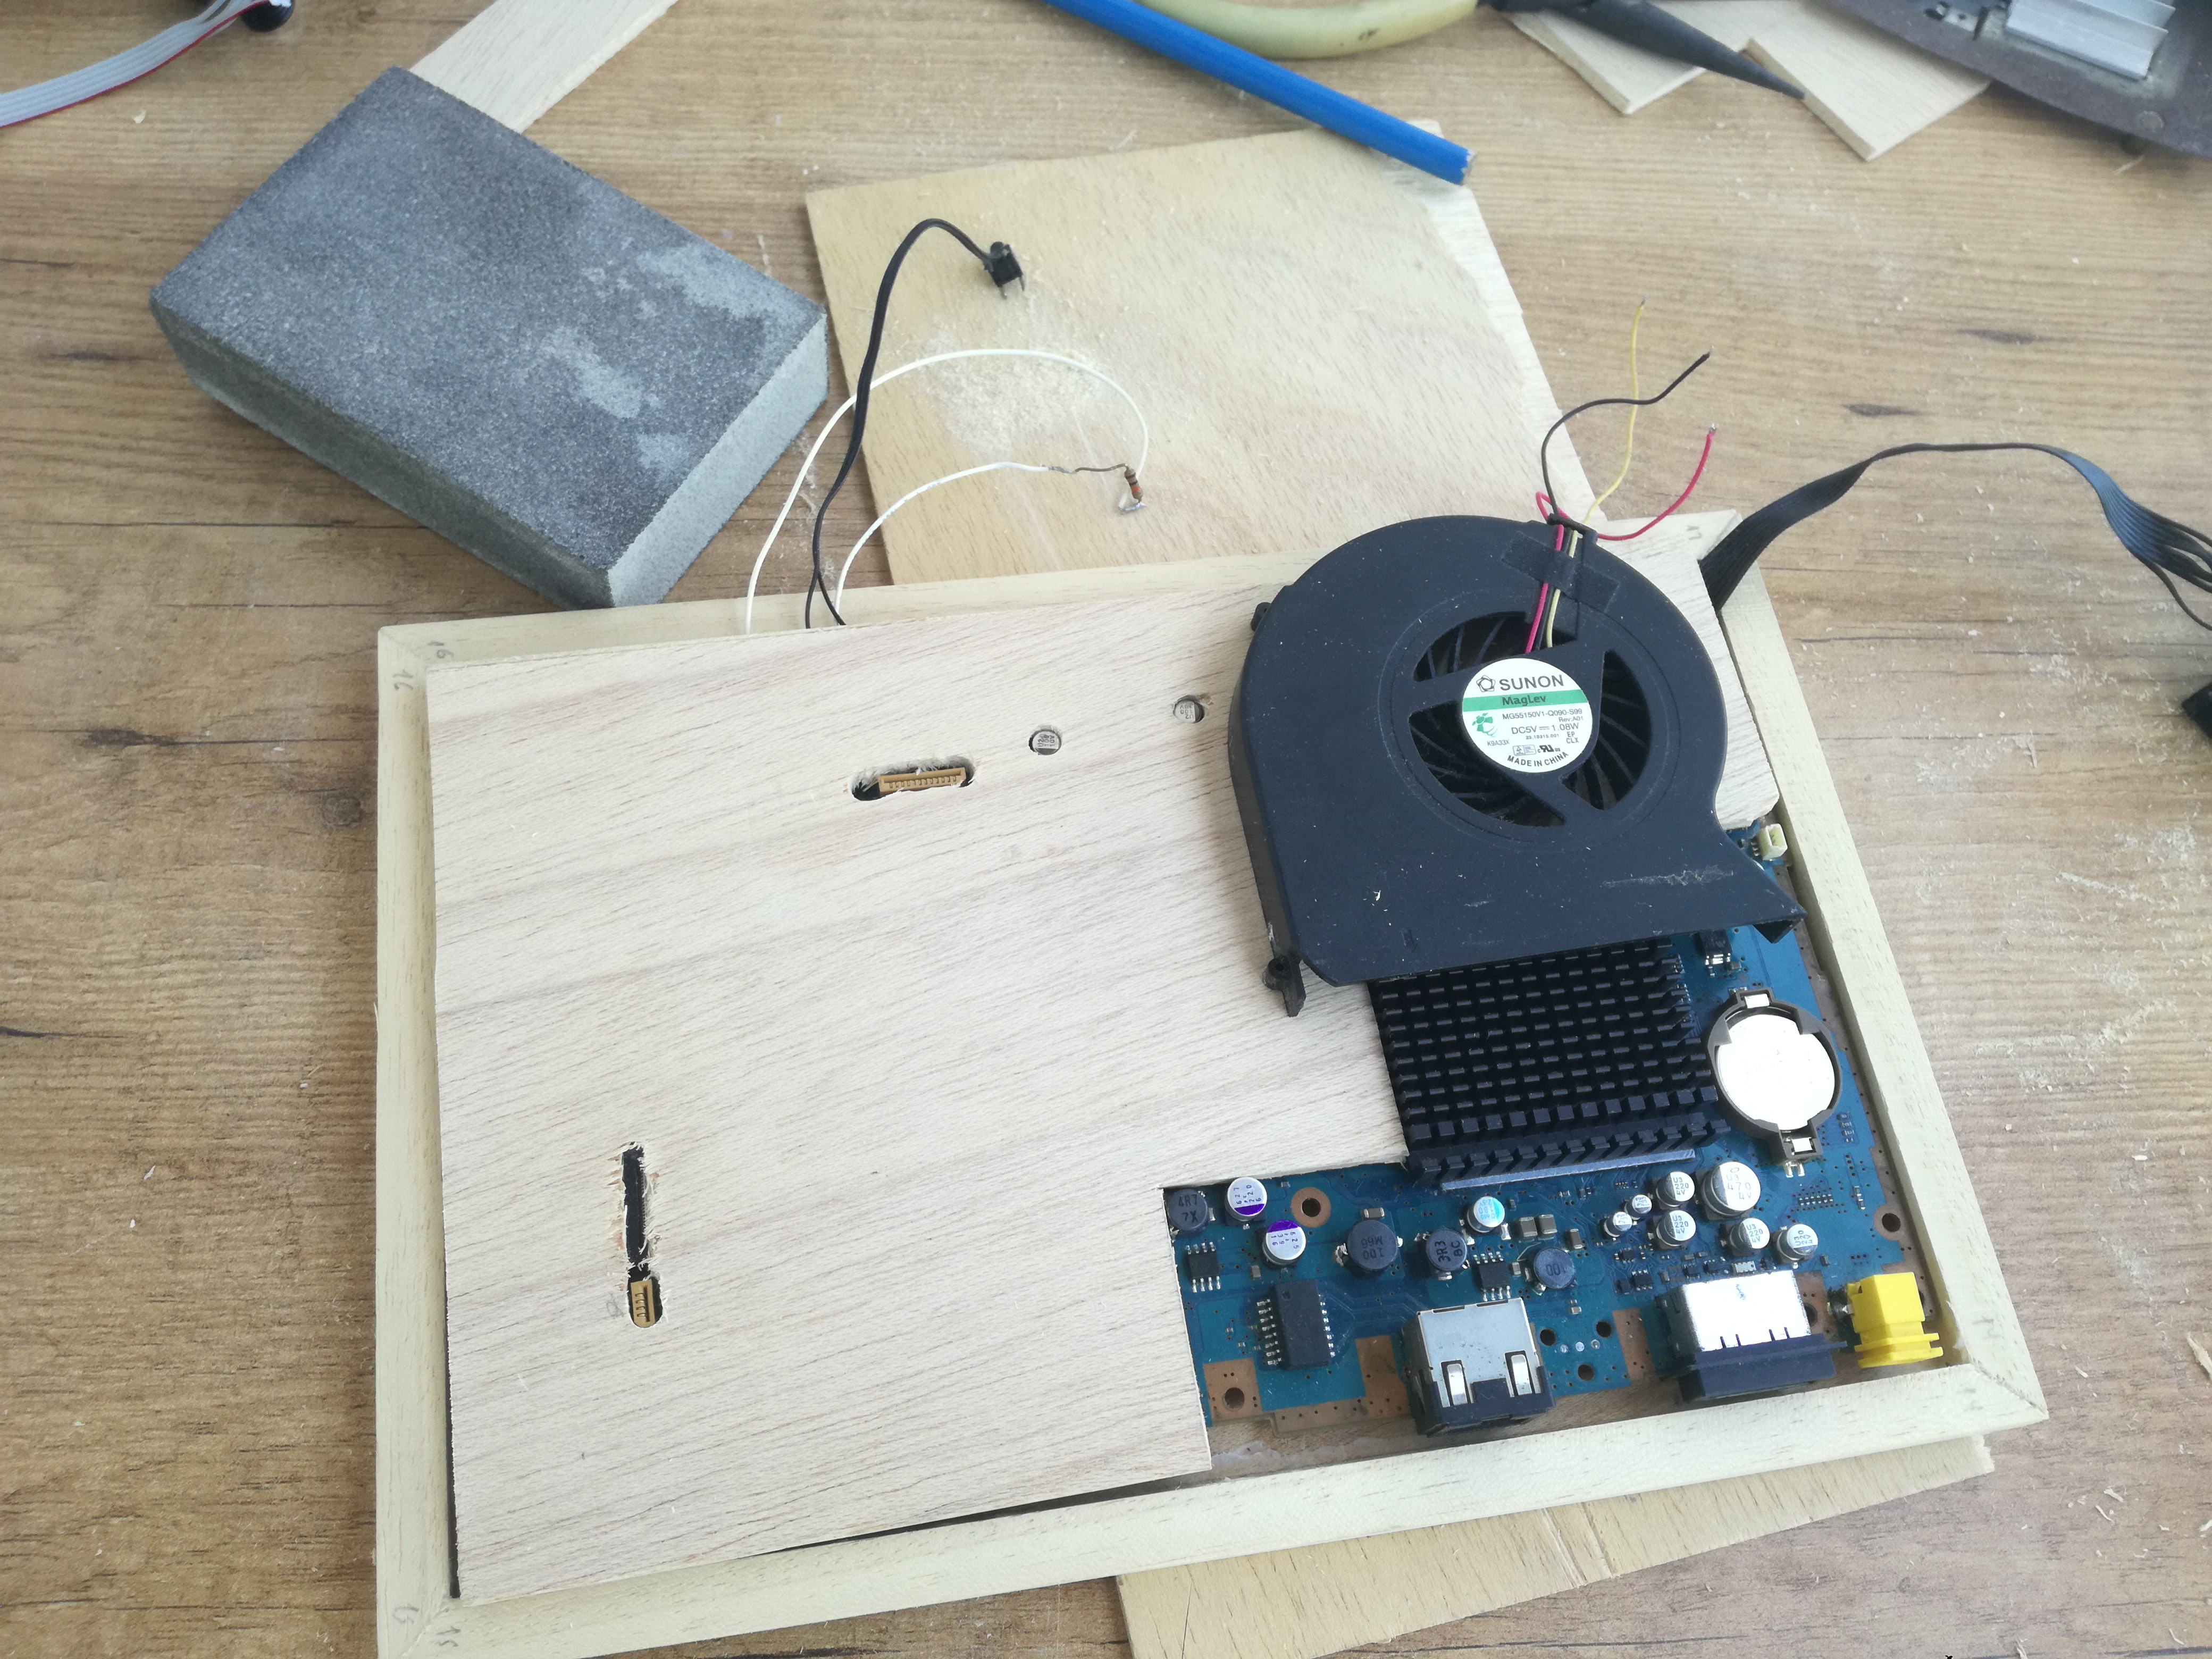 The workbench is a bit messy and the wood on top of the ps2 needs some work. I think that I can make this more compact than I spected and without spaghetti wiring and without hot glue.
I have free space on the left for the connector of the original idea of making a dock
I`m happy to have this rolling again after so much time
I`m posting this so that means that I finally have some time to work on the PS2p. The frame-based desing is actually easier than I expected, bought 2 200x1x1cm wood pieces and started cuting them with 45 degrees angles
After cutting them I started assembling the 4 frames (one of them is actually a leftover because I misscalculated the top half height
)Once I finished the frames and the top part I started working on the bottom half. I found a small heatsink lying around that has more surface area than the stock one, the wood glue that I´m using works on metals too so I only need to sand a bit the edge and it will be ready to glue
I have free space on the left for the connector of the original idea of making a dock
I`m happy to have this rolling again after so much time
I have drilled the holes for the hinge and tomorrow I will be doing some extra ones to pass the cables through. If I don´t mess it up too much the "only" things remaining will be controls (basically the hole top frame) and wiring everything up. I hope this won´t take me more than a week so I can finish it before starting college.
Hinge parts are now glued waiting for the glue to dry
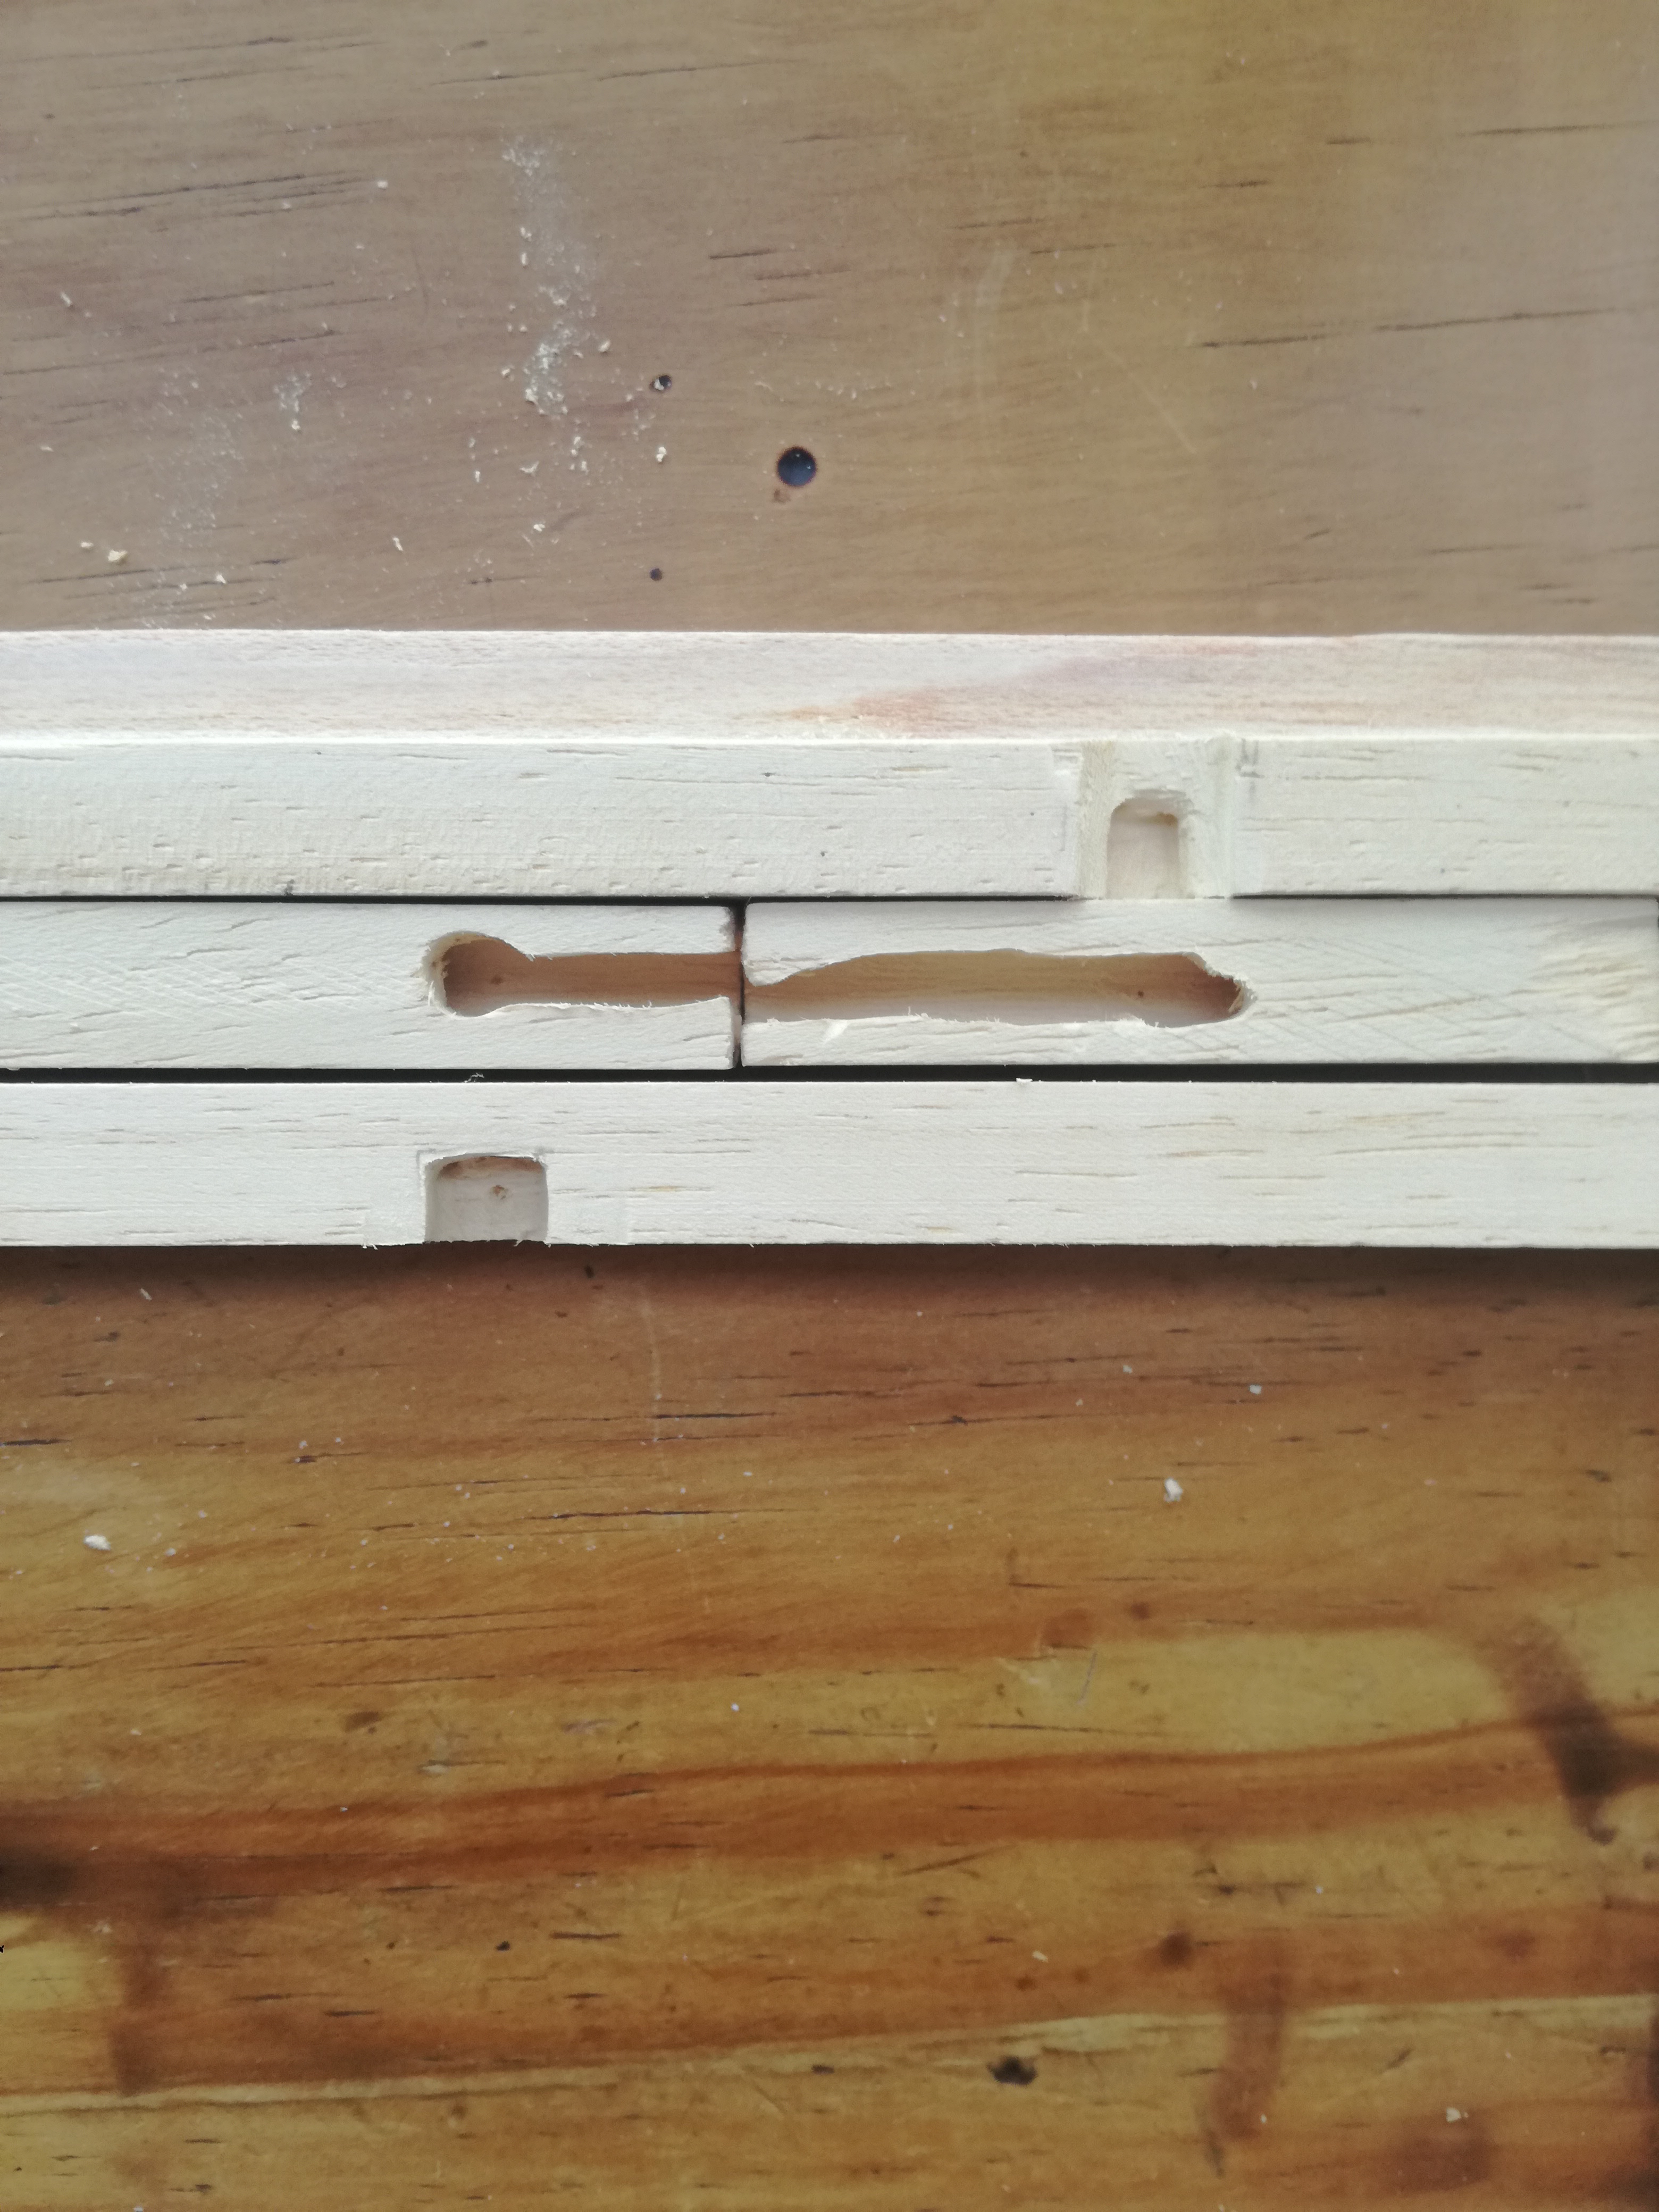
I carved the holes in order to have the 40pin LVDS cable going from bottom to top. As you can see, I started carving the pieces in the middle (don´t worry, the inside of them is a perfect 6mm hole) and then I got some skill to do almost perfect pieces into the top frame and the hinge base
The hinge is gettin tension from 2 screws that makes pressure so friction is created to hold it (if it is not enough I will add a rubber ring spacer)
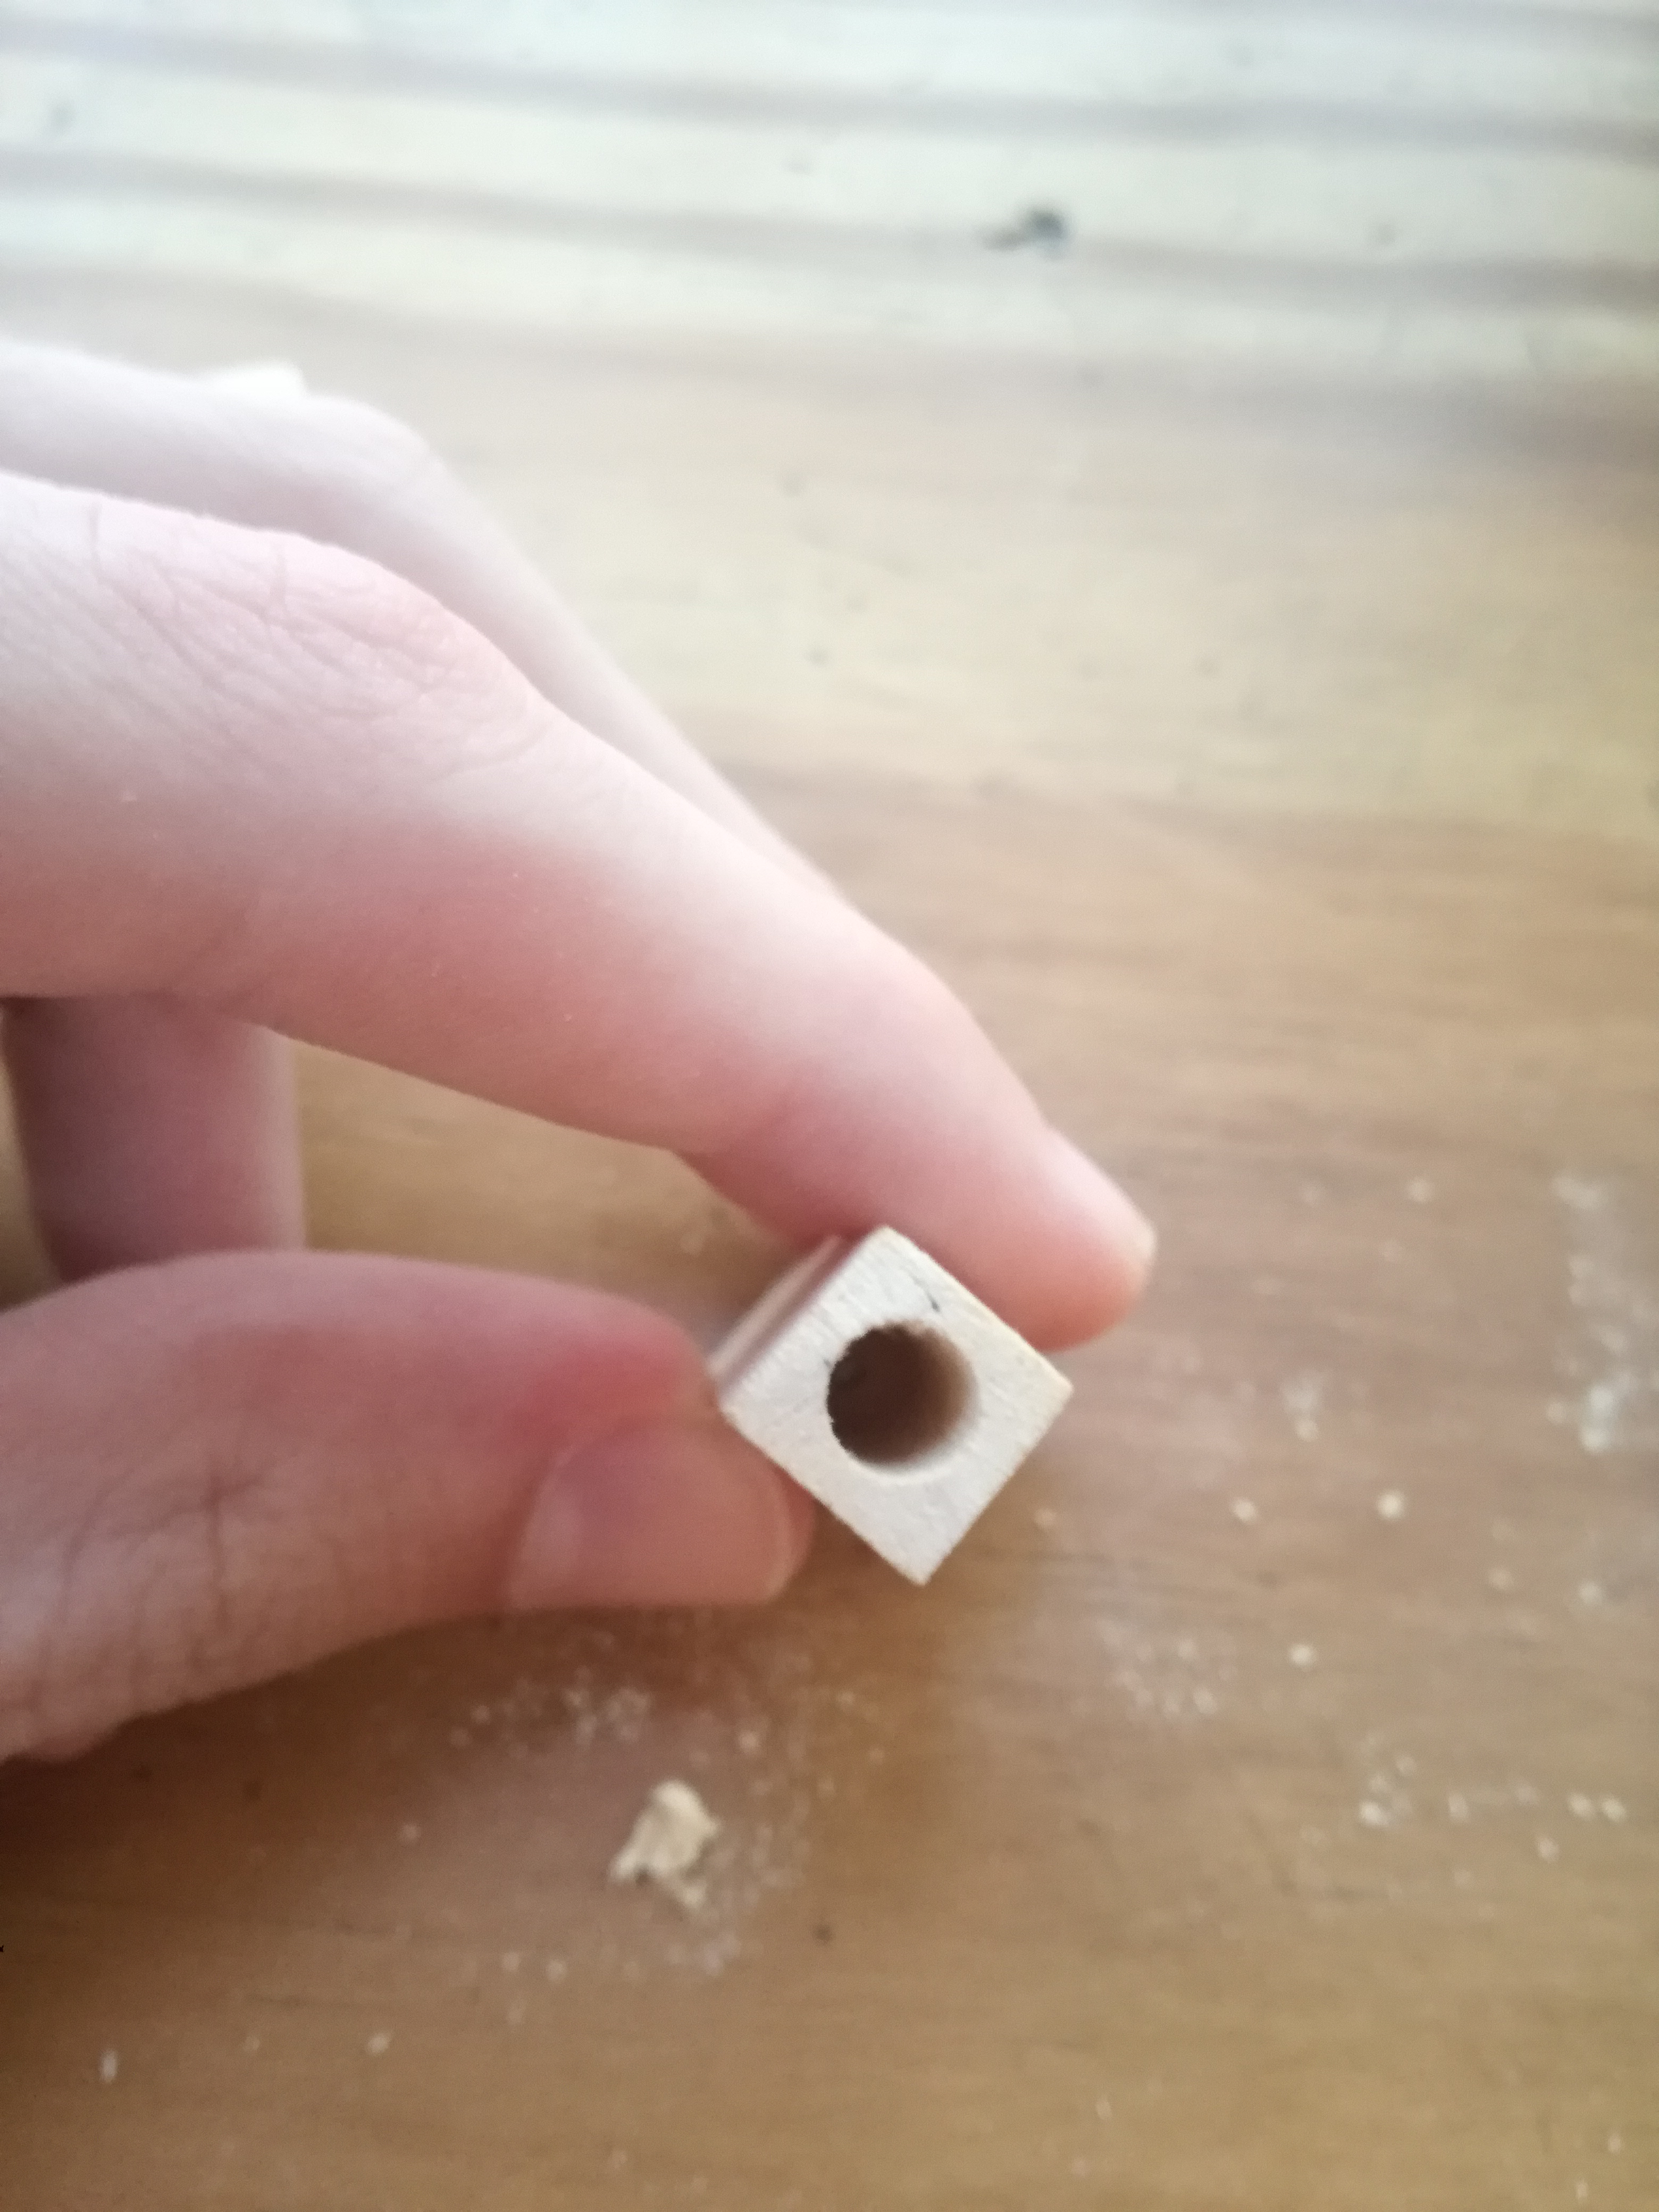
There´s a big hole to put the screw head trough (It digs deeper making sure that the screw has sufficient wood to pull
 A smaller one to be able to pass the screw through and retain its head
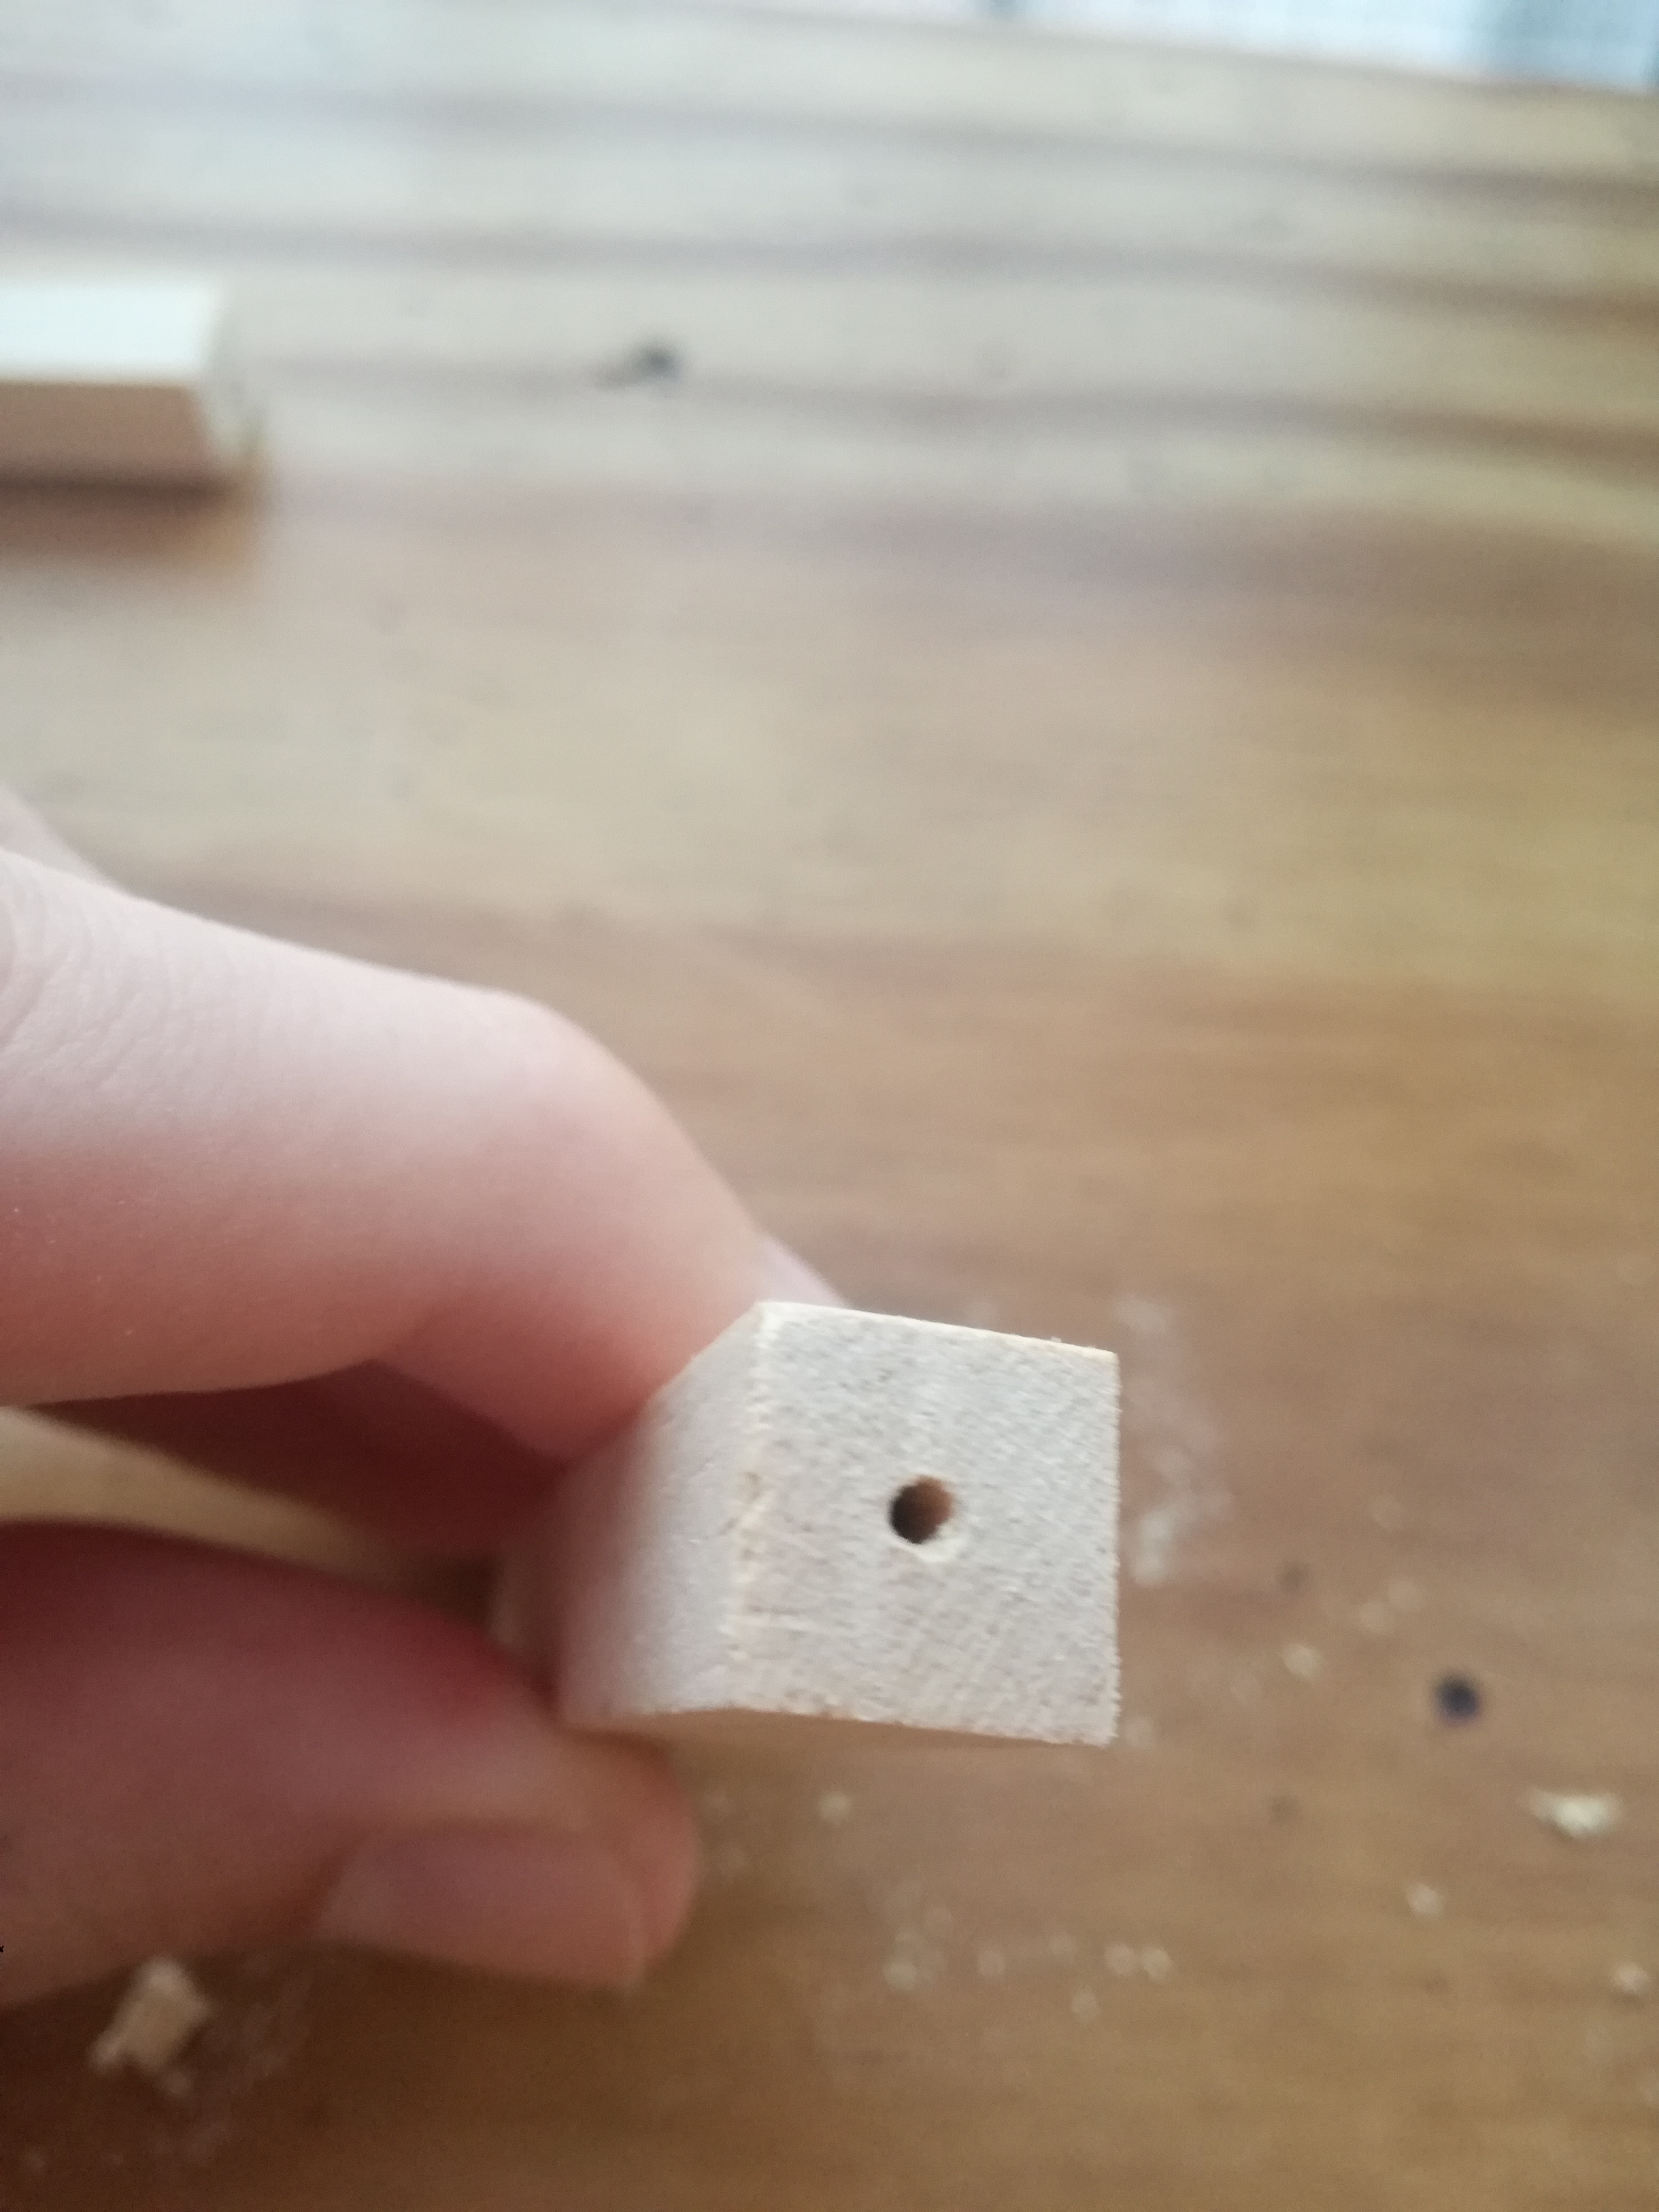
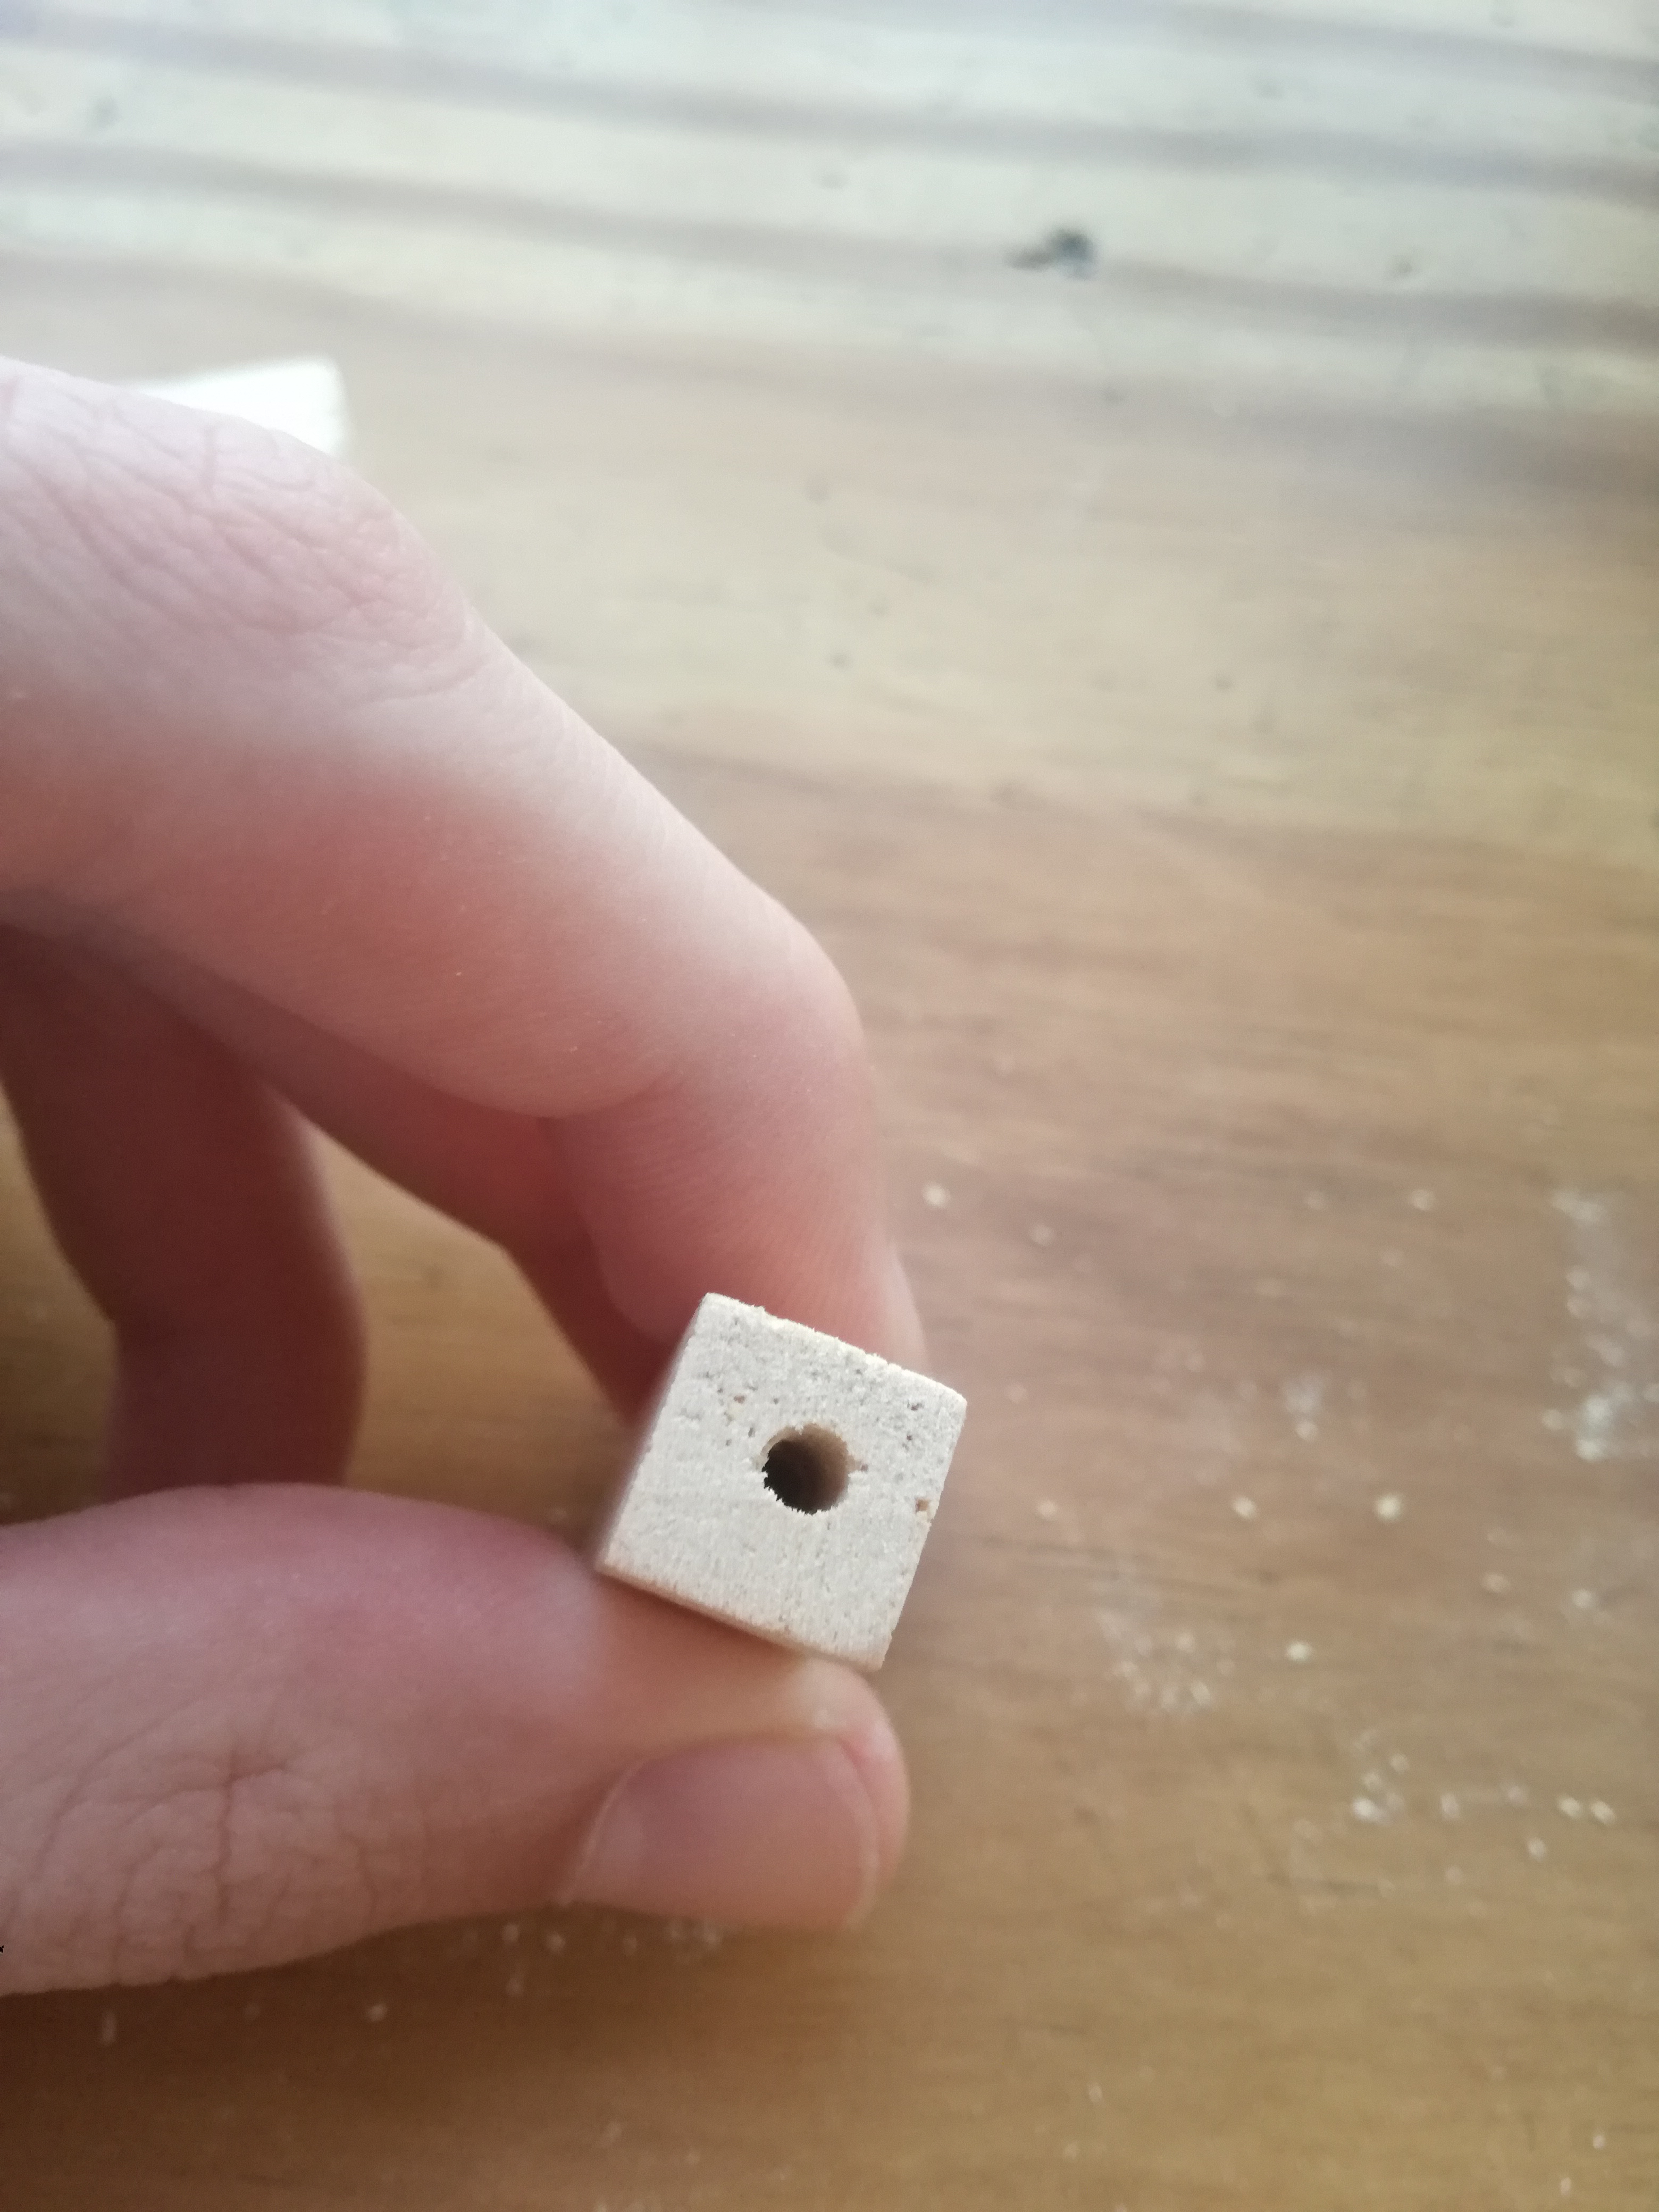
The even smaller one as a gideline to the screw (As I mount it the hole will be threaded by the screw making a perfect tight fit)
I´m love with the spoiler thing, it makes it easy to keep everything tidy on the thread
I carved the holes in order to have the 40pin LVDS cable going from bottom to top. As you can see, I started carving the pieces in the middle (don´t worry, the inside of them is a perfect 6mm hole) and then I got some skill to do almost perfect pieces into the top frame and the hinge base
There´s a big hole to put the screw head trough (It digs deeper making sure that the screw has sufficient wood to pull
The even smaller one as a gideline to the screw (As I mount it the hole will be threaded by the screw making a perfect tight fit)
I´m love with the spoiler thing, it makes it easy to keep everything tidy on the thread