
lyberty5
.
- Joined
- Sep 20, 2016
- Messages
- 40
- Likes
- 98
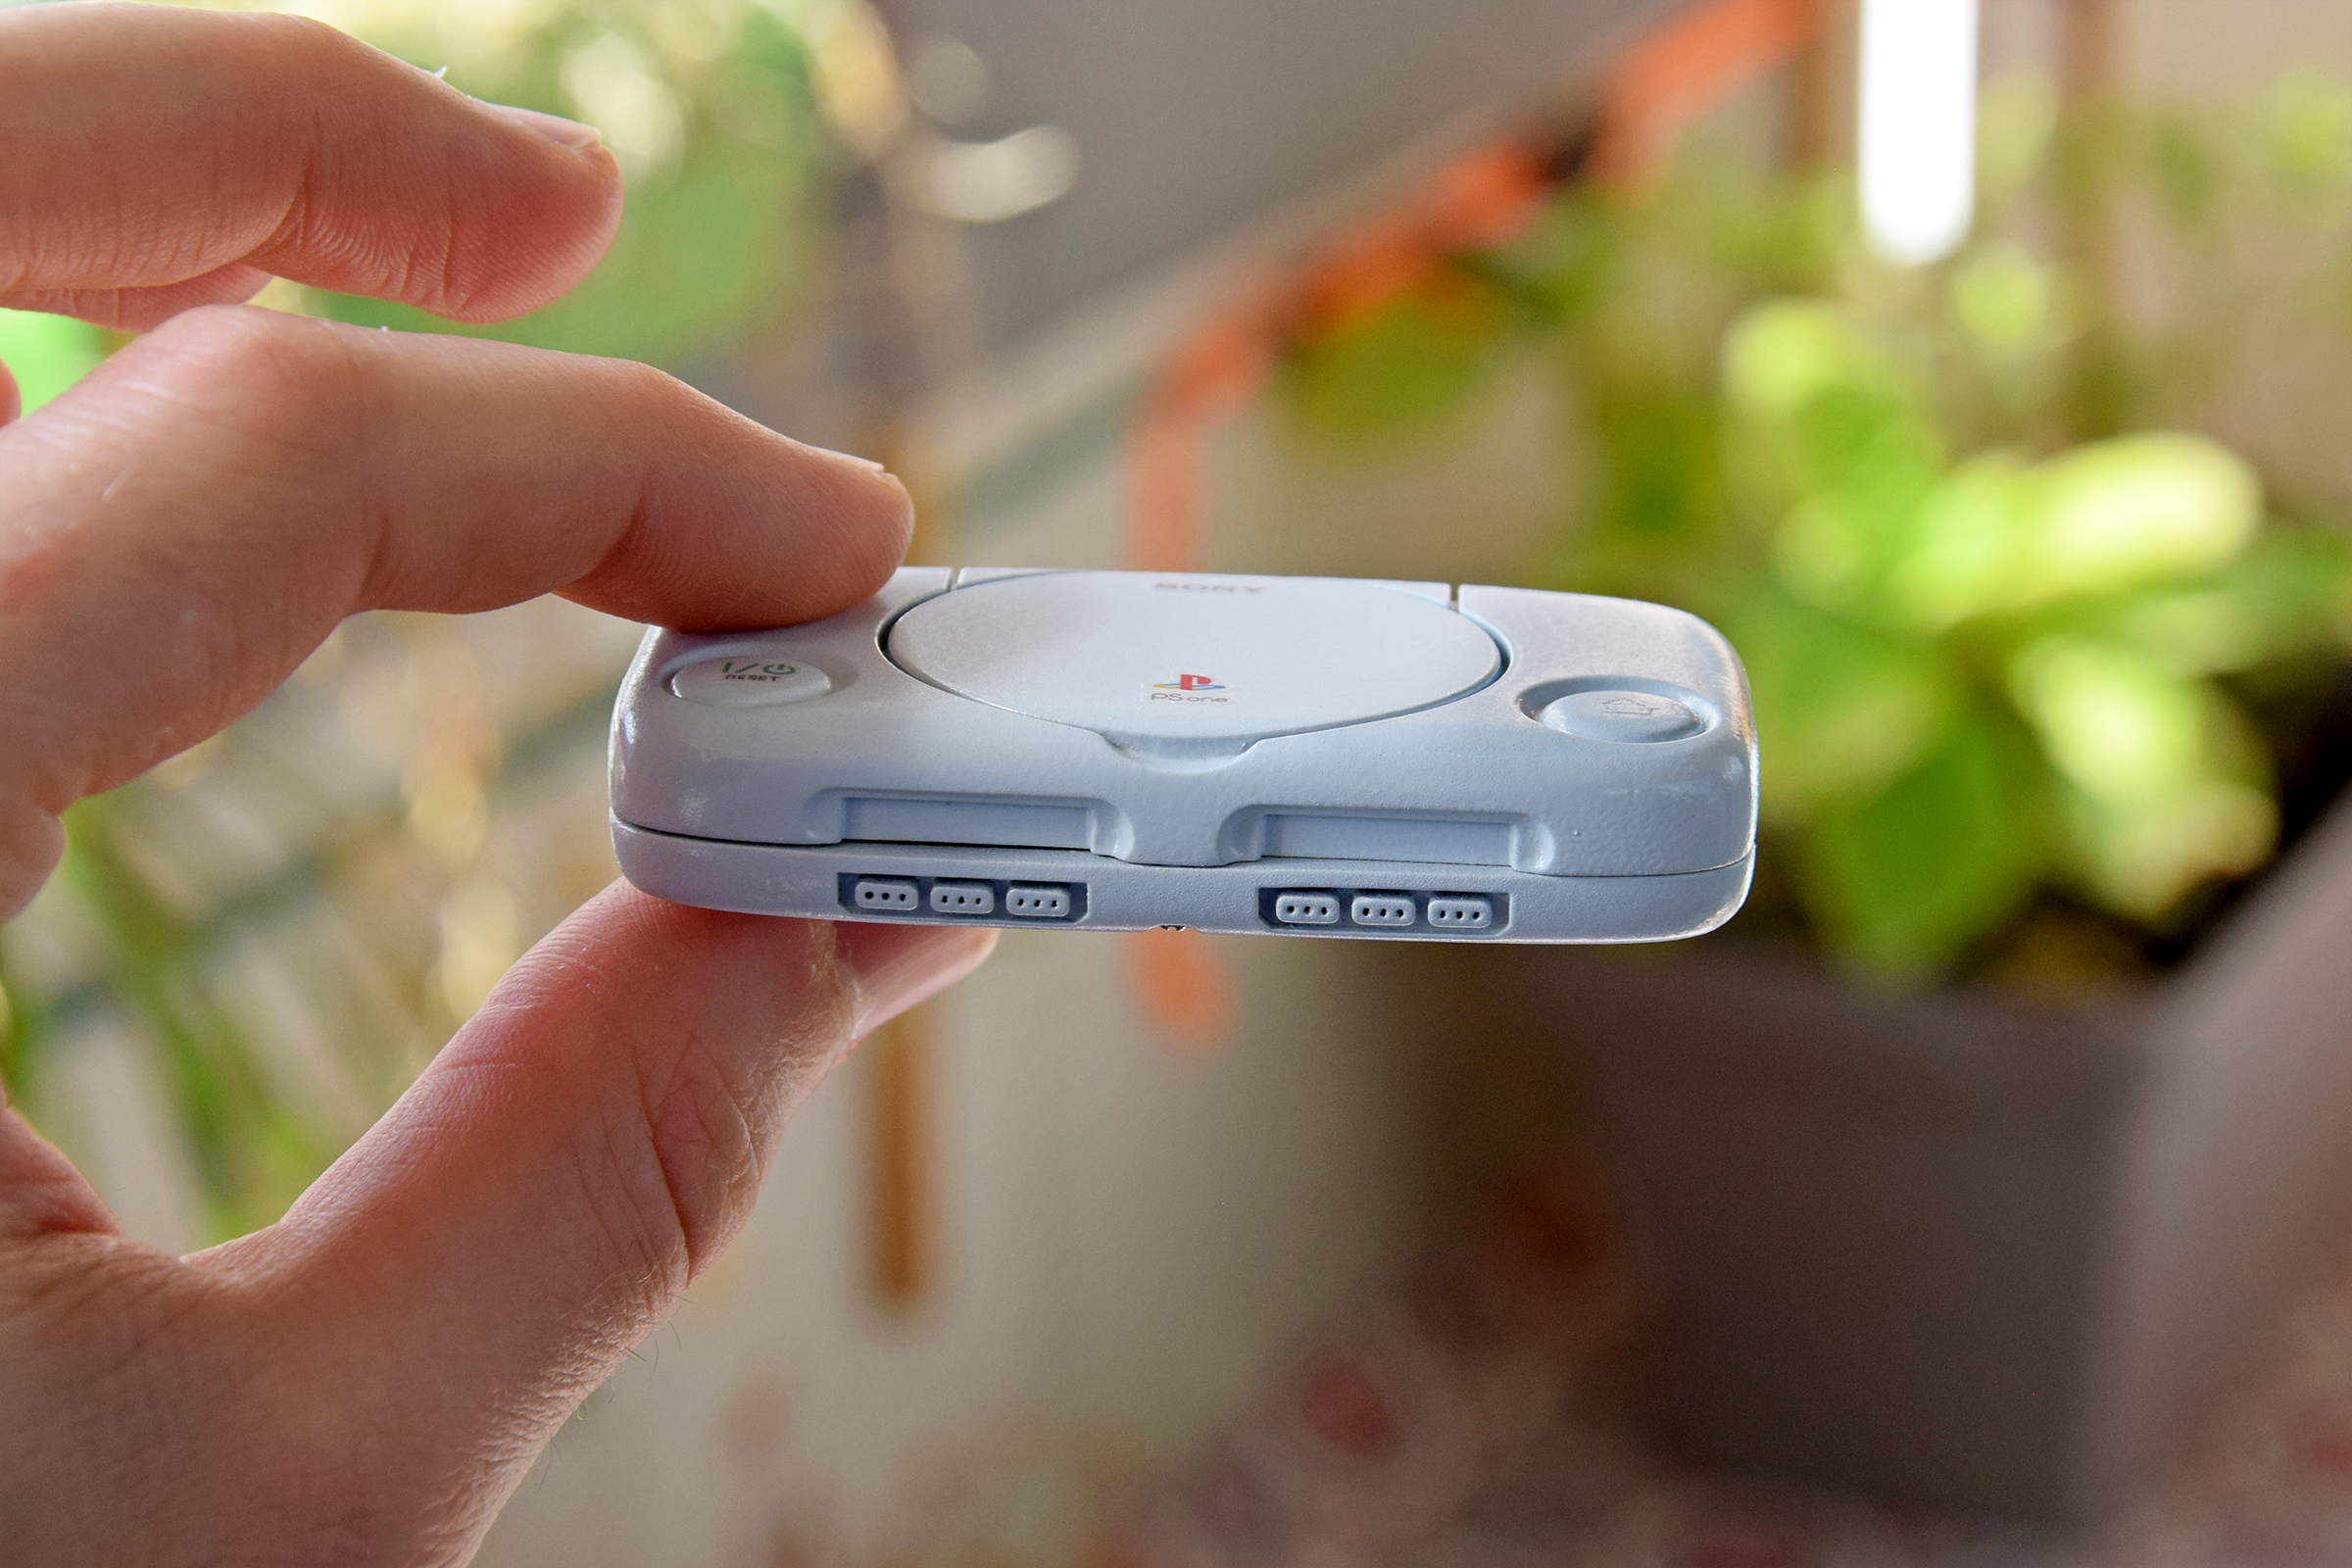
I hesitated to post this because it's only a simple pi zero case, but I think the use of custom decals gave it a specific look you guys might enjoy :
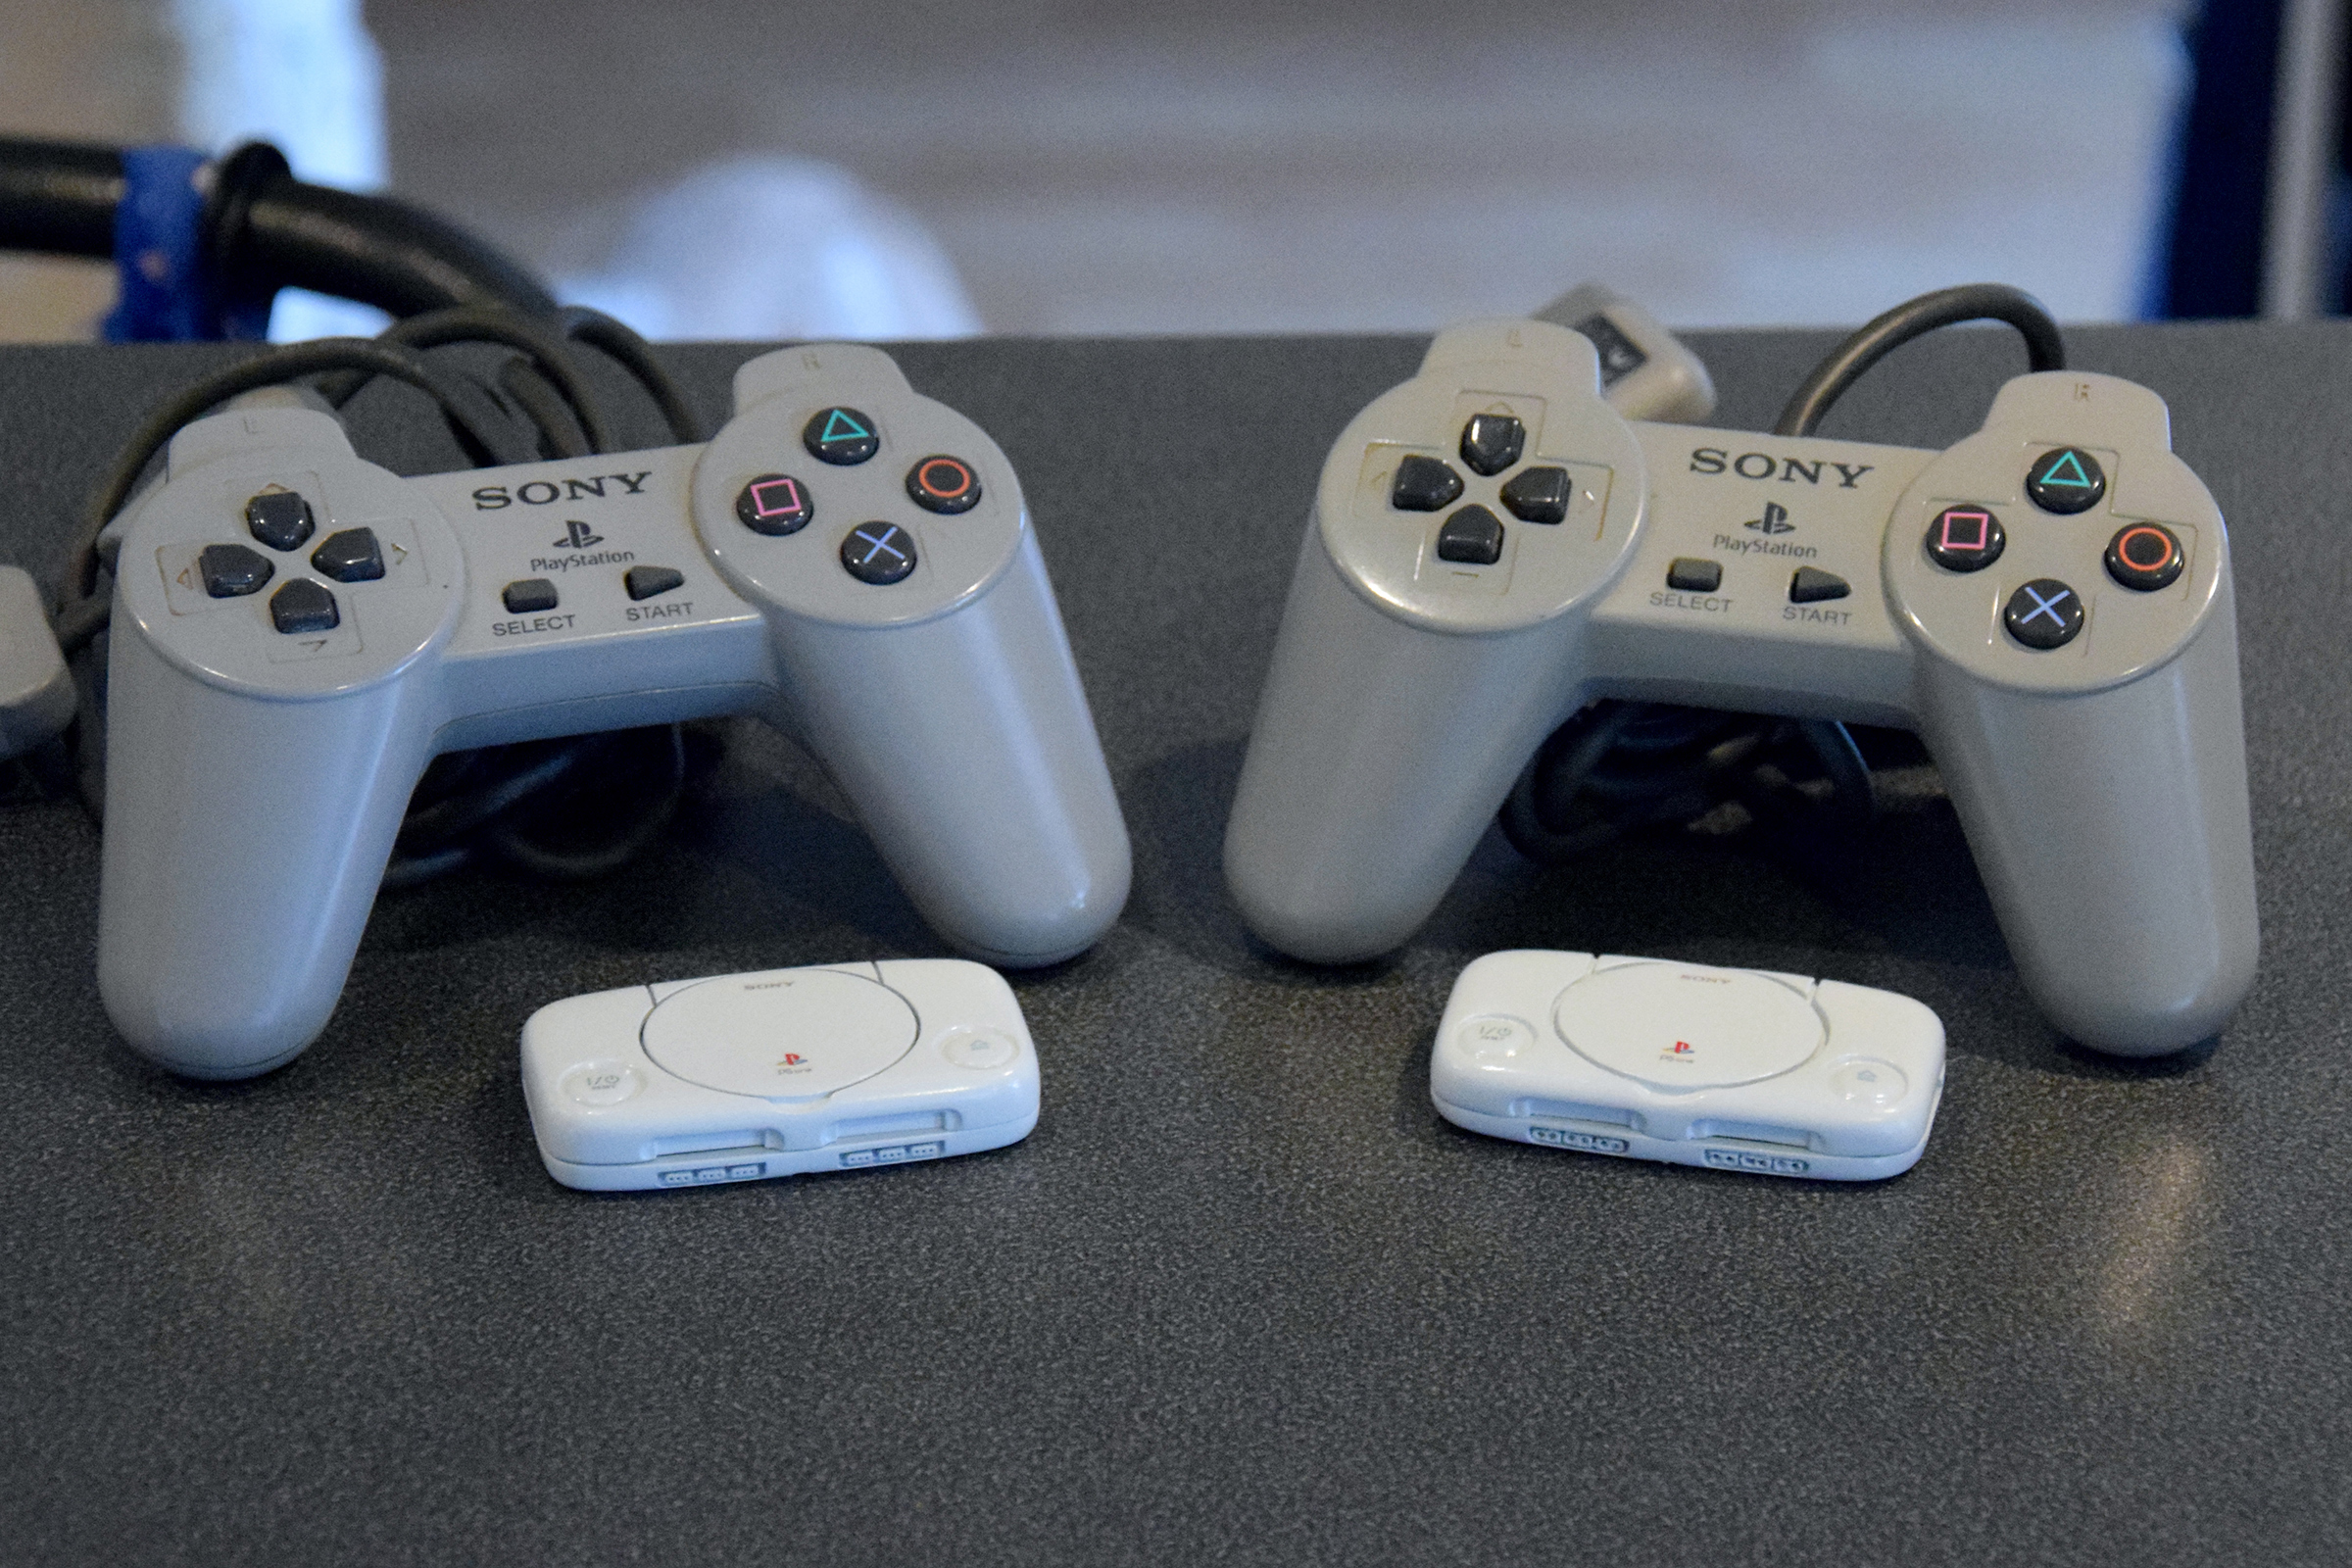

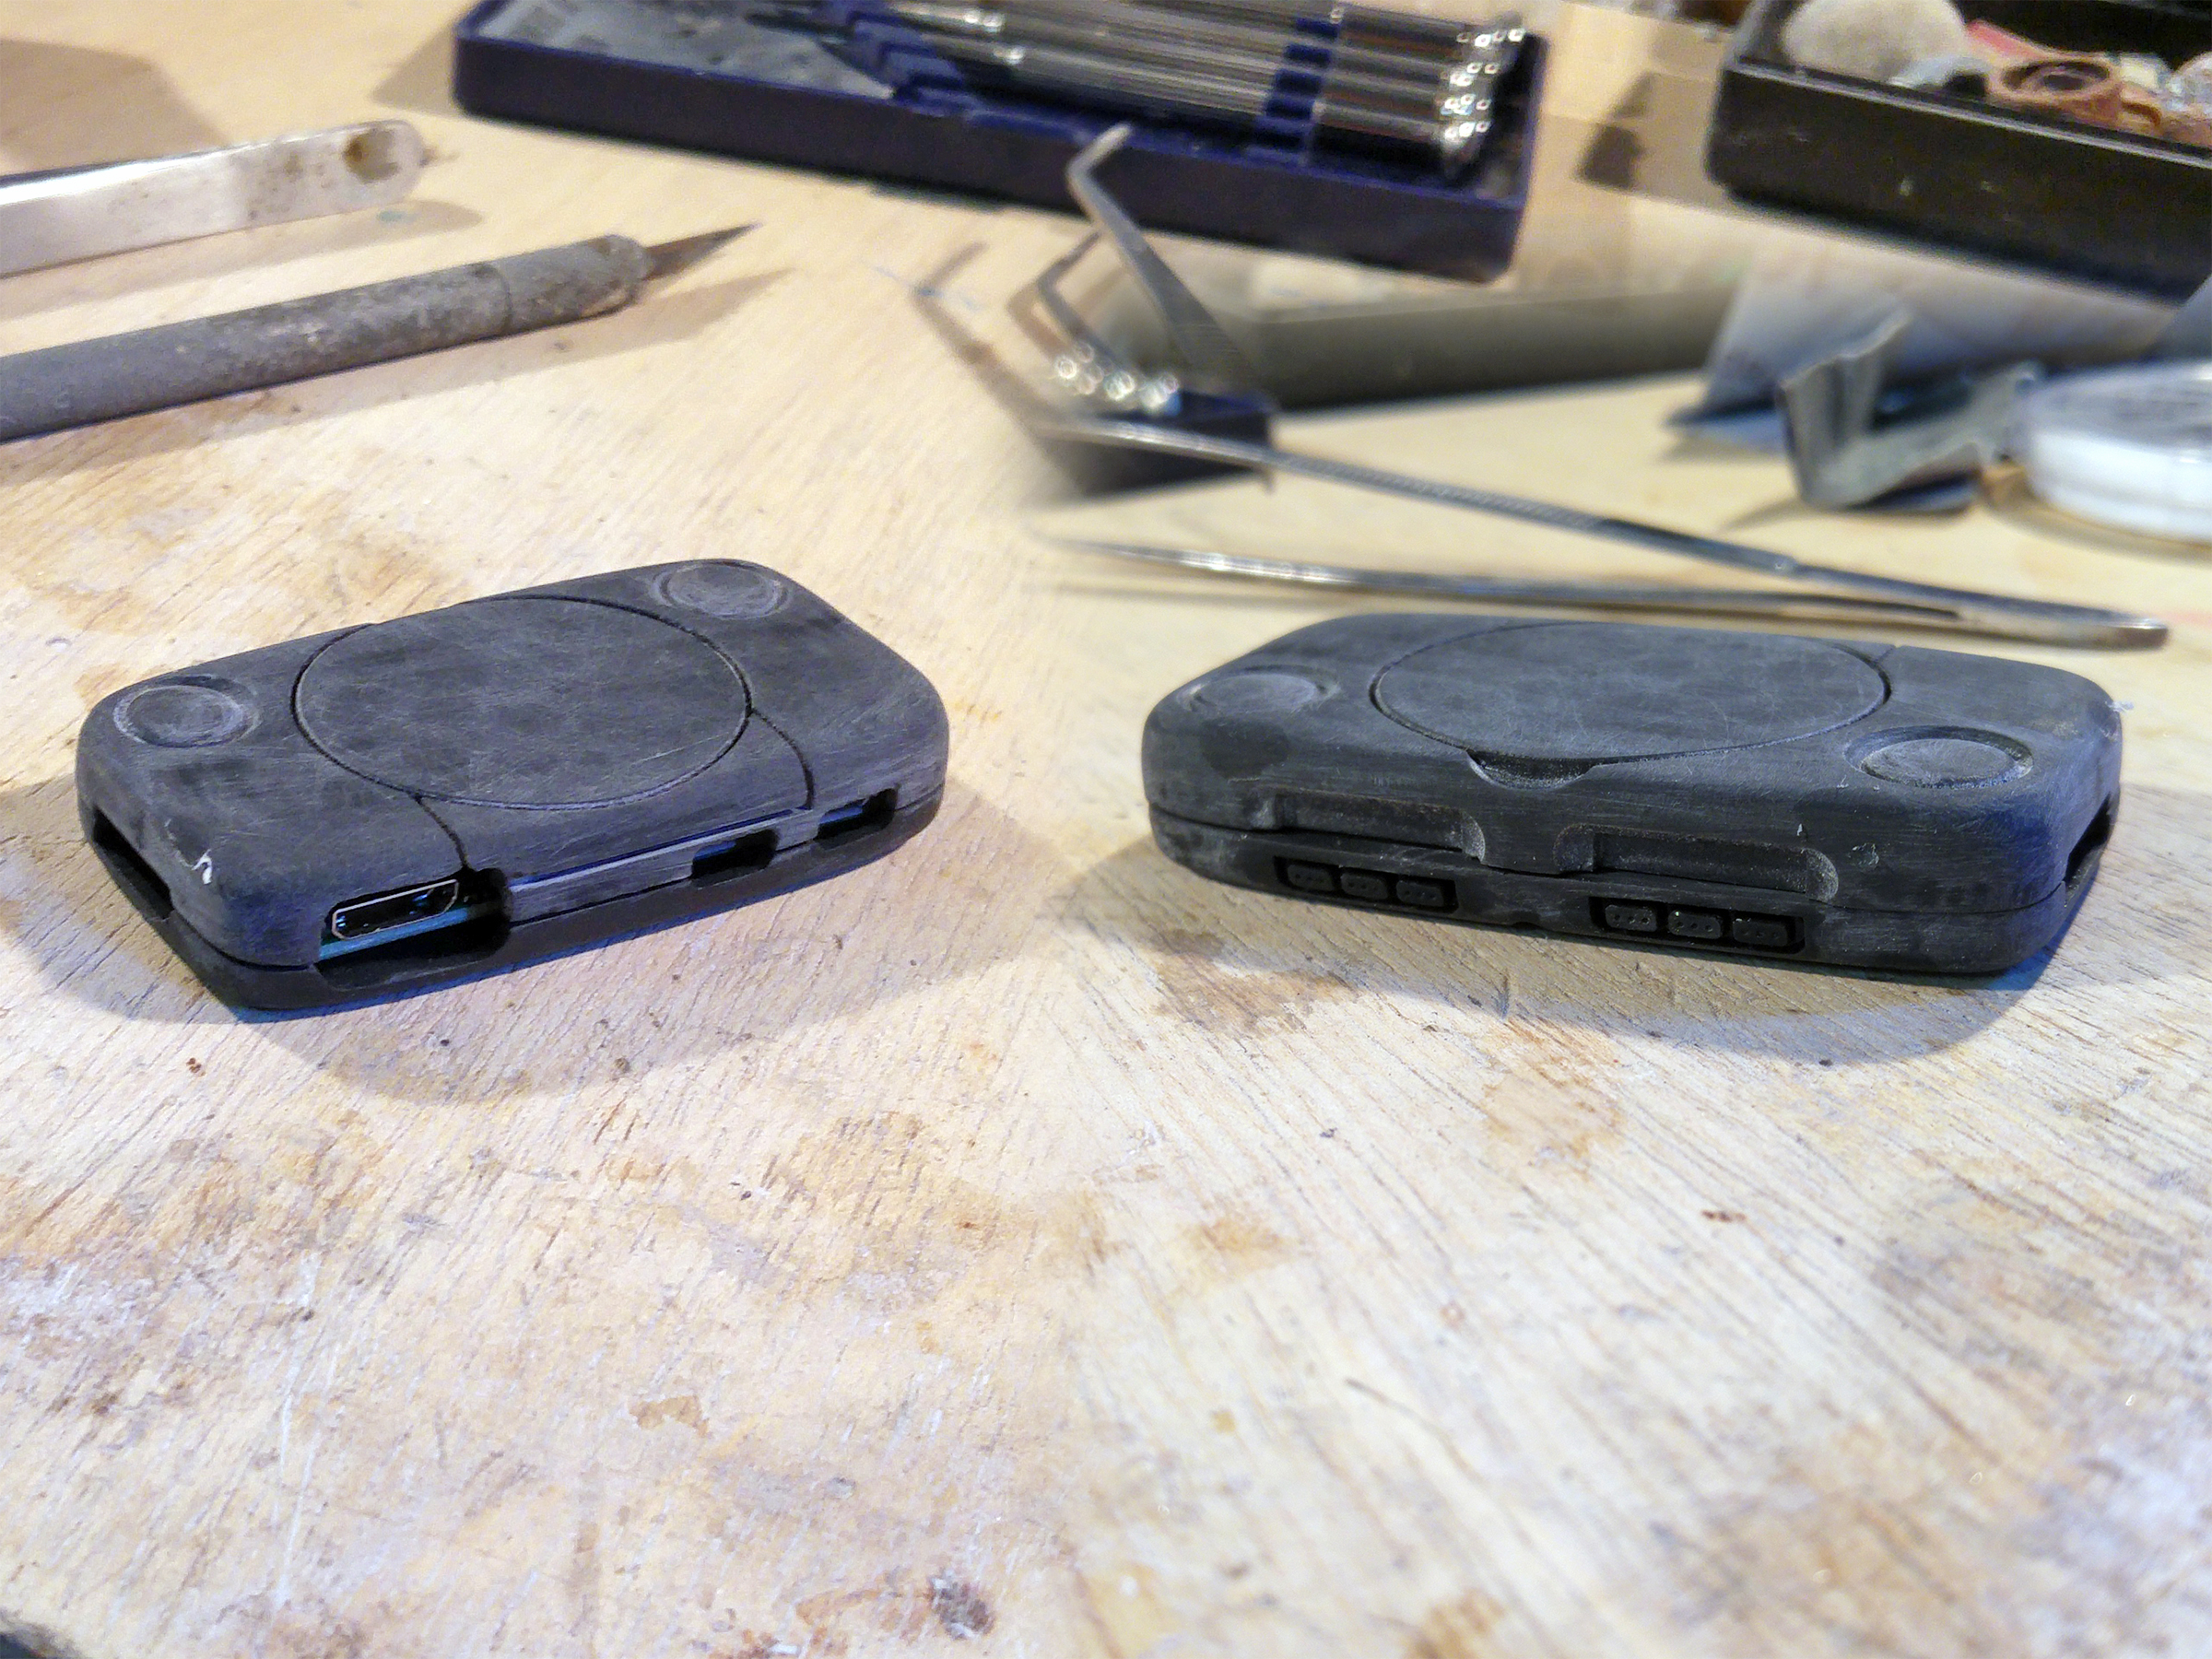
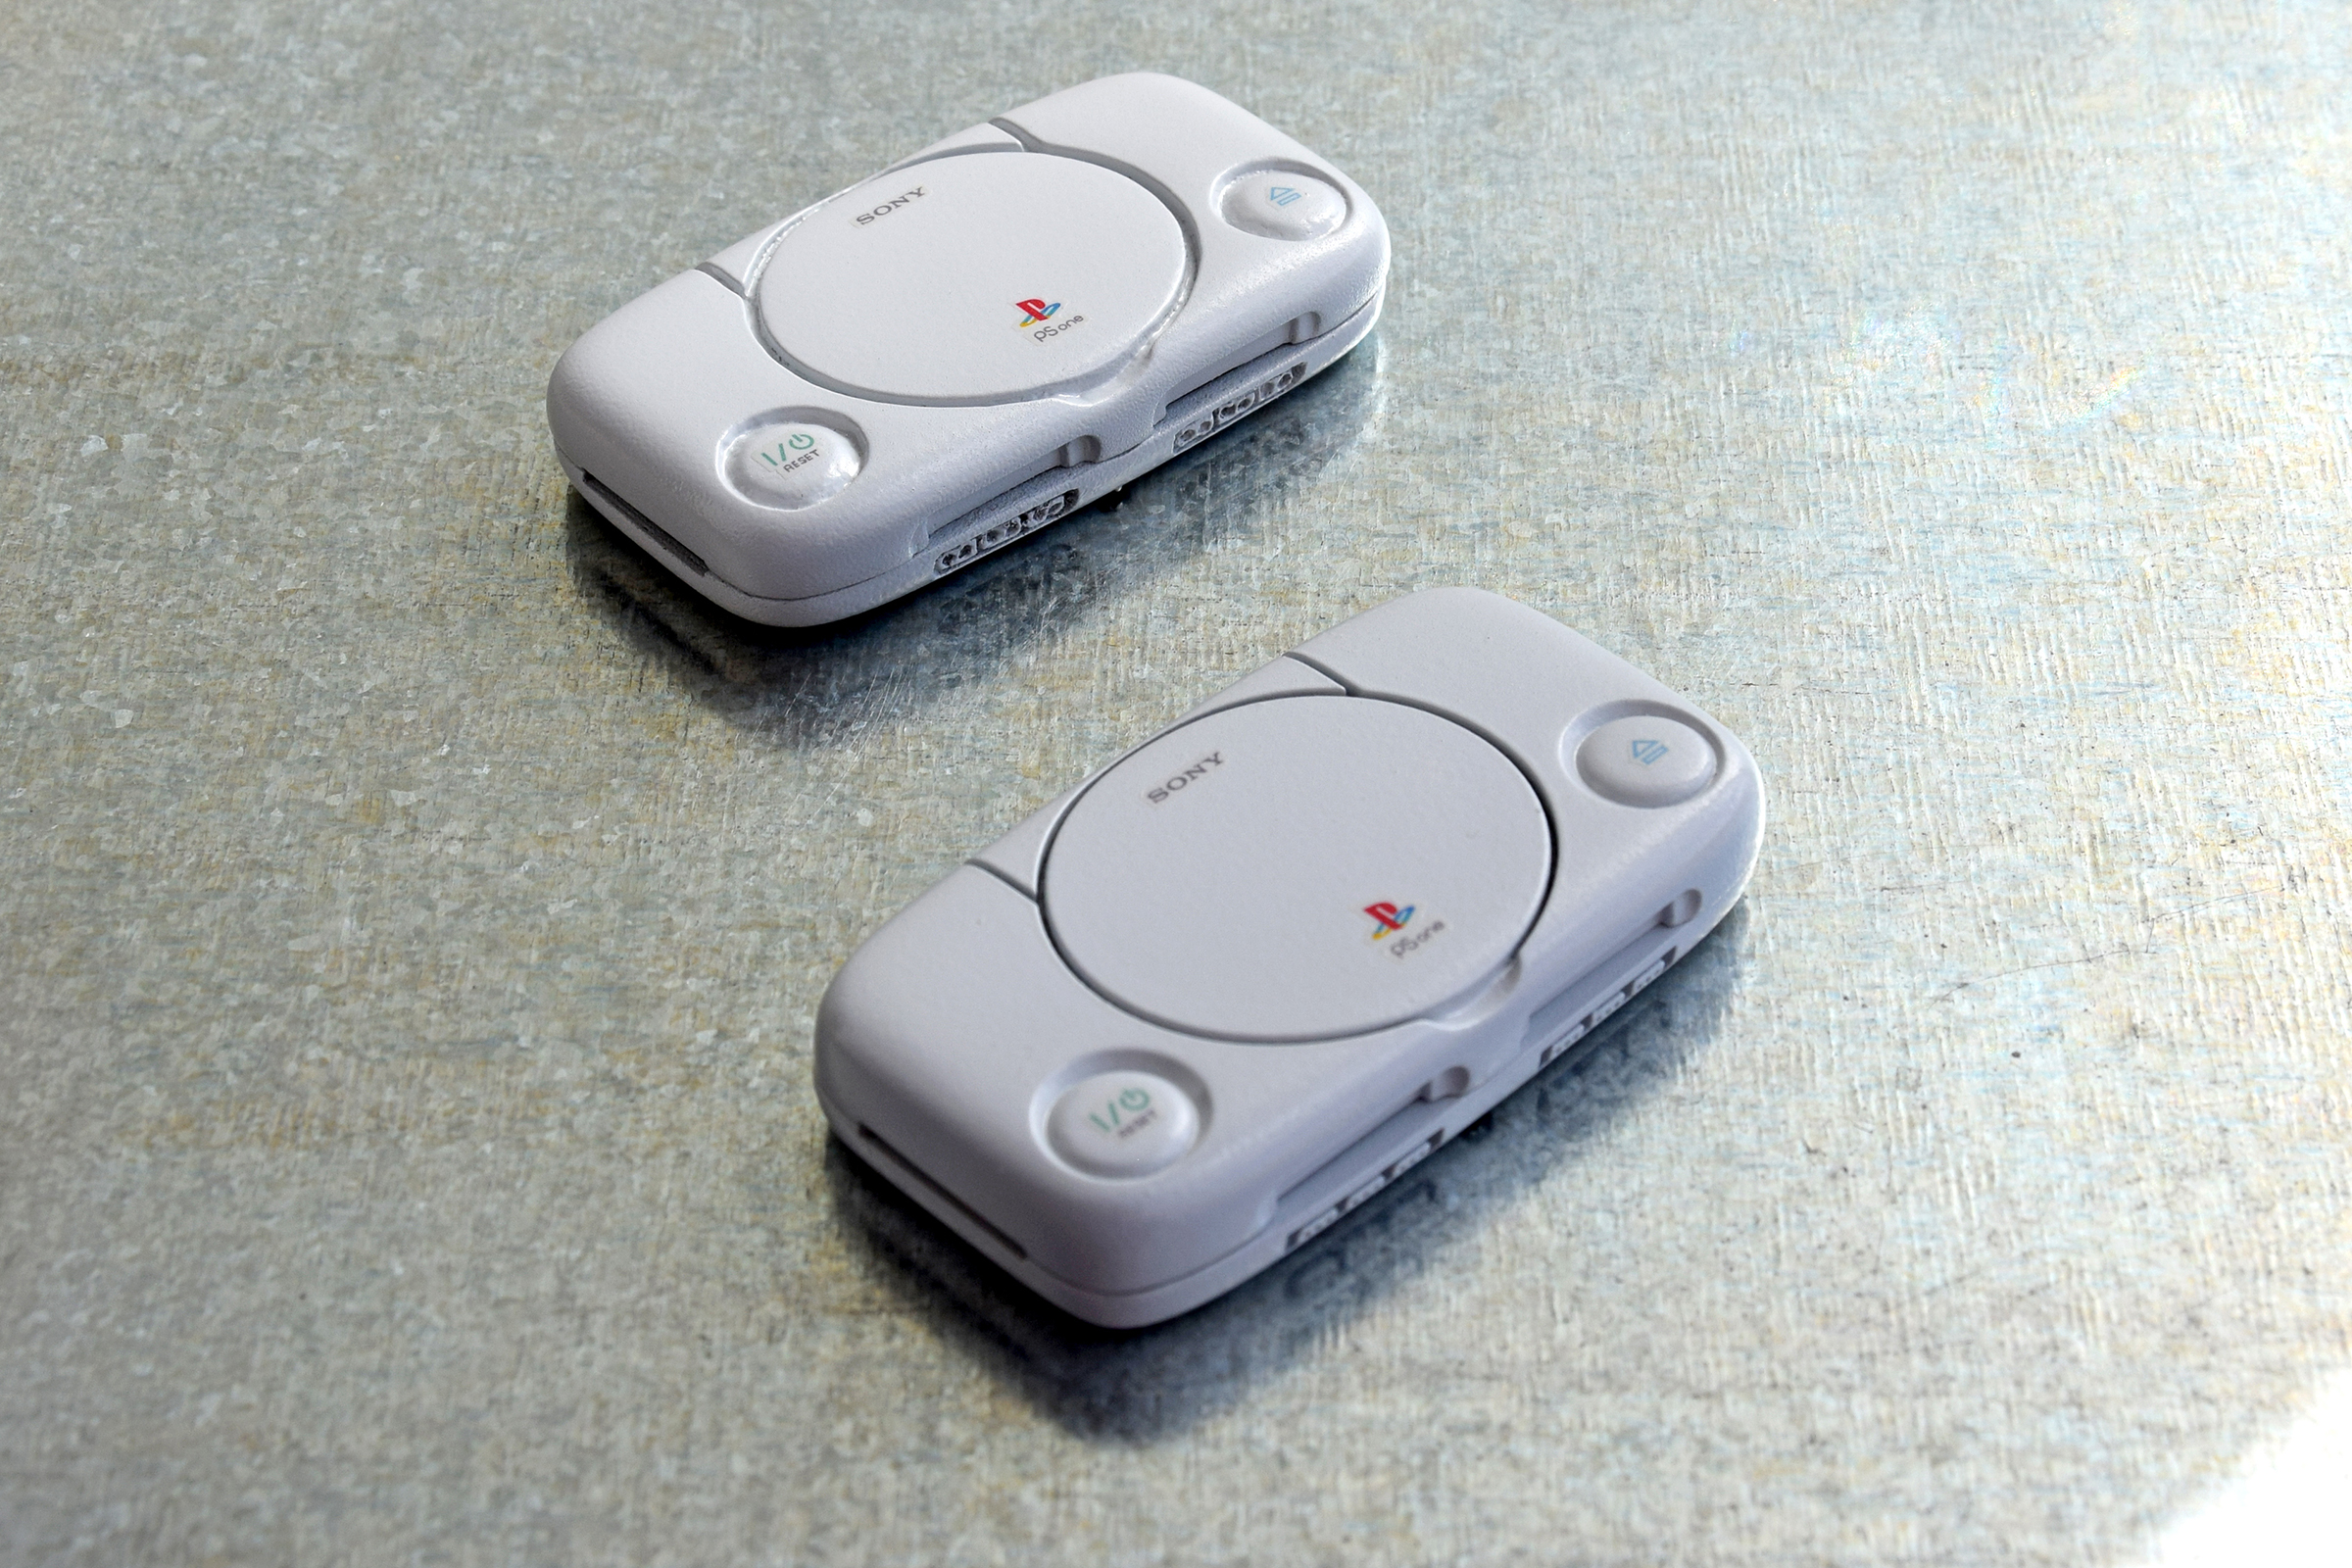
As you can see, there are two cases. I initialy only started working on a low quality FDM print made with my Da Vinci Jr 1.0 which is the uglyier of the two.
However, midway through the project, Downing proposed to SLA print this model on his form2 ! I also took the opportunity to refine the model.
The results are stunning, with the addition of custom decals, all of the details I intended are present in this case (left on the picture). I'm really thankful for Downing' opportunity on this ! I had never seen anything other than an FDM print !
I also made a lenghty video showing what went into making both those cases. If you're into this kind of thing")
Hope you guys still enjoyed this simple project. The FDM/SLA comparison gave it a reason to exist I think :p
As you can see, there are two cases. I initialy only started working on a low quality FDM print made with my Da Vinci Jr 1.0 which is the uglyier of the two.
However, midway through the project, Downing proposed to SLA print this model on his form2 ! I also took the opportunity to refine the model.
The results are stunning, with the addition of custom decals, all of the details I intended are present in this case (left on the picture). I'm really thankful for Downing' opportunity on this ! I had never seen anything other than an FDM print !
I also made a lenghty video showing what went into making both those cases. If you're into this kind of thing
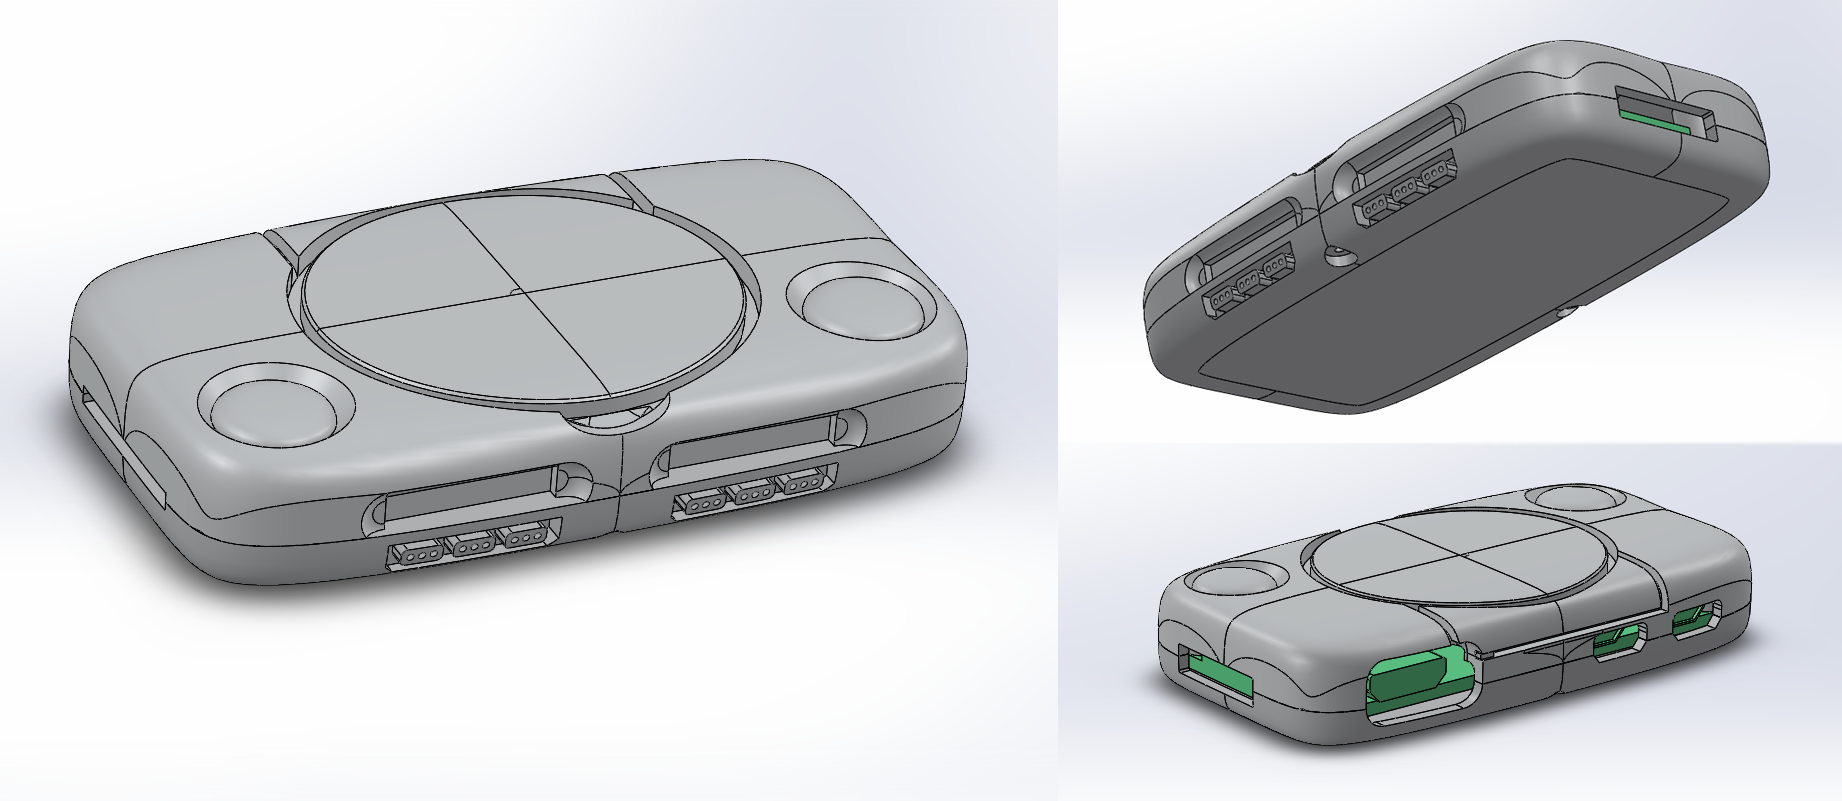
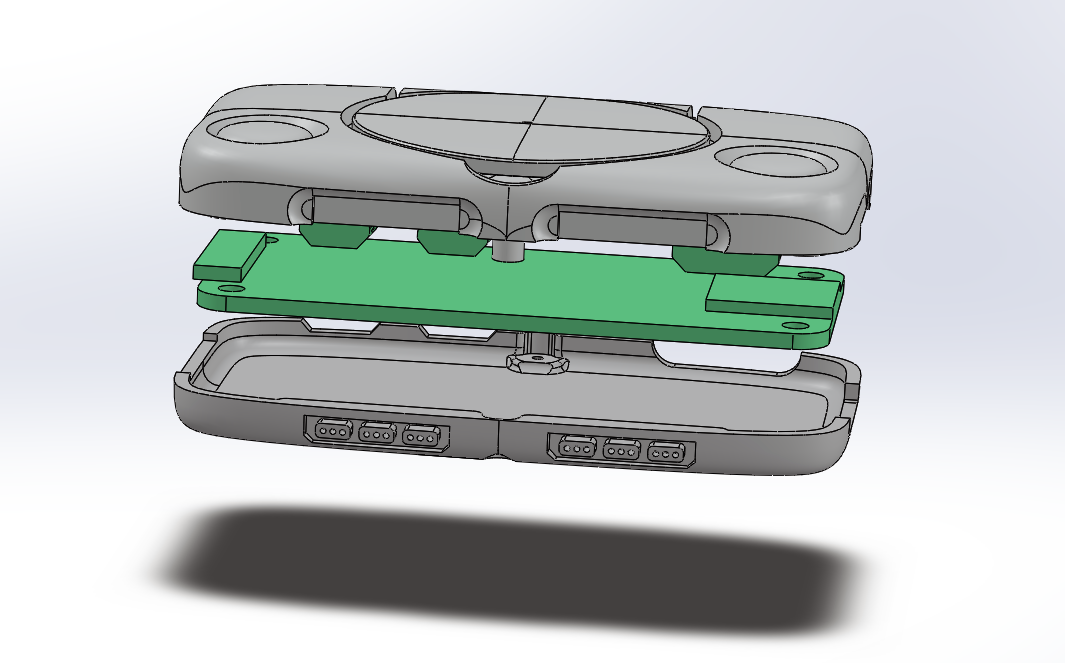
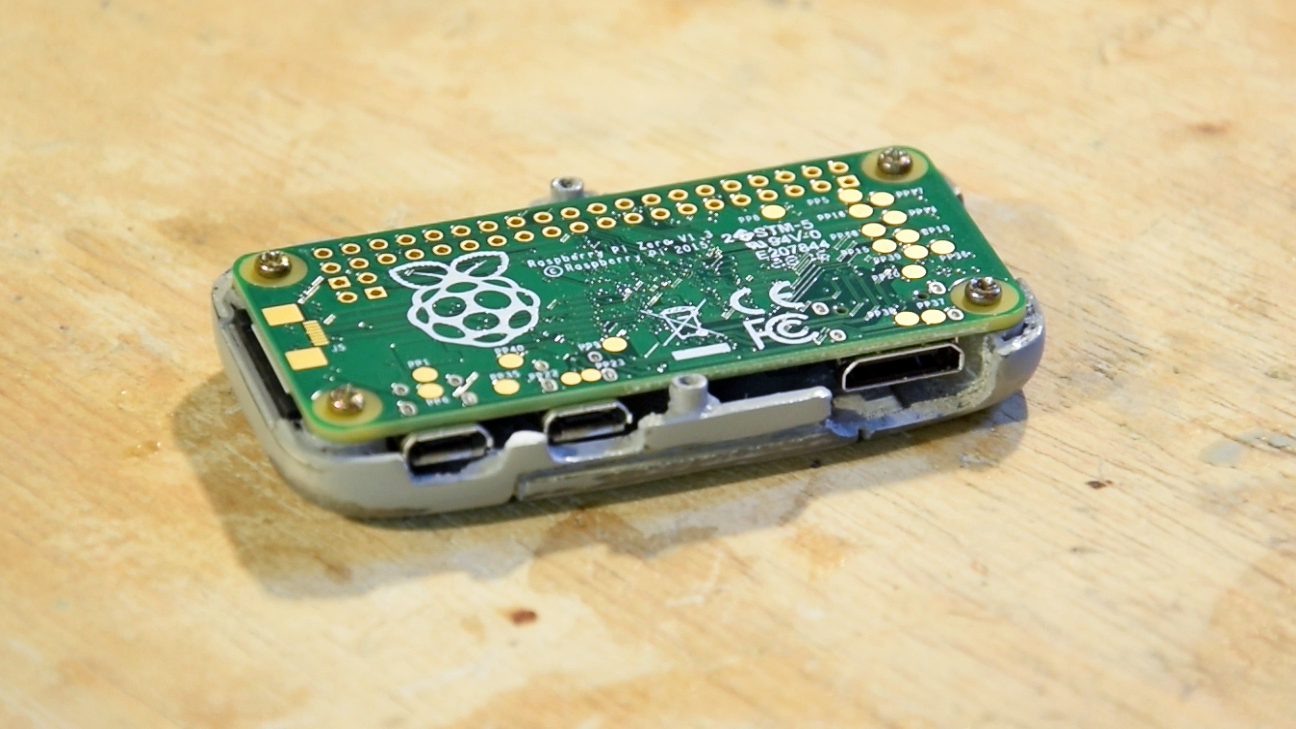
This was my first time making an actual case in Solidworks. It may not be impressive to many of you but it was quite an ordeal. Still, I'm glad I got all the screwposts and stuff right eventually.
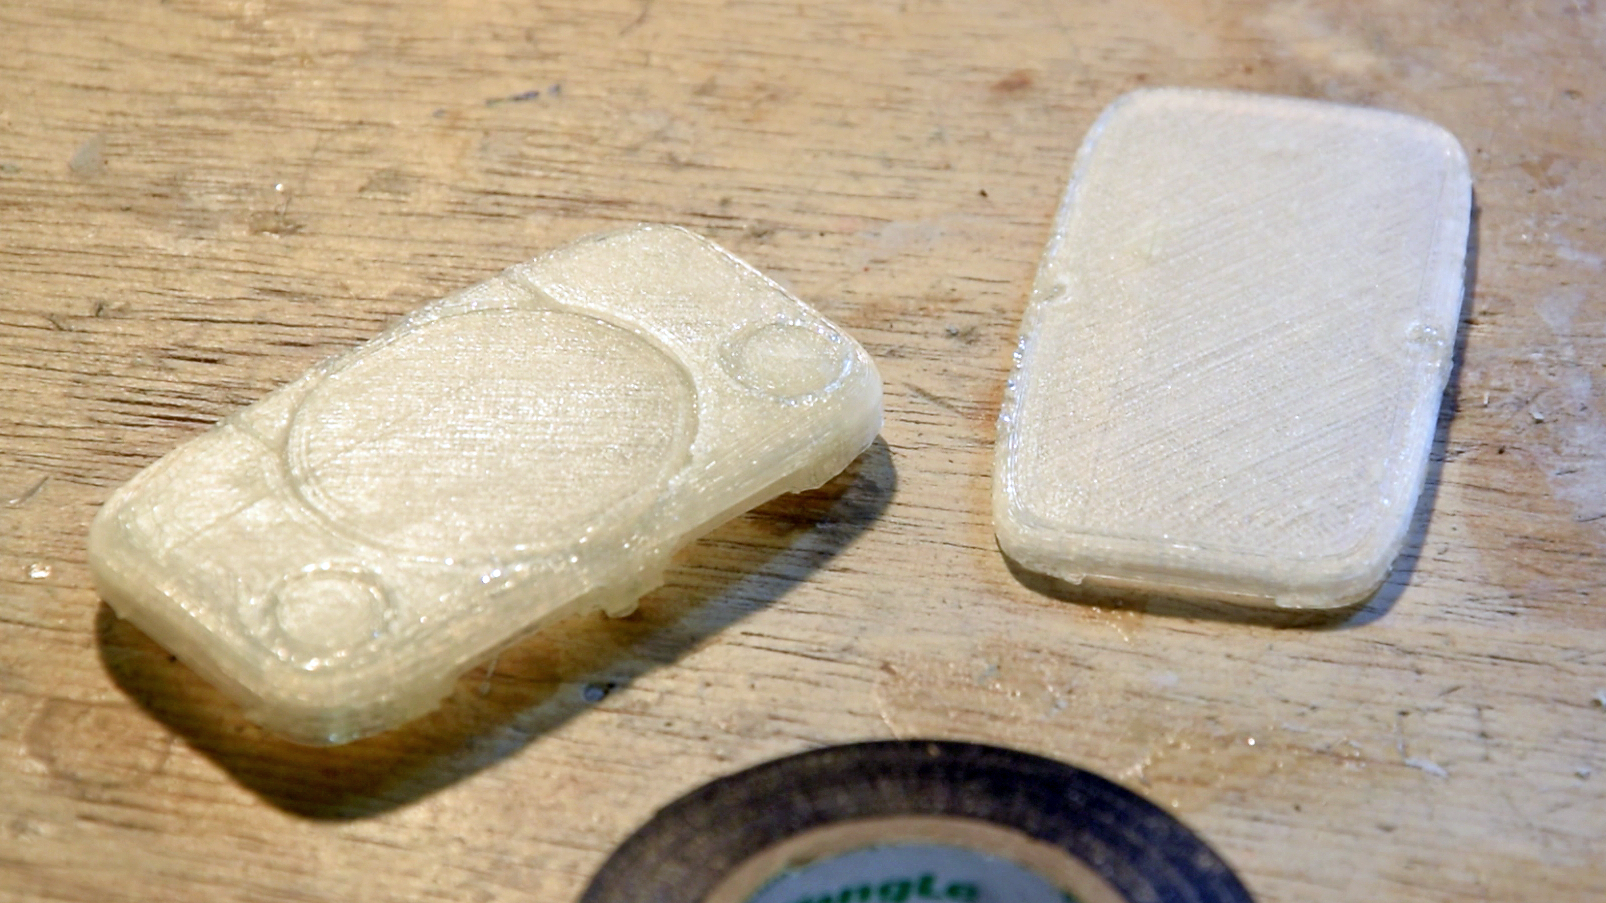
Then, as mentionned before, I FDM printed it with PLA, 0.2mm height on a Da vinci Jr 1.0 (without supports or anything, which wasn't the greatest idea).
I tryied refining the details with sanding and dremeling. I dedicated quite some time to it, then Bondo'ed and painted numerous times.
But then !

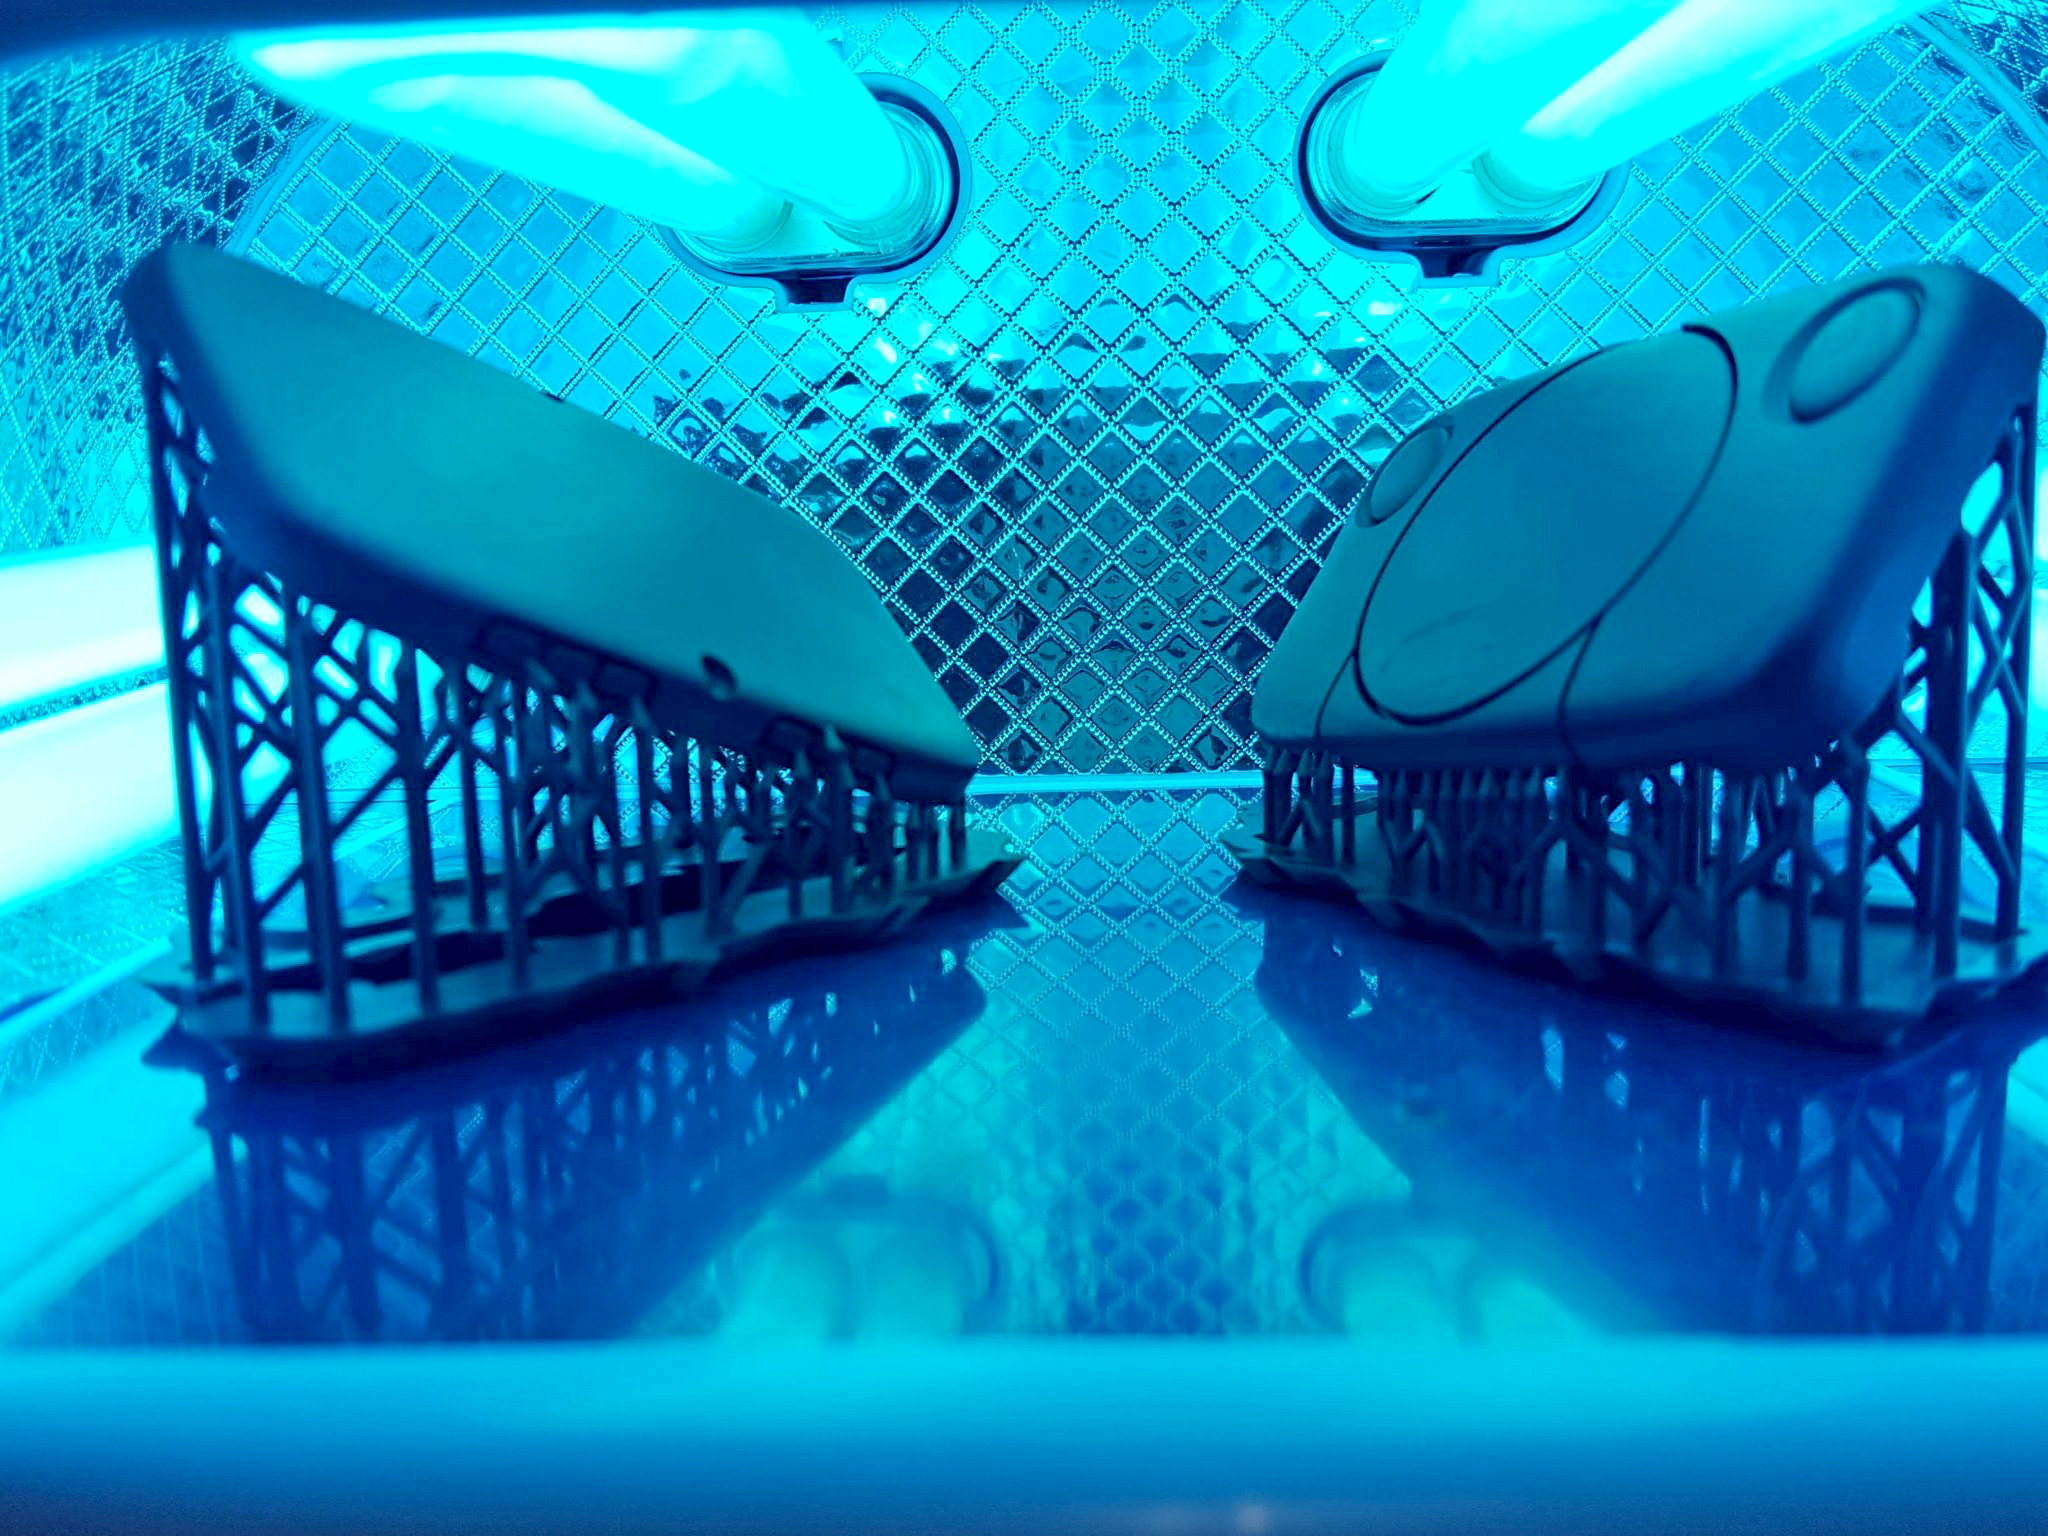
Downing graciously offered to give this model a swing on his Form2 ! Straight out of the printer, the results were stunning.
I was lucky enough that all the details were nicely reproduced, since I didn't know how to prepare a model for the angle of SLA printing !
PICTURES FROM DOWNING :
Obviously, this was a breeze to sand and prep for paint. A few coats sufficed and the details were conserved. (And the pi zero fit directly).
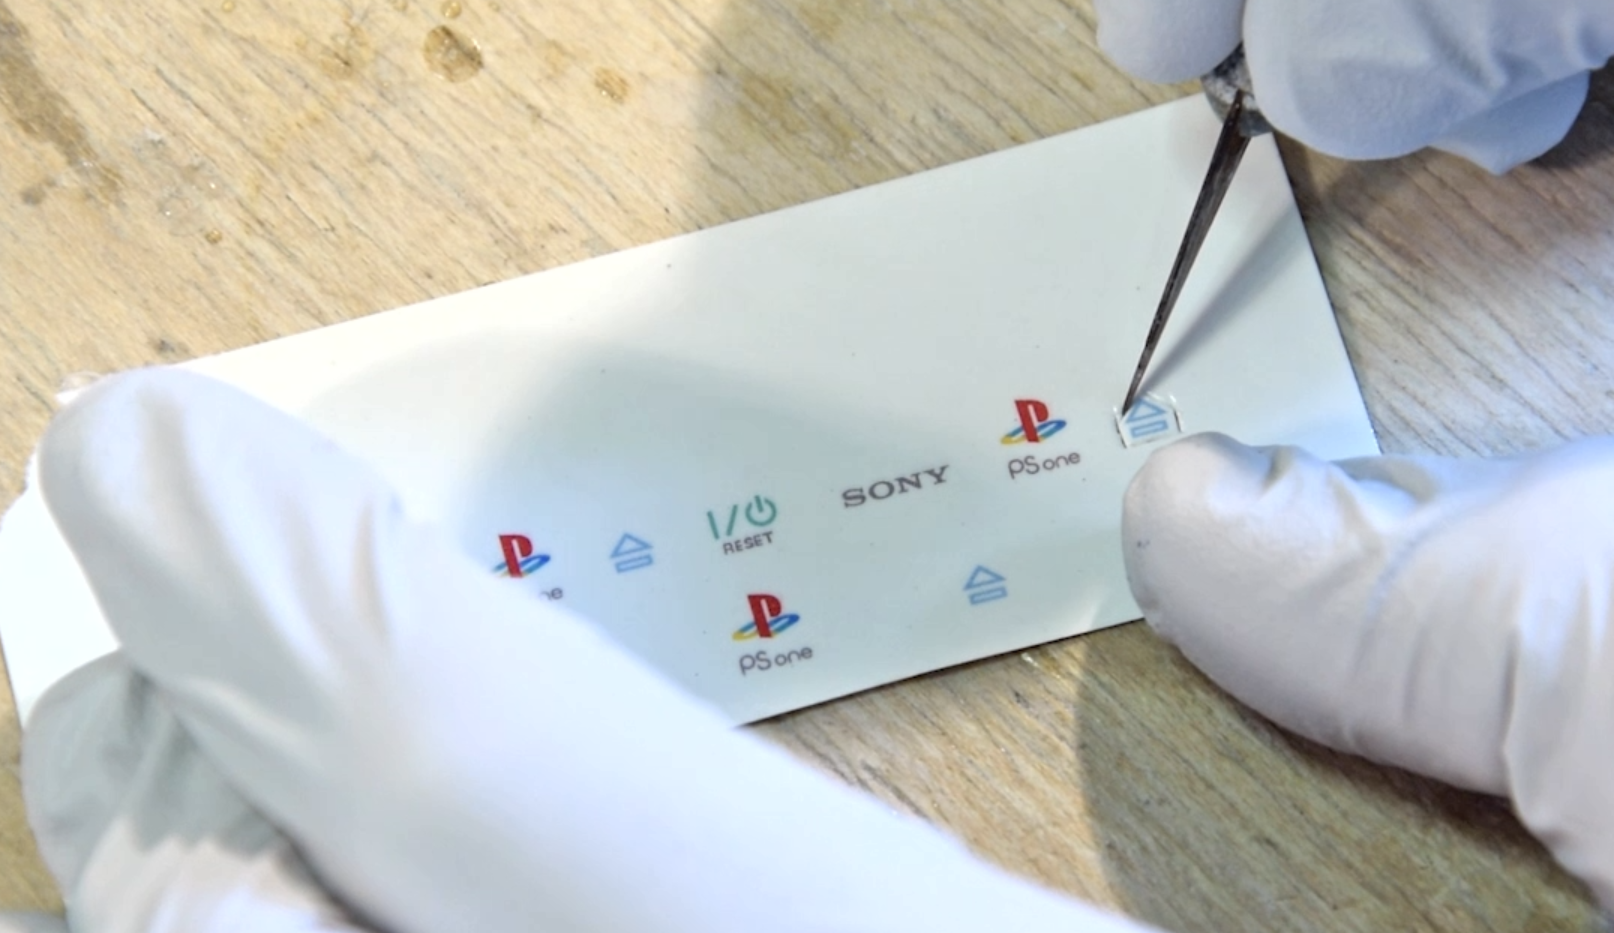
Thus, for the final step, I tryied to do something to make it look as detailed as possible in spite of the size of these cases. I initialy wanted to paint details with an exacto knife, but I wasn't too confident about it. So I thought of using decals like some do in classic modeling. I had never really done it before but I thought It'd be straight forward.
I bought waterslide decal paper for inkjet printers, Traced over the PSone logos in flash (vectorized), resized them correctly with 600pp precision and printed.
I was disapointed to find that it didn't work at all at first. Putting water on the decal to transfer them would also completely solubilize the ink. So I resorted to clearcoating the decals before using them. Which is apparently pretty common. It worked like a charm. Those ended up being really easy to apply.
I don't know if they are going to last long but I do think they bring the case to life.
(I also put a recuperated heatsink on the pi but it's not that interesting and I don't know if it actually did anything given the poor airflow situation of the case)
Then, as mentionned before, I FDM printed it with PLA, 0.2mm height on a Da vinci Jr 1.0 (without supports or anything, which wasn't the greatest idea).
I tryied refining the details with sanding and dremeling. I dedicated quite some time to it, then Bondo'ed and painted numerous times.
But then !
Downing graciously offered to give this model a swing on his Form2 ! Straight out of the printer, the results were stunning.
I was lucky enough that all the details were nicely reproduced, since I didn't know how to prepare a model for the angle of SLA printing !
PICTURES FROM DOWNING :
Obviously, this was a breeze to sand and prep for paint. A few coats sufficed and the details were conserved. (And the pi zero fit directly).
Thus, for the final step, I tryied to do something to make it look as detailed as possible in spite of the size of these cases. I initialy wanted to paint details with an exacto knife, but I wasn't too confident about it. So I thought of using decals like some do in classic modeling. I had never really done it before but I thought It'd be straight forward.
I bought waterslide decal paper for inkjet printers, Traced over the PSone logos in flash (vectorized), resized them correctly with 600pp precision and printed.
I was disapointed to find that it didn't work at all at first. Putting water on the decal to transfer them would also completely solubilize the ink. So I resorted to clearcoating the decals before using them. Which is apparently pretty common. It worked like a charm. Those ended up being really easy to apply.
I don't know if they are going to last long but I do think they bring the case to life.
(I also put a recuperated heatsink on the pi but it's not that interesting and I don't know if it actually did anything given the poor airflow situation of the case)
Hope you guys still enjoyed this simple project. The FDM/SLA comparison gave it a reason to exist I think :p
 I saw this video a couple days ago and liked it. Nice work!