
- Joined
- Aug 14, 2016
- Messages
- 86
- Likes
- 65
- Portables
- 1
Heya peeps.
Been on a bit of a hiatus from modding for the last year or so, but I'm back now. A few weeks back I thought about all of my modding supplies and selling it off to help pay for a Switch. After I got it all laid out I started getting that itch again so here I am.
Been messing around for the last few weeks, mainly on trying to get my feet wet with the PortablizeMii pack with not much luck and decided to get some practice on an N64 portable before going back and messing with the Wii.
This will be the worklog with a separate post for the finished product.
It'll be a prettysimple build with nothing too fancy added:
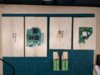
I'll update with progress pics as best as I can as I go.
Been on a bit of a hiatus from modding for the last year or so, but I'm back now. A few weeks back I thought about all of my modding supplies and selling it off to help pay for a Switch. After I got it all laid out I started getting that itch again so here I am.
Been messing around for the last few weeks, mainly on trying to get my feet wet with the PortablizeMii pack with not much luck and decided to get some practice on an N64 portable before going back and messing with the Wii.
This will be the worklog with a separate post for the finished product.
It'll be a pretty
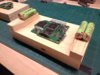
- Rev 4 (NUS-CPU-04) board
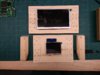
(Haven't decided whether I want to ram swap or not yet, leaning toward not right now but we'll see when I start casework how much room I'll have/need)Not doing the ram swap. The case design will allow for the expansion pack to stick through the back of my case. 4.3” TFT Amazon monitor7" TFT amazon monitor (The case design will allow me to use one of the 7" screens I had stocked away.- 7.4v
3500mAh7000mAh battery pack - Switching Headphone jack w/digital audio amp
- 3DS slider joystick
- 3DS XL buttons as c-buttons
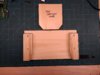
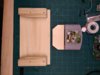
- Case will be vacuum-formed
Casework to be determined... (I have some OKW sample cases I got last year with my Eye on one in particular, theSmaller Interface-Terminal enclosurebut I'm unsure If I'll have the clearance I'll need for it)
I'll update with progress pics as best as I can as I go.
Last edited:
") Really I just need more motivation.
Really I just need more motivation. Lotta room for error.