
Corrine
.
- Joined
- Aug 3, 2019
- Messages
- 6
- Likes
- 20
I've been a little active on Discord but have been waiting to start my worklog until after I was done modeling my case. This also isn't something I'm doing solo, my stepdad is helping me a lot with the electronics portion and 3D printing as I have zero knowledge of any of that but I designed my own case and secured all the parts on my own. I'm hoping to have this done by Halloween because I definitely know I'm going to drop everything when Luigi's Mansion 3 comes out.
Features:
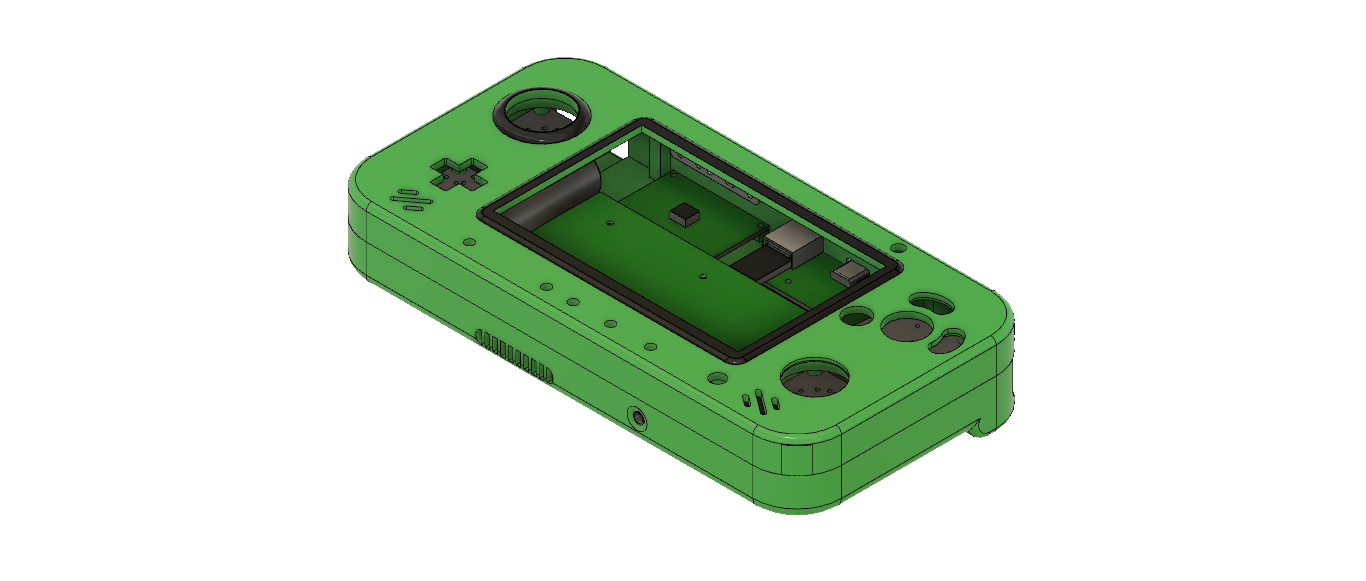

Features:
- Luigi's Mansion themed case, of course. This will probably be done using a combination of vinyl and/or spray paint (the design isn't fully pictured below). I may get into changing the theme for the PortablizeMii menu to match, not sure yet.
- Original Gamecube buttons, including LR triggers. These are a smoke gray to compliment the black and green theme. I'm a little torn on installing LEDs inside the buttons or not, I feel like it'd be cool but distracting so it'll probably be an idea I'll scrap.
- Original Switch power and volume buttons
- G-Man's PMS
- G-Man's USB-C custom PCB for charging and transferring data to the USB drive (if there's a better, more technical way to phrase that, I'm open to suggestions). G-Man hooked me up with this since it’s the PCB that was in the BB-Wii at MGC but he said he's going to start selling it in the BitBuilt store soon.
- GC+
- JacksonS's audio amp
- Aurelio's VGA patches for the onboard screen
Last edited: