Worklog G-Wii: My First Electronics Project

ToddyHD

Guest
Hi all.

Currently having issues with video and output. My screen is currently being powered either by my external power supply (12V in) or batteries which I have in a series configuration (7.4v). I thought that this was interference but I grounded the shielding at both ends of the RGB lines and I still get these weird vertical lines when I boot up the console. After hard resetting the console 2, 3 times I don't experience this issue much at all and the video holds sync. When I reset the console very quickly (I.e turn it on and off in the space of a few seconds, PM loads without fail everytime)

I know the Wii isn't the issue here since I can still faintly see portablizemii behind all of the wavy lines, plus my Bluetooth module works fine as I can sync all of my wiimotes up. I moved my regulators as far away as I could from the video lines as i thought the inductors of the PTHs were generating a lot of airborne interference but, that still hasn't fixed the issue either.

Should I try and bypass the onboard buck converter and supply the board with either 5v or 3.3v instead of straight from the power source? I haven't tried twisting the sync lines with GND yet. Keep in mind this issue only happens a few times when I boot the console. Other times, portablizemii works fine with zero interference whatsoever. Could this be something to do with a shitty fixed frequency buck converter rather than interference?

Here are pics of what I explained above:

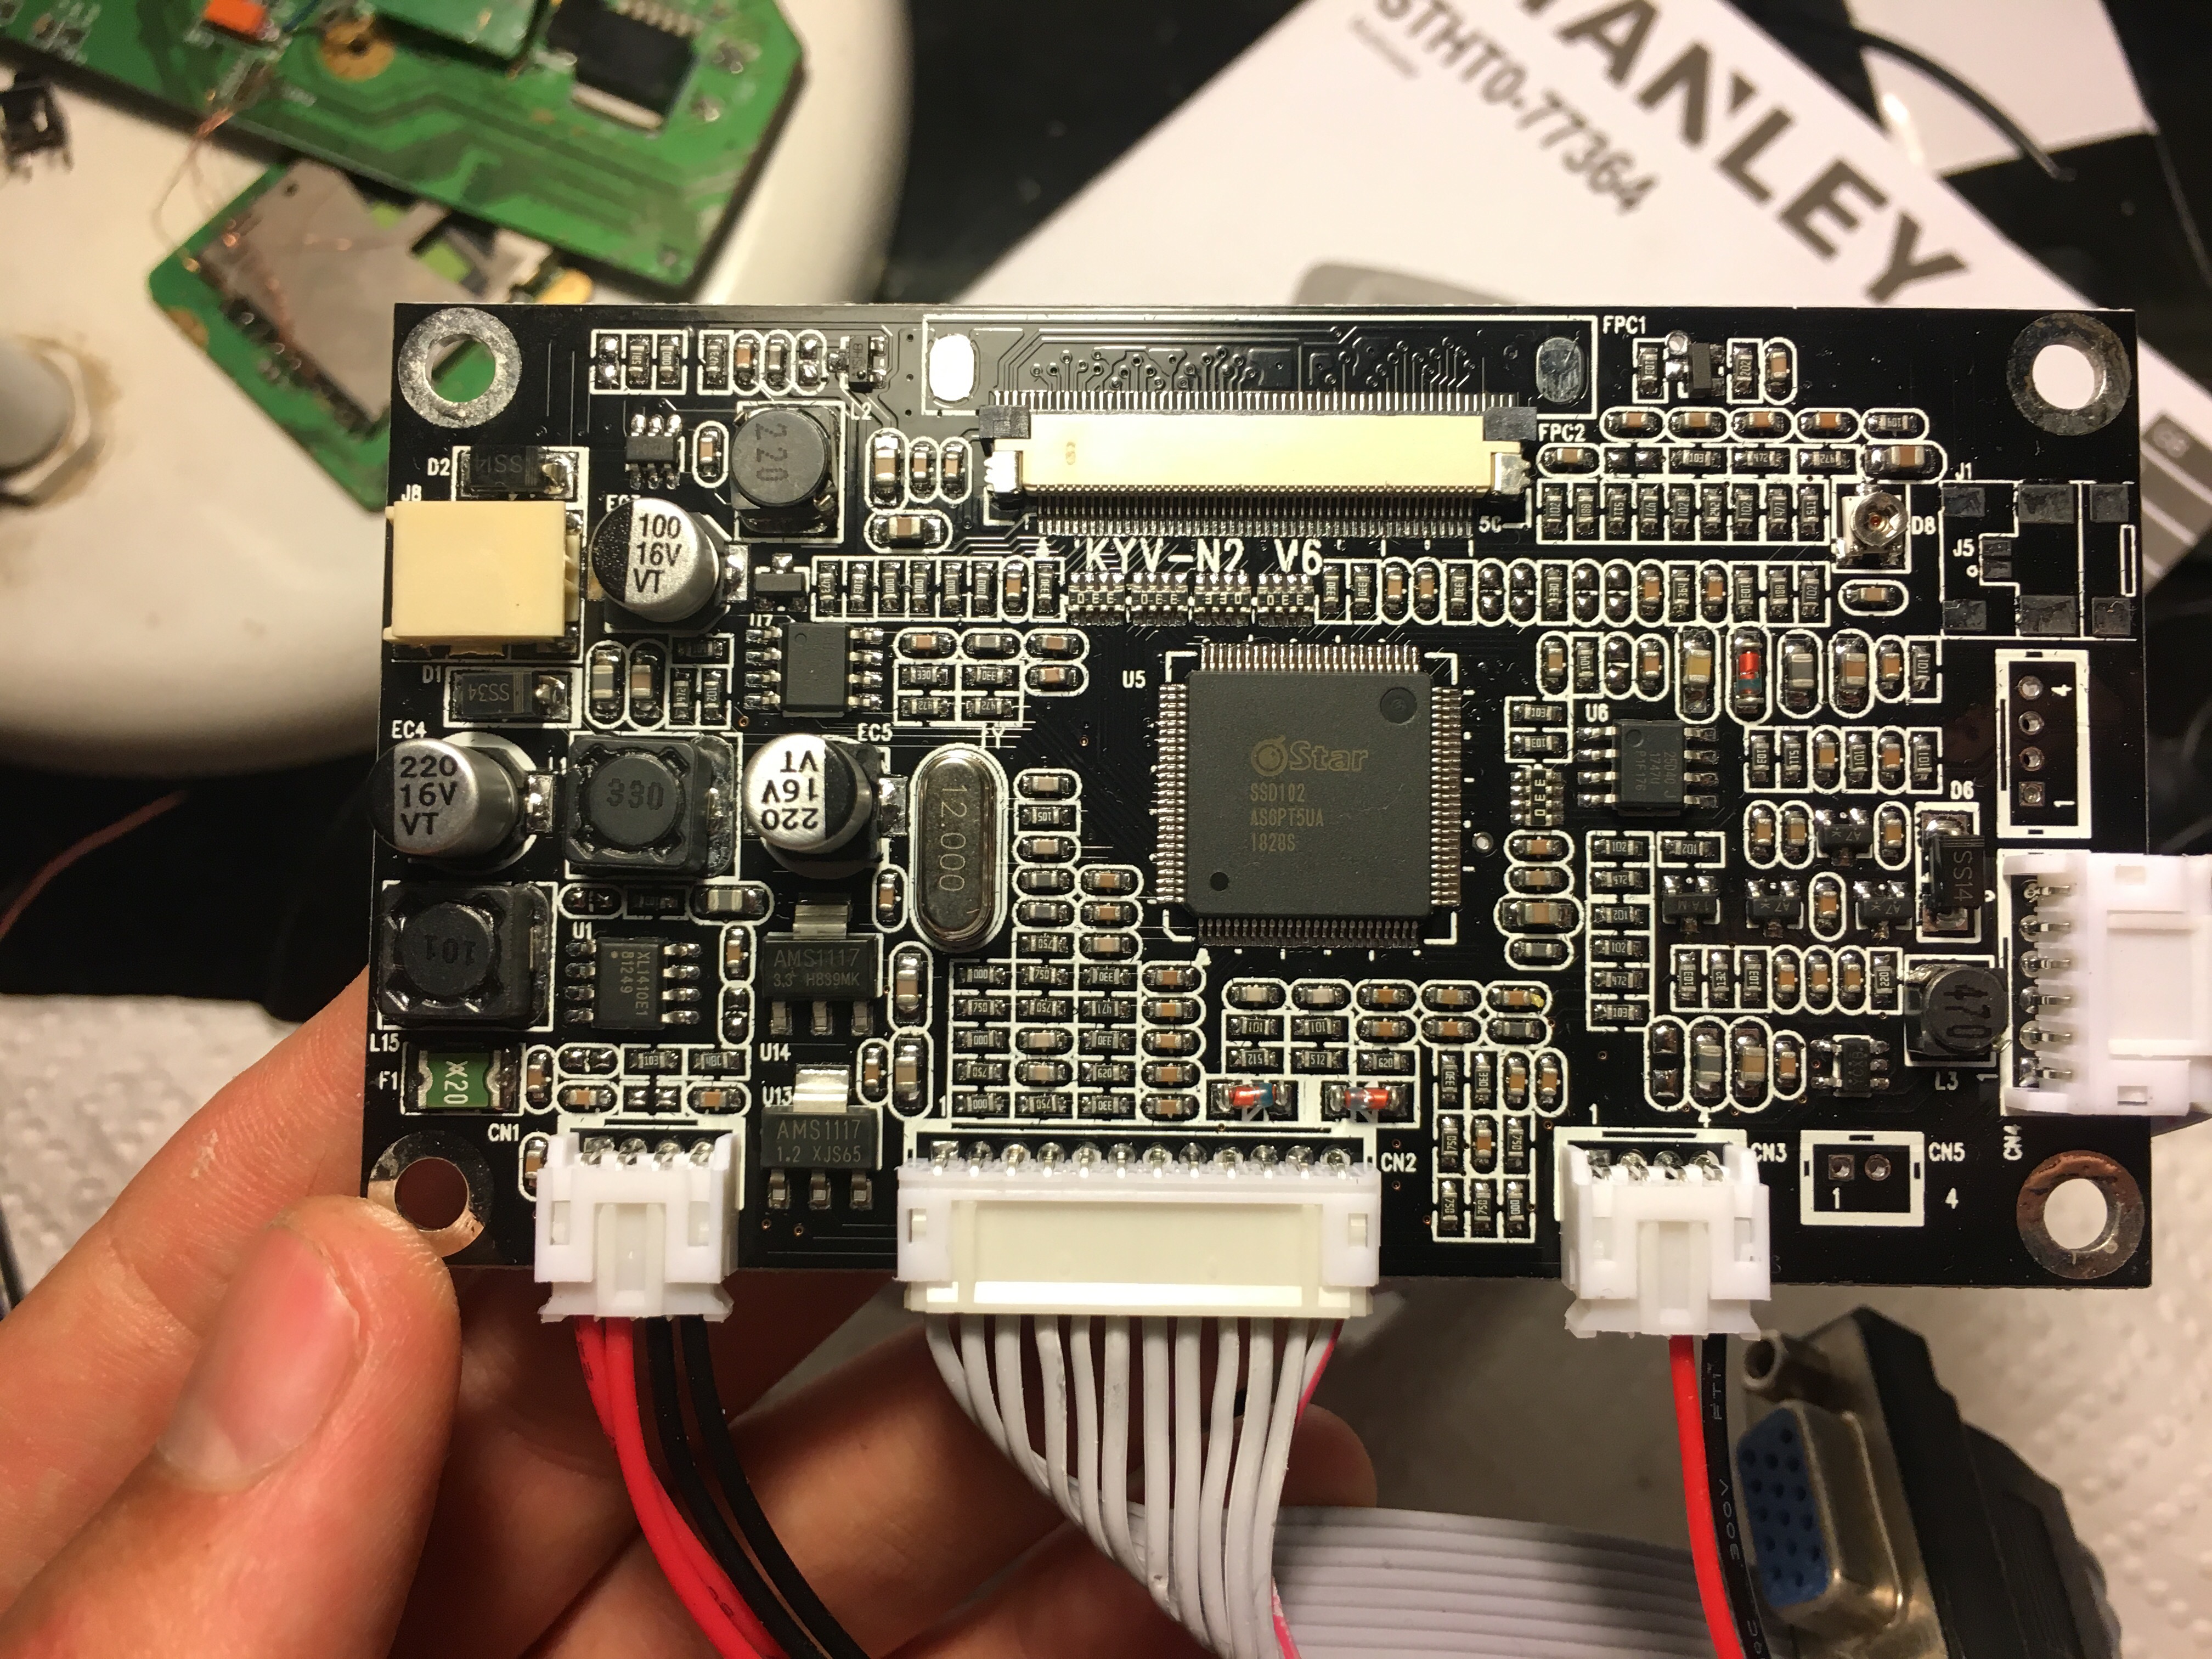
My driverboard: KYV-N2 V6
IMG_3611.JPG


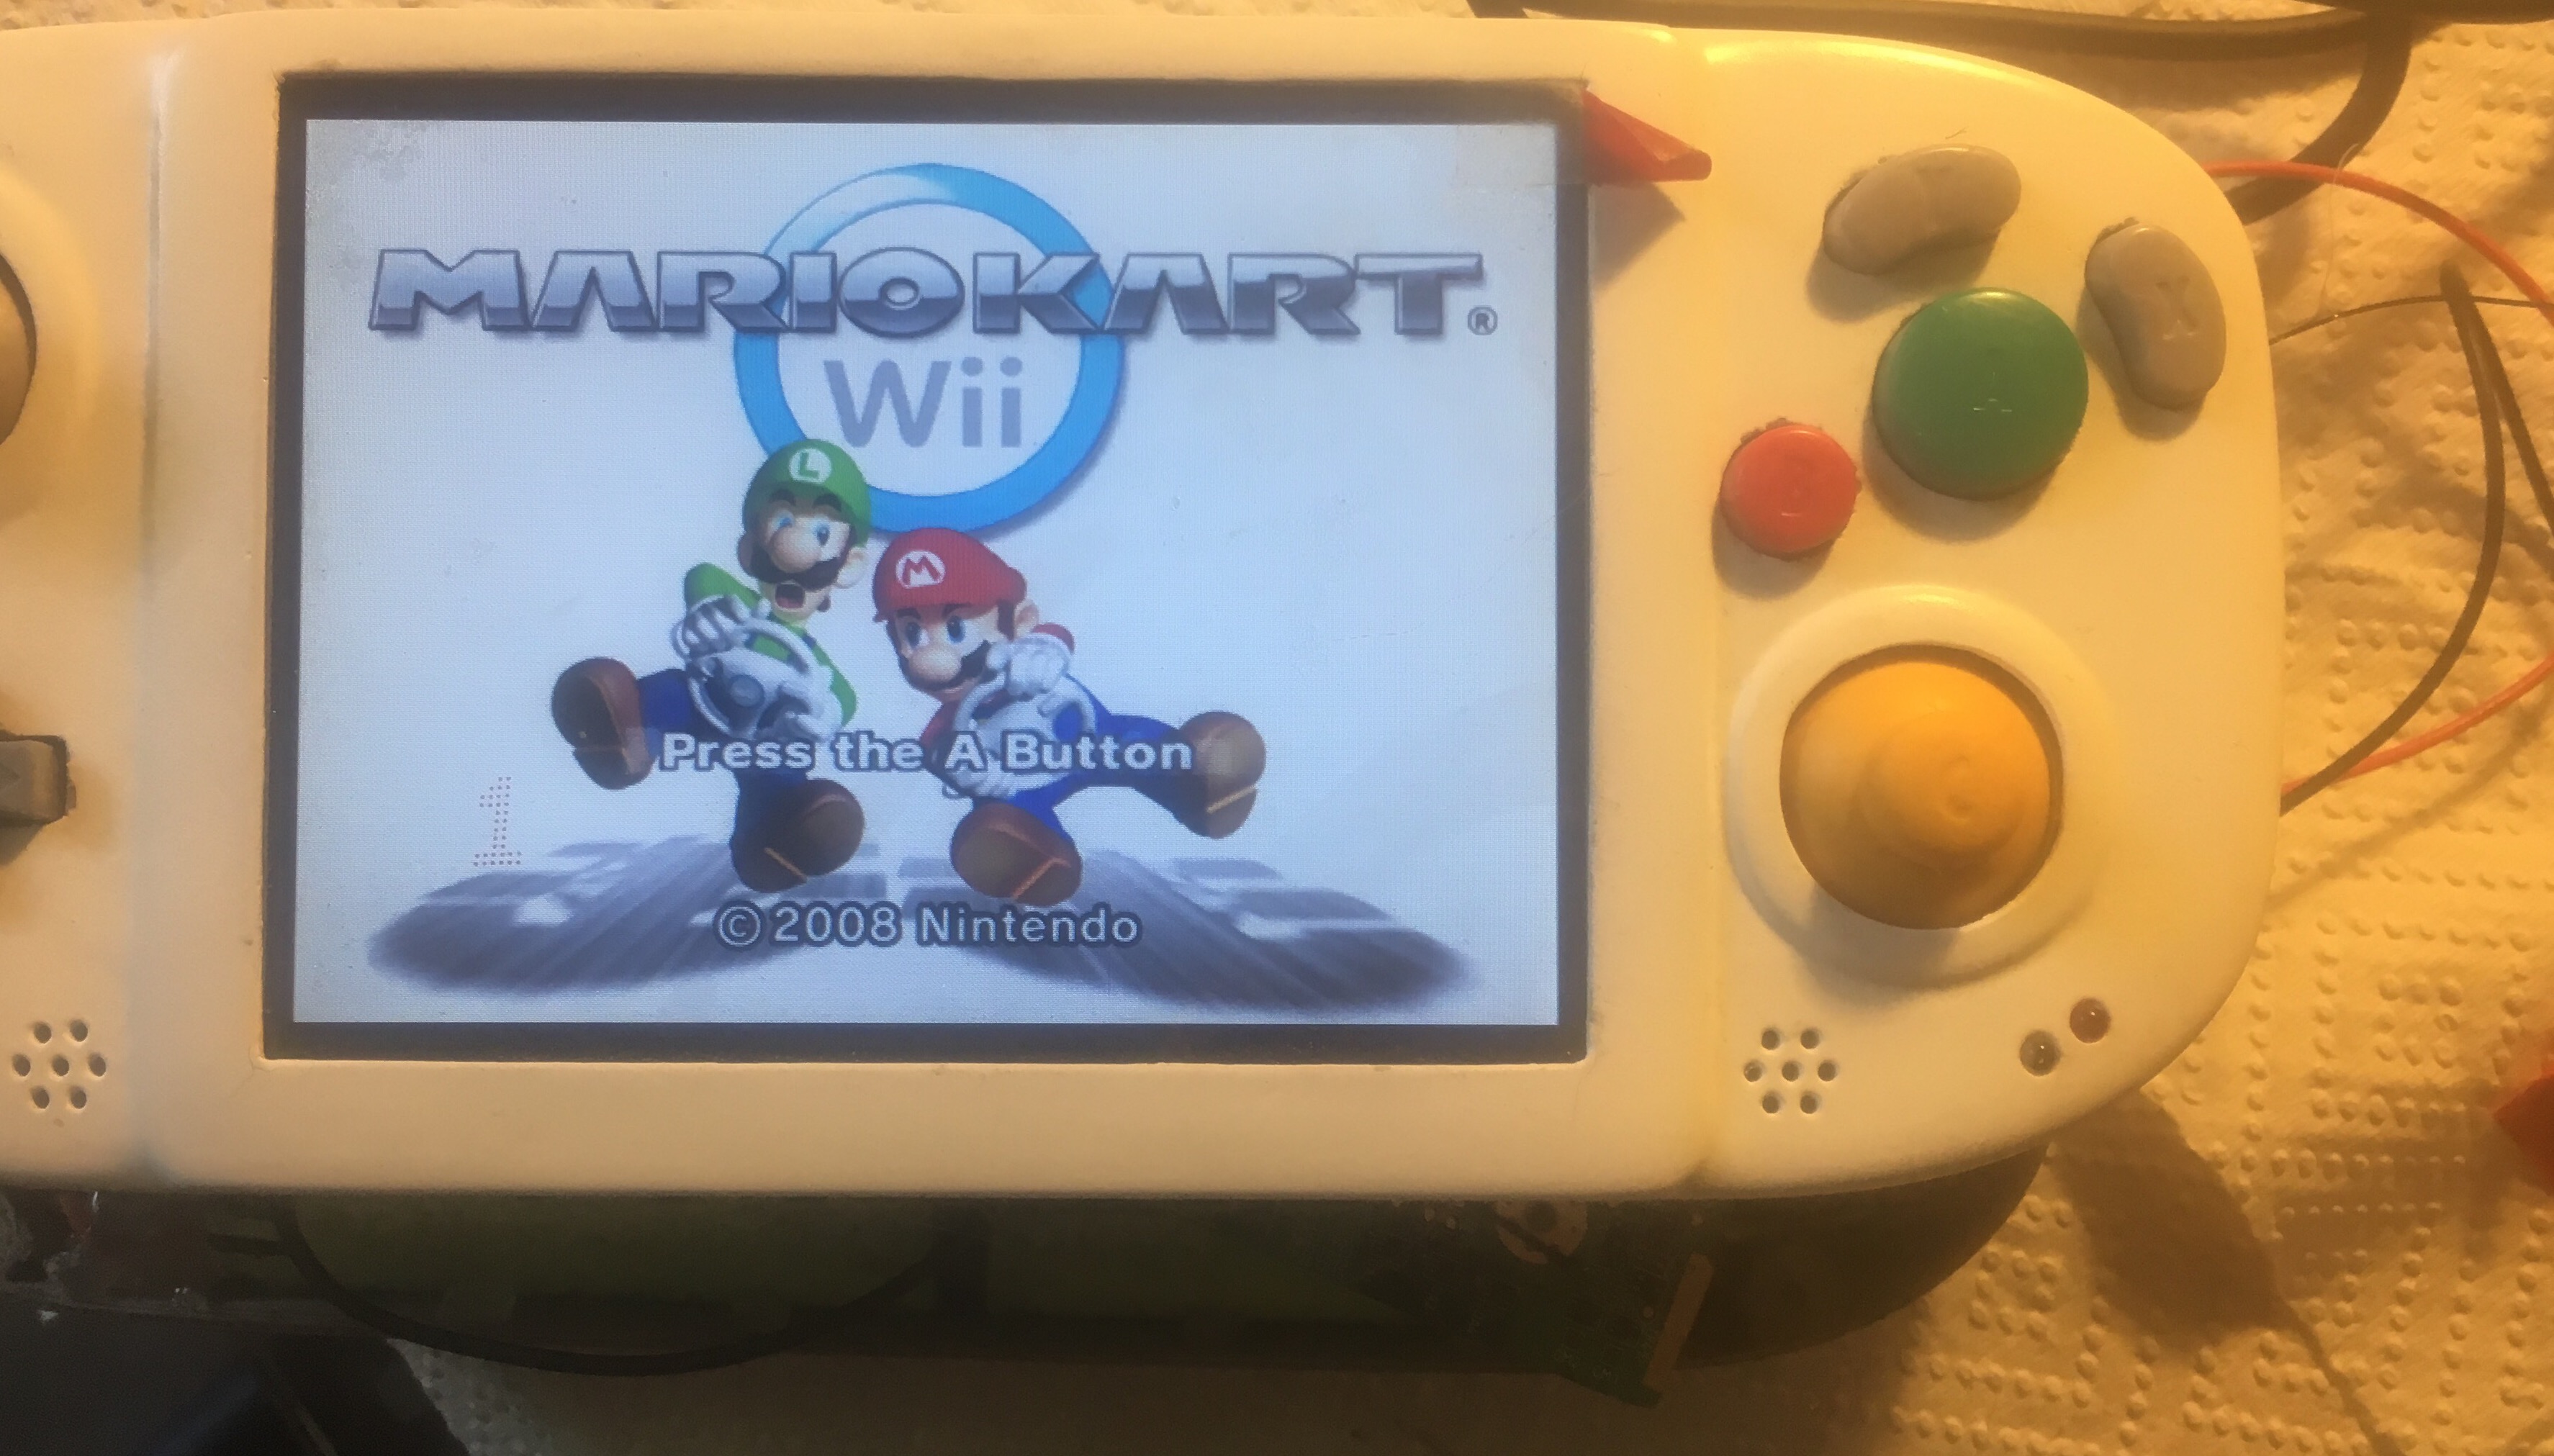
Console working just fine with native VGA 480p video output after a few hard resets. No interference here or wavy lines.
IMG_3599.JPG


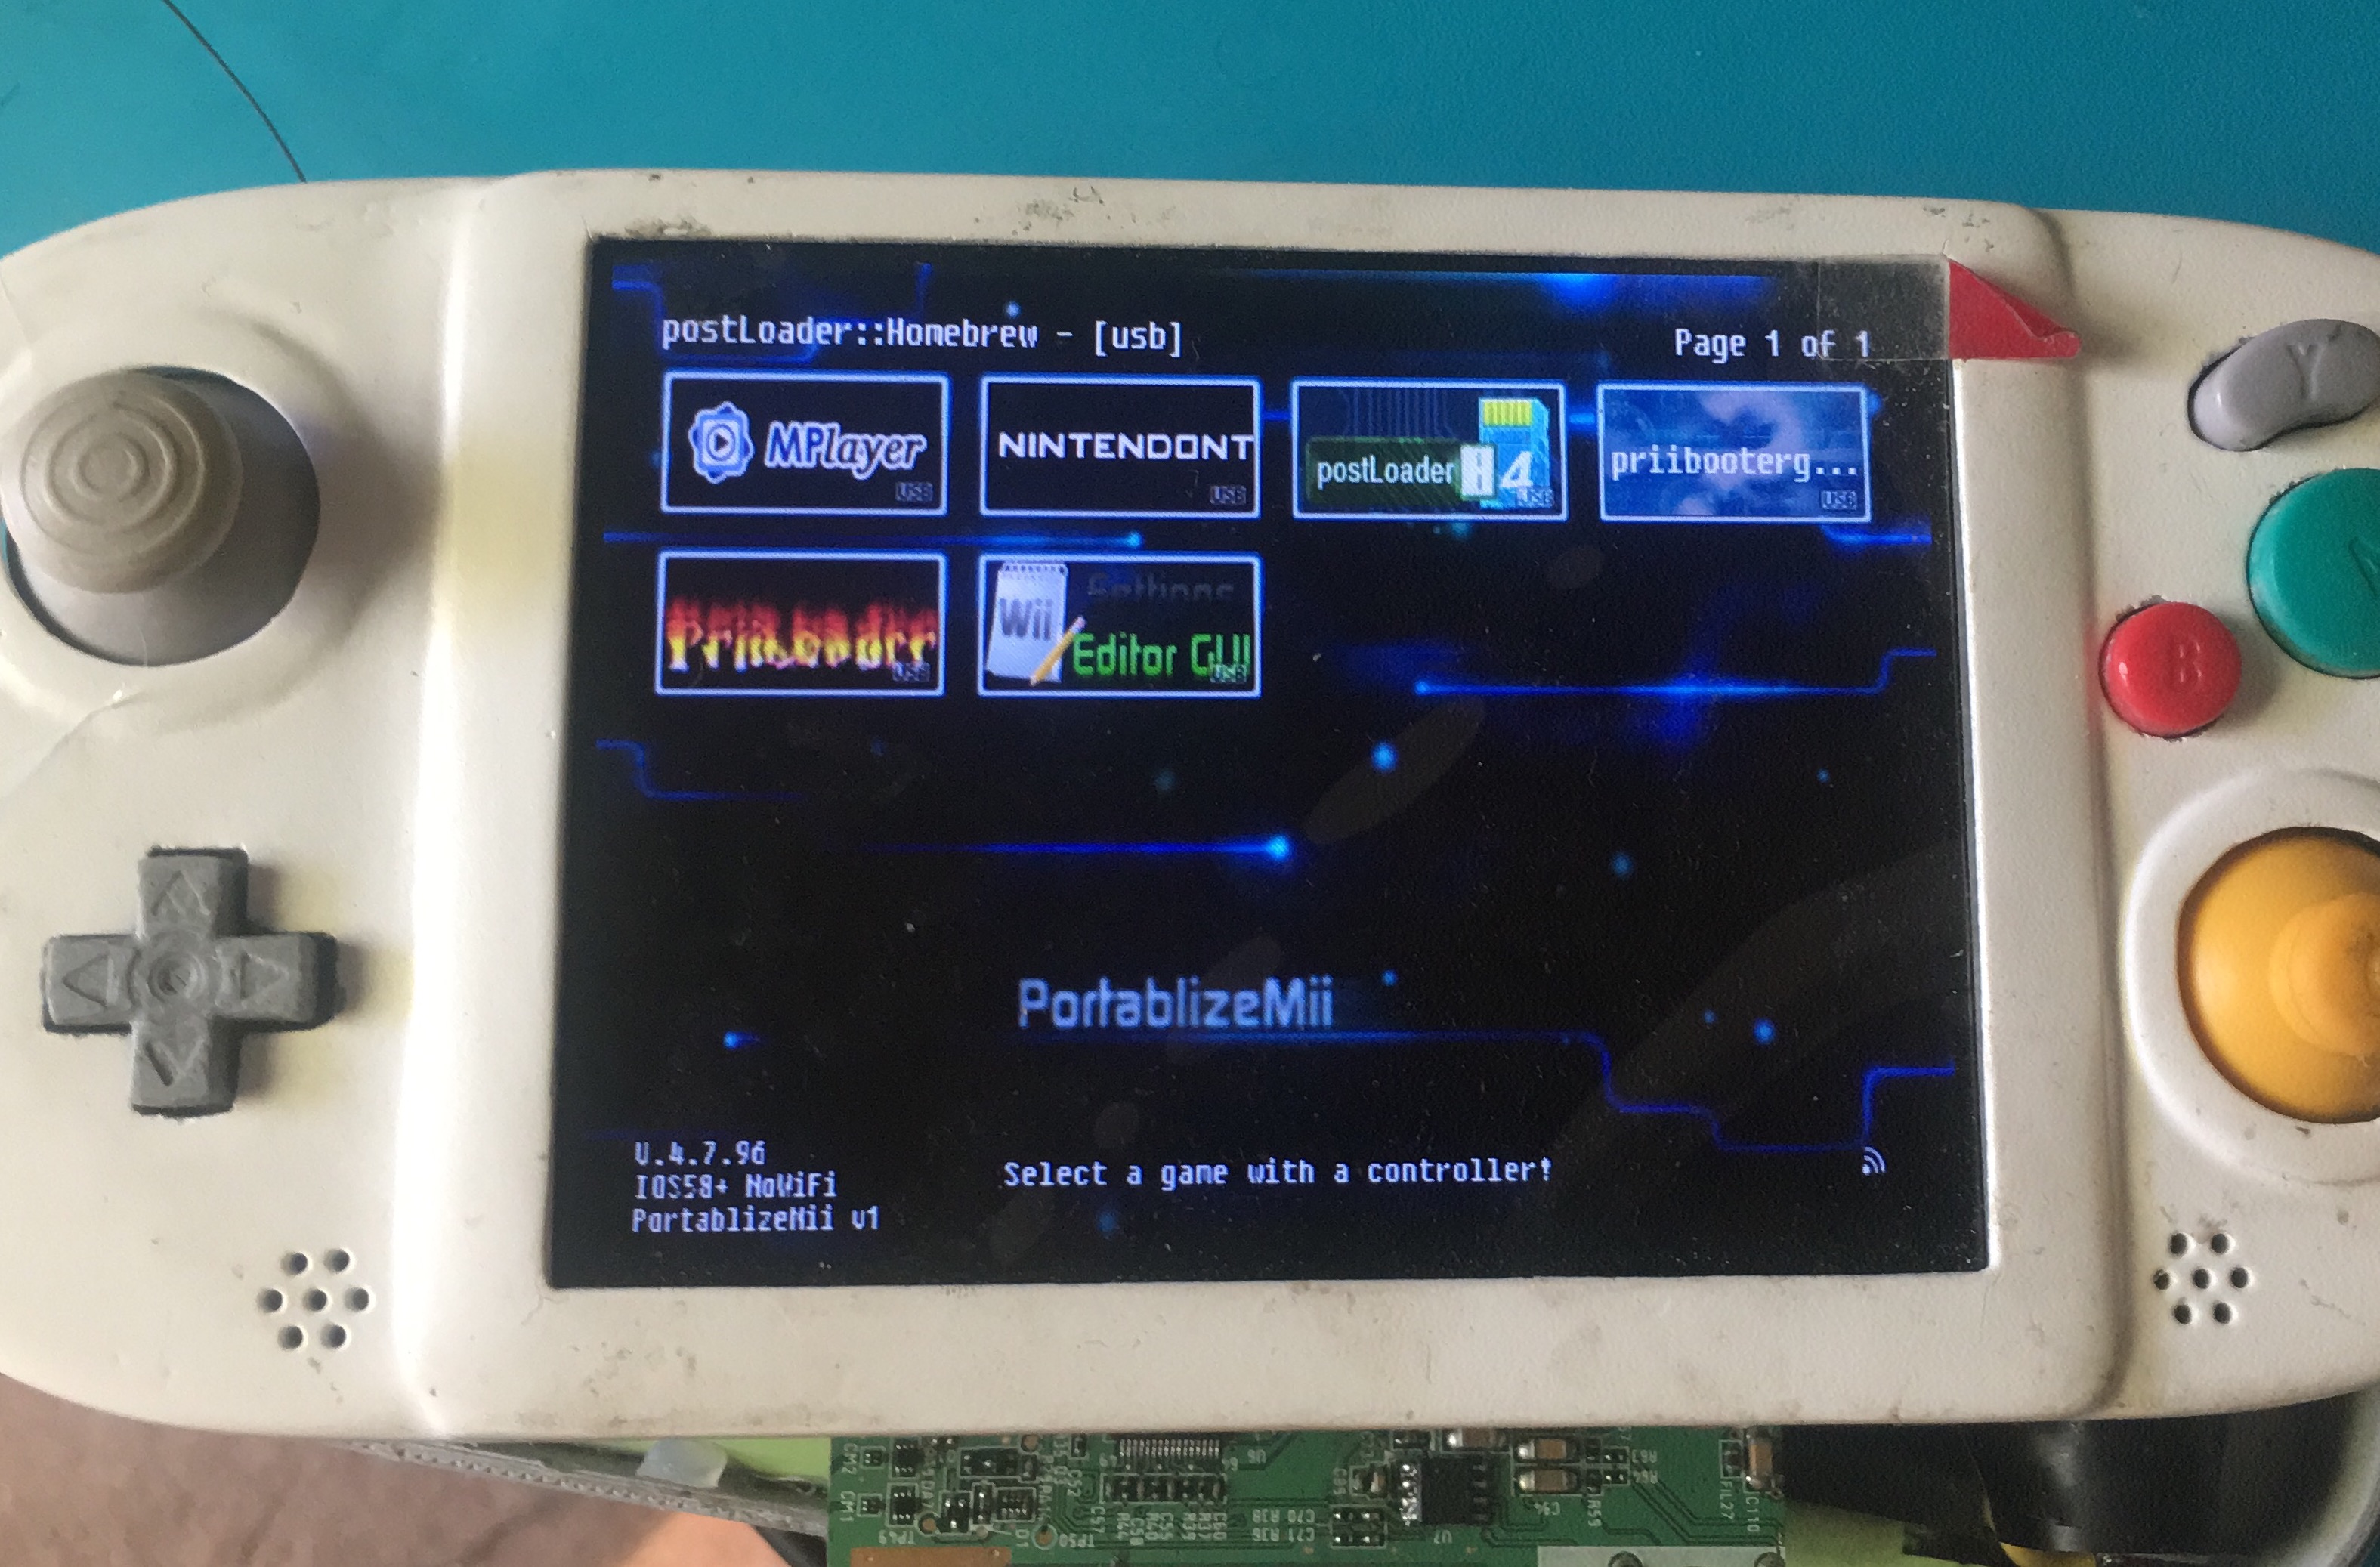
Booting to postloader just fine too. All colors displaying as they should.
IMG_3575.JPG


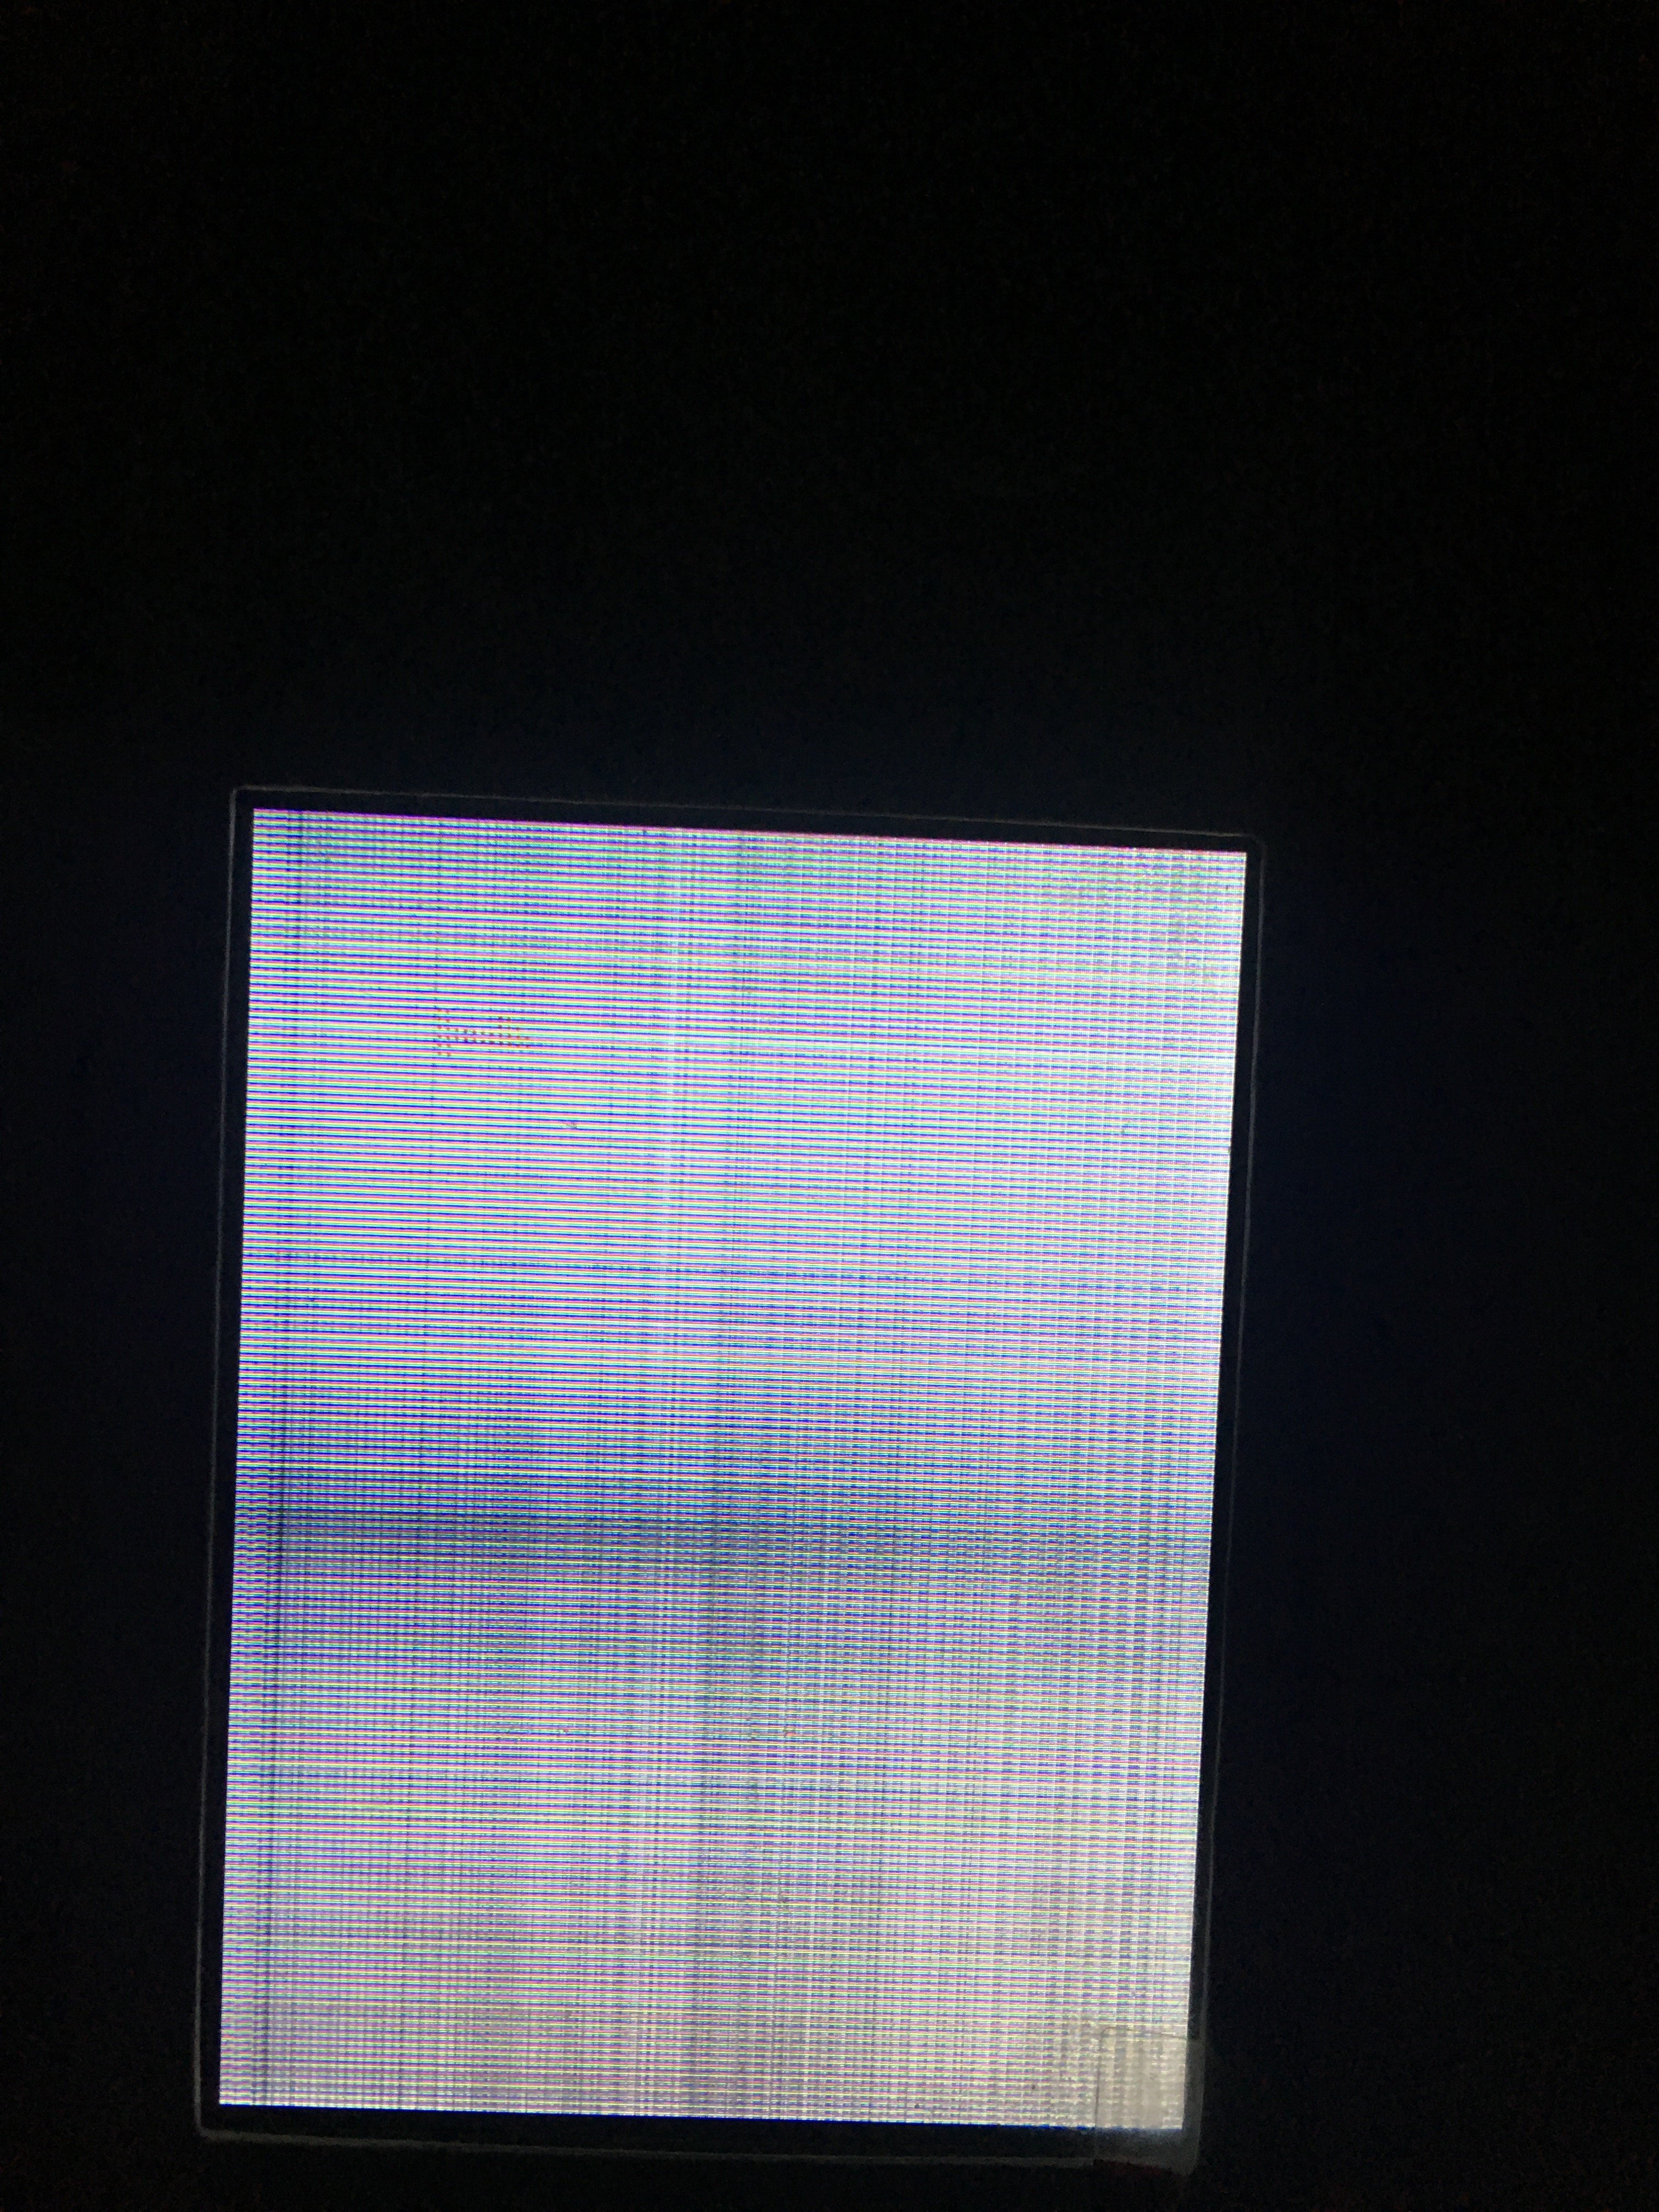
Annoying video on initial startup of the console.
IMG_3604.JPG

IMG_3559.JPG
 
Last edited by a moderator:

Gman

RTFDS
Staff member
.
.
.
.
.
Joined
Feb 25, 2016
Messages
1,436
Likes
2,876
For the 20th time, try making the video and sync wires as short as possible.
 

Stitches

2 and a Half Dollarydoos
Staff member
.
.
Joined
Feb 5, 2017
Messages
3,812
Likes
3,004
Location
Banana Bender Land, Australia
Portables
6
Removing the onboard regs and doing the 5v mod can't hurt, but I doubt it'll fix the problem. Despite their cheap nature, those regs aren't too bad. Are there any voltage or data wires that get close to/touch the video wires? And like Gman said, shorten the wires.
 

ToddyHD

Guest
Removing the onboard regs and doing the 5v mod can't hurt, but I doubt it'll fix the problem. Despite their cheap nature, those regs aren't too bad. Are there any voltage or data wires that get close to/touch the video wires? And like Gman said, shorten the wires.
The wires are extremely short, no more than 5cm in length at max. I wired them really close to the input pins on the screen driver from the Wii just for testing and it hasn't made a difference. I also tried shielding my sync lines just for good measure but the issue still persists.

There is also not really any wires carrying large current/voltage going anywhere near the video signal lines. The issue seems to be fixed when I use the screen controls to cut power temporarily from the screen and then turn the screen back on. I've tried this multiple times and it works 100% every single time.

I am powering the screen off of 5V from my PTH reg into the output pin of this onboard buck converter on the screen driver.

IMG_3633.PNG


EDIT:
Never mind! Changing the "no sync" option in the screen controls menu to "off" seems to have fixed the issue entirely. I have no idea why but it's working 100% now :D

Except now I have a short which seems permanent on the 3.3v line, which mean dead Wii number 4. Wow lol.
 
Last edited by a moderator:

ToddyHD

Guest
So it's basically all done.

The only thing left now is to fix up JacksonS audio amp as my QFN soldering did indeed fail me and the amplifier was not working when I tried to wire it up. I am really concerned though in closing the unit, since the case has slightly shrunk when I left the case out to dry in the sun during the painting process. I also need to run the system to set the low battery indicator using the potentiometer. Once these are all done, then it's officially finished.

There is basically a small 2/3mm gap up the top when I try to close the unit. I was planning on using a rubber fill to fill the gap and then tighten the screws down on it. I am pretty disappointed as the top half of the unit is definitely a few mill smaller than the bottom which makes it hard to close. Here are some pictures of the almost finished product. Audio is the only thing left, and then closing the unit which is going to be the hardest part :(

I am really happy to have come this far as is. I will definitely be making another G-Wii since this was my first ever attempt at making a portable. I learned so much about project building whilst doing this portable, and learned how precise you have to be in every step when making one. Here are some pictures of the almost finished product. I am again disappointed that I didn't try to fit the buttons in the case before painting which resulted in me sanding the holes to get them to fit, which stripped small bits of paint.

I have to thank a few people for bringing me this far. GingerOfOz printed this case for me and shipped it all the way to the land down under. He also gave me a working GC+ which I must say has been unbelievably reliable. The fact that it's updatable via homebrew makes it that much more awesome. Aurelio, for helping me in the late hours when I killed my Wii's. We reset one of my mobo's back to factory doing a nand reset using BootMii but it didn't come back as I had troubles installing the letterbomb. Big thanks to BocuD for listening to my shit late at night in the discord and always giving me good advice/direction when I needed it.

And of course, a huge thanks to Gman for providing the STLs and the amazing case. I think it was a reasonable challenge for a beginner like me and gave me a great introduction to soldering/what its like to build a Wii and electronics. I have started to read a hell of a lot more into circuit design and electronics, since I want to make my own portable next time. Definitely have huge respect for everyone here, more than I did before I tried this myself lol. I certainly rushed it to meet my deadline of going to Japan which was a shame. I should have definitely taken more pride in each step.

For all it's flaws, I am pretty happy with it for now. If anyone has any suggestions to get the two halves to close, I am open to them! As I said, my plan was to use a thin rubber strip between the two halves and then screw it shut. It won't look pretty, but at least it might hide the gaps. Here are pics of it right now. It's running on native VGA thanks to Aurelio's amazing patches. I actually forgot to set 480p in the system menu before I wired the whole thing together, and then stupidly forgot to set mode to 3.3v when using the Y line to set it. No wonder the video looked like absolute ass.

52446360_421877385216882_1801274516182138880_n.jpg


52072593_806018046422424_8768320741469847552_n.jpg

51960881_808600772818777_4887170851494952960_n.jpg


This photo is without the mounting screws in. It uses 4 screws to hold the two halves flush together. Unfortunately, the top half shrunk in the heat about 0.5mm and won't close flush without screwing the unit tightly (which I haven't tried) or using some sort of filler (like a rubber strip)

:(
51879605_378384716331913_2291393764272373760_n.jpg


Will post internals right before I shut the unit (if I can even shut it lol) :(
 
Last edited by a moderator:

ToddyHD

Guest
I finally closed up my first project! It's not pretty and I am really disappointed in butchering it, but it's fully functional and it works! The USB drive gets pretty toasty after about 20 minutes of gameplay and there is a fair amount of hot air coming out the top vent, but nothing that gets hot at all. If anything, I can definitely feel the inefficiencies of the red board generating a lot of heat. The regulators which rest on the left side are also getting quite warm but not too hot.

I ended up closing the unit with a piece of 2mm rubber I picked up from a local store. I clearly made a few mistakes with the G-Wii case such as buying a copper sheet that was pretty thick (0.098") as well as using a 10mm heatsink. I think 7mm would've been a bit slimmer to ensure the motherboard didn't sit so high in the case. I would also recommend having a clean workbench when putting this together. Little bits of flux that get on your case are really hard to get off. Isopropyl alcohol is a paint stripper and will remove paint (I learned this when trying to use it lol)

I've already run the batteries from full to about 6.2-6.3v and the console performed really well. The low battery indicator comes on with about 10 mins before the screen dies. I found that the lithium batteries really drop their voltage quickly at the lower end of the capacity range, so it's hard to give a voltage that turns the LED on. Trial and error was best for me!

At least the rubber acts as a functional display stand for the portable. Thanks again for the advice and support from all of the members. Without everyone here I wouldn't have been able to have my own portable.

For my next portable I plan on doing everything a lot more slowly. I've already started to look into learning SolidWorks since I can get a free license as a student. I plan on designing a similar case to the WiiBoy for my next portable. It'll use battery clips and hopefully have a lot of the connections on my own circuits that I'll design in eagle. I plan on trying to integrate an internal USB drive into it as well.

Here is the final post for this worklog. Abominable insides, rubbery outsides, but, for my first project, it will have to do. It's functional and that makes me happy for now. I have to say thanks to Gman again. He helped me fix my audio issue when the Wii wouldn't output audio (I forgot to wire the sense pin of the headphone jack to GND for testing. I left it floating lol which was embarrassing). Once I wired that up, audio worked just fine! I used the Wii WiFi antennas for audio input and 30 AWG kynar for the peripherals and haven't noticed any distortion.

Sorry for butchering your beautiful case. I'm disappointed but, thicc is better than gap. Hopefully I don't have to open this thing for a while. Here it is!

The GWii (ver Thicc)

- 4 x 18650 Panasonic Lithium-Ion Batteries
- 5" TFT Monitor outputting Wii native VGA thanks to Aurelio!
- GC+ 1.0 because why wouldn't you?
- Low battery indicator
- Bianode red/green LED for charging/fully charged indication
- 10mm heatsink
- 7mm box fan (please make sure your fan is the same height as your heatsink, I made this simple mistake and had to use washers to raise the fan slightly)
- Cooper Sheet
- BocuDs regulator breakout board with 4x PTH08080WAH regulators
- Red BMS Board w/ Charge and Play
- JacksonS audio amplifier with switching headphone jack and adjustable steps of volume
- Spaghetti wires galore
- One THICC strip of 2mm rubber to seal the deal

IMG_3836.JPG


IMG_3806.JPG


IMG_3800.JPG
 
Last edited by a moderator:

Gman

RTFDS
Staff member
.
.
.
.
.
Joined
Feb 25, 2016
Messages
1,436
Likes
2,876
Don't be so critical, I think it looks nice from the pictures. The rubber seal gives it a cool 2-tone appeal. Besides it's you first portable, it's a helluva lot better than my first portable I made.

If you can touch it without burning yourself or melting the plastic away, then it's probably not that hot in moderation.

I've already started to look into learning SolidWorks since I can get a free license as a student. I plan on designing a similar case to the WiiBoy for my next portable. It'll use battery clips and hopefully have a lot of the connections on my own circuits that I'll design in eagle. I plan on trying to integrate an internal USB drive into it as well.
:thonk: https://bitbuilt.net/forums/index.php?threads/wiiboy-rev3.2547/
 

Shank

Moderator
Staff member
.
.
Joined
Jan 31, 2016
Messages
1,287
Likes
2,726
Portables
6
Excellent first project! Congratulations on finishing! Like gman said, your first project never comes out how you want, so don't beat yourself up over what you see as imperfections. I think this one turned out well, and I know your second one will be even better!
 
Top