Worklog Bayjose's Wii Portable

Joined
Oct 9, 2017
Messages
45
Likes
11
So i've started to create my Wii portable.

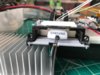
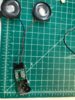
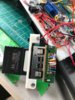
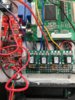
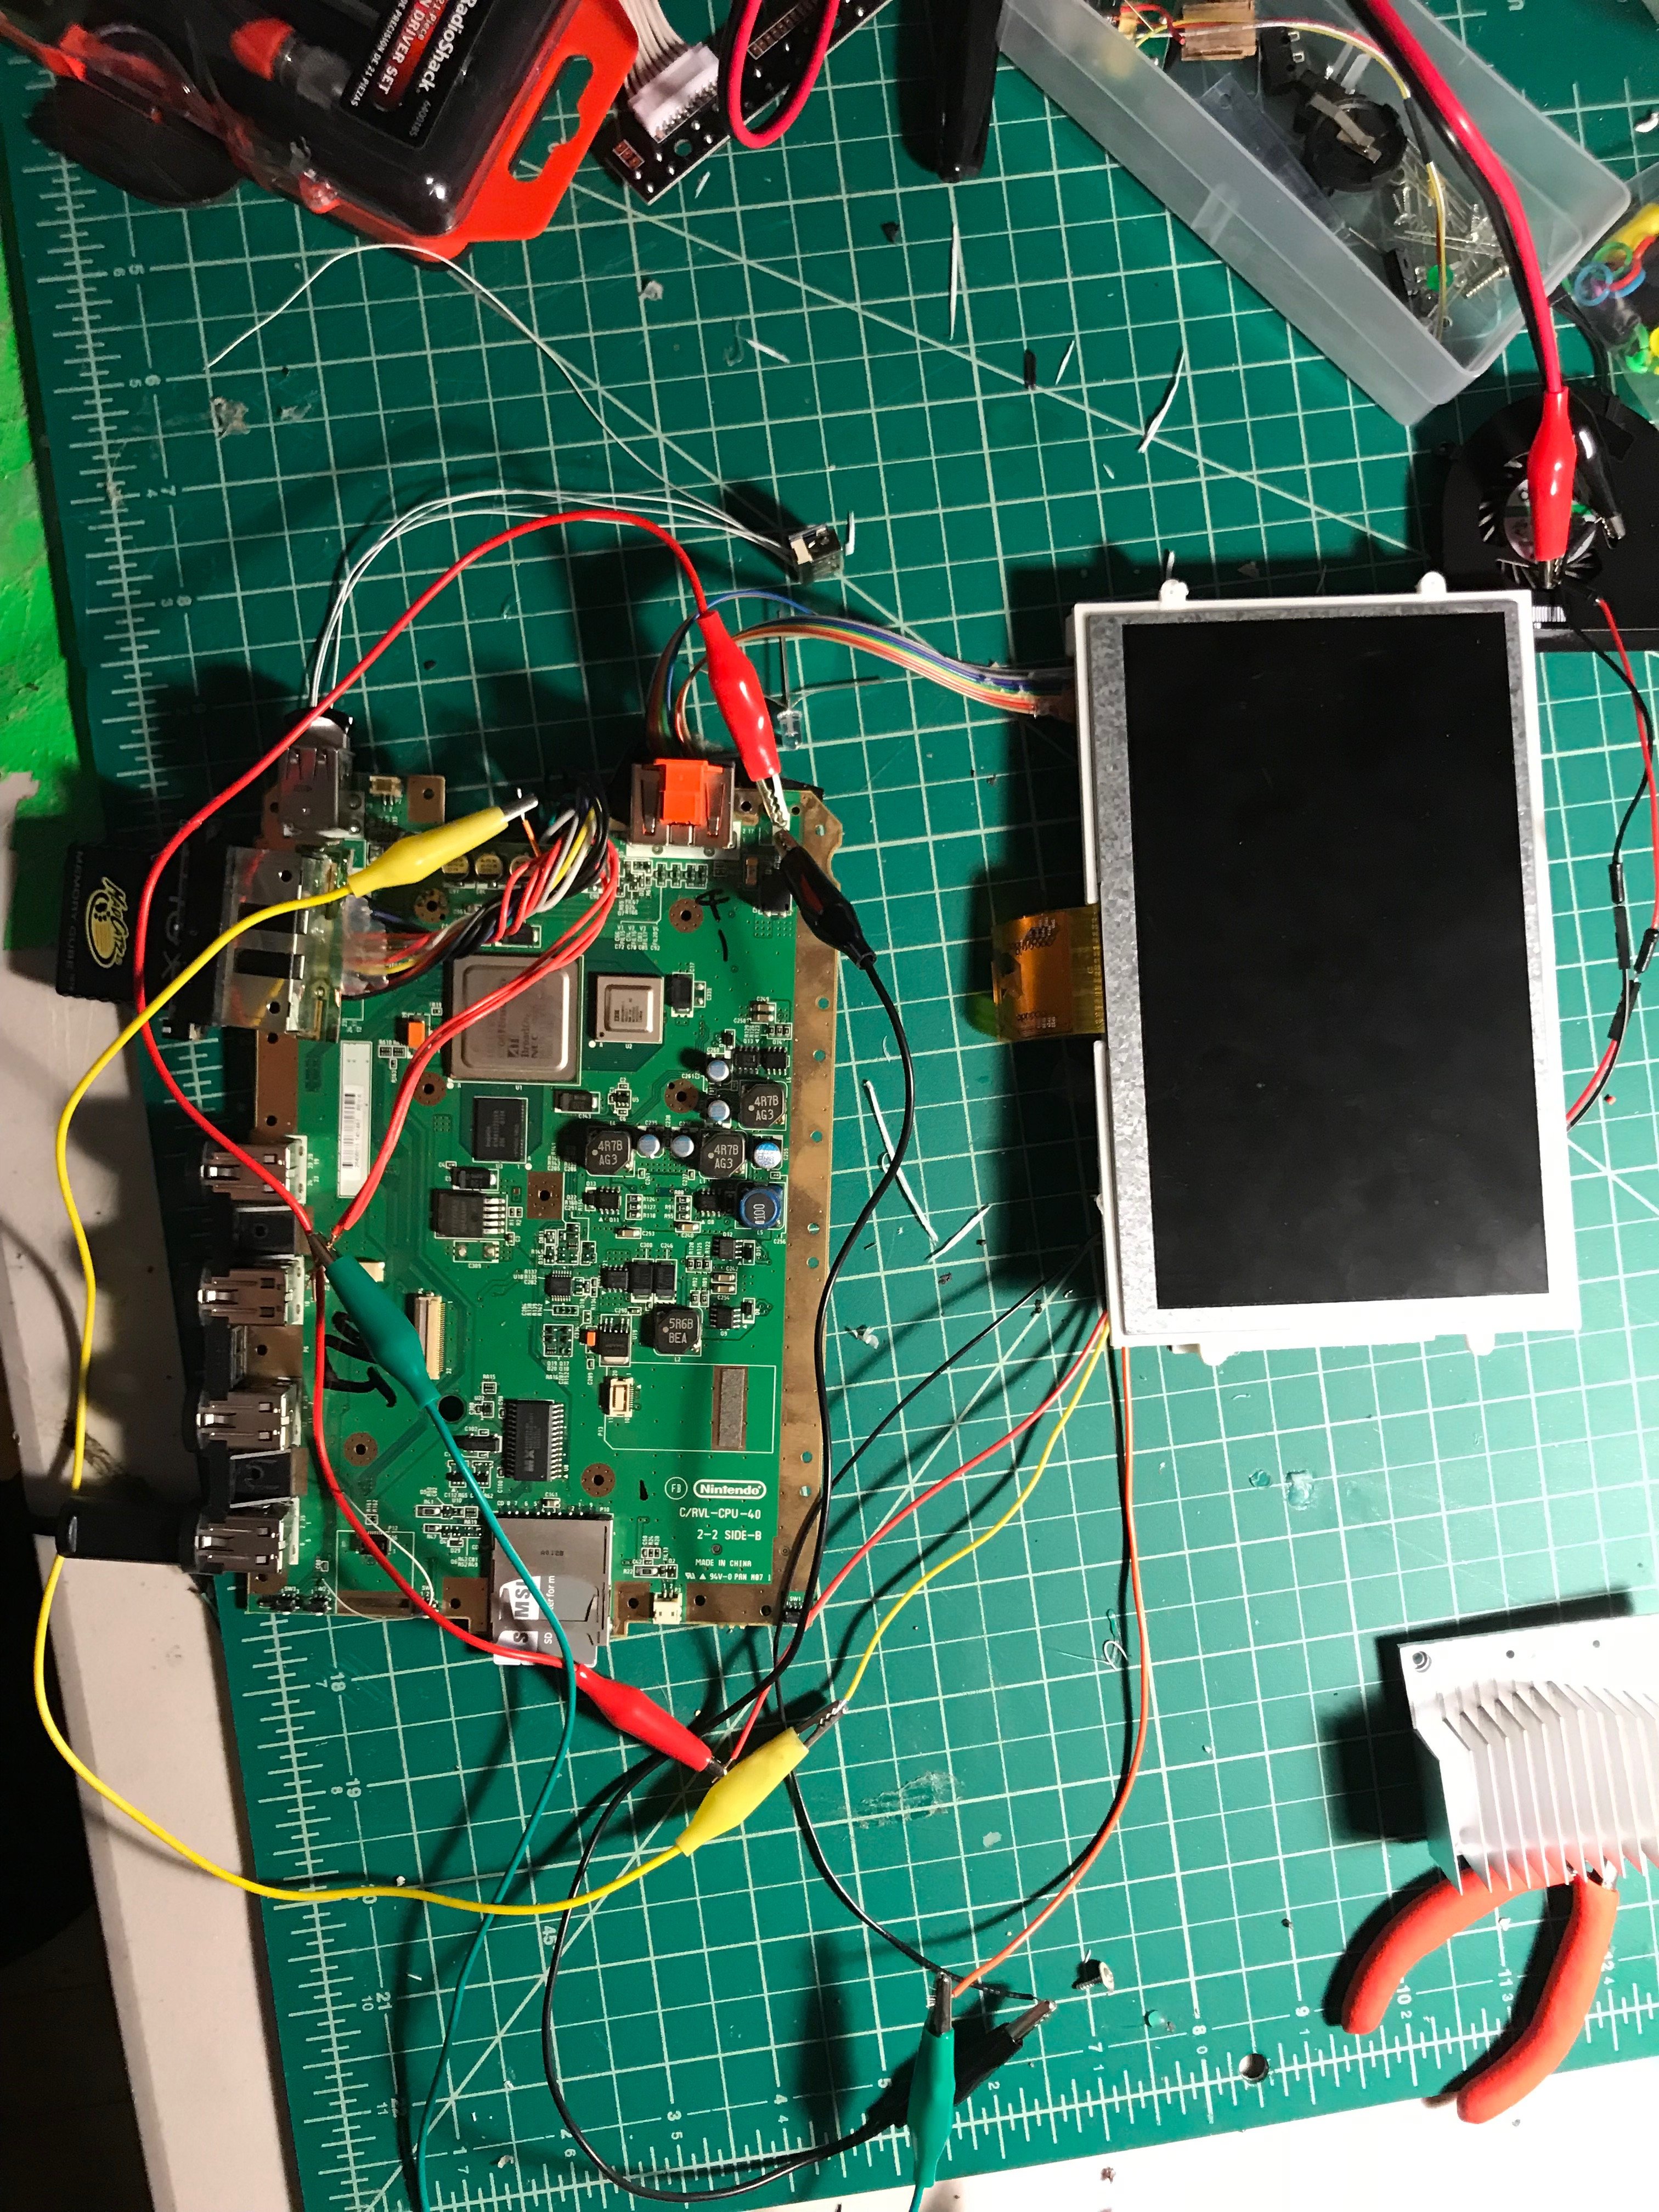
I have decided to design the whole handheld around the screen, as that is the only part of the system that is final in its current state. I have a 7" 1080P screen that I got off Amazon some time back. I also have a wii to HDMI upscale which scales the component video to 1080P and it looks really good, The white portion of the screen that can be seen are some 3D printed parts. Instead of making a bunch of custom regulators I am using an old GameCube Power board. The board is small and produces 12, 5, 3.3, and 1.9 volts out which work perfectly for everything I have so far. I have extended the USB port with some thin wires, and have wired the Wii A/V out port directly to the converter PCB with some ribbon cable. I have also wired the mem-card-A slot of the Wii up to a GameCube memory slot which i think looks really cool with its little door flap.

IMG-0828.JPG
IMG-0829.JPG

Moving Forwards.

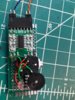
I think that the OMGWTF trim seems a little daunting and was wondering if there were any suggestions as to what I can cut off of this board. It seems that i can cut off the USB port and top roughly inch of the board, as that portion of the board only contains traces to go to the Controller ports.

Comments, Questions?

I'm happy to answer.
 

jefflongo

Broke BitBuilt
Staff member
.
.
Joined
Dec 15, 2016
Messages
1,017
Likes
1,361
Location
Santa Barbara, CA
Portables
3
The OMGWTF cut is recommended because it's more work to do trims in between. Many things start to not work if you just trim off parts of the board. I mean you could cut off the ground plane on the sides but is that really worth it? If you plan on keeping the on board regulators, there's not a whole lot you can trim off that would be worth it. If you don't plan on keeping the on board regulators, you would need to remove them anyways if you plan on making trims to the board, in which case you may as well do the OMGWTF trim (it's actually not that bad).

Some other things to note, I probably wouldn't use aluminum foil to group those wires together, maybe some heat shrink or electrical tape instead.

Is that a gamecube regulator board? Why are you using that?
 

Stitches

2 and a Half Dollarydoos
Staff member
.
.
Joined
Feb 5, 2017
Messages
3,833
Likes
3,018
Location
Banana Bender Land, Australia
Portables
6
I'm pretty sure you don't actually need all the wires going into the Wii2HDMI. Afaik you only need RGB, composite, power/ground, and to put 3.3v into the mode sense pin so it'll output 480p.
 

YveltalGriffin

First Wii U Trimmer
.
Joined
Jun 7, 2016
Messages
306
Likes
1,142
Location
South Florida
Portables
5
I like that LCD. Must have cost a lot if it's Full HD! I think the aluminum foil to shield the video lines is a good idea, but I would recommend covering a sheet of foil in electrical tape and then wrapping the wires with it. That way you get the shielding you want, but without bare metal near the wires.
 
Joined
Mar 18, 2017
Messages
281
Likes
135
Location
The Mitten
Also, there is no way to upscale 480p to 1080p. The only thing wii2hdmi does is take the analog video and convert it to digital signals that can be used with hdmi. You wont get better video quality using wii2hdmi, you just have a convenient hdmi output now.
 
Joined
Oct 9, 2017
Messages
45
Likes
11
The OMGWTF cut is recommended because it's more work to do trims in between. Many things start to not work if you just trim off parts of the board. I mean you could cut off the ground plane on the sides but is that really worth it? If you plan on keeping the on board regulators, there's not a whole lot you can trim off that would be worth it. If you don't plan on keeping the on board regulators, you would need to remove them anyways if you plan on making trims to the board, in which case you may as well do the OMGWTF trim (it's actually not that bad).

Some other things to note, I probably wouldn't use aluminum foil to group those wires together, maybe some heat shrink or electrical tape instead.

Is that a gamecube regulator board? Why are you using that?
Its not actually aluminum foil, that is the existing wire shielding. and a gamecube power board, is the small board containing a ton of different regulators that would usually go inside of a gamecube, it has output voltages of 12,5,3.3,1.9 volts. its also pretty small and i had it laying around.
 
Joined
Oct 9, 2017
Messages
45
Likes
11
Also, there is no way to upscale 480p to 1080p. The only thing wii2hdmi does is take the analog video and convert it to digital signals that can be used with hdmi. You wont get better video quality using wii2hdmi, you just have a convenient hdmi output now.
You're correct, i just checked the converter box and i totally had my facts wrong it dose NOT upscale to 1080p. Guess the screen is a little overkill now but hey, it was for another project that fell through so why not use it.
 

Bakuku

.
Joined
Jul 23, 2016
Messages
214
Likes
124
Location
Genk
Portables
4
You're correct, i just checked the converter box and i totally had my facts wrong it dose NOT upscale to 1080p. Guess the screen is a little overkill now but hey, it was for another project that fell through so why not use it.
GC video works with Wii as well. Instead of using that upscaler you could wire the GC video board to the Wii and use it's native HDMI plug. It will give you a nice crisp image I believe.

As for the GC powerboard, the Wii uses some different voltages than the GC. You might want to reconcider that, unless i'm mistaken ofcource.

Greets
 
Joined
Oct 9, 2017
Messages
45
Likes
11
GC video works with Wii as well. Instead of using that upscaler you could wire the GC video board to the Wii and use it's native HDMI plug. It will give you a nice crisp image I believe.

As for the GC powerboard, the Wii uses some different voltages than the GC. You might want to reconcider that, unless i'm mistaken ofcource.

Greets
Which voltages specifically, 1 volt?
 

jefflongo

Broke BitBuilt
Staff member
.
.
Joined
Dec 15, 2016
Messages
1,017
Likes
1,361
Location
Santa Barbara, CA
Portables
3
The Wii uses 5v, 3.3v, 1.15v, and 1v. The GC power board does not have 1v or 1.15v and it's critical those voltages and very close to those values. I don't understand why you would use the GC power board if you're keeping the stock Wii regulators since I can't imagine you would need voltages other than the ones already on there.

Also it's fine to have that shielding that will protect the video signal, but you're going to want to cover that with some electrical tape as that might short something if it touches the wrong spot.
 
Joined
Oct 9, 2017
Messages
45
Likes
11
The Wii uses 5v, 3.3v, 1.15v, and 1v. The GC power board does not have 1v or 1.15v and it's critical those voltages and very close to those values. I don't understand why you would use the GC power board if you're keeping the stock Wii regulators since I can't imagine you would need voltages other than the ones already on there.

Also it's fine to have that shielding that will protect the video signal, but you're going to want to cover that with some electrical tape as that might short something if it touches the wrong spot.
so I am taking your advice and getting 4 of the PTH08080 regulator boards: https://www.ebay.com/itm/162699507967 I am also getting an 18650 Charge Management System: https://www.ebay.com/itm/311721987212 Thanks for looking out for me, i'll post pictures in a couple weeks when they get here and I have time to solder them up.

I really appreciate all of the feedback on my work and take it to heart. Thanks for the comments and if anyone notices anything else about my portable please feel free to point it out or ask a question.
 
Joined
Oct 9, 2017
Messages
45
Likes
11
Update Pre-Christmas!

Hello everyone, I've been working quietly on my portable for the last couple of months, since the last update, i have purchased the correct regulators and made a proper regulation board with 5V 3.3V 1.15V and 1V using the TI Power regulator boards. I have also dived deep into Fusion360, found out that I get it through my school program for free so i've been designing parts. The goal is for my portable to look like a GameBoy Advanced, only with a 7" screen. Most recently I have been working on an audio module that will go inside my portable using a dual channel logarithmic audio-potentiometer to increase or decrease the volume, a switching headphone jack, and a PAM8403 class D amplifier. The quality of the amplifier is okay, certainly not perfect, however the board is ~$1 and draws 100MA can run off anywhere between 2.5V and 5V and can power my two .5W 8ohm speakers. I also received the batteries and charging board I ordered off Ebay. I went with 2 Panasonic 18650 cells with 3400MAH charge. Also since last time I got the Samsung 128GB Jump drive, which PriiLoader likes. If there are any questions please feel free to ask.

-Bayjose

IMG-0882.JPG IMG-0879.JPG IMG-0880.JPG IMG-0881.JPG IMG-0884.JPG
 

Attachments

Joined
Oct 9, 2017
Messages
45
Likes
11
Is there a reason you want the memory card slot? You know nintendont can emulate memory cards. Just throwing that out there if you want to save space.
I think its fun, and my Girlfriend has her memory card from when she was growing up, she wants to be able to just plug it in and be able to play games. If the system was just being used by one person sure that would be easier, but this is almost like a user system where we can each have saves for the same game.
 

cheese

the tallest memer in town
Staff member
.
.
.
Joined
Mar 2, 2016
Messages
2,759
Likes
2,431
Location
Florida
It's not quite that easy, since you'll have to transfer the saves from the card to the USB, and then back from USB to memory card after.
 

Stitches

2 and a Half Dollarydoos
Staff member
.
.
Joined
Feb 5, 2017
Messages
3,833
Likes
3,018
Location
Banana Bender Land, Australia
Portables
6
Update Pre-Christmas!

Hello everyone, I've been working quietly on my portable for the last couple of months, since the last update, i have purchased the correct regulators and made a proper regulation board with 5V 3.3V 1.15V and 1V using the TI Power regulator boards. I have also dived deep into Fusion360, found out that I get it through my school program for free so i've been designing parts. The goal is for my portable to look like a GameBoy Advanced, only with a 7" screen. Most recently I have been working on an audio module that will go inside my portable using a dual channel logarithmic audio-potentiometer to increase or decrease the volume, a switching headphone jack, and a PAM8403 class D amplifier. The quality of the amplifier is okay, certainly not perfect, however the board is ~$1 and draws 100MA can run off anywhere between 2.5V and 5V and can power my two .5W 8ohm speakers. I also received the batteries and charging board I ordered off Ebay. I went with 2 Panasonic 18650 cells with 3400MAH charge. Also since last time I got the Samsung 128GB Jump drive, which PriiLoader likes. If there are any questions please feel free to ask.

-Bayjose

View attachment 4631 View attachment 4632 View attachment 4634 View attachment 4633 View attachment 4636
Just letting you know now, you can't actually use memory cards with a trimmed wii and PortablizeMii under normal circumstances. Trimming the Wii removes the MX chip, which contains important font data for Gamecube and some VC games. Memory card emulation (to my understanding) is a part of providing that font data another way to allow games to run. Currently, if you want to use your memory cards, you'll have to perform the MX relocation, put a separate stock version of Nintendont on your USB, run it from Postloader's homebrew menu and boot games manually from there. Nintendont settings are global, so if two games need two different settings, you'll have to alter them every time manually.

It's a bit of a hassle, but at present that's the only way I know of to do it.
 
Joined
Oct 9, 2017
Messages
45
Likes
11
It's not quite that easy, since you'll have to transfer the saves from the card to the USB, and then back from USB to memory card after.
Just letting you know now, you can't actually use memory cards with a trimmed wii and PortablizeMii under normal circumstances. Trimming the Wii removes the MX chip, which contains important font data for Gamecube and some VC games. Memory card emulation (to my understanding) is a part of providing that font data another way to allow games to run. Currently, if you want to use your memory cards, you'll have to perform the MX relocation, put a separate stock version of Nintendont on your USB, run it from Postloader's homebrew menu and boot games manually from there. Nintendont settings are global, so if two games need two different settings, you'll have to alter them every time manually.

It's a bit of a hassle, but at present that's the only way I know of to do it.


Is there a separate trim that I should use, which simply takes out the internal regulators? it works fine as it is now in terms of swapping memory cards. I have the regulators installed so I may as well use them. I only really want to play GameCube games anyway.
 

Stitches

2 and a Half Dollarydoos
Staff member
.
.
Joined
Feb 5, 2017
Messages
3,833
Likes
3,018
Location
Banana Bender Land, Australia
Portables
6
Is there a separate trim that I should use, which simply takes out the internal regulators? it works fine as it is now in terms of swapping memory cards. I have the regulators installed so I may as well use them. I only really want to play GameCube games anyway.
The only well documented and currently supported trim is the OMGWTF trim. Others are more complicated than they're worth and come with greater risks. You'll have to choose what you value more: size or complexity.
 

cheese

the tallest memer in town
Staff member
.
.
.
Joined
Mar 2, 2016
Messages
2,759
Likes
2,431
Location
Florida
Is there a separate trim that I should use, which simply takes out the internal regulators? it works fine as it is now in terms of swapping memory cards. I have the regulators installed so I may as well use them. I only really want to play GameCube games anyway.
While there isn't a trim that leaves the MX chip on the board, you can cut out the section that has that and rewire it after trimming, similar to bluetooth. There is already information in the trimming guide as to where to connect what to keep MX.
 
Joined
Oct 9, 2017
Messages
45
Likes
11
While there isn't a trim that leaves the MX chip on the board, you can cut out the section that has that and rewire it after trimming, similar to bluetooth. There is already information in the trimming guide as to where to connect what to keep MX.
I did see it on there, it seems a little daunting, do you guys have a hot air gun recommendation for getting the chips off the board, like the U10 and MX chip? or should I just use my trusty Weller with a thin tip, some flux and some Chip-Quick?
 
Top