
Mystotic
.
- Joined
- Dec 7, 2020
- Messages
- 19
- Likes
- 3
I originally got interested in portables a couple years ago but felt that it was way too difficult for someone like me with no experience or knowledge about electronics prior, but just recently I thought about actually giving it a go. I decided on an Ashida because it's an amazing design with the least difficulty and I'm a beginner. I'm making a worklog because it seems fun and I know I'll have quite a few questions.
This is my current parts list which I'm preparing. Anything with a price not listed I already have, I just need to gather them. To start I'm going to get the PMS Lite when its back in stock, the screen, and everything else I need so I can test boot.
I also want to include bluetooth and the mx chip because I want to be able to connect a second controller and the RTC for some games. I'm drilling holes and putting IR LEDS for a sensor bar.
While I'm waiting for things to come in stock, I am learning about electronics and the whole process. Right now I mostly understand everything except for how to wire up VGA and the MX chip.
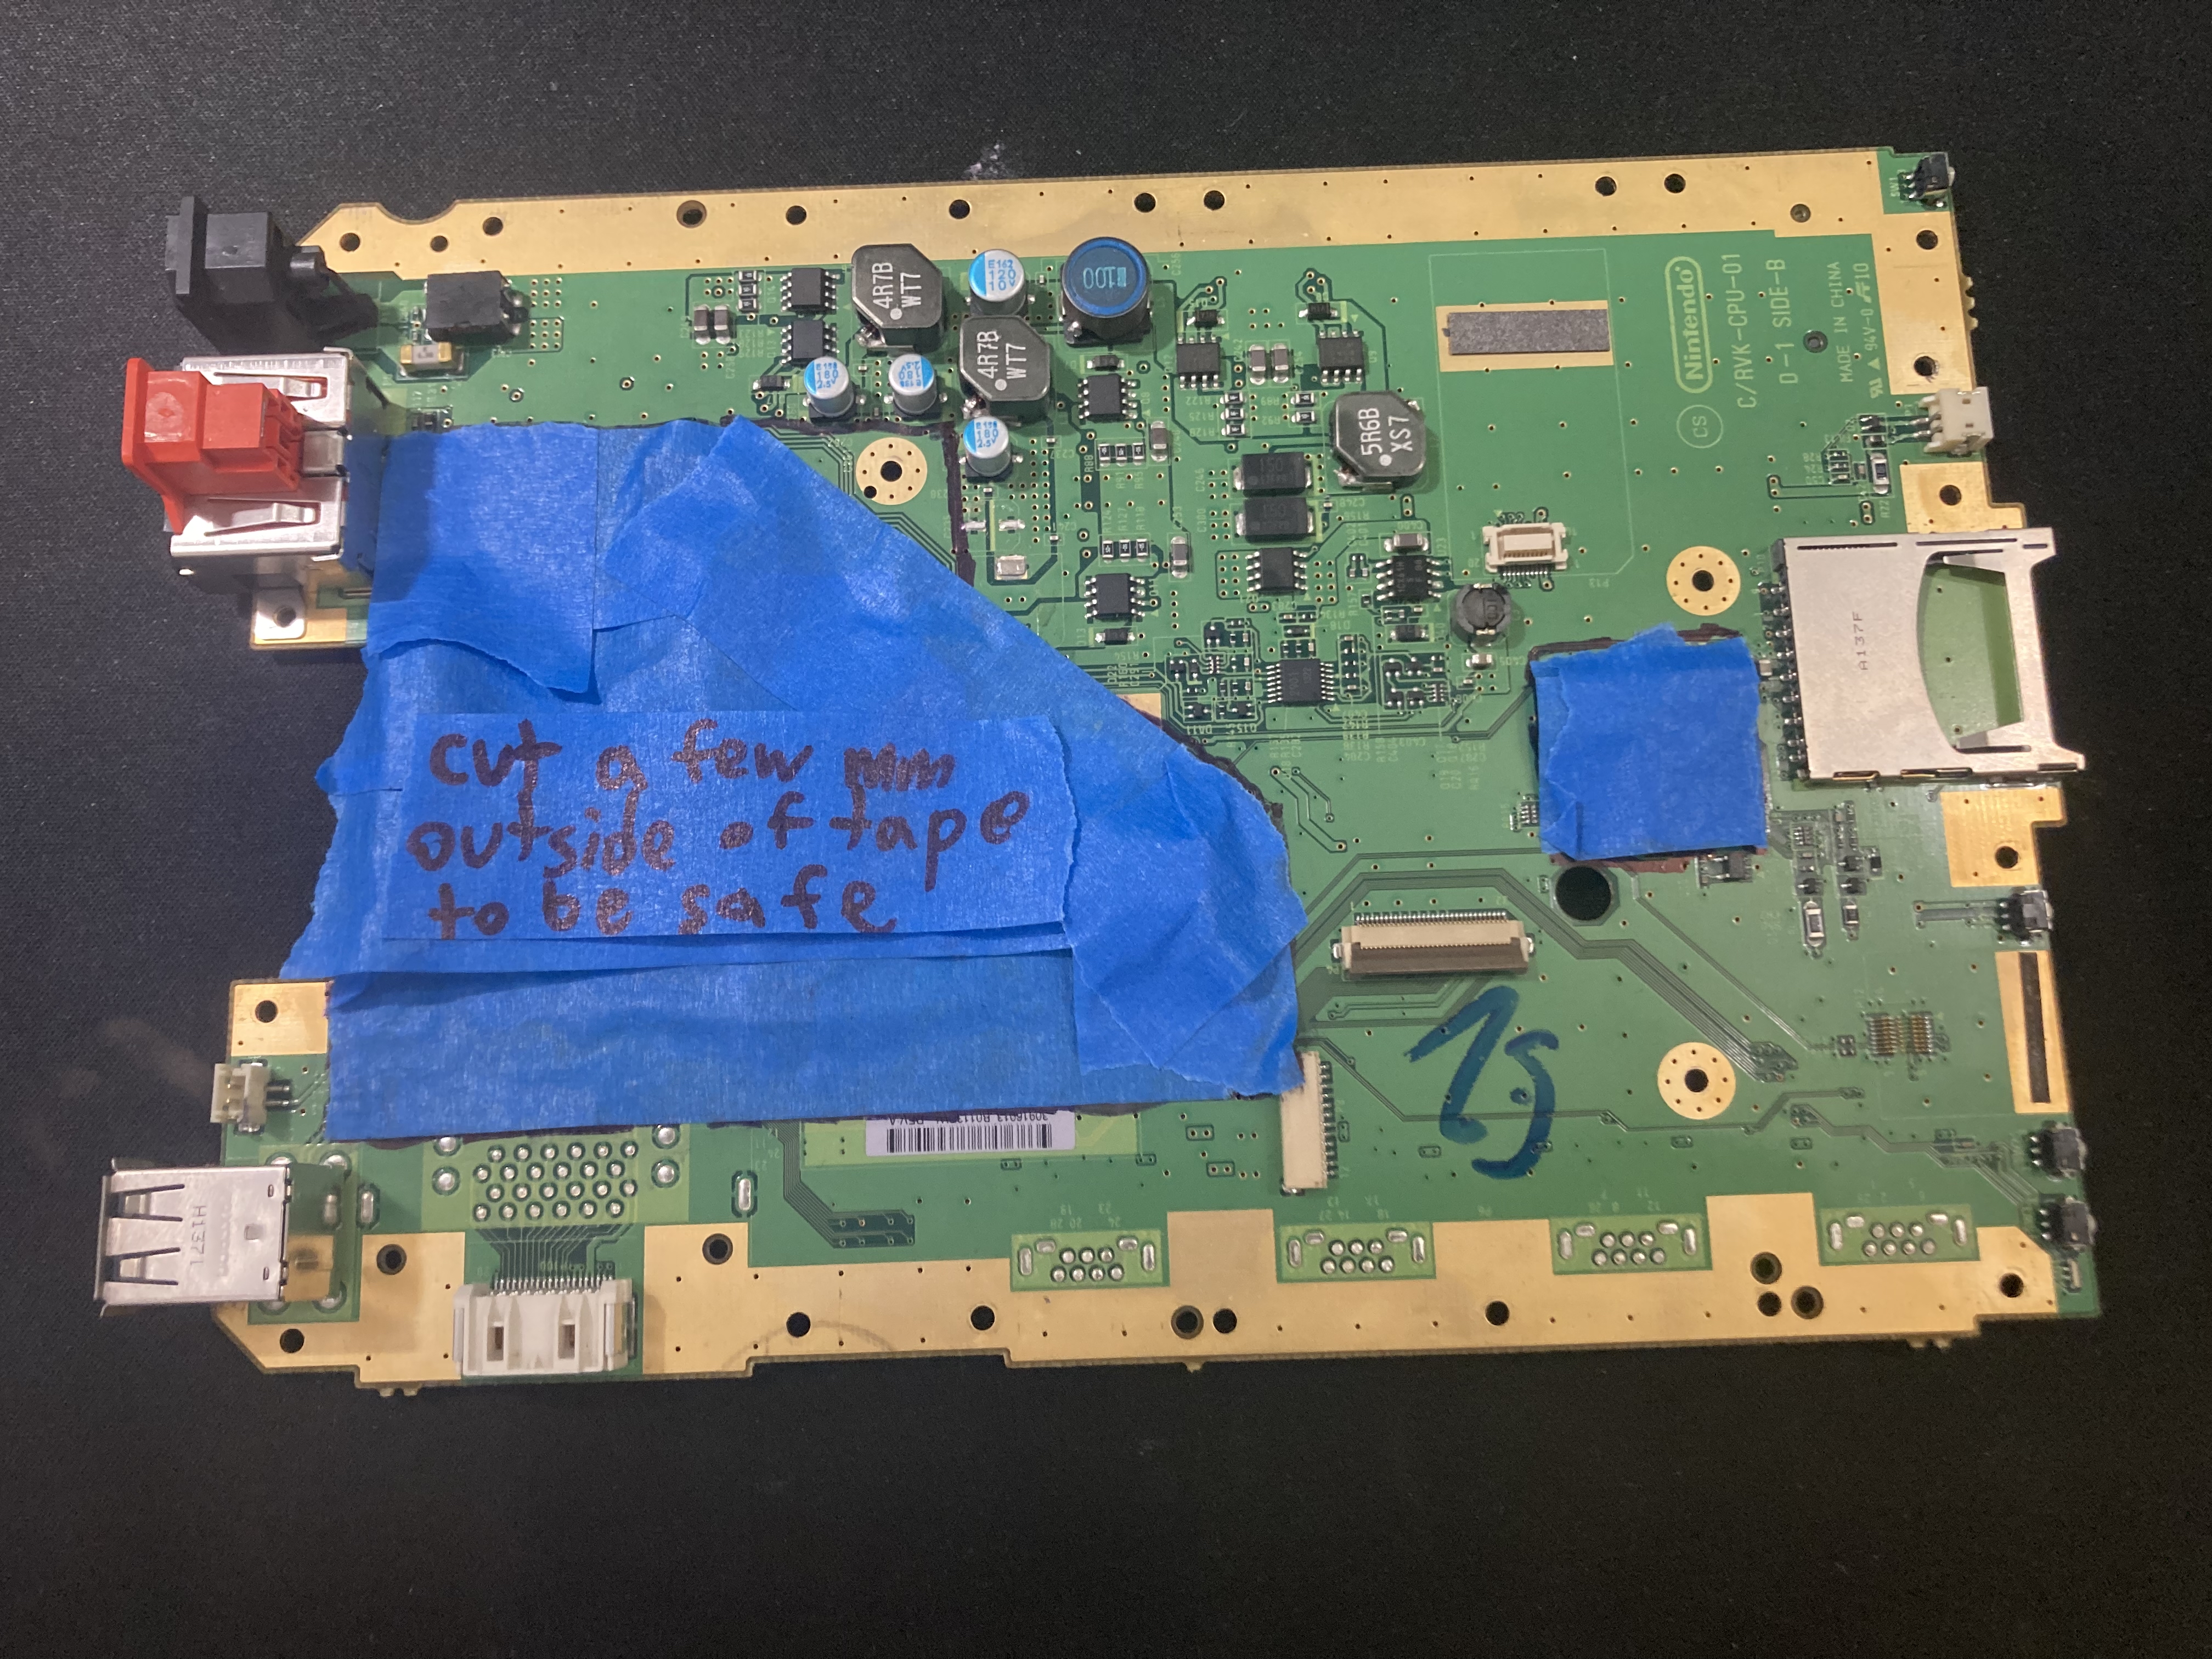
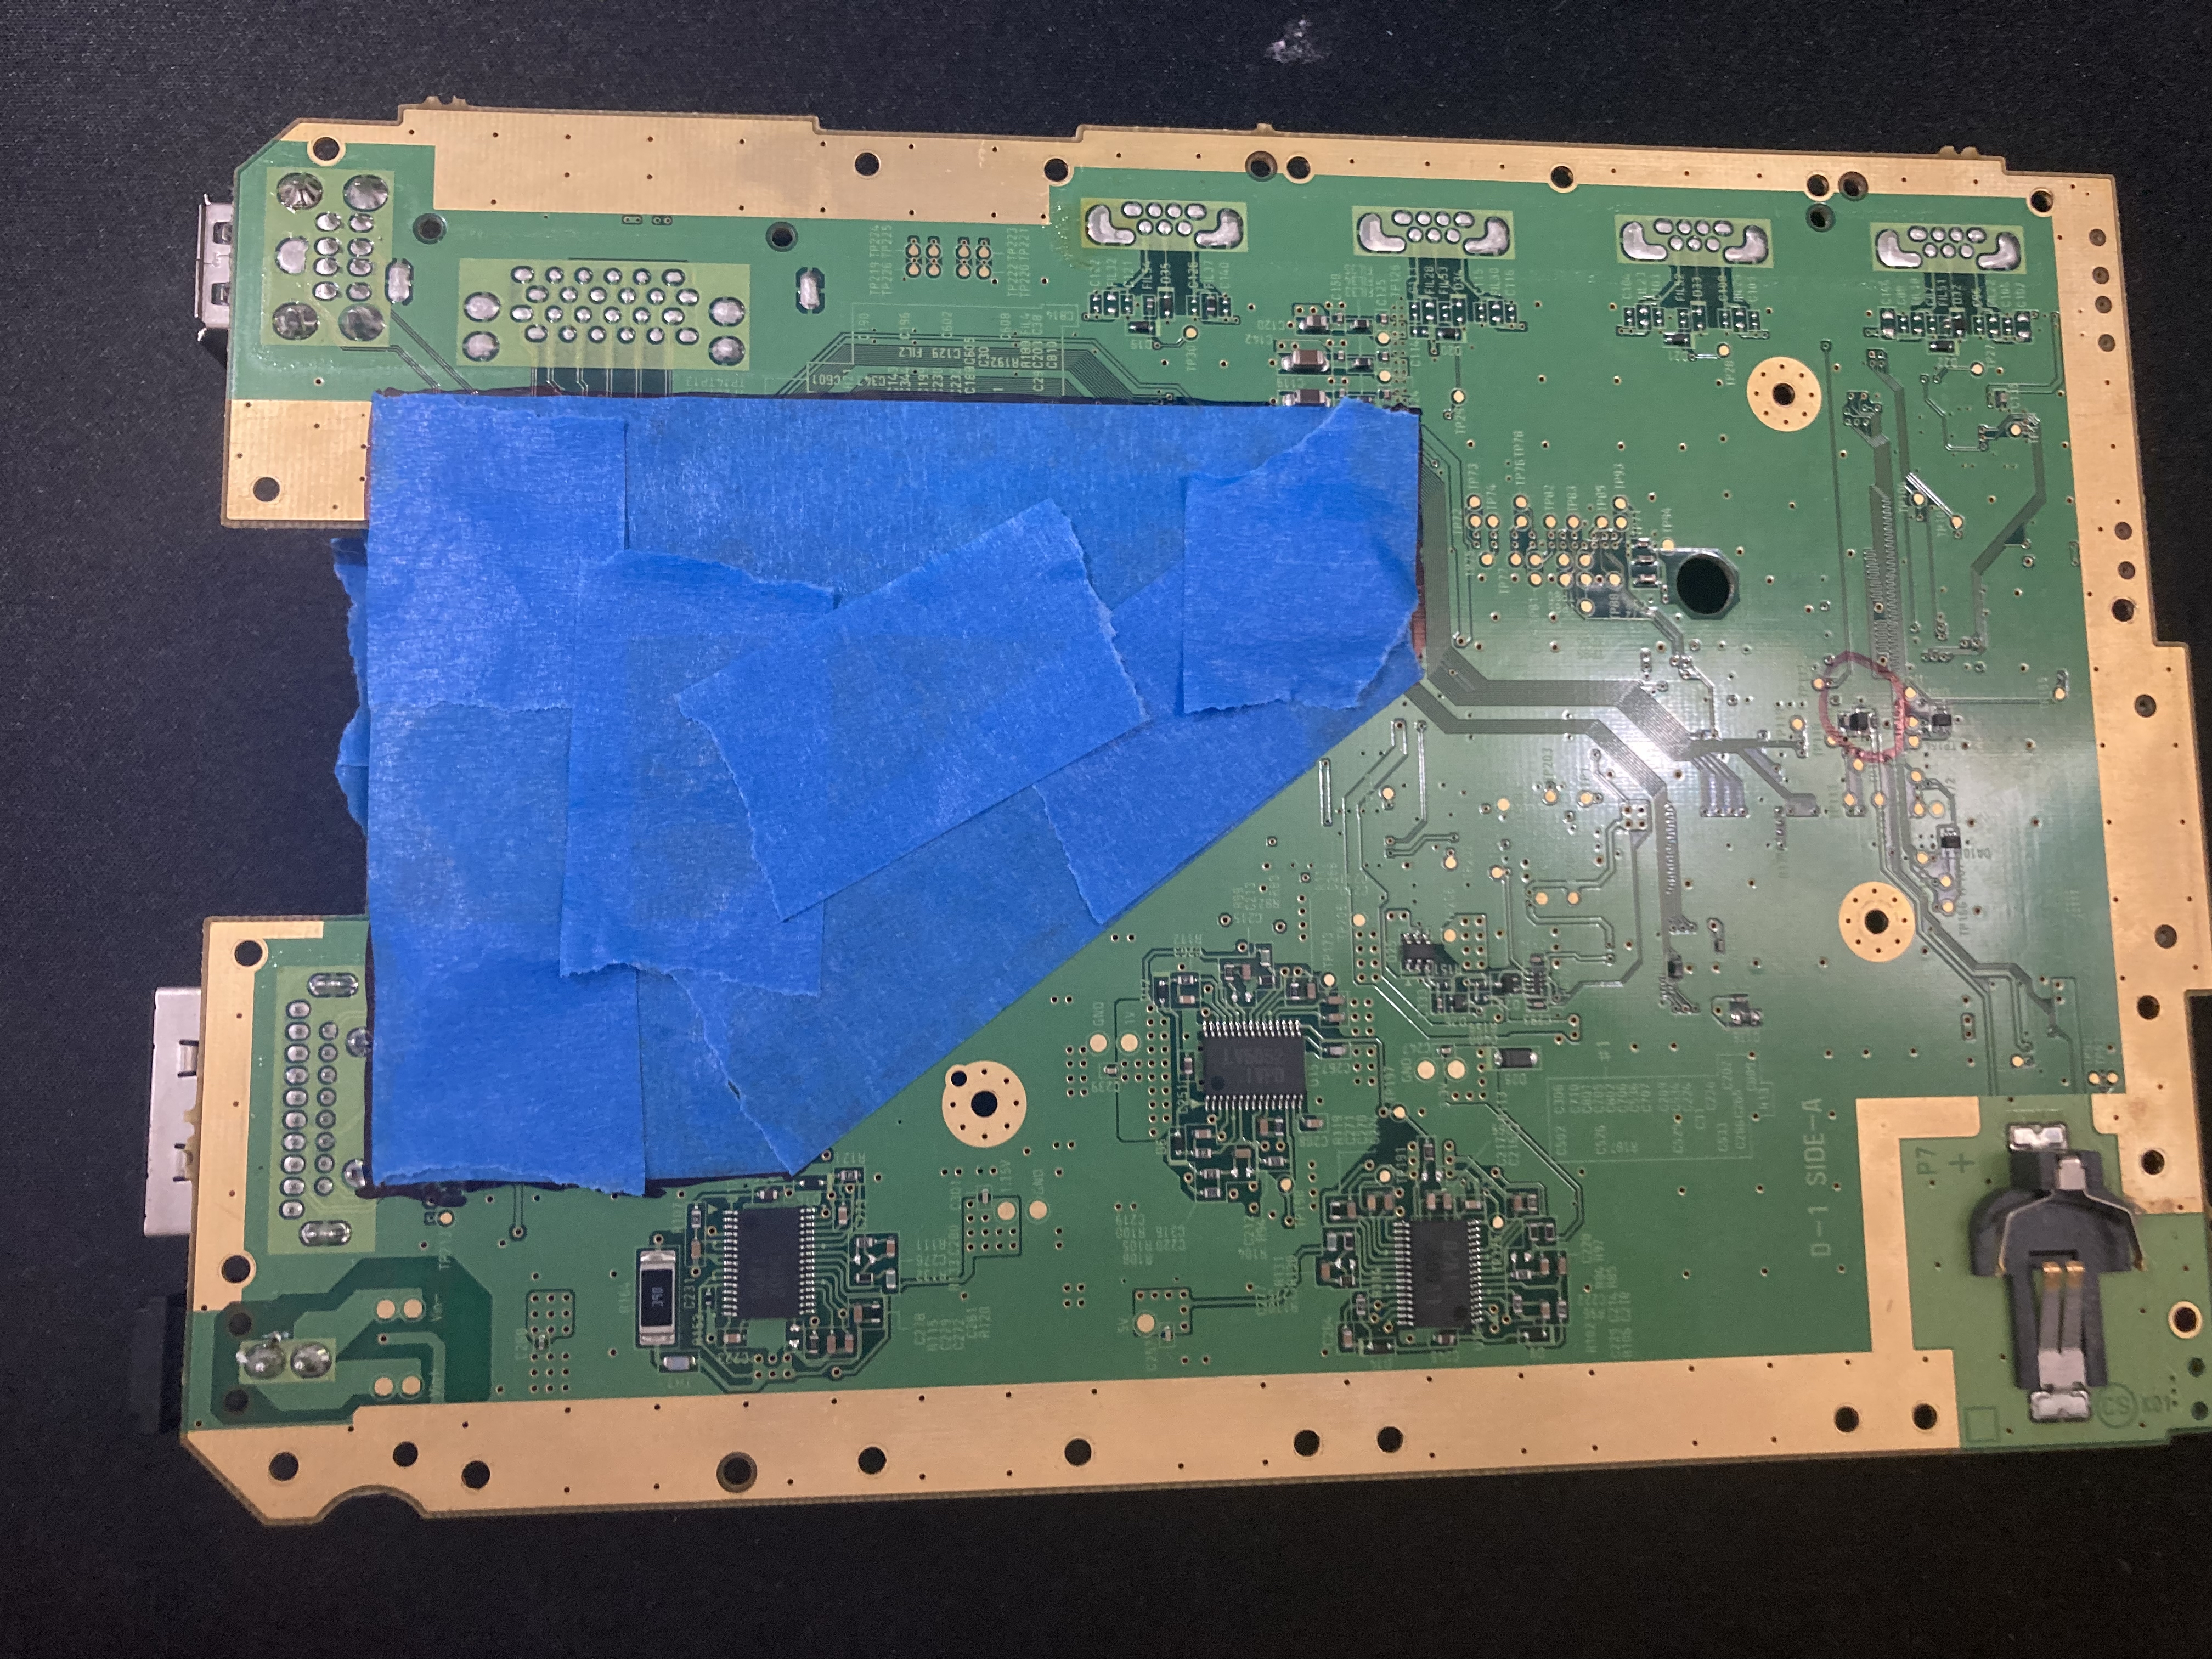
I have some random boards I'm going to practice soldering on before starting.
Parts:
Digikey cart (everything from digikey on BOM) - I have cart on my pc $31.98 +shipping and tax
one of these $1.61 plus tax and shipping
2 of these $4.88
2 lithium ion batteries $15.98
rvl pms lite $70
power delivery board $20
u-amp 2 $24
gc +2 $15
ashida pcb set $15
Screen $45
Stickboxes (taken from knockoff wii classic controller)
gamecube rubber pads $5.75
gamecube buttons $2.77
Need second Z button
Case (3d printing myself on my TEVO Tornado)
Screws (from wii)
4 Layer Wii (I have from when I was younger)
micro sd card adapter $6
Micro sd card $11.69
IR leds (taken from sensor bar)
Resistors for IR leds (no idea what kind)
Cost of parts: 269.66
Tools/Supplies:
Insulation tape
Brush
Caliper
Multimeter
Side snips/cutters
Wire stripper
Needlenose pliers
Tweezers
Work mat
Isopropyl alcohol
Screwdrivers
X-acto knife
Dremel
Shrink wrap
Sandpaper
soldering iron $26 (I have a soldering iron already which I’m going to test, but if that doesn’t work well I’ll buy this or something better than this)
Solder
Flux: $14
Solder sucker / wick: $7
soldering iron tip cleaner $9
Fume extractor (optional but highly recommended): $36
arms with magnifier $6
tape $7
22awg stranded wire: $17
34awg magnet wire: $16
Cost of tools and supplies: $138
Total: $407.66
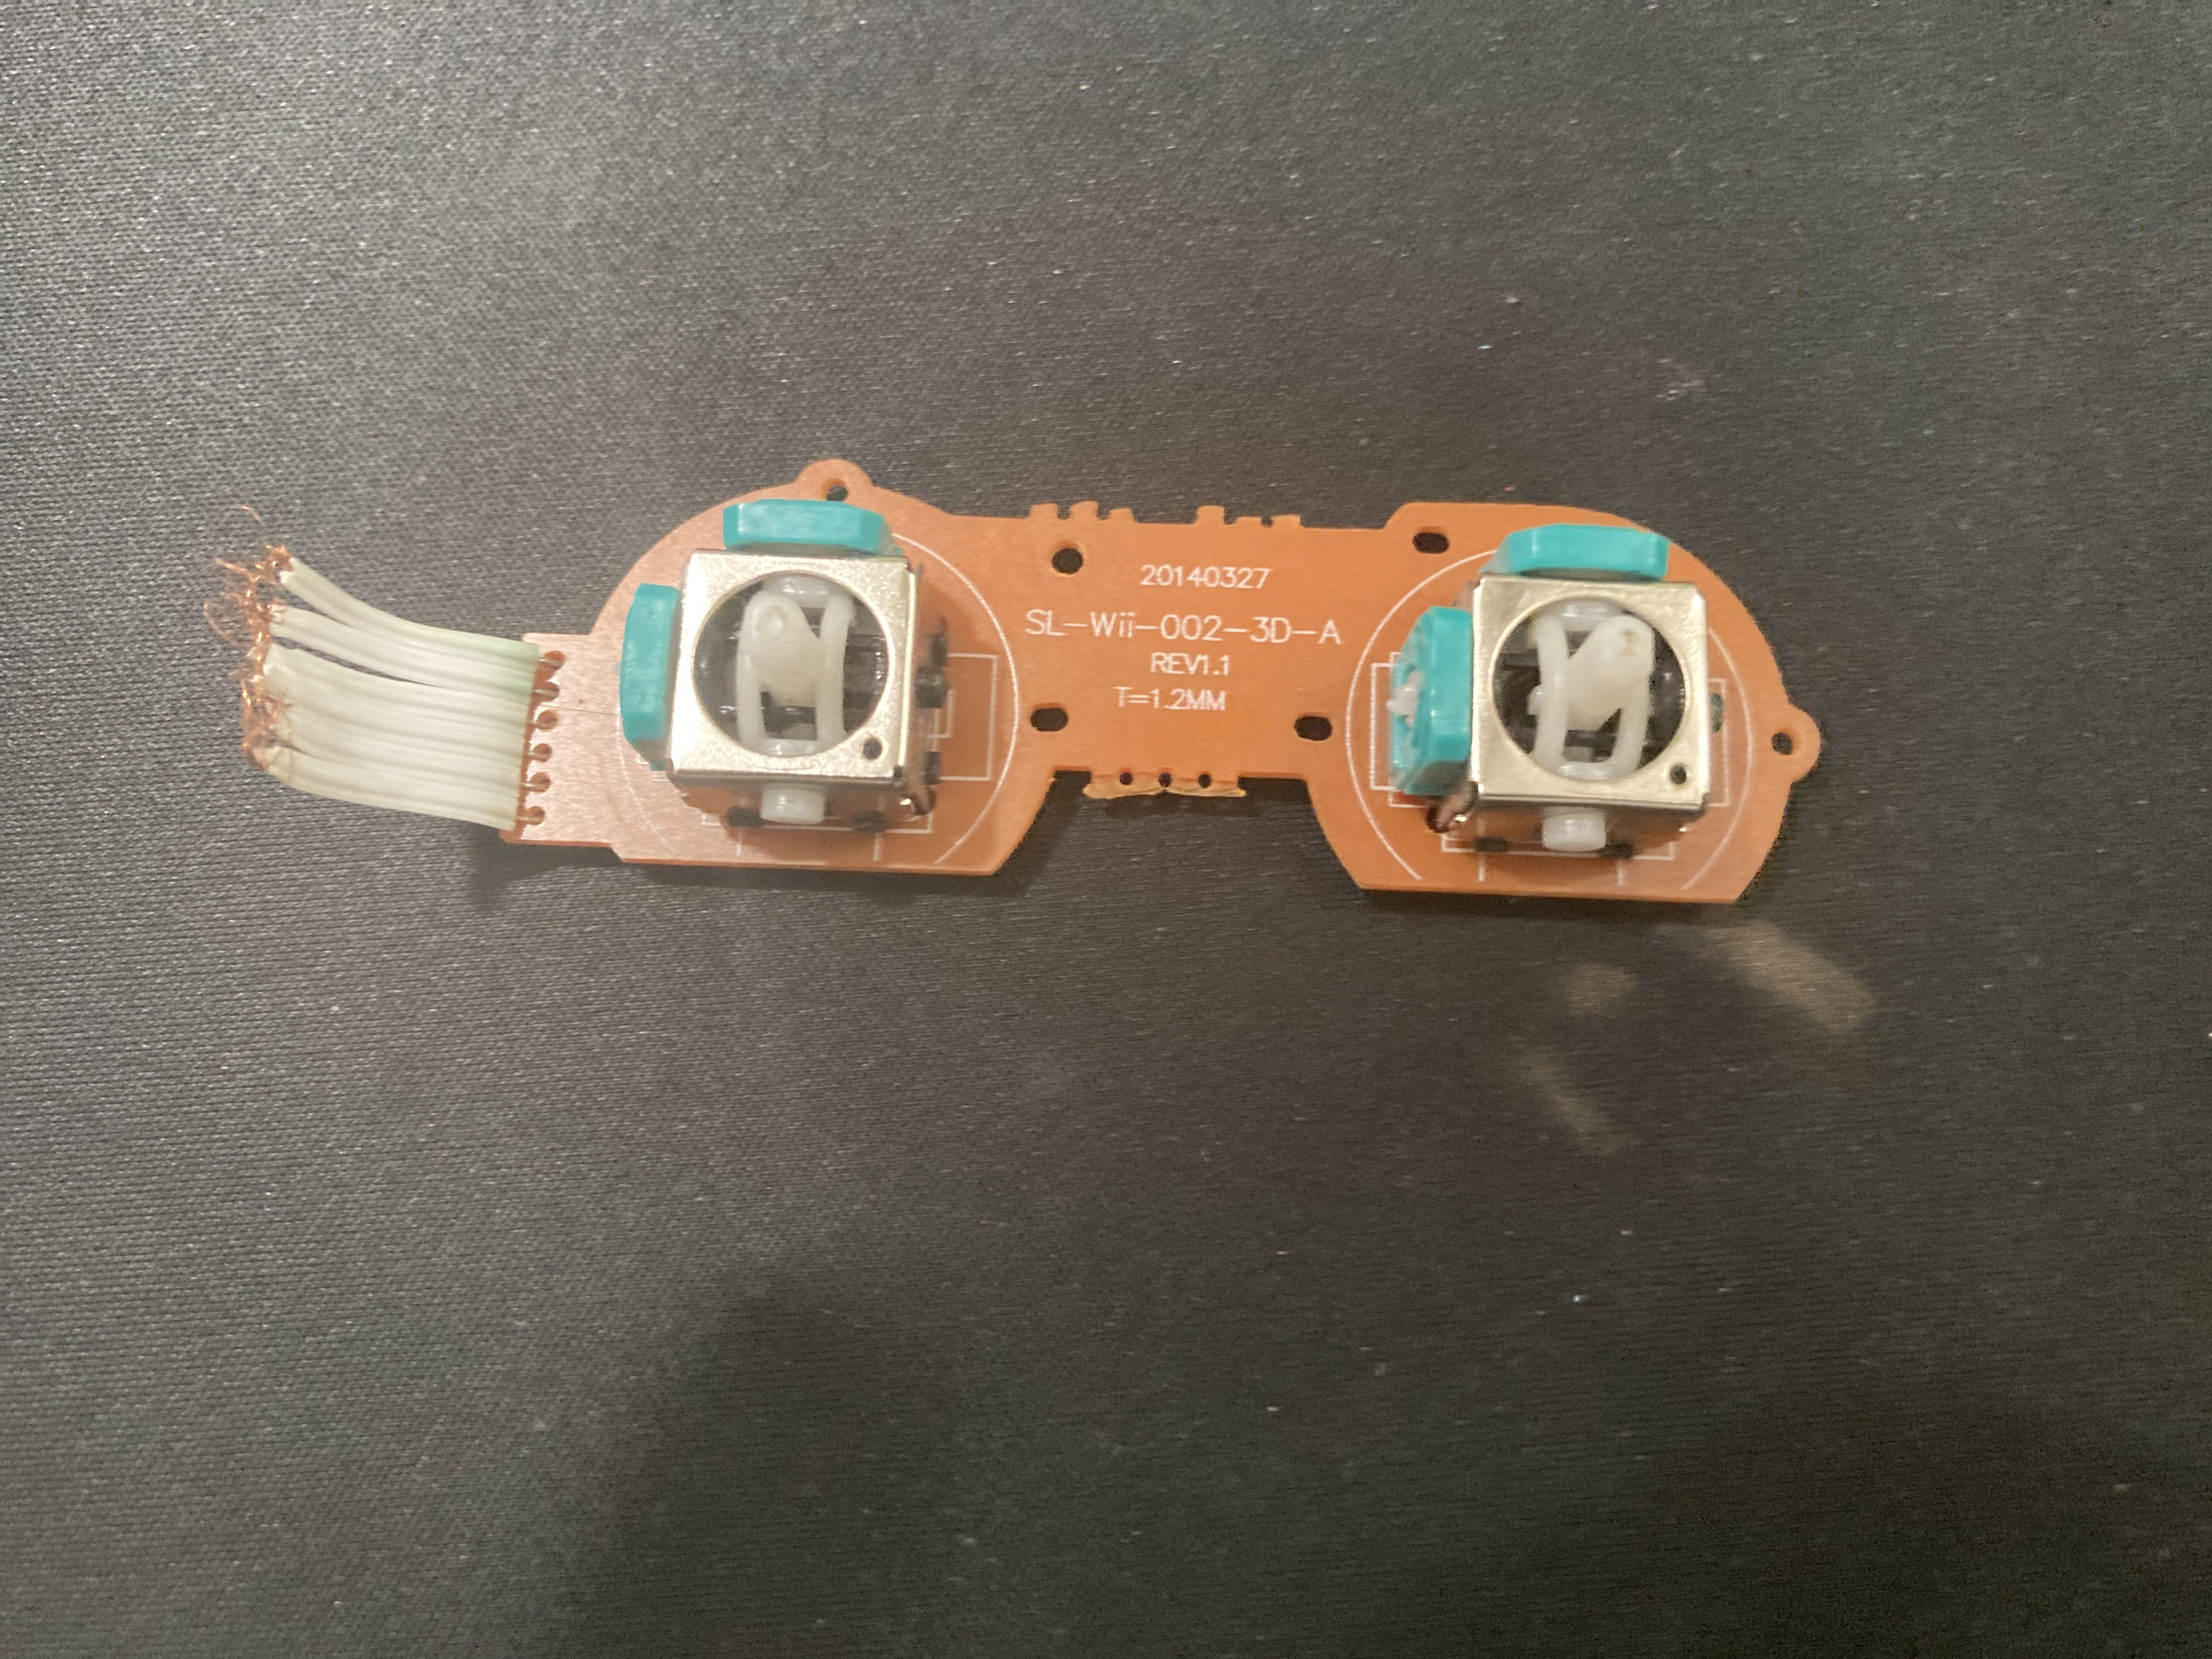
A couple questions I have are will these stickboxes from a knockoff classic controller work?
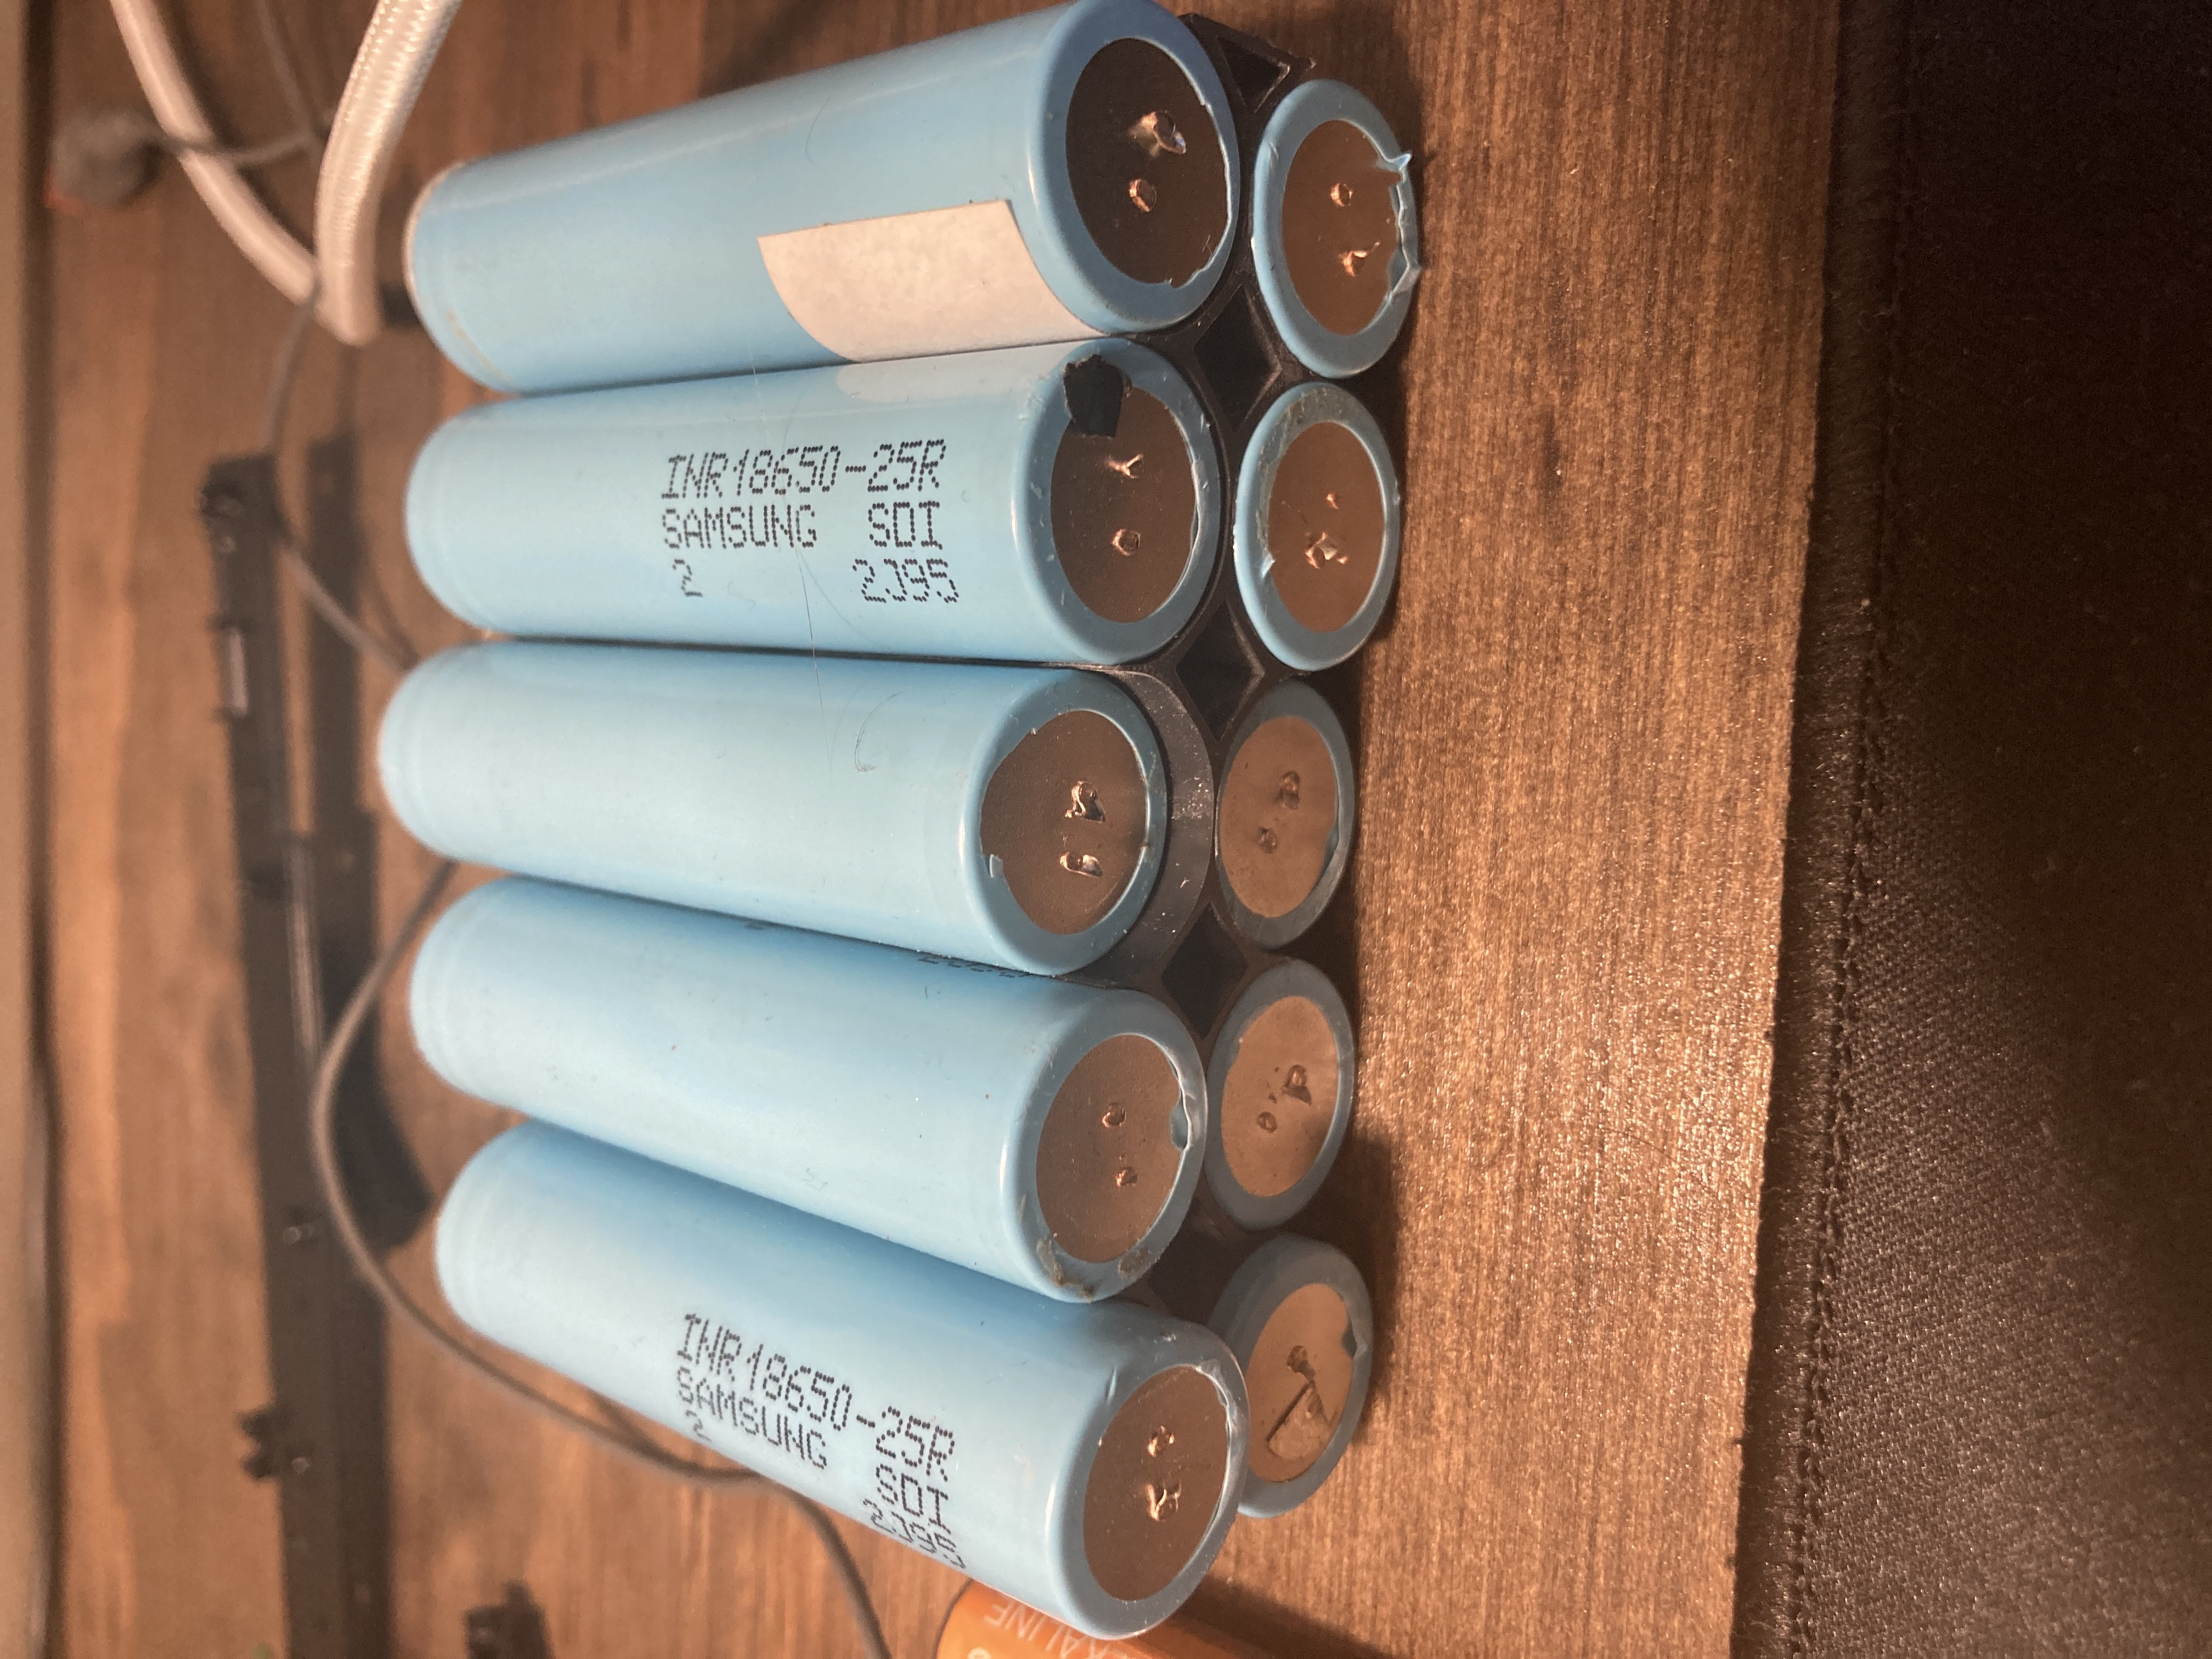
Another thing is I already have 10 18650 batteries from a ryobi battery, and is it worth the battery life to buy the bigger cells?
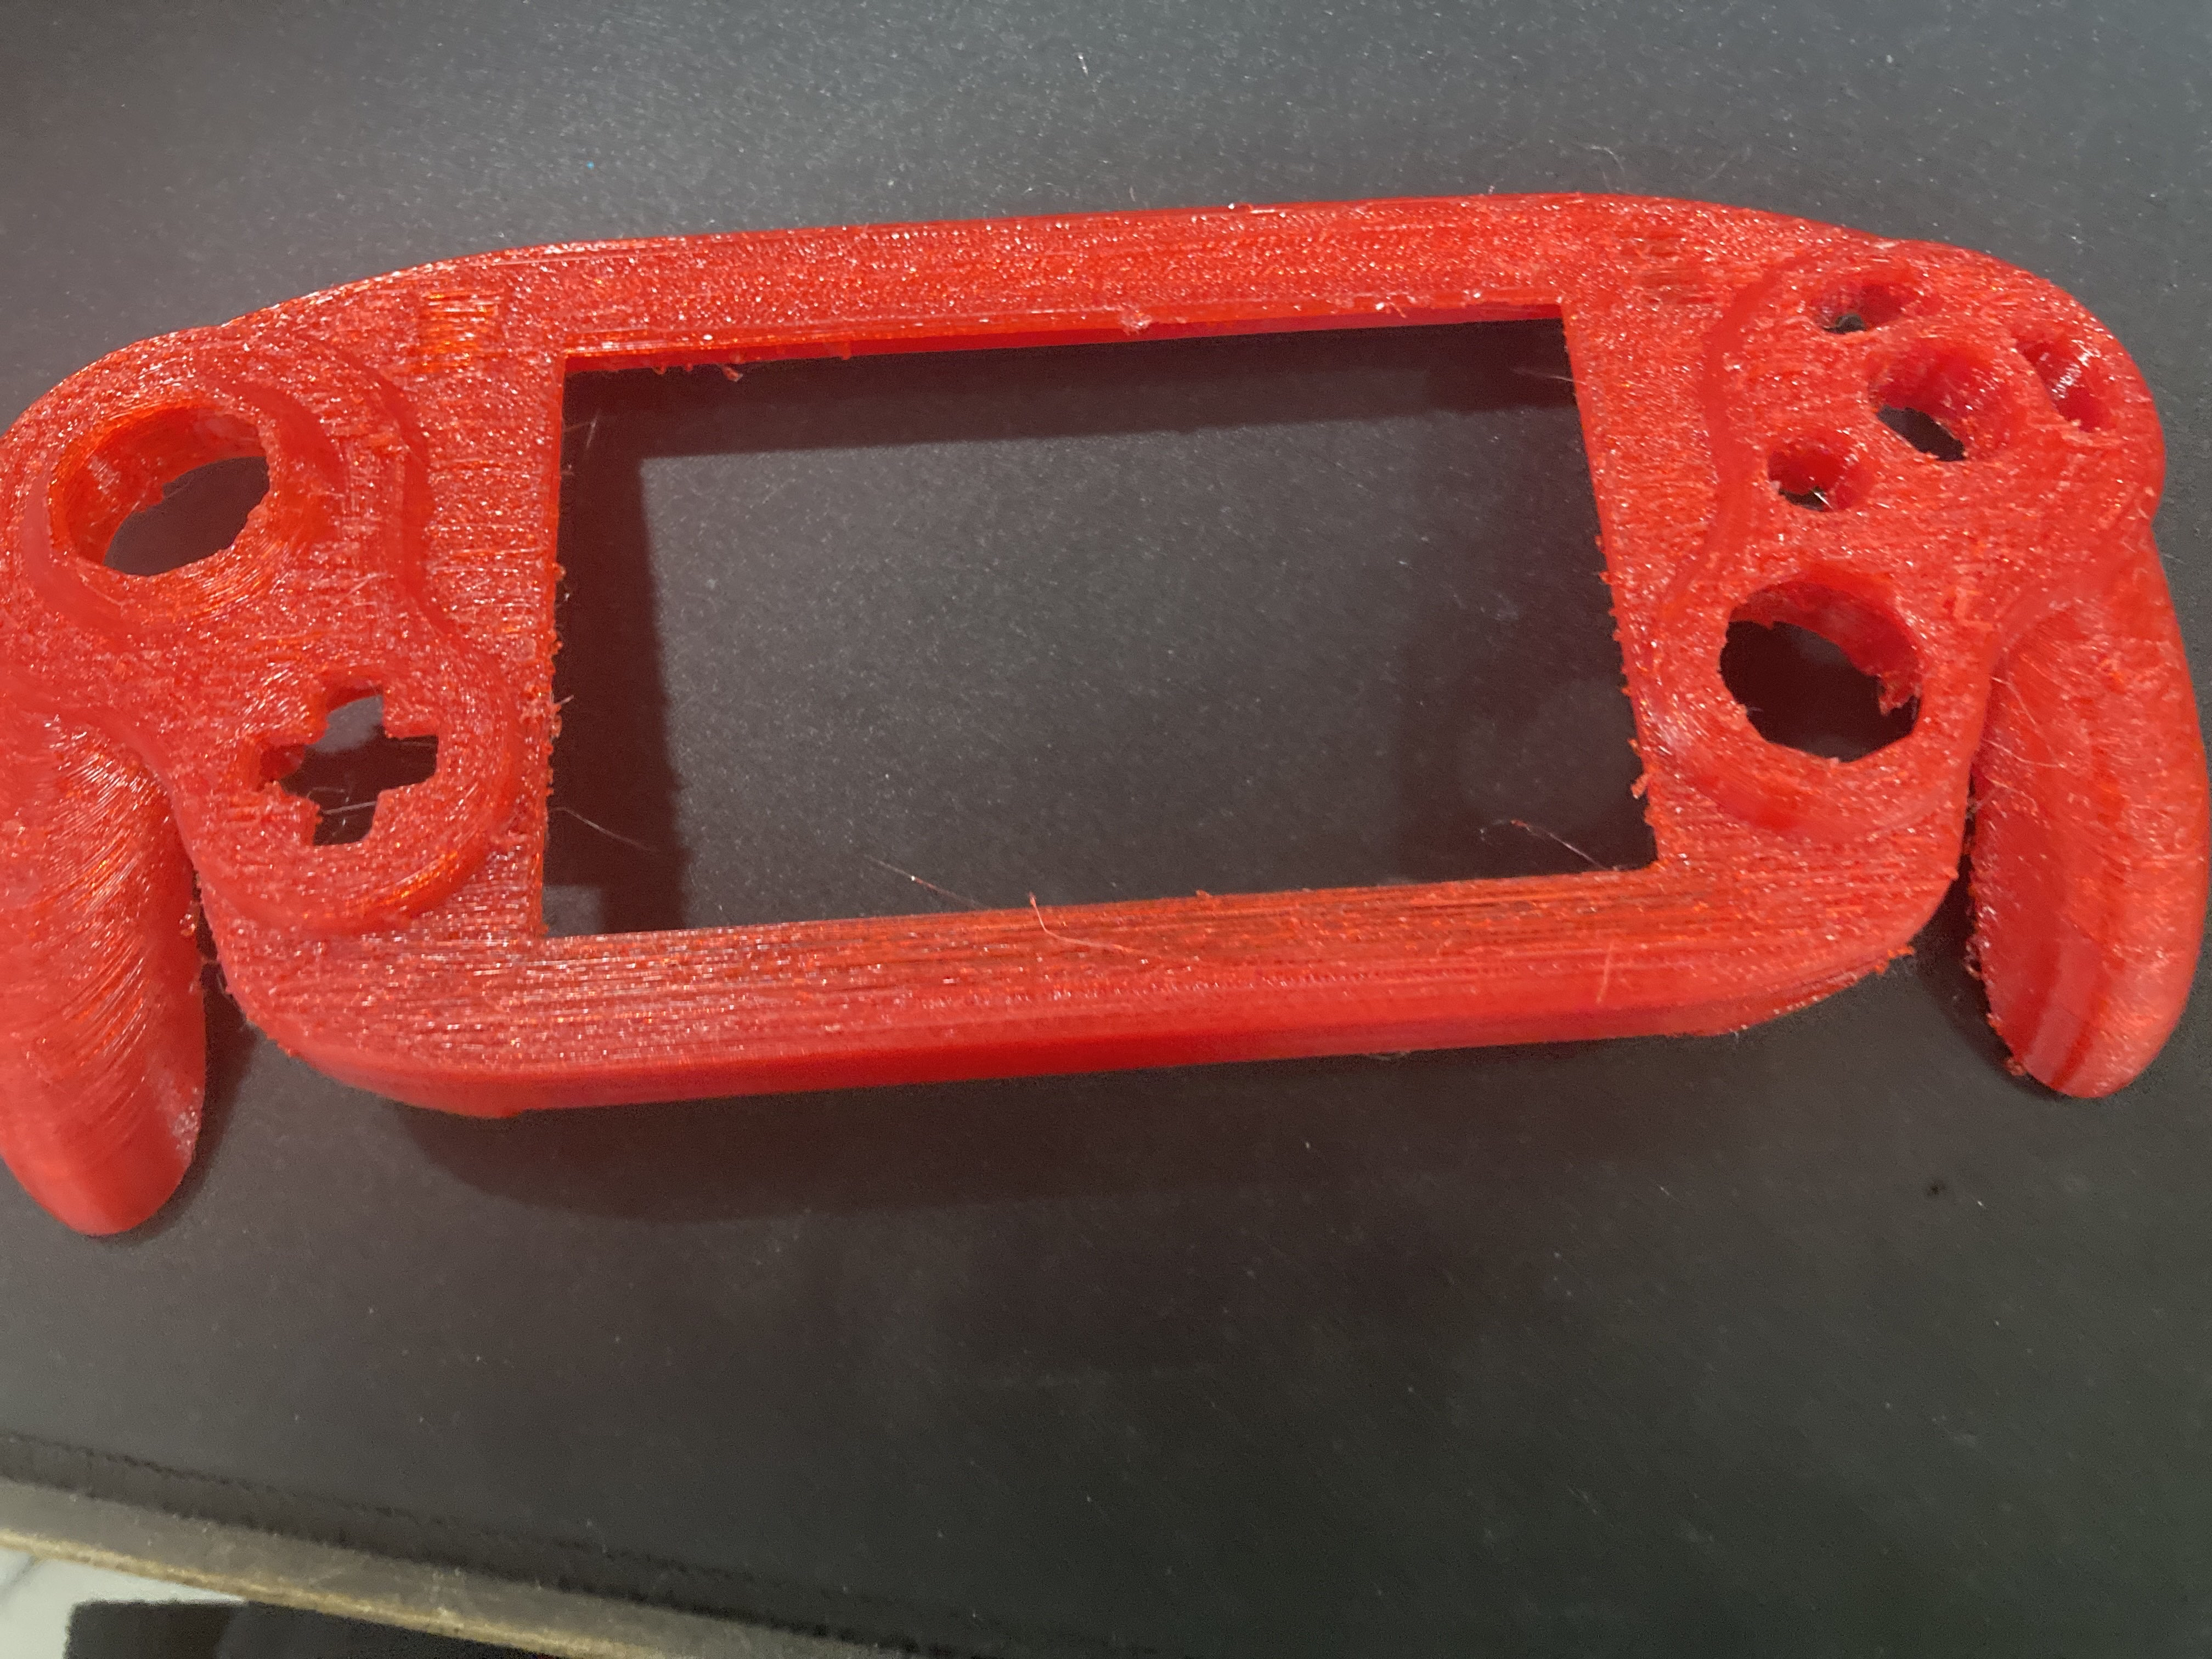
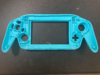
First try at a case print with PETG (went terribly):
Case with PLA after a few tries and some tuning. (Before I print the rest of the case I am going to tune some more, and I have much sanding and clean up to do)
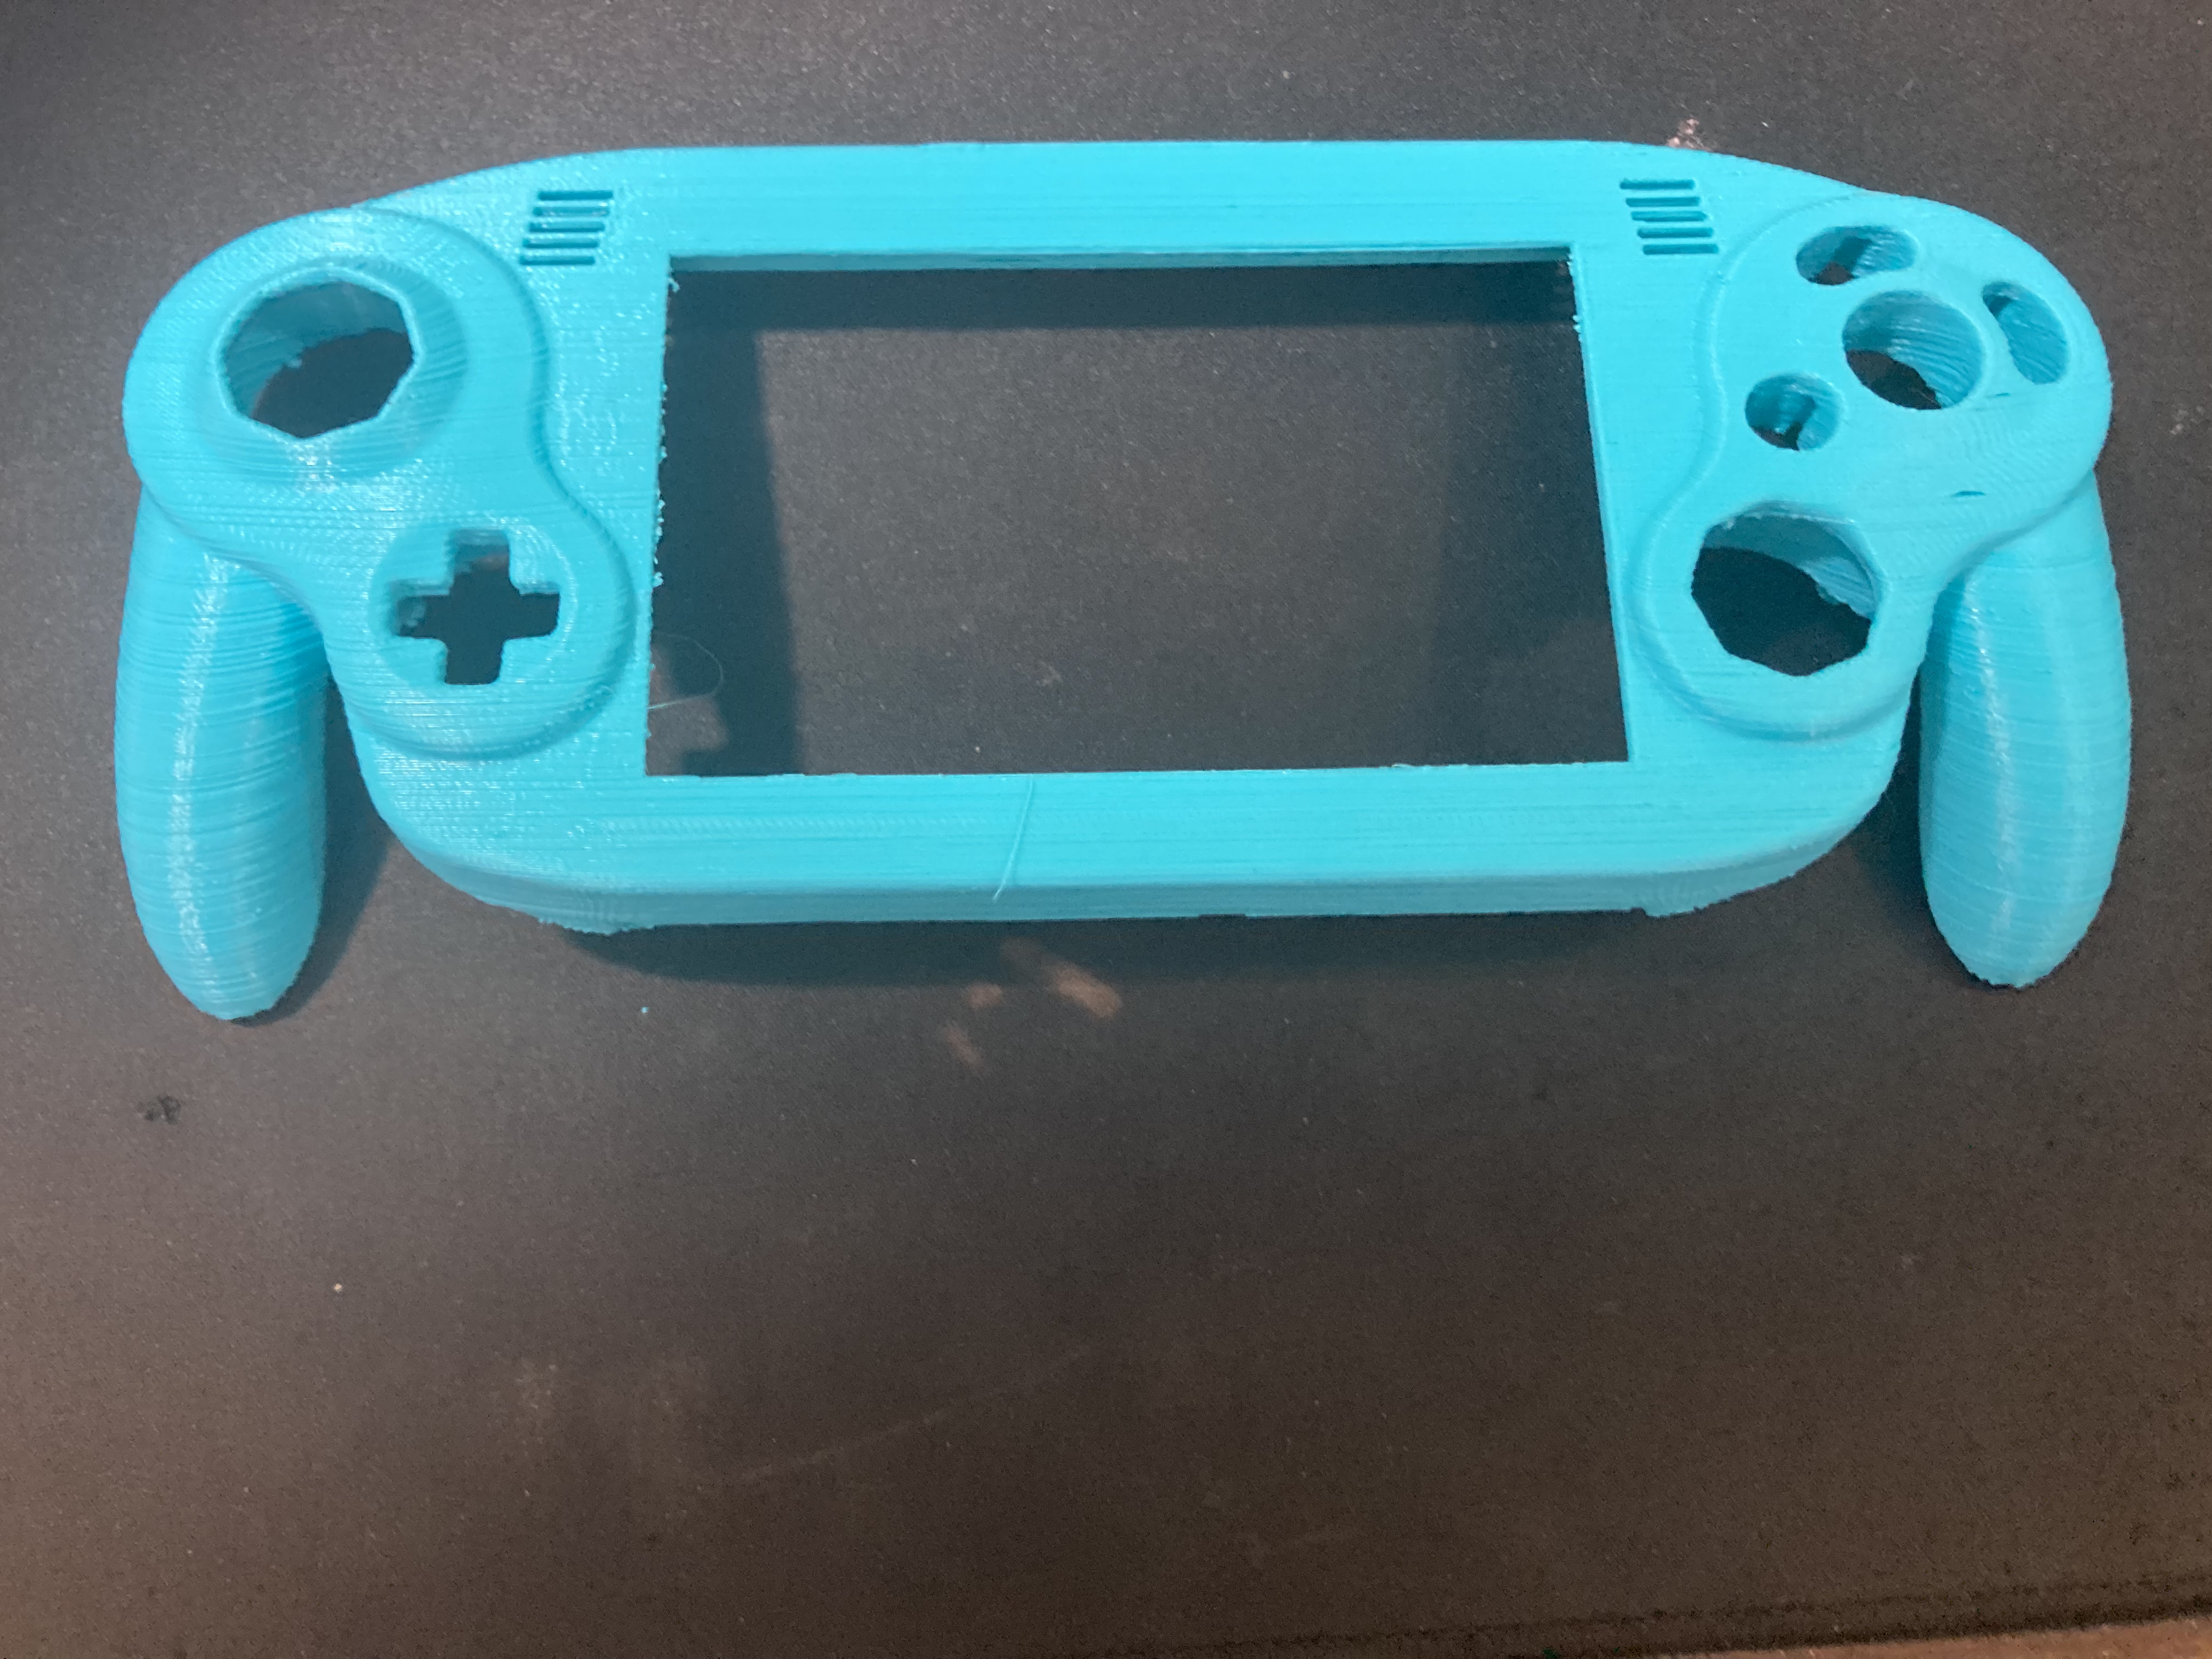
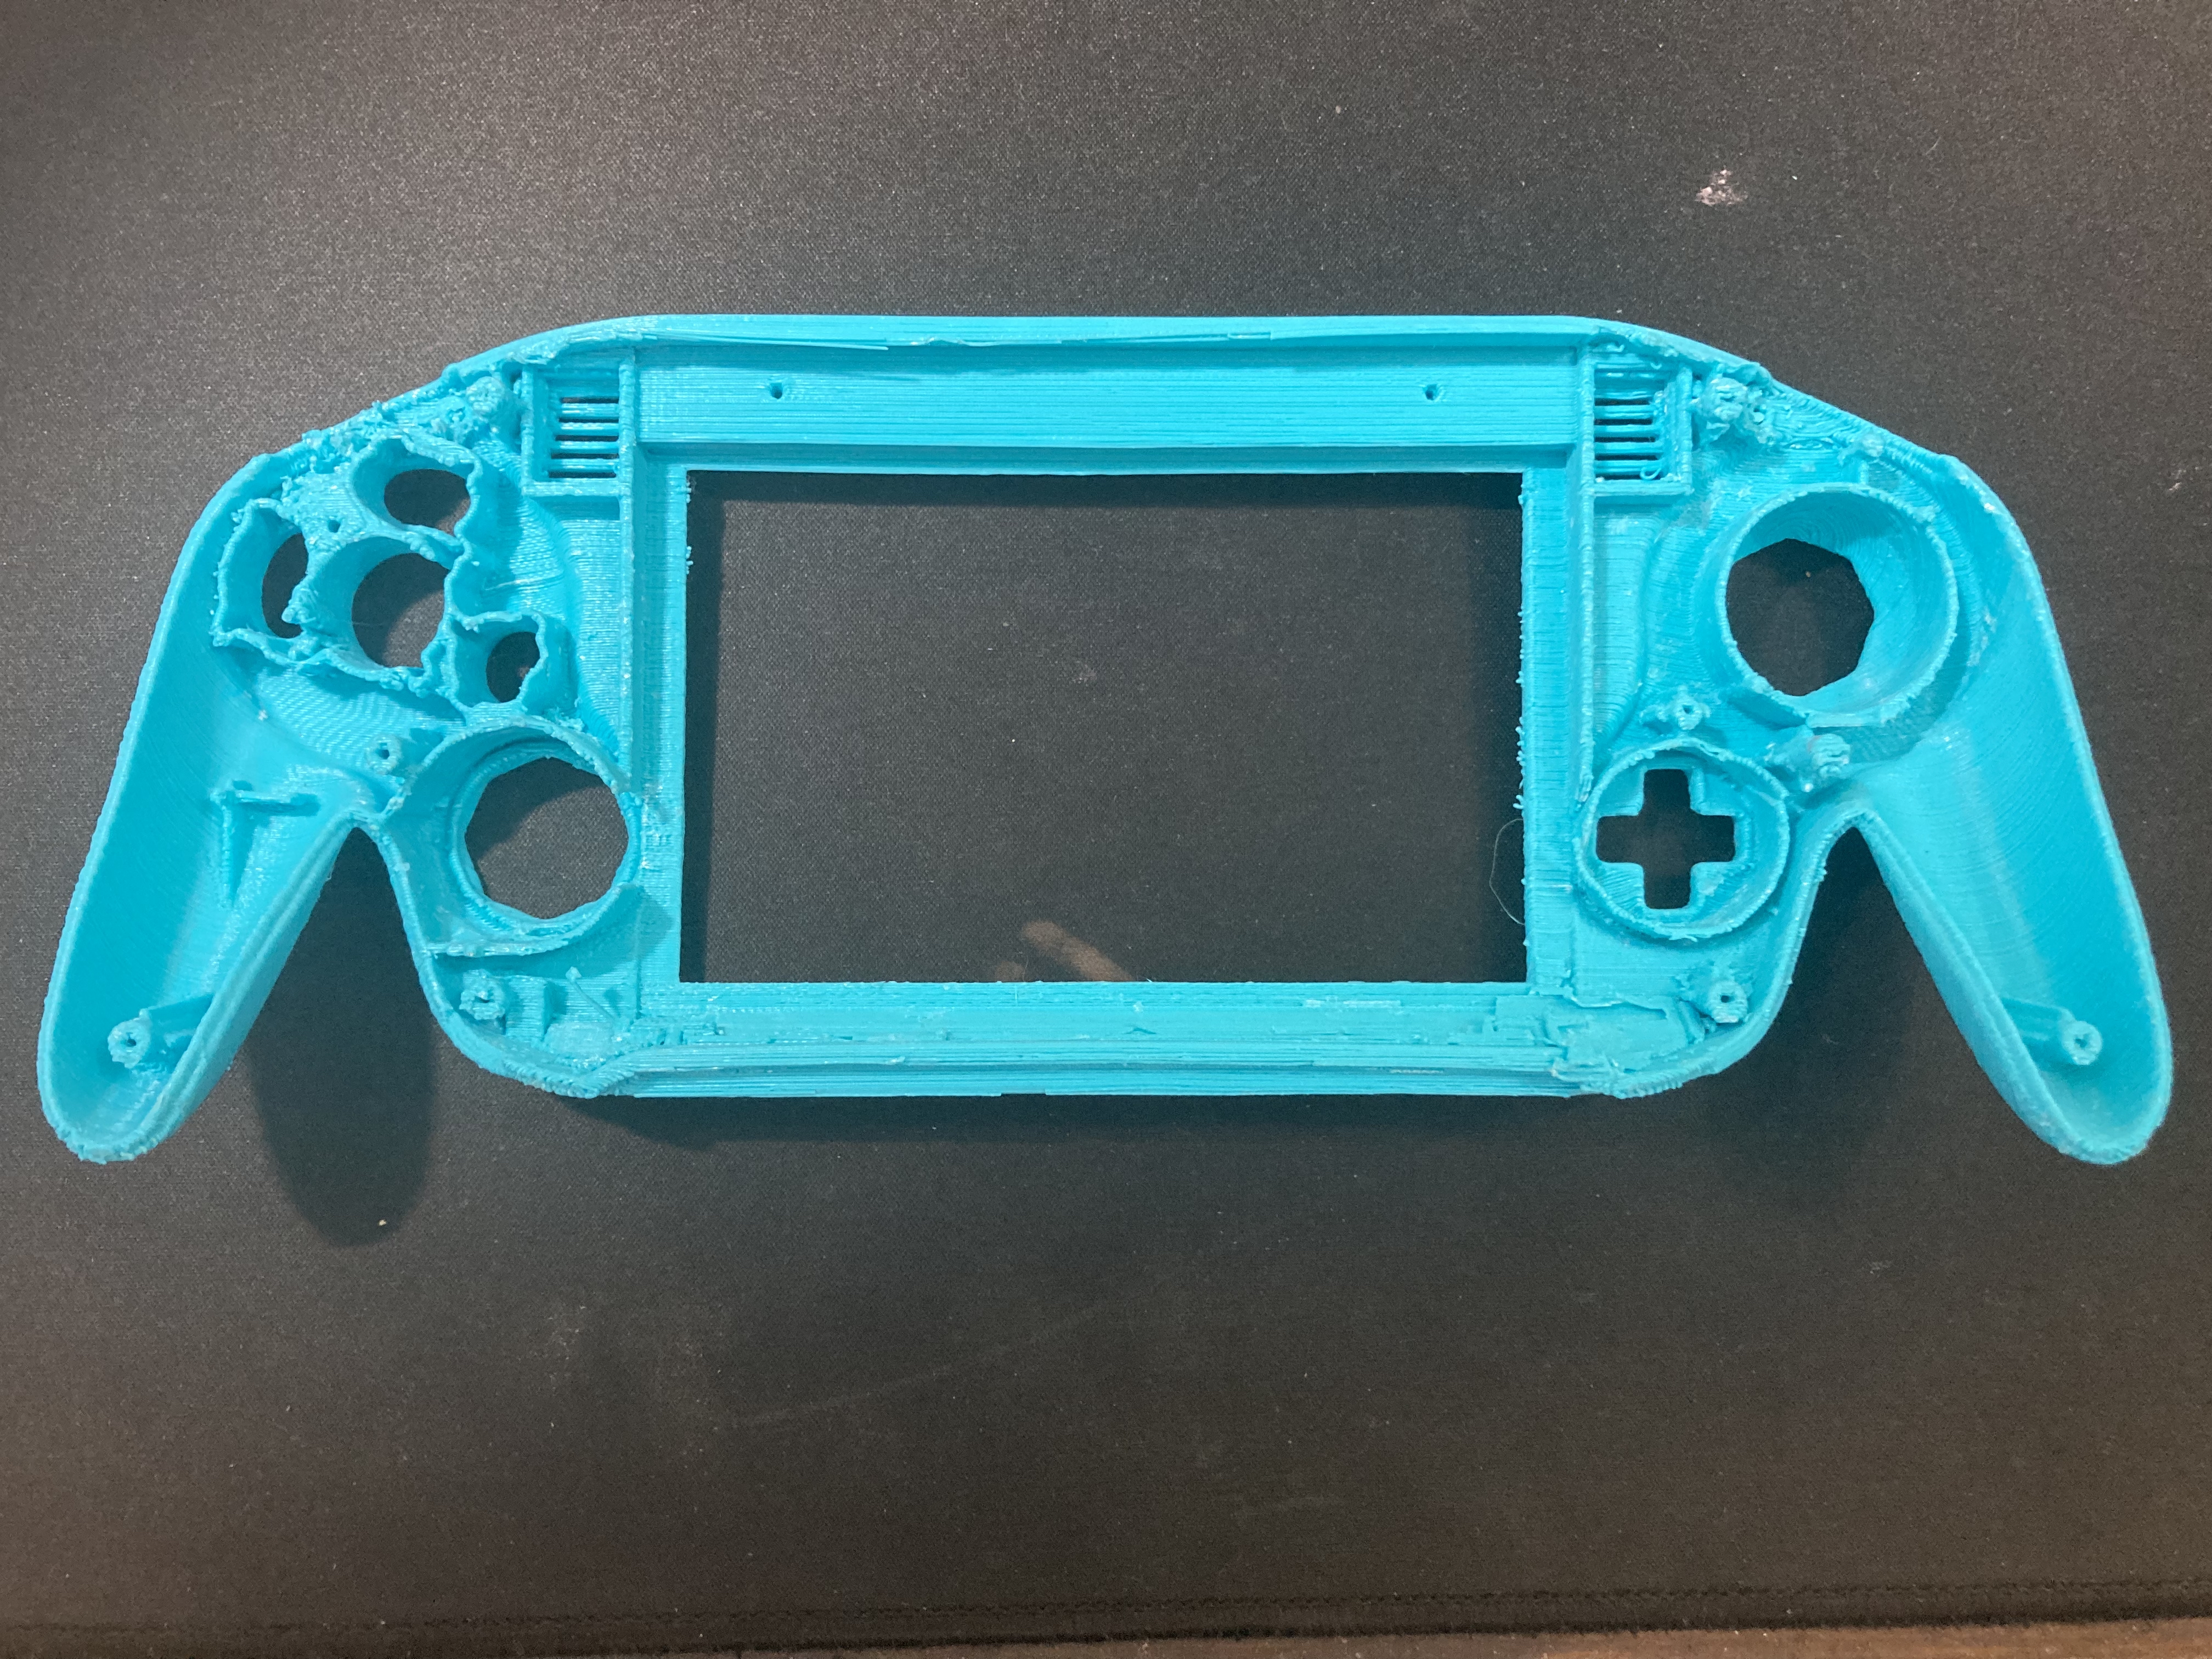
I broke the circle around the D-Pad while removing supports, but I think it should be fixable?
Lastly here are my trim lines:
This is my current parts list which I'm preparing. Anything with a price not listed I already have, I just need to gather them. To start I'm going to get the PMS Lite when its back in stock, the screen, and everything else I need so I can test boot.
I also want to include bluetooth and the mx chip because I want to be able to connect a second controller and the RTC for some games. I'm drilling holes and putting IR LEDS for a sensor bar.
While I'm waiting for things to come in stock, I am learning about electronics and the whole process. Right now I mostly understand everything except for how to wire up VGA and the MX chip.
I have some random boards I'm going to practice soldering on before starting.
Parts:
Digikey cart (everything from digikey on BOM) - I have cart on my pc $31.98 +shipping and tax
one of these $1.61 plus tax and shipping
2 of these $4.88
2 lithium ion batteries $15.98
rvl pms lite $70
power delivery board $20
u-amp 2 $24
gc +2 $15
ashida pcb set $15
Screen $45
Stickboxes (taken from knockoff wii classic controller)
gamecube rubber pads $5.75
gamecube buttons $2.77
Need second Z button
Case (3d printing myself on my TEVO Tornado)
Screws (from wii)
4 Layer Wii (I have from when I was younger)
micro sd card adapter $6
Micro sd card $11.69
IR leds (taken from sensor bar)
Resistors for IR leds (no idea what kind)
Cost of parts: 269.66
Tools/Supplies:
Insulation tape
Brush
Caliper
Multimeter
Side snips/cutters
Wire stripper
Needlenose pliers
Tweezers
Work mat
Isopropyl alcohol
Screwdrivers
X-acto knife
Dremel
Shrink wrap
Sandpaper
soldering iron $26 (I have a soldering iron already which I’m going to test, but if that doesn’t work well I’ll buy this or something better than this)
Solder
Flux: $14
Solder sucker / wick: $7
soldering iron tip cleaner $9
Fume extractor (optional but highly recommended): $36
arms with magnifier $6
tape $7
22awg stranded wire: $17
34awg magnet wire: $16
Cost of tools and supplies: $138
Total: $407.66
A couple questions I have are will these stickboxes from a knockoff classic controller work?
Another thing is I already have 10 18650 batteries from a ryobi battery, and is it worth the battery life to buy the bigger cells?
First try at a case print with PETG (went terribly):
Case with PLA after a few tries and some tuning. (Before I print the rest of the case I am going to tune some more, and I have much sanding and clean up to do)
I broke the circle around the D-Pad while removing supports, but I think it should be fixable?
Lastly here are my trim lines:
Attachments
-
 14.9 MB Views: 58