Worklog A Switch Lite Sized Raspberry Pi Portable
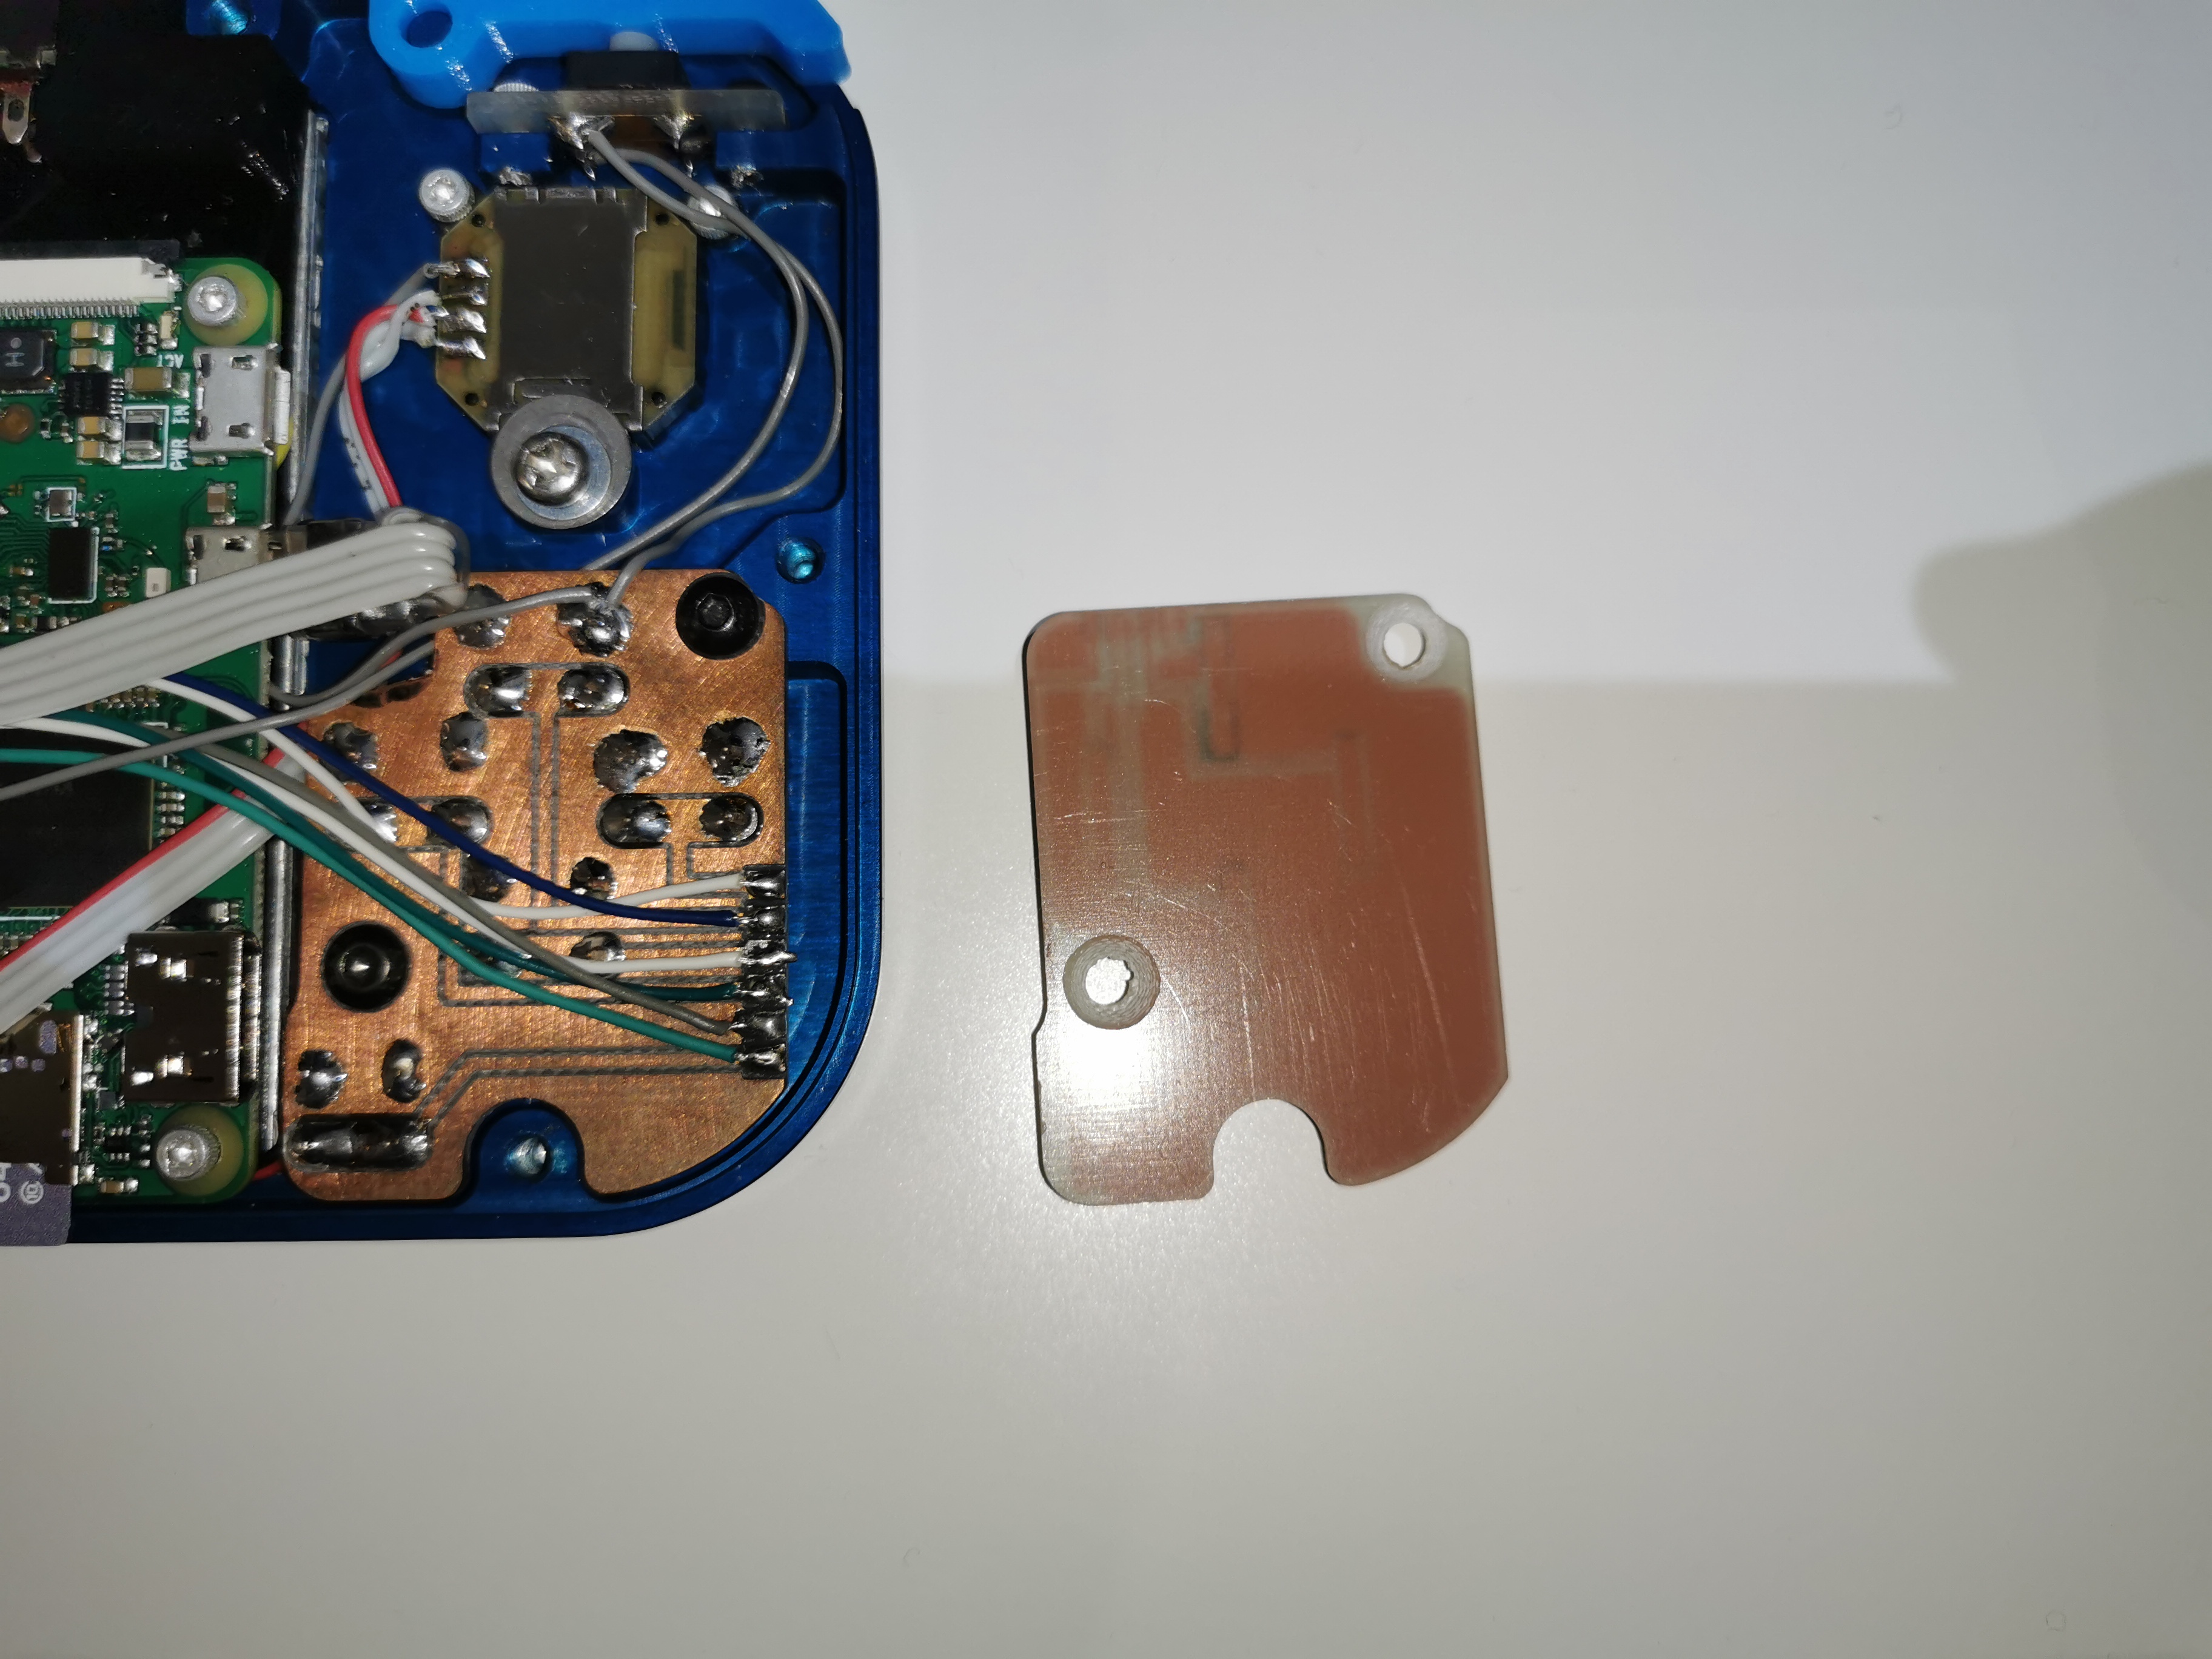
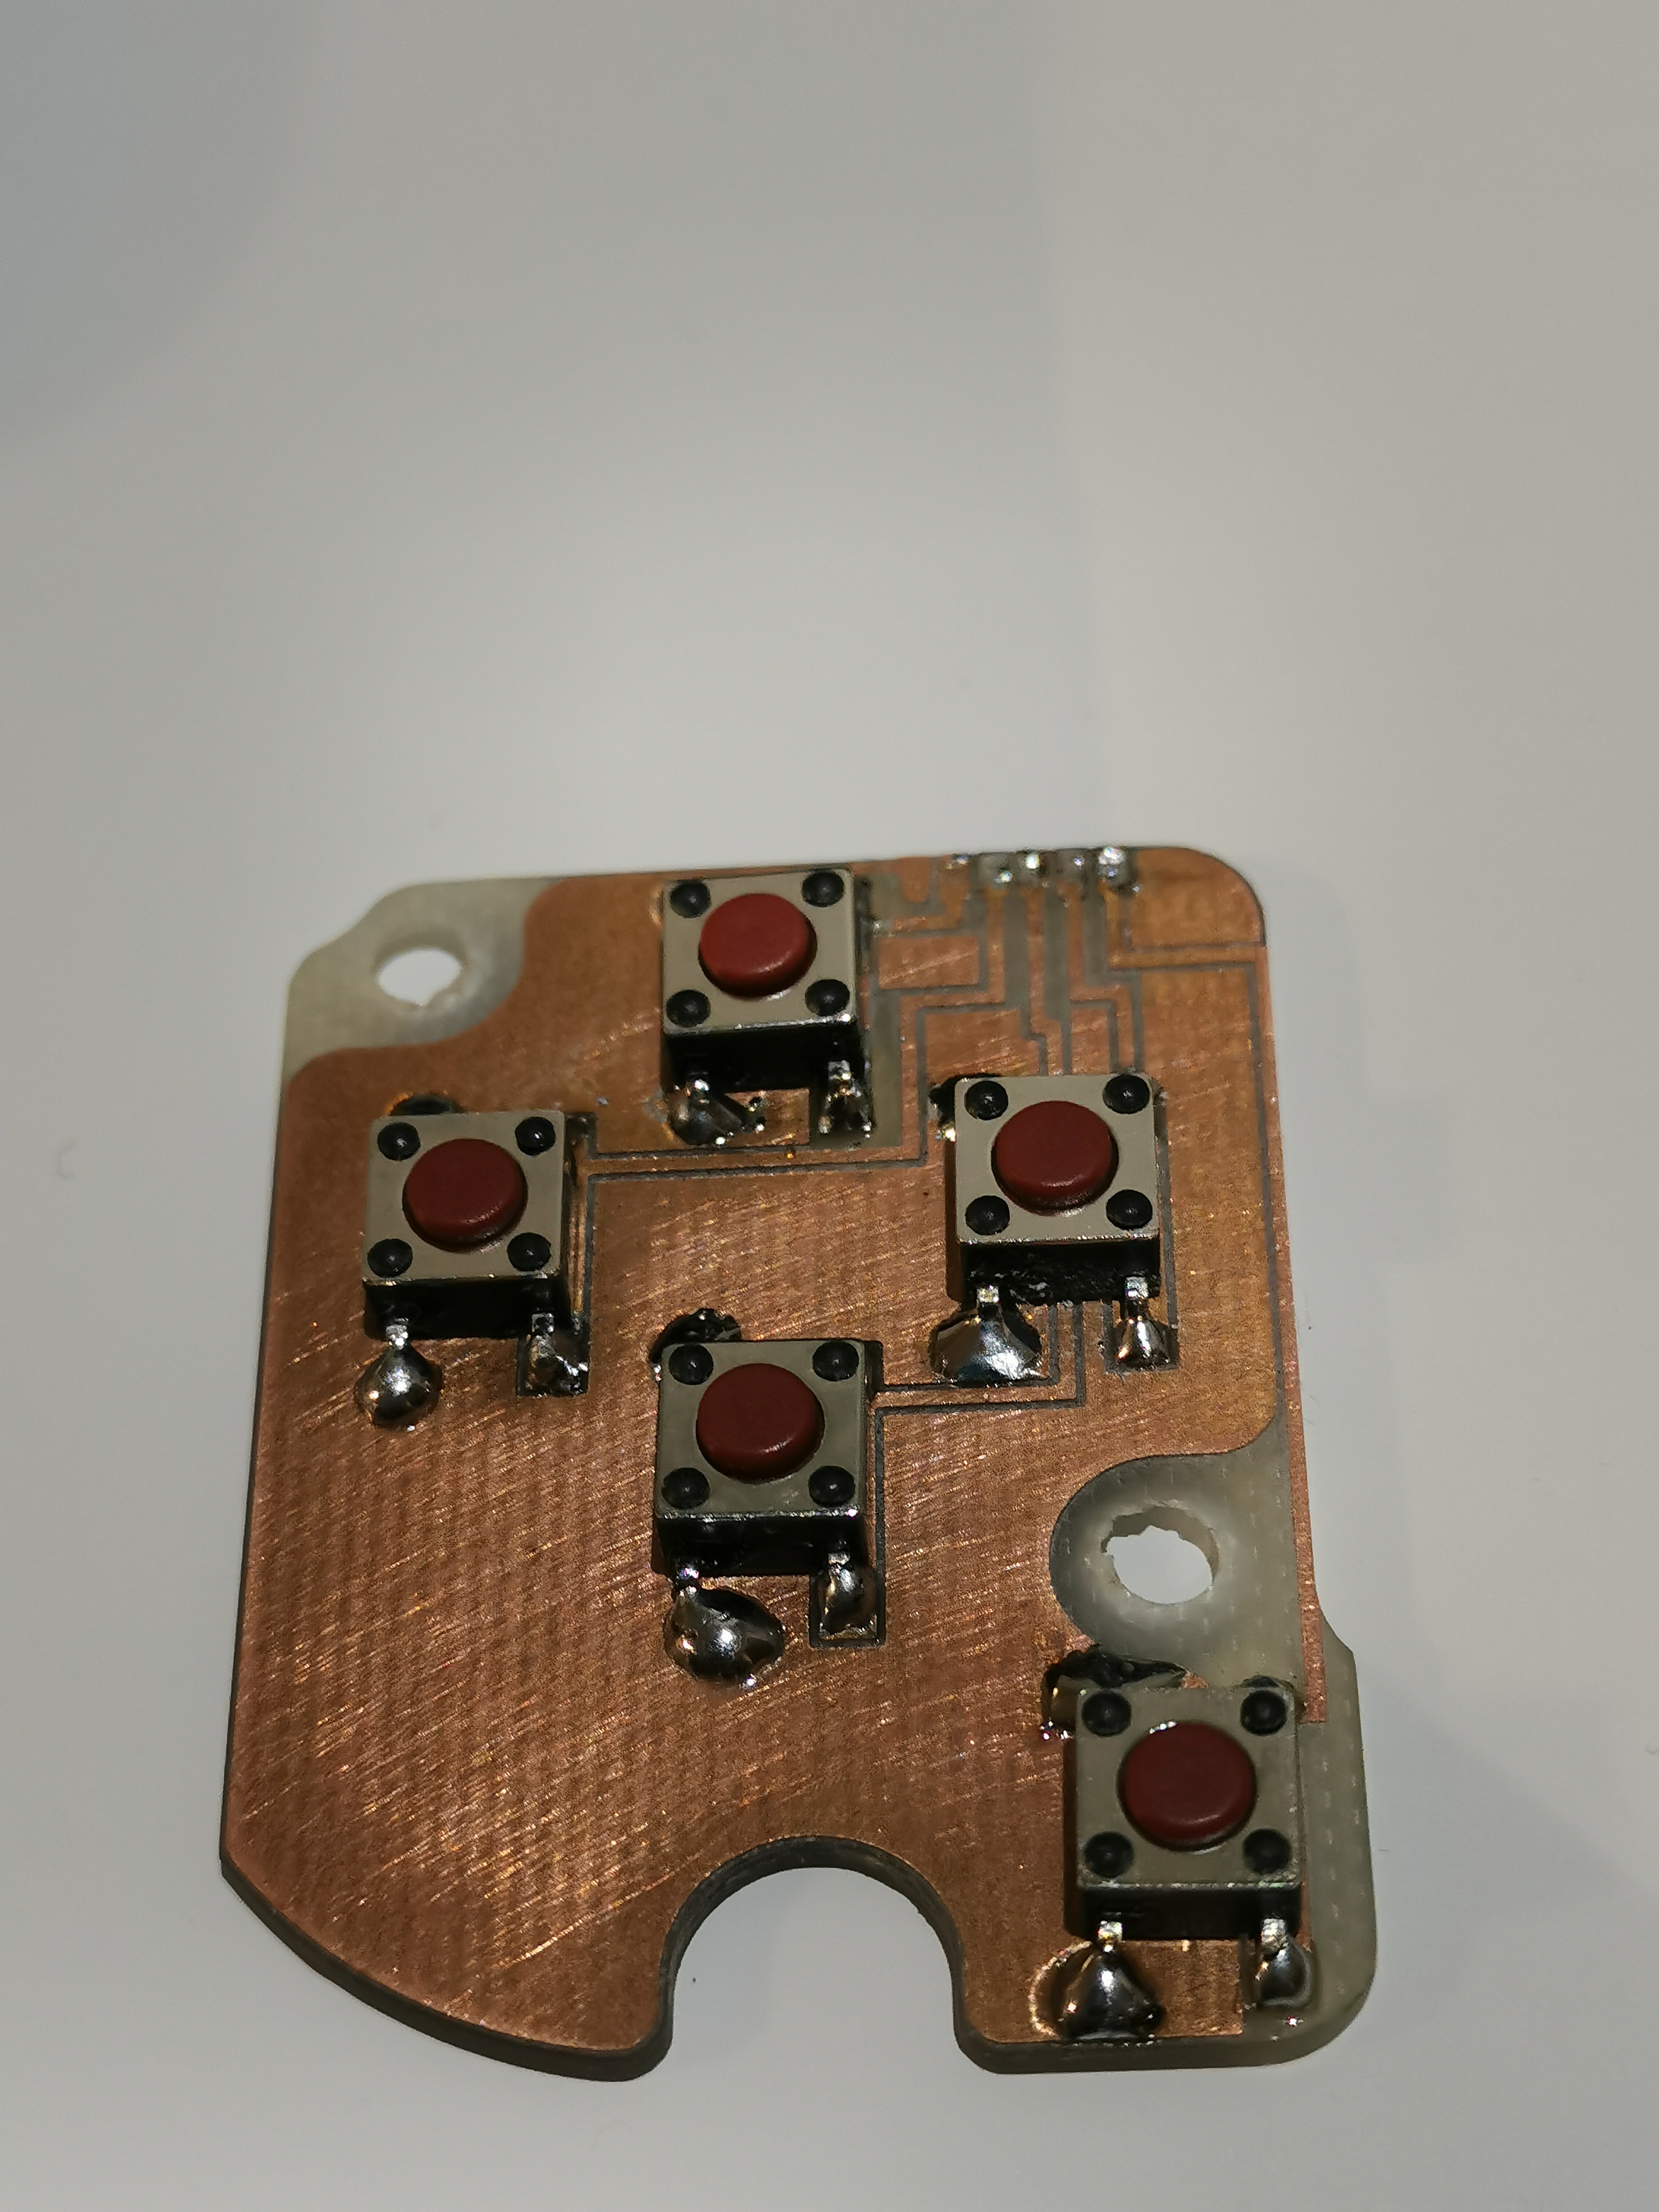
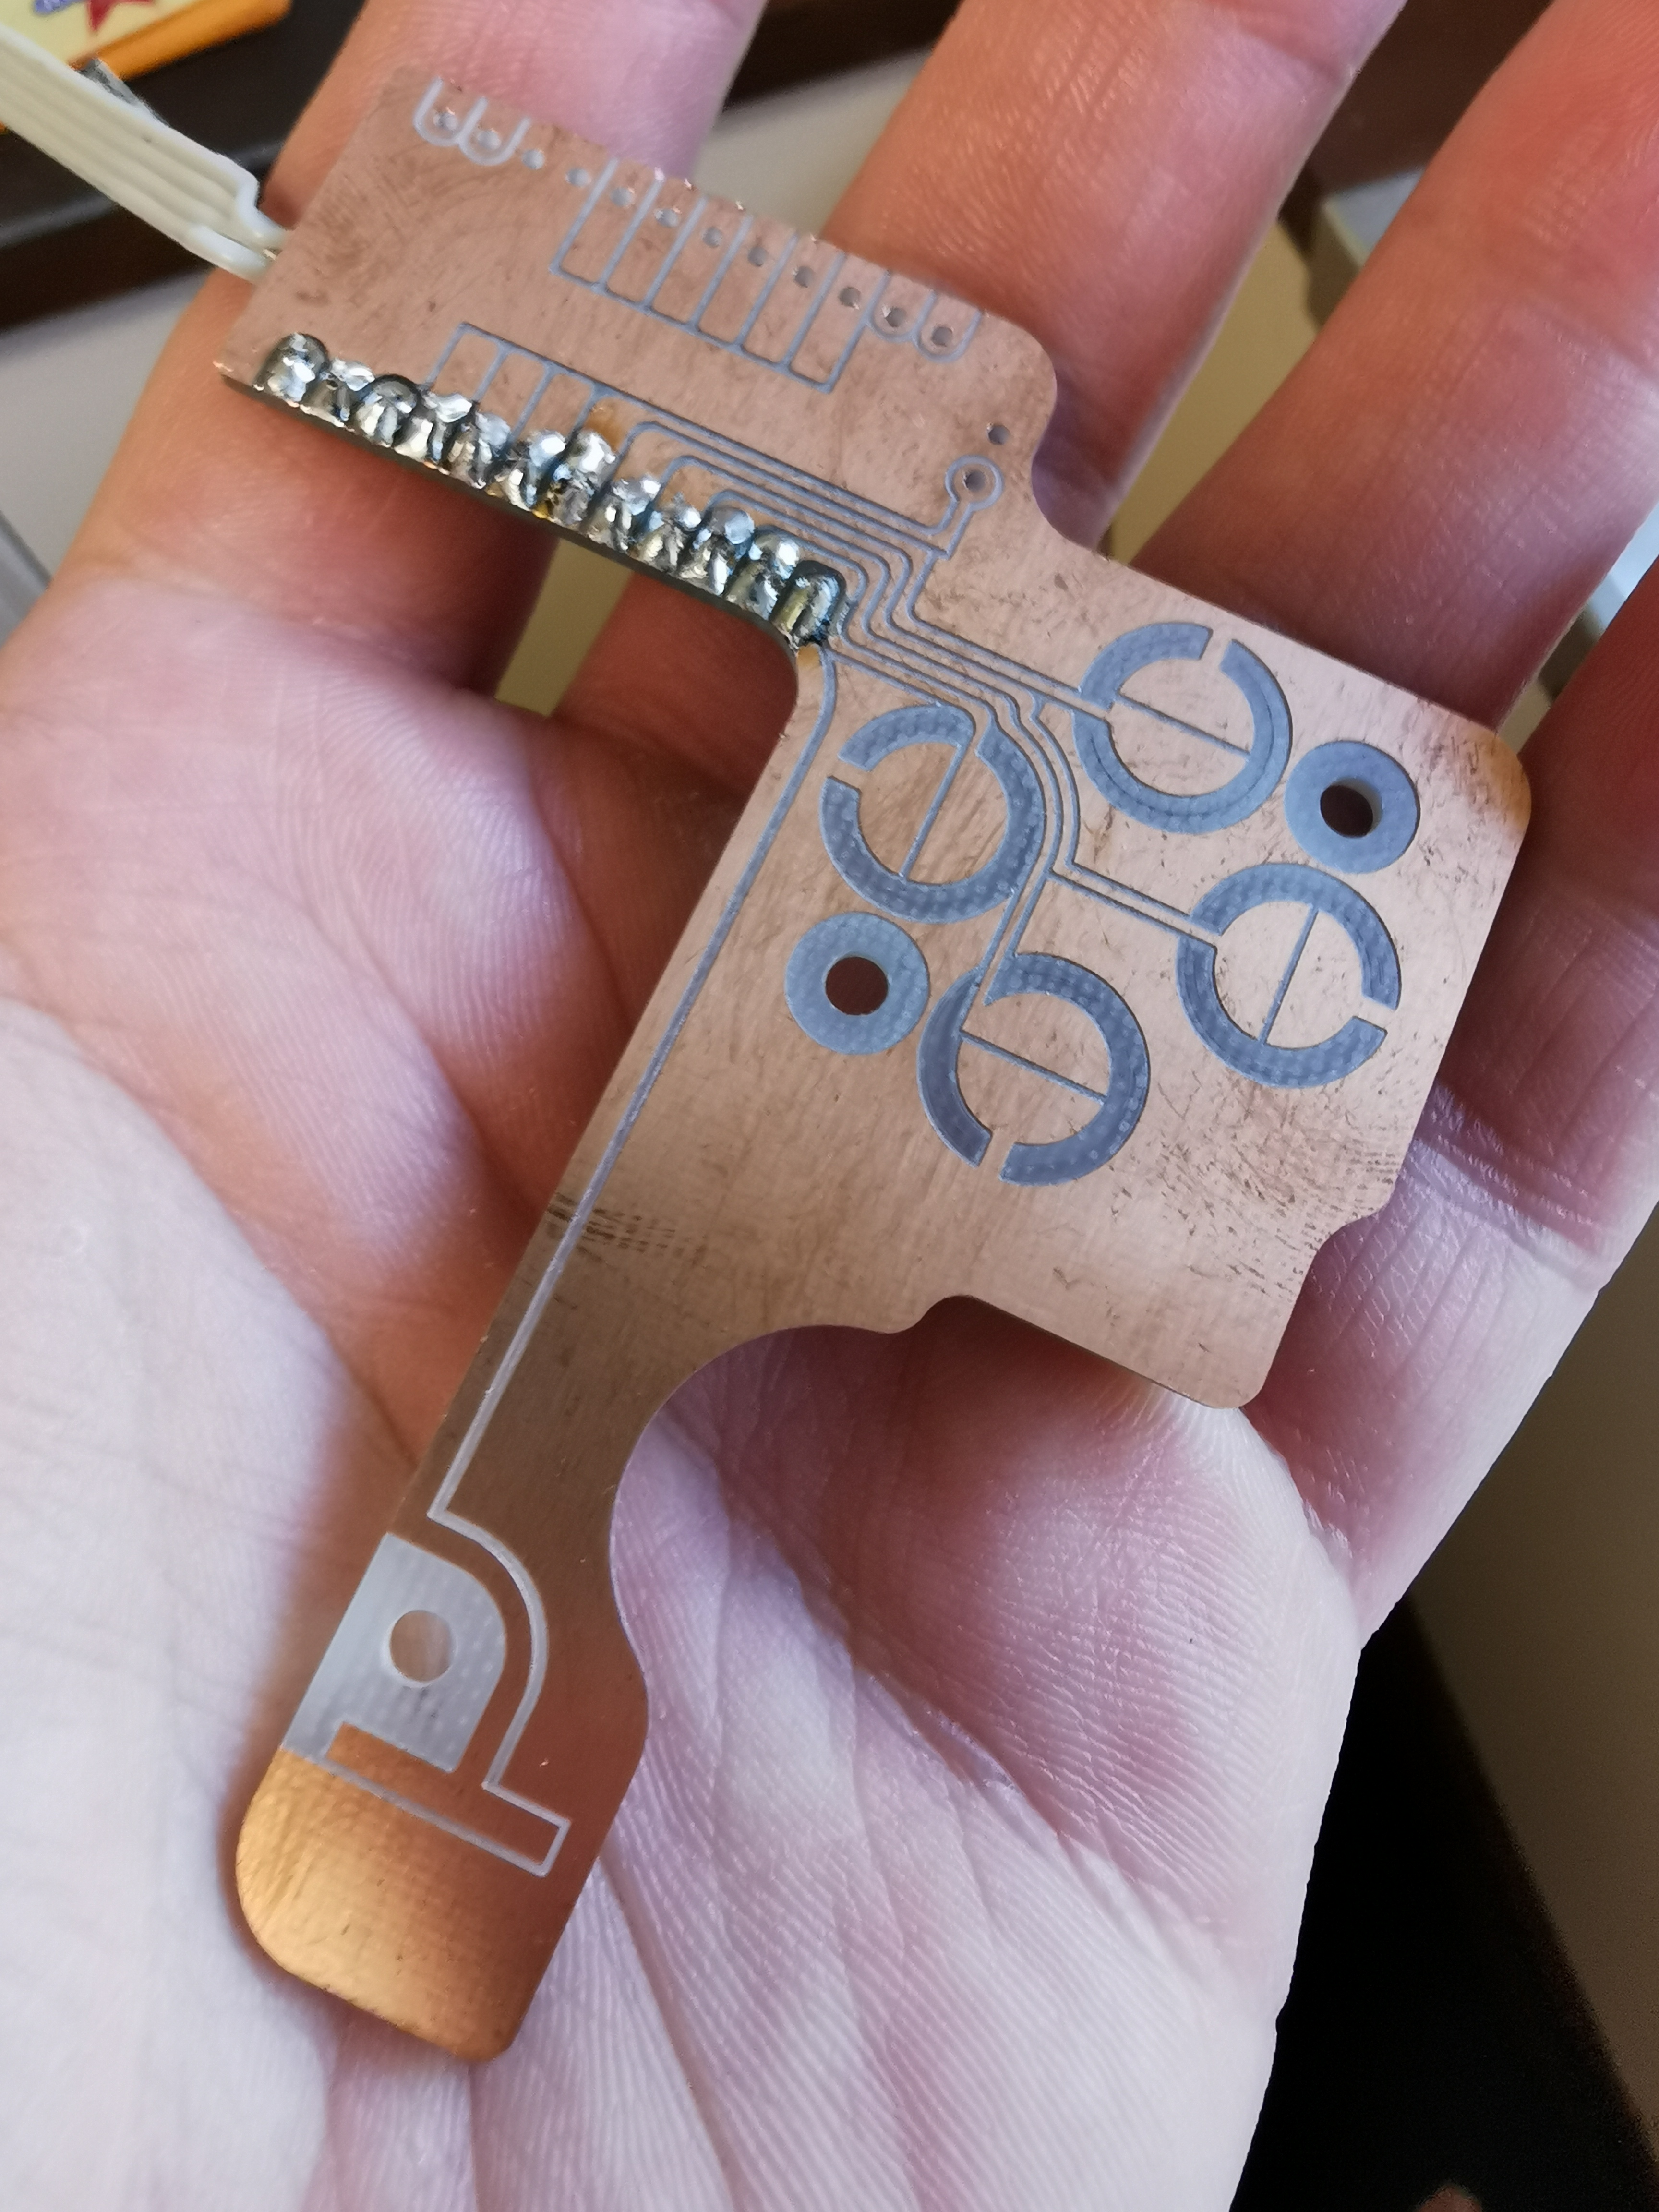
Took my first step towards fixing up some of the lingering issues today. I made a new PCB with lower profile, surface mount buttons to replace the larger through hole soft tactile buttons on the d-pad. I decided I would prefer a clicky d-pad as I find the extended travel on the soft ones limits the speed I can change directions. This also will save me quite a few millimetres of room behind the switch PCB. What I'm hoping is this will open up enough room to mount a raspberry pi 3a+ (with all ports removed) in place of the original pi zero, keeping the SD card in line with the pre-existing cut out. This will push the board out over the top of the d-pad PCB but that shouldn't be an issue anymore. I might even try and use the back of the case as a heatsink for the pi's processor.
Still have to pull everything out of the case and machine 1mm off the mounting points for the PCB to account for the change of height in the tactile buttons. Anyway, here's some pictures of the new board and what it is replacing.
P.S. ignore the shitty soldering, my hands shake a bit for a few hours after I've had caffeine so it was a battle getting it as neat as it is. Mental note to skip the morning coffee next time I plan on soldering before lunch time haha
Well my HDMI driver board turned up. Unfortunately it doesn't appear to be compatible with my existing 5" screen. So much so that it unfortunately destroyed the screen. So I've ordered another screen that I know is compatible and now I have no choice in the upgrade, I need to make all of this fit as there's no turning back to analog now!
Luckily I took a clear photo of the screen before I tried the new driver board so I can at least show you what small font looks like on a cheap analog reverse camera screen.
That's just a launch dialogue for one of the games, but it does a good job of showing how poor the text is. My main issue with the old screen is clarity in menus and in the retropie interface since the game names are barely readable.
Anyway, once I work out how I'm going to fit all of this in the existing case I'll post some pictures of what I'm planning to do.
Here's a picture of the HDMI driver board I'm going to use.
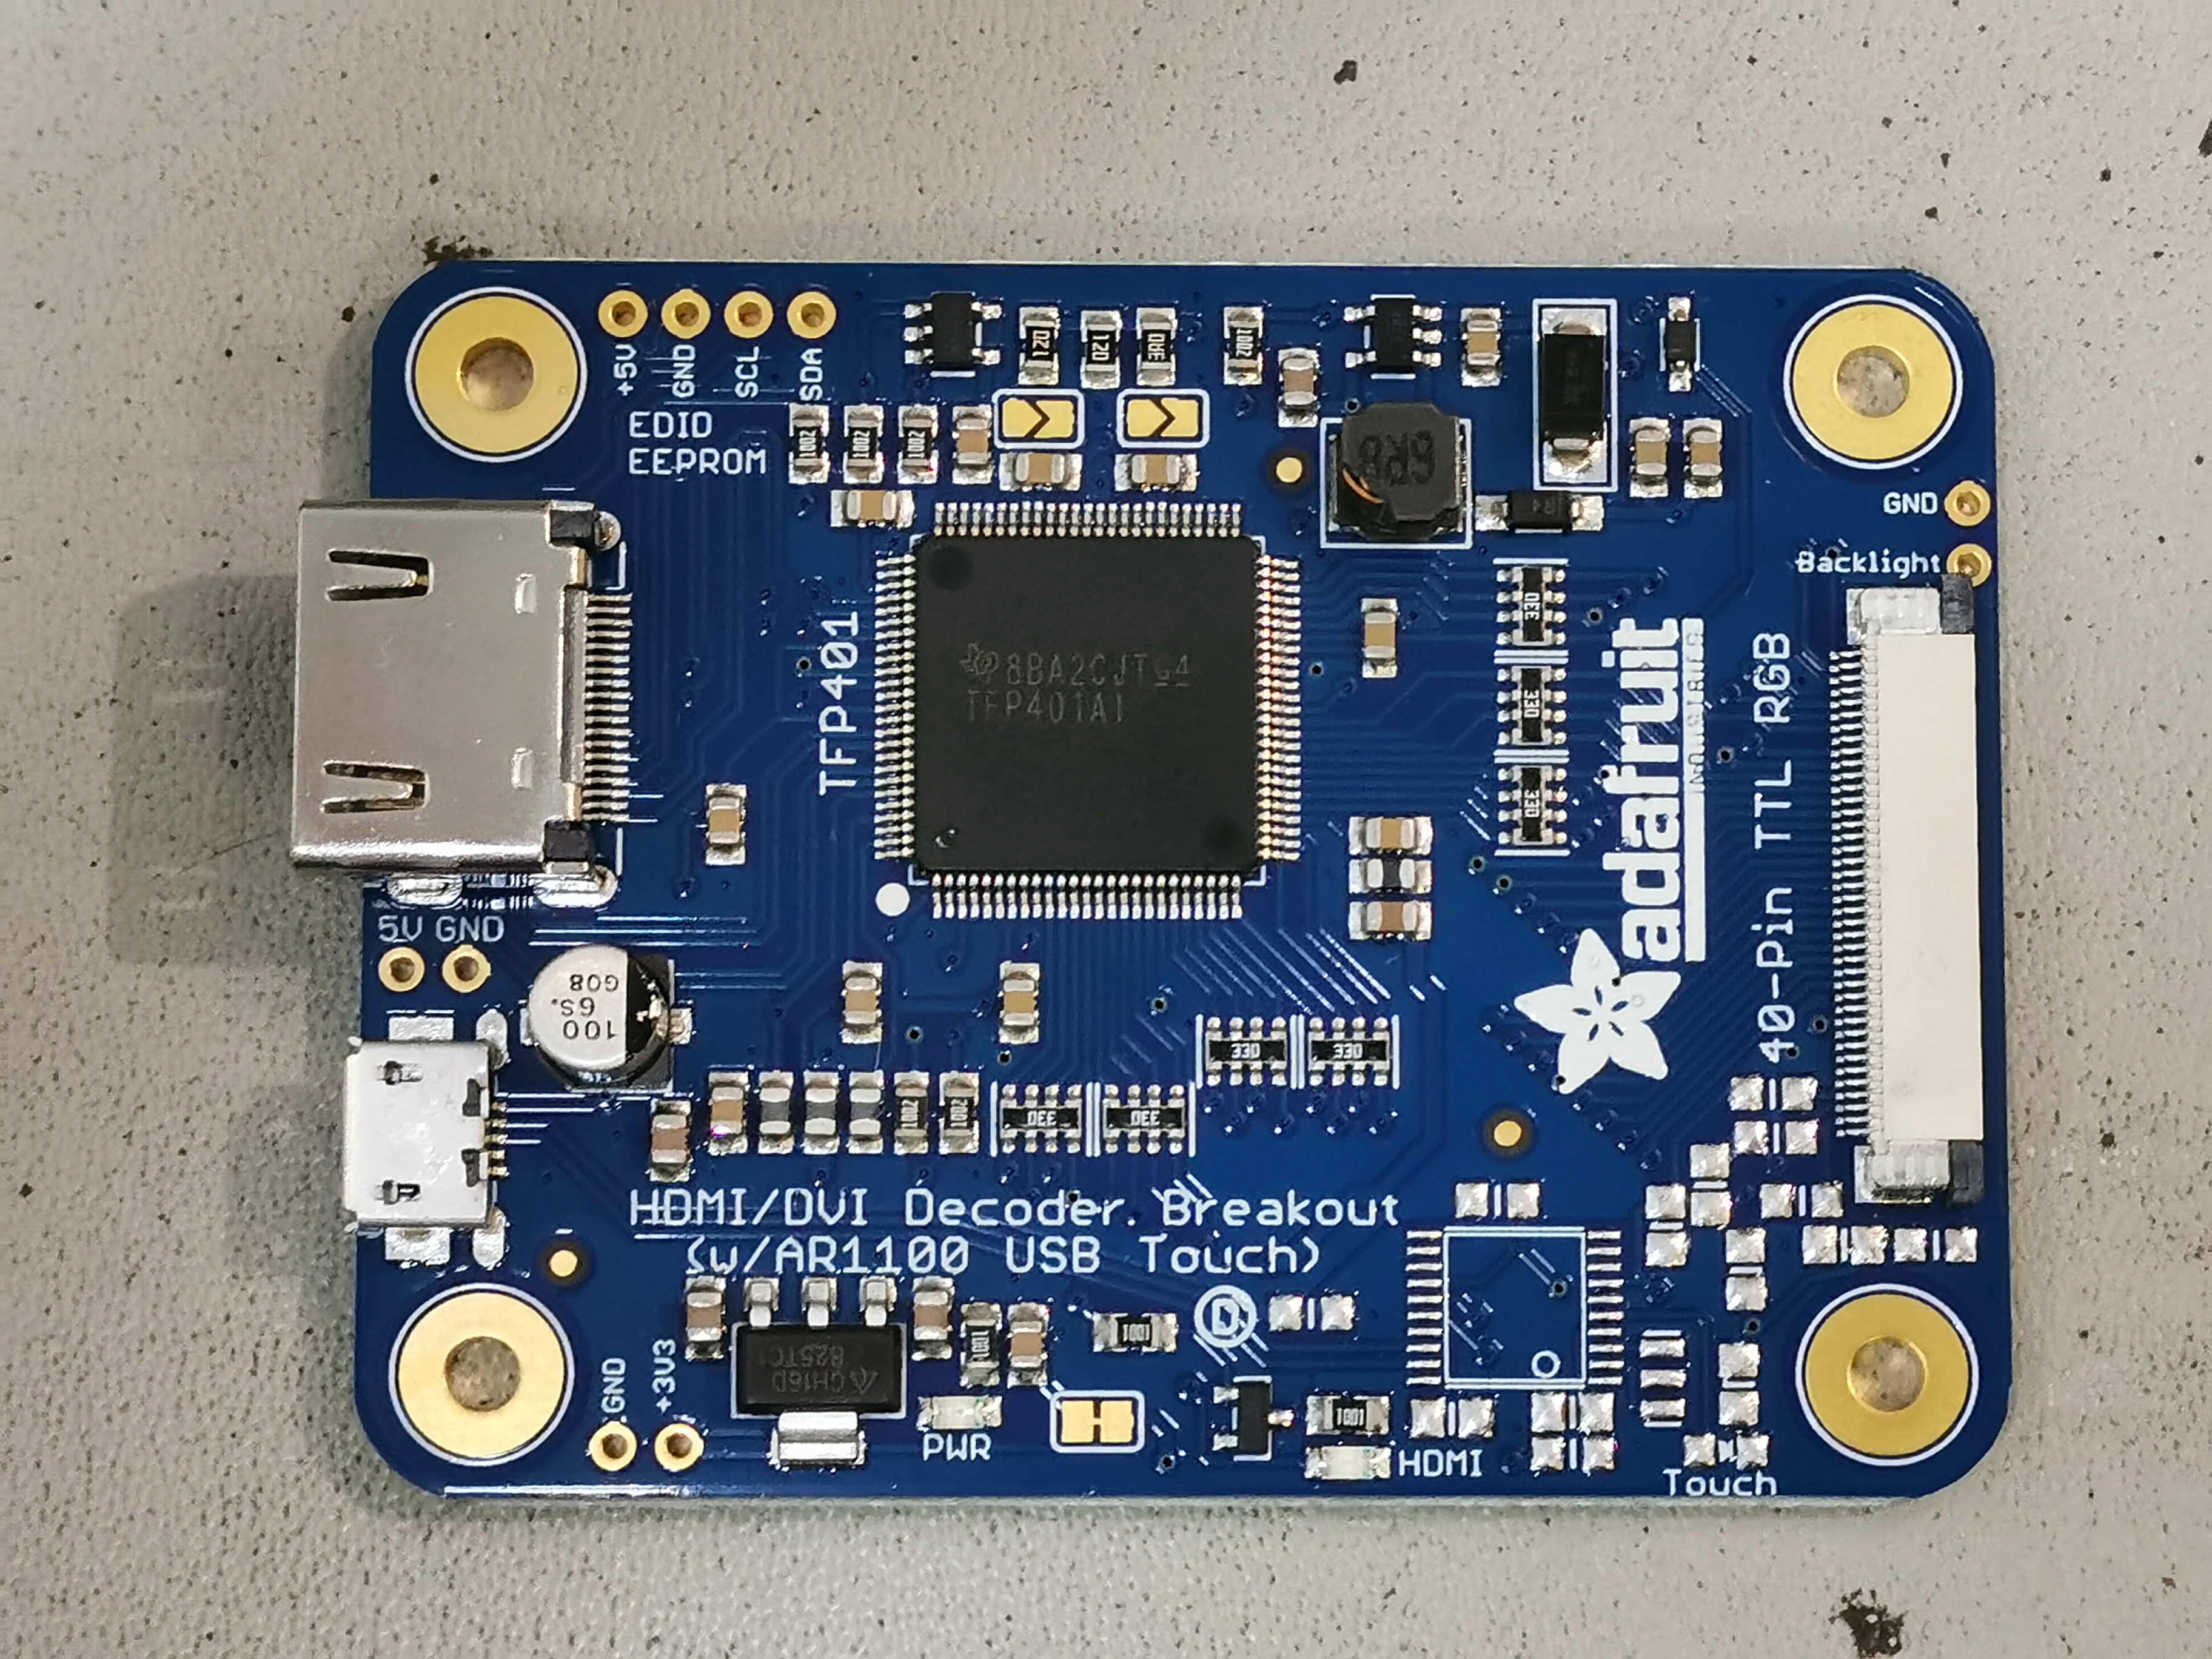
I'm going to have to remove the HDMI port, USB port and the capacitor between the two to make the board as thin as possible. The capacitor is just input power filtering so I'll just solder one in somewhere upstream from here. The other small black part towards the top right of the picture is some sort of inductor I think. I think it's part of the backlight driver circuit. I'd really love to remove it too but I'm afraid I don't know enough about them to know if I can get away without it or if there's something else I can use as a replacement.
Luckily I took a clear photo of the screen before I tried the new driver board so I can at least show you what small font looks like on a cheap analog reverse camera screen.
That's just a launch dialogue for one of the games, but it does a good job of showing how poor the text is. My main issue with the old screen is clarity in menus and in the retropie interface since the game names are barely readable.
Anyway, once I work out how I'm going to fit all of this in the existing case I'll post some pictures of what I'm planning to do.
Here's a picture of the HDMI driver board I'm going to use.
I'm going to have to remove the HDMI port, USB port and the capacitor between the two to make the board as thin as possible. The capacitor is just input power filtering so I'll just solder one in somewhere upstream from here. The other small black part towards the top right of the picture is some sort of inductor I think. I think it's part of the backlight driver circuit. I'd really love to remove it too but I'm afraid I don't know enough about them to know if I can get away without it or if there's something else I can use as a replacement.
Last edited:
New screen turned up and it's so much clearer than the last one!
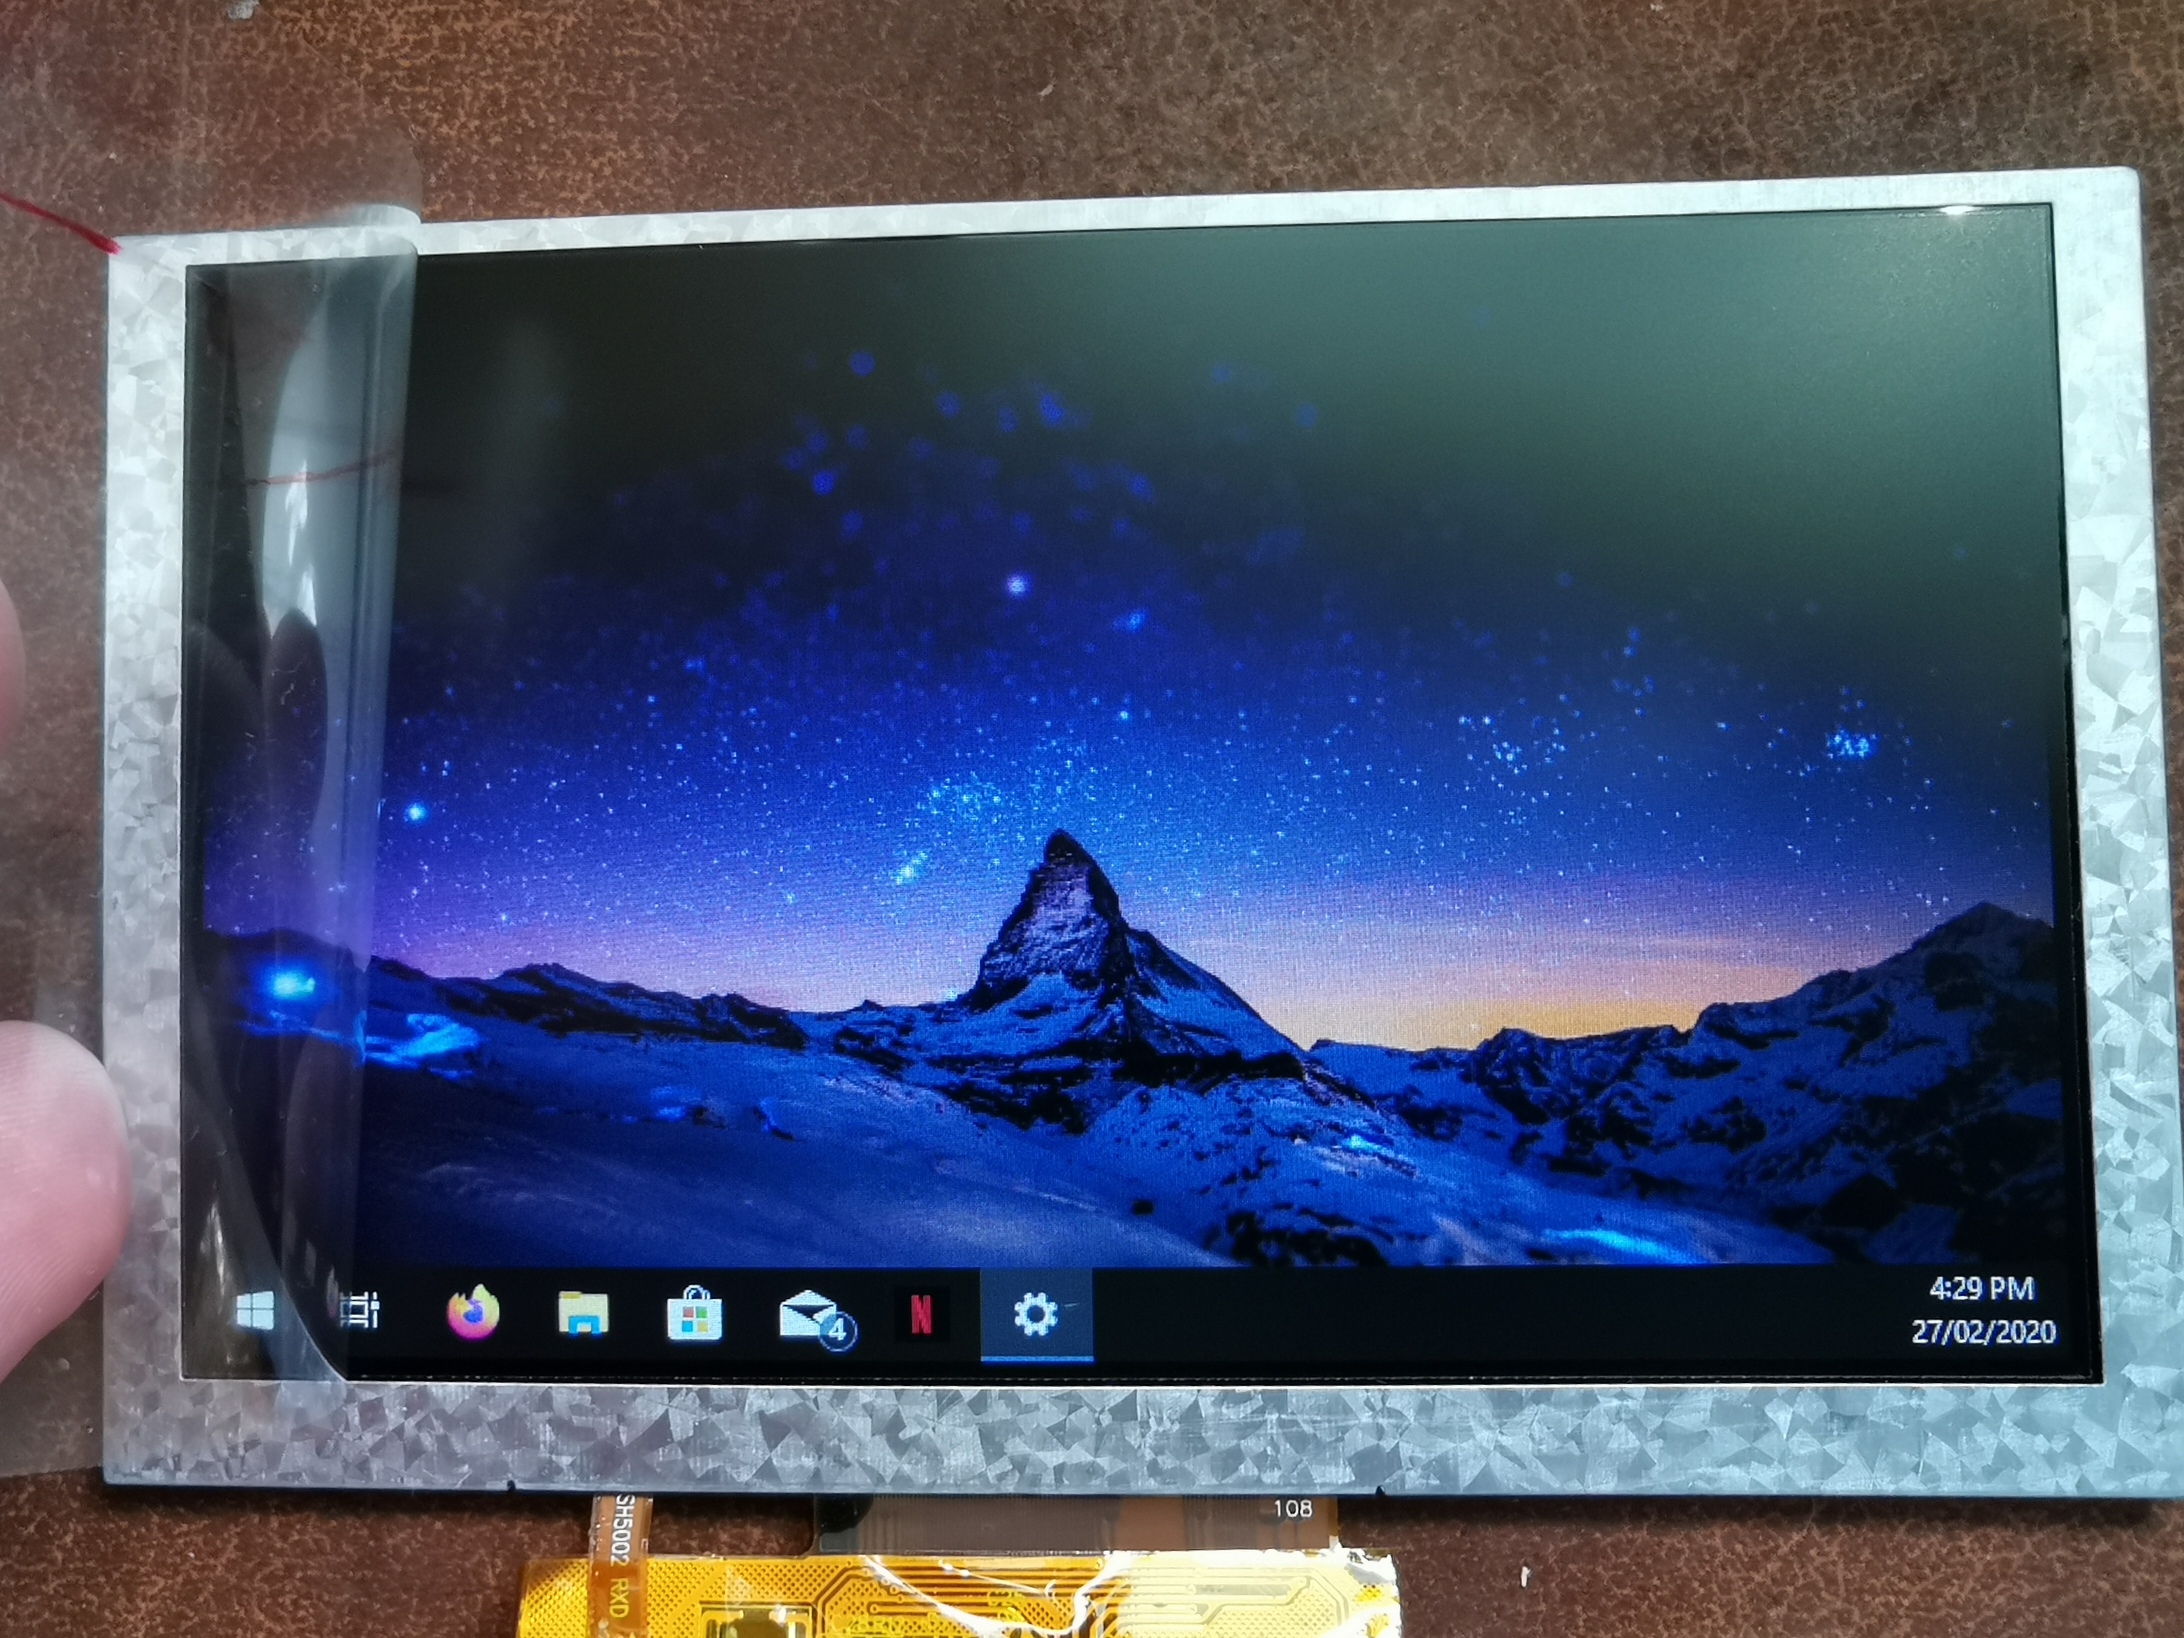
I have a slight issue though, in that the display area of this panel is slightly smaller than the original one. I'm thinking I might try and make a black vinyl surround to cover the edges of the screen. I probably won't like it but it'll do for the time being. May even end up making another case that fits this screen better, we'll see.
I have a slight issue though, in that the display area of this panel is slightly smaller than the original one. I'm thinking I might try and make a black vinyl surround to cover the edges of the screen. I probably won't like it but it'll do for the time being. May even end up making another case that fits this screen better, we'll see.
Just the 800x480 5" panel that adafruit sells. It's much clearer than I expected though. Night and day difference from the cheap reverse camera screen!Nice! Which LCD is that?
Okay, progress update. Everything has arrived and I've almost finished removing the ports off everything. Very fiddly time consuming work. Just got the micro USB left on the pi to remove and I'll be done. I had to notch the corner of the display driver board to fit around the USB charger. Luckily that corner of the board didn't have anything on it other than the tracks for the USB port, which I didn't need anyway.
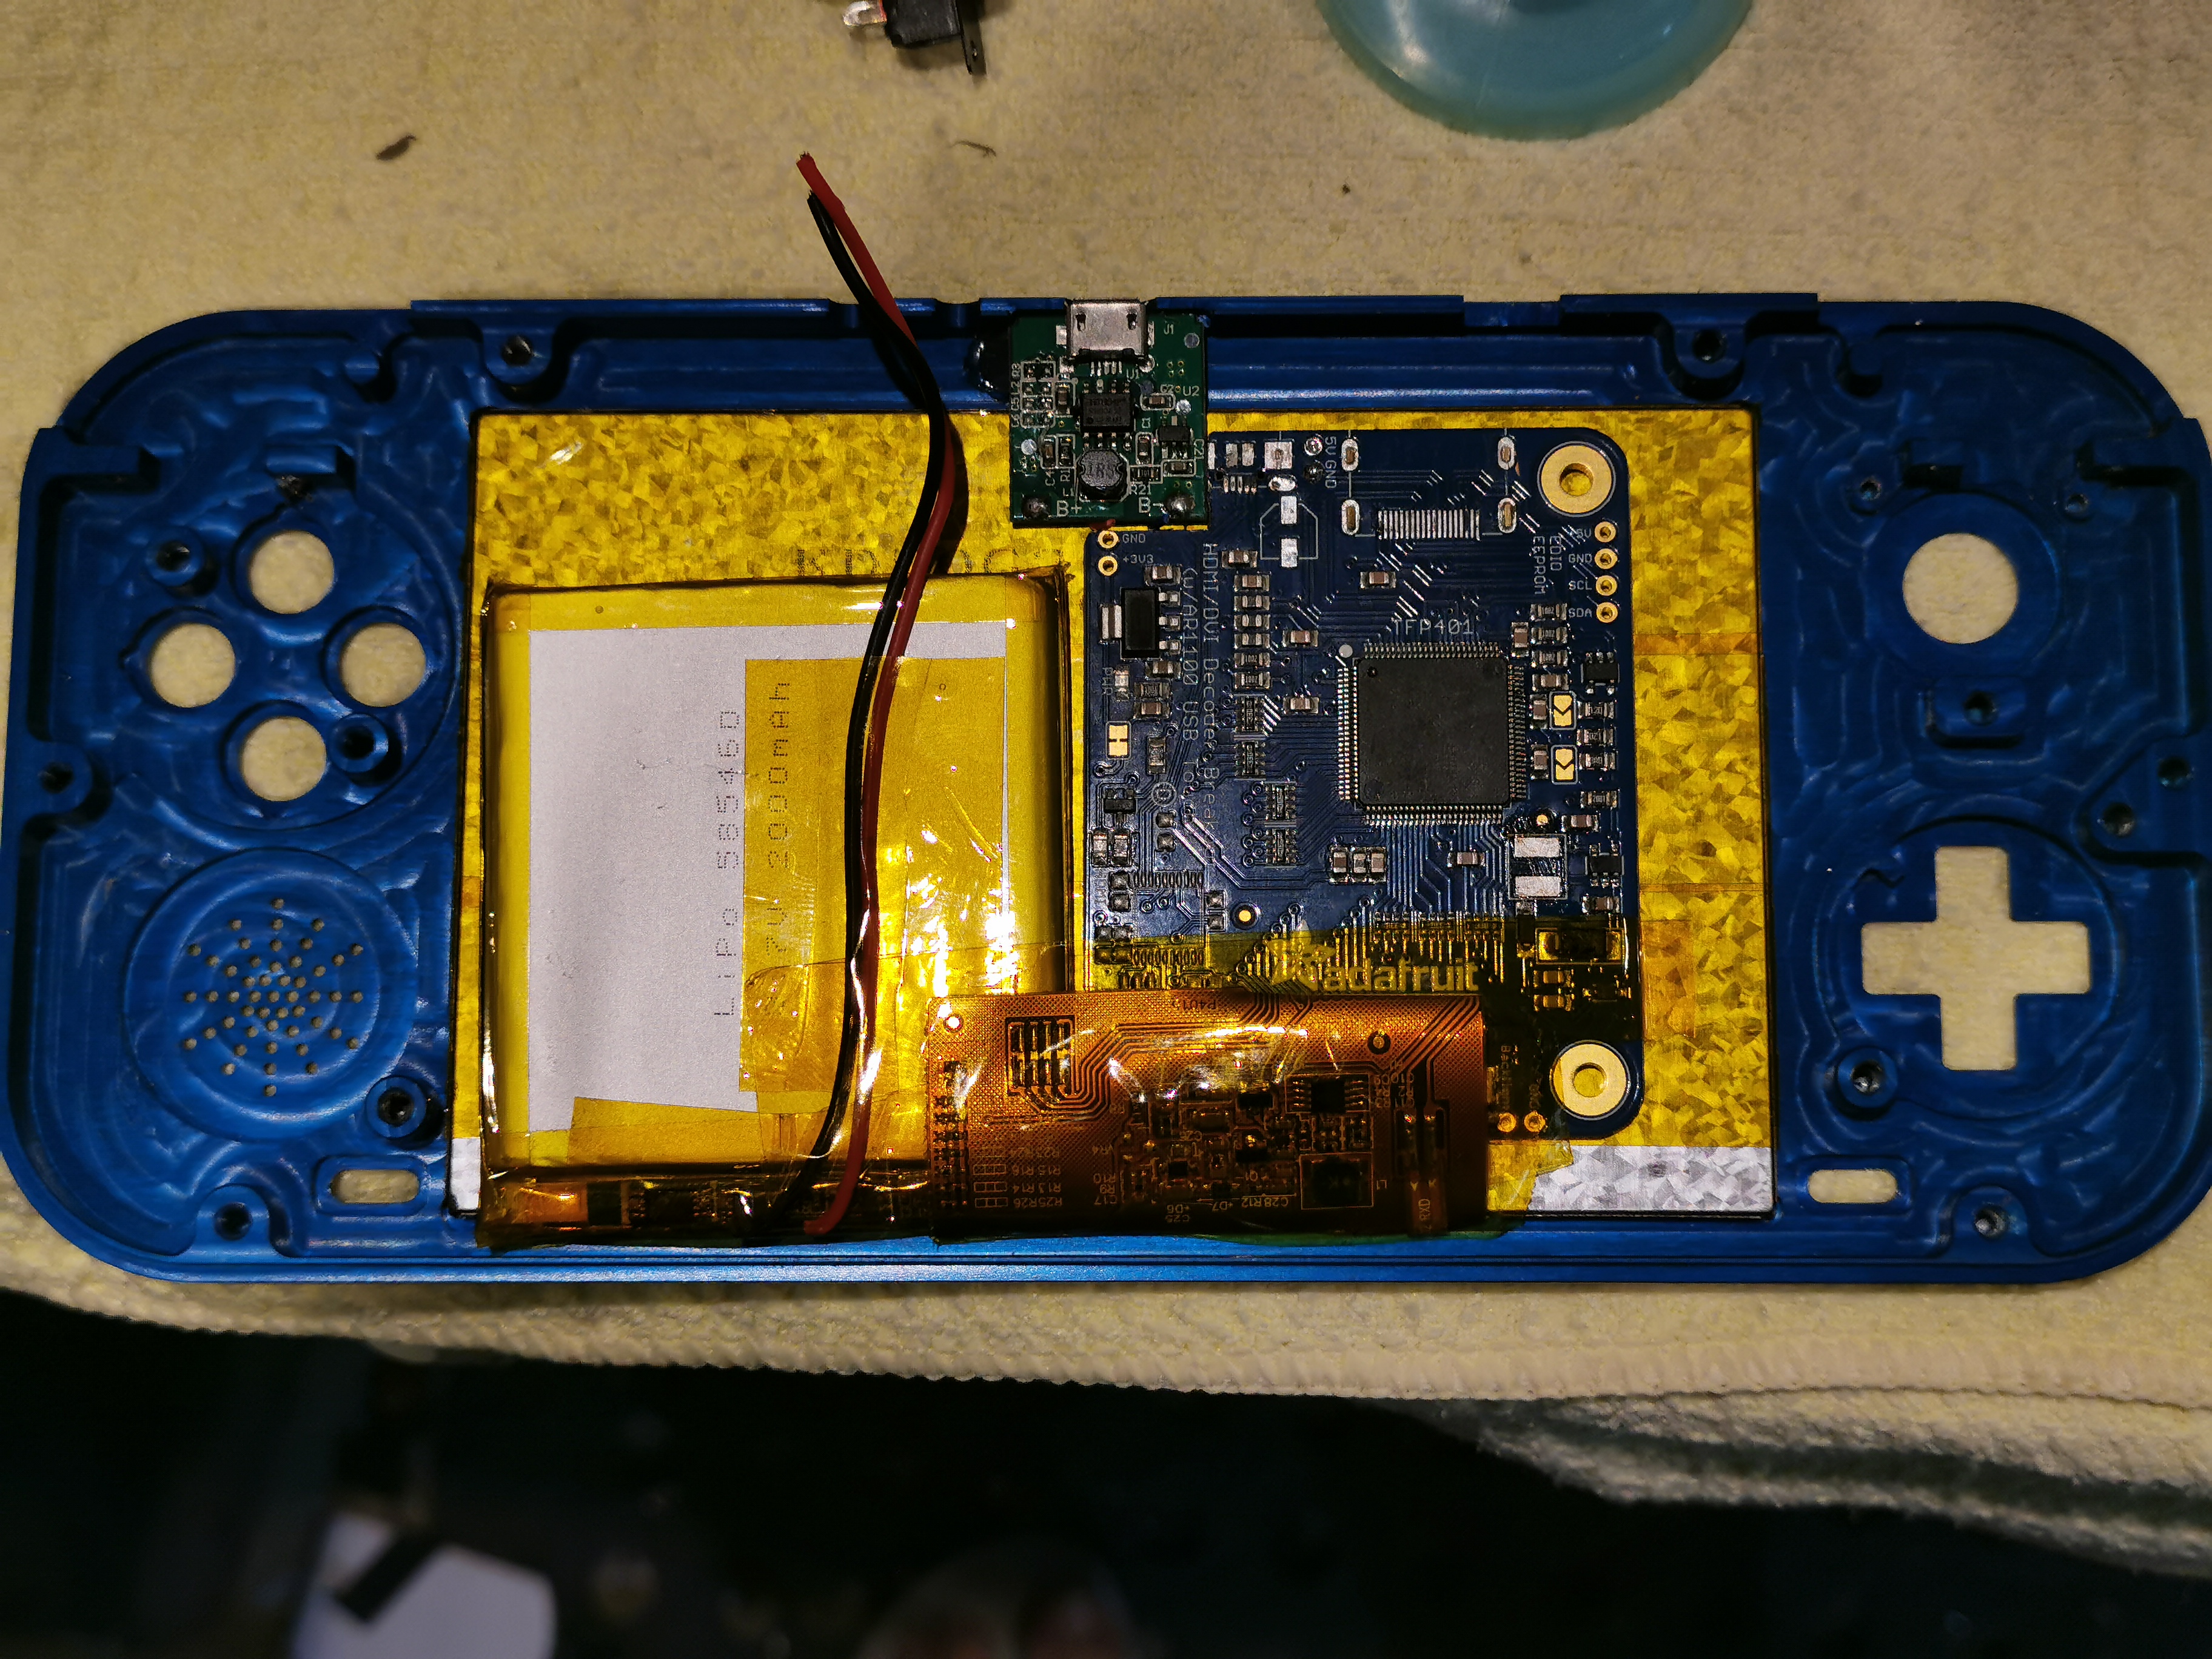
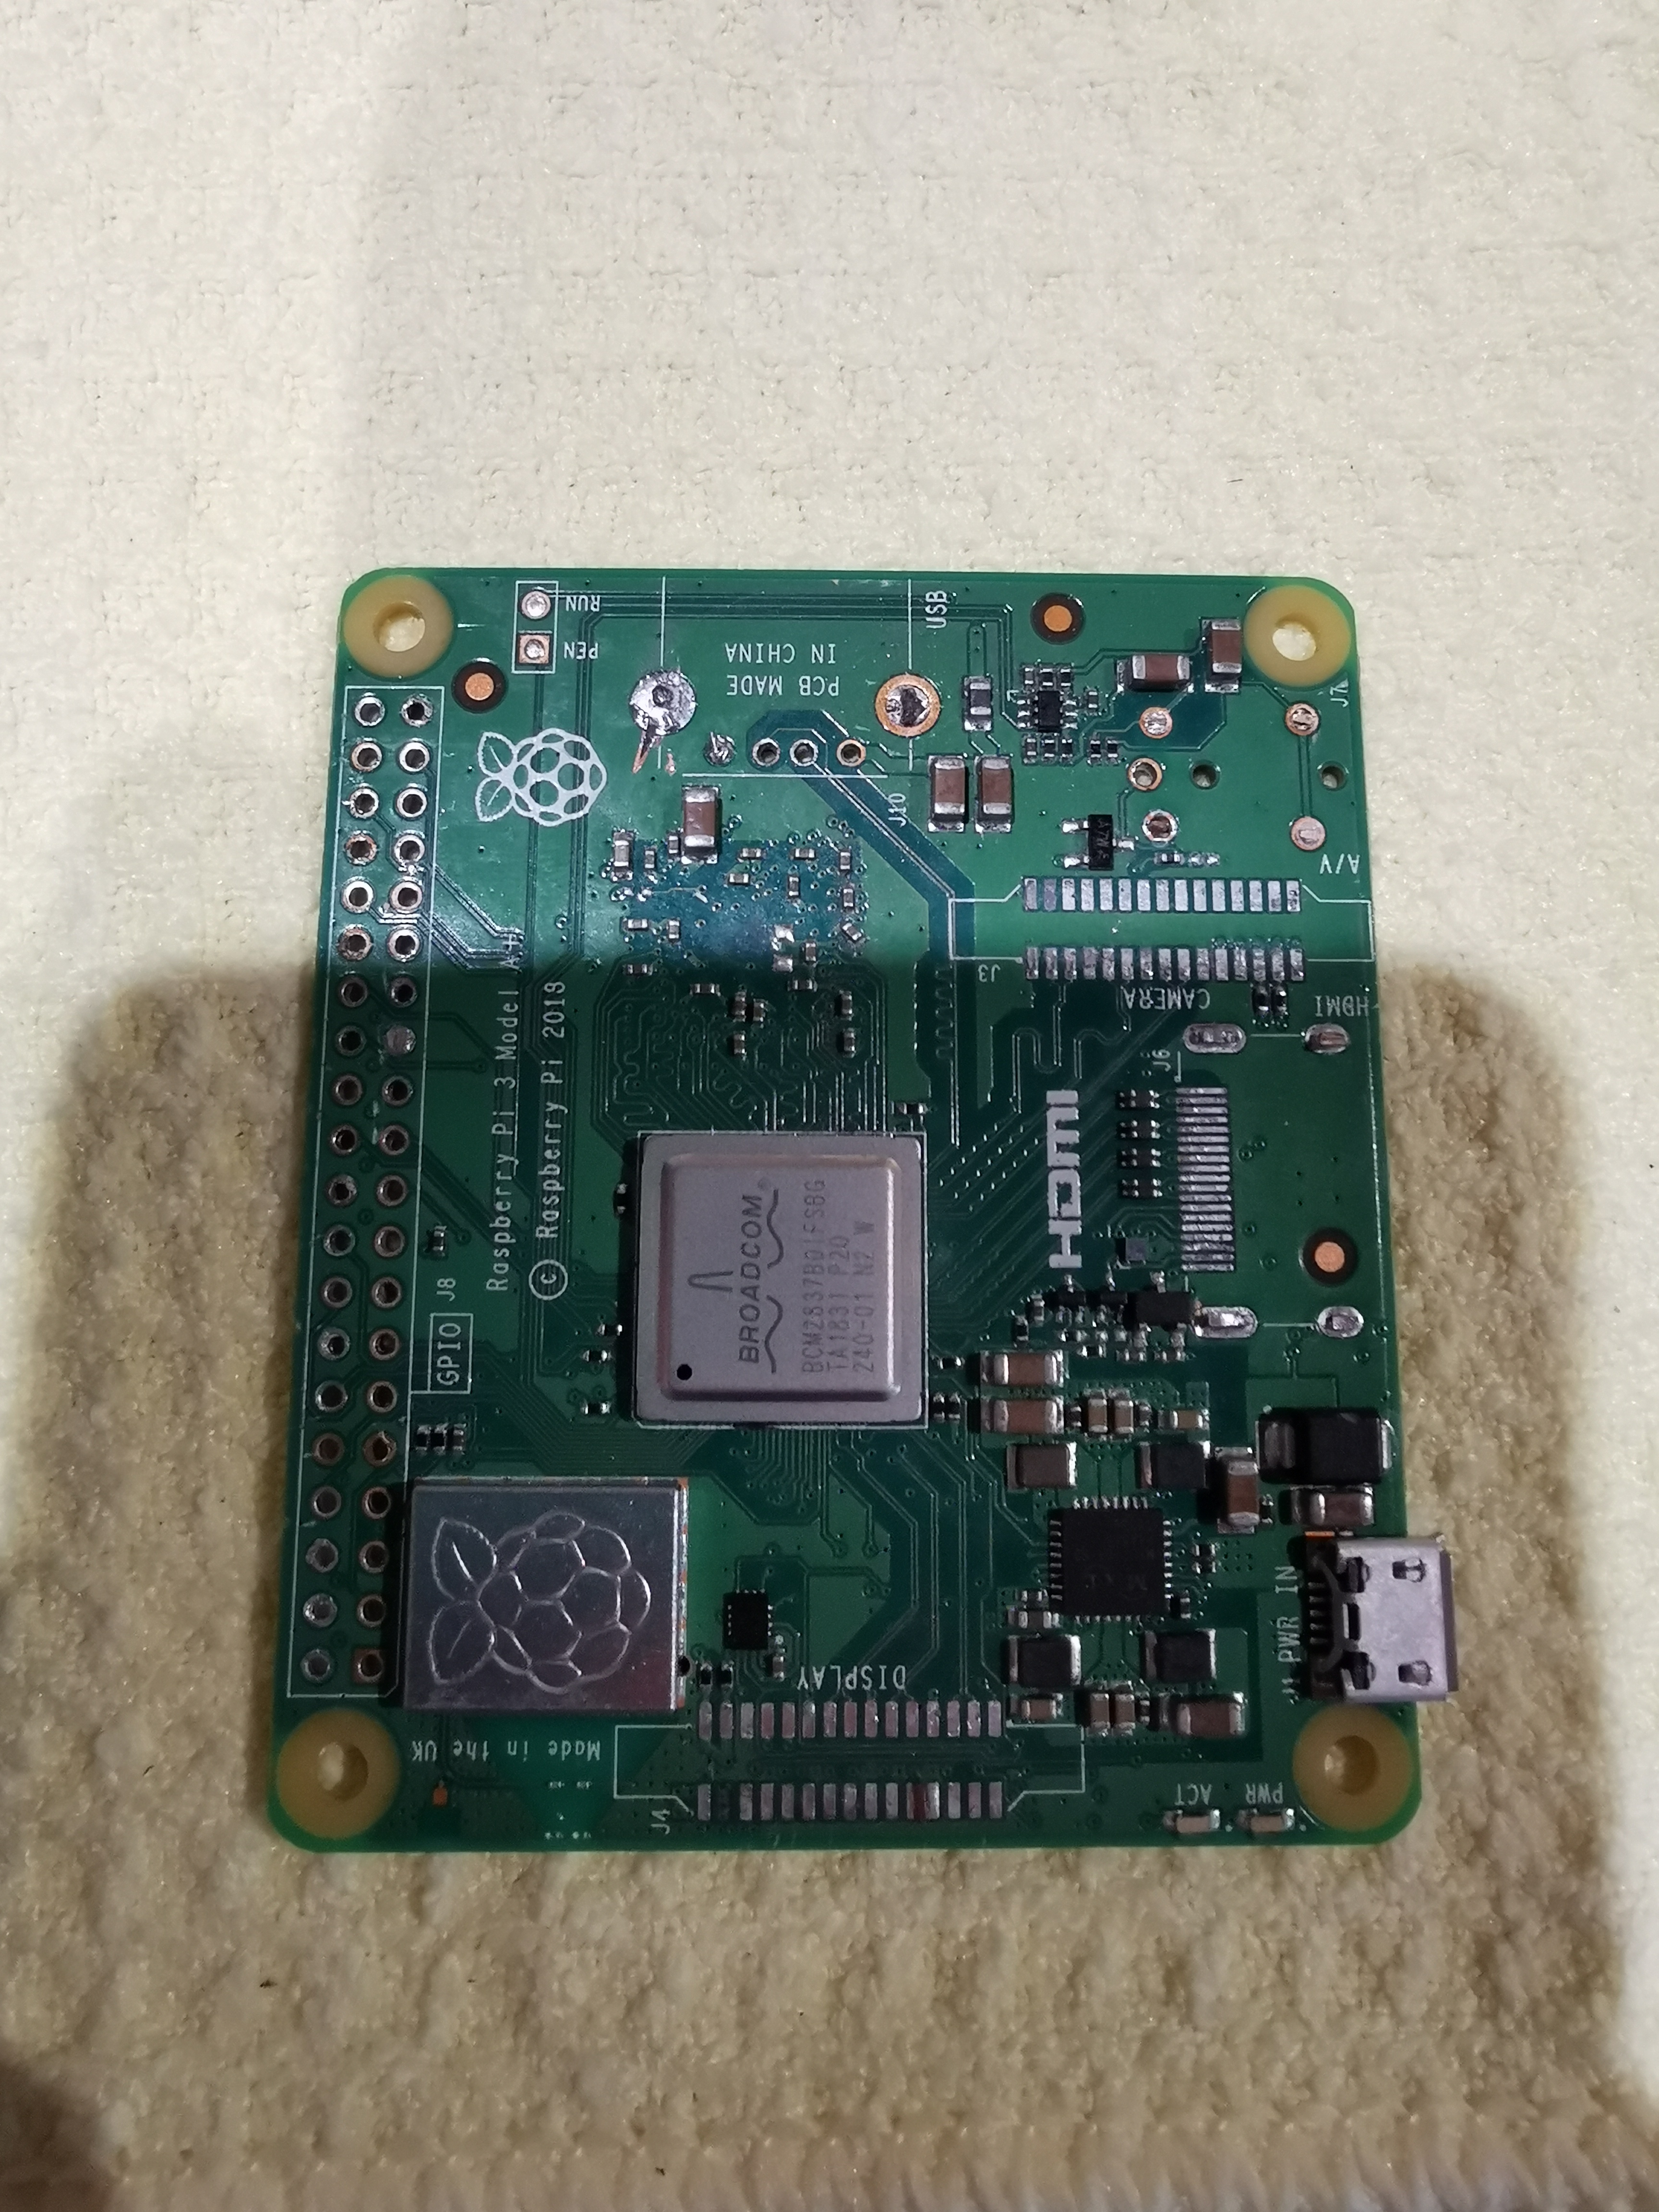
Here's the raspberry pi currently. It's a bit of an uncommon model, the 3a+. It's identical in specs to the much more common 3b+, it just has half the ram and is a smaller footprint which is why I chose it.
 I had a hard time with a few of the pins that are on the ground plane. I think this might be one of those fancy multi-layer boards as I'm having trouble getting enough heat into some sections to properly remove the pins. Dremel made short work of them though, and I think it's still looking fairly neat. Didn't loose any of the HDMI contacts so that's the main thing! I've secured a smaller tip for my soldering iron so I'm going to have a stab at soldering up the HDMI tonight.
Once I've proven this is working I'll need to load the case back up onto the CNC and take a skim off the PCB standoffs to make them lower to suit the new switches. Also need to make a rebate in the back cover to clear the pi's processor and wifi chips.
Lots of work ahead!
Here's the raspberry pi currently. It's a bit of an uncommon model, the 3a+. It's identical in specs to the much more common 3b+, it just has half the ram and is a smaller footprint which is why I chose it.
Once I've proven this is working I'll need to load the case back up onto the CNC and take a skim off the PCB standoffs to make them lower to suit the new switches. Also need to make a rebate in the back cover to clear the pi's processor and wifi chips.
Lots of work ahead!
Upgrade's looking sweet there
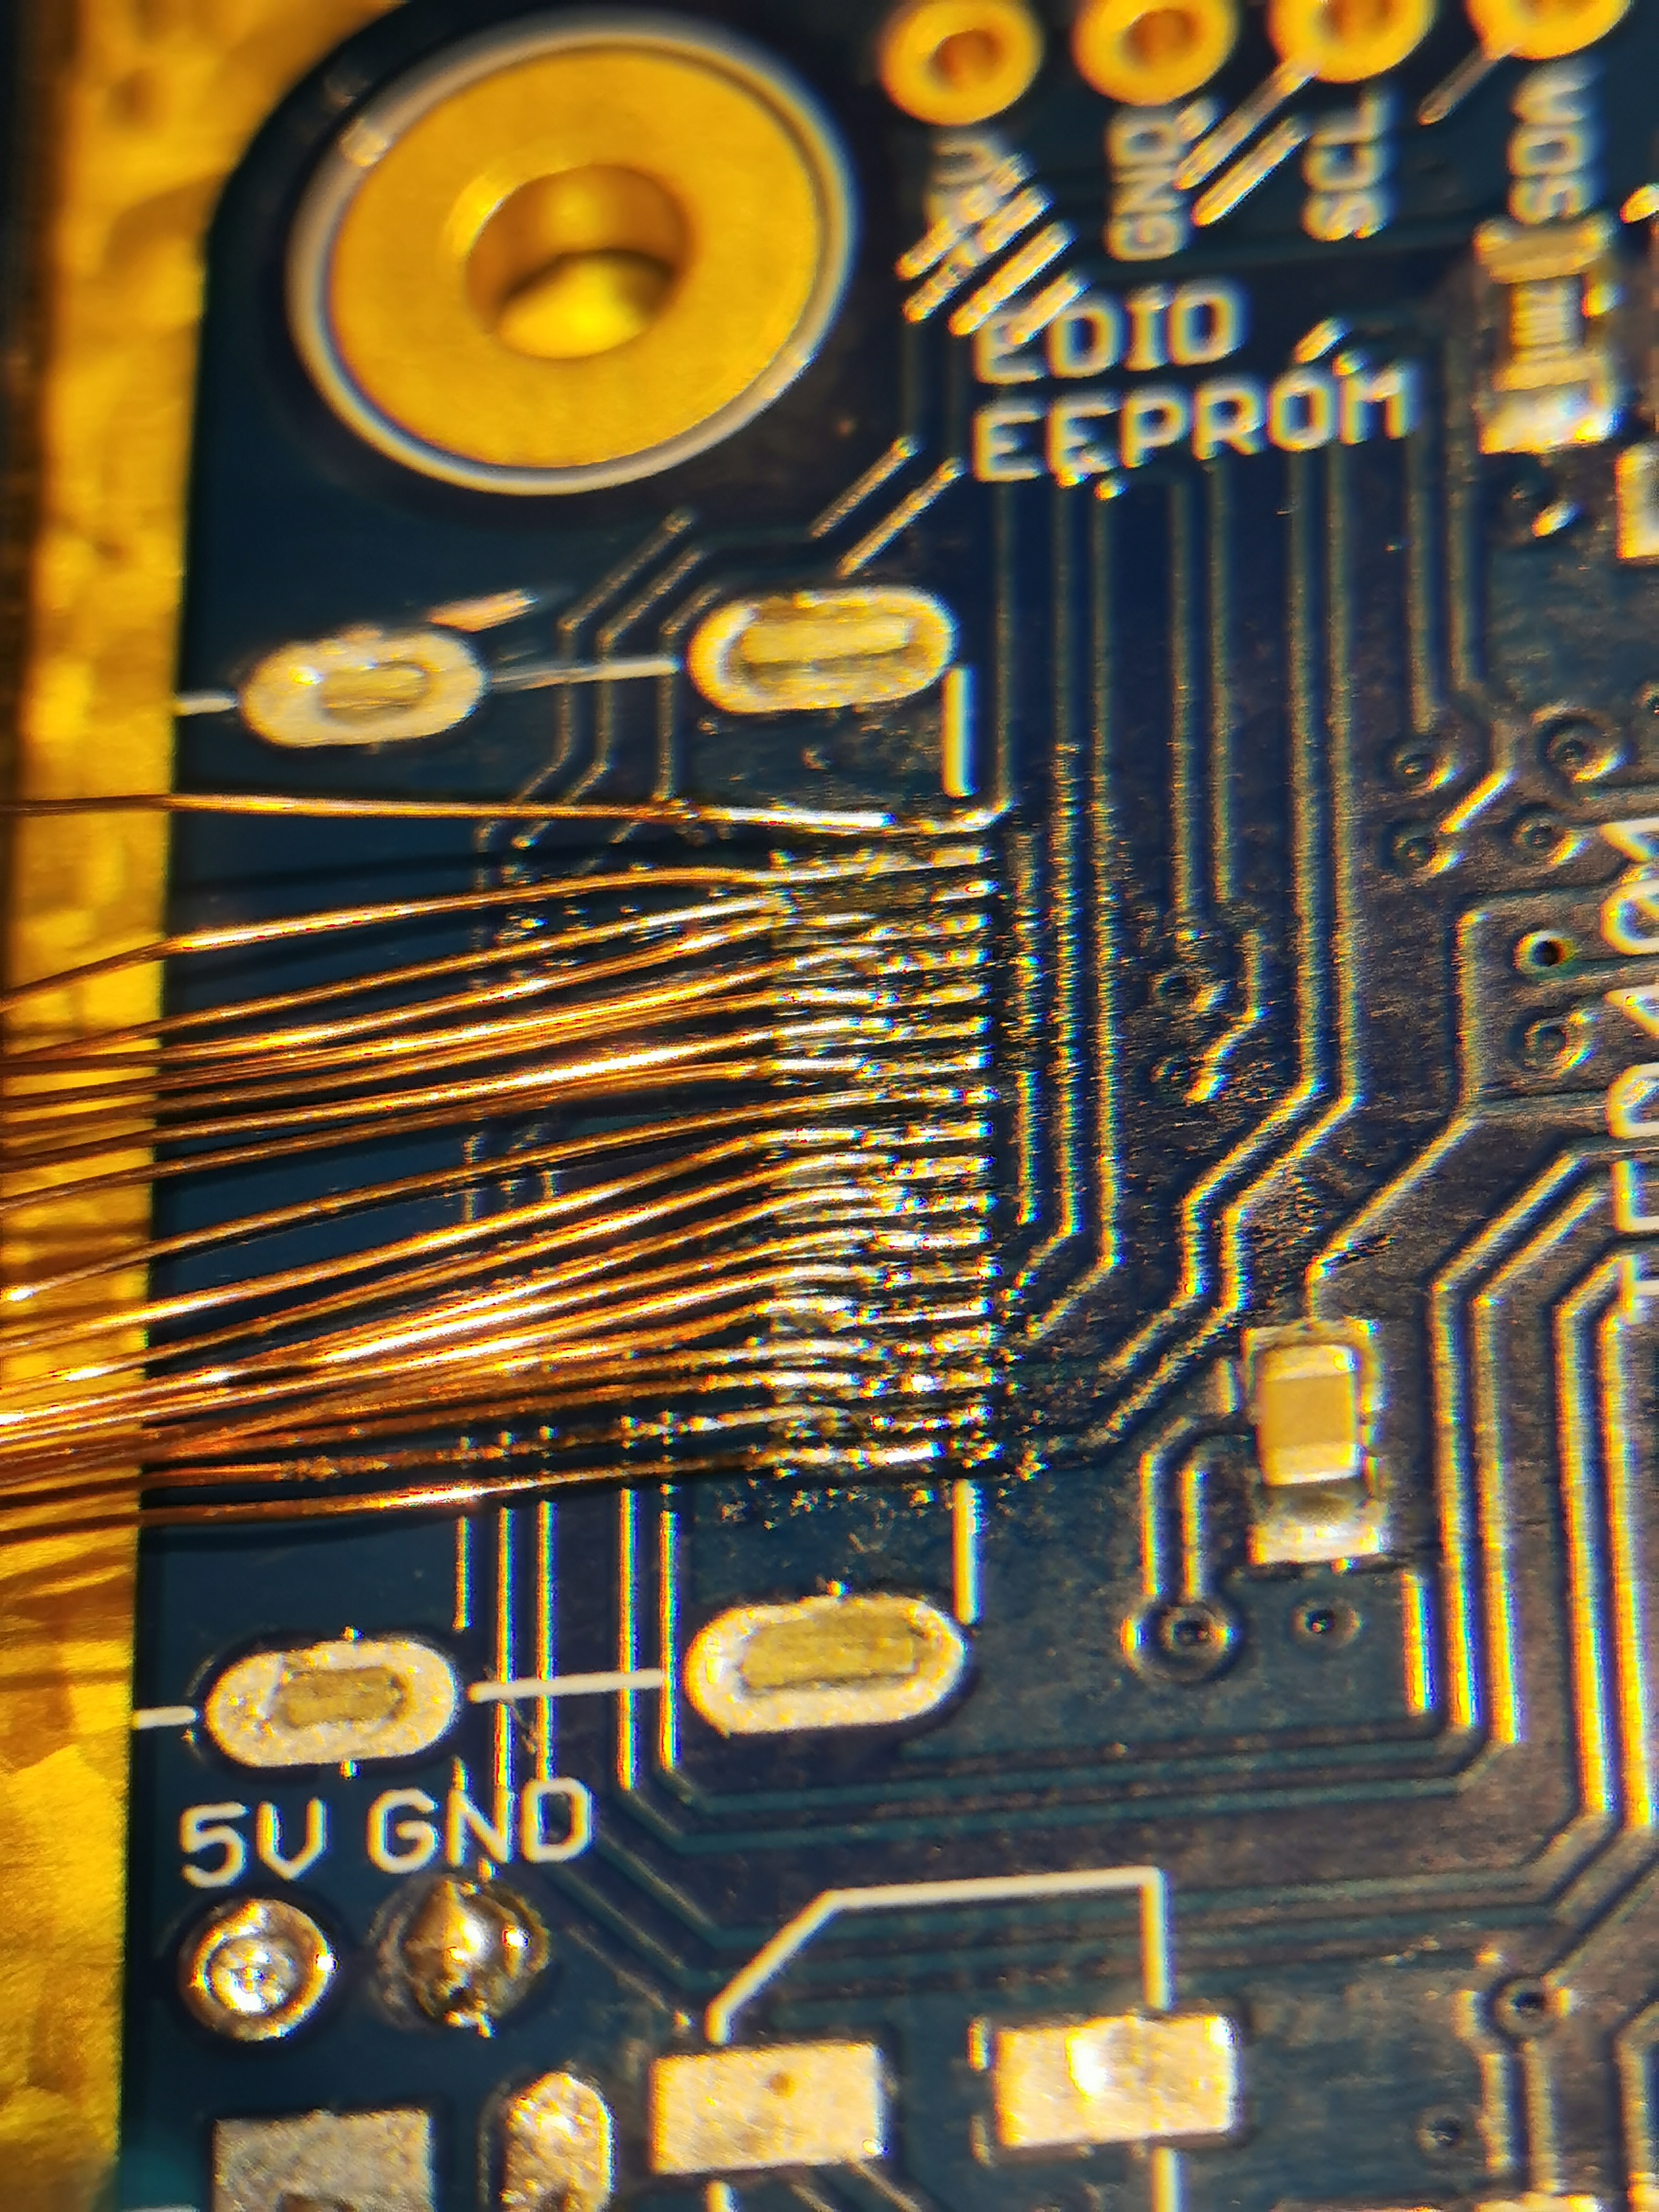
Got the first side of the HDMI wiring done tonight. Haven't verified nothing is touching yet with the multimeter but looks okay from the picture. This is easily the smallest thing I've ever soldered, so I'm pretty happy with it for a first go.
Attachments
-
 3 MB Views: 246
Got the first side of the HDMI wiring done tonight. Haven't verified nothing is touching yet with the multimeter but looks okay from the picture. This is easily the smallest thing I've ever soldered, so I'm pretty happy with it for a first go.View attachment 10808

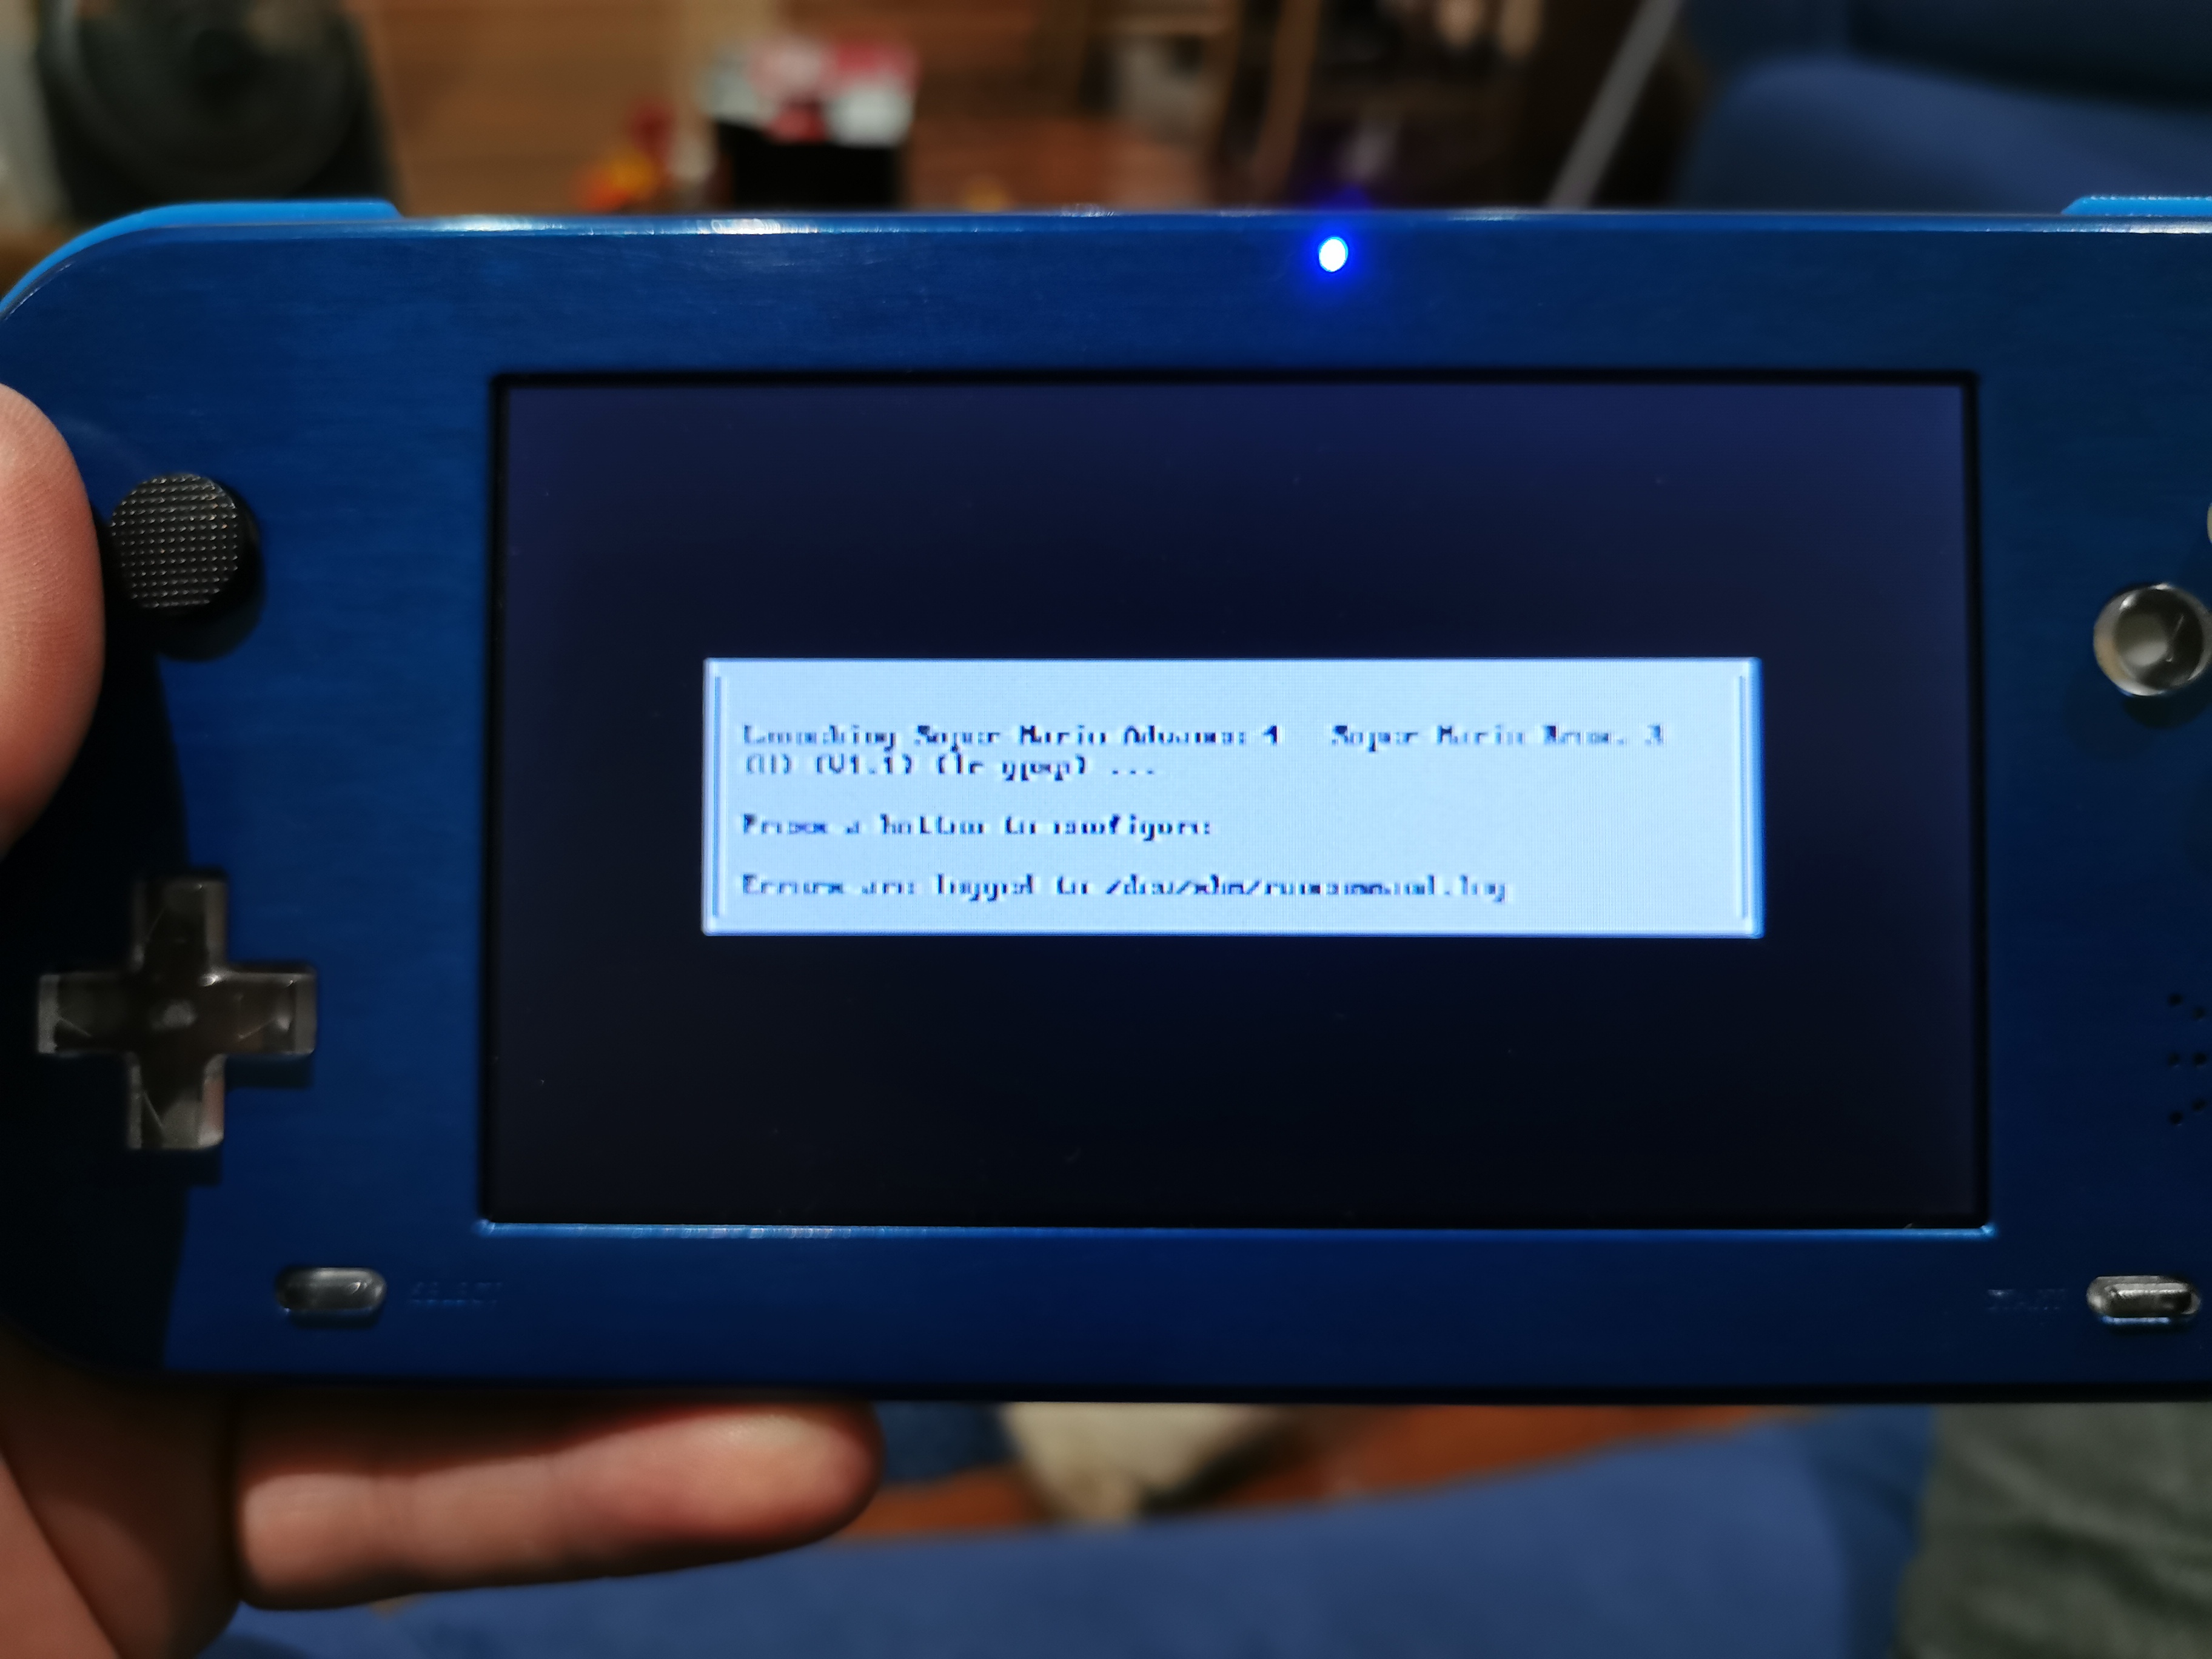
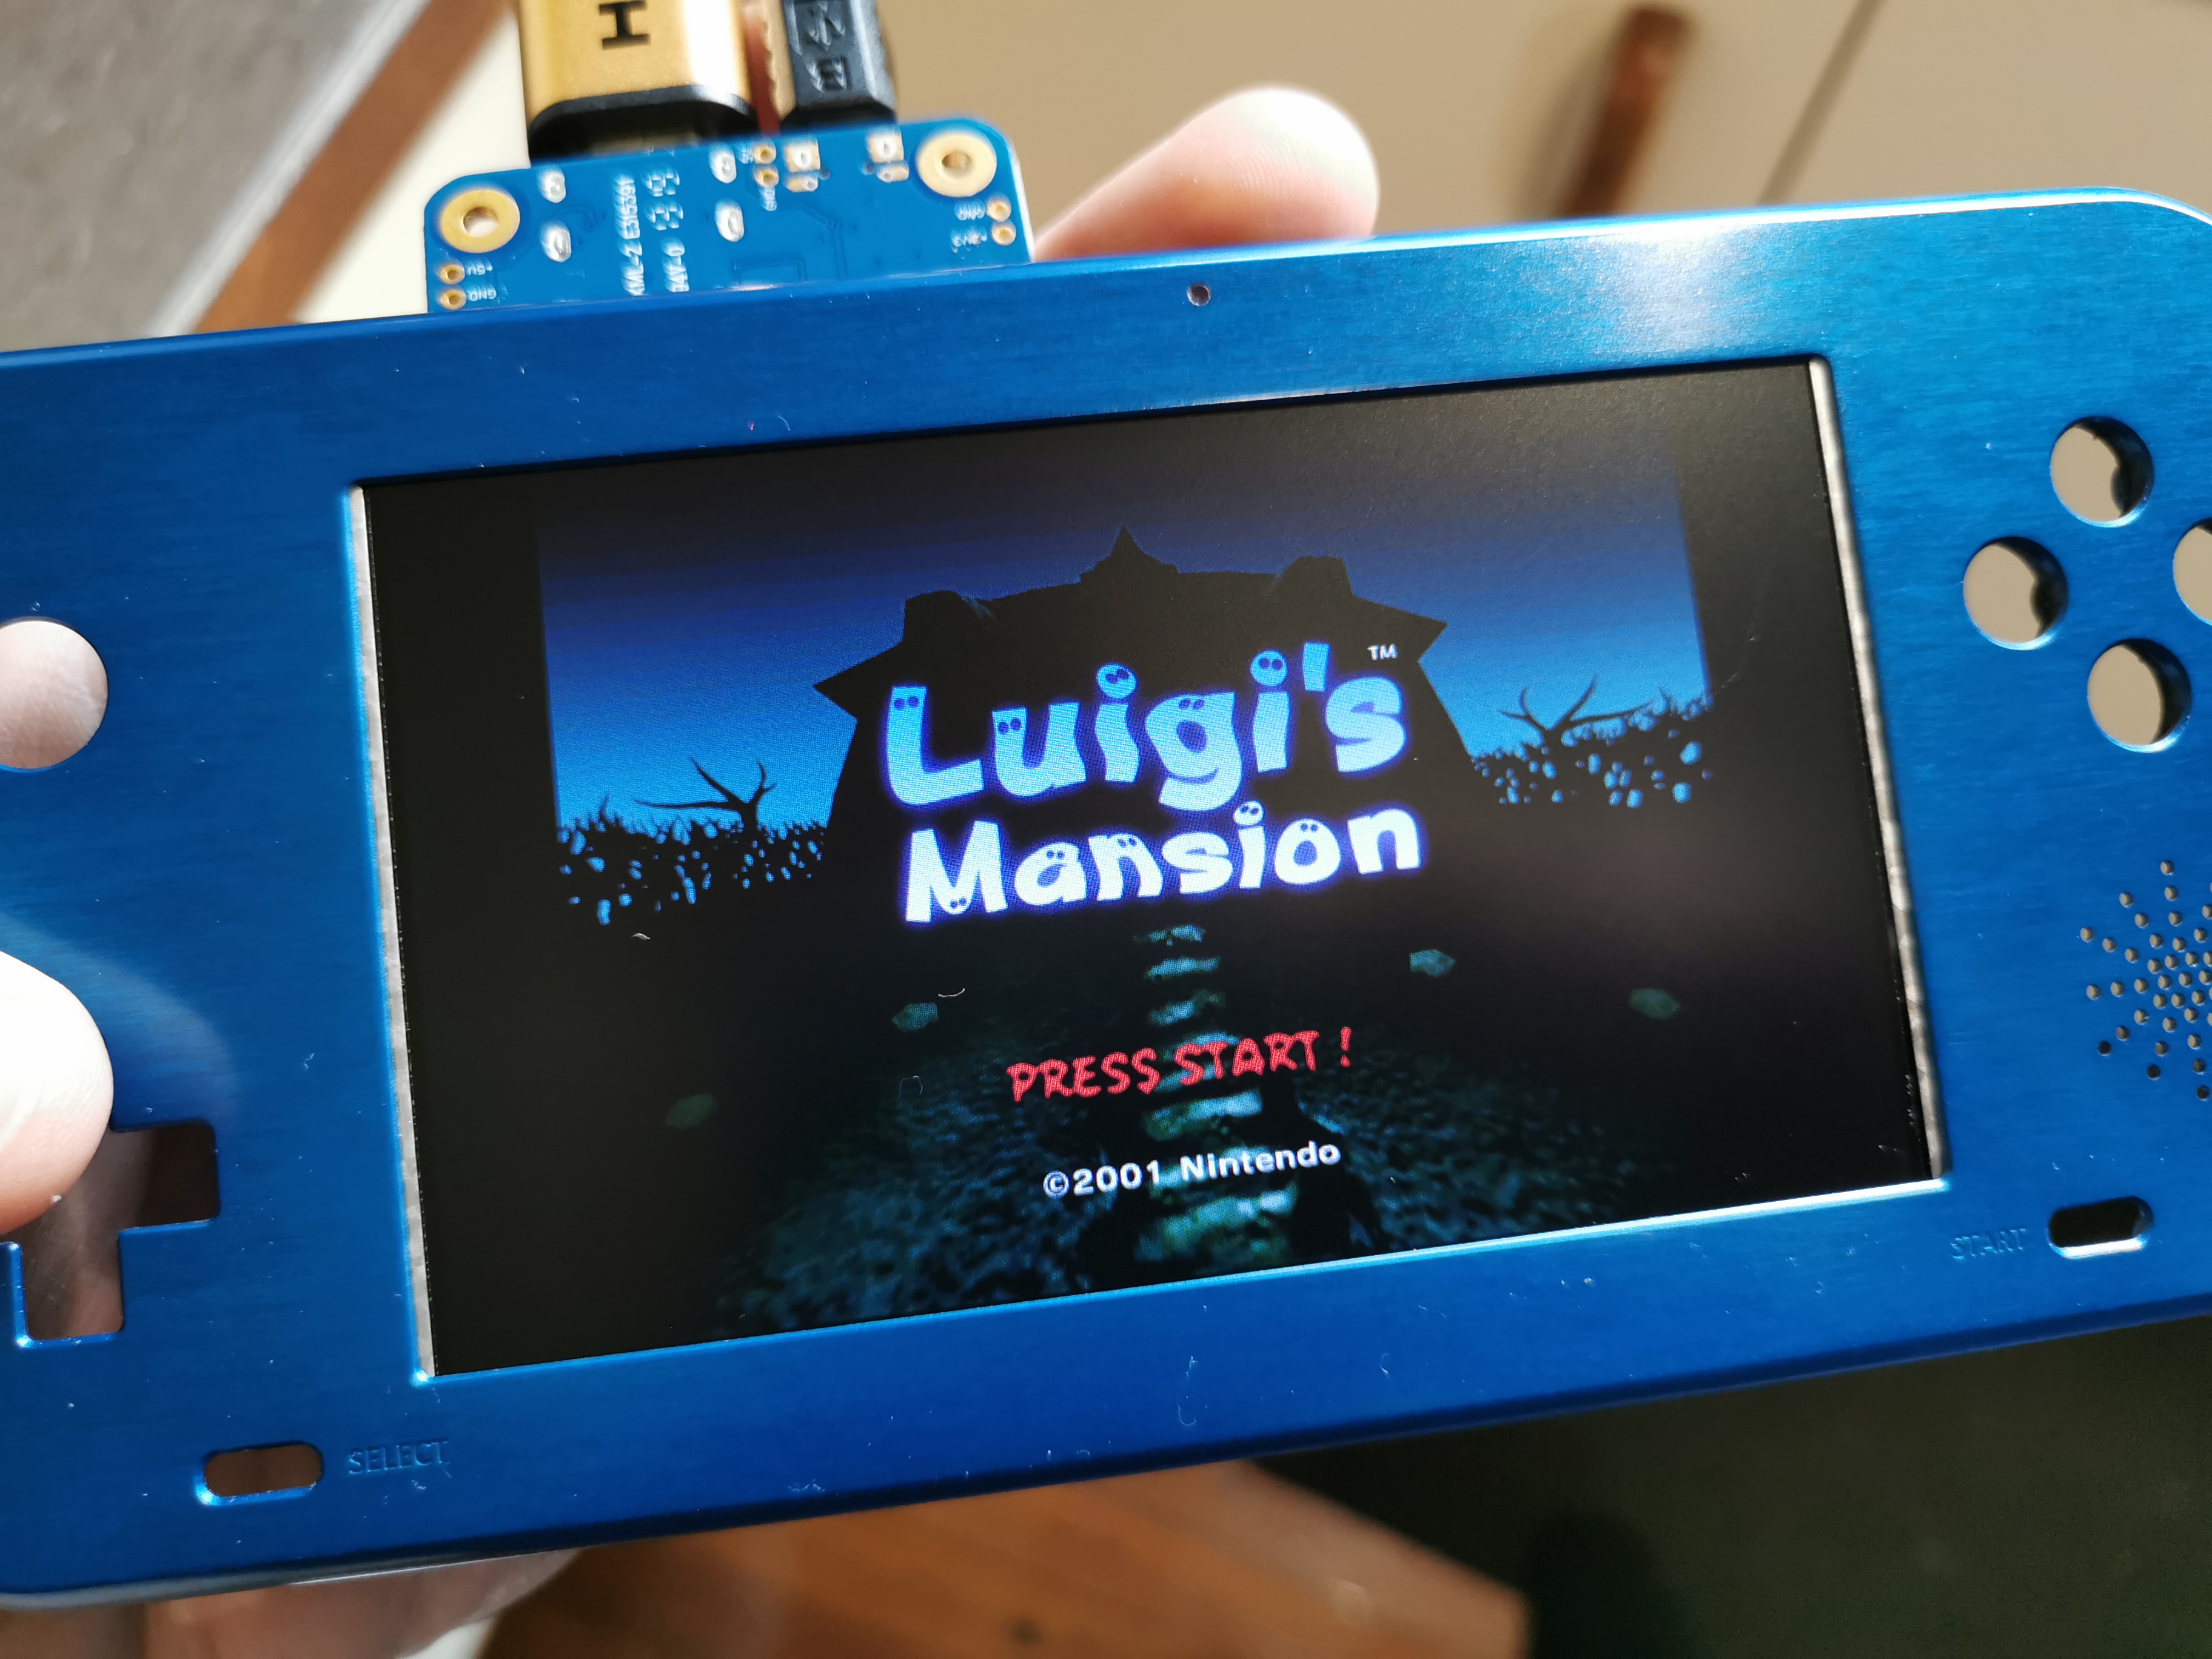
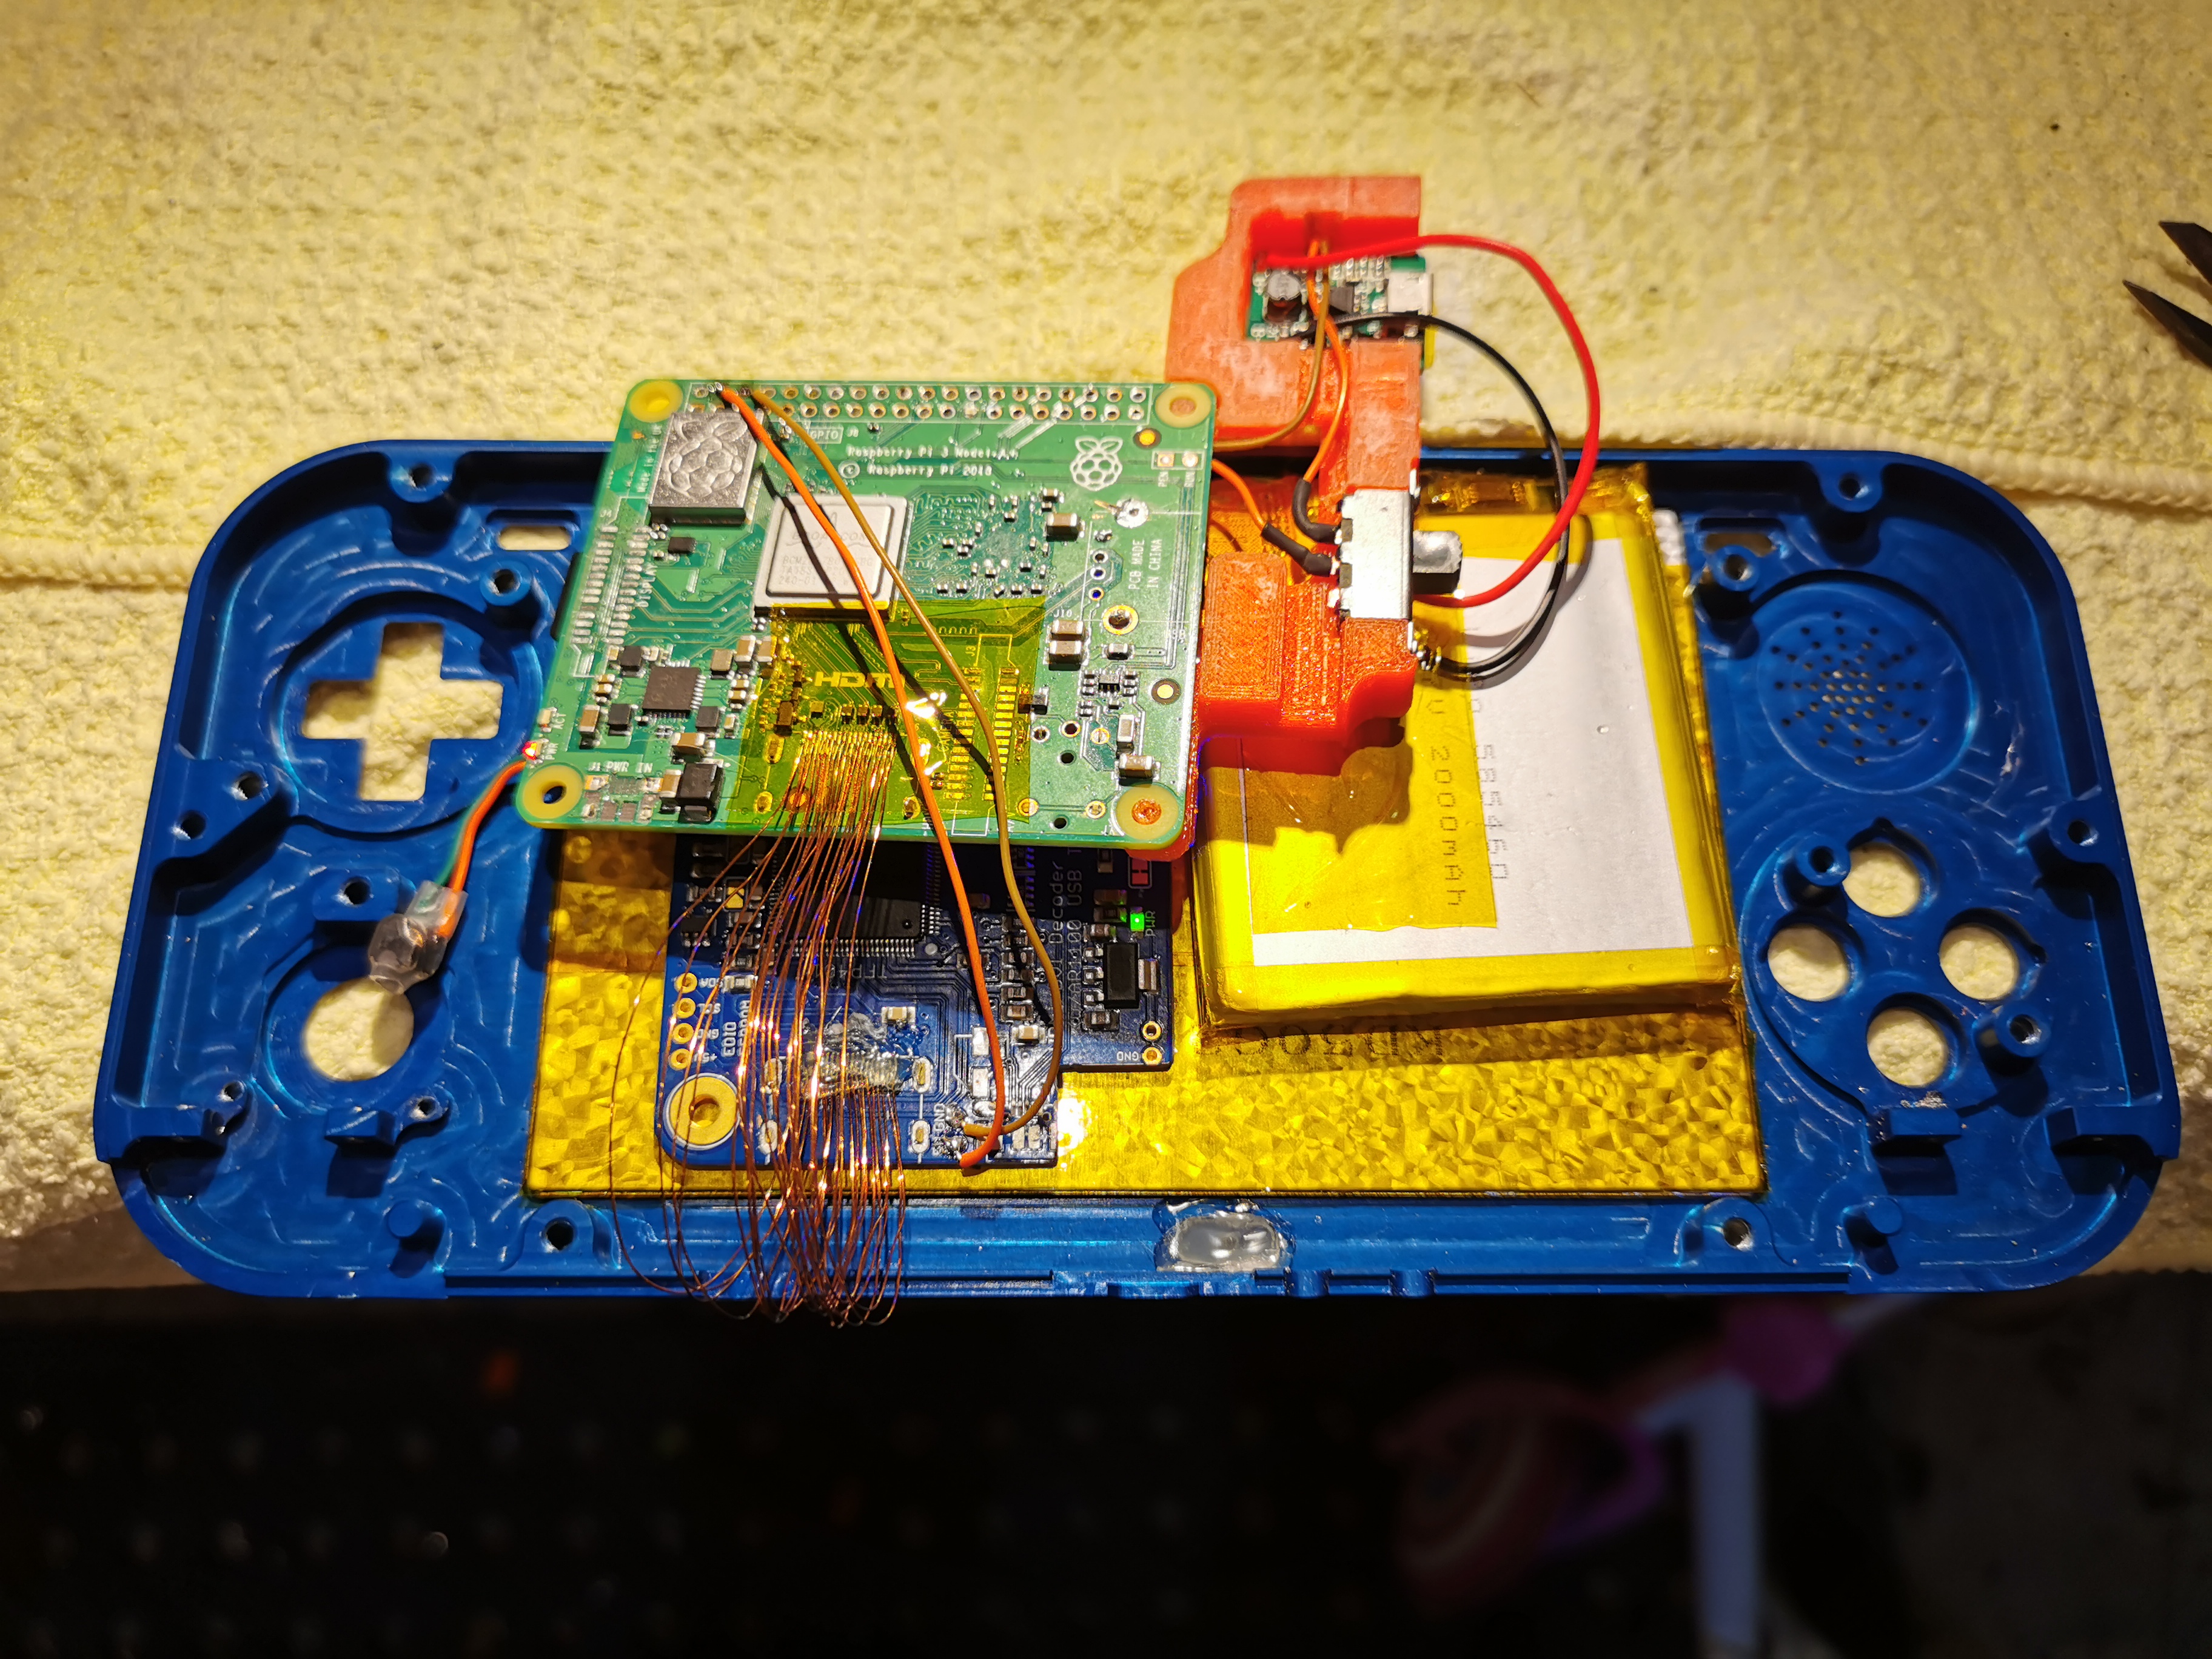
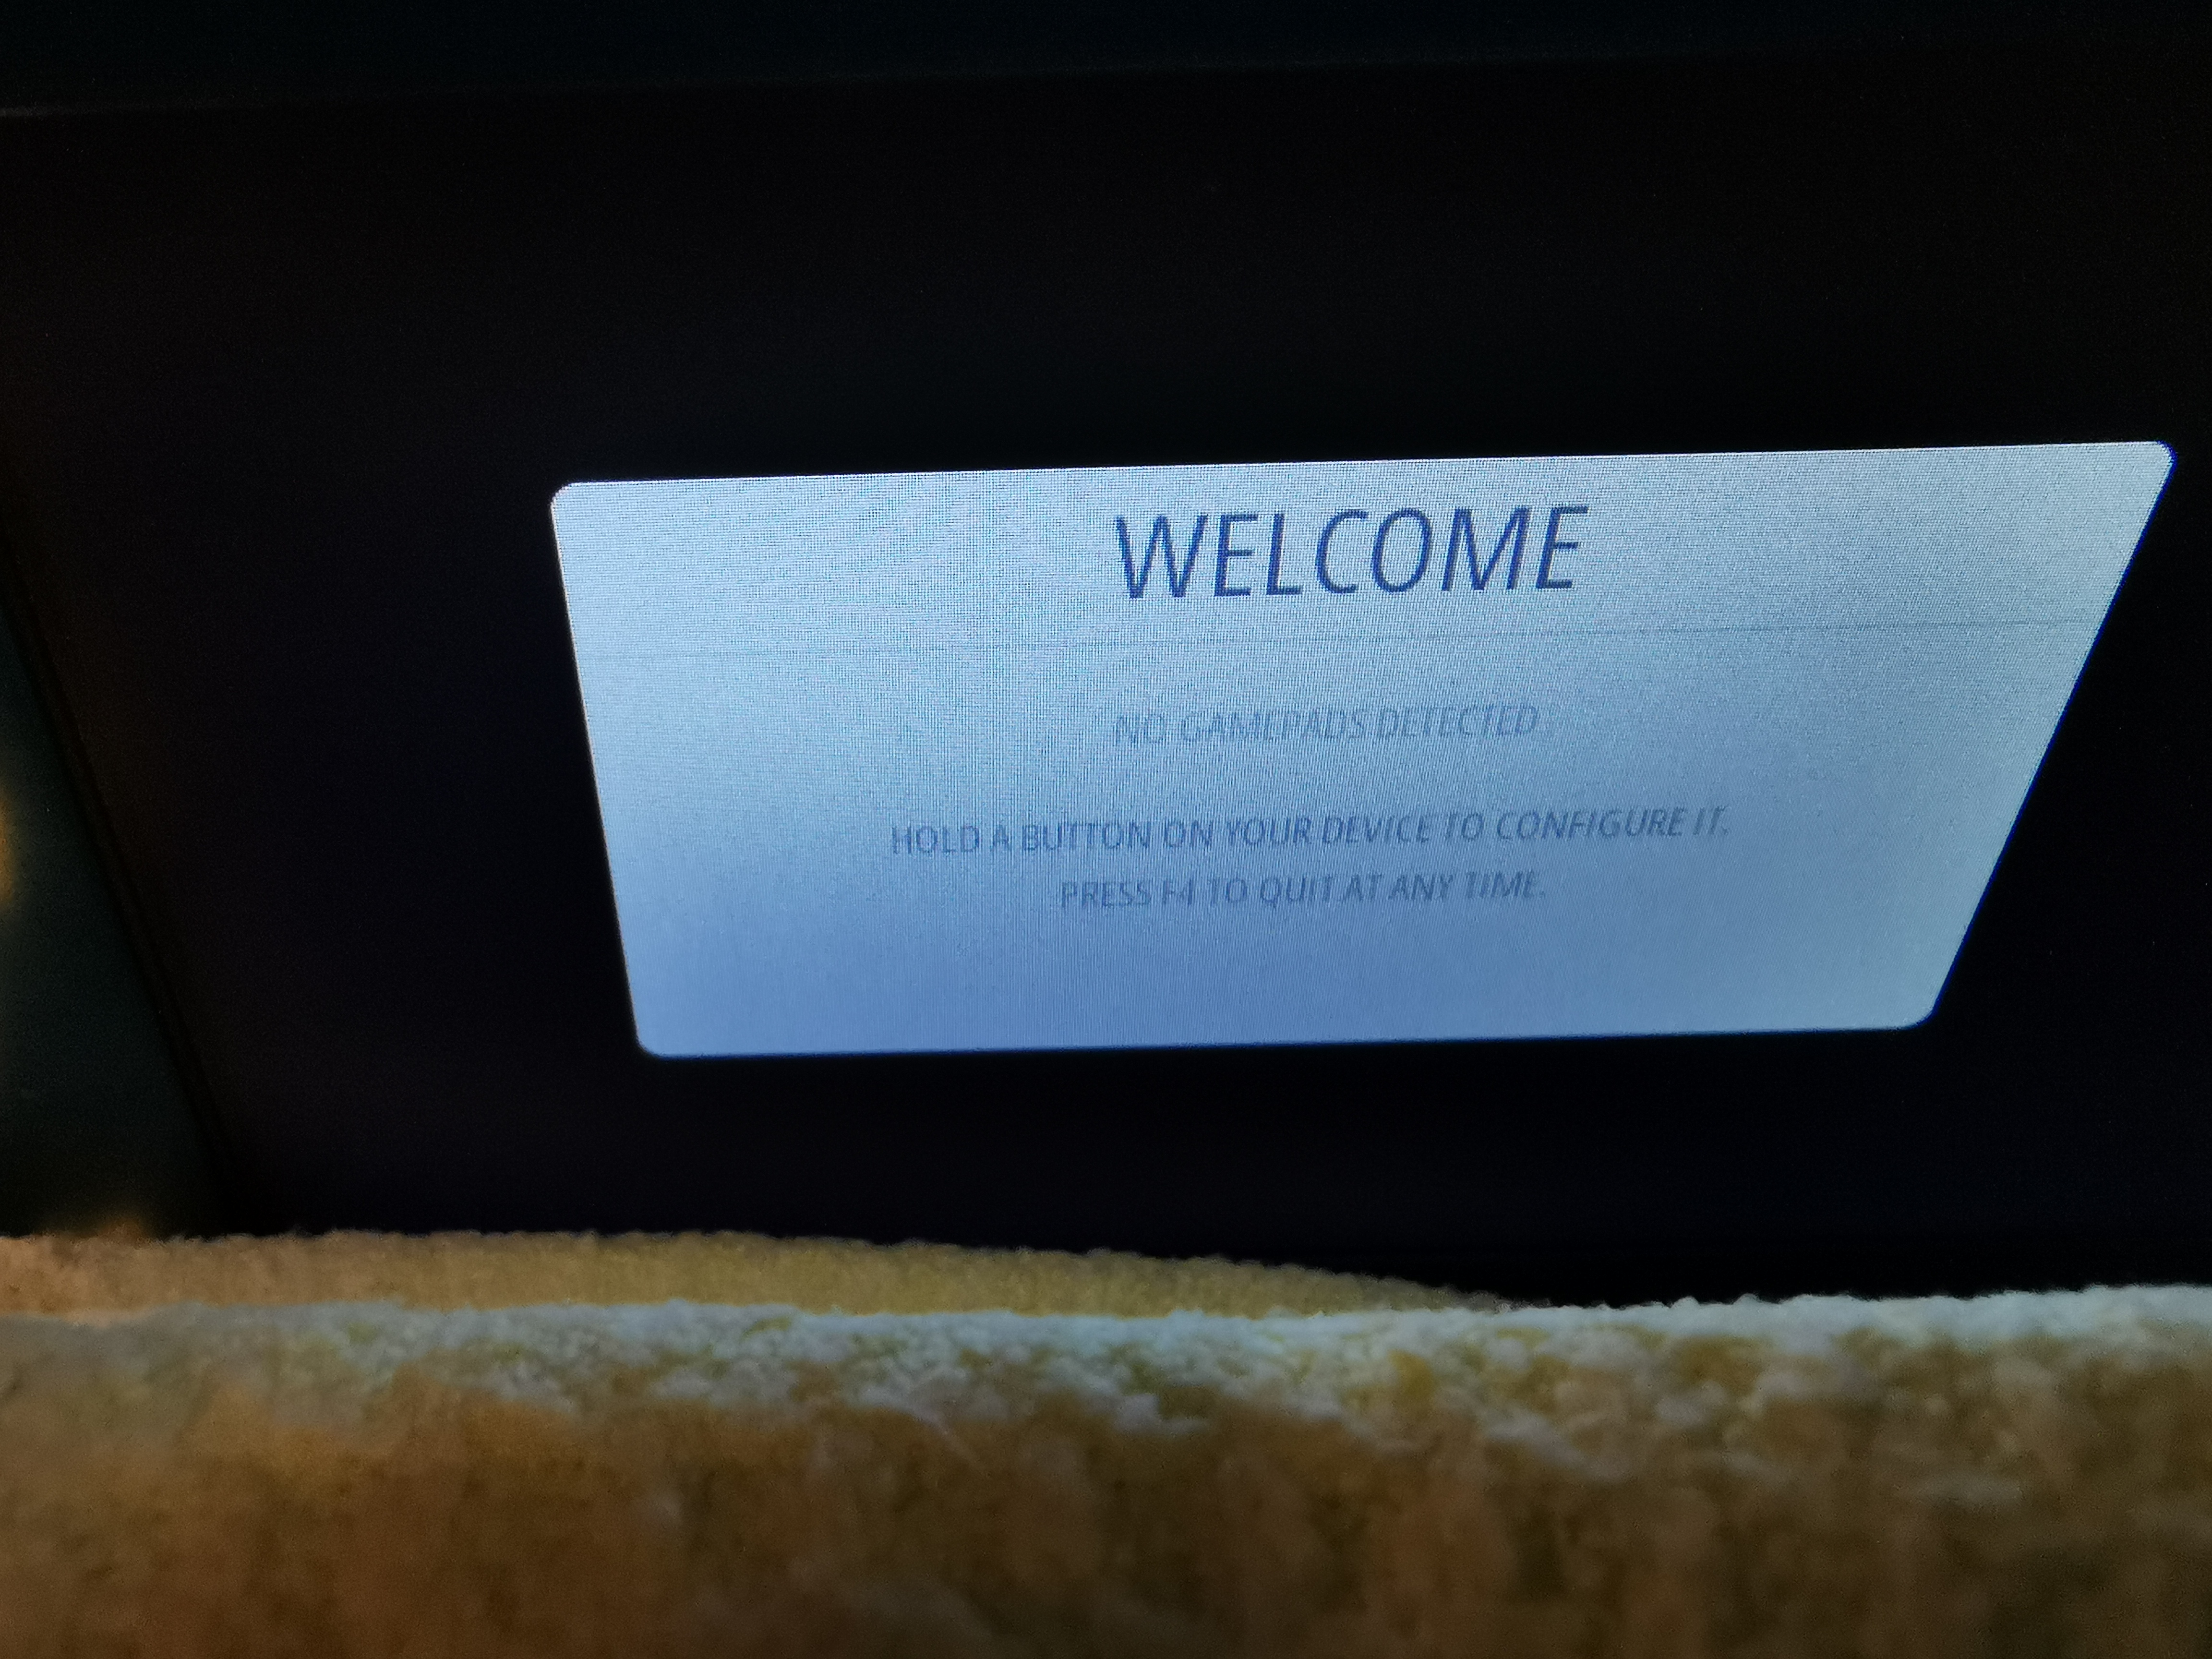
Holly shit, it actually worked!
Congrats on the soldering job. Any fine-pitch soldering, especially with that many pads is a huge pain in the ass.
Tell me about it! I reckon I spent at least 2 hours on those 38 connections, possibly even a bit longer.Congrats on the soldering job. Any fine-pitch soldering, especially with that many pads is a huge pain in the ass.
Now I've just got to tidy it all up and get on with the case modifications to make it all fit!
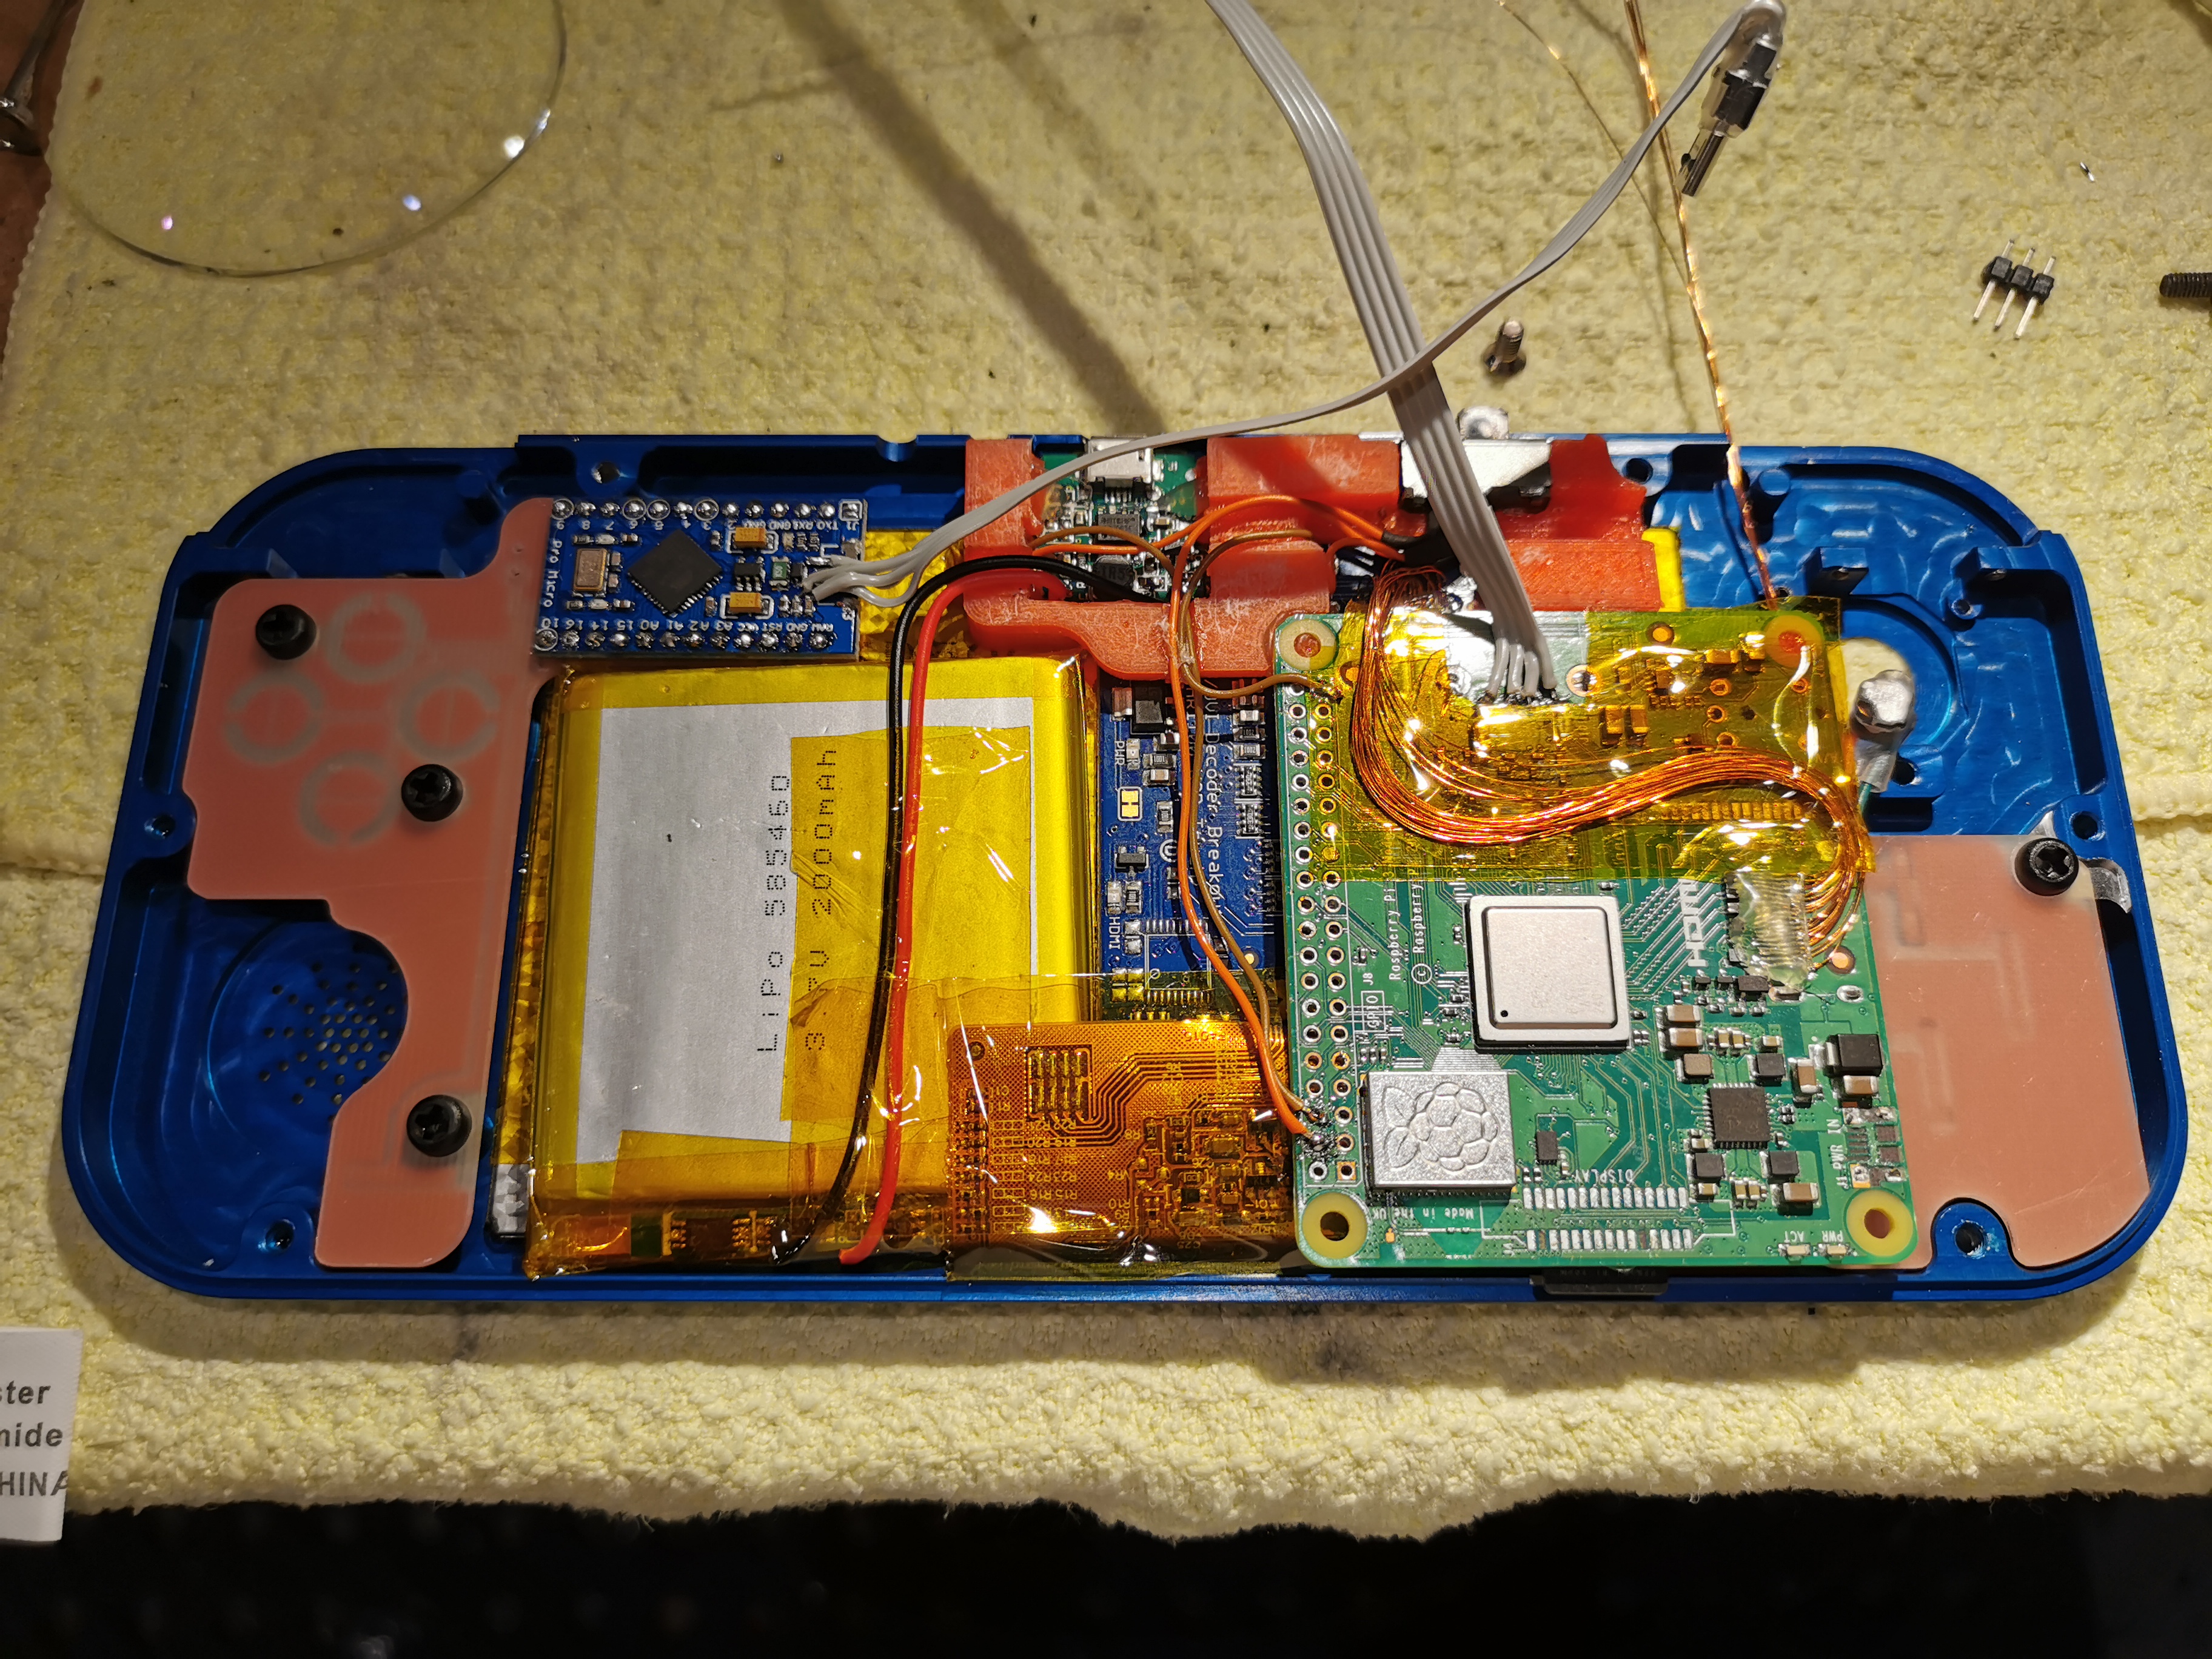
Got the last of the new PCBs done tonight. Not finished soldering yet but here it is. Arduino is attached to it directly to minimise on the spaghetti wiring. Still need to run some wires across to the other side for the other PCB but it'll still be a lot less mess than last time. Getting set up to modify the case today!
Are you etching these PCBs yourself? Have you considered just fabbing them somwhere like JLCPCB or Oshpark? They are relatively inexpensive.
Yep sure am! I'm using an engraver tip on the CNC. It's good for down to about 0.5mm traces.Are you etching these PCBs yourself? Have you considered just fabbing them somwhere like JLCPCB or Oshpark? They are relatively inexpensive.
I know about those places, I'll use them when I need to do something that has to be finer than this. For simple stuff though can't beat doing it myself. The PCB material is cheap and I can have my parts within minutes instead of days. Cost isn't really an issue anyway, I'll usually take the quickest option unless the price difference is huge lol
Test fit up of the PCB's and on to the wiring!