z4ch4ry5
.
Crossing my fingers to hoping this name isn't taken.
So while this is technically going to be my second Wii Portable, I've never posted my worklog here, and my first portable is honestly not the greatest thing in the world. Also, it died a day after completion, and I haven't figured out what's wrong with it yet. My functioning portable count remains at: 0.
Since there's about a million and one things that could be wrong with my first one, I decided to rebuild my portable from the ground up, combining my school's 3D printers with my dangerously unhealthy obsession with CAD. This way I'll be able to plan and account for every single component in my portable and design accordingly.
My biggest challenge in building this will be my lack of tools I regularly use. Since I'm away for school, I don't have access to a lot of stuff I normally would have. That means my large collection of drill bits, files, sandpaper, glue gun, epoxy, acetone, pliers, wire strippers, soldering station third hands, pcb clamps, etc., are all gone. While I do gain the usage of nice 3D printers, I lose pretty much everything else. The only tools I bought for this project were a Dremel 7700 and a TS100 soldering iron. Everything else will have to be hacked together with what few tools I managed to bring on the drive down. I feel like Tom Hanks in Cast Away, except I get a 3D printer.
Features:
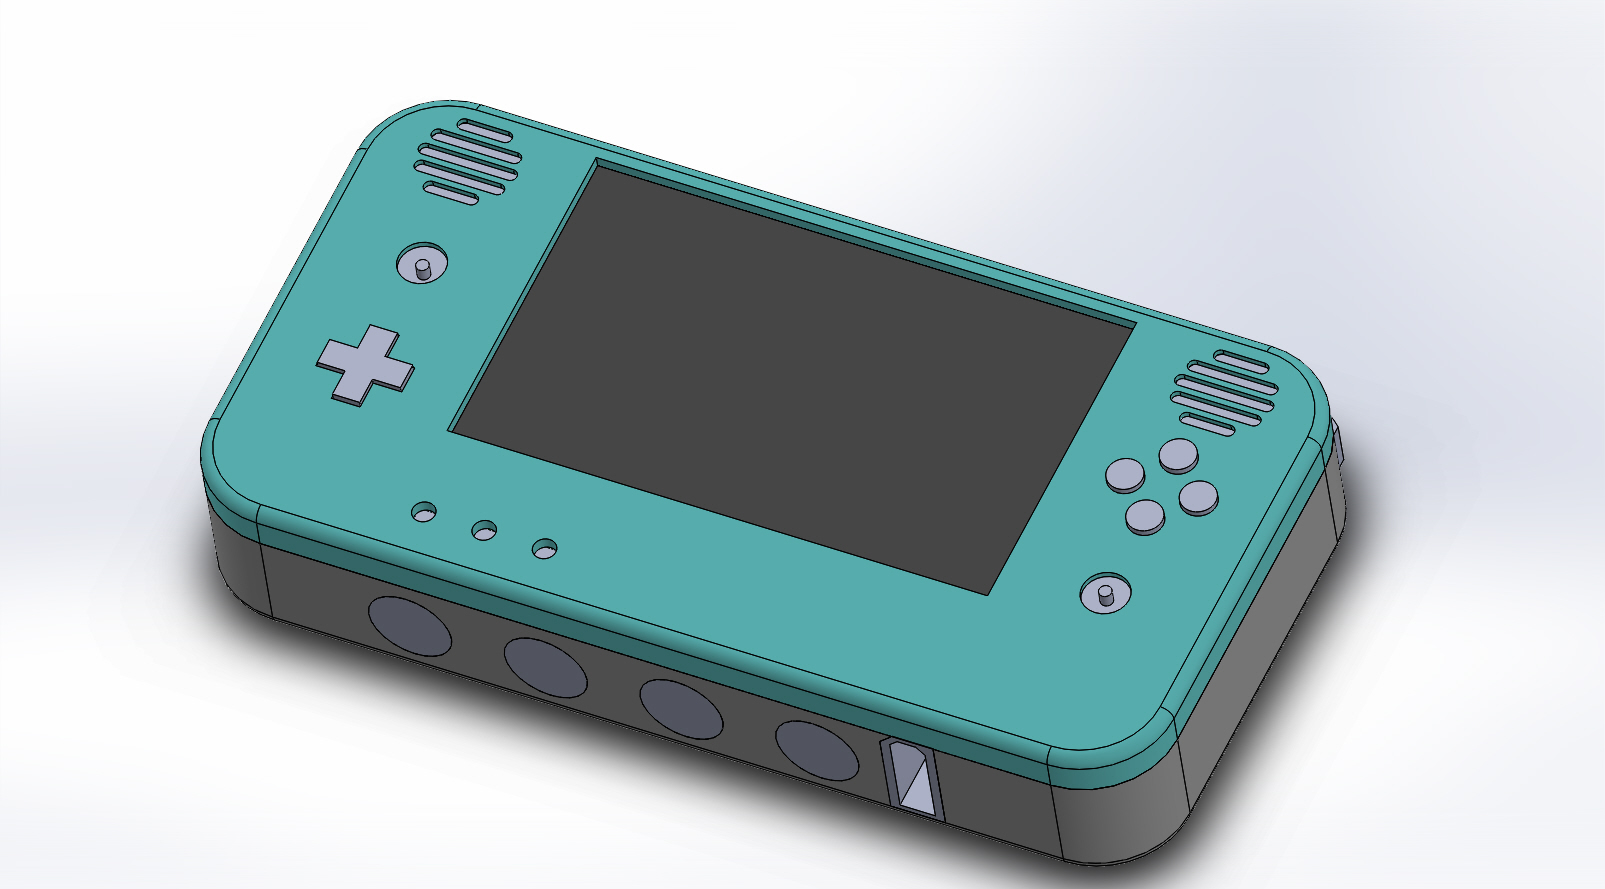
5" 800x480 screen
2s2p 18650s with total 10000mAh
3ds analog sliders and ABXY/Dpad
Dual tact LR buttons
Volume control through buttons
4-port GC out
Original AV out
1 port play and charge with red CMB
Dimensions so far: 7.75" x 4" x 1.35"
EDIT: Had to tweak the dimensions because the printer is too small. Now 7.5" x 4.25" x 1.35".
Progress so far
Ordering most of my parts from eBay keeps the cost low. Unfortunately that also means that shipping times go through the roof. Luckily for me, midterms and school in general will keep me busy in between waiting for parts to arrive. Not ideal, but oh well.
I now have most of the parts I will be using, except for some DPDT switches, the ABXY/Dpad boards, the audio chip, and my squishy tacts. In the meantime, I've CADded the rest of what I have.
More images will be available through this link.
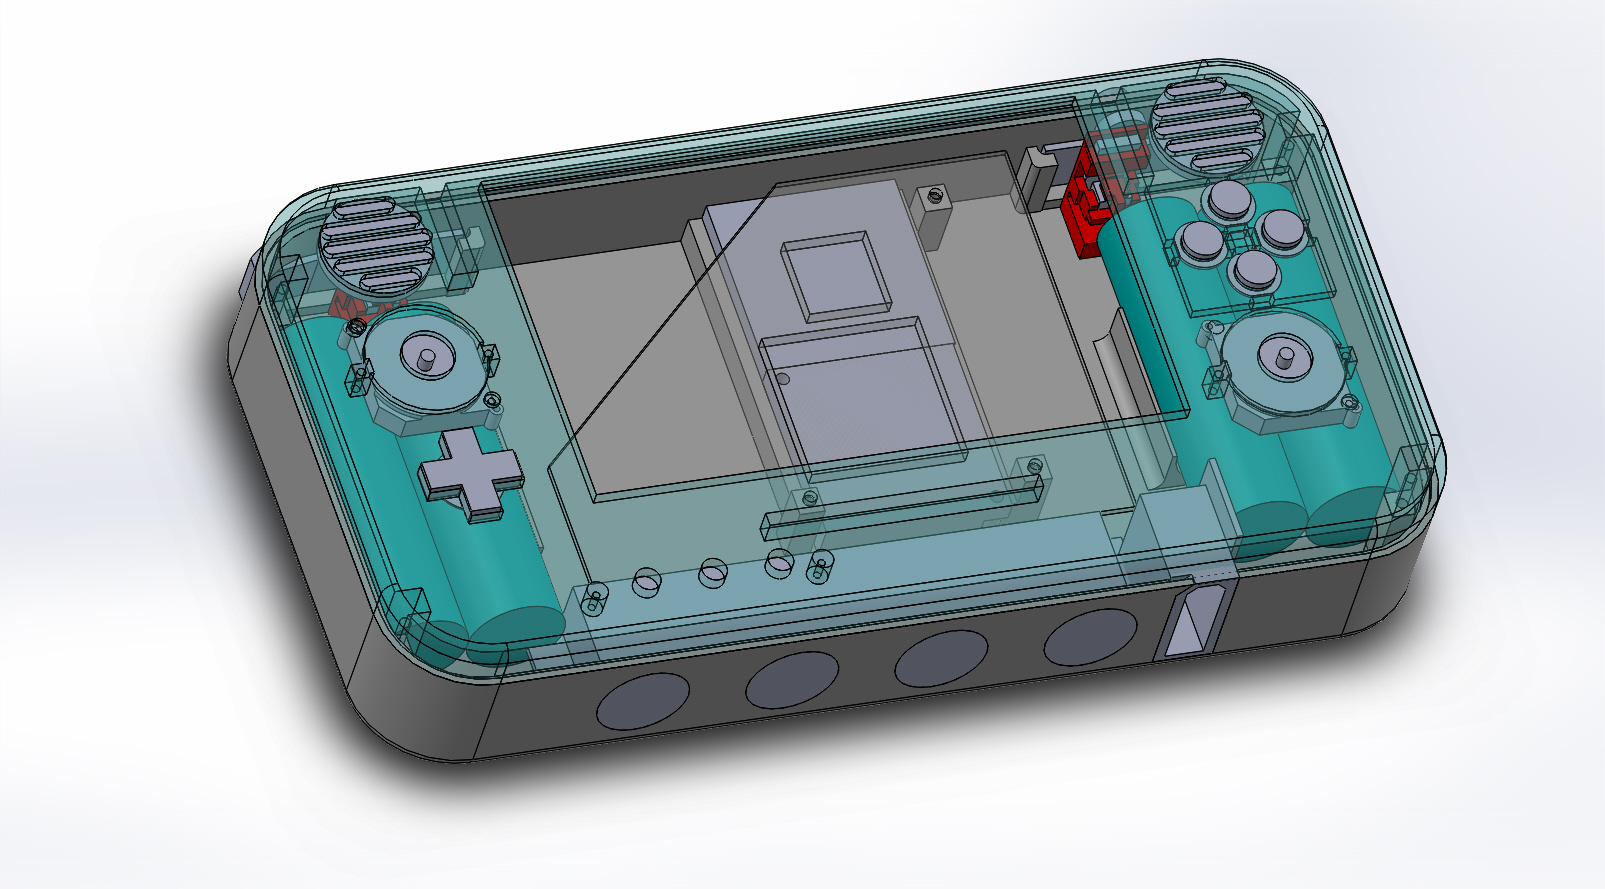
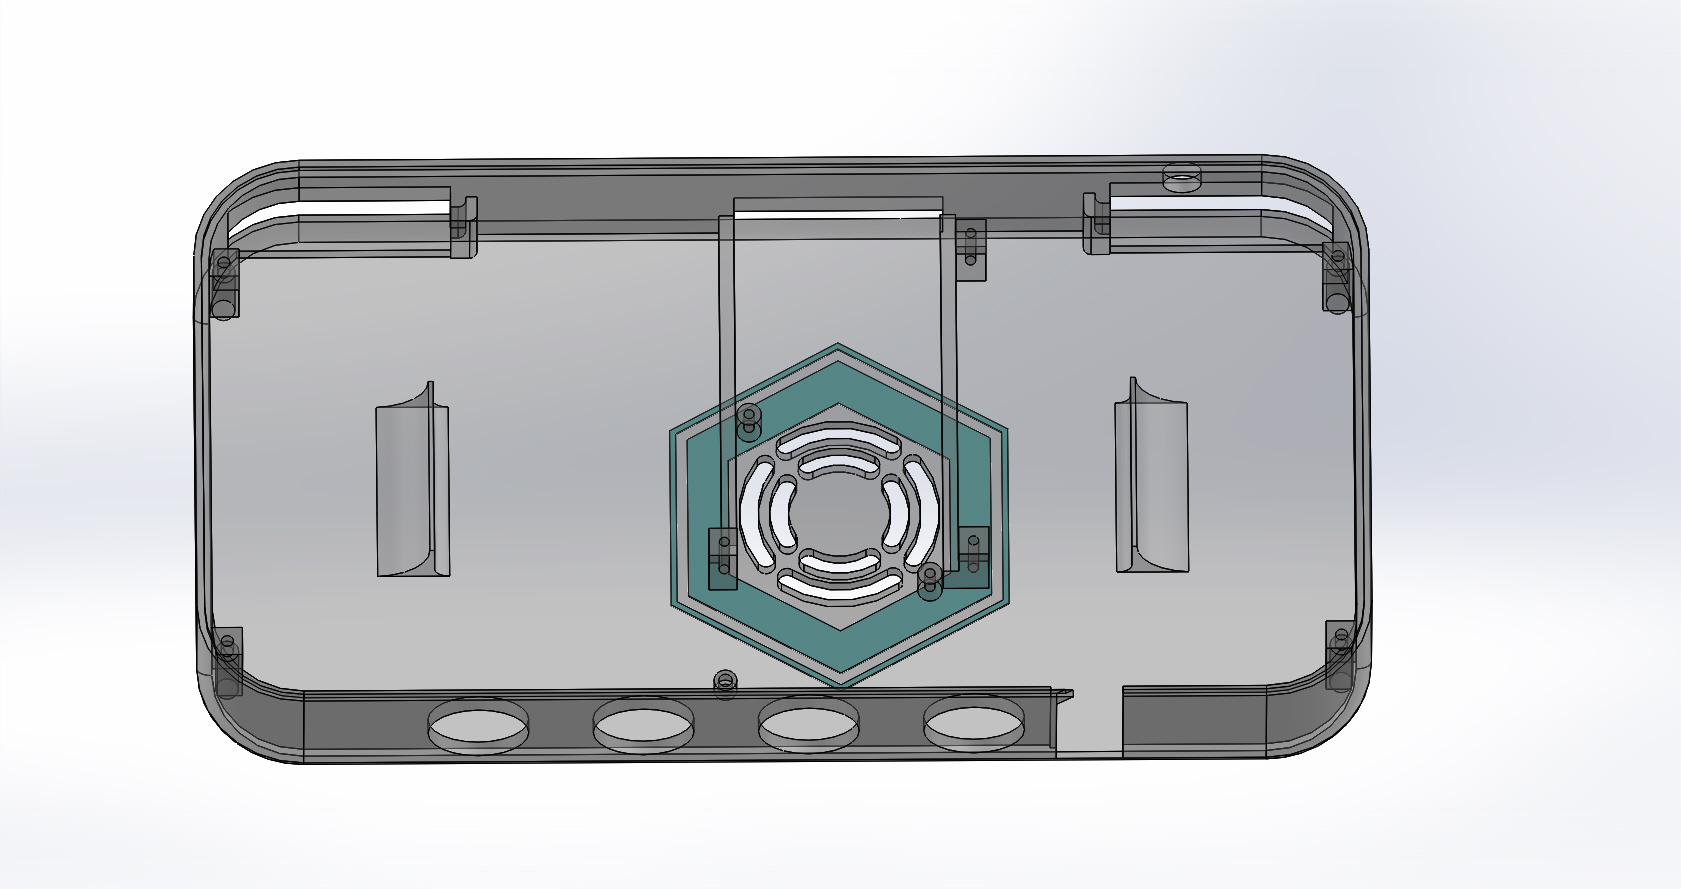
As an homage to my Melee main, Falco, I decided to design an embossed "shine" to surround the fan grate. This also spawned the name of my portable, The Lombardii. Get it? Get it??
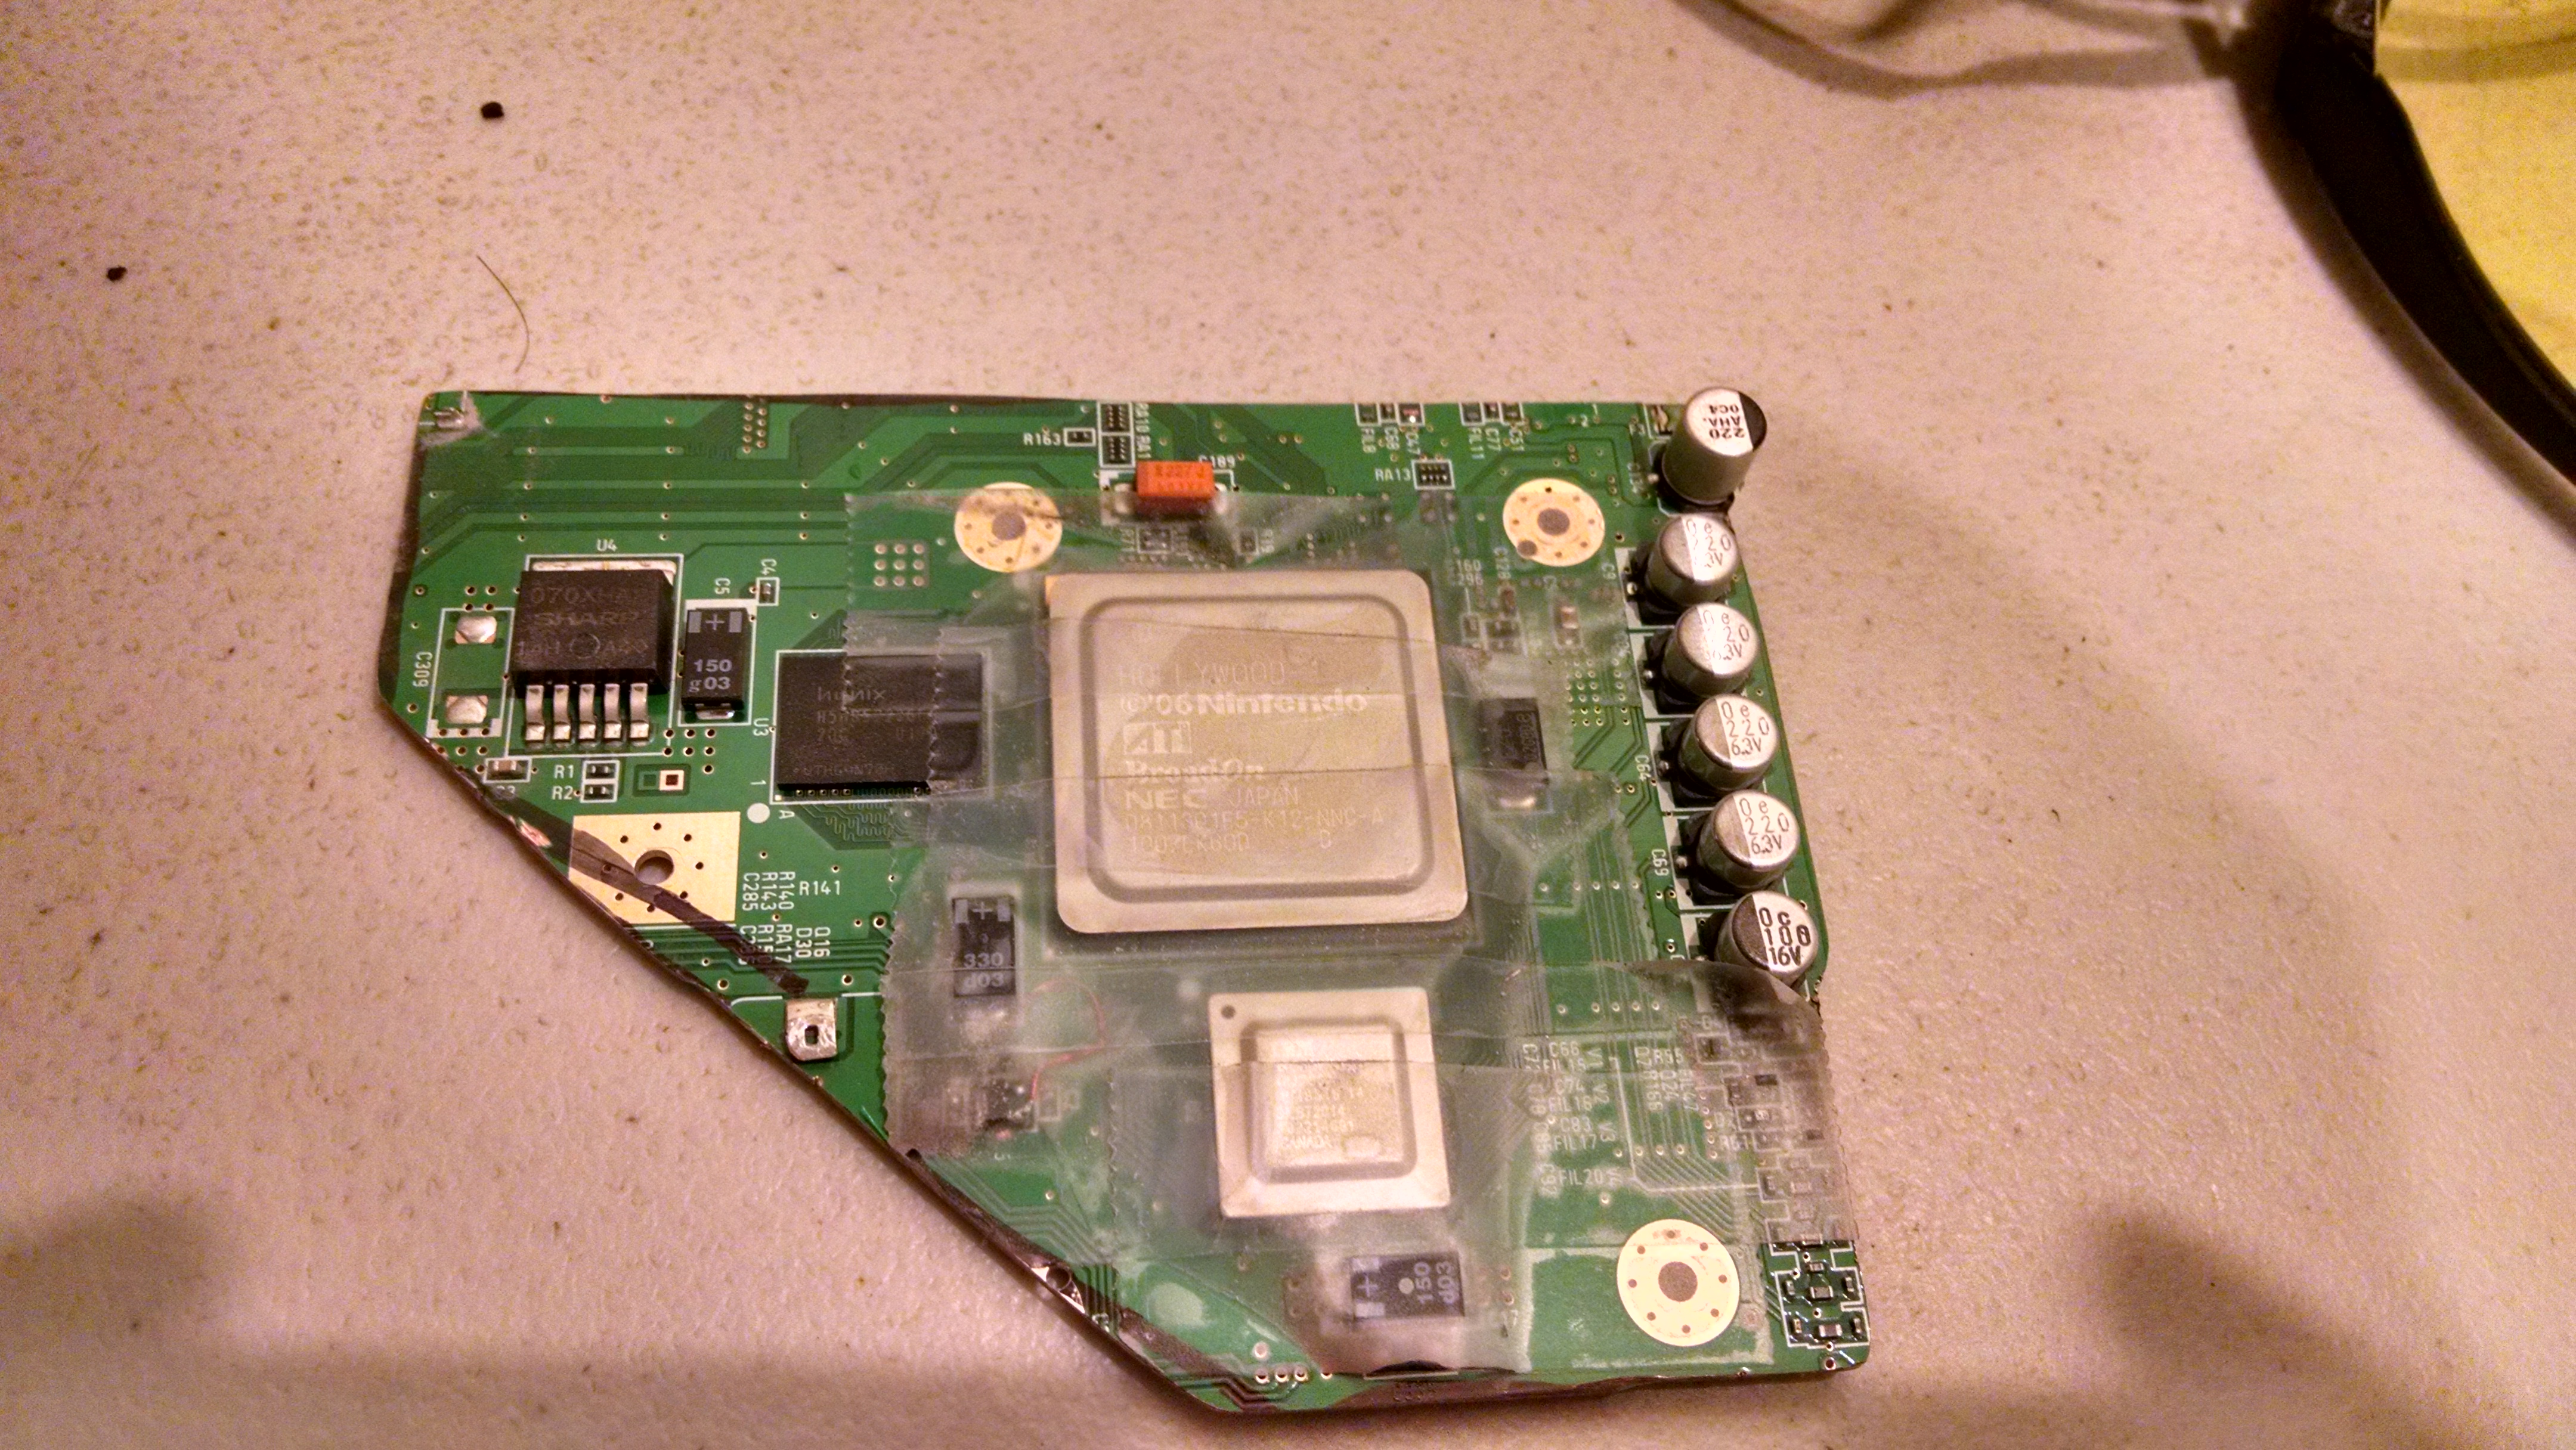
So far, the only physical construction progress I have is trimming the board, running PM, and relocating the U10. Once my resistors arrive, I'll start wiring up the TI's. Hopefully none of my lines have shorted.
As far as Solidworks goes, the only components left for me to design are the mounts for the various PCBs and the switches that stick out of the top of the case. Once my PCB and switches arrive, I'll finalize my design and bring it in to be printed. For now, I'll pass the time by studying for my upcoming midterms. Yay engineering.
So while this is technically going to be my second Wii Portable, I've never posted my worklog here, and my first portable is honestly not the greatest thing in the world. Also, it died a day after completion, and I haven't figured out what's wrong with it yet. My functioning portable count remains at: 0.
Since there's about a million and one things that could be wrong with my first one, I decided to rebuild my portable from the ground up, combining my school's 3D printers with my dangerously unhealthy obsession with CAD. This way I'll be able to plan and account for every single component in my portable and design accordingly.
My biggest challenge in building this will be my lack of tools I regularly use. Since I'm away for school, I don't have access to a lot of stuff I normally would have. That means my large collection of drill bits, files, sandpaper, glue gun, epoxy, acetone, pliers, wire strippers, soldering station third hands, pcb clamps, etc., are all gone. While I do gain the usage of nice 3D printers, I lose pretty much everything else. The only tools I bought for this project were a Dremel 7700 and a TS100 soldering iron. Everything else will have to be hacked together with what few tools I managed to bring on the drive down. I feel like Tom Hanks in Cast Away, except I get a 3D printer.
Features:
5" 800x480 screen
2s2p 18650s with total 10000mAh
3ds analog sliders and ABXY/Dpad
Dual tact LR buttons
Volume control through buttons
4-port GC out
Original AV out
1 port play and charge with red CMB
Dimensions so far: 7.75" x 4" x 1.35"
EDIT: Had to tweak the dimensions because the printer is too small. Now 7.5" x 4.25" x 1.35".
Progress so far
Ordering most of my parts from eBay keeps the cost low. Unfortunately that also means that shipping times go through the roof. Luckily for me, midterms and school in general will keep me busy in between waiting for parts to arrive. Not ideal, but oh well.
I now have most of the parts I will be using, except for some DPDT switches, the ABXY/Dpad boards, the audio chip, and my squishy tacts. In the meantime, I've CADded the rest of what I have.
More images will be available through this link.
As an homage to my Melee main, Falco, I decided to design an embossed "shine" to surround the fan grate. This also spawned the name of my portable, The Lombardii. Get it? Get it??
So far, the only physical construction progress I have is trimming the board, running PM, and relocating the U10. Once my resistors arrive, I'll start wiring up the TI's. Hopefully none of my lines have shorted.
As far as Solidworks goes, the only components left for me to design are the mounts for the various PCBs and the switches that stick out of the top of the case. Once my PCB and switches arrive, I'll finalize my design and bring it in to be printed. For now, I'll pass the time by studying for my upcoming midterms. Yay engineering.
Attachments
-
 211.6 KB Views: 290
 -
 158.5 KB Views: 266
 -
 356.2 KB Views: 296
 -
 298.5 KB Views: 269
Last edited:
")

")